Neck warmers are the perfect little project: quick to work up, practical, and stylish. They sit snugly around your neck to trap warmth without the bulk of a full scarf, and they’re an ideal way to show off texture, color, or a small motif. Whether you want a beginner-friendly 30-minute neck warmer, a chunky statement cowl, or a delicate lacy collar for dressier looks, this post collects seven distinct patterns with full, copy-ready instructions.
Each pattern below follows the same helpful structure so you can jump in fast:
- Skill level
- Finished size (one standard adult size with notes for adjustments)
- Materials (yarn weight suggestions, hook, notional yardage)
- Step-by-step instructions (row/round counts and stitch placement)
- Finishing & assembly
- Tips, troubleshooting & variations
- Care
Abbreviations (US terms): ch = chain, sl st = slip stitch, sc = single crochet, hdc = half double crochet, dc = double crochet, tr = treble, st(s) = stitch(es), BLO = back loop only, FLO = front loop only, rep = repeat, RS = right side.
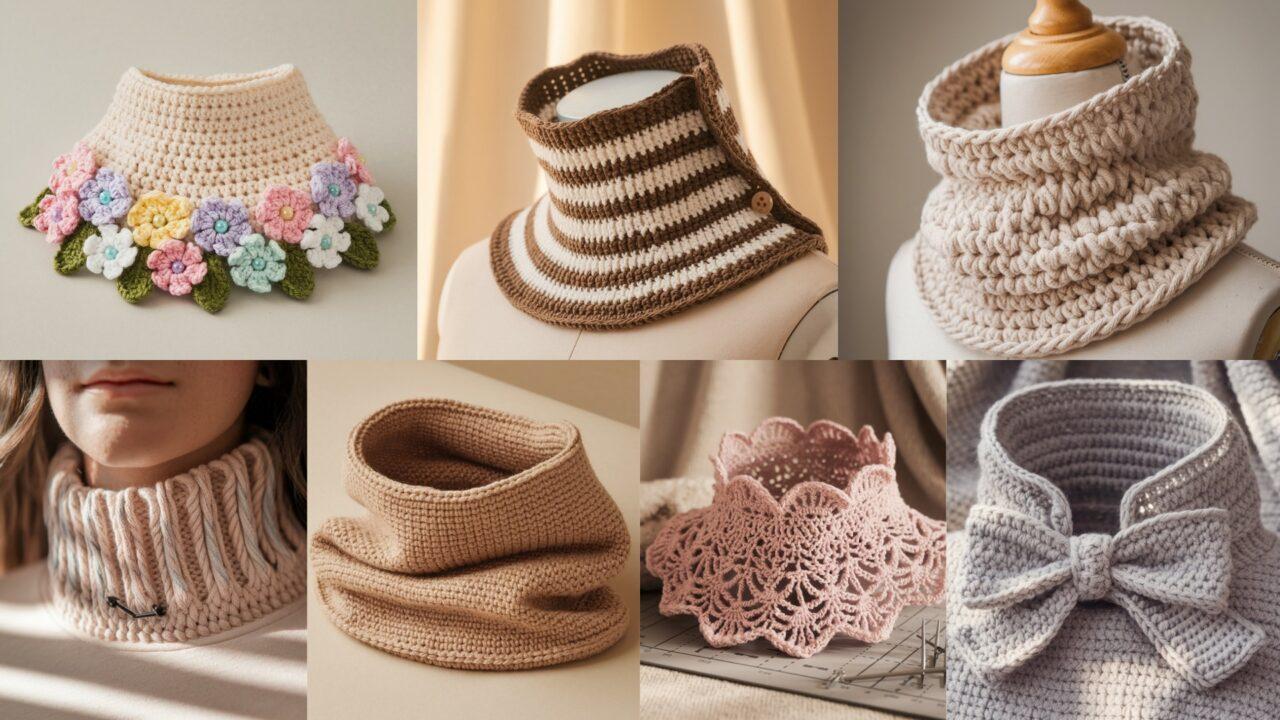
1 . Chunky Crochet Neck Warmer Pattern
Skill level: Beginner — single crochet / half double crochet in the round
Finished size: Approx 11–12″ high × 22–24″ circumference (unstretched). Fits most adults as a snug cowl. Adjust for looser fit by adding 2–4″ to circumference.
Materials
- Super bulky yarn (super bulky / roving; weight 6) — ~150–250 yards (depending on height and looseness)
- 10–12 mm crochet hook (or size recommended on yarn label)
- Tapestry needle, scissors
Step-by-step instructions (worked in the round)
- Foundation chain: Ch 56. Join with sl st, being careful not to twist the chain. (This gives ~22–24″ unstretched circumference — adjust ch in multiples of 2 for larger/smaller.)
- Round 1: Ch 1, sc in each ch around. Join with sl st to first sc. (56 sc)
- Round 2: Ch 2 (counts as hdc), hdc in each st around. Join. (56 hdc)
- Rounds 3–10 (or desired height): Repeat Round 2 until neck warmer is approx 11–12″ tall (usually 8–10 rounds with super bulky yarn). For a shorter cowl stop at 6 rounds; for an extra warm taller cowl work to 14–16″.
- Last round: Ch 1, sc in each st around for a neat top edge. Join and fasten off.
Finishing & assembly
- Weave in ends with tapestry needle.
- Block lightly (super bulky often doesn’t need blocking; just shape with hands).
- If you want a double-thick look, fold in half horizontally and seam the top and bottom edges together (makes a folded, double-layer cowl).
Tips & variations
- For more structure, use a smaller hook than the yarn label suggests.
- Add one round of ribbing by working BLO hdc rounds for a knit-like appearance.
- Embellish with a large wooden or leather toggle sewn to one side for a closure look.
Care
- Follow yarn label. Many super bulky roving yarns require hand wash and lay flat to dry.
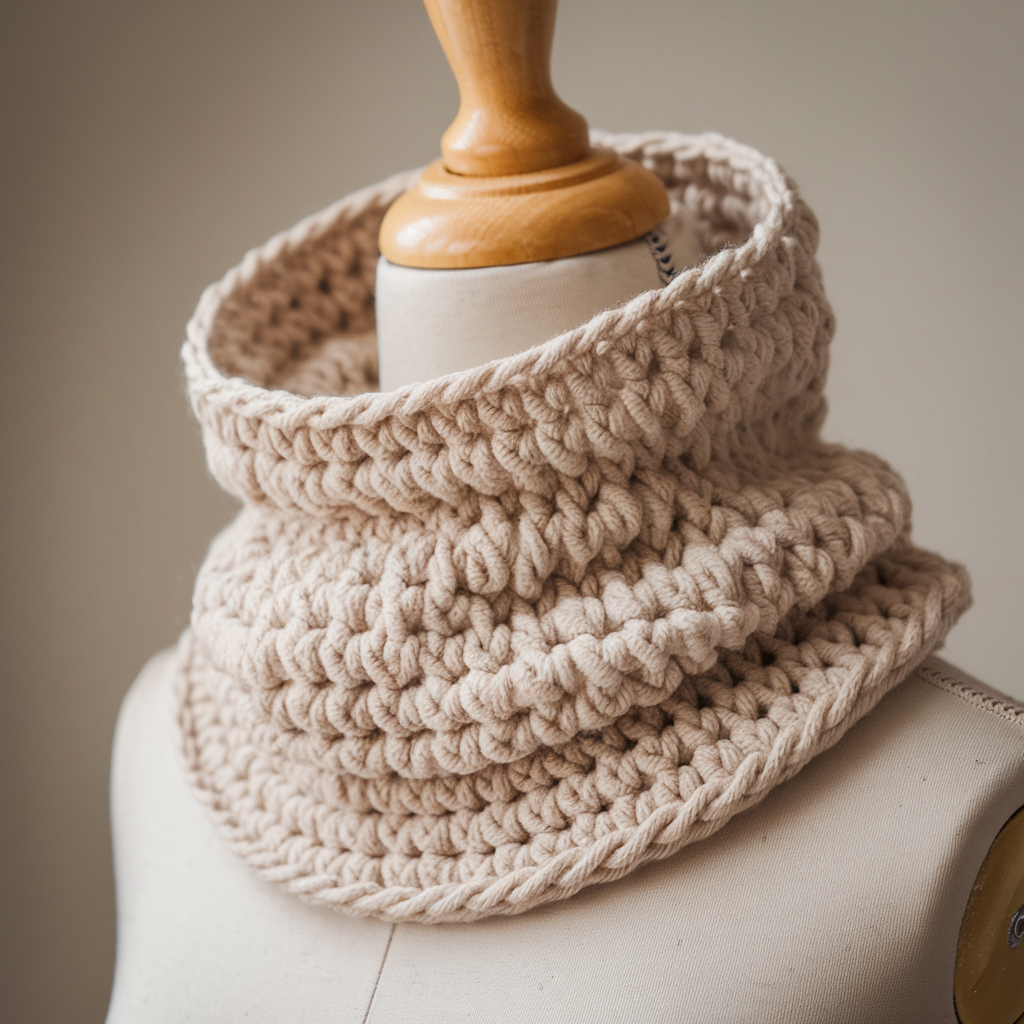
2. Crochet Bow Neck Warmer Pattern
Skill level: Easy — basic stitches + simple seaming and a bow tie wrap
Finished size: Cowl band: 10″ high × 22–24″ circumference. Bow: 7″ wide × 4″ high.
Materials
- Worsted weight yarn (#4) — ~250 yd total (main color + small contrast for bow if desired)
- 5.0 mm (H) hook
- Tapestry needle, small amount of ribbon or scrap yarn to cinch bow
Step-by-step instructions
Band (cowl):
- Foundation: Ch 60. Join with sl st (or work a starting chain for a flat band you will seam).
- Round 1: Ch 1, sc in each ch around; join. (60 sc)
- Rounds 2–8: Ch 2, dc in each st around; join. (This builds a soft, slightly looser fabric for the band.) Work until band height ~10″ total (about 7 rounds of dc with worsted).
- Optional ribbed edge: Work 2 rounds of sc in BLO to create a folded/elastic edge.
Bow motif:
- Make a rectangle: Ch 18. Row 1: sc in 2nd ch and across (17 sc). Row 2–6: ch 1, sc across. Fasten off leaving long tail. The rectangle should be about 7″ × 4″.
- Shape bow: Fold rectangle lengthwise and join long edges with slip stitch or whipstitch. Pull the tube flat, then wrap the long tail (or a scrap of yarn) tightly around the center several times, knot and secure — this forms the bow center.
Attach bow to band:
- Wrap the bow around the cowl where you want it (front center or slightly off-center). Sew the back of the bow to the band with a few secure stitches. Alternatively, attach with a small snap if you want it removable.
Finishing & assembly
- Weave in all ends. Adjust bow cinch tightness until you like the shape.
- If you want a reversible look, attach bow to both sides with small tacking stitches.
Tips & variations
- Make the bow in a contrasting color for pop.
- Use a ribbed band (hdc in BLO) for a more fitted look.
- For a masculine twist, create a “tie” shape instead of a bow.
Care
- Machine wash gentle for most worsted cotton/acrylic blends; lay flat to dry.
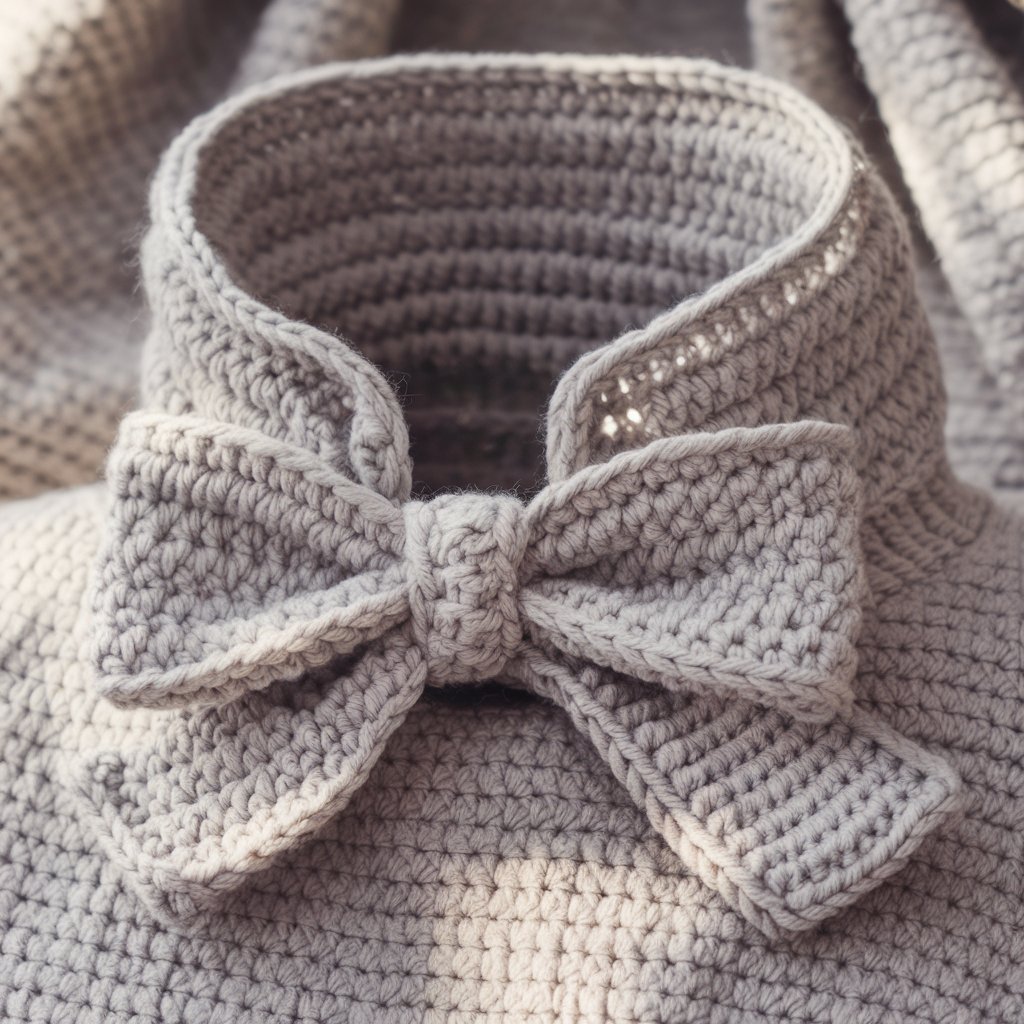
3. Crochet Lacey Charm Neck Warmer Pattern
Skill level: Intermediate — shell or lace repeats and blocking required
Finished size: Approx 7–8″ high × 22–24″ circumference (an elegant, slightly loose collar). For a delicate choker style reduce the circumference by 4–6″.
Materials
- Fingering or sport weight yarn (bamboo, cotton, or wool blend) — ~300 yd
- 3.5–4.5 mm hook (choose based on yarn and desired openness)
- Blocking tools (pins, mat), tapestry needle
Step-by-step instructions (shell lace worked in the round)
Pattern repeat (multiple of 8 sts):
- Foundation chain: Ch 56 (or multiple of 8 plus 0). Join into round.
- Round 1: Ch 1, sc in each ch around — work 1 round sc to stabilize. Join.
- Round 2 (lace set): Ch 3, skip next 2 sts, (5 dc) in next st, skip next 2 sts, ch 3, sc in next st — rep around. This creates small shell arches. Join.
- Round 3 (anchor round): Ch 1, sc in top of each shell center and in each ch-3 space to anchor shells; join.
- Round 4 (offset): Repeat Round 2 but offset so shells sit between shells of previous round to form a layered lace. Join.
- Repeat Rounds 3–4 until neck warmer reaches desired height (usually 3–4 shell rows for 7–8″ height). End with one round sc for a neat edge.
Finishing & assembly
- Block: Wet block or steam to open and set the lace pattern. Pin gently to measured dimensions to keep straight edges.
- Weave in all ends.
Tips & variations
- Add tiny seed beads into the dc shells by pre-stringing beads onto the yarn and sliding a bead into place before completing the central dc for sparkle.
- For a more structured look, work one round of hdc in BLO before the final sc round.
- Make a wider lace collar by adding more shell repeats vertically.
Care
- Hand wash and lay flat to dry for delicate fibers. Re-block after washing if needed.
4. Crochet Striped Neck Warmer Pattern
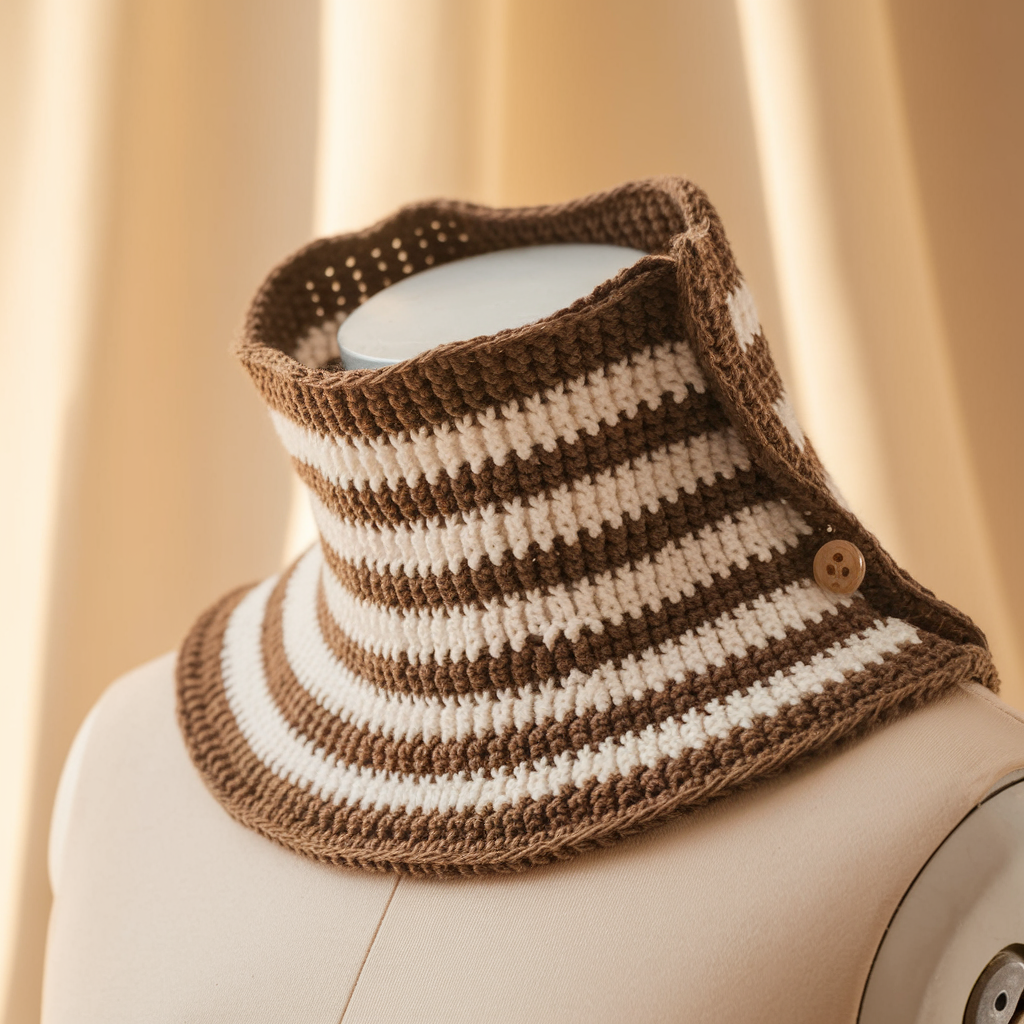
Skill level: Beginner to Easy — simple stitch repeats with color changes
Finished size: Approx 8″ high × 22–24″ circumference (adult standard). Make longer for a slouchy cowl.
Materials
- Two or more contrasting worsted weight yarns — ~300–400 yd total
- 5.0 mm hook
- Tapestry needle, stitch markers
Step-by-step instructions (horizontal stripes, worked in the round)
- Foundation chain: Ch 60; join with sl st, careful not to twist. (60 ch gives ~22–24″ circumference.)
- Round 1: Ch 1, sc in each ch around; join. (60 sc)
- Round 2–4 (Color A): Ch 2, hdc in each st around; join. (3 rounds of Color A)
- Change to Color B: On last yarn-over of previous round change color. Work 3 rounds hdc in Color B. Continue alternating color blocks every 3 rounds (or vary: 2 rounds for thin stripes, 6 rounds for bold stripes).
- Repeat until height ≈ 8″. Finish with 1–2 rounds sc for neatness and to prevent rolling.
Finishing & assembly
- Weave in color change tails carefully, trapping ends in the top/bottom bands or using a tidy Russian join on long floats.
- Optional: add a small decorative button or leather tag at the seam.
Tips & variations
- Use self-striping yarn for effortless stripes.
- Make a “mismatched” stripe version by alternating different yarn weights (test tension).
- For added elasticity, finish edges with one round of crab stitch (reverse sc) for a twisted, finished edge.
Care
- Machine wash on gentle if yarn permits; use colorfast yarns to avoid bleeding.
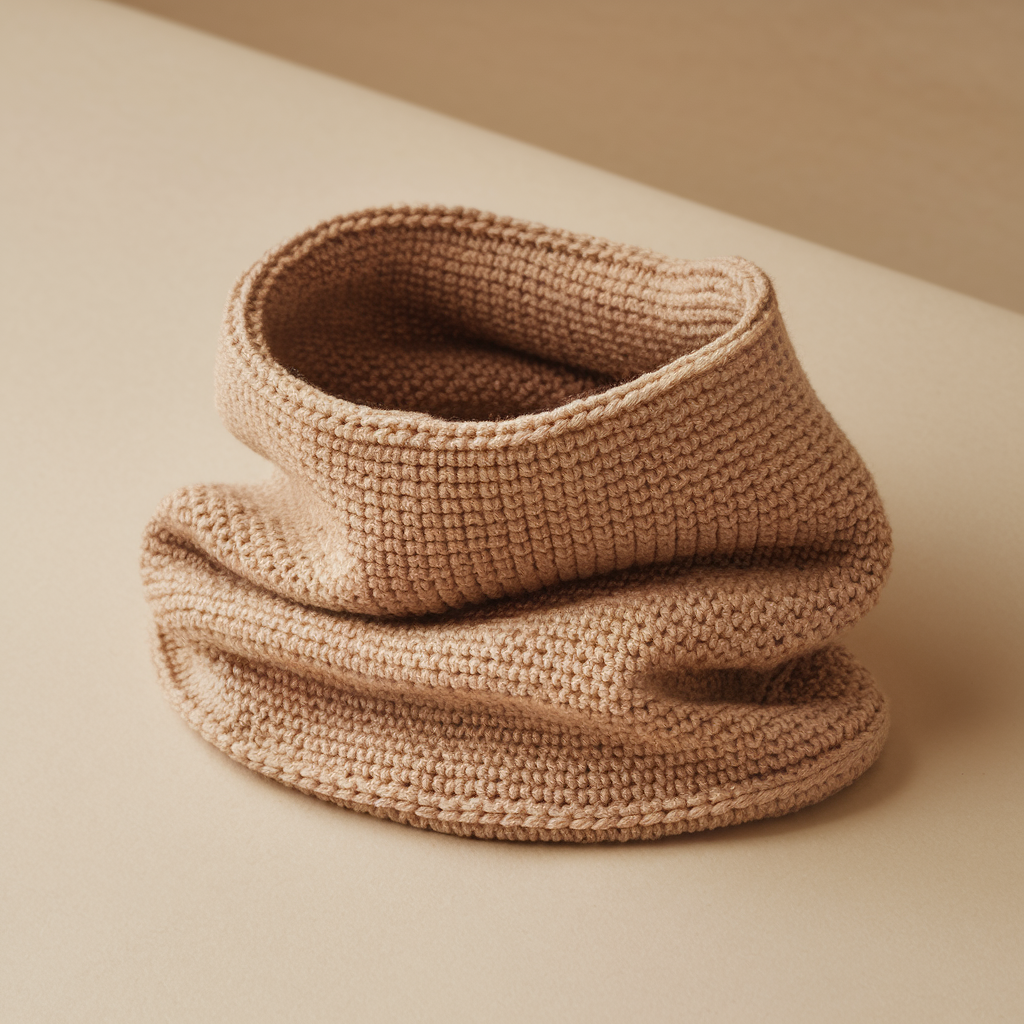
5. Crochet Ribbed Neck Warmer Pattern
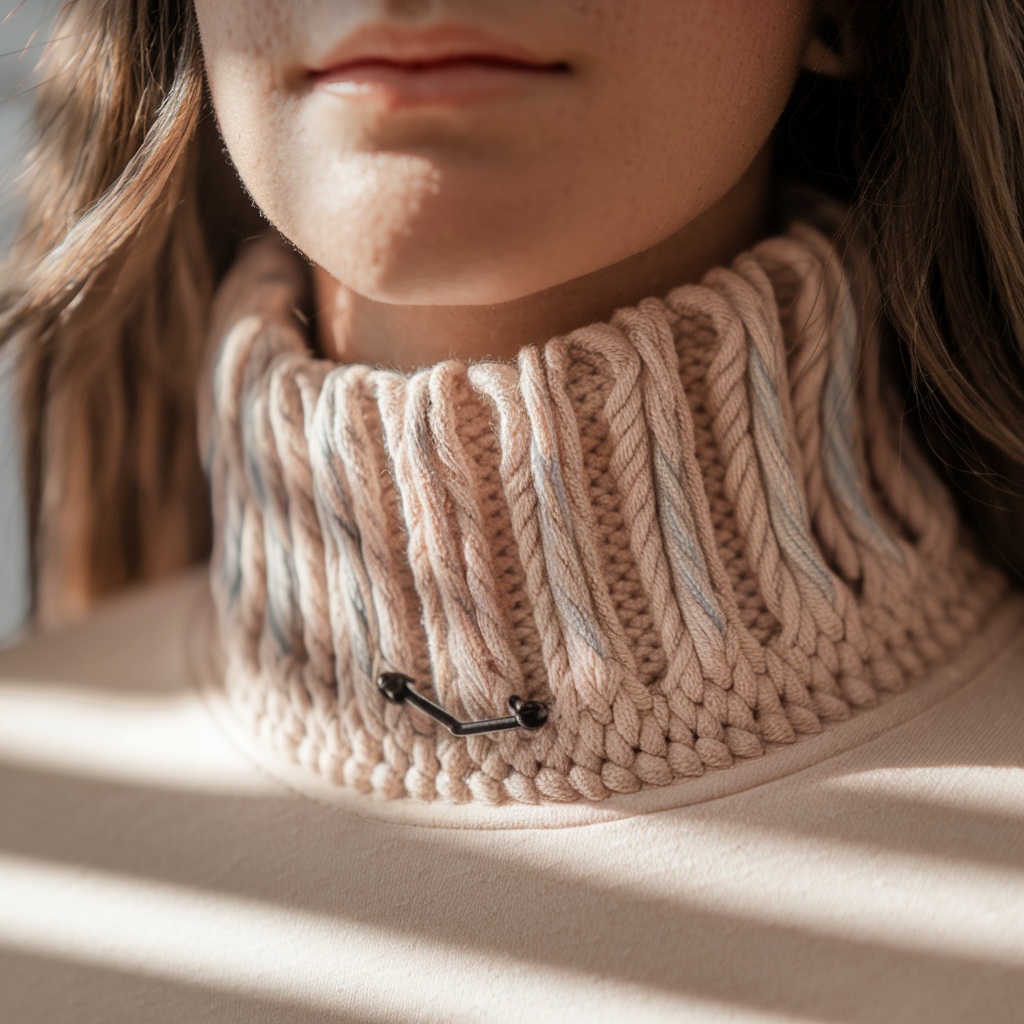
Skill level: Easy — working in back loop only (BLO) for ribbing or using post stitches for deep ribs
Finished size: Approx 8–9″ high × 22–24″ circumference (thicker rib may make it slightly smaller).
Materials
- Bulky or worsted weight yarn — ~200–300 yd
- 6.0 mm hook for chunky rib; 5.0 mm for worsted
- Tapestry needle
Step-by-step instructions (BLO ribbing)
Method A: Back loop only hdc (easy rib)
- Foundation: Ch 56; join with sl st, keeping chain untwisted.
- Round 1: Ch 1, hdc in BLO of each ch around; join. (56 hdc)
- Rounds 2–16: Repeat Round 1 until height is ~8–9″. The BLO hdc forms vertical ribs.
- Optional deeper rib: On every other round, work hdc in FLO to alternate raised ribs.
Method B: Post stitch ribbing (pronounced ribs)
- Foundation: Ch 56; join.
- Round 1: Ch 2, fpdc around next st, bpdc around next st — repeat around and join. The vertical columns of front post and back post dc create deep ribs. Continue to desired height.
Finishing & assembly
- Add one round sc at top and bottom edges for a neat finish.
- Add a small toggle closure if you want to open/close the cowl.
Tips & variations
- Ribbing is very stretchy; if you want a closer fit decrease starting chain by 4–6 sts.
- For a reversible texture, use alternating rows of fpdc and bpdc in subsequent rounds.
- Use a loop-and-button closure to make it convertible (open as a scarf or closed as a cowl).
Care
- Bulky wool may felt; follow yarn care instructions. Acrylics are easy-care.
6. 30-Minute Neck Warmer Crochet Pattern
Skill level: Beginner — extremely quick using super bulky yarn and slip stitches or sc in the round
Finished size: Approx 7–9″ high × 22–24″ circumference (works up quickly; exact size depends on yarn and hook).
Materials
- Super bulky yarn or roving — ~120–200 yd (very small project)
- Large hook 10–15 mm (choose size that works for speed and drape)
- Tapestry needle
Step-by-step instructions (quick sl st / half double crochet combo)
This pattern is optimized for speed. Use a hook one size larger than yarn label to work fast.
- Chain: Ch 48 (or 50 for a slightly larger neck). Join with sl st into a ring. (This should take less than a minute with a large hook.)
- Round 1: Ch 1, sc in each ch around; join. (48 sc) — fast and firm foundation.
- Round 2–6: Ch 2, hdc in each st around; join. Repeat for about 4–6 rounds until height is ~7–9″ depending on desired cuffiness. Because the yarn is super bulky, each round grows fast.
- Finish: Work one round of sc to tidy the top. Fasten off and weave ends.
Alternative ultra-fast option (no sc foundation):
- Ch 48, join, then work 7–9 rounds of sl st in back loop only (BLO). Sl st in BLO creates a thin, almost knitted fabric in record time.
Finishing & assembly
- Weave in ends. No blocking necessary unless using handspun; shape with hands.
Tips & variations
- Use a contrasting color for one round to give a “popped” seam.
- Add a faux fur trim sewn along the top edge for a luxe look.
- This is the perfect charity or market stall make — quick, low cost, and popular.
Care
- Many super bulky yarns require gentle care; follow label.
7. Floral Neck Warmer Crochet Pattern
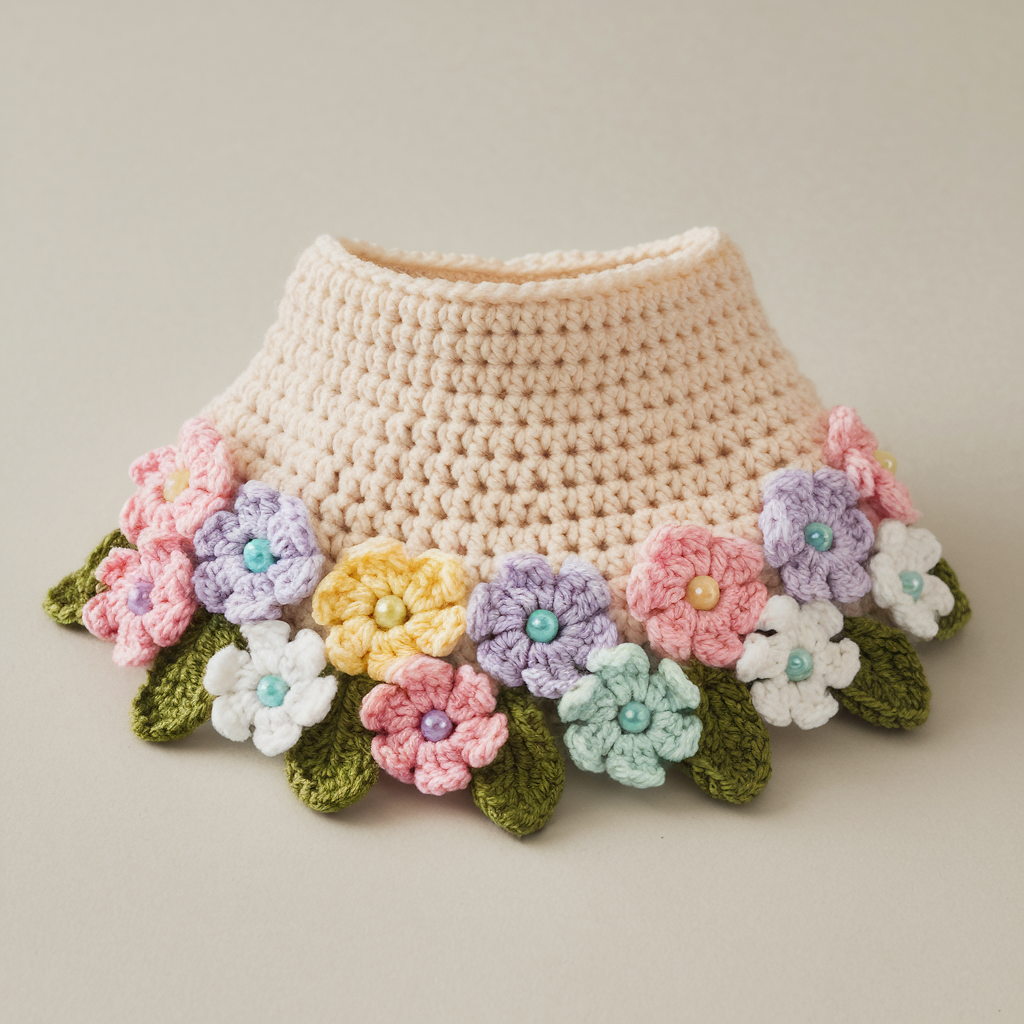
Skill level: Intermediate — small motifs (flowers) joined to a band with some sewing
Finished size: Band base: 7–8″ high × 22–24″ circumference. Floral band overlay adds extra width and texture.
Materials
- DK or fingering weight yarn for delicate flowers (or worsted for chunkier blooms) — ~400 yd total (flowers + band)
- 3.5–4.5 mm hook (depending on yarn)
- Tapestry needle, blocking tools, small buttons/beads for flower centers (optional)
Step-by-step instructions
A. Make the base band
- Base chain: Ch 56; join to work in the round.
- Round 1: Ch 1, sc in each st around; join.
- Rounds 2–10: Ch 2, hdc in each st around. Keep band plain and sturdy — the floral overlay will be sewn on top.
B. Crochet small flower motifs (example simple 5-petal flower)
- Make magic ring. Ch 1, sc, ch 3, (3 dc, ch 3, sc) in ring — repeat 5 times to form 5 petals (or use your favorite small flower pattern). Pull ring tight and join. Fasten off leaving tail for sewing. Make ~12–16 flowers to cover the front of the band (adjust qty for coverage).
- Optionally make small leaves (ch 6, sc, hdc, dc, sc) to place between flowers.
C. Block & assemble
- Block all flowers to consistent shape and size.
- Arrange flowers across the front of the band in a pleasing composition. Sew flowers into place by stitching through the center and underside to secure. Add small beads or buttons in centers if desired.
Finishing & assembly
- Weave in all ends, secure flowers well so they don’t catch on clothing.
- Optionally add a thin lining behind flower area to protect delicate petals and to make the interior smoother against skin.
Tips & variations
- Make tonal flowers for a subtle textured collar or bright multicolored blooms for a statement piece.
- For a bridal neck warmer, use ivory thread, add pearl beads in centers, and attach a detachable ribbon tie.
Care
- Hand wash gently and lay flat to dry. Beads and embellishments may require spot cleaning.
Strong Conclusion
Neck warmers are incredibly versatile — they can be a one-evening gratification (30-Minute Neck Warmer), an expressive accessory (Striped, Floral, Bow), a knitting-look staple (Ribbed), or an heirloom-worthy lace piece. Choose the yarn and hook sized for the function you need: sturdy cotton blends for everyday utility, wool or bulky roving for extreme warmth, and plant-based yarns (bamboo/cotton) for lightweight, breathable lace.