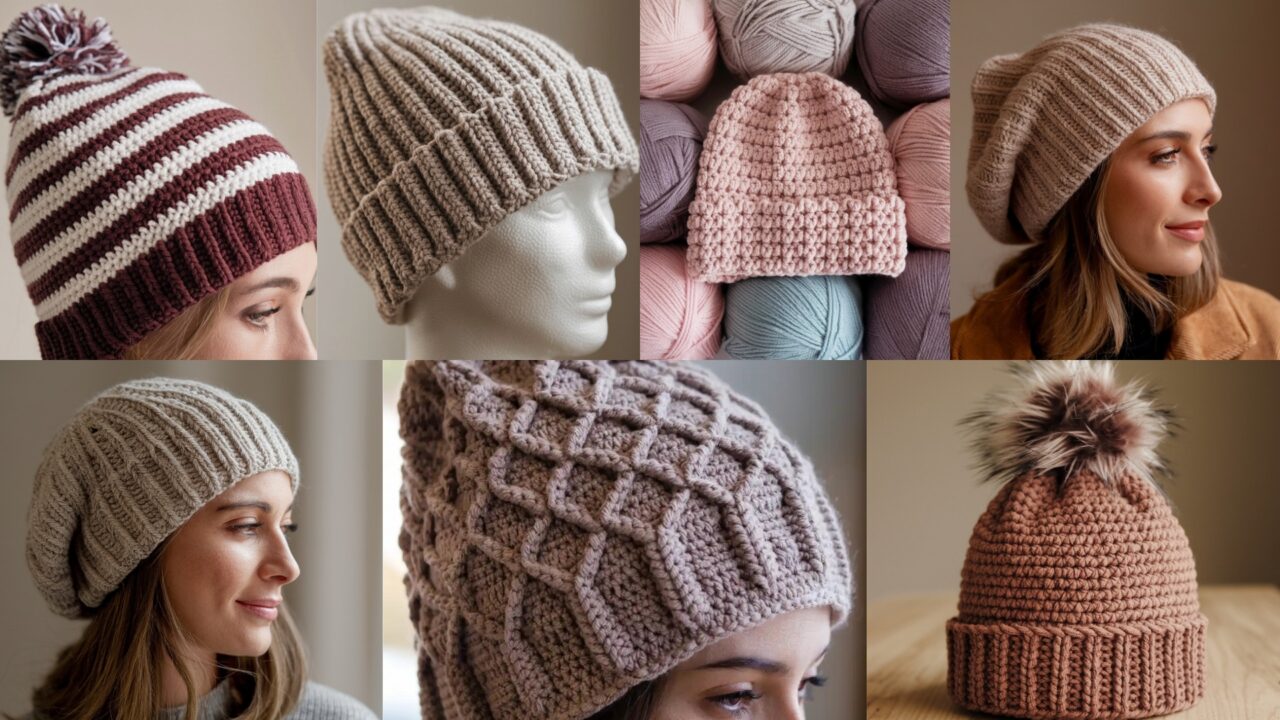
Beanies: practical, fast, and universally obvious when they’re actually well-made. Whether you want a tidy ribbed cuff for commute weather, a slouchy companion for weekend coffee runs, or a show-off mosaic stitch for bragging rights, this collection gives you seven detailed, wearable patterns. Every hat is written top-down (crown → body → brim) and includes an example gauge/size and the tiny sums you need to scale for XS → XL.
Before you pick a pattern, do two things: 1) swatch a 4″ (10 cm) square in the main stitch and measure stitches per inch, and 2) measure the head you’re making for. This saves you time and annoyance. I’ll show the math.
Quick universal notes (read this — it matters)
- Abbreviations (US terms): MR = magic ring, ch = chain, sc = single crochet, hdc = half double crochet, dc = double crochet, tr = treble, sl st = slip stitch, st(s) = stitch(es), inc = increase (2 sc in same st), dec = decrease (sc2tog) or invisible decrease (InvDec), BLO/FLO = back/front loop only.
- Yarn & hook baseline: Most sample hats use worsted weight (#4) and a 5.0 mm (H) hook for a classic beanie. If you use DK (#3) or bulky (#5) your gauge and counts change. I include math examples using this baseline gauge.
- Example swatch/gauge (use your swatch, not this if you want accuracy): 4″ = 16 sc (that is 16 ÷ 4 = 4 stitches per inch). I will use this example gauge in sample calculations so you can follow the arithmetic. Always recalc for your swatch.
- Hat sizing (circumference targets; finished circumference):
- Infant 0–6 mo: 15–16″
- Toddler 2–4 yrs: 18″
- Child 6–10 yrs: 19–20″
- Teen/Adult S (small): 20–21″
- Adult M (medium): 21–22″ (typical target used below = 21″)
- Adult L: 22–23″
- Adult XL: 23–24″
Decide finished circumference = head measurement − 0.5–2″ negative ease for stretch (adult beanie usually 0.5–1.5″ negative ease depending on stitch density). I use finished 21″ (medium) as the example.
- How to calculate stitches for your hat (the 3-step):
- Make 4″ swatch and count stitches across. Example: 16 sts across 4″.
- Compute stitches per inch: 16 ÷ 4 = 4 sts/in. (digit-check: 16 divided by 4 equals 4)
- Multiply finished circumference by sts/in: e.g., 21 × 4 = 84 stitches. (digit-check: 21 × 4 = 84) Round to nearest pattern multiple if necessary (I’ll tell you the multiples for stitch-pattern repeats).
- Construction style: All hats are top-down in rounds (start from crown increases or magic circle). Brims may be worked as ribbing (BLO hdc), folded cuffs, or simple sc. For slouch, add extra body rounds before brim.
- Blocking & finishing: Light blocking evens stitches; weave ends, and add pom-poms if you like. Machine wash depends on yarn fiber—read labels.
1. Crochet Striped Beanie Pattern
Classic, bold, and forgiving. Stripes are simple and you can use stash yarn. Includes tidy folded cuff.
Skill level: Beginner
Materials: worsted weight yarn (main color A + contrast color B), 5.0 mm hook, tapestry needle, scissors, optional pompom maker. Approx yarn: 150–200 yds total.
Gauge (example): 4″ = 16 sc → 4 sts/in (use your swatch)
Sample target (M): finished circumference 21″ → stitches needed 21 × 4 = 84 sts.
Crown & increase plan (top-down)
Use MR or closed-loop start. Increases should distribute evenly to make a flat crown.
Crown rounds (example to reach 84 sts total at crown expansion):
- MR, R1: ch1, 6 sc in MR — 6.
- R2: inc around (inc in every st) → 6 × 2 = 12.
- R3: sc 1, inc ×6 → adds 6 → 12 + 6 = 18.
- R4: sc 2, inc ×6 → adds 6 → 18 + 6 = 24.
- R5: sc 3, inc ×6 → adds 6 → 24 + 6 = 30.
- R6: sc 4, inc ×6 → adds 6 → 30 + 6 = 36.
- R7: sc 5, inc ×6 → adds 6 → 36 + 6 = 42.
- R8: sc 6, inc ×6 → adds 6 → 42 + 6 = 48.
- R9: sc 7, inc ×6 → adds 6 → 48 + 6 = 54.
- R10: sc 8, inc ×6 → adds 6 → 54 + 6 = 60.
- R11: sc 9, inc ×6 → adds 6 → 60 + 6 = 66.
- R12: sc 10, inc ×6 → adds 6 → 66 + 6 = 72.
- R13: sc 11, inc ×6 → adds 6 → 72 + 6 = 78.
- R14: sc 12, inc ×6 → adds 6 → 78 + 6 = 84. → stop increases (you have 84 sts = target circumference).
Note: These rounds assume perfectly even growth. If your gauge differs, recalc target rounds to reach your computed stitch count. You can also use a different increase scheme (inc every N stitches) but keep increases evenly spaced.
Body (striping)
- After R14 with 84 sts, join color B (contrast) on last join according to stripe schedule:
- Example stripe pattern: 4 rounds A, 2 rounds B, repeat until hat height before brim ≈ 7.5″ (adult medium).
- Work rounds in sc (or hdc for slouchier drape). Keep color carries inside or weave ends. Count rounds for height—example: If gauge (rows per inch) = count your swatch vertical rows: suppose 8 rows = 2″ ⇒ 4 rows/in. If you need 7.5″ height, 7.5 × 4 = 30 rounds. (You would stop stripe repeats once you reach approx that many rounds.)
Brim (folded cuff)
- Work 8–10 rounds BLO hdc (back loop only half-double crochet) to create stretchy rib), or sc in BLO for tighter cuff. Example: 10 rounds BLO hdc.
- Fold cuff to inside and seam with slip-stitch or whipstitch for neat fold.
Finishing
- Weave in ends, block gently, attach pompom if wanted.
Variations & notes
- Use narrower stripes (1–2 rounds) for subtle effect.
- For a bulkier winter hat, hold two worsted strands and use 6.5 mm hook; recalc counts (you will get fewer sts per inch).
2. Crochet Ribbed Beanie Pattern
A stretchy, classic ribbed cuff beanie that fits snug and looks tailored. Uses alternating BLO & FLO rows or front/back post stitches.
Skill level: Beginner → Confident Beginner
Materials: worsted yarn, 5.0 mm hook, tapestry needle. Approx 150–200 yds.
Gauge example: 4″ = 16 sc (4 sts/in) — but ribbing gauge can be tighter; check your swatch.
Crown & shaping (top-down, same increase plan as Striped Beanie to 84 sts)
Use the same crown increases as the striped beanie (R1–R14 shown earlier) to reach target 84 sts. Stop increases when reach desired circumference.
Body — ribbing method (two options)
Option A — BLO/FLO hdc rib (flat elastic band look)
- After crown increases finish, switch to hdc and work rows in continuous rounds but alternate BLO and FLO rounds to create ridges:
- Round 1 (even round): hdc BLO in each st around.
- Round 2: hdc FLO in each st around.
- Repeat Round1–Round2 until hat body reaches desired height (e.g., 7.5″ total from crown).
- This creates a reversible rib texture.
Option B — Front-post/Back-post double crochet (chunky rib)
- Work rounds of fpdc (front-post double crochet) and bpdc alternating rows:
- Round 1: fpdc around st below, skip next st? Actually, in the round: fpdc around next st, bpdc around next st repeat produces vertical ribs. Continue to desired length.
Brim — folded (for extra warmth)
- Work 8 rounds hdc in BLO (if using Option A you already have rib); fold and seam inside.
Finishing
- Weave ends. Use invisible decrease at crown to close top: once you have about 10–12 sts left, dec around to close hole, pull yarn through remaining stitches and secure inside.
Variations
- Make taller slouch by adding 1–2″ more body rounds before brim.
- For tighter fit choose smaller hook for rib rounds (e.g., 4.5 mm).
3. Crochet Mosaic Stitch Beanie Pattern
Graphic look without colorwork strain — mosaic uses slipped stitches and two-row repeats; here we do mosaic using two colors.
Skill level: Intermediate (mosaic technique)
Materials: worsted weight in MC (main color) + CC (contrast), 5.0 mm hook, tapestry needle. ~200–250 yds total.
Gauge & repeat: Mosaic charts typically require stitch multiples; this example uses a repeat multiple of 4 so final stitch count should be divisible by 4. Our example 84 ÷ 4 = 21 repeats — fine.
Crown & crown increases
- Use crown increase rounds like earlier to reach final stitch count 84 and make sure 84 ÷ 4 = 21 is a whole number (it is).
Mosaic body (two-row repeat)
Mosaic uses two-row pattern where you work with MC and CC alternatively; you slip stitches of the other color.
Example mosaic repeat (simple diamond motif using sl sts)
- Row pattern in the round (read rows as rounds because working in joined rounds or spiral—mosaic is easier flat, but we’ll do in rounds using turning rows concept):
- Round A (MC): [dc 1, sl st CC 1] repeat across (i.e., dc in MC stitch, slip the next stitch of CC color without working it — you’ll pick it up later).
- Round B (CC): [dc 1, sl st MC 1] repeat across.
This is simplified; you’d follow a small 4×8 mosaic chart to produce diamonds. For a blog, give the sample two-row repeat as starting point and include a small chart image if you want visual help.
Height and brim
- Work mosaic rounds until desired height (slightly more rounds because mosaic is less stretchy). Then finish with 8–10 rounds of BLO hdc for a neat brim.
Finishing & variations
- Because mosaic uses slipped stitches of unused color, carry the unused color up the inside loosely to avoid tightness, or cut and weave (more ends).
- For a subtle mosaic, use tone-on-tone colors.
4. Crochet Slouchy Beanie Pattern
Generous extra fabric at back and a relaxed look. Wider crown increases and additional body rounds create the slouch.
Skill level: Confident Beginner
Materials: worsted/aran yarn, 5.5 mm hook for softer drape, tapestry needle. ~200–250 yds.
Gauge example: 4″ = 14 sc → 3.5 sts/in (because larger hook). If your swatch reads 14 sts per 4″, then 14 ÷ 4 = 3.5 sts/in. We must recalc.
Important arithmetic example for slouch using this gauge:
- Gauge = 14 sts per 4″ → stitches/in = 14 ÷ 4 = 3.5 sts/in. (Digit-by-digit: 14 divided by 4 gives 3 remainder 2, decimal 0.5 → 3.5)
- Target finished circumference for M = 21″ → stitches = 21 × 3.5. Compute: 21 × 3 = 63; 21 × 0.5 = 10.5; 63 + 10.5 = 73.5 → round to 74 stitches. So you’ll aim for 74 stitches around. (Step arithmetic shown: 21×3 =63; 21×0.5=10.5; total 73.5 → 74.)
Crown increases (top-down to 74)
You’ll need to modify the increase plan because 74 is not multiple of 6 increments used earlier. Use increases that create a flat crown and reach 74.
Suggested increase rounds with variable spacing:
- MR, R1: 6 sc — 6.
- R2: inc around → 12.
- R3: sc1, inc ×6 → 18.
- R4: sc2, inc ×6 → 24.
- R5: sc3, inc ×6 → 30.
- R6: sc4, inc ×6 → 36.
- R7: sc5, inc ×6 → 42.
- R8: sc6, inc ×6 → 48.
- R9: sc7, inc ×6 → 54.
- R10: sc8, inc ×6 → 60.
- R11: sc9, inc ×6 → 66.
- R12: sc10, inc ×6 → 72.
Now you have 72, slightly below 74. Do one more round where you add 2 increases spaced evenly to reach 74: - R13: sc11, inc ×? or just even round and then do an increase round where you add 2 incs (e.g., sc 11, inc ×6 would add 6 -> too many). Simpler: on R13 do sc around to 72; R14 perform 2 evenly spaced increases: locate positions at every 36 sts maybe. Practically: do R14: sc across, but do inc in st 18 and st 54 to get +2 → final 74.
This is slightly fiddly; you can also choose final count 72 and make slightly less negative ease — both are fine for slouch.
Body & slouch
- After crown, switch to dc or hdc for drape, and work many rounds (add 1.5–2″ more than a fitted beanie). Example total height before brim ≈ 9–10″ for slouch; measure on wearer.
- Brim: optional ribbed cuff or single-crochet folded hem.
Finishing
- When closing top, you may have small hole; use gather-through method or do invisible decrease rounds until 8–10 sts left and cinch.
Variations
- Add textured stitch bands (bobble rows) around body for interest.
- Make extra slouch by using bulky yarn + larger hook.
5. Crochet Granny Stitch Beanie Pattern
Granny stitch (cluster-based) makes a charming textured beanie — quick and forgiving. Works great with color changes and variegated yarn.
Skill level: Confident Beginner
Materials: worsted or DK (depends on how open you want clusters), 4.5–5.0 mm hook, tapestry needle. ~150–200 yds.
Gauge & repeat: Granny cluster pattern usually uses multiples of 3 per round; ensure final stitch count is divisible by 3. Example 84 ÷ 3 = 28 clusters.
Crown top-down using cluster increases
For cluster-based crowns, increase by adding new cluster spaces each round.
Cluster definition: cluster = (ch2, 3 dc) in same sp or classic (3 dc, ch2, 3 dc) as corner clusters. For round crowns, we’ll use small 3-dc clusters separated by ch1 spaces.
Example crown rounds (clusters count rather than raw sts):
- MR, R1: ch2, 3 dc in MR, ch1, repeat 6 times → you create 6 cluster groups around. (6 clusters)
- R2: into each ch1 space work a cluster and ch1 repeat → increases clusters to 12 (6 × 2 = 12) depending on pattern. Keep increasing until reach desired circumference in number of clusters = target 28 clusters for 84 stitches equivalent if you interpret cluster equals 3 dc + spacing. This section requires following a cluster chart. For a blog, include a small cluster-chart (visual) for conversion.
Body
- After reaching target cluster count, work even rounds of cluster pattern for desired height (7–8″ for fitted, 9–10″ for slouch).
- Brim: add 6–8 rounds sc or hdc for stability; folded cuff optional.
Finishing & variations
- Granny beanie looks great in ombré or tonal stripes.
- Add earflaps for warmth by working short triangular flaps on sides before final edging.
6. Crochet Simple Beanie Pattern
Plain, reliable hat for beginners — sc in the round, minimal shaping. Good for quick gift-making.
Skill level: Beginner
Materials: worsted yarn, 5.0 mm hook, ~150 yds.
Gauge & target: Use the baseline gauge: 4″ = 16 sc → 4 sts/in → 21″ circumference → 84 sts target.
Crown increases (simple evenly spaced incs)
- MR, 6 sc — 6
- inc around → 12
- sc1, inc ×6 → 18
- sc2, inc ×6 → 24
- sc3, inc ×6 → 30
- sc4, inc ×6 → 36
- sc5, inc ×6 → 42
- sc6, inc ×6 → 48
- sc7, inc ×6 → 54
- sc8, inc ×6 → 60
- sc9, inc ×6 → 66
- sc10, inc ×6 → 72
- sc11, inc ×6 → 78
- sc12, inc ×6 → 84 → stop increases.
Body & brim
- Work sc around evenly for body until ~7.5–8″ from crown.
- Brim: 8 rounds BLO hdc for stretch, fold to inside and seam.
Variations
- Add simple earflaps, or a faux-fur pom for a quick glam.
7. Crochet Shell Stitch Beanie Pattern
Textured shell stitch adds visual interest and feminine curves. Shell rows often require stitch counts multiple of pattern repeat (multiple of 6 or 8 depending on shell size). I’ll give a common multiple-of-6 shell.
Skill level: Confident Beginner → Intermediate (pattern repeat)
Materials: worsted yarn, 5.0 mm hook, tapestry needle. ~200 yds.
Gauge & repeat: Use baseline 4″ = 16 sc (4 sts/in). Shell repeat = 6 stitches. Example 84 ÷ 6 = 14 repeats — good.
Crown & increase plan
Start top-down using increases that maintain multiples of 6.
Crown round example (clusters in place of sc counts):
- MR, ch1, 6 sc in MR (6)
- R2: inc in each st → 12
- R3: sc 1, inc ×6 → 18
- R4: sc 2, inc ×6 → 24
- R5: sc 3, inc ×6 → 30
- R6: sc 4, inc ×6 → 36
- R7: sc 5, inc ×6 → 42
- R8: sc 6, inc ×6 → 48
- R9: sc 7, inc ×6 → 54
- Continue until multiple matches final target 84 — follow increases to round up to 84 as prior examples do.
Shell pattern body (worked in rounds)
Once you reach stitch count (84, divisible by 6), switch to shell rounds:
- Shell stitch (example): skip 2, (5 dc) in next, skip 2, sl st in next — that uses a set of 6 sts per shell with overlaps. More common easier shells: sc or dc in between shells.
Round example (shell repeat)
- Round1: [shell in next st, sc in next st] repeat around (ensures shells sit on every other stitch). Work shell rounds for height you want (6–8 shell rounds ~7–8″ hat).
Brim
- Finish with 2–3 rounds sc for stability or fold-over rib if desired.
Variations
- Use smaller shells (3 dc) for dainty look or huge shells for dramatic texture.
Final finishing & real-world tips
- Swatch, measure, then chain. The tiny math you did earlier prevents frogging.
- Try on as you go. Once your body length is about half the intended height, test on a head or mannequin. It’s easier to add/subtract now than after seaming.
- Invisible decreases for top. For a cleaner crown, use invisible decrease (InvDec) rather than sc2tog. When 8–12 stitches remain, use a yarn needle to thread and cinch for a tidy closure and knot inside.
- Pom-poms and lining: Large pom-poms hide a messy crown but add weight. Lining a beanie with fleece or a soft band gives warmth and hides seam ends. Sew lining in before final seam.
- Care: Acrylic & blends = machine wash gentle, reshape, air dry; wool = hand wash if not superwash. Read yarn label.
- Selling or gifting: include fiber content and wash instructions. If using wool, warn about shrinking if machine dried.
Conclusion
That’s a full set of seven beanie patterns — from the simple plain hat to mosaic colorwork and shell stitch showoffs. The real difference between a hat that’s useful and one that sits in a drawer is not the stitch choice but the prep: a quick 4″ swatch, exact stitches-per-inch math, and a thoughtful crown increase plan. Swatch, measure, try on early, and reinforce the top and brim as needed. Make one in the simplest pattern first if you only have an evening — and then make the mosaic one when you’ve earned it.