Crochet dresses are some of the most satisfying garments to make — they combine shaping, texture, and color in a single wearable project. Whether you want a breezy sundress, a cozy day dress, or a structural corset-style piece, there’s a dress here you can make at home. Below you’ll find a long, detailed, ready-to-post article with an introductory section (tools, sizing, gauge and general tips) followed by seven full patterns: Corset Sundress, Cabo Dress, Puff Sleeve Dress, Babydoll Dress, V-neck Star-Stitch Tank Sundress, Cozy Dream Dress, and Mesh Slit Dress. Each pattern includes skill level, materials and yardage estimates, gauge, a step-by-step construction guide (with stitch-by-stitch examples for an adult Medium), shaping/fitting notes, variations and finishing/care tips.
Before you begin — tools, sizing, gauge and common abbreviations
Tools & notions
- Crochet hooks: 3.0 mm — 6.5 mm depending on yarn weight and pattern. Each pattern specifies a recommended hook size; always swatch.
- Yarn: cotton/cotton blends and cotton-mixes are ideal for summer dresses; wool blends, acrylic or cotton-blends work for cozier dresses. Yarn weight suggestions appear with each pattern.
- Notions: tapestry needle, stitch markers, measuring tape, safety pin, elastic (for casings or waistbands), small amount of lightweight woven fabric (for linings or straps if needed), optional boning or interfacing for corset details, seam ripper, blocking mats and pins.
- Optional hardware: small buttons, snaps, zippers, decorative rings or toggles.
Sizing & fit basics
- Make a quick measurement of bust, waist, hip and desired dress length (shoulder → hem). For a Medium example I use approximate numbers: bust 36 in, waist 29–30 in, hip 38–40 in. Always design to your own measurements.
- Decide ease: fitted garments often use 0–2 in negative ease (for stretch fabrics) or 0–2 in positive ease for relaxed fit.
- Top-down construction lets you try on as you go, making fit adjustments easier. Bottom-up or panels are also possible.
Gauge & swatching
- Always make a 4 in × 4 in (10 cm) blocked swatch in the stitch pattern. Measure stitches/rows per inch — this is how you calculate foundation chain or stitch counts for different sizes.
- When the stitch pattern is lacy, measure after blocking; lacy stitches open up more than dense ones.
Common abbreviations (US crochet)
- ch = chain
- sl st = slip stitch
- sc = single crochet
- hdc = half double crochet
- dc = double crochet
- tr = treble crochet
- st(s) = stitch(es)
- sp = space
- sk = skip
- rep = repeat
- BLO / FLO = back loop only / front loop only
- RS / WS = right side / wrong side
- inc = increase (2 sts in same stitch)
- dec = decrease (two or more stitches worked together)
- MR = magic ring
1. Crochet Corset Sundress Pattern
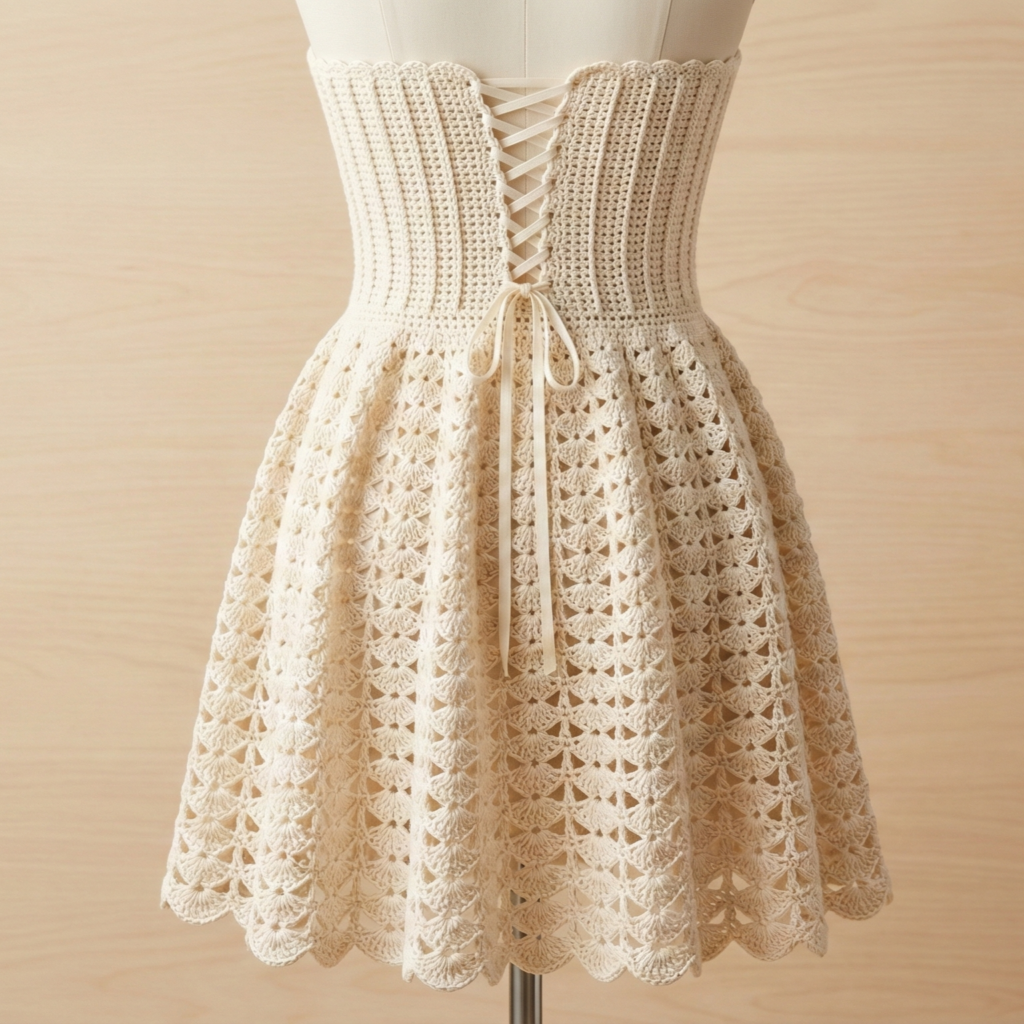
Skill level: intermediate (shaping + optional corset details)
Vibe: structured bust with a soft flared skirt — a flattering mix of supportive shaping and summer ease.
Materials (Medium)
- Sport/DK cotton-blend yarn: ~900–1200 yd depending on length.
- Hooks: 3.5 mm for bodice (for firm fabric), 4.5 mm for skirt (for softer drape).
- 1/2″ elastic for optional waist casing, narrow ribbon for lacing (if desired), small amount of lightweight cotton for lining (optional).
- Optional: plastic bone stays (if you want a more corseted structure) — only use soft plastic and sew into channels if adding.
Gauge (example)
- Bodice (hdc in pattern): 16 hdc = 4 in (work your own swatch).
- Skirt (dc mesh): 14 dc = 4 in.
Finished measurements (example Medium)
- Bodice underbust circumference (finished): ~30 in (bust shaping covers bust).
- Skirt hem circumference: adjustable via increases; sample hem ≈ 110 in for a flared skirt.
- Dress length (shoulder → hem): customizable; sample 36–38 in.
Construction overview
Work this dress top-down so you can shape the corset-style bodice to fit. The bodice is worked with a firmer stitch and optional vertical channels for lacing or rigid support. After the bodice, pick up stitches and work a flared skirt in a lighter, lacy stitch.
Step-by-step (Medium example)
1. Measure & compute
- Swatch the bodice stitch (hdc in pattern). Suppose spi = 4 hdc/in. For an underbust finished 30 in target → 30 × 4 = 120 hdc around as a starting point (adjust to a multiple required by stitch pattern). If you want 1 in negative ease for a snug fit, reduce to 29 in × spi.
2. Start the bodice (top edge or band)
- Option A (strapless top edge): foundation round using foundation hdc: chain foundation to a small loop and join: foundation hdc 120 sts, join with sl st.
- Option B (strap-based): create two cups (left/right) and join in back — I describe strapless top-down here.
Round 1: hdc in each st around.
Round 2–6: hdc in BLO to create a sturdy foldable casing (if you want to insert elastic for a snug fit later). Block and try on; if the band feels too loose, remove and rework with smaller hook.
3. Corset shaping (vertical panels)
- Establish vertical panels using fpHdc and bpHdc columns to create channels. Example repeat across: 3 hdc, fpHdc 4, 3 hdc, bpHdc 4 rep across. Work 10–12 rounds to build height to underbust (about 6–8 in depending on preference).
- To make channels for optional boning, work a few rounds of tight sc at the base of the channel then later sew fabric strips inside the lining to hold boning.
4. Bust shaping
- Divide the band into front center and sides: pick up extra stitches in the front triangle area to provide cup shaping. Use short rows or increase rounds across front center: for example, over the front 1/3 width add 4–8 extra hdc over 2–3 rounds to create shaping.
- For a built-in bust cup, you can make two small cups (worked separately) and join at center with a few rows.
5. Lacing/back detail (optional)
- For a corset look: work an eyelet row along center back: sc 3, ch 3, sk 3 rep to create eyelets, then work 3 rounds to reinforce. Insert narrow ribbon or cord.
6. Join for skirt
- Once the bodice reaches desired underbust height and shaping is good, pick up stitches along bottom edge and switch to a larger hook and lighter stitch (dc mesh or shell stitch).
- Example skirt start: Round 1 (attached): dc in each st around, placing 3 dc in every 6th st to begin flare (calculate increases to reach desired hip/hem width gradually). Continue increases every 6–8 rounds until you reach desired hem fullness.
7. Skirt body (lacy option)
- Work a repeating mesh: e.g., [dc, ch 2, skip 2, dc] as a row repeat (in the round adapt to round format) or a shell pattern for more texture. Continue until skirt length reaches target (e.g., 24 in from waist for a midi; 16–18 in for a shorter sundress).
8. Hem & finish
- Add a decorative scallop or picot hem. If you used elastic casing at the top, insert elastic now and stitch closed. Sew lining inside bodice if you used channels or boning.
Fitting & tips
- Try on after bodice rounds before adding the skirt. Adjust shaping early.
- For better support, line bodice with lightweight cotton and sew channels for boning only if you are comfortable sewing and adding soft plastic boning.
Variations
- Make narrower straps or a halter by adding strap panels from front to back.
- Use a more structured yarn (cotton + nylon) for a firmer bodice.
Care
- Cotton blends: hand wash or machine wash gentle; reshape when damp.
2. Crochet Cabo Dress Pattern
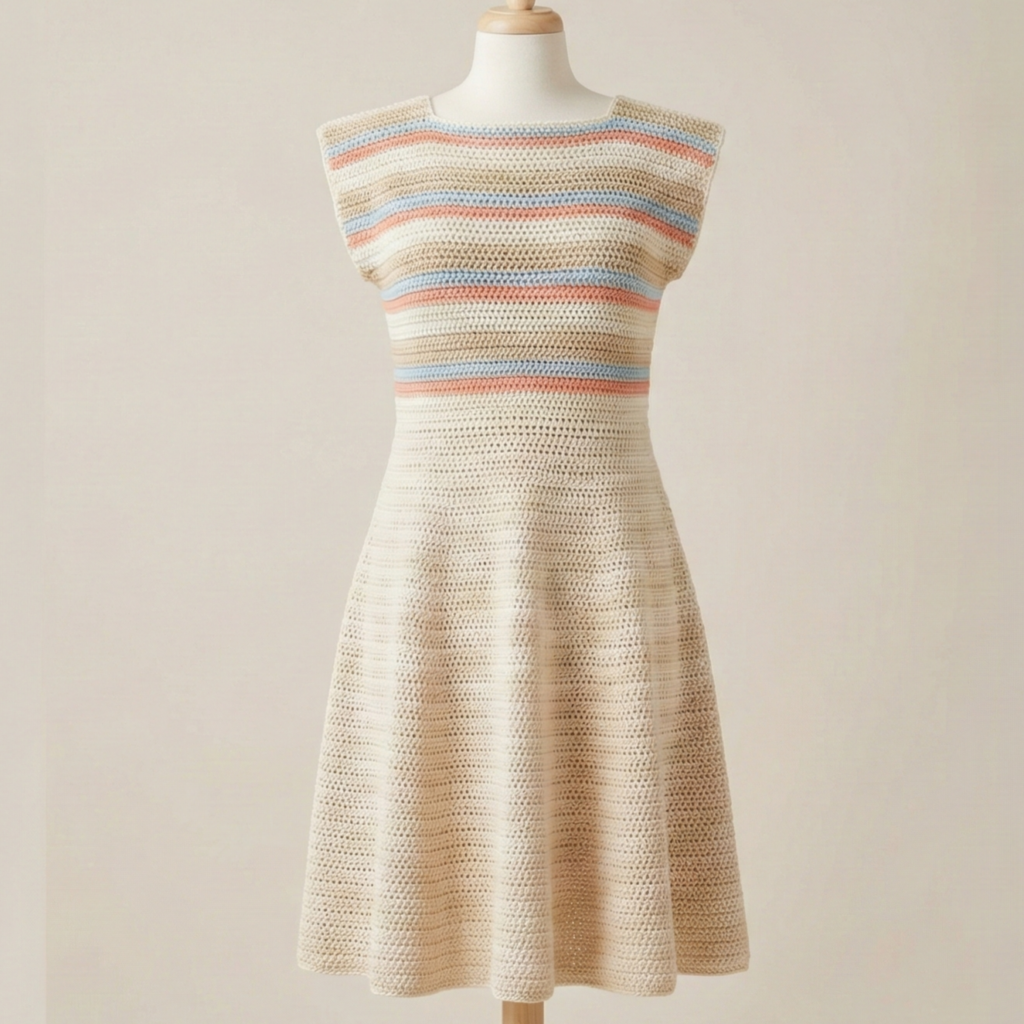
Skill level: confident beginner → intermediate (colorwork, stripes, shaping)
Vibe: effortless coastal dress with a slightly boxy top and soft A-line skirt — great for beach days.
Materials (Medium)
- DK/cotton blend: ~800–1000 yd for a knee-length dress.
- Hook: 4.0 mm.
- Optional: contrast color for stripes.
Gauge (example)
- 16 dc = 4 in in the main stitch.
Finished (example Medium)
- Bust finished: 36 in (with light ease), length: 36–38 in.
Construction overview
This dress is worked top-down in one piece: a simple boxy yoke (worked in rounds or flat) then divided for body and sleeves (if you keep sleeves short), with a soft A-line skirt formed by regular, gentle increases.
Step-by-step
1. Yoke/top
- Create a comfortable band for upper chest (or work raglan yoke if you like seams). For a simple box yoke:
Chain foundation: measure upper chest and compute stitches: e.g., 36 in × 4 dc/in = 144 dc around for the yoke. Join and work rounds.
Rounds 1–6: dc in each st to create a neat, wide yoke. For raglan shaping you would work increases at four raglan corners and shape shoulders — for a boxy shape these rounds are even.
2. Divide for body & optionally sleeves
- After yoke height you can divide for sleeves by placing markers: front panel stitches / sleeve stitches / back / sleeve. If you prefer sleeveless, simply continue body.
3. Skirt increases
- For A-line shape, distribute increases every 6–8 rounds: dc 8, inc repeated across to add fullness gradually. Repeat these increase rounds 4–6 times until desired hip and hem fullness is reached.
4. Stripe & texture options
- Periodically change color to create Cabo stripes. Use a contrast color every 6 rounds for a nautical look.
5. Hem
- Finish with one or two rounds of sc and a small scallop or shell edge.
Fitting & tips
- Measure hip circumference as you go. The dress is forgiving because of the A-line shape.
- For a more fitted waist add a short round of waist shaping: decrease slightly below bust and increase slightly below hips (or add a drawstring casing at waist).
Variations
- Add short puff sleeves (worked from armhole down) or make long sleeves for cooler weather.
- Work the yoke in texture (waffle or moss stitch) and the skirt in smooth dc for contrast.
Care
- Cotton: wash gentle and dry flat.
3. Crochet Puff Sleeve Dress Pattern
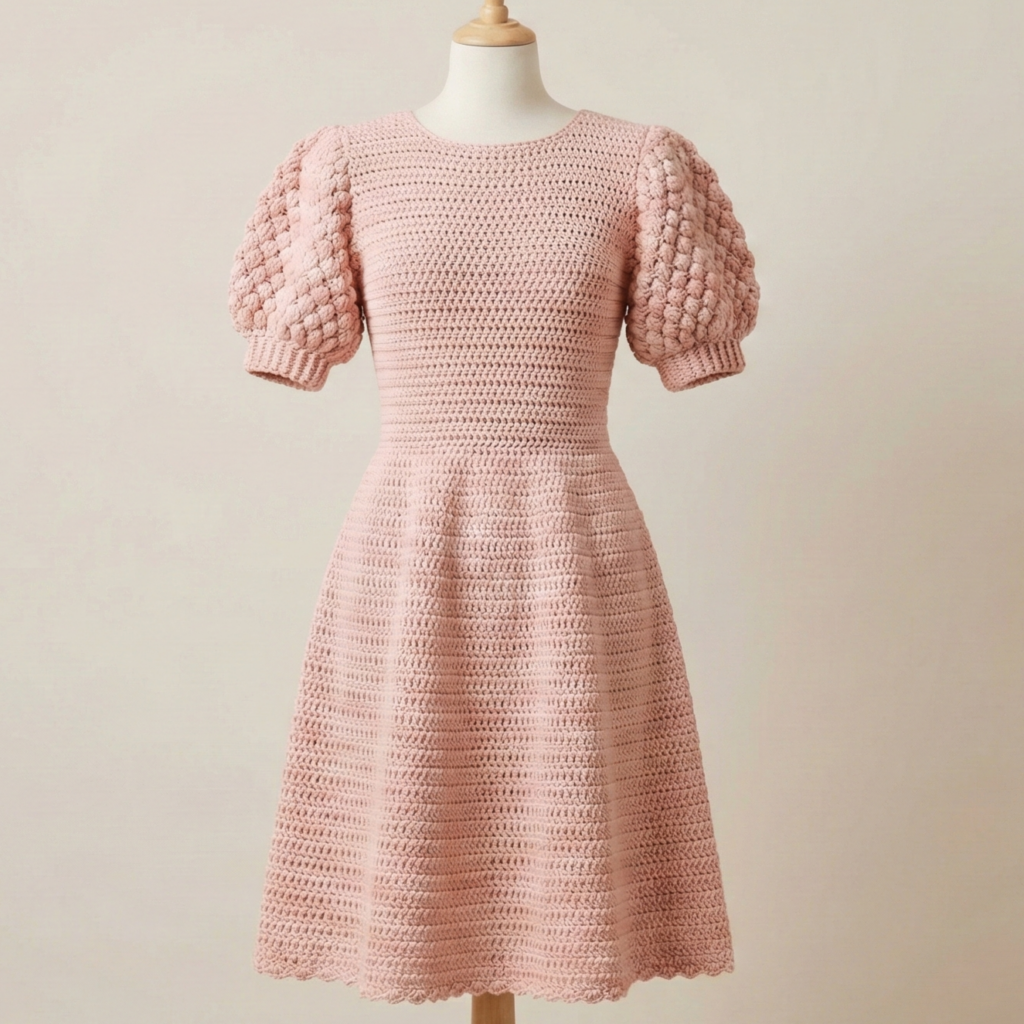
Skill level: intermediate (sleeve shaping + textured sleeve)
Vibe: feminine and playful — fitted bodice, flared skirt, cute puff sleeves.
Materials (Medium)
- DK cotton blend: ~900–1100 yd.
- Hooks: 4.0 mm for body, 3.5 mm for cuff/bodice details.
- Narrow elastic for sleeve cuffs (small for comfort).
Gauge (example)
- 16 dc = 4 in for body fabric.
Finished (example Medium)
- Bodice fitted to bust with slight ease, waist defined or relaxed, sleeve puff circumference gathered by elastic cuff.
Construction overview
Work the bodice top-down to shape bust and armholes; pick up for puff sleeves after dividing the armholes. The skirt can be worked with gradual increases.
Step-by-step
1. Bodice
- Start with upper band or straps as preferred. For a sleeved dress start with a band that sits just above bust.
Round 1: foundation chain to chest measurement (e.g., 36 in × spi) and join.
Rounds 2–8: hdc or dc in pattern to build bodice height (6–8 in), shaping slightly at waist if desired by decreasing rounds (dc2tog at even intervals).
2. Armhole & sleeve set up
- Once bodice length reaches underarm, divide for sleeve openings by leaving out a number of stitches for each armhole: e.g., on a 144 stitch band, you might allocate 44 sts for front, 20 sts for sleeve opening, 44 for back, 20 for sleeve opening. Work body in the round on the remaining front + back stitches.
3. Puff sleeve
- On held sleeve stitches, join yarn and work puff increases to create volume:
Round 1 (sleeve cuff): ch foundation to get cuff circumference (or work directly on held sts): sc around the sleeve opening 2–3 rounds in BLO to create a cuff. Leave small opening for elastic insertion.
Round 2 (puff body): switch to larger hook; work 1 puff stitch (puff = yo, insert hook, pull loop 4 times, yo draw through all loops, ch1) then sc 2 — repeat across to create spaced puffs. Work 6–8 rounds of puffs; gather top and attach to shoulder seam if set-in; for ease you can create seamless join.
- Insert narrow elastic into cuff using a safety pin and secure ends.
4. Skirt
- Pick up skirt stitches around bodice bottom or continue working in the round. Add increases to flare skirt: every 6–8 rounds add increases until desired hem fullness.
5. Hem & finish
- Hem with decorative edge (shell or picot) appropriate to puff style.
Fitting & tips
- Keep puff volume proportional to body size — too large puffs will overpower a small frame. Reduce puff repeats for petite sizes.
- Try on as you go to balance sleeve puff and bodice proportions.
Variations
- Make three-quarter length puffs or short cap puffs.
- Combine a lace bodice with solid puff sleeves for contrast.
Care
- Cotton blends: gentle wash and reshape.
4. Crochet Babydoll Dress Pattern
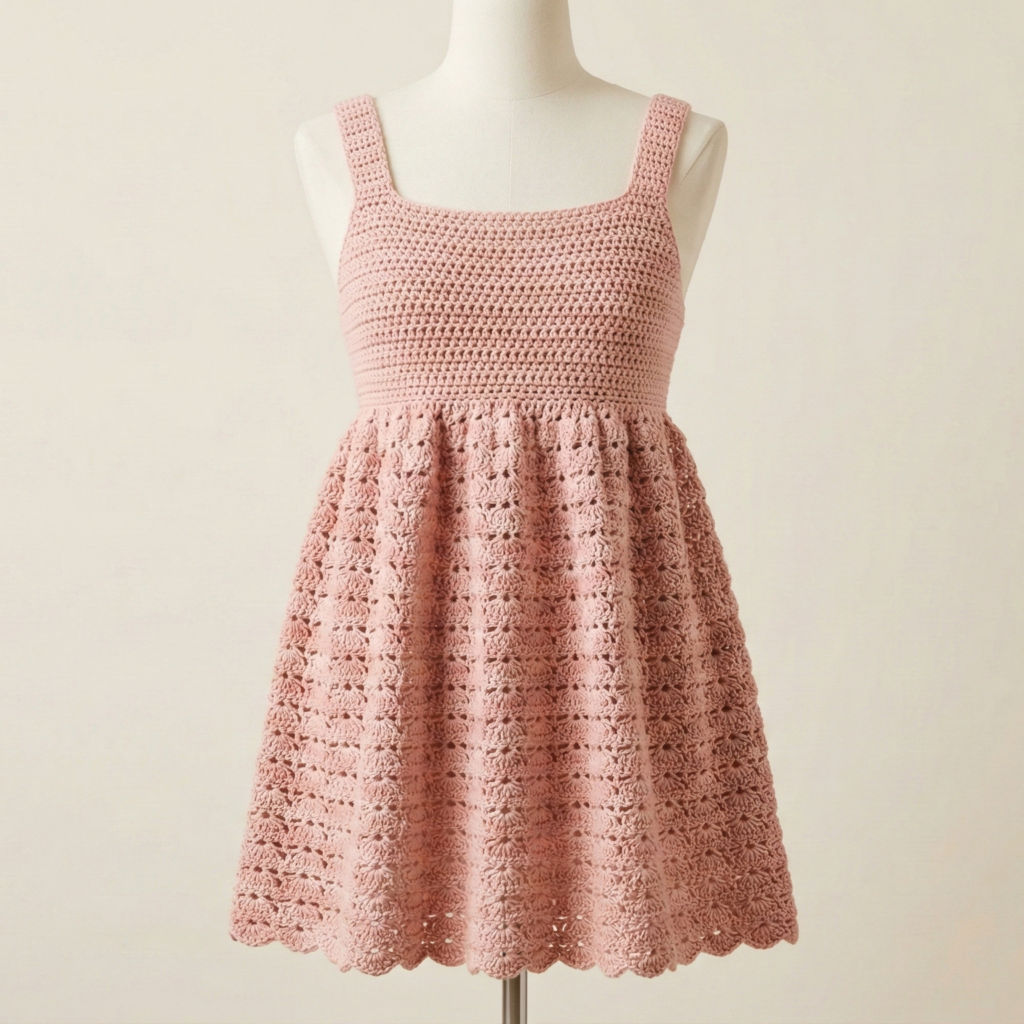
Skill level: confident beginner (simple shaping & gathering)
Vibe: short, breezy, empire waist — playful and comfortable with lots of ways to customize.
Materials (Medium)
- DK or light worsted yarn: ~700–900 yd.
- Hook: 4.0–4.5 mm.
- Optional ribbon for empire tie or small elastic.
Gauge (example)
- 16 dc = 4 in.
Finished (example Medium)
- Empire waist sits just under bust; skirt gently flares; length typically 30–34 in.
Construction overview
Top-down: fitted yoke or band under bust, then a gathered skirt worked by increasing heavily at the join for that classic baby-doll shape.
Step-by-step
1. Yoke / band
- Measure underbust circumference and make a firm band: foundation hdc for the band (e.g., 30 in × spi = count). Work 4–6 rounds of hdc in BLO for a neat band.
2. Bodice / straps
- For short straps, pick up stitches and work hdc bands up to desired bust coverage; for a tank style, increase a few stitches at the front to shape.
3. Gather join (skirt start)
- To create full skirt, join a contrast yarn and increase drastically at the join: for example, make 1 dc, 2 dc in next st, rep across the band — this doubles stitch count and creates gathers. Alternatively work multiple dc in each st for even more volume.
4. Skirt body
- Work rounds of dc or shell stitch, maintaining light increases every 4–6 rounds to add fullness. Make the skirt as short or long as desired. For pockets, pick up stitches and create small patch pockets worked separately and sewn on.
5. Hem & finishing
- Add a ruffle by increasing in every other stitch for one round and finishing with a shell hem.
Fitting & tips
- Babydoll is forgiving due to empire shape; adjust band snugness to taste.
- Add a drawstring or ribbon through a round to gather skirt more or less.
Variations
- Make a baby-doll tunic by shortening skirt.
- Use openwork shells for a summery airy version.
Care
- Machine wash gentle if yarn allows; reshape.
5. Crochet V-neck Star-Stitch Tank Top Sundress Pattern
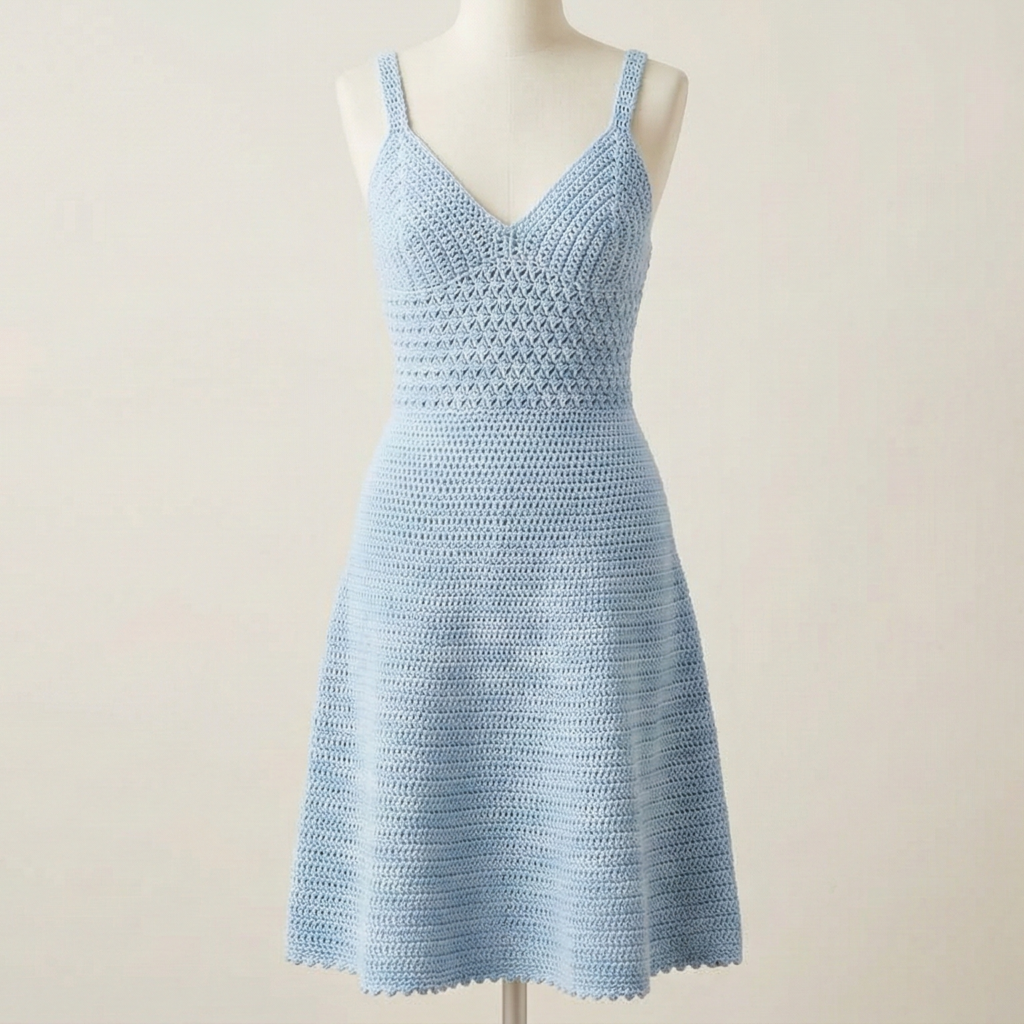
Skill level: intermediate (star stitch familiarity)
Vibe: modern tank sundress with a textured star-stitch V-neck front — pretty and structured.
Materials (Medium)
- DK cotton blend: ~800–1000 yd.
- Hook: 4.0 mm (star stitch needs consistent tension).
- Optional narrow ribbon for straps or built-in crocheted straps.
Gauge (example)
- Star stitch: 14–16 star clusters = 4 in (depends on exact variation).
Finished (example Medium)
- Fitted through bust with gentle A-line to hip, V-neck depth adjustable.
Construction overview
Work front and back panels separately flat (to shape the V-neck) and seam at shoulders/side. The star stitch makes a dense textured fabric that holds shape well, perfect for a tank silhouette.
Step-by-step
1. Swatch & compute
- Swatch star stitch until you find clusters per inch. Compute required panel width for bust half: e.g., finished bust 36 in → front half = 18 in × clusters per inch = stitches.
2. Back panel
- Work a rectangle in star stitch to the desired back width and height to underarm. Keep straight lines; no shaping necessary for simple tank.
3. Front panel & V-neck shaping
- Work front panel in star stitch but when you reach the point where the V-neck begins, work two panels simultaneously or divide and decrease at center to shape the V-neck: decrease one star cluster every other row at center until desired depth. Keep edges even.
4. Join & straps
- Seam shoulders (1–2 in for a medium strap width), seam sides leaving armhole depth around 7–8 in. Create straps by picking up stitches at shoulders and working a band (hdc band) for desired strap width or crochet separate straps and sew in.
5. Skirt (if dress)
- At waist, pick up stitches around and work an A-line skirt with gentle increases every 8–10 rounds. Continue to length.
6. Hem & finish
- Work 1–2 rounds sc around edges to stabilize. Block.
Fitting & tips
- Because star stitch is dense, you may need a slightly larger size or add side seam gussets for mobility.
- Try on at side seaming stage to check armhole and bust fit.
Variations
- Make a short sundress or long maxi by changing skirt length.
- Use striping with star stitch panels for color blocking.
Care
- Handwash recommended for star stitch texture to preserve shape.
6. Crochet Cozy Dream Dress Pattern
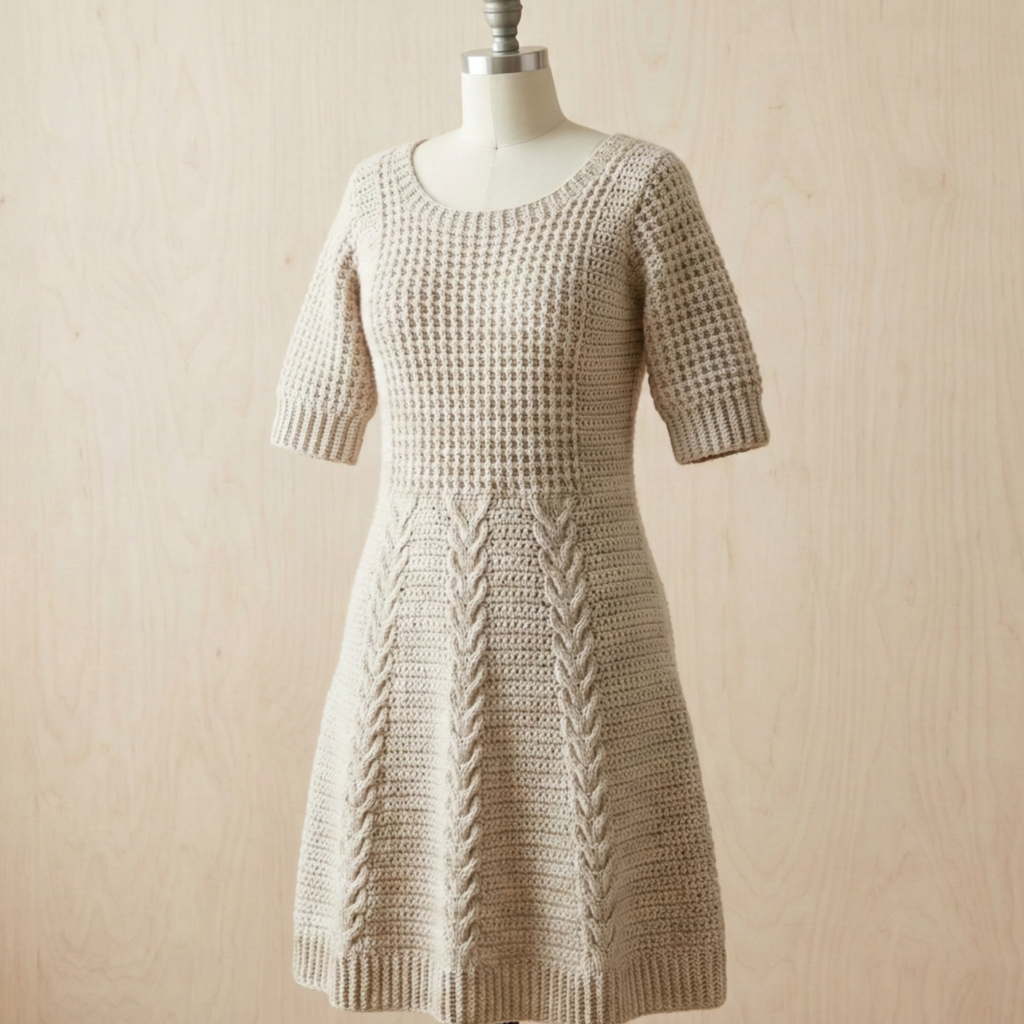
Skill level: intermediate → advanced (Tunisian or textured stitches possible)
Vibe: soft, cozy day dress with textured panels — great for cooler days or layered looks.
Materials (Medium)
- Aran or worsted weight wool blend: ~1100–1400 yd depending on length and sleeves.
- Hooks: 5.0–6.5 mm (or Tunisian hook if using Tunisian stitch).
- Lining optional for some textures.
Gauge (example)
- 14 hdc = 4 in in textured stitch.
Finished (example Medium)
- Knee length sample: length 38–40 in, comfortable ease.
Construction overview
Work panels (front/back) in textured stitch (waffle, alpine or cable-like stitches) to create a cozy fabric; seam and add sleeves or leave sleeveless.
Step-by-step
1. Panel construction
- Make back panel: foundation chain to hip width divided by 2 (e.g., 20 in half bust = foundation chain accordingly). Work textured repeat rows until desired body length.
- Make front panel: same as back but include neck shaping (bind off or work short rows for scoop or V neck).
2. Join panels
- Seam shoulder and side seams by mattress stitch. For more comfort add a small slit at hem 2–3 in each side.
3. Sleeves (optional)
- Pick up stitches around armhole and work a short textured sleeve in the round or two flat halves seamed.
4. Ribbing & finishing
- Add ribbing at neck, cuffs and hem using BLO hdc or sc for a neat finish.
Fitting & tips
- Because textured stitches are thicker, allow more ease at bust/hip for comfort (2–4 in).
- Block panels before seaming to line up textures.
Variations
- Make a sweater dress version (shorter length) or a long coat-style dress by adding button band and collar.
Care
- Follow yarn label — wool blends may need hand washing.
7. Crochet Mesh Slit Dress Pattern
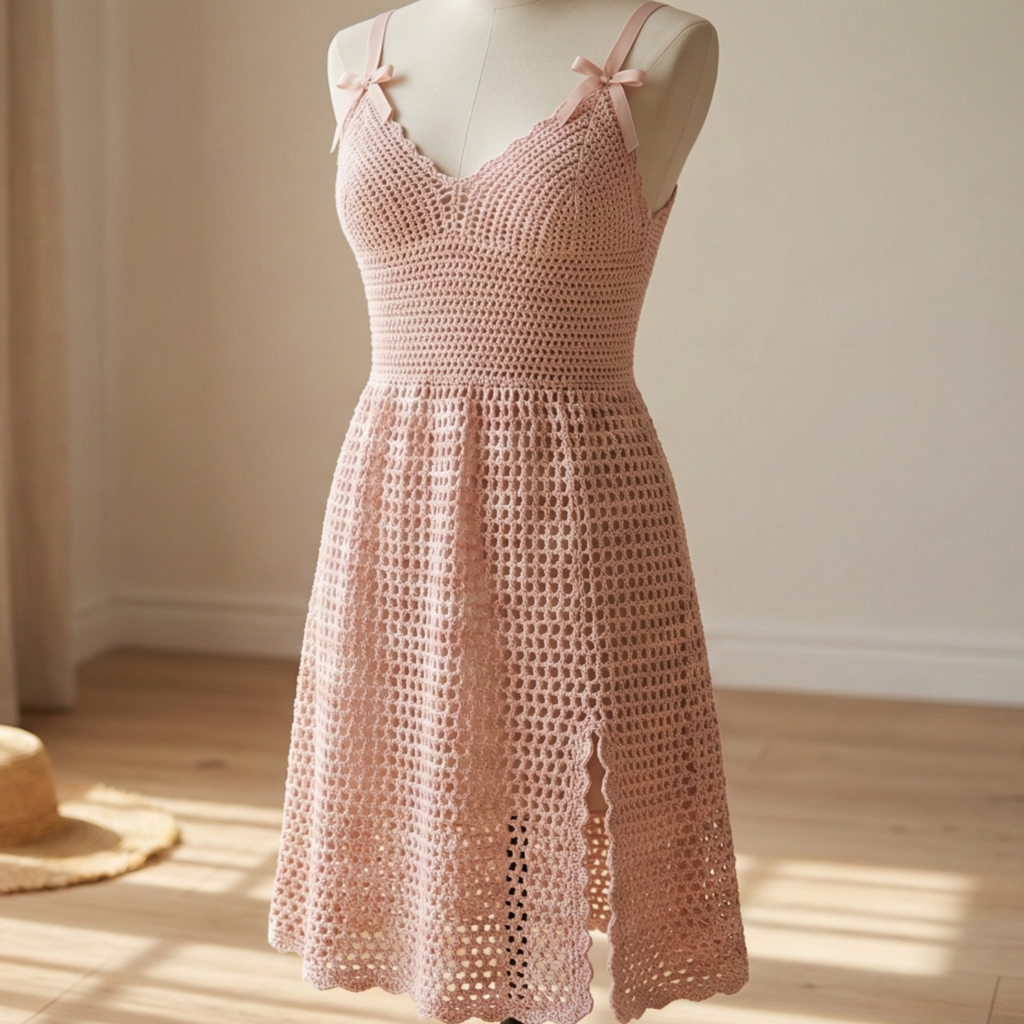
Skill level: confident beginner (mesh stitch + shaping + modesty finishing)
Vibe: sexy-but-simple beach-to-evening knit: breathable mesh fabric, optional side slit, designed to wear over a slip or swimsuit.
Materials (Medium)
- Sport/DK cotton or cotton-blend: ~800–1000 yd for mid-length.
- Hook: 4.0–4.5 mm.
- Slip or lining for modesty if needed.
Gauge (example)
- Mesh dc/ch pattern: 12 dc = 4 in (mesh is measured after blocking).
Finished (example Medium)
- Lightweight shape with optional side slit 6–10 in.
Construction overview
Work in the round from the top (short bodice) and increase gradually for skirt; add a side slit by stopping increases on one side and adding vertical shaping or working a small rectangular opening and reinforcing edges.
Step-by-step
1. Top band / yoke
- Work a fitted band under bust using hdc in the round (e.g., 30 in finished band). Work 4–6 rounds to form a sturdy band.
2. Mesh body
- Pick up stitches and work mesh round repeat: dc, ch 2, sk 2 repeated around (adapt counts to fit). Work mesh rounds and increase evenly for flare as desired.
3. Side slit
- To create a slit at hip: on one round mark start of slit with stitch marker and when you reach slit height, stop working rounds across the slit width and instead work vertical rows up and down to create a rectangular opening, then reconnect top and bottom. Reinforce edges with sc.
4. Hem & finish
- Add narrow border rounds of sc around hem and slit for tidiness.
5. Lining
- Sew or wear a slip under the dress; optionally attach a lightweight lining to the bodice for added modesty.
Fitting & tips
- Mesh stretches; aim for less negative ease or even slight positive ease to ensure coverage when worn.
- Block openwork to set mesh shape.
Variations
- Make mini or midi by shortening or lengthening skirt rounds.
- Add tassel trim at slit edges for boho details.
Care
- Cotton blends: wash gentle and dry flat to avoid stretching.
Final finishing, sewing & fitting tips (applies across patterns)
- Try on early: For fitted garments (corset, ribbed, V-neck) try on at critical points (after bodice, before skirt) — it’s much easier to adjust early than rip later.
- Seams: Use mattress stitch for invisible seams on panels. For rounded seams, whipstitch with matching yarn and line to hide ends.
- Lining & modesty: Many crochet dresses use openwork stitches — a lightweight lining or slip makes them practical for everyday wear. Sew the lining in by hand or machine before adding top trims.
- Blocking: Block panels and lace work to measurement before assembly — blocked fabric behaves differently from unblocked.
- Inserting elastic: For waistbands or sleeves that need stretch, create a small casing and feed elastic using a safety pin; stitch elastic ends overlapped and secure with stitching.
- Stability: For baggy skirts and heavier yarns, consider a lighter hook or add stabilizing rows (sc rounds) at waist to avoid sagging.
Conclusion
These seven dress patterns give you a wide seasonal wardrobe: the supportive Corset Sundress, breezy Cabo Dress, feminine Puff Sleeve Dress, playful Babydoll, textured V-neck Star-Stitch Tank, cozy Cozy Dream Dress, and airy Mesh Slit Dress. Each pattern is written so you can adapt yarn weight, hook size, ease, and length to make a dress that fits your style and measurements. The recurring advice is the same for every dress: swatch carefully, try on early, and block pieces before finishing to get the best result.