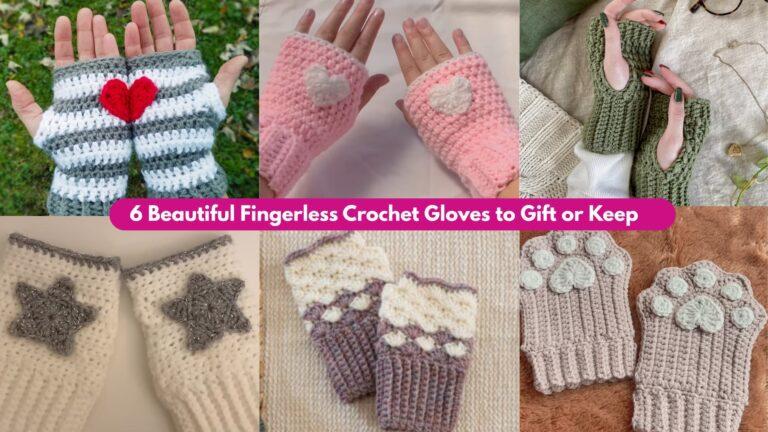
Little mittens are one of the loveliest, fastest, and most practical baby projects — they keep tiny hands warm, stop newborn scratching, and make perfect shower gifts. Below you’ll find a single, practical introduction that covers yarn, sizing, safety and general construction choices, followed by seven full mitten patterns. Each pattern includes: skill level, exact materials for a sample newborn pair (+ how to grade to larger sizes), finished sizes, a step-by-step guide, useful variations, finishing tips and care instructions. The tone is clear, practical and human so you can paste this directly into a blog post.
yarn, hooks, sizing, safety, gauge & abbreviations
Yarn & fiber choices
- Recommended weights: Fingering / sport (2–3) or DK (3) yarn works best for baby mittens — they give warmth without bulk. For the plush “velvet” look, use a chenille/velvet yarn but be mindful of care instructions.
- Fibers: For babies choose soft, non-itching, machine-washable yarns: superwash merino, cotton blends, acrylic blends, bamboo blends. For newborns, avoid scratchy wool unless it is very soft and labeled baby/superwash.
- Avoid novelty fluff for parts that will contact the face (it can shed). If you use sparkly or metallic threads for accents, use sparingly and securely sew ends.
Hooks & notions
- Typical hooks: For fingering/sport use 2.5–3.5 mm; for DK use 3.5–4.5 mm. Adjust hook to match gauge and your tension.
- Notions: tapestry needle, stitch marker, small amount of stuffing only for decorative (but avoid stuffing for baby safety), small lengths of elastic (optional) for cuffs, labels for care.
Sizing (Newborn-friendly)
Design these patterns with newborn sizing in mind but include how to grade to 0–3, 3–6 and 6–12 month sizes.
Approx finished mitten circumference (around palm) and length examples:
- Newborn (0–3 mo): Palm circumference ≈ 3.5–4.0 in (8.5–10 cm), mitten length ≈ 3.0–3.5 in (7.5–9 cm).
- 3–6 months: Palm ≈ 4.0–4.5 in, length ≈ 3.5–4.0 in.
- 6–12 months: Palm ≈ 4.5–5.0 in, length ≈ 4.0–4.5 in.
When grading: measure wrist-to-base-of-fingers on a baby hand photo or sample glove and adjust stitches by stitch gauge.
Fit & ease
Baby mittens should be slightly snug to prevent them falling off; allow 0–⅓ in positive ease (or roughly none) around the palm for newborns. Add more ease for older infants.
Safety notes
- No small parts — do not attach buttons, beads, pom-poms, or glued decorations where they could detach and become a choking hazard for babies unless you are making adult decor items. If you add decorations, note they should be embroidered and sewn securely or avoided for infant use.
- Avoid cords or long ties — these present strangulation risks. Use short, integrated cuffs or an elasticized edge, never strings.
- For baby gear intended as sleepwear alternatives: follow local guidelines; mittens used to prevent scratching should be breathable, not cover the wrist with tight elastic.
Gauge & swatching
Always make a small 2×2 inch swatch in the stitch pattern you’ll use, block it the same way you will finish mittens, and count stitches per inch. Use these values when the pattern gives stitch counts so readers can grade sizes easily.
Abbreviations (US)
- ch — chain
- sc — single crochet
- hdc — half double crochet
- dc — double crochet
- tr — treble crochet
- sl st — slip stitch
- st(s) — stitch(es)
- inc — increase (2 sc in same st)
- dec — decrease (sc2tog or invisible dec)
- BLO / FLO — back loop only / front loop only
- MR — magic ring
- rnd — round
1. Crochet Augie Baby Mittens Pattern
Overview & vibe: Simple, slightly rounded mittens with a clean, modern silhouette — great for gifting and made to be worked quickly in the round.
Skill level: Confident beginner — basic crochet in the round, increases and decreases.
Materials (newborn sample)
- Sport / DK soft yarn (e.g., baby acrylic or superwash merino) — ~25–40 yd.
- Hook: 3.5 mm (adjust to your gauge).
- Tapestry needle, stitch marker.
Finished size (newborn): Palm circumference ≈ 3.75 in; mitten length ≈ 3.25 in.
Gauge example: 6 sc = 1 in in single crochet (this is illustrative — swatch to check).
Step-by-step (worked in continuous rounds — no seams)
Make a gauge swatch first and compute foundation stitch count for target circumference:
- Example: 3.75 in × 6 sc/in = 22.5 → round to 22 or 24 sc for an even round. This pattern uses multiples of 2; choose 22 for a snug or 24 for slightly roomier.
A. Foundation & cuff
- MR; rnd 1: 6 sc in MR — place marker (6).
- rnd 2: inc around (12).
- rnd 3: sc 1, inc around (18).
- rnd 4: sc 2, inc around (24). Continue increasing rounds as needed until you reach your computed stitch count (e.g., 24 sc). You now have a small flat circle which will be the top of the mitten (the rounded top when joined into the tube) or the base when worked differently. (Alternate approach below.)
Alternate — cuff-first method (preferred for better fit):
- Chain the number equal to computed stitch count (e.g., ch24) and join into ring (careful not to twist).
- Rnd 1: sc around (24).
- Work 6–8 rounds sc in the round for the cuff (use BLO on first round if you want a slightly tighter inner grip). This makes a cuff first.
B. Body (after cuff)
5. After cuff rounds, continue sc in the round until the mitten height reaches approx 2.0–2.25 in from cuff rib (measure on your sample for newborn).
C. Top shaping — decrease to close
6. Start decreasing to shape the rounded top: sc 2, dec around; join. (If 24 sts → 18 sts)
7. Next round: sc 1, dec around.
8. Next round: dec around until 6–8 sts remain. Fasten off, leaving long tail. Pull tail through remaining 6 sts and close hole tightly; weave tail inside. Turn mitten so decreased section is the top of the hand. For a top-first approach, start with the MR increases and then work tube downwards until cuff length.
D. Thumb considerations
- This style is thumbless (no thumb opening), which is fine for newborn mittens to prevent scratching. If you want a matching small thumb, skip to the thumb instructions in Pattern 6 (Cuff Baby Mittens) to learn how to add a tiny thumb tube.
Finishing
9. Weave all ends. Block very lightly to shape.
Variations
- Make cuff taller for extra wrist warmth.
- Hold yarn doubled for double-thickness for cold climates.
Care
- Machine wash gentle for acrylic/cotton blends; hand wash and lay flat for delicate fibers.
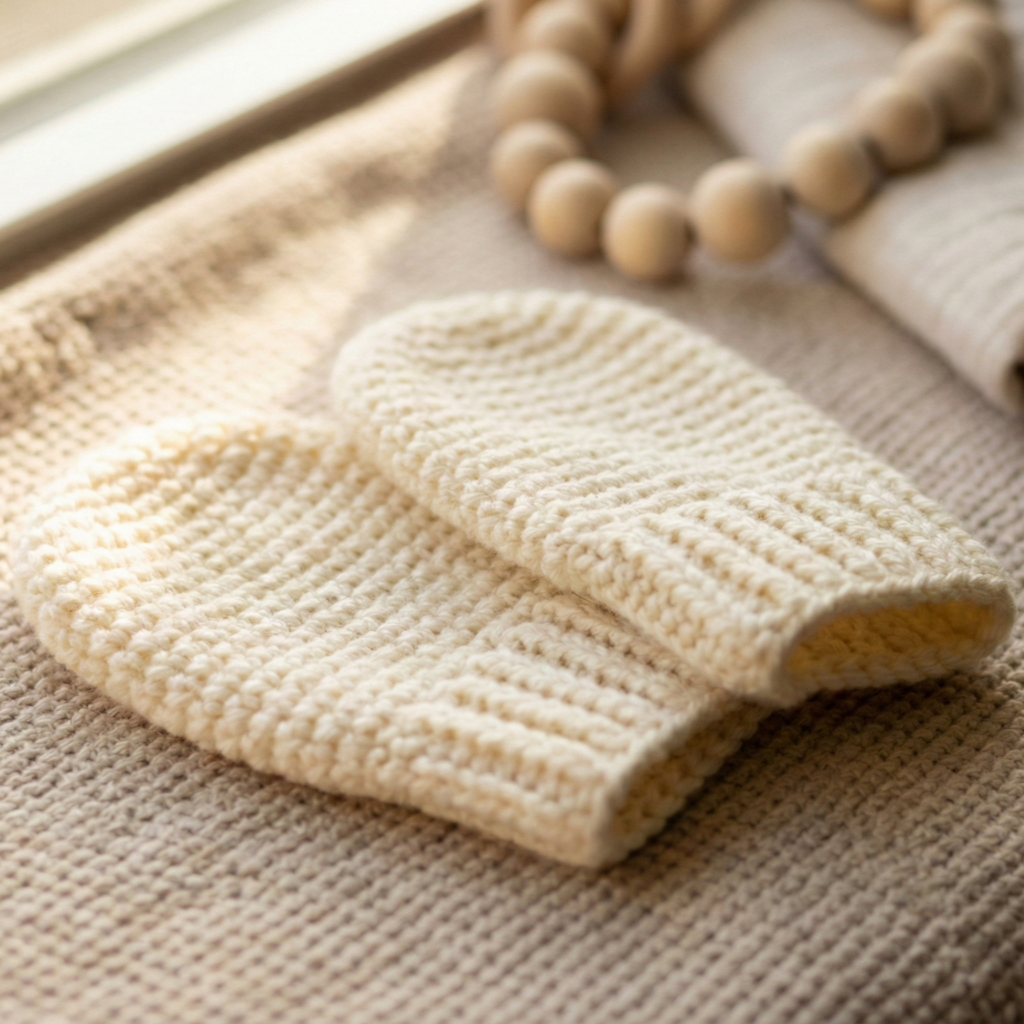
2. Crochet No-Seam Thumbless Mittens Pattern
Overview & vibe: Ultra-quick, seamless mittens worked as a flat rectangle and seamed invisibly — no shaping per se, great for absolute beginners.
Skill level: Beginner
Materials (newborn sample)
- Sport weight yarn — ~20–30 yd.
- Hook: 3.25–3.5 mm.
- Tapestry needle.
Finished size (newborn): Palm circ. ≈ 3.5–3.75 in; length ≈ 3.0–3.25 in.
Method — flat rectangle then seam
A. Swatch & compute
- Make sc or hdc gauge swatch and determine stitches per inch. Example: 5 sc/in. For 3.75 in circumference → 3.75 × 5 = 18.75 → round to 18 or 20; choose 20 for a slightly roomier fit. Height target 3.25 in × rows per inch (example 6 rpi → 3.25 × 6 = 19.5 → 20 rows). So rectangle: 20 sts × 20 rows.
B. Work rectangle
2. Ch 20. Row1: sc in 2nd ch from hook and across (19 sc). Turn.
3. Row2–20: sc across (19 sc) — continue until you have 20 rows (or your computed row count). Fasten off leaving long tail for seaming.
C. Seam to form mitten
4. Fold rectangle so short edges meet to form a tube, and then seam one side from cuff up to just below the top edge leaving the top for rounded end. Use mattress stitch to create an invisible seam on the palm side.
5. For the top, fold the seam under and close the top edge by stitching across the remaining open short side so the top is rounded — you can also gather top stitches and pull through to close and hide tail.
D. Alternative tubular assembly
- Fold rectangle in half, seam short edges together (forming a doughnut), then seam across one side to create thumbless mitt. This may be easier: fold into tube, seam along one edge and across one end with mattress stitch.
Finishing
6. Weave tails inside and trim. Optionally add a narrow sc border around cuff for a tidy finish.
Variations
- Use hdc for a thicker fabric.
- Make a slightly larger rectangle for 3–6 month size using the same method.
Care
- Machine wash per yarn label.
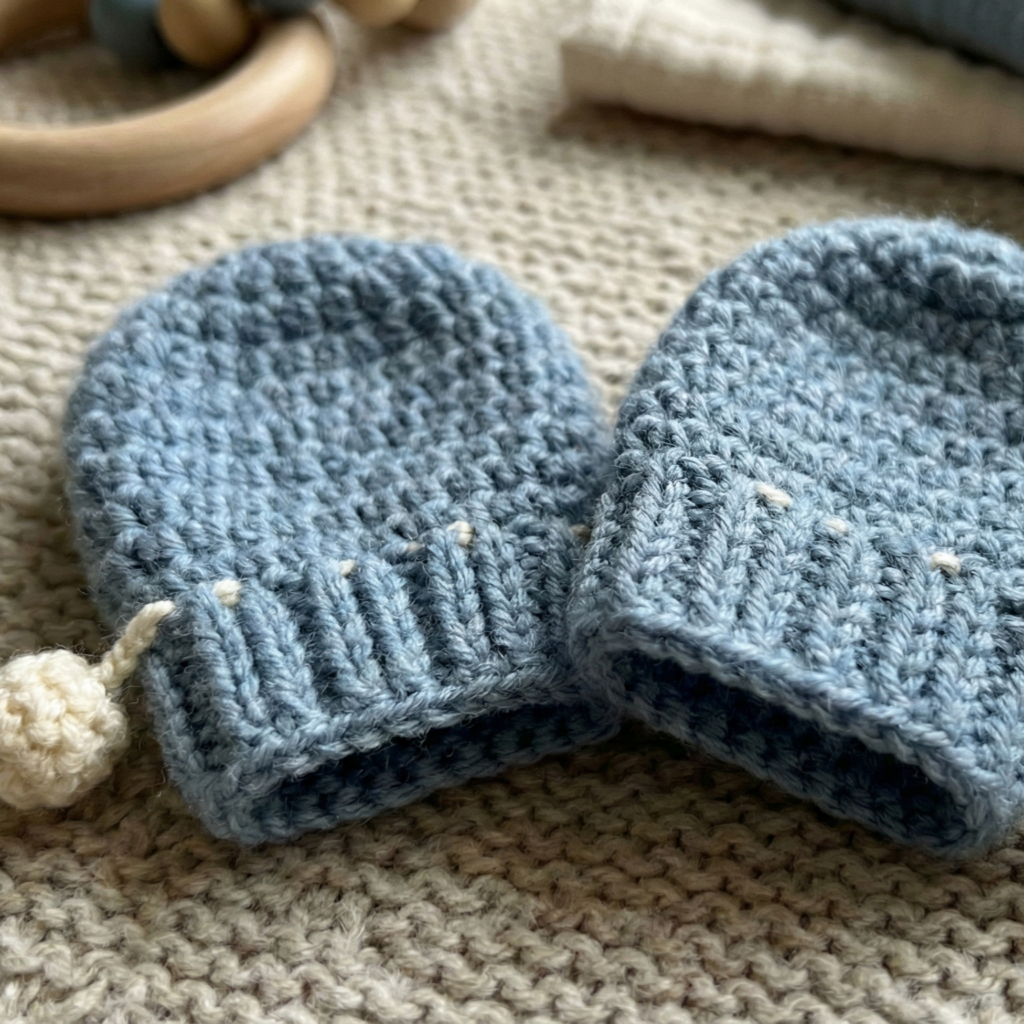
3. Crochet Garter Stitch Baby Mittens Pattern
Overview & vibe: A crochet “garter” look using rows of sc in BLO (back loop only) to create a knitted stripe texture reminiscent of garter stitch. The mitten is worked flat and seamed for a cozy, stretchy fabric.
Skill level: Confident beginner
Materials (newborn sample)
- Fingering held doubled or DK yarn — ~30–40 yd.
- Hook: 3.5 mm (or slightly larger if holding doubled).
- Tapestry needle, stitch marker.
Finished size (newborn): Palm circ. ≈ 3.75 in; length ≈ 3.25 in.
Step-by-step
A. Gauge & foundation
- Swatch sc BLO rows: count stitches per inch both horizontally and rows per inch. Example: 5 sc/in; 6 rows/in. For 3.75 in circumference → 3.75 × 5 = 18.75 → 18 or 20 sts. For height 3.25 in × 6 rpi = 19.5 → 20 rows. So aim for a rectangle of 20 sts × 20 rows again.
B. Work garter panel
2. Ch 20 (or computed number); Row1: sc in 2nd ch from hook and across (19 sc). Turn.
3. Row2: ch1, sc BLO across. Turn.
4. Repeat Row2 until you have reached desired height (20 rows). This creates horizontal raised ridges like garter.
C. Assembly
5. Fold the rectangle in half widthwise; seam along one side and around the top curve or seam the short side and one long side to create a mitten shape that leaves a cuff opening — use mattress stitch for neat join. For the rounded top you can seam up to within 0.5–0.75 in from the end and then weave remaining stitches closed by passing the tail through remaining top stitches and tightening.
D. Thumbless style
- These mittens are designed thumbless for newborn safety. If you want a thumb later, see Pattern 6 for a cuff style with thumb tube.
Finishing
6. Add a narrow sc border around the cuff and weave in ends. Optionally add a small ribbon loop sewn inside to attach to clothing (but note safety concerns — avoid loops that could catch).
Variations
- Work with a stranded color change every few rows to produce stripes while keeping garter look.
- Knit-look cables using front-post/back-post stitches can be added for older infant sizes.
Care
- Machine wash gentle for superwash fibers; gentle hand wash otherwise.
4. Crochet Pom-Pom Baby Mittens Pattern
Overview & vibe: Cute mittens with a decorative, soft yarn-wrapped pom on the cuff. Because small detachable parts are a safety risk for infants, this pattern includes strict safety guidance: for newborns, use an embroidered pom or tightly crocheted puff sewn flat to the cuff; reserve fluffy pom-poms for adult/older child sizing or for mittens intended for display.
Skill level: Confident beginner
Materials (newborn safe version)
- Soft DK yarn — ~30–40 yd.
- Hook: 3.5 mm.
- Tapestry needle, small piece of felt for backing the pom (optional).
Finished size (newborn): Palm circ. ≈ 3.75 in; length ≈ 3.25 in.
Safety first (pom guidance)
- Never attach a loosely tied pom pom to a mitten for a baby who mouths or chews. Instead:
- Make a crocheted flat puff (a small 3-round rosette) and sew it flat and firmly to the cuff with multiple passes and a felt backing.
- Or embroider a flower/spot motif instead of using a pom.
Step-by-step (baby-safe flat puff version)
A. Make the mitten body (cuff style)
- Ch 24, join to work in the round (or use MR increases to reach computed stitch count). Rnd1: sc around (24). Rnd2–7: sc around for cuff height. Rnd8–12: sc around until body measures ~2.25 in above cuff.
B. Crown shaping
2. Begin decreases: sc 3, dec around; next round: sc 2, dec; next: sc 1, dec; final round: dec around until 6–8 sts remain. Fasten off, pull tail through remaining sts and close. Weave in tail.
C. Baby-safe flat puff (pom approximation)
3. MR; R1: ch1, 8 sc in MR, join. R2: ch3, 3 dc in next st, ch3, sl st in next st around to form 4–8 small petals. Fasten off leaving long tail. Flatten the rosette and sew through the center several times with the tail, and securely stitch the rosette flat to the cuff front. On the inside add a small felt circle and sew through felt & rosette together to distribute stress.
D. Finishing
4. Weave in all ends; for extra security sew the felt backing down with multiple tiny stitches.
Variations
- For older babies (non-mouthers) or toddler mittens: you may attach a small pom pom but fuse it to the mitten by sewing through the pom center and into a felt backing with heavy-duty thread; periodically check for wear and replace pom if loose.
Care
- Because felt is used, hand wash recommended and reshape while damp. If made entirely from washable yarn and an embroidered motif, machine gentle is usually okay.
5. Crochet Velvet Baby Mittens Pattern
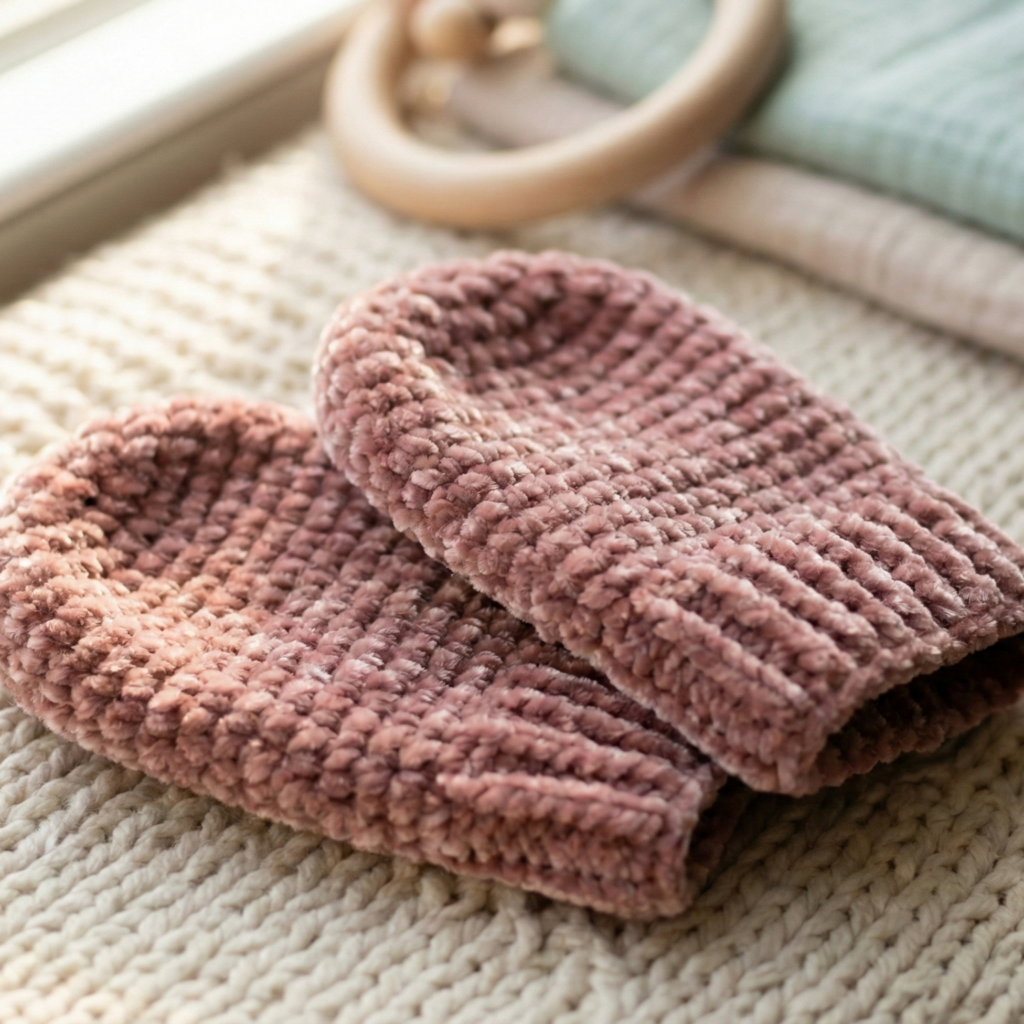
Overview & vibe: Ultra-soft mittens made from velvet or chenille yarn; perfect for photo props or gentle skin. Velvet yarn behaves differently — it traps heat and is plush, but it can be slippery to stitch and may require a larger hook.
Skill level: Confident beginner → intermediate (due to handling plush yarn)
Materials (newborn sample)
- Velvet/chenille baby yarn (e.g., 100% polyester chenille) — ~30–40 yd.
- Hook: 4.5–5.5 mm (larger than usual because velvet hides stitches).
- Tapestry needle (pointed eye recommended).
Finished size (newborn): Slightly bulkier; palm ≈ 3.75–4.0 in; length ≈ 3.5 in.
Notes about working with velvet yarn
- Stitch visibility: You cannot see the loops as easily — use stitch markers and count carefully.
- Avoid long floats: Velvet shows them as lumps; work colorwork sparingly.
- Care: Many velvet/chenille yarns require very gentle washing — follow label (often hand wash cold, air dry).
Step-by-step (cuff + simple shaping)
A. Foundation — cuff first
- Ch 20 (or computed stitch count for gauge with velvet yarn) and join to form ring (20). Rnd1: sc in each ch around (20). Rnd2–6: sc around for cuff height (or work hdc for more squish). Because gauge may be slightly looser, check fitting.
B. Body
2. Rnd7–12: sc around until length from cuff to top measured ≈ 2.5 in.
C. Decrease crown
3. Rnd13: sc 3, dec around (if working 20 sts, dec pattern makes 16). Rnd14: sc 2, dec around. Rnd15: dec until 6–8 sts remain. Pull yarn length through and close; weave into the inside carefully (velvet hides knots but secure well).
Finishing
4. For the inside, add a soft cotton or jersey fabric lining if you want additional durability or easier washing — slip the lining in and hand-sew it to the cuff interior using ladder stitch.
Variations
- For a slimmer look, hold velvet yarn single and work with a smaller hook.
- For extra warmth, make mittens with double thickness: crochet two mittens and sew them together inside out, leaving a small gap, turn, then close gap.
Care
- Follow yarn label: most velvet/chenille require hand wash cool, reshape and dry flat. Do not tumble dry.
Safety
- Some velvet yarn sheds slightly; keep away from baby’s face/eyes and choose high-quality baby-grade chenille.
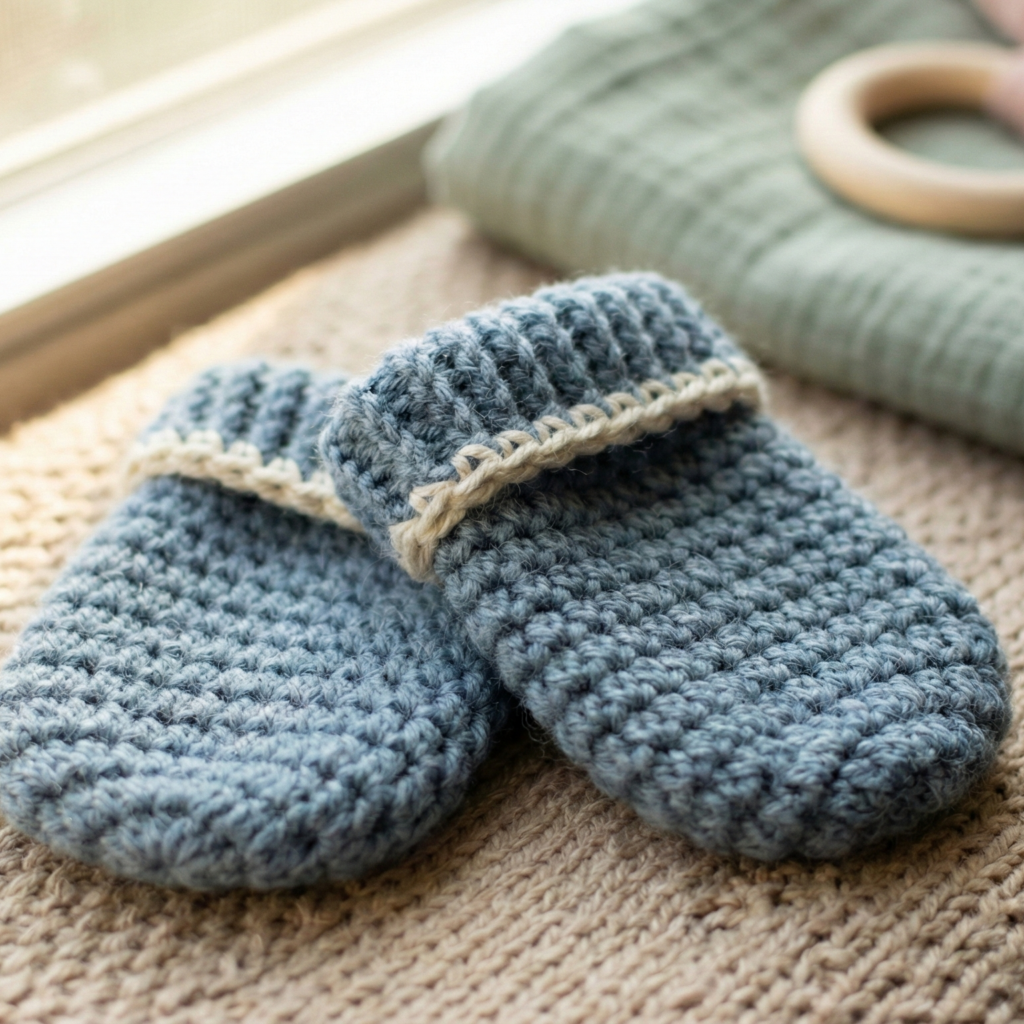
6. Crochet Cuff Baby Mittens Pattern
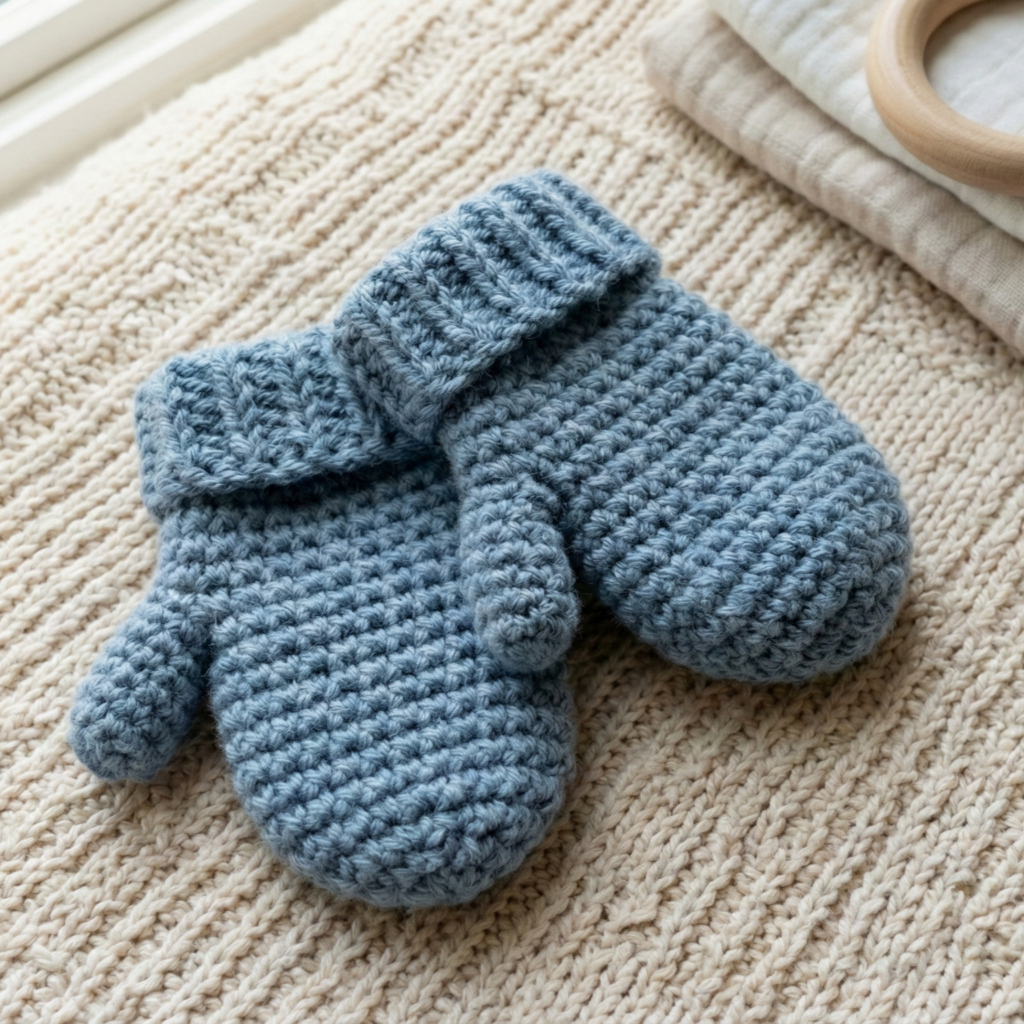
Overview & vibe: A classic mitten with a folded cuff and a small thumb tube option for infants who need more dexterity (3–12 months). The thumb is optional — for newborns you can omit it.
Skill level: Intermediate (short tube thumb shaping)
Materials (newborn sample)
- Sport/DK yarn — ~30–45 yd.
- Hook: 3.5 mm.
- Small stitch marker, tapestry needle.
Finished sizes
- Newborn sample (no thumb): palm 3.75 in, length 3.25 in.
- For 3–12 month sizes add stitches/rows per gauge guidelines below.
Step-by-step (cuff, hand, thumb tube)
A. Cuff
- Ch computed number to match circumference (example 22 ch), join into ring. Rnd1: sc around (22). Rnd2–6: sc in BLO for foldable cuff (this creates a natural fold and grip). Work more rounds if you like a tall cuff that folds twice.
B. Body
2. After cuff, switch to sc in both loops and work rounds until you reach the base of the thumb placement — typically 1.5–2.0 in above cuff for newborns. For older sizes measure wearer where thumb will sit.
C. Thumb placement & creation (optional)
3. To create a thumb opening: on the round where thumb starts, work sc across until you reach the thumb position, then place the next 5–7 stitches (depending on thumb width) on a stitch holder or leave them unworked (count them). Continue sc across remainder of the round. Work body rounds normally until you reach the top shaping point (see below). The held stitches will later be used for thumb tube. For newborns skip this step and continue to crown shaping.
D. Top shaping
4. Decrease rounds to close the mitten top: sc 3, dec around; next round sc 2, dec; next sc 1, dec until 6–8 sts remain. Fasten off, pull tail through and close. Weave in.
E. Thumb tube (if held sts)
5. Pick up the held stitches (or pick up stitches evenly around the chain gap) with your hook; join and sc in the round for 4–6 rounds (or until desired thumb length ~0.75–1.0 in for newborns). Decrease one round if you want tapered tip, then fasten off and close. Weave tail inside.
F. Finishing
6. Fold cuff up if you worked BLO rounds and tuck ends. Weave in all tails and check thumb seam for comfort — pad seams if needed.
Variations
- Make cuff row in rib (alternating BLO/ FLO hdc or sc) for elastic stretch.
- For older infants, lengthen thumb tube accordingly.
Care
- Machine wash per yarn label.
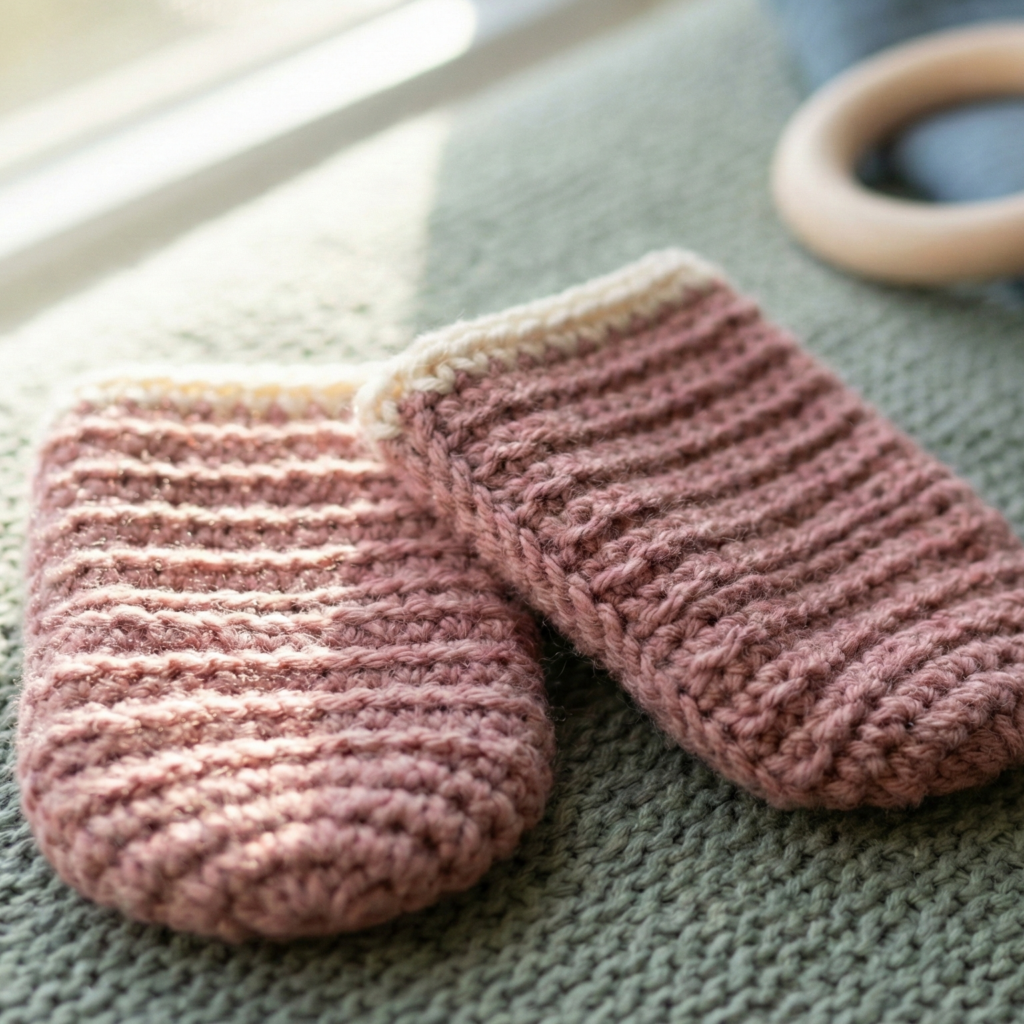
7. Crochet Ribbed Baby Mittens Pattern
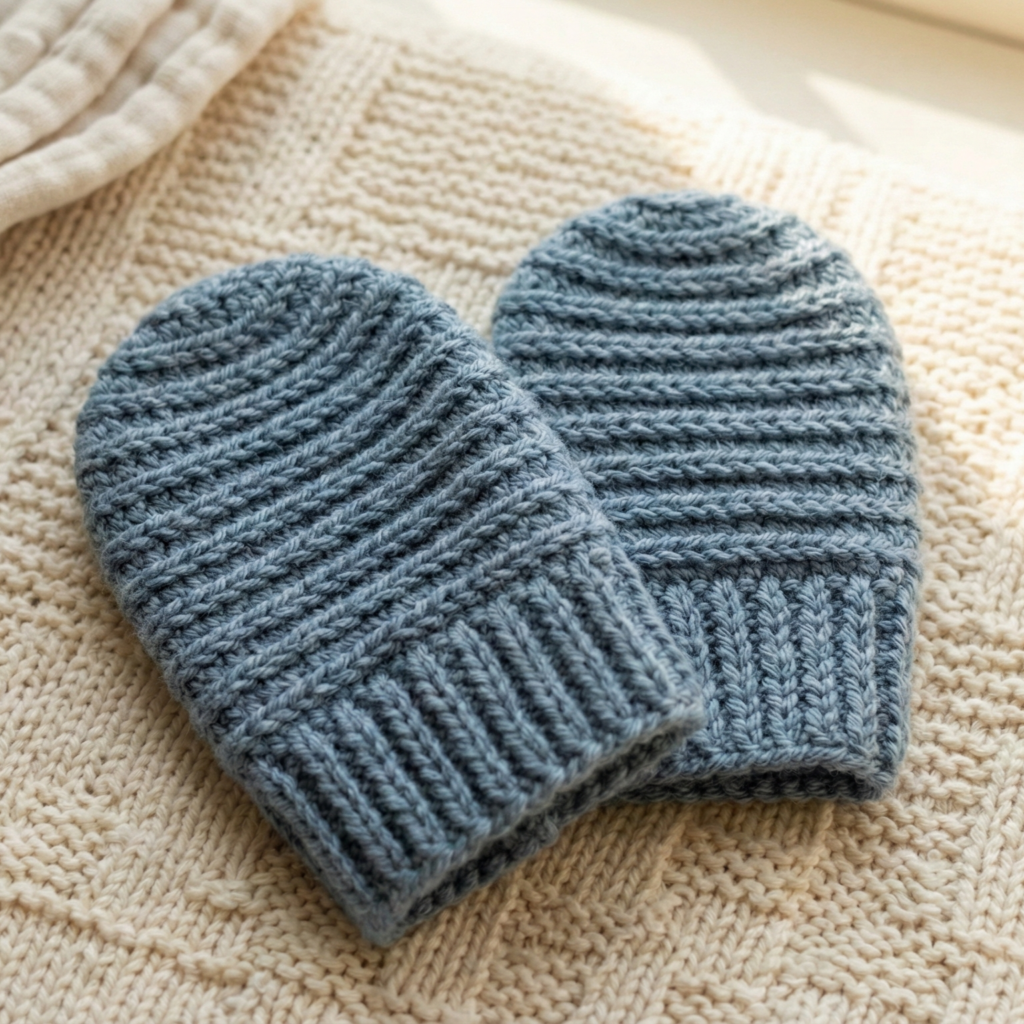
Overview & vibe: A snug mitten with a fully ribbed fabric (worked in alternating front-post and back-post stitches or in BLO rows) for great elasticity and a knit-like look.
Skill level: Intermediate (post stitches or BLO technique)
Materials (newborn sample)
- Fingering/ DK yarn — ~30–40 yd.
- Hook: 3.25–4.0 mm.
- Tapestry needle.
Finished size (newborn): Palm circ. ~3.75 in; length ~3.25 in.
Two options for rib: BLO rows (flat) or post stitches (in the round)
Option A — BLO rib (worked flat then seamed)
- Ch computed number for circumference (e.g., 20 ch). Row1: sc across. Row2: sc BLO across. Repeat Row2 for about 20 rows to create a ribbed rectangle. Fold and seam to make mitten, close top as in Pattern 2. This produces a horizontal rib, elastic and soft.
Option B — Post stitch rib (worked in the round)
- Ch computed number and join. Rnd1: sc around. Rnd2: fpdc around next front post of previous round (or fpdc around next st), bpdc around next alternate to create vertical ribs. Continue for cuff and body height. Decrease at top with careful patterning to keep rib continuity: dec by working fpdc2tog or standard dec into post stitches.
Step-by-step (post stitch vertical rib, in the round)
A. Foundation & cuff
- Ch 22, join ring. Rnd1: hdc around for flexibility (22 hdc).
- Rnd2: fpdc around next st, bpdc around next st repeat to end (this creates alternating raised and recessed ribs). Place marker at start.
B. Continue
3. Rnds 3–10: repeat Rnd2 until cuff height ~1.25 in. Continue same pattern up the hand for another 1.0–1.5 in.
C. Top shaping
4. To decrease for the rounded top, work an even decrease round using matched decreases that maintain rib continuity: fpdc around next st, bpdc around next st; when decreasing work fpdc2tog where two fpdc ribs meet etc. If this is complicated, you may switch to sc decreases symmetrically across the top for simplicity and accept slightly different texture at the tip.
D. Finishing
5. Close remaining sts, weave in. The rib will hold the mitten snug on the wrist, reducing the need for extra elastic.
Variations
- Make stripe ribs by changing color every two rounds for a candy stripe effect.
- Hold two strands for extra squish.
Care
- Hand wash for wool; machine gentle for superwash blends.
Conclusion
You now have seven full baby mitten patterns that range in construction methods (tube, flat seam, ribbed, plush) and styles (cuffed, flat-pom-safe, thumb-optional). A few professional finishing tips to make the patterns feel complete and safe for your readers:
Finishing & durability
- Weave in tails carefully — on baby items weave tails through multiple stitch plies or knot and then weave to prevent pullouts.
- Secure seams — use mattress stitch for flat seams; for mittens worked in the round, pull the final tail through several interior stitches and knot on the inside to secure.
- Felt backing option — for extra durability and to hide seams add a small felt disk inside cuff (stitched in place) — but avoid felt at areas that contact the mouth.
Grading to other sizes (quick rules)
- To grade up one size (e.g., newborn → 3–6 mo): add ~2–4 stitches around the circumference (depending on gauge) and add 2–4 rows to the body before top decreases. Use baby hand measurements for precise fit. Provide a 4″ swatch for each size and recalc.
Photography tips for your blog
- Photograph mittens flat, and also placed on a neutral baby hand prop or a soft cloth to show scale. Include a close up of stitch texture and one shot of the cuff interior. Natural diffused light and a shallow depth of field work best for yarn photos.
Care & labeling
- Always include yarn fiber content and care instructions with the pattern (e.g., “100% acrylic — machine wash cold, tumble low or lay flat to dry” or “superwash merino — machine wash gentle, lay flat to dry”). Recommend test washing one sample mitten to confirm behavior if you use a new yarn.
Safety reminder for selling/gifting
- Add a small card with a safety note: “Remove mittens if baby is unsupervised in bed. Avoid strings/ties. Check for loose stitches before use.”