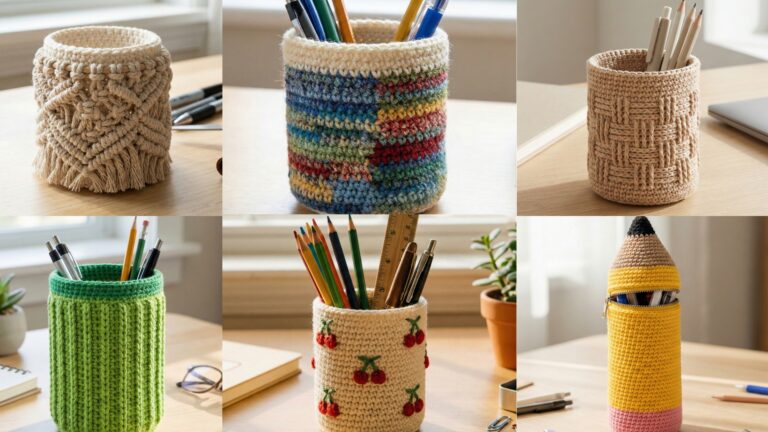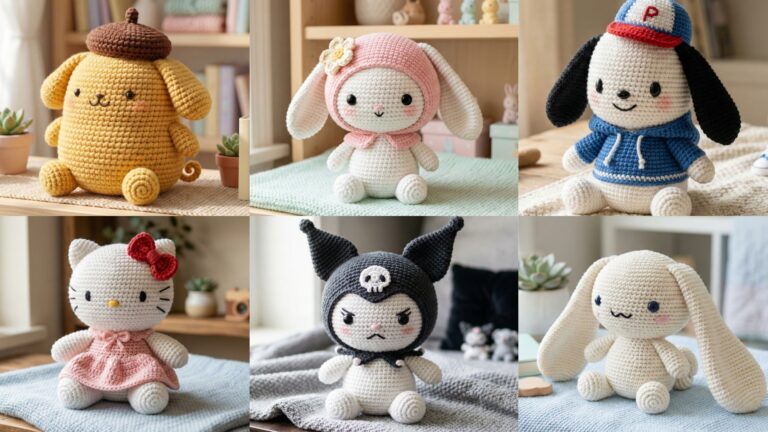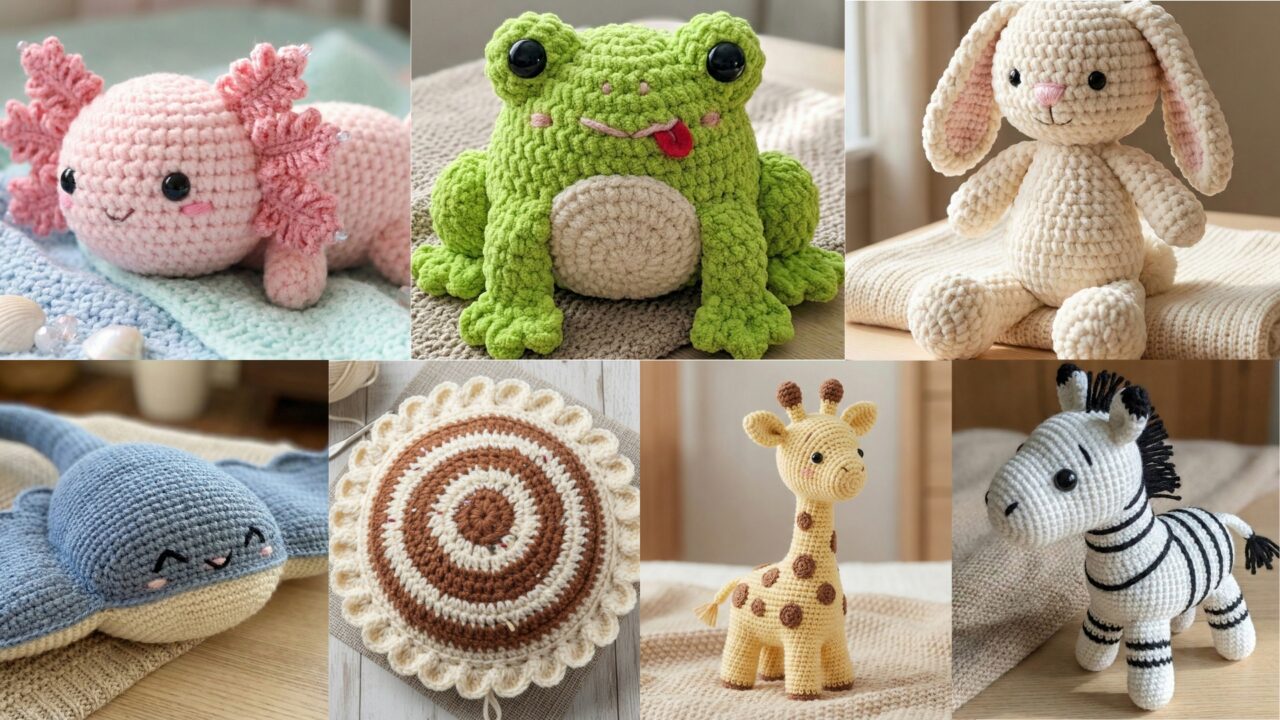
Crochet amigurumi plushies are tiny acts of joy — soft, squishy, and endlessly customizable. Below you’ll find a single practical primer (materials, gauge, safety, sizing tips) followed by seven full, detailed patterns: Adorable Zebra, Cute Stingray, Sweet Chunky Bunny, Baby Axolotl, Wholesome Chunky Frog, Amigurumi Lovely Plush (a sweet rounded character you can customize), and Chiffon Cinna Roll Plush. Each pattern includes skill level, materials and sample yardage, finished size, stitch abbreviations, a clear round-by-round shaping guide, assembly and finishing instructions, variations, and care. I write each amigurumi in continuous rounds (unless noted) using US terms; when numbers or arithmetic appear I show the calculations step-by-step so you can adapt.
Read the primer first — it applies to all seven designs — then jump to the plush you want.
GENERAL PRIMER — MATERIALS, GAUGE, SAFETY, AND SIZING
Materials (applies to all patterns)
- Yarn: Acrylic or cotton amigurumi-friendly yarn. Typical recommendations:
- For mini plush: fingering or sport weight + 2.75–3.25 mm hook.
- For standard plush (~6–8″ tall): DK to worsted weight + 3.5–4.5 mm hook.
- For chunky plush: bulky yarn + 5.5–6.5 mm hook.
- Stuffing: polyester toy stuffing (grade A) or wool for firmer feel.
- Safety eyes (6–12 mm) or embroidered features for toys for little children.
- Tapestry needle, stitch marker, small scissors, small amount of felt for backing (optional), pins.
- Optional: pipe cleaners or thin floral wire for posable limbs (do not use for toys sold to young children).
Gauge & sizing
- Amigurumi is gauge-flexible: hook & yarn choice determine finished size. If you want to scale a design, change hook size or yarn weight. For example, to increase finished height by roughly 25% use a hook one size larger or hold two strands together and crochet with a larger hook. Always keep stitches tight for less stuffing showing.
- Example arithmetic for sizing estimate (digit-by-digit): If standard pattern yields 8″ height using worsted yarn + 4.0 mm hook and you switch to bulky yarn + 6.0 mm hook, you can expect finished size to increase by roughly (6.0 ÷ 4.0) = 1.5 times. So 8 × 1.5 = (8 × 1) + (8 × 0.5) = 8 + 4 = 12 inches tall.
Safety
- For children under 3, do not use safety eyes or small beads — embroider all features.
- Securely stitch on any small parts and consider backing them with felt or stitching through multiple times.
- Test stuffing and seams; tug at attachments to confirm strength.
ABBREVIATIONS (US)
MR = magic ring
ch = chain
sc = single crochet
hdc = half double crochet
dc = double crochet
inc = increase (2 sc in next st)
dec = decrease (sc2tog)
sl st = slip stitch
st(s) = stitch(es)
rep = repeat
flo / blo = front / back loop only
1. Crochet Adorable Zebra Plush Pattern
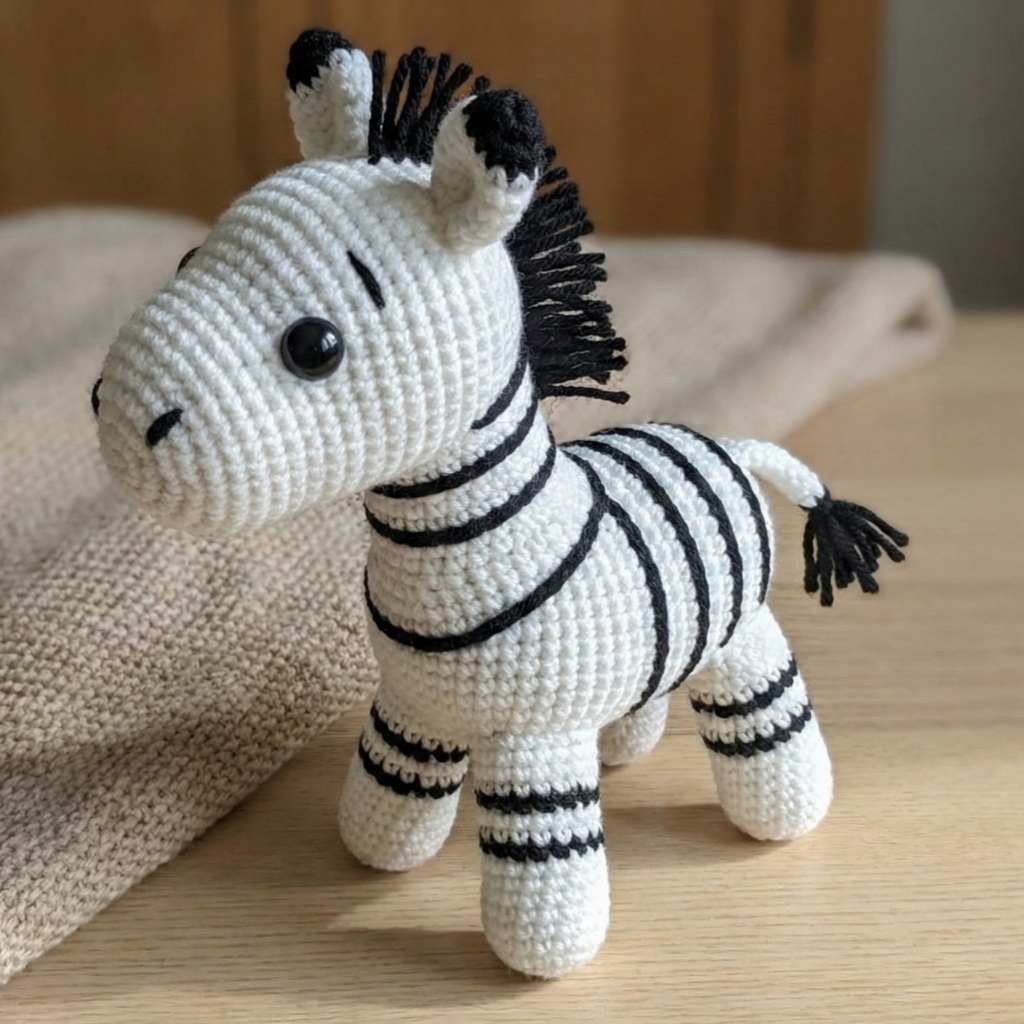
Skill level: Intermediate (color changes and striping)
Finished size: ~7–9″ tall with worsted weight yarn and 4.0 mm hook (adjust per yarn/hook).
Materials
- Worsted weight yarn: white main (~120–150 yd), black accent (~50 yd).
- Hook: 3.75–4.0 mm.
- Safety eyes 10 mm (or embroider).
- Polyester stuffing, tapestry needle, stitch marker.
Notes on stripes and color carry
- Zebra uses simple striping: change to black for a few rounds for stripes. Carry the unused color along inside the work and crochet over floats every 3–4 sts to lock them, or cut and weave tails for short stripe runs.
Head & body (worked joined or as separate pieces seamed)
HEAD (worked in white, change for stripes around neck if desired)
- MR: R1 6 sc in MR (6)
- R2 inc around (12)
- R3 (sc, inc) rep around (18)
- R4 (sc x2, inc) rep around (24)
- R5–R10 sc around (24) — adjust rounds for oblong head; example gives head height ~1.25–1.5″
- R11 (sc x2, dec) rep around (18)
- R12 (sc, dec) rep around (12)
Insert safety eyes between R6–R7 spaced about 6–8 sts apart depending on look. Begin stuffing lightly. - R13 dec around to close (6). Finish and leave tail for sewing if head is separate; otherwise continue shaping into neck.
BODY (if separate; can join directly)
- MR: 6 sc in MR (6)
- inc around (12)
- (sc, inc) rep around (18)
- (sc x2, inc) rep around (24)
- (sc x3, inc) rep around (30)
- R6–R12 sc around (30) — lengthen as needed for torso.
- R13 (sc x3, dec) rep around (24)
- R14 (sc x2, dec) rep around (18)
- R15 (sc, dec) rep around (12)
Stuff firmly and close with dec rounds.
Legs (make 4)
- MR: 6 sc (6)
- inc around (12)
- R3–R6 sc around (12) — lengthen for thicker legs. Stuff lightly and sew to body bottom.
Ears (make 2)
- ch 6, sc 5 starting in 2nd ch from hook; turn, sc across for 2 rows; fold and sew sides to create pointed ear shape. Use black yarn for tips.
Mane and tail
- For mane: cut 2–3″ lengths of black yarn; attach standing loops along head/back seam and trim to desired mane length. For tail: use a small yarn tassel of black yarn and sew into place.
Striping
- Work body/head in white and add black rounds as stripes: e.g., R7–R8 black, R10 black, etc. Keep stripe placement asymmetrical for a natural look.
Assembly
- Sew head to body if separate, attach legs evenly spaced, sew ears to top of head, add mane along neck seam, attach tail at rear. Embroider nostrils with black yarn. Back safety eyes with felt discs or embroidery for security.
Variations & colorways
- Make a “zebra plush with a heart” by single crochet a small heart motif and sew to chest.
- For baby-safe toy, embroider eyes and nose and avoid mane loops.
Care
- Spot clean recommended; machine wash in mesh bag gentle cycle if yarn allows; reshape damp.
2. Crochet Cute Stingray Plush Pattern
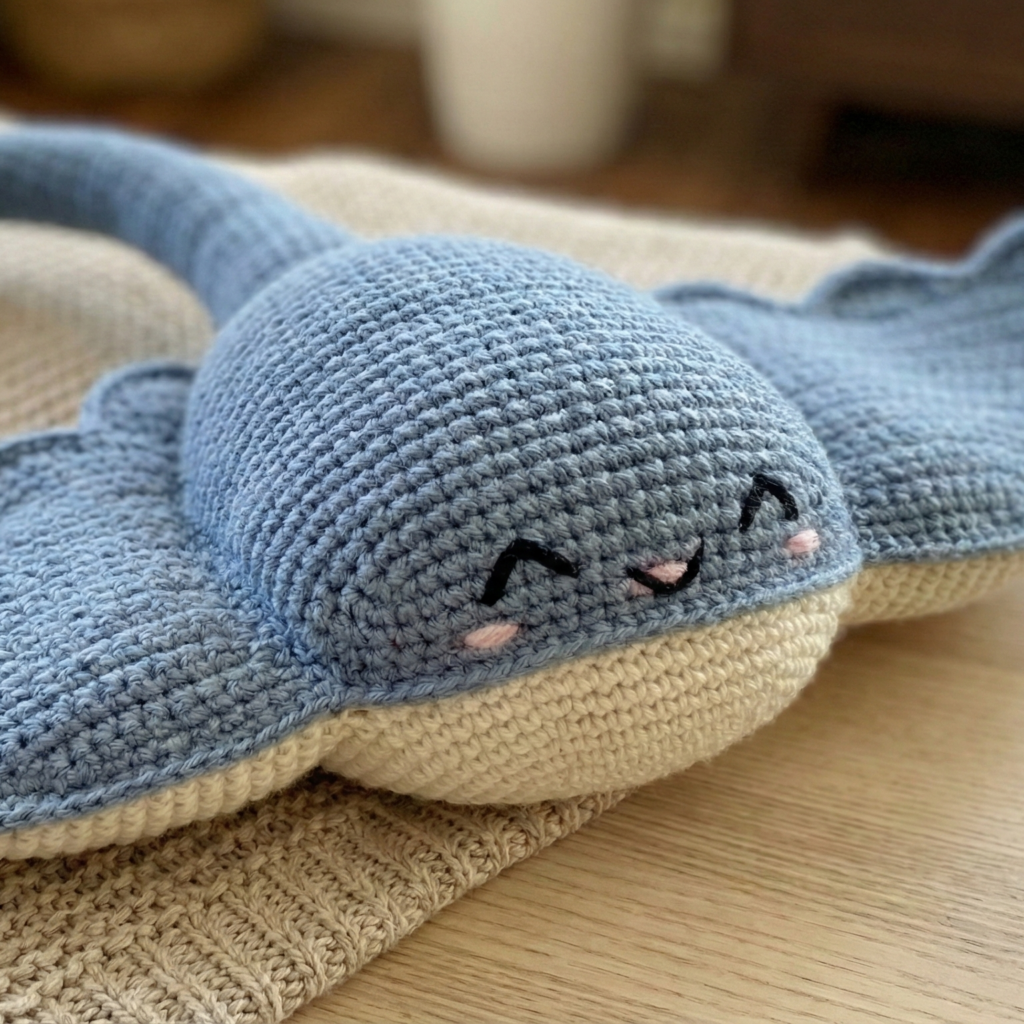
Skill level: Confident beginner → intermediate (flat shaping, grafting)
Finished size: ~9–11″ across the wings with DK/worsted and 4.0 mm hook.
Materials
- DK to worsted: main color for top (~150 yd), contrast for belly (~60 yd).
- Hook: 3.5–4.0 mm.
- Stuffing, tapestry needle, small amounts of felt for mouth if desired.
Construction notes
- Stingray is mostly flat with a stuffed center “pouch.” Work two large wing panels and a smaller belly panel, then seam and stuff.
Wing panels (make 2)
- Start with MR for center: R1 6 sc in MR (6)
- R2 inc around (12)
- R3 (sc, inc) rep around (18)
- R4 (sc x2, inc) rep around (24)
- Continue increasing in same fashion, increasing evenly to create a flat disc until disc measures about half the desired wingspan radius. Example if you want 10″ wingspan, radius ≈ 5″. When 1 cluster per inch roughly, increase until disc ≈ 5″. For more defined wing shape, stop increases and begin short-row shaping on each side to create wing tips.
Belly panel
- Make an oval panel sized about 60–75% of wing width. Work oval: ch foundation equal to desired length, work sc across both sides to create oval shape, increase evenly then work flat to height.
Tail
- Chain 40 for tail, work decreasing tapered tube using sc dec rounds every few rounds to taper tip. Add fun curve by stuffing with thin wire wrapped with yarn if posable (not for kids).
Assembly & stuffing
- Layer belly panel between two wing panels and crochet around edge with sc to seam, leaving a gap to stuff. Stuff the center fairly firmly and finish seaming. Add eyes with embroidery, small smile with backstitch. Add little frill along wing edge by slip-stitch scallop.
Variations
- Make kawaii face with blush spots using pastel yarn or embroidery thread.
- Make a keychain mini stingray with sport yarn and small hook.
Care
- Spot clean or gentle machine wash inside pillowcase.
3. Crochet Sweet Chunky Bunny Plush Pattern
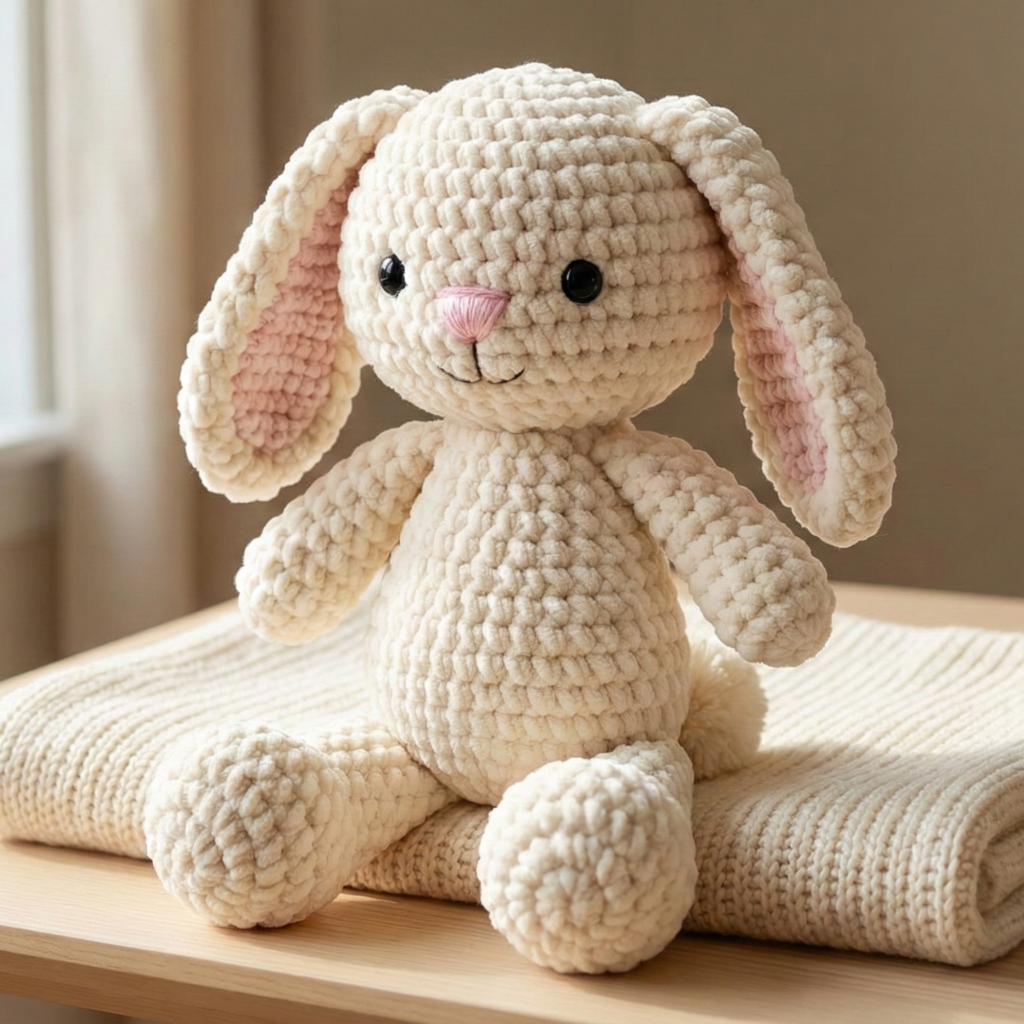
Skill level: Beginner–Intermediate (simple shaping, big yarn is forgiving)
Finished size: ~10–14″ tall using bulky yarn + 6.0 mm hook.
Materials
- Bulky yarn (weight 5) main color ~250–350 yd.
- Hook: 6.0–7.0 mm.
- Safety eyes 12 mm or embroidery, stuffing, tapestry needle.
Design notes
- Chunky bunnies are great for beginners because the fabric builds quickly. Use tighter tension to avoid visible stuffing.
Head (worked in the round)
- MR R1 6 sc (6)
- R2 inc around (12)
- R3 (sc, inc) rep around (18)
- R4 (sc x2, inc) rep around (24)
- R5–R8 sc around (24)
- R9 (sc x2, dec) rep around (18)
- Insert eyes between R5–R6 spaced 6–7 sts apart. Begin stuffing.
- R10 (sc, dec) rep (12)
- R11 dec around to close (6), finish and leave tail for sewing if separate.
Body (worked as tube or joined to head)
- MR 6 sc (6)
- inc around (12)
- (sc, inc) rep around (18)
- (sc x2, inc) rep around (24)
- R5–R10 sc around (24) — lengthen for body height; for chunky plush you may need fewer rounds because of thicker yarn.
- Stuff and close with dec rounds as with head.
Arms and legs
- Make 2 arms and 2 legs: small tubes with gentle taper using dec rounds at ends. Sew arms to upper body and legs to bottom.
Ears (long floppy)
- ch 12; Row 1 sc 11 across, turn; Rows 2–8 sc across to create rectangle; fold and sew base to shape ear taper. Alternatively work 2 oval panels and seam for a rounded ear. Sew ears to head top and slightly forward for floppy look.
Tail
- Make simple pom-pom or small MR 6 sc closed ball and sew to back.
Face
- Embroider triangular nose in pink and mouth with backstitch. Add small blush with pastel yarn or fabric paint.
Variations
- Make monochrome or add inner-ear in contrasting yarn. Use a ribbon scarf for personality.
Care
- Bulky toys may be hand-wash only; check yarn label.
4. Crochet Baby Axolotl Plush Pattern

Skill level: Intermediate (shaping + gills applique)
Finished size: ~6–8″ long with DK yarn + 3.5 mm hook.
Materials
- DK yarn: pale pink main (~120 yd), darker pink for gills (~30 yd).
- Hook: 3.5 mm.
- Safety eyes 6–9 mm or embroider.
- Stuffing, tapestry needle.
Anatomy and design
- Axolotl has a rounded head-body with short stubby limbs and frilly external gills (signature feature). Gills are made from loops or small frilled petals sewn on each side.
Body & head (joined)
- MR R1 6 sc (6)
- R2 inc around (12)
- R3 (sc, inc) rep (18)
- R4 (sc x2, inc) rep (24)
- R5–R10 sc around (24) continue until head to body transition felt right — axolotl is elongated but smooth.
- Increase a few rounds to widen torso: R11 (sc x3, inc) rep -> 30 sts. Continue a few rounds for body length.
- Stuff lightly as you go.
Limbs (make 4)
- MR 6 sc (6)
- inc around (12)
- R3–R4 sc around, stuff lightly and flatten base, sew to body.
Gills (make 6 on each side)
Option A — looped gills:
- ch 6, sl st back into first ch to produce loop, repeat 6 times to make frill strip, then sew base to side of head.
Option B — petal gills: - MR; ch2, 3 dc in MR × 5; pull tight and flatten to make petal; make multiple petals and sew in fan shape.
Tail
- From body end, decrease to form tapered tail: sc rounds with decs every 4–5 sts; then finish as flat fin: ch 20, work along chain with dc shell row for fin texture, sew to tail tip.
Face & details
- Embroider smile and small blush spots. Sew gills symmetrically on both sides. Use a few tiny French knots for freckles.
Variations
- Make pastel or neon axolotls; add tiny beads at gill tips for wet-look sparkle.
Care
- Spot clean; for heavy dirt, hand wash and reshape.
5. Crochet Wholesome Chunky Frog Pattern

Skill level: Confident beginner — simple spherical shaping and large feet
Finished size: ~7–9″ diameter with bulky yarn and 6.0 mm hook.
Materials
- Bulky yarn (green main ~200 yd, lighter green or cream for belly ~50 yd).
- Hook: 6.0–7.0 mm.
- Safety eyes 12 mm (or embroidered).
- Stuffing, tapestry needle.
Design concept
- Chunky frog is squat and round; large flat feet create charm.
Body (round squat)
- MR R1 6 sc (6)
- R2 inc around (12)
- R3 (sc, inc) rep (18)
- R4 (sc x2, inc) rep (24)
- R5 (sc x3, inc) rep (30)
- R6–R10 sc around (30) to create squat body. Stuff firmly; close with dec rounds.
Eyes (two domes on top)
- MR 6 sc (6)
- inc around (12)
- sc around for 2–3 rounds; leave tail for sewing; sew eyes to top of head with a slight gap. Insert safety eyes into domes for 3D look.
Feet (make 4: two hands small, two big feet)
- For foot: start with MR 6 sc; inc around to 12; work flat oval by working even rows increasing at ends; flatten and sew to lower body front. Make webbing by overlaying chain loops and catching across toes.
Tongue (optional)
- Small flat felt tongue or crochet: ch 8, sc back across, fasten and sew inside mouth for character.
Assembly & face
- Embroider nostrils and smile with brown yarn; attach eyes and place small felt blush if you like.
Variations
- Make tiny frog keychains with sport yarn and 2.75 mm hook.
Care
- Bulky amigurumi hand-wash only.
6. Crochet Amigurumi Lovely Giraffe Plush Pattern
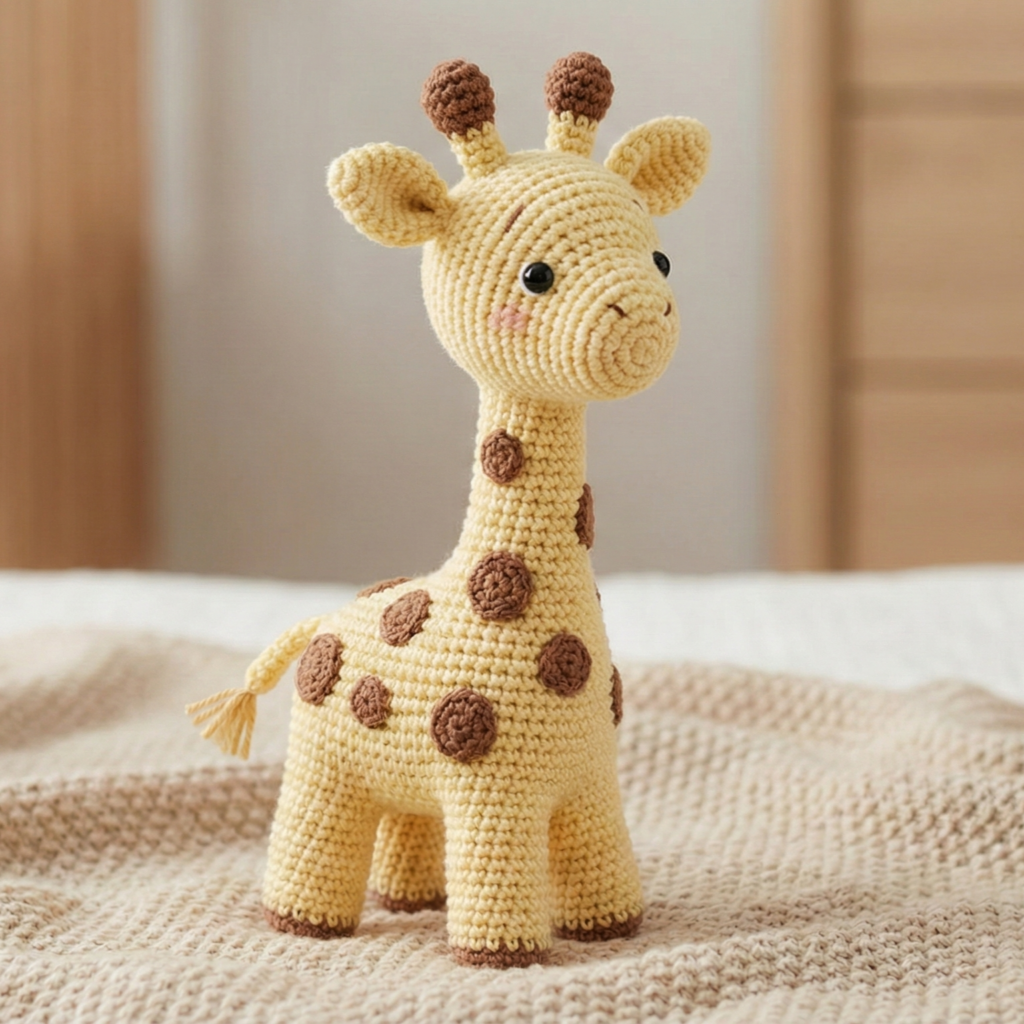
Skill Level
Beginner to Intermediate
(Perfect if you’re comfortable with basic amigurumi shaping and increases/decreases.)
Finished Size
Approximately 8–10 inches tall, depending on yarn weight and hook size.
Materials Needed
- Soft DK or worsted weight yarn
- Main color: pale yellow, cream, or mustard
- Accent color: brown or tan (for spots & horns)
- 3.5–4 mm crochet hook
- Fiberfill stuffing
- Safety eyes (8–10 mm) or embroidered eyes
- Yarn needle
- Stitch marker
- Scissors
Stitches Used
- Magic ring
- Single crochet (sc)
- Increase (inc)
- Decrease (dec)
- Slip stitch (sl st)
Step-by-Step Pattern Instructions
Head
- Begin with a magic ring and crochet 6 single crochets into the ring.
- Increase evenly in each round until you reach 36 stitches, forming a smooth round sphere.
- Crochet several rounds evenly to build height.
- Insert safety eyes between rounds, spacing them evenly.
- Begin decreasing gradually to shape the top of the head.
- Stuff firmly but gently before closing.
Neck
- Attach yarn at the bottom of the head.
- Work straight rounds with no increases to form a long, sturdy neck.
- Lightly stuff as you go to help the giraffe stand upright.
Body
- Increase stitches slightly from the base of the neck.
- Crochet evenly to create a round, chunky torso.
- Add stuffing gradually for a plush feel.
- Decrease toward the bottom and fasten off securely.
Legs (Make 4)
- Start with a magic ring and build a small oval foot.
- Crochet evenly upward to form short, sturdy legs.
- Stuff lightly and sew evenly to the base of the body so the giraffe can sit or stand.
Arms (Make 2)
- Work in continuous rounds with minimal shaping.
- Lightly stuff only the bottom half for flexibility.
- Attach to the upper sides of the body.
Ossicones (Horns – Make 2)
- Crochet tiny cylinders using the accent color.
- Stuff lightly and attach symmetrically on top of the head.
Ears (Make 2)
- Crochet small half-oval shapes.
- Flatten gently and stitch to the sides of the head.
Tail
- Crochet a short chain and single crochet back along it.
- Add a tiny yarn tassel at the end for detail.
- Attach to the back of the body.
7. Crochet Chiffon Cinna Roll Plush Pattern

Skill level: Confident beginner — fun novelty plush shaped like a cinnamon roll
Finished size: ~6–8″ diameter with DK/worsted yarn.
Materials
- Worsted in cream for base (~100 yd) and cinnamon-brown for swirl (~40 yd).
- Hook: 4.0 mm.
- Stuffing, tapestry needle.
Construction concept
- Work a spiral wedge base and a spiral top to sew together to form roll, then add “icing” ruffles with textured stitches.
Base spiral (flat disc)
- MR R1 6 sc (6)
- R2 inc around (12)
- R3 (sc, inc) rep (18)
- R4 (sc x2, inc) rep (24)
- Continue increasing evenly until disc reaches about 6–7″ diameter (stop increases when desired size reached). This becomes the bottom of the roll.
Top spiral (winding bump)
- Make a long strip that will be the swirl: ch 60 (adjust to desired coil length). Row 1 sc across. Row 2 create scallop edges to mimic rolled layers: sc, ch3, skip 1 across. Roll the strip around itself starting from one end to form the swirl; stitch the coil together as you roll and attach to base disc. Stuff lightly between layers if you want plumpness.
Icing ruffle
- Using cream yarn, attach at top edge and work rounds of 5 dc shells spaced every 1–2 sts to simulate dripping icing. Work 2–3 rows of shell increases for deeper drips.
Details & finishing
- Add small felt “sugar dust” or embroidered sprinkles with yarn. Add a tiny loop beneath for hanging as ornament.
Variations
- Make other bakery items with similar spiral technique (danish, bun). Use variegated yarn for marbling.
Care
- Spot clean; small dessert plushes are decorative—avoid heavy washing.
Conclusion
You now have seven full amigurumi plush patterns with detailed shaping and finishing guidance: Zebra, Stingray, Chunky Bunny, Baby Axolotl, Chunky Frog, Lovely Rounded Plush, and Chiffon Cinna Roll. A few final, practical tips:
- Work tight stitches for amigurumi so stuffing doesn’t show — if your fabric is loose, use a smaller hook.
- Stuff progressively as you work so shapes are even and you can adjust fill density.
- Use locking stitch markers to track round starts when working continuous rounds — they save a lot of confusion.
- Test safety attachments by tugging on eyes/parts to ensure they’ll hold up to play.
- Personalize colors, facial expressions, and accessories — that’s what makes each plush unique and lovable.