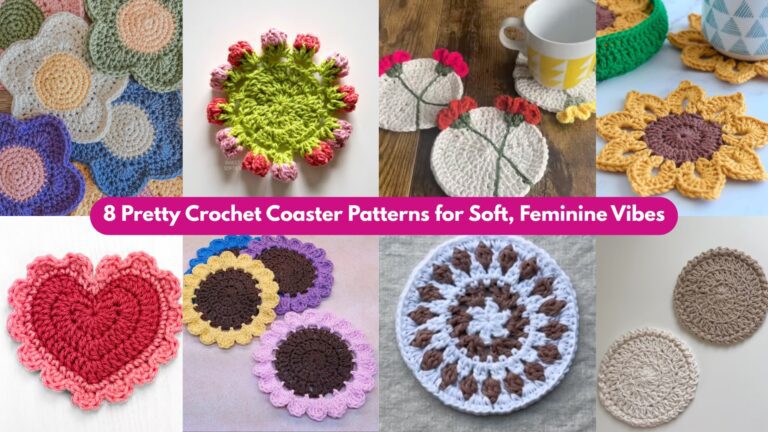
Handmade coasters are fast, useful, and perfect for gifting — they’re small projects you can finish in an evening, they show off stitch texture and color, and they photograph beautifully. Below you’ll find a practical primer (materials, gauge, how to scale), then seven fully detailed coaster patterns with step-by-step instructions, finishing tips, variations, and care notes. All patterns use US crochet terms.
Quick primer — materials, tools, gauge & scaling (read first)
Materials (general)
- Yarn: 100% cotton or cotton blends are ideal for coasters — they absorb, block well, and launder easily. Use worsted (category 4) for sturdy coasters, DK (3) for medium-weight, and sport/fingering if you want dainty mini coasters.
- Hook: 3.5–5.0 mm depending on yarn. For crisp stitches, use a hook 0.5 mm smaller than the yarn label suggests.
- Notions: tapestry needle, scissors, blocking pins/mat, small piece of felt (optional backing), fabric glue (optional), starch (optional).
- Extras: tiny beads/buttons only for decorative display coasters; avoid loose small bits if gift is for households with young children.
Gauge & scaling — digit-by-digit example (do this before each project)
Always make a small swatch to know stitches per inch (spi) for the stitch you’ll use. Then do digit-by-digit math to convert desired coaster diameter into stitch counts.
Example: you want a 4.25 in coaster and your swatch in sc rounds gives 6 stitches per inch (spi = 6). Multiply 4.25 × 6.
Work it digit-by-digit:
- Break 4.25 into 4 + 0.25.
- 4 × 6 = 24.
- 0.25 × 6 = (1/4 × 6) = 1.5.
- Add: 24 + 1.5 = 25.5 → round to nearest pattern multiple (for rounds you’ll often pick a count that matches your increase pattern; common round increases yield 24, 30, 36, etc.). If pattern increases in +6 per round, choose 24 or 30 depending on desired size — 24 will be slightly smaller, 30 slightly larger.
Safety & finishing note
If you plan to use a felt backing or glue, test for heat/water resistance and avoid glues that stay tacky. Always weave ends neatly and block coasters to set shape.
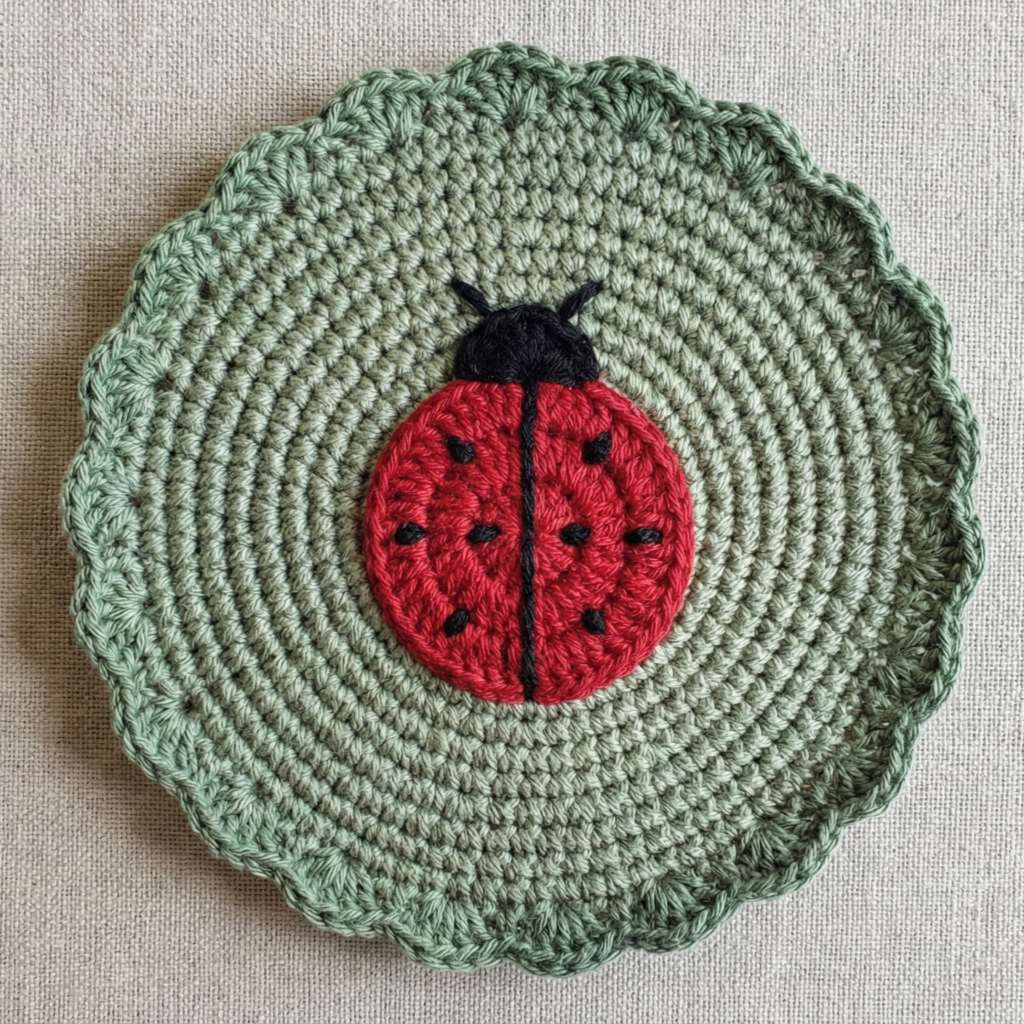
1. Crochet Ladybug Coaster with Shell Stitch Border Pattern
Skill level: Beginner–Intermediate
Finished size: ~4–4.5 in diameter (adjust with hook/yarn)
Materials: worsted cotton in red (~50 yd), black (~10 yd), small amount white/ivory, 4.0 mm hook, tapestry needle, optional small felt backing
Gauge (example): 6 sc = 1 in
Construction — step-by-step
Center & body (worked in continuous rounds)
- MR: 6 sc. (6)
- R2: inc around. (12)
- R3: sc, inc ×6 = 18
- R4: sc x2, inc ×6 = 24
- R5: sc x3, inc ×6 = 30
- R6: sc x4, inc ×6 = 36 — check diameter. If you need slightly bigger, continue: R7 sc x5, inc → 42. Stop when flat disc reaches desired pre-border size (about 3.8–4.0 in before scallop).
Head/black semicircle
7. To add a head area: when disc base is done, you can form head by changing to black and working 3–4 rounds only over the stitches that correspond to roughly 1/4–1/3 of the disc edge. To do this: at the place where head should begin, join black yarn and work short rounds across that arc (count sts across that arc: use marker). Option: work the full red disc then surface embroider a black semicircle.
Spots
8. Make 4–6 tiny spot appliqués: MR, 6 sc, sl st, leave long tail; flatten and sew to red area. Or embroider small round spots with black yarn (safer for kids).
Shell scallop border
9. Join black (or contrast) at any outer stitch: sl st in next st, ch1, (5 dc) in next st, ch1, sl st in next st repeat evenly around; spacing depends on final base stitch count — if stitches are not divisible, adjust spacing by inserting occasional sl st or sc between shells. This shell round gives a frilly, ladybug-like scalloped edge.
Finishing
10. Weave in ends. Optionally cut a felt circle to match coaster size and whipstitch to back for absorbency. Lightly block to open scallops.
Variations & tips
- Make mini set (3 in) by switching to DK or fingering yarn and smaller hook.
- Make leaf-shaped coaster by adding small green applique.
Care
- Machine wash gentle; reshape damp and air-dry.
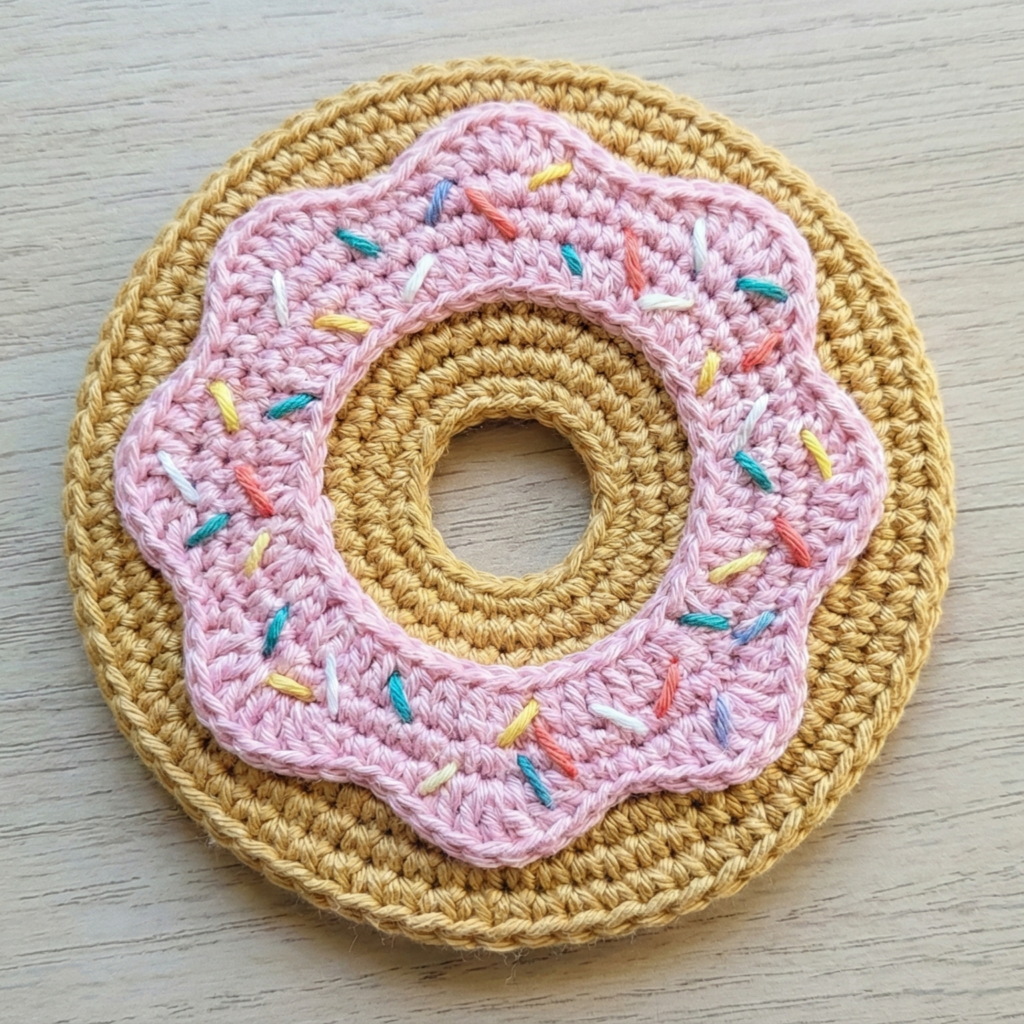
2. Crochet Flat Donut Coaster Pattern
Skill level: Beginner
Finished size: ~4 in diameter with ~1 in hole (adjust)
Materials: worsted or DK cotton (main + icing color), 4.0 mm hook, embroidery floss for sprinkles (optional)
Construction — step-by-step
Donut torus (flat ring)
- MR: 8 sc (8)
- R2: inc around (16)
- R3: sc, inc around (24)
- R4: sc x2, inc around (32)
- R5: sc x3, inc around (40) — check inner hole diameter; stop increasing when inner hole is ~1 in. Continue sc rounds (no increases) until outer diameter ≈ 4 in (usually 2–4 more rounds).
Icing
6. Join icing color 2–3 rounds in from outer edge and work a wavy icing row: ch2, skip 1 st, sc in next or for a ruffled glaze, do shells (3–5 dc in st) spaced every 2–3 sts to mimic drips. You can also overlay a separate small round disc for icing and whipstitch on top for raised effect.
Sprinkles
7. Embroider tiny straight stitches with bright floss/yarn to represent sprinkles. Alternatively make micro bobble clusters and sew on.
Finishing
8. If you prefer a thicker coaster, make two donut layers and whipstitch them together with a thin layer of felt in between. Weave ends and block flat.
Variations
- Use variegated yarn for funky glaze.
- Make a “filled donut” (no hole) by starting with MR, but close hole at center.
Care
- Machine wash gentle; lay flat to dry.
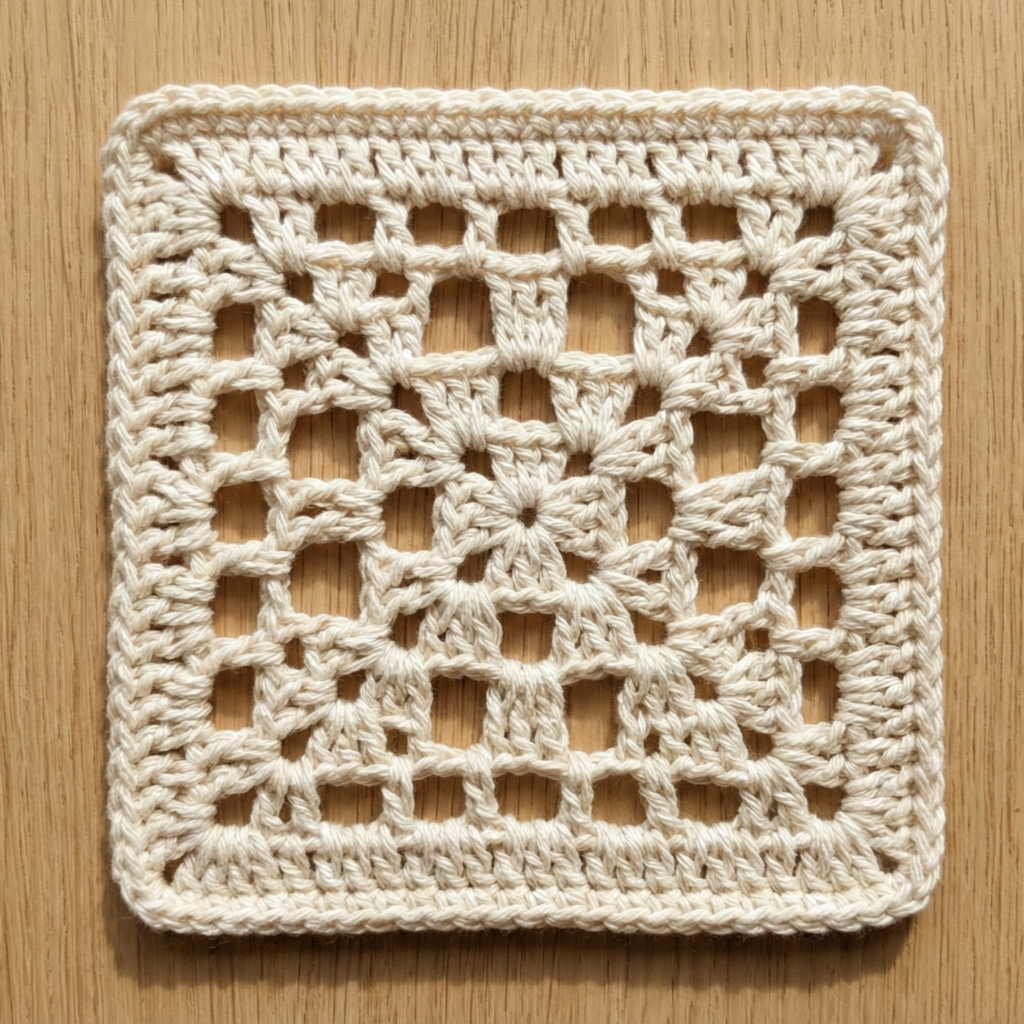
3. Crochet Lattice Coaster Pattern
Skill level: Intermediate (patterned openwork)
Finished size: ~4–4.5 in square or round
Materials: DK cotton, 3.5–4.5 mm hook, blocking pins
Construction — square lattice example
Foundation & base
- Chain a foundation to produce desired width. Example: target 4.25 in × spi 6 sc/in → 4.25 × 6 = 25.5 → round to 26 chain + 1 turning = 27 ch (adjust to pattern multiples). Row 1: sc across.
Frame
2. Work 4 rounds sc to create a sturdy frame.
Lattice body (repeat rows)
3. Row A (RS): ch5, skip 3, sc in next, repeat across; turn. (This forms tall chain loops.)
4. Row B (WS): sc across, inserting sc into the chain loops from Row A where desired to anchor. Example: sc in next sc, sc in ch-5 loop (work 5 sc evenly across the loop) — this converts loops into anchored lace. Work 6–10 rows alternating chain-loop rows and anchoring rows, offsetting orientation every 2–3 rows to form a basket-lattice.
Border
5. After lattice height is achieved, work 2–3 rounds sc around the whole square (work across ends) to tidy. Use corner increases (3 sc in corner) to keep shape square.
Blocking
6. Wet-block on mat; stretch lattice to grid shape and pin to set.
Variations
- Make circular lattice by working rounds of ch4, sc and anchoring on the next round.
- Use two colors for an ombré lattice.
Care
- Hand wash or machine gentle; reshape while damp.
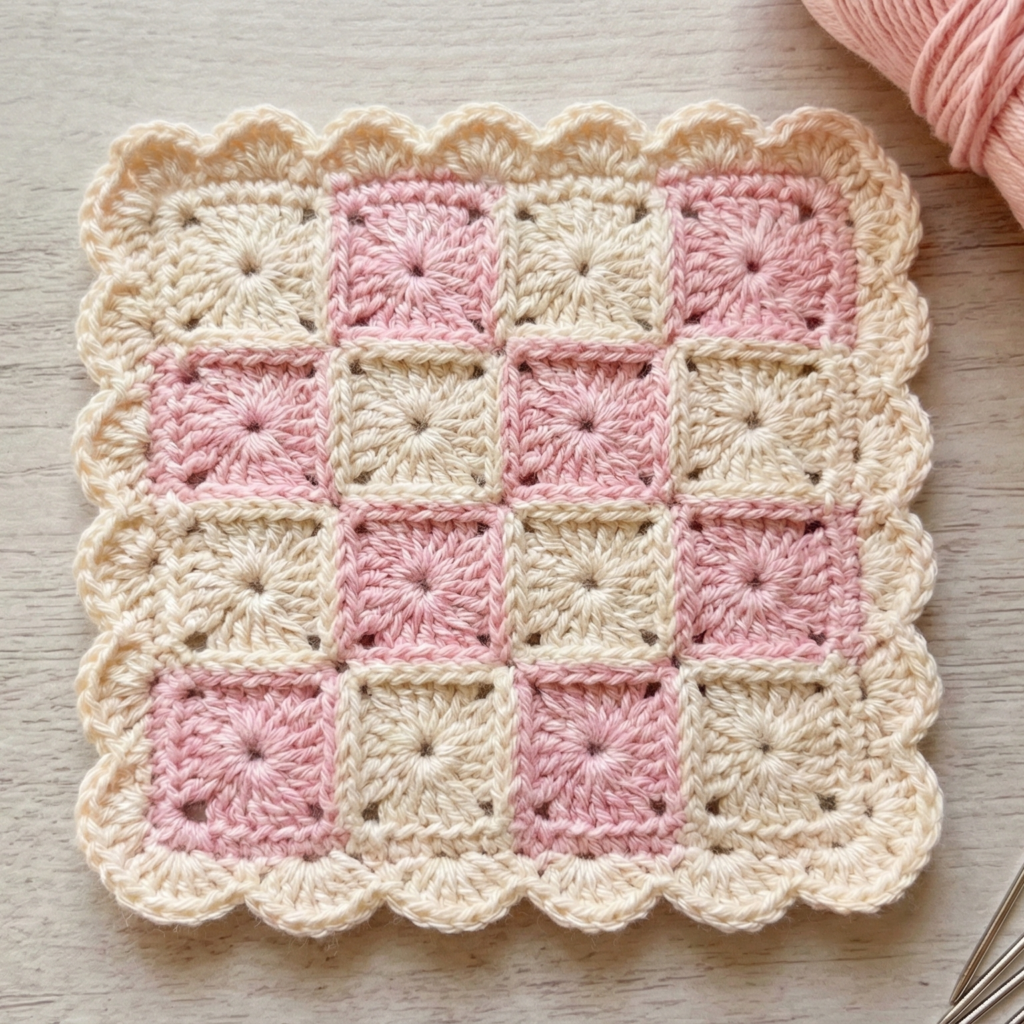
4. Crochet Coquette Checkered Coaster Pattern
Skill level: Confident beginner (colorwork or join-as-you-go)
Finished size: ~4 in square or circle
Materials: DK cotton in two contrast colors, 3.5–4.0 mm hook, tapestry needle
Construction — join-as-you-go mini squares (simple method)
Make mini tiles
- Mini tile: foundation ch 6; Row 1: sc in 2nd ch and across (5 sc). Row 2–3: sc across to make a small 5×3 rectangle ~1 in. Make 16 tiles for a 4×4 grid.
Join into checkerboard
2. Arrange tiles alternating colors. Join-as-you-go: as you complete each tile on the join side, slip-stitch or mattress-stitch it to adjacent tiles. Make a flat square.
Border & frill
3. Work 2 rounds sc around outer edge to tidy. Add scalloped shell: sc, skip 1, (5 dc) in next st, skip 1, sc repeat to create coquette frill.
Alternative single-piece check
- Tapestry single-crochet squares: chain foundation for width and work sc rows with color changes per checker chart, then seam or fold.
Finishing
4. Weave ends, block flat.
Variations
- Add picot edge for extra vintage flair.
- Make round check by charting radial blocks.
Care
- Machine wash gentle; reshape.
5. Crochet Handmade Coffee Coaster Pattern

Skill level: Beginner–Confident beginner (post stitches & surface slipstitching)
Finished size: ~4 in diameter
Materials: worsted cotton in browns/creams, 4.0 mm hook
Construction — concentric texture with latte swirl
Base rounds
- MR: 6 sc. R2: inc → 12. R3: sc, inc → 18. R4: sc x2, inc → 24. Continue increasing until base ~3 in.
Ridges & rings
2. Alternate rounds: Rn (even) sc around; Rn+1: fpdc in next st, bpdc in next st around to create ridged concentric rings. Work this alternating pattern for 3–4 sets until diameter ≈ 4 in.
Latte-art surface slipstitch
3. With cream yarn, use surface slipstitch to draw a simple heart or swirl: insert hook from back to front at starting point and surface sl st along chosen path to form a heart — this sits on top of ridges and mimics foam art.
Edge
4. Finish with one round of sc in mocha color.
Finishing
5. Block slightly; optional felt backing to protect furniture.
Variations
- Make a set in gradient browns.
- Add a tiny embroidered “steam” line.
Care
- Machine wash gentle; reshape damp.
6. Crochet Spiral Geometric Coaster Pattern
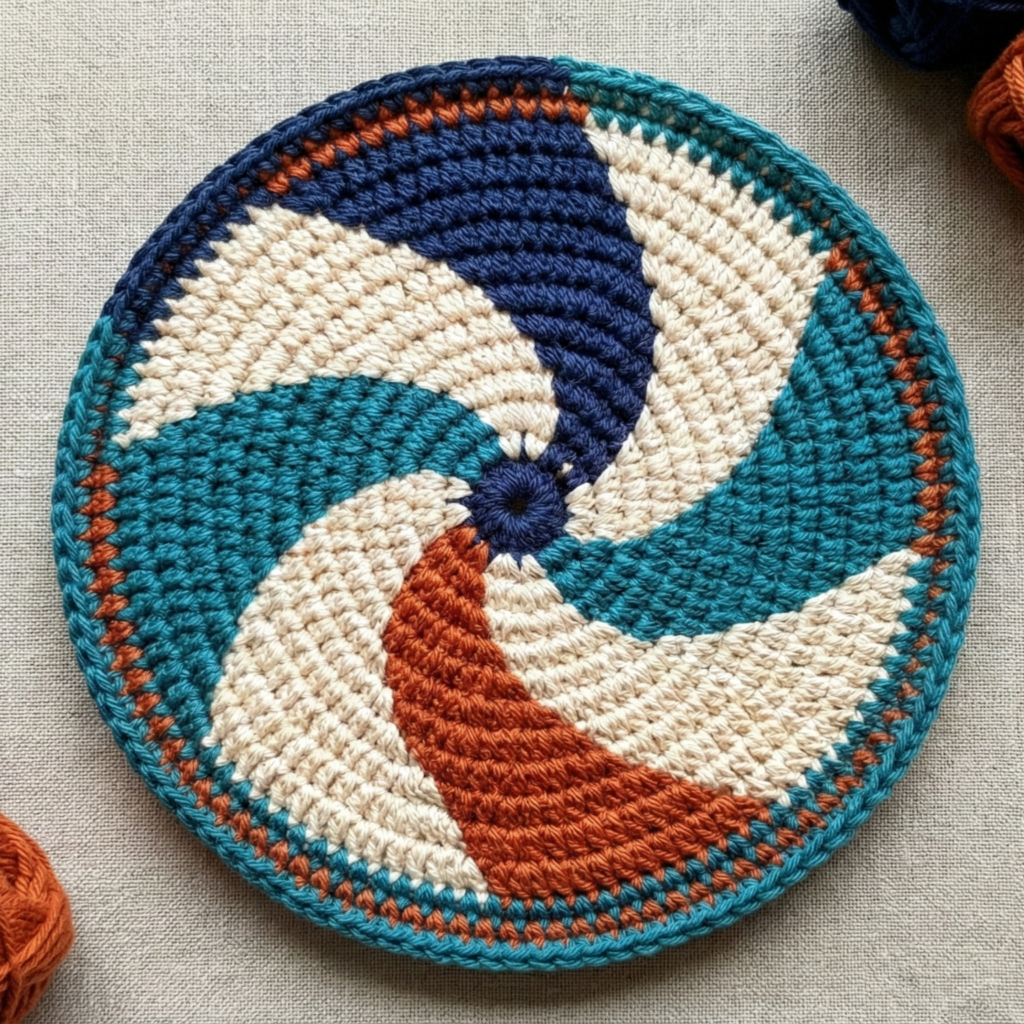
Skill level: Intermediate (joined rounds & color changes)
Finished size: ~4–4.5 in diameter
Materials: DK cotton in 3–4 contrasting colors, 3.5–4.5 mm hook
Construction — wedge spiral (8-wedge example)
Decide wedges & counts
- Choose wedge count (e.g., 8). Determine target outer stitches using spi digit math: for 4.25 in diameter × spi 6 = 25.5 → pick an achievable final stitch round like 30 sts. If 8 wedges → 30 ÷ 8 = 3.75 ≈ 4 stitches per wedge base; increases will add stitches each round.
Center & increase logic
2. MR: 8 sc. R2: inc around to 16. R3: sc 1, inc around to 24. Start color changes for wedges.
Wedge shaping rounds
3. Work rounds with wedge repeats: per wedge do sc xN, inc where N increases gradually to create radial widening. For 8 wedges, do sequence so each round adds 8 sts total (1 per wedge). Example round pattern: repeat [sc x3, inc] ×8. Change color at every wedge seam or every 2 wedges to create pinwheel.
Color transitions
4. Carry or break yarn at color changes; for crisp wedges fasten off and weave ends.
Finish & border
5. When diameter reached, finish with 2 rounds sc and a final crab stitch (reverse sc) for a tidy, raised edge.
Variations
- Make fewer wedges for bolder triangular segments.
- Use gradient yarn for a spiral fade.
Care
- Machine wash gentle; block if needed.
7. Crochet Christmas Wreath Coaster Pattern
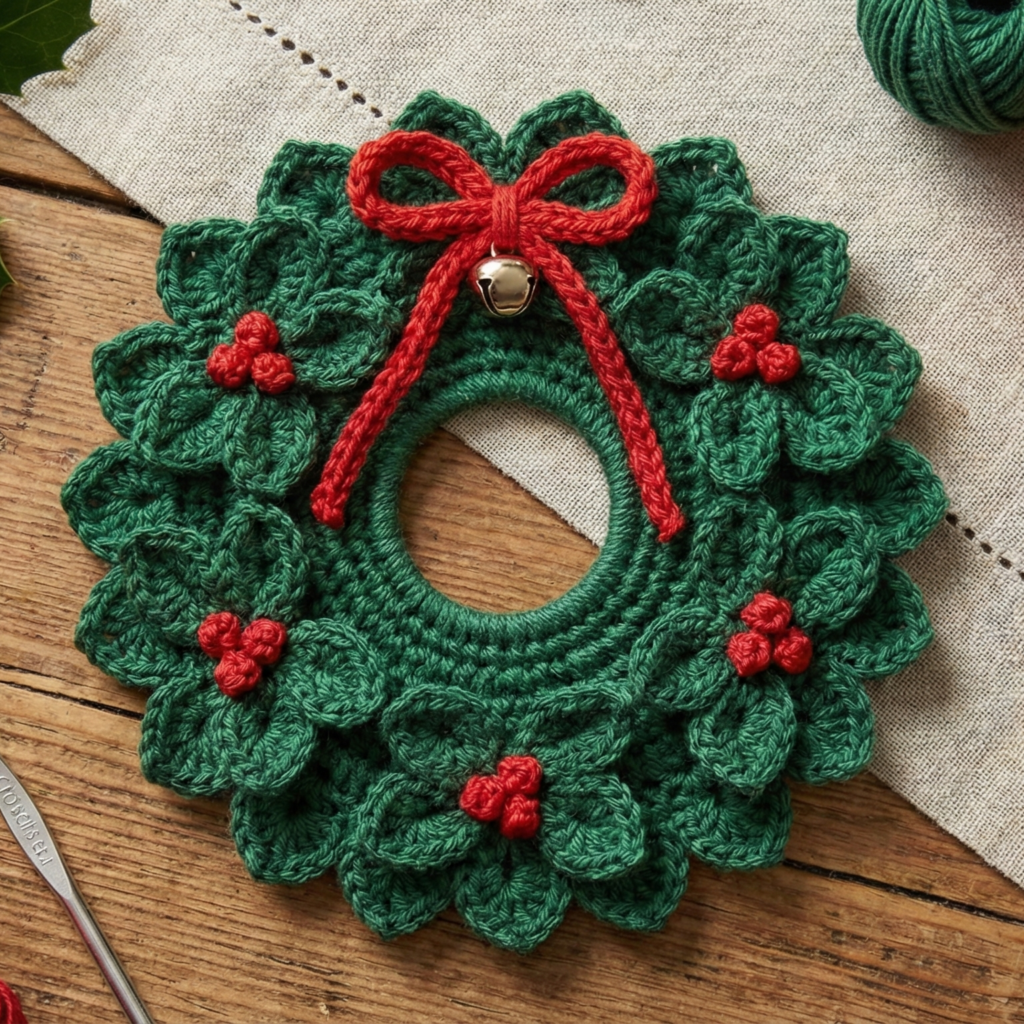
Skill level: Intermediate (leaf clusters & small embellishments)
Finished size: 4–4.5 in diameter outer; inner hole 1–1.25 in
Materials: DK cotton in deep green, small red for berries, 3.5–4.0 mm hook, optional tiny jingle bell (sewn securely, not for young children)
Construction — ring base + leaves
Ring base
- MR: 8 sc. R2: inc → 16. R3: sc, inc → 24. Continue until inner hole ~1–1.25 in (often 16–24 final at this stage).
Leaf rounds (clustered leaves)
2. Round: ch3, sl st in same st or for fuller leaves use: ch6, sc in 2nd ch, hdc, dc, hdc, sc, sl st to base to make a full tapered leaf. Work a leaf on every or every-other st around. If doing a leaf every st makes it dense; doing every other st makes gaps filled by subsequent leaf rounds.
Second round of leaves (staggered)
3. Work a second leaf round staggered between first leaves so leaves overlap and form dense wreath foliage.
Berries & bow
4. Make tiny berries: MR 4–6 sc, flatten and sew in clusters of 2–3 to wreath. Make small bow: ch 12, sc back across, fold and sew center with narrow band.
Finish
5. Work a tidy sc round on back for a smooth surface. Weave ends. Optionally glue or whipstitch a small felt circle on back for protection.
Display & care
- Use as coaster or mini mat. If you add bell, secure with multiple stitches and/or sew to felt backing. Hand wash preferred; reshape while damp.
conclusion
You now have seven gift-ready coaster patterns covering playful (ladybug, donut), modern (lattice, spiral), feminine (coquette checkers, scallop — earlier post), cozy (coffee rings), and festive (wreath) styles. A few practical finishing tips that make your gifts look pro:
- Make sets: 3 or 4 coasters in coordinated colorways make an instant handmade gift set. Tie with ribbon and a printed label with care instructions.
- Mix textures: combine solid/cozy coasters for practical use and openwork/embellished coasters for display.
- Add felt backs when the coaster will be used under very wet cups — cut a circle of felt and whipstitch in place.
- Block everything: blocking evens stitches, shapes scallops, and makes your coasters lie flat. For starched coasters use diluted spray starch if you want a firmer finish.
- Photographing for your blog: shoot on neutral wood or linen, include a mug or teacup for scale, and photograph close-ups of texture as well as a styled group shot for social sharing. Natural light + slight vignette = cozy lifestyle images.
- Care instructions to include with gifts: machine wash gentle (if yarn allows), reshape and air dry; spot clean felt-backed pieces.