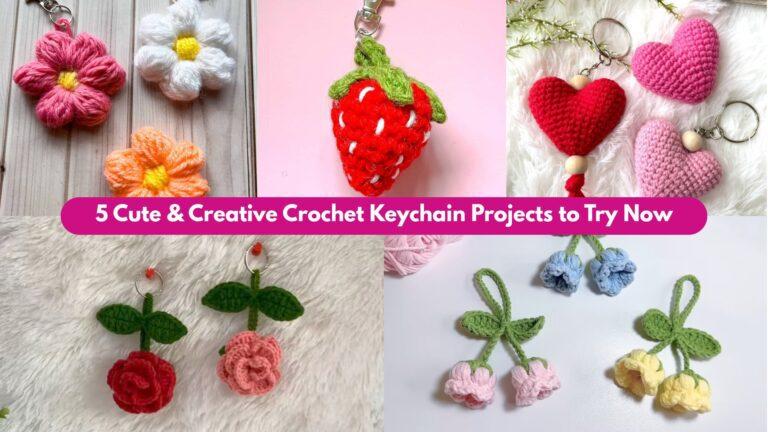
Keychains are the perfect tiny crochet projects — quick to make, great for using scraps, and adorable as gifts or shop items. Below you’ll find a friendly introduction (materials, safety, tools, abbreviations and finishing tips) and seven full patterns with step-by-step instructions so you can make each keychain start-to-finish. I wrote each pattern to be beginner-friendly but flexible — swap yarn, scale the size, or add beads and charms.
Quick introduction — tools, materials, safety & general tips
Why make crochet keychains?
They’re fast (most under an hour), portable, and forgiving. Because they’re small, they’re ideal for practicing tiny shaping and finishing skills (magic ring, increases/decreases, sewing small parts).
General materials & tools (use for most patterns)
- Yarn: fingering, sport, or DK weight for best stitch definition. For super tiny amigurumi use fingering or crochet thread. Cotton yarn is tidy and washable; acrylic is soft and inexpensive.
- Hook: use the size that gives a neat, compact fabric for your yarn — typically 2.5–3.5 mm for keychains.
- Stuffing: small amount of polyester fiberfill.
- Findings: split keyring (30–40 mm), short keychain chain with lobster clasp, small jump ring, small eye pin or head pin for dangling beads (if used).
- Notions: tapestry needle, small scissors, stitch marker, round-nose pliers (for jewelry findings), optional small buttons/beads.
- Optional: felt backing for reinforced attachment if you’ll glue on studs or heavy pendants.
Safety note
Keychains often include small parts (beads, metal findings). If making keychains for young children (under 3), avoid tiny detachable beads and safety eyes; prefer embroidered faces and securely sewn-on or felted details. Always sew hardware on strongly — tie off, weave ends, and consider a second reinforcing stitch.
Abbreviations (US)
- MR = magic ring
- ch = chain
- sc = single crochet
- hdc = half double crochet
- dc = double crochet
- inc = increase (2 sc in same st)
- dec = decrease (invisible dec recommended)
- sl st = slip stitch
- st(s) = stitch(es)
- rep = repeat
- BLO / FLO = back loop only / front loop only
Finishing tips (applies to all patterns)
- Weave tails through inside of piece and knot/secure; trim close.
- Stuff firmly but not overstuffed — shape depends on gentle stuffing.
- Use a small washer or felt circle on the wrong side when attaching a keyring to hide the knot and protect the yarn from wearing.
- Seal metal ends and rings tightly with pliers — eye pins must be closed fully.
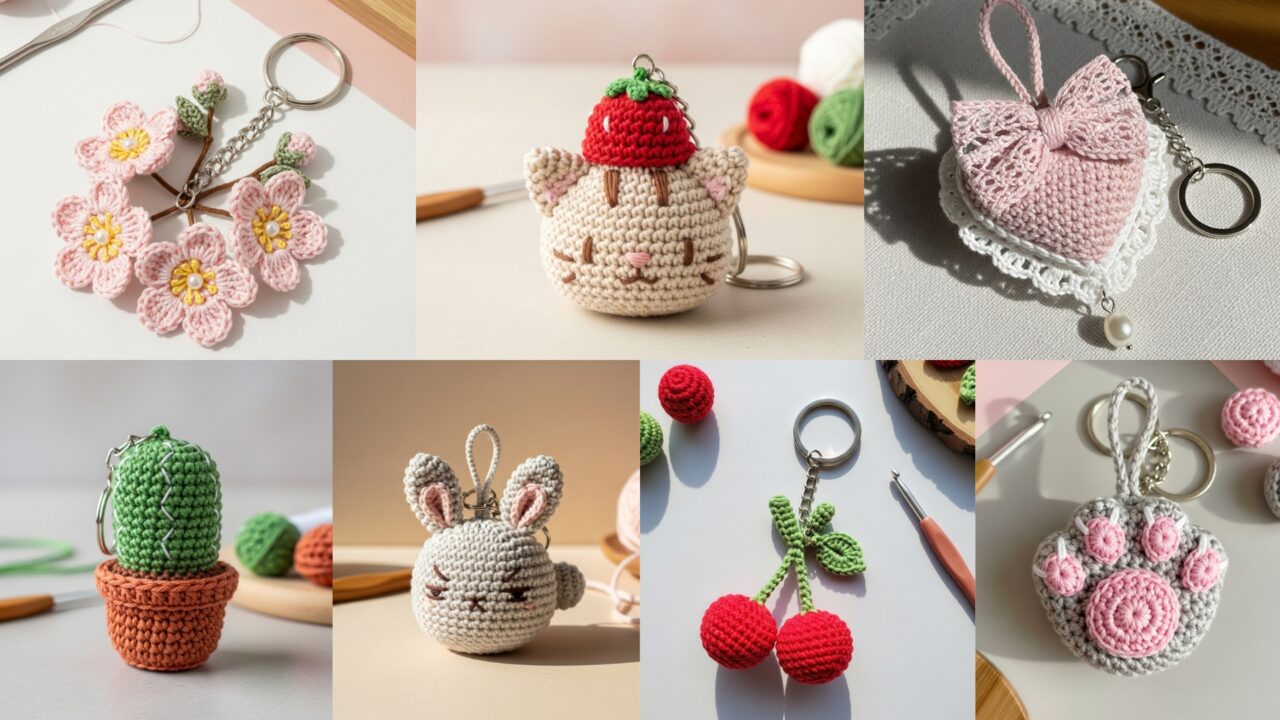
1. Crochet Mini Cactus Plant Keychain Pattern
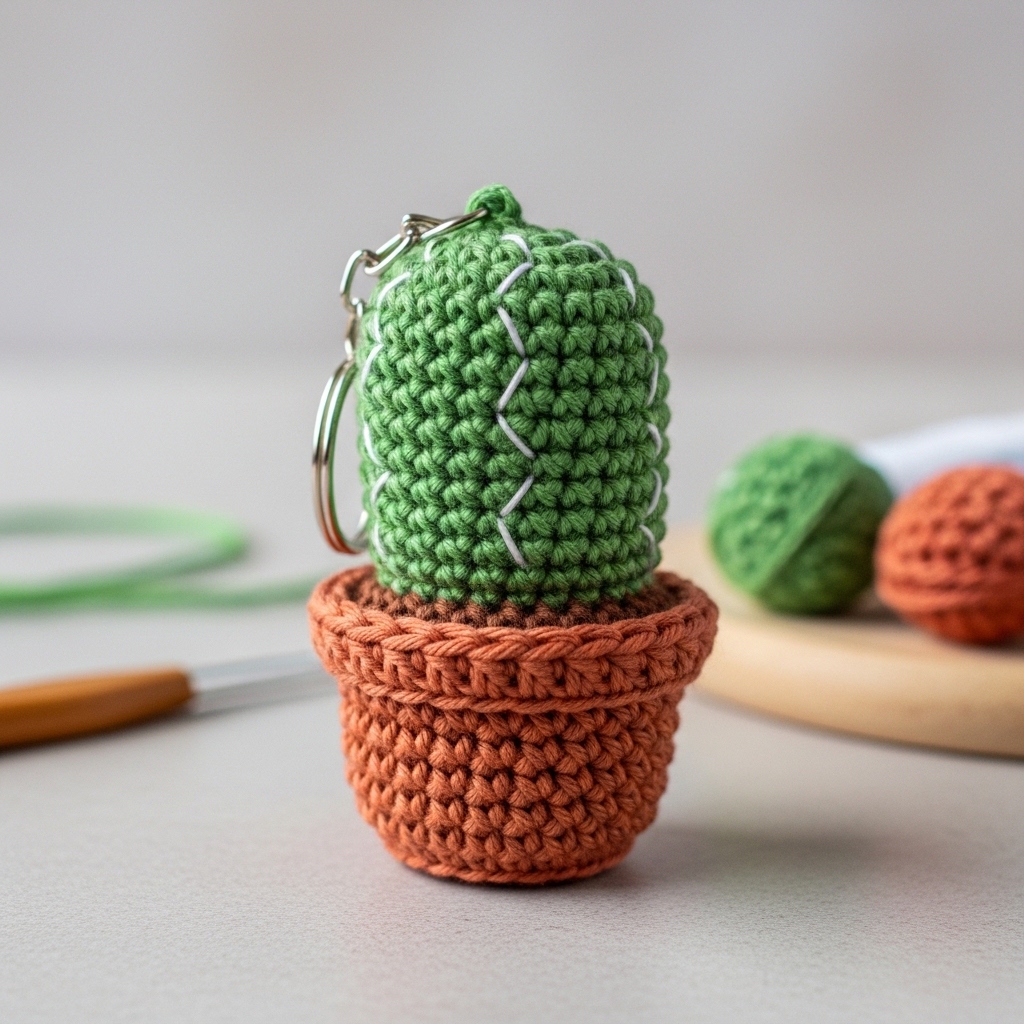
Cute mini cactus in a tiny pot — low-maintenance “plant” that never needs watering.
Skill level: confident beginner
Finished size (approx): 2–2.5 in tall (cactus) + 0.75–1 in pot
Materials
- Fingering/sport cotton in green (cactus) ~6–10 yd, brown or terracotta ~4–6 yd for pot.
- Hook: 2.5–3.0 mm.
- Polyester stuffing, small keyring & 1 jump ring, tapestry needle.
Stitch idea
Work small tube for cactus (worked in continuous rounds), small pot as shallow cup, then join and add tiny embroidered spines.
Step-by-step
Cactus body (make 1)
- MR, ch1, 6 sc in MR — (6).
- inc around — (12).
- sc 1, inc around — (18).
- sc around for 4 rounds (even) — (18).
- sc 2, dec around — (12).
- sc around 1 round. Stuff firmly.
- dec around until small opening remains (6), fasten off leaving tail for sewing. Close and bury tail.
Pot (make 1)
- With terracotta: MR, ch1, 6 sc in MR — (6).
- inc around — (12).
- sc 1, inc around — (18).
- sc around 1–2 rounds to make pot wall height (adjust). Fold top edge outward and sc through both loops to make a rim if you like. Fasten off leaving long tail.
Assembly
- Insert cactus base into pot, lightly stuff pot so cactus sits firmly. Sew cactus to pot rim with mattress stitch so it’s secure.
- Use white yarn to embroider tiny “spines”: small straight stitches spaced around the cactus. Or use tiny French knots.
- Attach keyring: sew a short length of yarn loop at top of cactus (or create a small flat loop of chain 6 closed into a ring) and attach jump ring to it, then the split keyring. Alternatively stitch a small felt circle on inside top of cactus and sew a jump ring through it for reinforcement.
Variations
- Make a prickly pear (flattened pads) by crocheting oval pads and joining.
- Add a tiny flower (single round of 5 dc petals) on cactus top.
2. Crochet Cute Cat Head Keychain Pattern
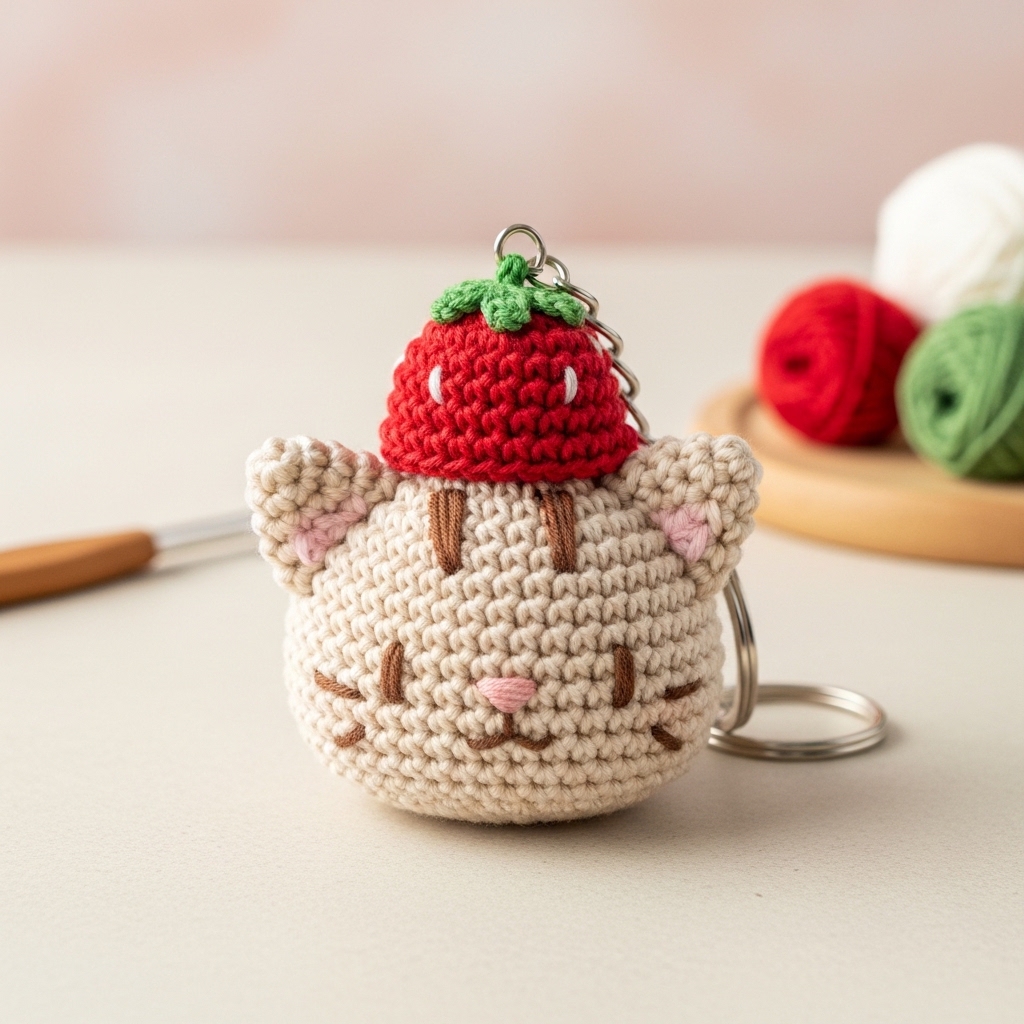
Cat head with a tiny strawberry cap — adorable and full of personality.
Skill level: intermediate (small shaping + applique cap)
Finished size: ~2–2.5 in across (head) + small cap
Materials
- Fingering yarn: main cat color ~10 yd, cap color (strawberry red) ~3–4 yd, green for tiny leaf ~1–2 yd.
- Hook: 2.5–3.0 mm.
- Small amount of stuffing, embroidery floss for face, keyring & jump ring.
Stitch idea
Amigurumi head: worked in continuous rounds, simple ear shaping, tiny appliqué cap made flat and sewn on.
Step-by-step
Head
- MR, ch1, 6 sc — (6).
- inc around — (12).
- sc1, inc around — (18).
- sc2, inc around — (24).
- sc around 3 rounds (24).
- sc2, dec around — (18).
- Begin ear shaping rounds: sc around to positions for ears, leave small gaps (or make ears separately). Continue sc1, dec until head begins to close but leave opening to stuff. Stuff firmly. Finish decreasing to close. Fasten off and weave tail inside.
Ears (make 2)
- With main color: ch 4. Row 1: sc in 2nd ch from hook and across (3), turn. Row 2: sc across (3). Fold and sew base to head where ear positions chosen; attach firmly. Alternatively work small cone: MR, 4 sc, inc to 8, then sc 2 rounds and close.
Face
- Use embroidery floss to sew eyes (small vertical stitches or French knots) and a little nose/ mouth (tiny inverted “Y”). For safety eyes on keychains, we recommend embroidered eyes for children’s safety.
Strawberry cap
- With red: MR, ch1, 6 sc in MR. R2: inc around → 12. R3: sc1, inc → 18. R4: sc around 1 round and fasten. Make tiny green leaf: ch6, sc in 2nd ch, hdc, dc, hdc, sc; fasten. Sew leaf to cap top. Sew cap onto head top offset like a little beanie.
Attachment
- Add small chain loop or yarn loop at top back of head, add jump ring and keyring.
Variations
- Make different cap themes: tiny pumpkin, tiny hat, tiny flower crown.
3. Crochet Adorable Cat Paw Keychain Pattern
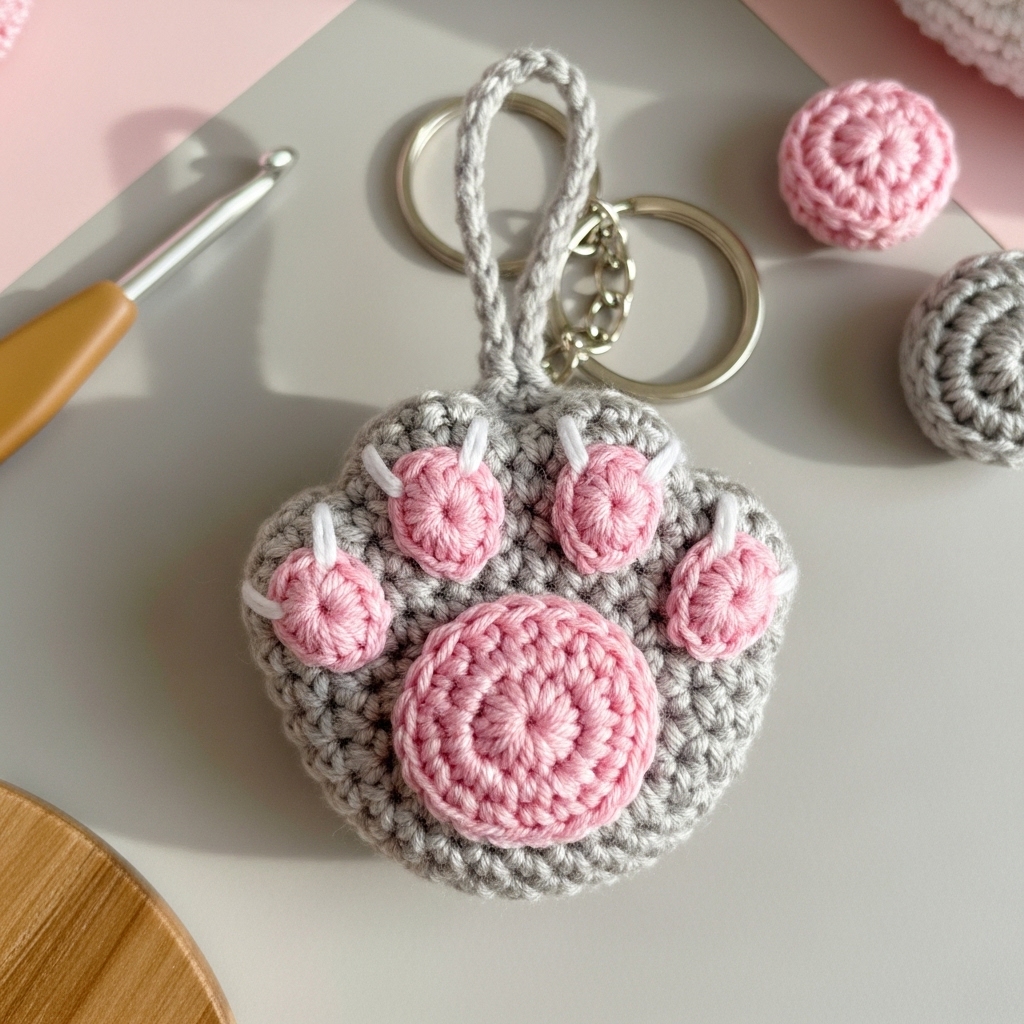
Tiny paw pad with embroidered claws — ultra-cute and easy to hold.
Skill level: confident beginner
Finished size: ~1.5–2 in wide
Materials
- Fingering or sport yarn: main color for paw ~6–8 yd, contrast pink for pads ~3 yd.
- Hook: 2.5–3.0 mm.
- Small amount of stuffing, keyring, jump ring.
Step-by-step
Base paw (flat, then stuffed lightly)
- MR, ch1, 6 sc — (6).
- inc around — (12).
- sc1, inc around — (18).
- sc around 2 rounds to make a slightly oval pad. Fasten off leaving tail.
Pad circles (make 4 small pads)
- With pink: MR, ch1, 6 sc in MR, sl st to join, fasten leaving tail to sew. Make three small pads for toes and one larger for center (larger: MR, 8 sc then 12). Sew pink pads onto base in paw arrangement.
Stuff & finish
- Put a tiny dab of stuffing under the paw base (optional) to give slight puff. Sew an underside back cover or leave flat. Attach a small yarn loop at top for keyring and sew a jump ring through it.
Embroidery
- Add tiny embroidered claws with white or pale pink floss — short vertical stitches at the top of each toe pad.
Variations
- Make paw in different animal colors (bear, fox) and add a felt backing.
4. Crochet Angry Little Bunny Keychain Pattern
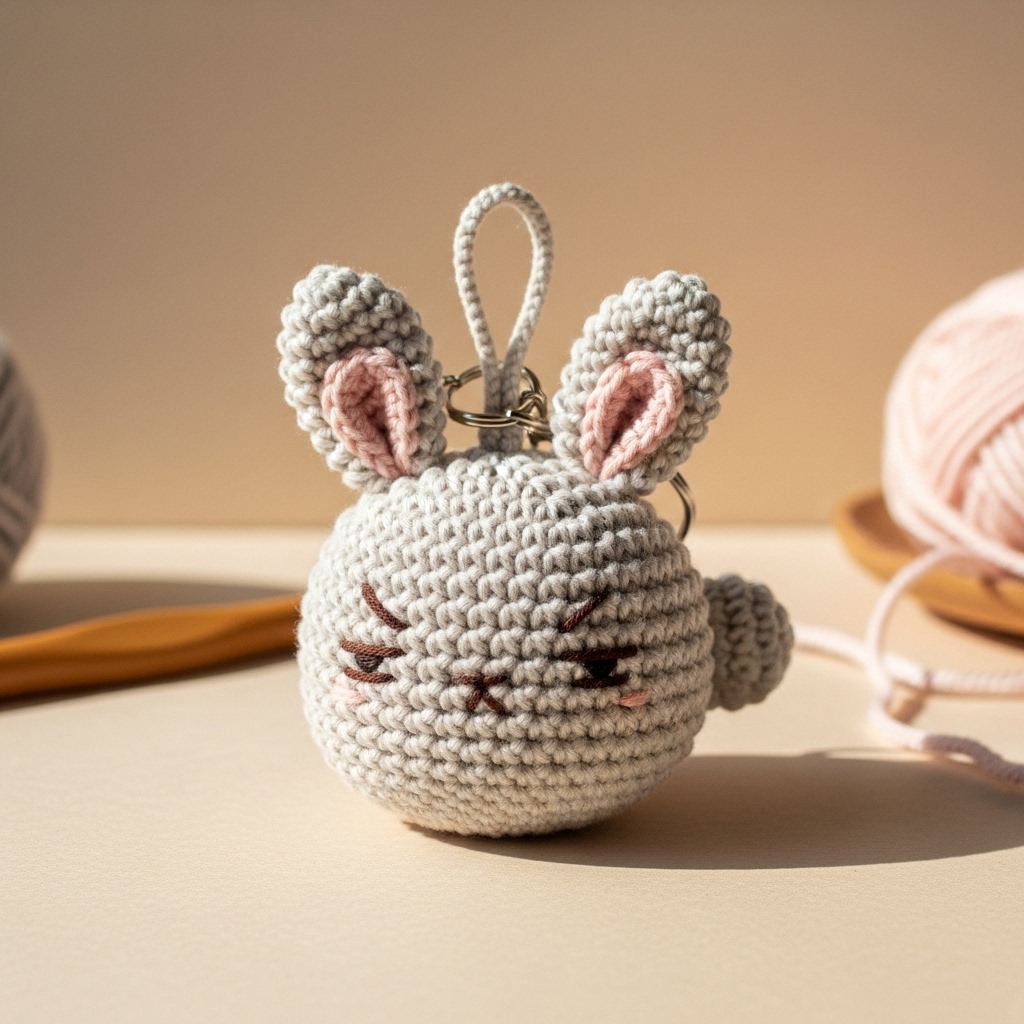
A small grumpy-eyed bunny — full of character with little ears and a scowly face.
Skill level: intermediate
Finished size: ~2.5–3 in tall including ears
Materials
- Fingering yarn: main bunny color ~10–15 yd; inner ear contrasting ~2 yd.
- Hook: 2.5–3.0 mm.
- Stuffing, embroidery floss for face, small keyring.
Step-by-step
Head/body (combined stubby shape)
- MR, ch1, 6 sc — (6).
- inc around → 12.
- sc1, inc → 18.
- sc around 4 rounds (18).
- sc1, dec around → 12. Stuff lightly. Continue dec around to close top (if making head-only) or keep open to attach ears.
Ears (make 2)
- With main color: ch 6, sc in 2nd ch and across (5), ch1 turn; sc across 4 rows to make small ear, or make a cone shape with MR 6 → 10 sc to create standing ear. Add inner ear small oval in contrasting pink sewn on.
Face (angry expression)
- Embroider slanted eyebrows with black floss using short diagonal stitches (two stitches per eyebrow), add small slanted eyes (horizontal slits), and an upside-down “v” mouth for scowl. Embroidery gives most expression — make eyebrows angled down toward center.
Tail or little body
- For a tiny body, continue working more rounds to give height and close. For a bobble tail, make a small puff stitch ball and sew to the back.
Assembly
- Sew ears to top, ensure strong attachment. Add keyring loop at top center.
Variations
- Make happy bunny by changing eyebrow angle.
- Make mini carrot accessory with orange yarn and green frill to hang next to bunny on the same keyring.
5. Crochet Sakura Flower Keychain Pattern
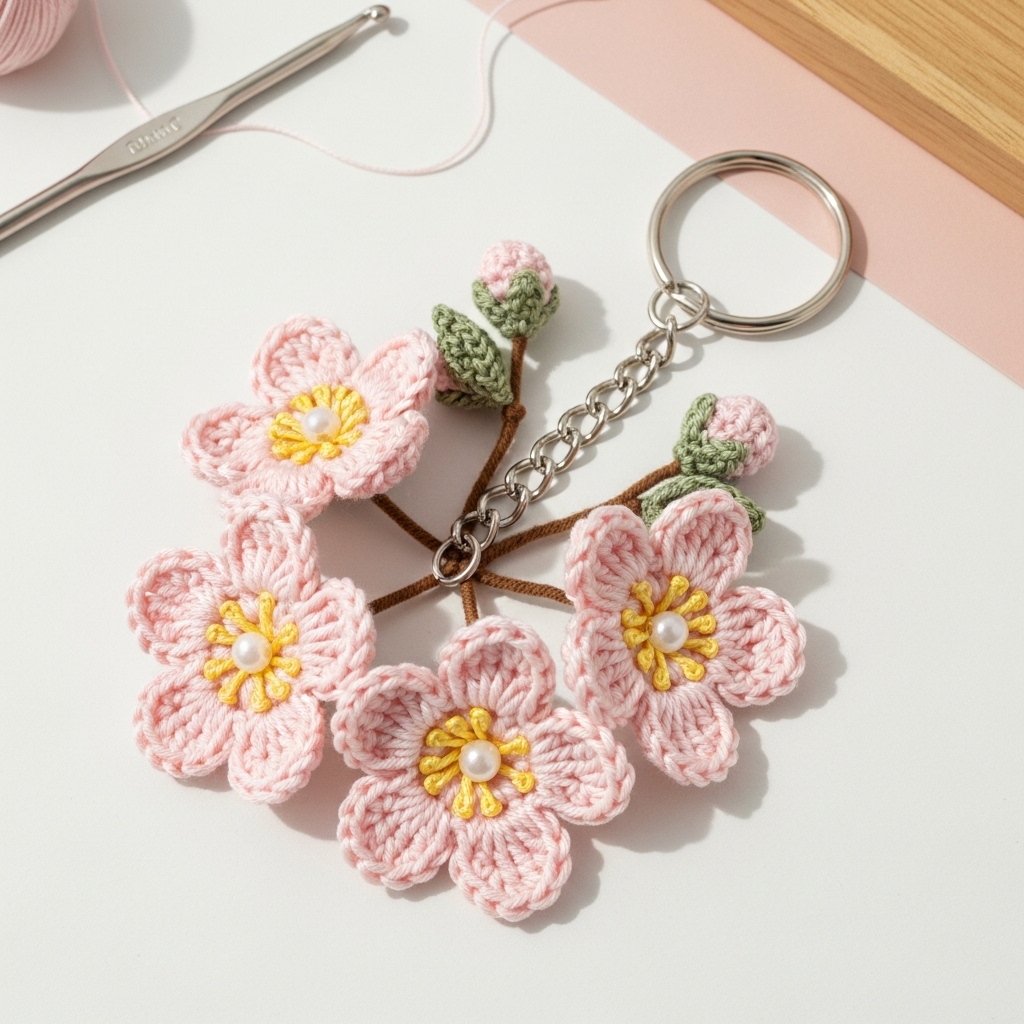
Delicate cherry blossom flowers on a short chain — elegant and light.
Skill level: confident beginner
Finished size: flower ~1.5–2 in diameter
Materials
- Fingering/thread in pale pink and yellow ~5–10 yd.
- Hook: 2.0–2.5 mm (smaller for crisp petals).
- Small bead or tiny pearl for center, keyring + short chain, jump rings.
Step-by-step
Single sakura blossom (one flower)
- MR, ch1, 6 sc in MR; sl st to join — (6). Pull ring tight.
- R2: ch 3, sl st in next st repeat 6 times (makes 6 loops).
- R3 (petals): In each ch-3 loop work sc, hdc, 2 dc, hdc, sc — creates a rounded petal. Repeat for all 6 petals. Fasten off leaving tail.
- Add a tiny bead or pearl to center by sewing in place.
Leaf / stem (optional)
- Make a small chain of 6 and sc back to make a leaf shape; attach behind flower.
Assembly
- Sew a small jump ring to the back of the blossom (use a few stitches to wrap around ring) and attach to keychain chain. If you want multiple flowers, make 2–3 small blossoms and attach at different lengths for a cluster.
Finish
- Lightly block petals by shaping with fingers on a foam pad if using thread. For yarn, gently steam to set.
Variations
- Make mini buds (smaller petals) and arrange 3 blossoms + 2 buds on a short chain for a branch look.
6. Crochet Cherry Keychain Pattern
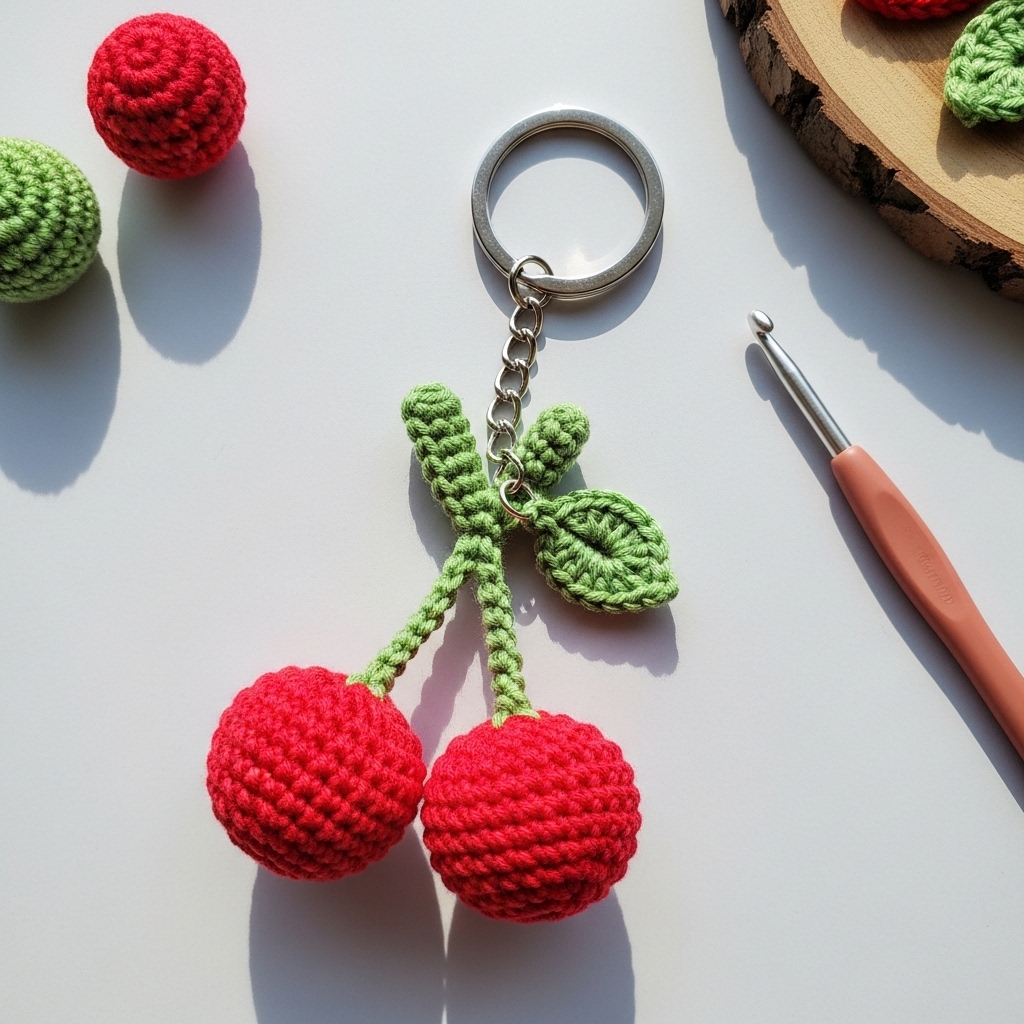
Two tiny cherries joined by a stem — sweet and cute on backpacks.
Skill level: confident beginner
Finished size: ~2.5 in from top of stem to bottom of cherries
Materials
- Red yarn for cherries ~6–8 yd, green for stems ~3 yd.
- Hook: 2.5–3.0 mm.
- Small stuffing, keyring with chain, jump rings.
Step-by-step
Cherry (make 2 identical)
- MR, ch1, 6 sc — (6).
- inc around — (12).
- sc1, inc around — (18).
- sc around 2 rounds.
- sc1, dec around → (12). Stuff firmly.
- dec around until closed. Fasten off leaving tail for sewing.
Stem & join
- Make a short chain of 10 in green, attach both cherries to the end with a small seam so they dangle from a V-shaped stem: fold chain in half and sew cherries at two adjacent points so they hang like a pair. Add small green leaf if desired (ch5, sc back).
Attach to keyring
- Sew a jump ring to top center of stem (stitch or wrap yarn around ring and sew down) and attach chain/keyring.
Variations
- Make sour-berry pair with pink and cream for contrast.
- Add small sewn-on felt tag with initial for personalization.
7. Crochet Coquette Lacy Bow Heart Keychain with Pearl Dangling Pattern
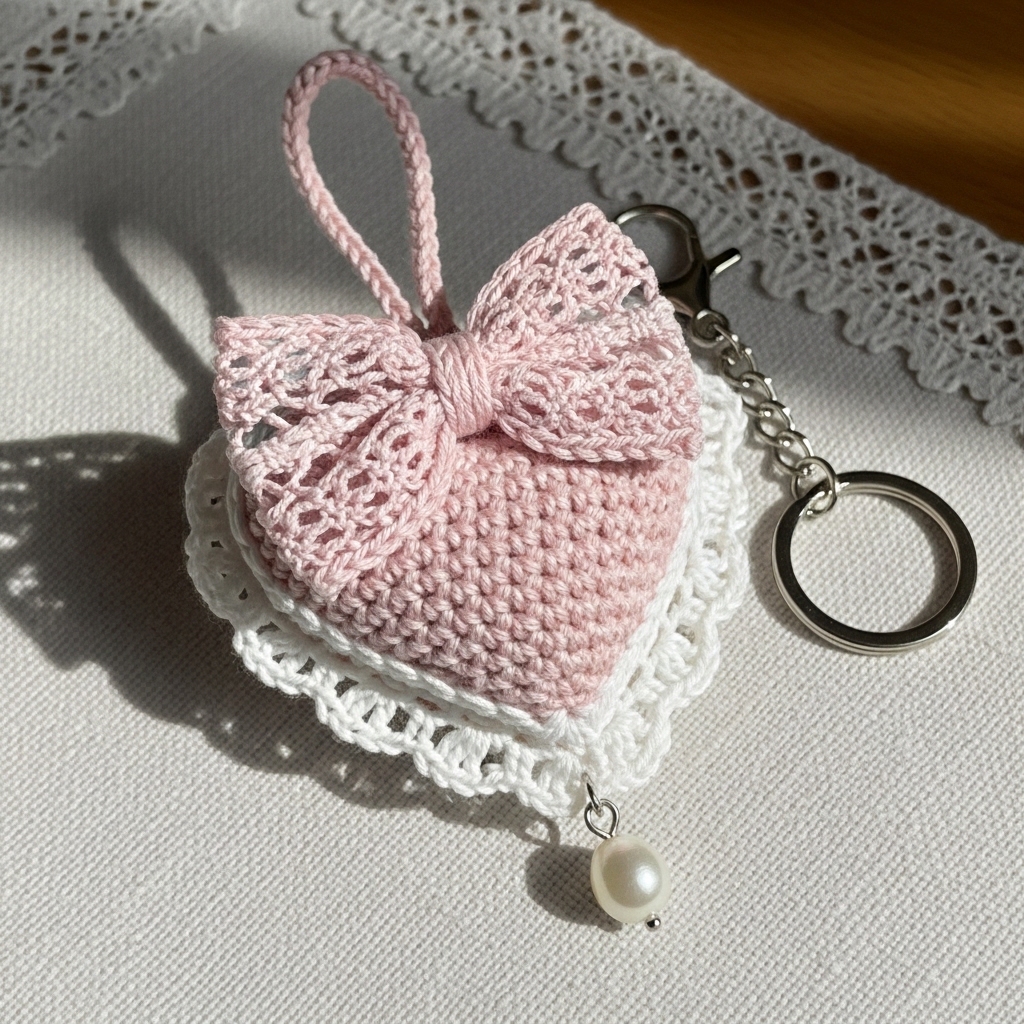
A lacy heart with a coquette bow on top and a tiny pearl dangle for a romantic / fancy keychain.
Skill level: intermediate (lace + small hardware dangle)
Finished size: heart ~1.75–2 in; overall length with bow ~3 in
Materials
- Fine cotton or fingering: heart color ~10 yd, bow contrast ~6 yd.
- Hook: 2.25–3.0 mm.
- Small freshwater pearl on head pin, tiny jump ring, keyring.
- Tapestry needle, pliers.
Step-by-step
Lacy heart (flat motif)
- Ch 6. Row 1: sc in 2nd ch from hook and across (5 sc). Turn.
- R2: ch 3, dc in first, (ch 1, skip 1, dc in next) across to form airy row. Turn.
- R3: work shells to shape heart lobes: into each small chain space work (sc, hdc, 3 dc, hdc, sc) to form a lobe. Repeat on each side and shape center point with few decreases. You can also follow a small 3-round heart chart for a regular heart. Fasten off and block lightly.
Bow
- Make a small bow strip: ch 18, sc across for 3 rows (or to desired width). Fold and cinch middle with a wrap to make bow. Sew bow centered at top of heart.
Pearl dangle
- Thread pearl onto head pin, form small loop on top with round nose pliers, close loop. Use a tiny jump ring to attach pearl loop to underside center of heart or hang it from bow center. Make sure the head pin loop is fully closed.
Assembly
- Secure bow to heart with small whipstitches; insert felt on back if you like neat finish. Attach a small jump ring at the back top of the heart by sewing a small yarn loop around ring and tightening; attach the keyring chain to jump ring.
Finishing
- Hide ends, block heart so edges are lacy and even. Make sure pearl is securely attached (add a dab of clear fabric glue if you want extra security, but stitching is preferable).
Variations
- Make bow detachable by sewing a tiny snap behind, letting wearer swap bows.
- Swap pearl for tiny crystal or charm for seasonal themes.
Final finishing & gift packaging ideas
- Weave and secure: For keychains that will be used daily, weave tails at least 10–15 mm inside the piece, knot, and weave again. Reinforce attachment points with extra passes.
- Metal hardware: Use pliers to fully close any wire loops. If attaching split rings directly through yarn, use a small felt reinforcement to reduce abrasion.
- Personalize: Add tiny tags with initials (stamped metal or small leather) or use color themes for recipients.
- Packaging: Present single keychains on a little cardstock backing with two punched holes and tied with twine, or put 3–4 in a small organza bag for gift sets.
conclusion
These seven keychain patterns — from the tiny mini cactus to the lacy heart with pearl dangle — are designed to be quick, customizable, and highly giftable. Start with the project that fits your current skill level, make a prototype to test gauge and attachment method, and then batch-produce a few for gifts or a craft market.