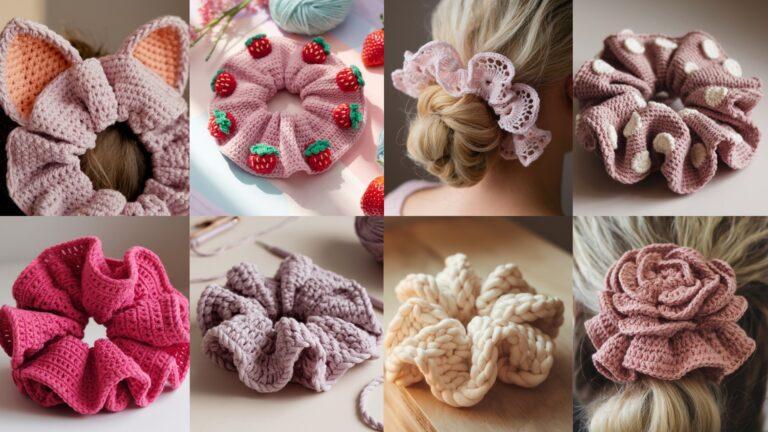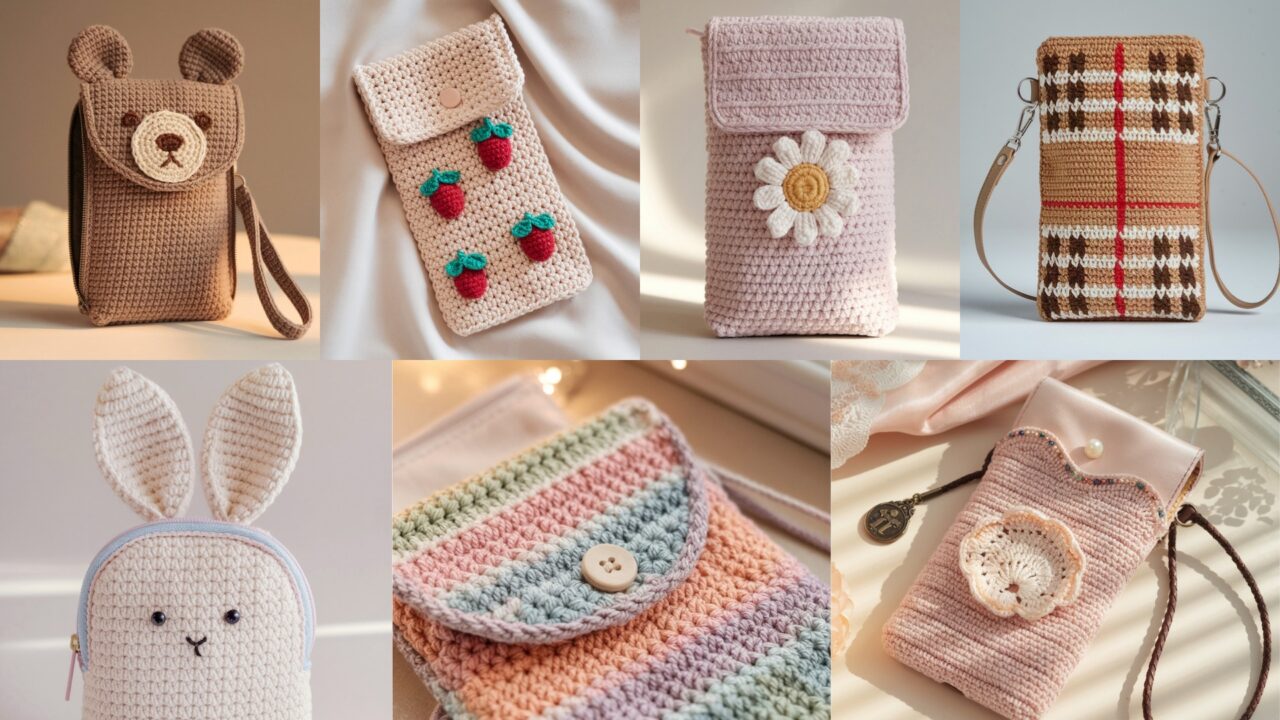
A phone pouch is the perfect crochet project: quick, portable, and actually useful. These seven patterns cover clean modern checkers, adorable animals, floral charm, fruit motifs, classic granny texture, and vintage vibes. I wrote every pattern so your readers can scale them for any phone size — not just the tiny rectangle in your imagination.
Before you jump in, do three things: swatch, measure the phone with a case (yes, include the case), and decide whether you want a strap or a pocket. Don’t skip the swatch — it’s the single thing that saves you hours of frogging later.
Universal notes (read this — it saves time)
Abbreviations (US): ch, sc, hdc, dc, tr, sl st, st(s), BLO/FLO = back/front loop only, MR = magic ring, inc = 2 sc in same st, dec = sc2tog.
Tools & recommended yarn:
- For structure: 100% cotton or cotton-blend worsted (#4) — washable and crisp.
- For softer, squishier case: acrylic worsted or hold DK doubled.
- Hook examples: 4.0–5.0 mm depending on yarn.
- Tapestry needle, scissors, optional interfacing fabric for lining, small zipper or snap, strap hardware (D-rings, swivel hooks) if desired.
Swatch & gauge (do it):
- Make a 4″ × 4″ swatch in the stitch you’ll use and block if you’ll wash it.
- Count stitches across 4″. Example I use for math below: 16 sc across 4″ → 16 ÷ 4 = 4 sts/in. Write that down.
- Also count rows per 4″ to calculate height in rows.
Measuring the phone: Always measure the phone with its case (width × height × thickness). For the math examples below I’ll use a sample modern phone + case size: 3.25″ wide × 6.5″ tall. You can plug your own measurements into the formulas I give.
How to calculate stitches for width:
- Stitches needed = finished width (in inches) × stitches per inch.
- Example: sample phone width 3.25″ × 4 sts/in = 13 stitches. Write digits: 3.25 × 4 = 13. So foundation chains or motif counts should produce ~13 stitches across.
Ease: Add 0.25–0.5″ horizontal ease so the phone slides in without struggle. For snug cases use 0–0.125″ ease. I’ll show sample counts with 0.25″ ease added.
Closures & straps: zipper, snap, magnetic snap, flap with button, or open top (for crossbody wear). Straps can be short wrist loops, long crossbody cords, or detachable webbing straps with swivel hooks. For durability, reinforce strap attachments with cotton webbing or extra stitching.
Lining: strongly recommended for phone pouches — protects from snagging, hides color carries, and gives shape. Use quilting cotton and sew in before closure is attached. For a padded case add a layer of foam or felt between crochet and lining.
1. Crochet Checkered Phone Pouch Pattern
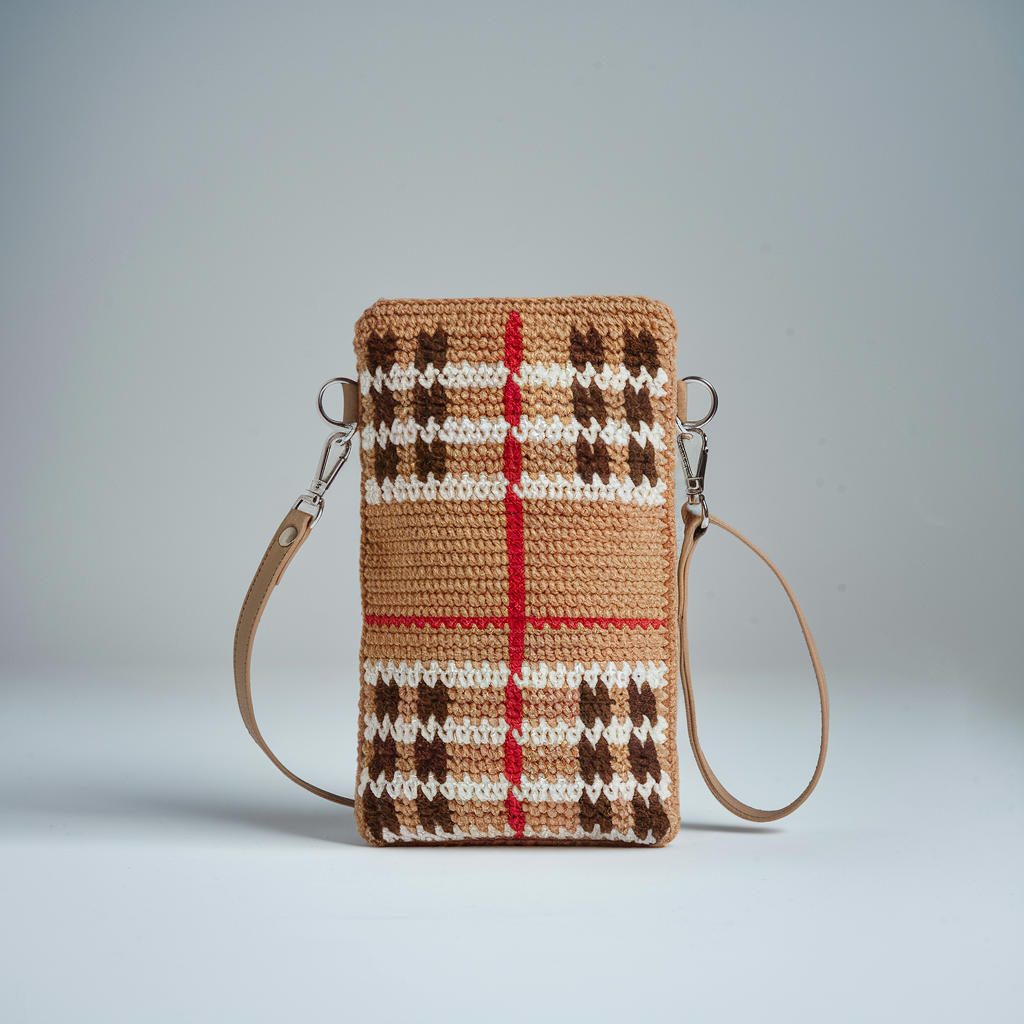
Clean, modern, graphic. Checkerboard with two colors using tapestry crochet (single crochet colorwork). Works for minimalist and bold palettes.
Skill level: Confident Beginner (basic tapestry colorwork)
Materials: worsted cotton (#4) in two colors (MC, CC), 4.0 mm hook, tapestry needle, optional zipper or snap, lining fabric.
Sample phone size for math: phone w/case 3.25″ × 6.5″. Gauge: 4 sts/in (use your swatch).
Math for width
- Add horizontal ease 0.25″: finished width = 3.25 + 0.25 = 3.5″.
- Stitches needed = 3.5 × 4 = 14 stitches. (Three point five times four equals fourteen.)
- Foundation: chain 15 and sc in 2nd ch from hook or ch14 + turning ch conventions — make 14 sc across.
Construction (flat panel, then fold & seam)
- Ch 15, sc in 2nd ch from hook and across → 14 sc. Turn.
- Work tapestry chart of checker squares: decide square size in stitches/rows — example 2 × 2 stitch squares gives a crisp small checker. That means each color block is 2 sts wide × 2 rows tall. Your panel width 14 sts gives 7 blocks across. For height, target finished phone height with 0.25″ top ease: 6.5 + 0.25 = 6.75″. Rows needed = 6.75 × (rows per inch). If row gauge = 4 rows/in -> rows needed = 6.75 × 4 = 27 rows. So make 27 rows alternating color per chart. (Compute: 6.75 × 4 = 27.)
- Follow tapestry technique: carry non-active color along inside, keep tension even, and catch floats every 4–6 stitches if floats get long.
- Block panel lightly. Cut lining fabric to inner dimensions minus 1/4″ seam allowances; sew lining and hand-stitch into crochet inside.
- Fold panel so edges meet, whipstitch sides leaving top open. Insert lining and sew lining to top edge. Add zipper across top inside seam, or add a small flap with snap.
Strap option
- Add a short strap by making crocheted tube (ch 30, join, sc in each ch around for a thin strap) and attach with swivel hooks sewn to small D-rings anchored to reinforced tabs sewn into side seam.
Finishing
- Weave ends, press lining, test fit with phone. For padding, add a layer of felt between crochet and lining.
Variation: use mosaic crochet method if you prefer to avoid carrying floats (but mosaic requires more color shifts).
2. Crochet Cute Rabbit Phone Pouch Pattern
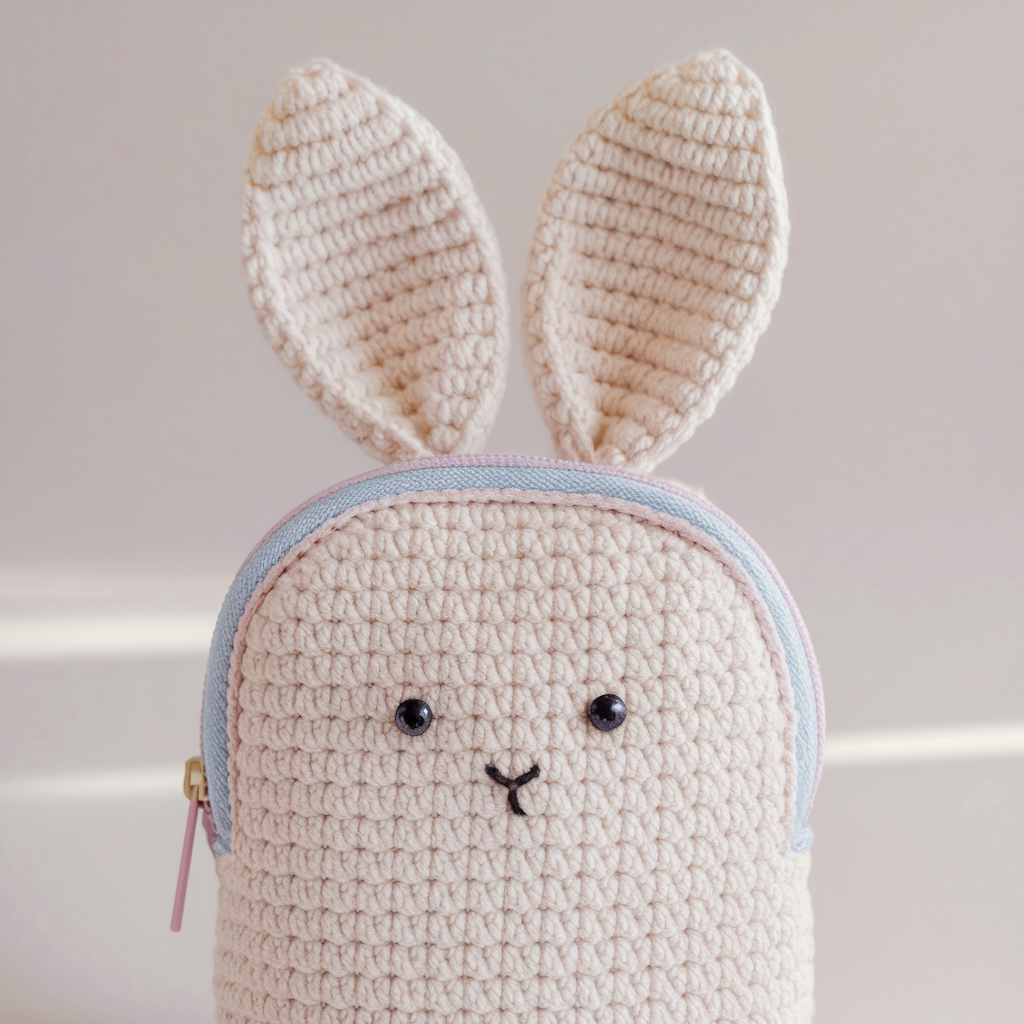
Too-cute rabbit face with ears peeking out. Works best with a flap closure or zippered top. For baby gifts or playful audiences.
Skill level: Confident Beginner → Intermediate (appliqué + shaping)
Materials: worsted cotton in main color + contrast for face details, 4.0 mm hook, small amounts of black/white embroidery thread for eyes, tapestry needle, lining, snap or magnet for flap.
Sample size & math: same phone sample. Gauge 4 sts/in.
Width math
- Finished width target 3.5″ (3.25 + 0.25 ease) → 3.5 × 4 = 14 sts across. Chain 15 (or chain 14 + turning ch convention). Work 14 sc across.
Construction overview
- Work a flat panel for body, shape a small flap for closure and attach rabbit ears and facial appliqués. Line and finish.
Step-by-step
Body panel
- Ch 15, sc across 14 sts. Row gauge from swatch: rows/in = 4; target finished height for body before flap = phone height 6.5″ minus flap height 1.25″ → 6.5 − 1.25 = 5.25″. Rows needed = 5.25 × 4 = 21 rows. So work 21 rows sc. (Compute: 5.25 × 4 = 21.)
- After 21 rows stop — this forms the main pocket.
Flap
3. Pick up stitches across top edge andwork a small rounded flap or triangle: ch 3, dc across center third to make a nice closure; decrease rows symmetrically to make a triangular flap about 1.25″ tall. Add a magnet/snaps to keep closed.
Ears (make 2)
4. For each ear: ch 6, sc across (5 sc), turn. Work 4–6 rows decreasing slightly to shape a tapered ear: dec at sides each other row until 3 sc remain, finish and leave tail. Sew ears to top of flap (inside seam) so they sit upright.
Facial details
5. Make small circle for nose using MR: 6 sc in MR, sl st, fasten off. Sew on. Embroider eyes with French knots (or tiny safety eyes if not for small children). Add whiskers using embroidery thread.
Lining & padding
6. Line the pouch, sew flap magnet under lining to hide it. For extra protection, add a 2–3 mm felt pad inside lining.
Finishing & safety
- If intended for kids, embroider eyes instead of plastic safety eyes. Reinforce ear attachment with extra stitches.
Variation: make bunny with long ears that fold into pouch when zipped to make a flatter pouch for pockets.
3. Crochet Phone Pouch with a Daisy Flower Pattern

Classic floral applique; daisy sits centered or offset. Can be a flat pouch or a padded case.
Skill level: Confident Beginner
Materials: worsted cotton #4, 4.0 mm hook, small amounts contrast for daisy center & petals, lining fabric, optional zipper.
Sample math: same base counts: 14 sts across (3.5″ width target) and 27 rows height (6.75″ target) for a pouch with slight top ease. Use your swatch.
Construction overview
- Panel in sc or hdc, attach daisy applique, line and add closure.
Daisy applique (one)
- MR, ch1, 6 sc in MR; sl st to join (6).
- Petals: ch4, sl st in next; repeat 6 times to make 6 loops.
- In each loop: sc, hdc, 3 dc, hdc, sc to make rounded petal. Fasten off leaving tail to sew to panel.
Steps
- Work main panel: ch15, sc across and repeat rows until desired height (27 rows for sample). Block panel.
- Sew daisy centered on front or corner. For low-profile, sew only around center, not full petal bases.
- Line the pouch with quilting cotton; if you want padding, sandwich thin foam or felt between crochet and lining; stitch the lining to the top edge and add zipper or flap closure.
Variation & tips
- Make multiple small daisies and scatter them for a field effect.
- Use a contrasting center (yellow) and white petals for classic look, or tone-on-tone for subtlety.
4. Crochet Phone Pouch with Mini Strawberries Pattern
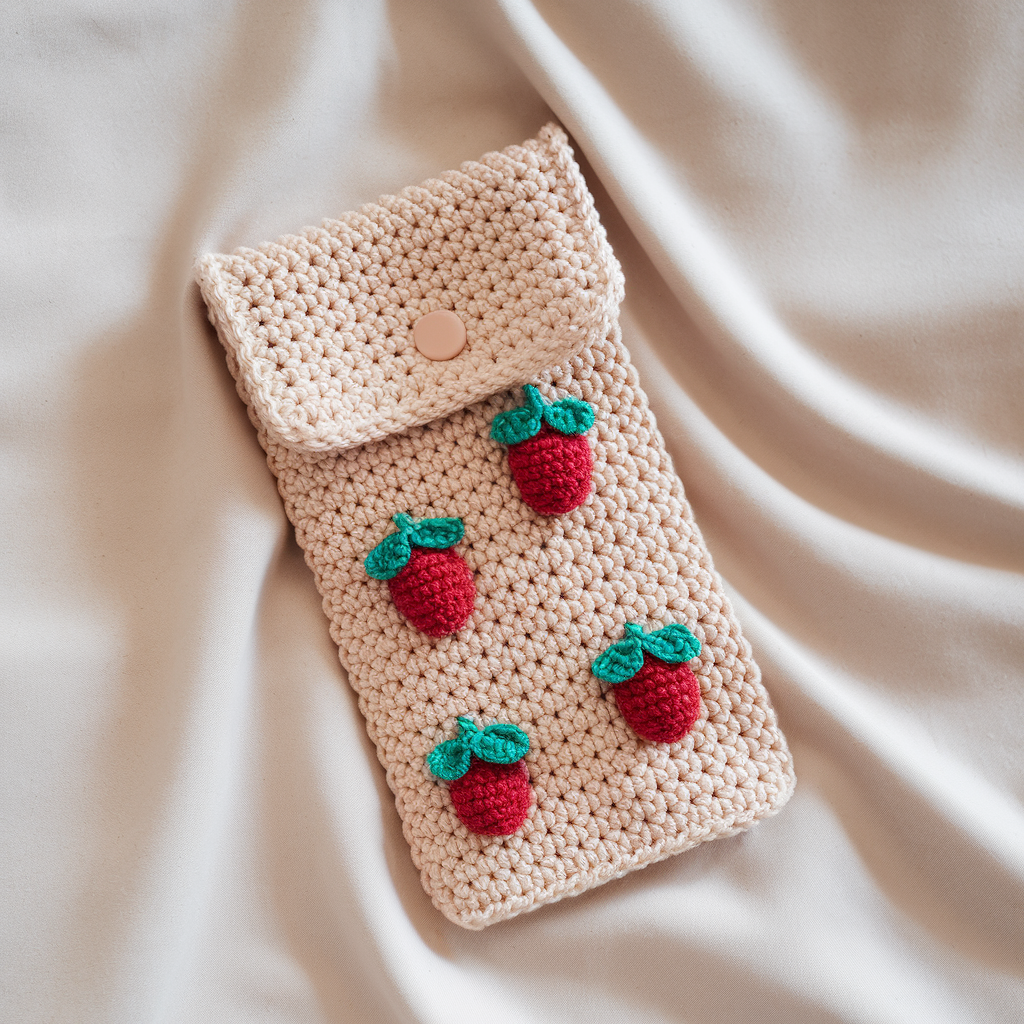
Playful 3D strawberries dotted across a simple pouch. Keep strawberries small (under 1″) and securely sewn.
Skill level: Intermediate (small amigurumi applique)
Materials: worsted cotton in red + green + tiny cream for seeds, 4.0 mm hook, stuffing for tiny berries (optional), lining.
Base math: same 14 sts across; rows determined by phone height (27 rows sample).
Strawberry mini (make 4–6)
- MR, R1: 6 sc in MR (6). R2: inc around → 12. R3: (sc1, inc) ×6 → 18. R4–R5: sc around to make body. R6: (sc1, dec) ×6 → 12. Fasten leaving tail. Optionally stuff lightly and close.
- Green cap: ch5, sc across to make tiny leaf crown and sew onto top.
- Embroider tiny seeds as french knots or small straight stitches in cream.
Assembly
- Crochet base pouch panel as before and position strawberries evenly. Sew them firmly through base and lining with multiple passes. For better durability, sew a small felt patch inside lining behind each strawberry and stitch through felt + crochet for secure anchoring.
- Add zipper or flap closure. Lining recommended because strawberries add texture that can catch things.
Tips
- Keep strawberries small and flat if the pouch must fit into tight pockets.
- Use removable appliqués (small snap under berry) if you want to wash pouch without tripping beads/stitches.
5. Crochet Granny Stitch Phone Pouch Pattern
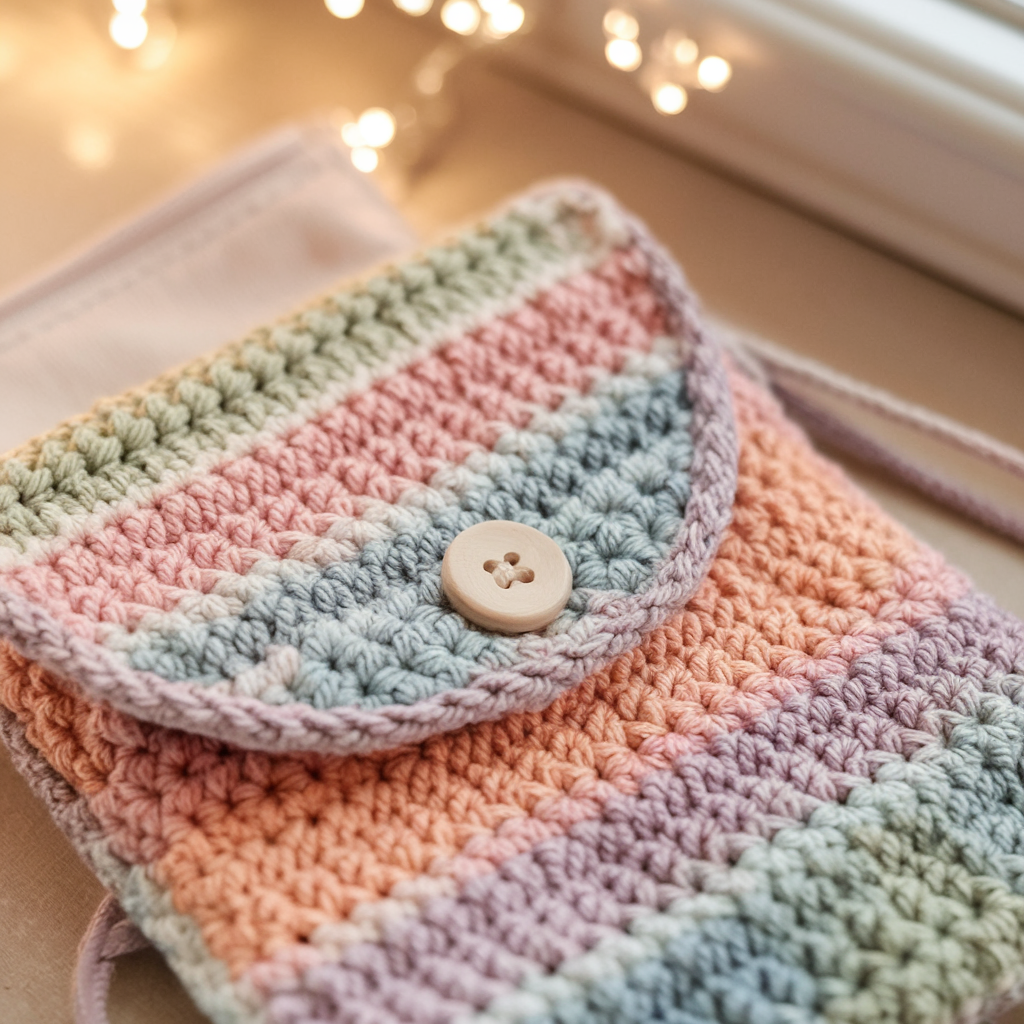
Granny texture for a classic handmade look. Great for quick motifs or mixed-color stash use. Works as a small granny square bag or a band of granny rows.
Skill level: Confident Beginner
Materials: worsted cotton in one or multiple colors, 4.5 mm hook, lining optional.
Method choices: make one large granny square and fold into a pouch, or work rows of granny stitch in a rectangular panel.
Option A — Single granny square pouch (clean, fast)
- Make a granny square to finished size slightly wider than phone: target square dimension = phone height or width depending on orientation. For our sample phone tall orientation, aim for square ~7″ so you can fold to make a tall pouch. If your swatch gauge gives 4 sts/in and typical granny round size yields 6″ at 3 rounds, continue rounds until square reaches 7″.
- Block square, fold in half, seam sides with whipstitch, add lining and zipper or top flap.
Option B — Granny strip panel
- Chain foundation to get width 14 sts (computed earlier). Instead of sc, work rows of classic granny clusters (clusters are 3 dc groups worked into chain spaces or into chains). For a neat rectangular panel, work first row as dc row then granny clusters anchored across rows.
- Work until panel height equals phone height + flap allowance. Block, fold, seam, line, and finish.
Closure & strap
- For granny texture, a flap with a loop and button looks hand-made and elegant. Sew the button through a felt backing or d-ring for durability.
- Keep lining inside to protect phone from the open holes in granny stitch.
Tip
- Because granny stitch has holes, always line if you care about small things (cards, coins) or if you want dust-free phone.
6. Crochet Bear Inspired Phone Pouch Pattern
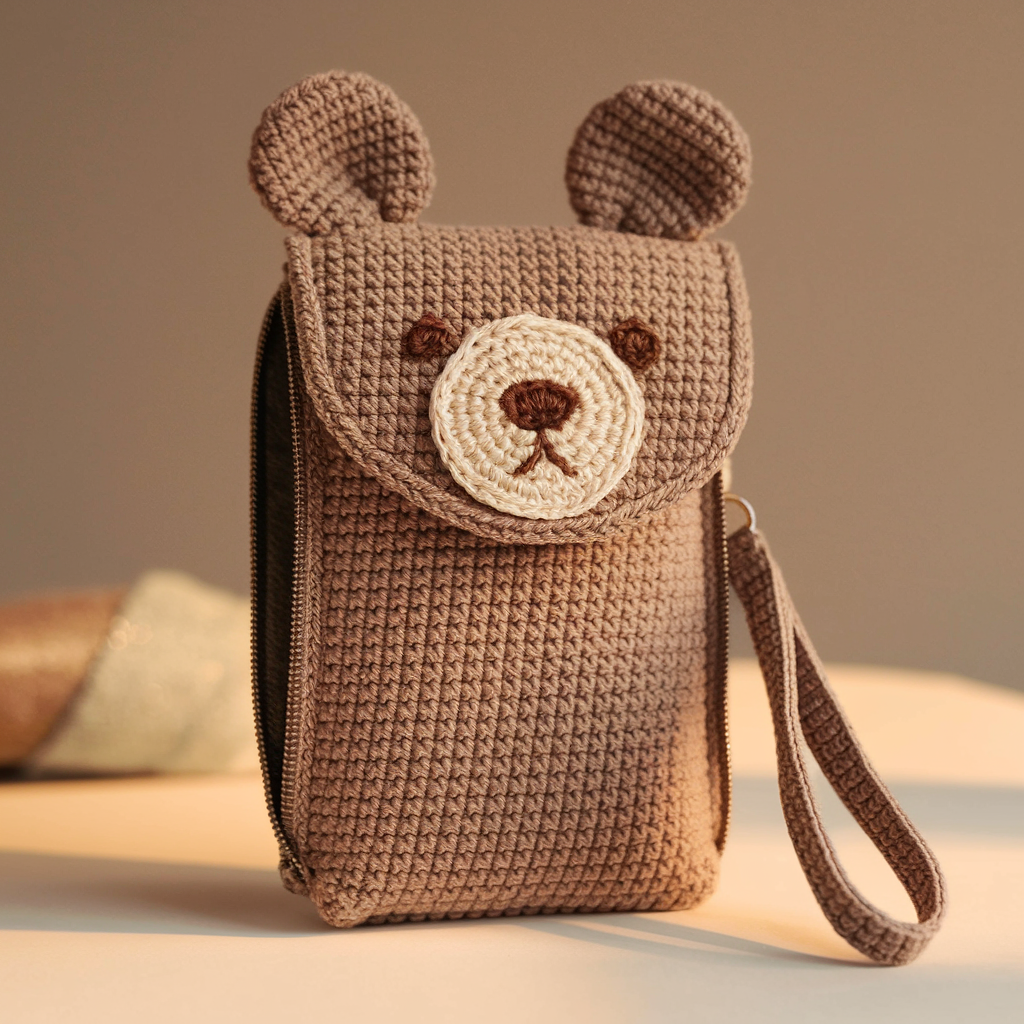
A small bear face + rounded ears. Friendly and great for kids; embroider face details for safety.
Skill level: Confident Beginner → Intermediate (appliqué + shaping)
Materials: worsted cotton, 4.0 mm hook, embroidery floss for face, lining fabric.
Construction: same base panel counts. Add round bear face applique or use front panel shaping.
Bear face applique (flat circle + ears)
- MR, 6 sc in MR; R2 inc around → 12; R3 (sc1, inc) ×6 → 18; R4 sc around to reach ~1.25″ diameter. Fasten off.
- Ears: small semi-circles or tiny triangles made with chains and sc. Sew ears to top of pouch flap.
- Embroider eyes and nose with satin stitch; for kids, avoid safety eyes — use stitched features only.
Assembly
- Panel, flap, ears, line, and secure. Add a small wrist strap for kid-safe carry (short strap that slips over wrist).
Tip
- Reinforce the base if kids will toss pouch into backpacks; attach a small leather patch at bottom inside.
7. Crochet Vintage Phone Pouch Pattern
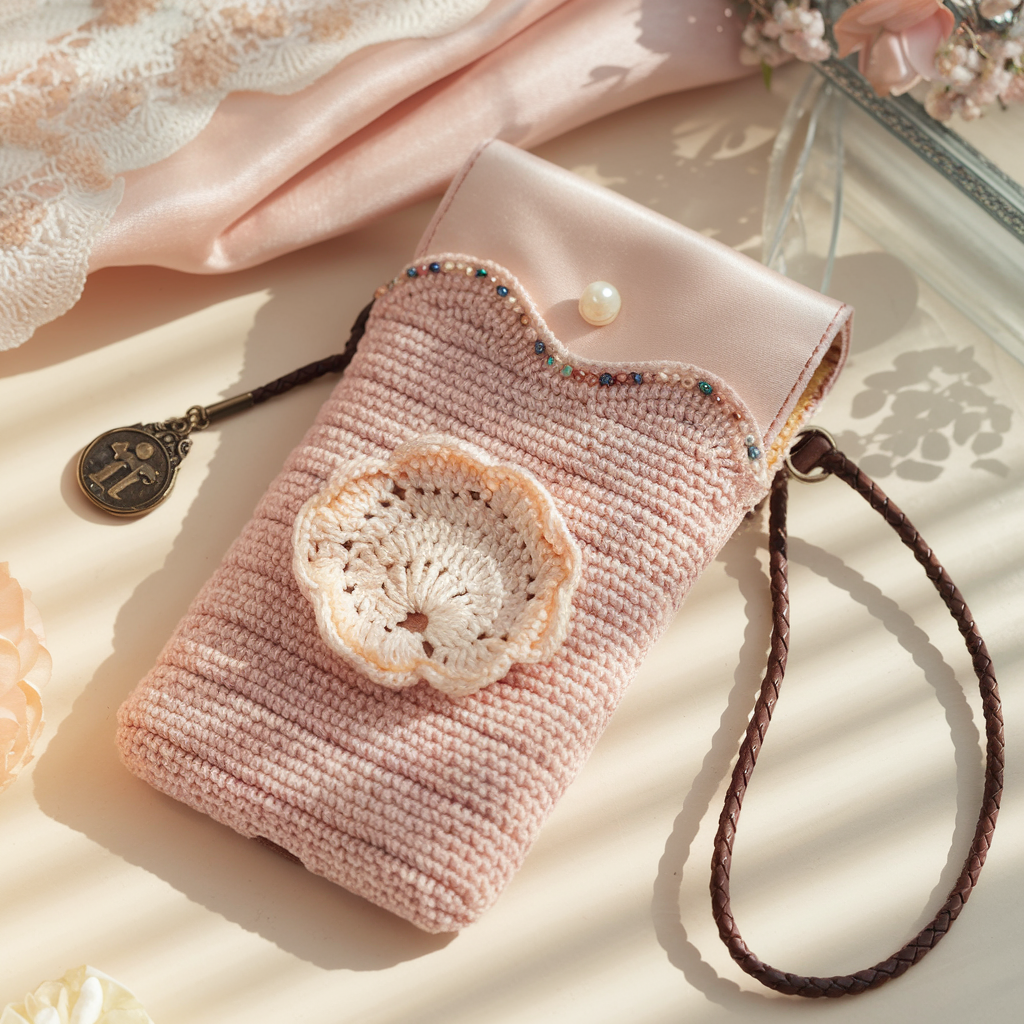
Victorian-inspired stitch panels, scalloped edge, perhaps a tiny beaded tassel. Uses textured stitches like shell or cluster for classic look.
Skill level: Intermediate (textured stitches + beading optional)
Materials: DK or fingering yarn for delicate look, 3.5–4.5 mm hook, small seed beads (optional), lining fabric.
Sample math: For a slim vintage pouch with delicate yarn, your gauge will be different. Swatch first: assume 6 sts/in with fingering. For width target 3.5″, stitches = 3.5 × 6 = 21 stitches — chain 22 and sc across or adjust to pattern repeat multiple.
Construction idea
- Work a panel in vintage shell stitch repeat (common multiple: 6 + 1). Example: foundation ch 22 (6×3 + 4 adjust to fit) — then work shells across in rows. For height, calculate rows per inch from swatch: e.g., rows/in = 6 so for 6.75″ height rows = 6.75 × 6 = 40.5 → round to 40 or 41 depending on where pattern repeat falls.
Beaded scallop finishing
- Work final row with picots and add beads at scallop points: string beads onto yarn before working last row; slide bead into place and work picot over it or place bead on center of scallop with a few secure stitches.
- Line with satin or cotton for vintage feel and insert a small internal pocket for cards.
Closure & strap
- A small flap with a decorative button (mother-of-pearl) or a narrow chain threaded through loops as a closure adds to vintage charm. For crossbody, a thin braided leather strap complements the look.
Finishing tips common to all pouches
- Lining: Cut lining to be about ⅛” smaller than crochet interior so the lining doesn’t bag. Sew lining to crochet at top edge by hand or machine for neat finish. For padded cases add thin foam/felt between crochet and lining.
- Zipper installation: Sew zipper to lining first, then hand-stitch the lined zipper assembly into the crochet top for a neat inside finish. Alternatively, use a flap with snap — easier for hand sewing.
- Reinforce stress points: Add a small fabric/woven webbing tab behind strap attachments. Sew multiple passes with upholstery thread.
- Weave ends: Hide tails inside lining where possible and tack them down to prevent unraveling.
- Care: Cotton = machine wash gentle (inside laundry bag), reshape and air dry. Acrylics similar but avoid high heat. Delicate beading or appliqués: hand wash.
Quick comparison cheat-sheet
- Want modern & bold? — Checkered.
- Want playful and kid-friendly? — Rabbit or Bear.
- Want floral charm? — Daisy.
- Want fruity/cute motif? — Mini strawberries.
- Want classic handmade texture? — Granny stitch.
- Want delicate & dressy? — Vintage with beads.
conclusion
You can make a phone pouch that looks deliberate and works. The three most common mess-ups are: wrong gauge, failing to include lining, and skimping on ease (the phone must go in with its case). Swatch, measure the phone with case, add 0.25″ ease horizontally, and pick a closure you’ll actually use (zippers are the least fussy).