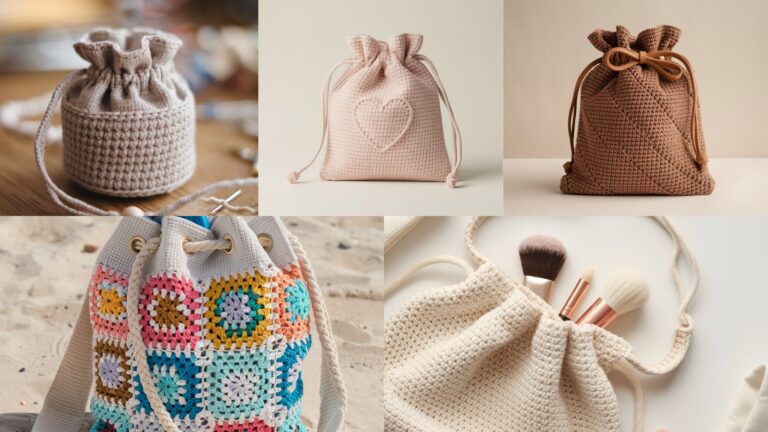
Drawstring pouches are fast, useful, and endlessly customizable — perfect for gifts, market stalls, travel organizers, and little everyday luxuries. They’re also an excellent scrap-busting project: stripes, mosaic panels, or a single textured stitch can turn leftover yarn into a polished pouch. Below you’ll find one complete, long-form post with a single introduction followed by seven full patterns. Each pattern includes skill level, materials, a worked example (adult/standard pouch ~7 × 9 in), a step-by-step construction guide, finishing and lining tips, and creative variations.
Quick essentials: tools, sizing, stitch references, and techniques you’ll use
Tools & notions
- Crochet hooks (most examples use 4.0–5.5 mm; I specify per pattern)
- Yarn: worsted/aran (Category 4) is the most versatile for pouches; DK works for smaller/finer pouches; cotton is great for structured bags.
- Tapestry needle, scissors, stitch markers, measuring tape
- Small cord or thin rope for drawstring (or crochet a cord), 2 small beads or cord stops (optional)
- Optional: lightweight cotton lining fabric and sewing needle (for lined pouches and extra structure)
Common abbreviations (US)
- ch = chain
- sl st = slip stitch
- sc = single crochet
- hdc = half double crochet
- dc = double crochet
- tr = treble crochet
- st(s) = stitch(es)
- sp = space
- sk = skip
- rep = repeat
- BLO / FLO = back loop only / front loop only
- MR = magic ring
Sizing and basic math
- The worked examples below target a standard drawstring pouch size roughly 7 in (width) × 9 in (height) when closed (flat measurements). To reach that width with worsted yarn and the stitches used, a typical foundation chain will be between 36–48 ch depending on stitch and gauge. Always make a small swatch to check stitches per inch in your chosen stitch pattern and yarn.
- When you want a larger or smaller pouch, scale the foundation chain by the stitch multiple shown for that pattern and adjust height by working more or fewer vertical rounds.
Construction approaches used in these patterns
- Tube method — work a rectangle or tube in the round, add a base (flat circle or oval), then add a drawstring channel at top. (Used by many patterns.)
- Flat panel with gusset base — make front/back panels and a long strip for the base (side gusset). Seam and add drawstring channel.
- Round base up — start with a flat circular base and work up in the round into a net or patterned body.
- Granny / motif assembly — join squares or motifs into a bag shape and add a top band for drawstring.
Finishing & lining basics
- Lining: cut a cotton rectangle to fit interior and hand-sew lining into seams for a clean interior. Lining makes small items (coins, makeup) easier to manage and prevents tiny beads from poking out.
- Drawstring channel: pick up sts for a 4–6 row firm channel, or work a crochet cord and thread through eyelets. For a tidy result, add a folded-over top edge and sew a channel inside.
- Cord finishes: knots, beads, or metal cord stops give a polished finish and prevent the drawstring from slipping back through.
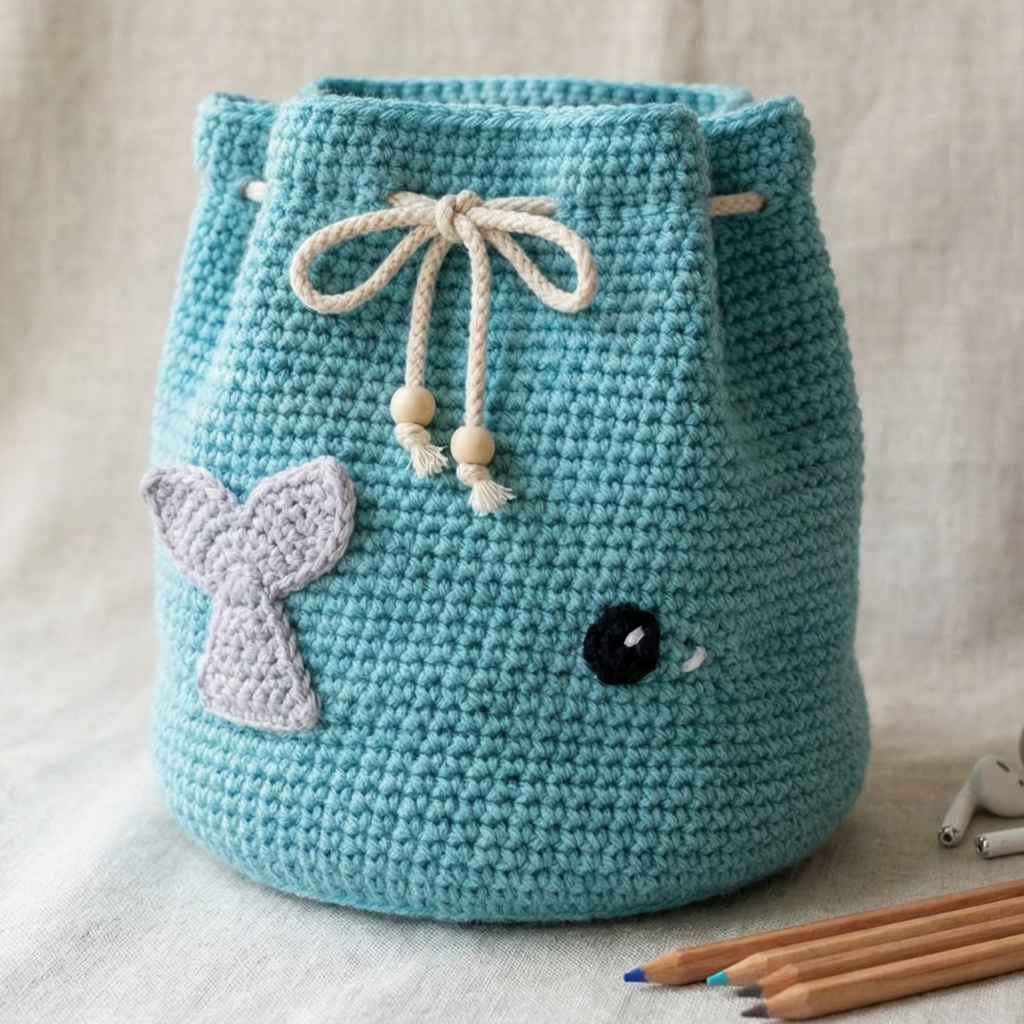
1. Crochet Whale Inspired Drawstring Pouch Pattern
Skill level: confident beginner
Vibe: playful, rounded pouch with a whale-silhouette flap or appliqué; great for kids, travel earbud cases, or stationery.
Materials (for a ~7 × 9 in pouch)
- Worsted weight cotton or acrylic yarn: MC (body) ~120–180 yd, accent color for whale tail/eye ~20 yd.
- Hook: 4.5 mm (7).
- Tapestry needle, stitch marker, small button (optional) for whale eye or embroidered eye.
- 1 length cotton cord or crocheted cord ~40 in.
Gauge & foundation
- Sample gauge: ~14 hdc = 4 inches in the round (worked example). Measure your own swatch.
- Foundation chain (worked flat then seamed): ch 42 (this yields about 7.0–7.5 in width with sample gauge).
Construction overview
- Work main body as a rectangle in hdc (or hdc in the round tube), seam sides to form a tube, add a rounded oval base (optional) or simply seam bottom, create a top band with eyelets for drawstring, then attach whale tail appliqué or crochet flap closure.
Step-by-step
Body (flat rectangle method)
- Ch 42. R1: hdc in 3rd ch from hook and across (40 hdc). Turn. (If you prefer a tighter fabric, sc can replace hdc; adjust counts.)
- R2–R20 (or until height ≈ 8.5 in): ch 2, hdc across, turn. Work even to desired height minus channel & folded edge (~8 in). Block/measure.
Bottom
Option A — simple seam: fold bottom edge together (short side), seam with slip stitch or whipstitch and flatten.
Option B — oval base (for rounded bottom): pick up sts along bottom edge and work rounds of hdc in the round, increasing on first round to close bottom into a neat oval. Example: join MC to one bottom corner, ch 1, sc evenly along bottom edge, then work 3–4 rounds of sc decreasing/increasing to shape base. (Exact counts depend on seam length — aim to close base with ~20–30 sts in round.)
Seaming
3. Fold rectangle so sides meet with RS facing out, seam one full side leaving top 1.5 in unseamed for drawstring or seam fully and make separate channel later.
Top band & drawstring eyelets
4. Pick up loops around top edge and work: R1: sc around (count = width stitches), R2: sc, ch 1, sk 1 across to make eyelet row (or sc 4, ch1, sk1 for spaced eyelets). R3–R4: sc around to reinforce. Alternatively work a dedicated 6-row band with BLO for a neat folding cuff and then pick up small holes for cord.
Whale tail appliqué (simple)
5. Using contrast color, ch 7. Row 1: sc in 2nd ch and next 5 — 6 sc groups. Row 2: ch 1, sc across 6. Row 3: ch 1, sl st, ch 3, sl st in next st to create scalloped fin lobes — adapt until small tail shape is formed. Block, sew onto front or back as a decorative patch. Embroider an eye with black yarn or attach a small button (sew tightly and avoid for small children).
Drawstring
6. Make a crocheted cord: ch 2 and sc in 2nd ch and across small length OR use a chainless CROCHET CORD (chain 2, sc in 2nd ch etc.), or use a simple i-cord if you knit. Thread cord through eyelets and tie beads at ends.
Finishing touches
- Weave all ends. If making for a child, secure button eyes or embroider eyes for safety. Add a fabric liner cut slightly smaller than interior and hand-sew for a clean inside.
Variations
- Use color stripes for ocean waves with a textured shell stitch.
- Make the flap shaped like a whale’s head and add a snap to close the pouch (instead of drawstring closure) for a novelty toy bag.
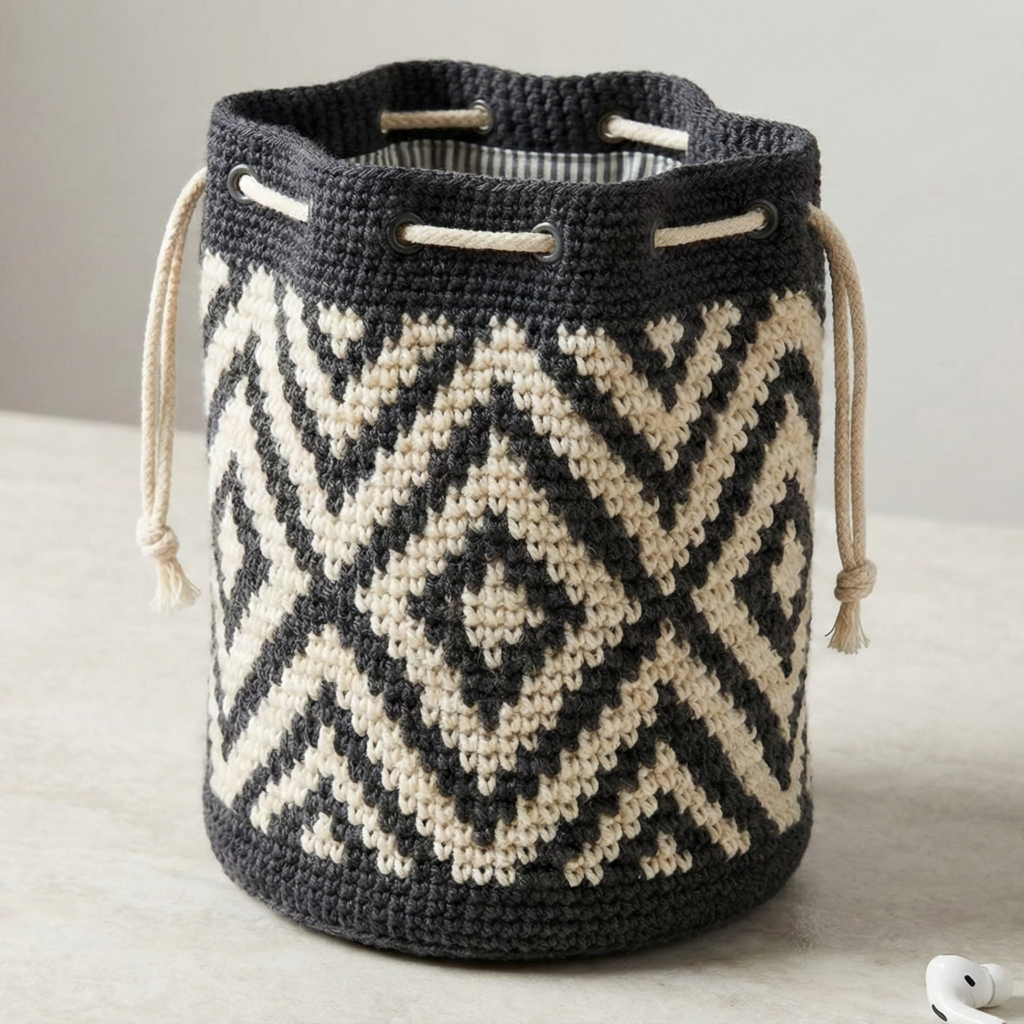
2. Crochet Fair Isle Drawstring Pouch Pattern

Skill level: intermediate (colorwork/tapestry crochet)
Vibe: sophisticated, geometric stranded colorwork inspired by Fair Isle motifs. Great for jewelry, cosmetics, or tech accessories.
Materials (for ~7 × 9 in pouch)
- Two or three colors of worsted-weight yarn; primary ~140–180 yd, secondary colors ~30–60 yd each. Cotton or acrylic works.
- Hook: 4.0 mm (G) — choose slightly smaller than label to keep colorwork tight.
- Tapestry needle, stitch markers, thin cord for drawstring.
Gauge & approach
- Tapestry crochet/stranded colorwork is worked in single crochet or hdc (sc recommended for tight floats).
- Sample gauge: ~18 sc = 4 in (measure your yarn & hook). For 7 in width you’ll need about 32 sc across (adjust counts to motif multiple). Usually design motifs as a chart measured in sts × rows. For a 32-st wide pouch, choose or design a 16–32 stitch motif and repeat horizontally.
Construction overview
- Work the pouch in single crochet in the round (spiral or joined rounds) using stranded colorwork chart. Keep floats short and catch bobbins occasionally or carry floats loosely across WS. At top, work a reinforced eyelet round for the drawstring.
Step-by-step
Foundation (in the round)
- Using MC, work a flat circle base (magic ring): MR, ch 1, 8 sc in MR. Rnd 2: inc every stitch = 16 sc. Rnd 3: sc 1, inc rep = 24. Rnd 4: sc 2, inc rep = 32. Continue adding rounds until base diameter ~3.5–4 in. (Base size depends on desired depth; for a 7 × 9 pouch a 4–4.5 in base is fine.)
Body (colorwork in the round)
2. When base is the right size, begin working vertical rounds without further increases. Transition to working your chart: place a stitch marker at the beginning of round and maintain consistent tension. Work sc in each stitch, switching colors per chart. Carry unused colors across back and trap floats every 4–6 sts or catch float by crocheting over it for two stitches then releasing.
- Continue chart rows until pouch body height is ~7.5 in (0.5 in left for top band and channel).
Eyelet & drawstring
4. Work 1 round sc in MC. Next round: sc 3, ch 1, sk 1 or sc 4, ch 1, sk 1 (depending on spacing) to create eyelets. Then 2 rounds sc to reinforce. Work last 2 rounds in hdc or sc for a neat cuff.
Lining
5. Cut and sew a lining to fit inside, tack at seams to prevent colorwork from stretching.
Drawstring
6. Make two contrasting cords and thread through eyelets; tie with decorative beads.
Finishing
- Carefully weave in ends from color changes. Press lightly (no steam on acrylic) or block gently to settle stitches.
Variations
- Work a single-motif center panel surrounded by solid color for a minimalist look.
- Use stranded colorwork only as a band and work the rest in single color to save yarn.
3. Crochet Granny Square Drawstring Pouch Pattern

Skill level: confident beginner → intermediate (joining and seaming motifs)
Vibe: cottagecore, modular, and perfect for scrappy yarn use. Make it from many small squares or a few large granny squares depending on taste.
Materials (for a 7 × 9 in finished pouch)
- Scraps or small skeins of worsted/DK — enough to make 12–16 small granny squares (if 3 in each) or 6 larger squares.
- Hook: 4.0–4.5 mm depending on granny size.
- Tapestry needle, fabric liner optional.
Construction overview (two approaches)
A. Small-square assembly — join many 3-in squares into a rectangle, seam sides and bottom, add top band with eyelets.
B. Two large square method — make two large squares and seam three edges to form a pouch then top band and drawstring.
Step-by-step (small-square approach)
Make squares
- Small classic 3-round granny square (approx 3 in): MR, ch 3 (counts dc), 2 dc, ch2, 3 dc, ch2 x3 more; join. Round 2: in corner ch2 spaces make 3 dc, ch2, 3 dc; add additional rounds if needed to reach size. Make 12 squares and block flat.
Layout & join
2. Arrange squares in a 3 × 4 rectangle (3 across × 4 down) for a front panel; make another 3 × 4 rectangle for back, or make one 3 × 8 rectangle and fold (depends on assembly). Join squares with join-as-you-go or whipstitch RS together for a flat seam.
Add base / bottom
3. Option A: make a long strip of granny or a few half-squares for a side gusset and join around. Option B: after joining panels, pick up stitches along bottom edge and work 3–4 rounds of sc to close a firm base.
Top band & eyelets
4. Work 6 rounds of sc around top edge for a firm band. Then create eyelets: sc 4, ch 1, sk 1 around; then 2 more rounds of sc.
Lining & drawstring
5. Add fabric lining to hide seams and protect small items; thread drawstring and finish with wooden beads.
Variations
- Make the pouch entirely in one color with a granny-border at top.
- Create a patchwork heart by arranging colored squares into a heart shape on one side.
4. Crochet Mosaic Drawstring Pouch Pattern
Skill level: intermediate (mosaic crochet techniques)
Vibe: crisp geometric pattern without many carried floats — mosaic uses slipped stitches and two colors per row for blocky motifs.
Materials (for 7 × 9 in pouch)
- Two contrasting worsted-weight colors (MC + CC). MC ~150 yd, CC ~60 yd.
- Hook: 4.5 mm.
- Tapestry needle, lining optional.
Technique notes
- Mosaic crochet normally uses dc (or hdc) in rows with slip-stitch colorwork to build blocks. It’s worked in the round for a pouch but can be adapted to in-the-round mosaic by alternating color rounds.
Construction overview
- Make base in MC (flat circle), then work mosaic band in the round using charted mosaic pattern repeating every N stitches. Mosaic works beautifully for bold diamonds, chevrons, and checker motifs.
Step-by-step
Base
- MR, ch 2, work 10 dc in ring, sl st to join (10). Rnd 2: inc (20), Rnd 3: dc1, inc rep (30), Rnd 4: dc2, inc rep (40). Continue until base diameter ≈ 4 in (to suit width).
Mosaic band in the round
2. Join color A (MC). Work 1 round dc in MC to even base edge. Place marker. For mosaic, you’ll alternate rounds of MC and CC: odd rounds are worked in color A, even rounds are slip-stitch rounds in color B that create the block shift.
- Example mosaic repeat (multiple of 8 for a 40-st circumference): follow chart: Round A (MC): dc in each st across. Round B (CC): sl st 3, dc 5 or a shifted slip/dc pattern per the chart. The slip-stitches carry previous color visually; follow a known mosaic chart or design your own in graph paper with the chosen multiple.
- Repeat the mosaic chart rows until body height ≈ 7.5 in.
Eyelet & top
5. Add an eyelet row: sc 3, ch 1, sk 1 around, then 2 rounds sc to reinforce.
Lining & drawstring
6. Add a cotton liner fitted to interior and stitch in place to hide slipped stitches if desired. Thread drawstring and finish with cord stops.
Variations
- Use tri-color mosaic by switching CC colors on slip-stitch rounds for a ticketed palette.
- Use a bold border at bottom in a third color.
5. Crochet Star Stitch Drawstring Pouch Pattern

Skill level: intermediate (star stitch is a specialty stitch that creates dense texture)
Vibe: textured, cozy pouch with intricate surface — great for jewelry or gift pouches.
Materials (7 × 9 in pouch)
- Worsted weight yarn MC ~150–180 yd.
- Hook: 4.5 mm (or as needed for star stitch tension).
- Tapestry needle, lining optional.
About the star stitch
- The star stitch (also called the Margaret’s Star or daisy stitch depending on variation) creates a dense, starry fabric by working clusters of partial loops. It’s less stretchy than sc and makes a sturdy pouch.
Construction overview
- Work body in star stitch in the round for a sturdy, textured pouch; start with a flat circular base and work up. Finish with a 6-row top band of sc for the eyelet row.
Step-by-step
Base
- MR, ch 2, 8 hdc in ring. Join. (8) Rnd 2: inc in each = 16. Rnd 3: hdc 1, inc = 24. Rnd 4: hdc 2, inc = 32. Continue until base is ~4 in.
Star stitch rounds
2. Join star stitch pattern:
- Star stitch cluster: yo, insert hook in next st, pull up loop; repeat this step 4 times to have 5 loops on hook then yo and draw through all 5 loops, ch 1 to close star. Then sc or hdc between stars depending on your chosen variation.
- Work star stitch across around: star cluster, sc in next st — repeat to end of round. Keep counts balanced; if your multiple is off, adjust with a sc between stars to keep alignment.
- Continue star stitch rounds until body height ≈ 7.5 in.
Top band & eyelets
5. Work 1 round sc to stabilize, 1 round eyelet (ch 1, sk 1 method) and 2 rounds sc to finish.
Finish
6. Make a sturdy drawstring by chaining 120 and making a rope via slip-stitching back along chain or using a braided cord; stitch through eyelets and knot ends.
Variations
- Use variegated yarn to make stars pop in color.
- Combine star stitch panel with a smooth base and top for contrast.
6. Crochet Checkered Drawstring Pouch Pattern
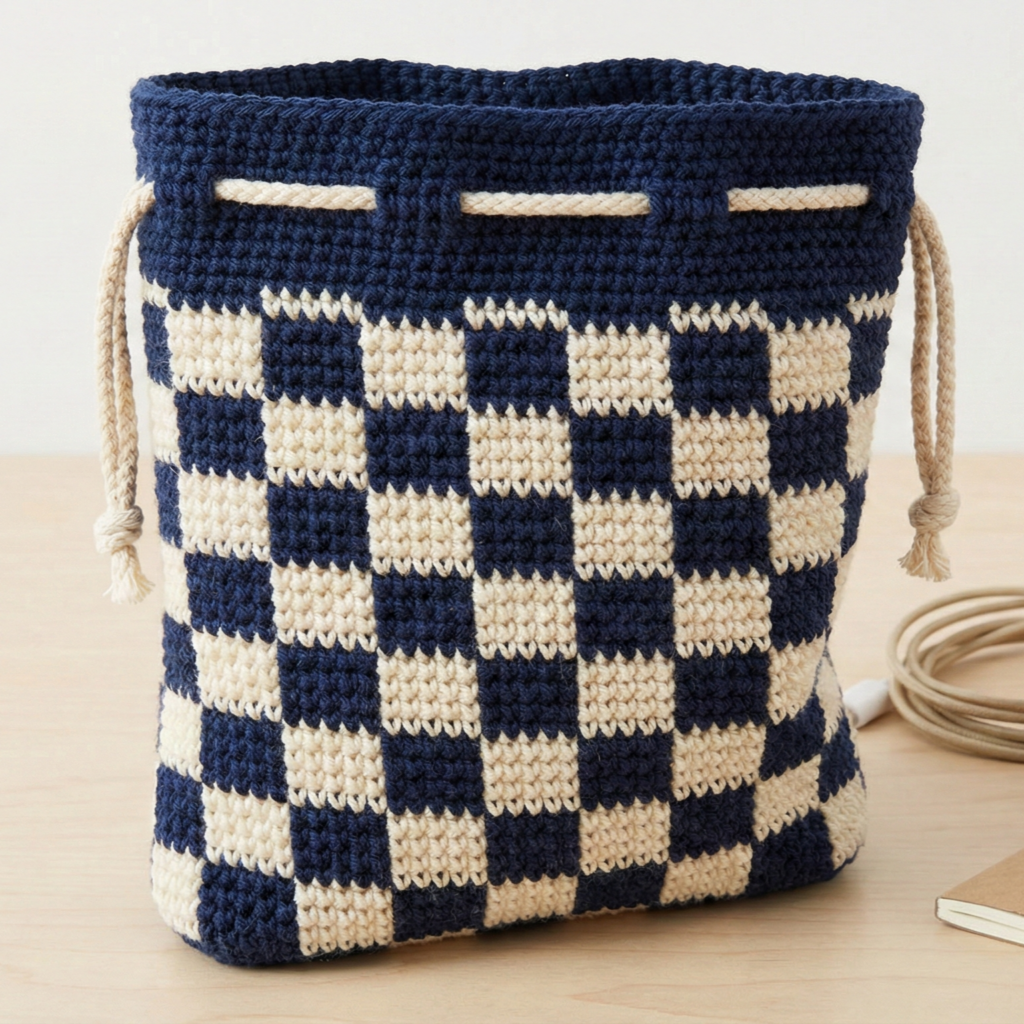
Skill level: confident beginner (color changes and simple checks)
Vibe: classic checkered grid — bold and modern, easy to work in rows or rounds.
Materials (~7 × 9 in)
- Two contrasting worsted yarns (MC & CC). MC ~140 yd, CC ~60 yd.
- Hook: 4.5 mm.
- Tapestry needle.
Construction overview
- Work a tube in hdc or sc in the round, switching colors in blocks to create a checkerboard. Alternatively make a flat woven-like panel in tapestry style and seam.
Step-by-step
Foundation
- Ch 44 (or appropriate multiple; blocks of 4 sts across work nicely for 7 in width). R1: sc in 2nd ch and across (42 sc). Turn. R2–R30: Work checker blocks by changing color per 4 sts × 4 rows: e.g., MC for 4 sts × 4 rows, then CC for next 4 sts × 4 rows, etc., to build the grid. For a flat panel, you’ll then seam long edges to form a tube; for a round method do color blocks in joined rounds and change color per chart.
Round approach (in the round)
2. Make a flat base (as earlier) and work height in rounds: use a small chart where each round is worked in one color, and you alternate colors every 4 rounds but change the start index to offset blocks and create the check effect — or follow a simple 4×4 block chart.
Eyelets & top
3. Work eyelet round and finish with sc rounds. Thread drawstring through.
Variations
- Use three or more colors for large-scale checker effects.
- Use linen stitch for a woven look and alternate colors every 3 rows for a subtler check.
7. Crochet Summer Slice Drawstring Pouch Pattern
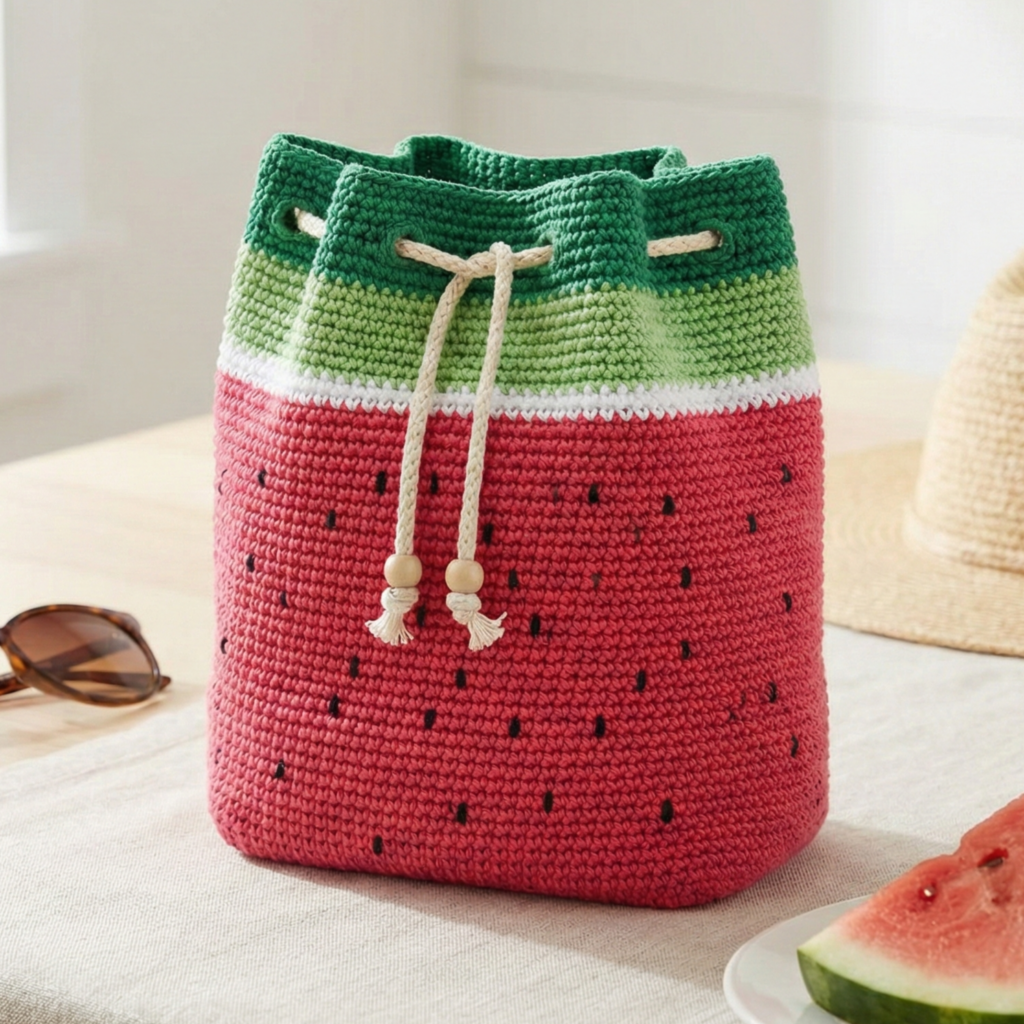
Skill level: confident beginner
Vibe: bright, citrus-slice motif or watermelon-slice theme; fun festival pouch or tiny gift bag.
Materials (approx. 7 × 9 in)
- Cotton yarn in 3–4 colors depending on fruit (e.g., watermelon: pink/red, green, white/cream, black for seeds) — total ~180–220 yd.
- Hook: 4.5 mm.
- Tapestry needle, small safety for seed appliqués (or embroidered seeds).
Construction overview
- Make a round base and work up in the round in stripes that mimic a slice (wedge panels) OR work a simple tube and appliqué slice panels. This pattern offers a wedge motif on one side and solid on the back.
Step-by-step (wedge-appliqué method)
Body
- Ch 42; R1 hdc across to create rectangle approx width 7 in. R2–R20 work alternating color striping (pink for interior flesh). This is quickest.
Slice appliqué
2. Make several small wedge appliqués (slice segments) to sew on front:
- MR, using pink: ch 2, work 6 hdc in MR; Rnd 2: inc around to 12, sl st join. Shape wedge by working partial rounds or by shaping with sc & hdc to a small wedge. Add a thin white border (ch 1 sc) and a green outer rind strip (sc across a small strip and stitch to edge).
- Add seed appliqués (tiny black French knot-like embroidered stitches or tiny little bobble circles) to the pink wedges.
Assembly
4. Sew appliqués to one side of pouch with small stitches. For a lined finish, sew lining first and then applique over top so seams hide.
Top & drawstring
5. Add strengthened eyelet row: sc rounds + eyelet row, then thread cord.
Variations
- Make orange-slice using wedge color gradations in orange to mimic segments.
- Create a set of small coin pouches in multiple fruit themes as party favors.
Final finishing, safety notes, and care
Weaving ends
- Tidy joins with a tapestry needle, weaving tails along the same color path for 2–3 inches to secure. Use small knots inside lining only when necessary.
Lining
- A cotton lining is highly recommended for small item pouches (jewelry, cosmetics) — cut lining 1/4 in smaller than interior dimensions and hand-sew in place before finishing top band.
Safety
- If pouches are intended for children, avoid small buttons or beads that could detach — embroidery is safer than sewn-on buttons. Use tightly stitched seams and secure knots.
Care
- Cotton and acrylic pouches: machine wash gentle or hand wash, reshape while damp. Wool items should be hand washed and dried flat.
Conclusion
These seven drawstring pouch patterns give you a versatile toolkit: playful animal motifs, elegant Fair Isle colorwork, modular granny-square charm, crisp mosaic and checkerboard geometry, dense star-stitch texture, and bright summer-slice novelty. Each pattern is designed to be adaptable — scale up the dimensions for a larger tote, add a lining for a polished interior, or turn a pouch into a gift bag for jewelry, soap, yarn notions, or treats.