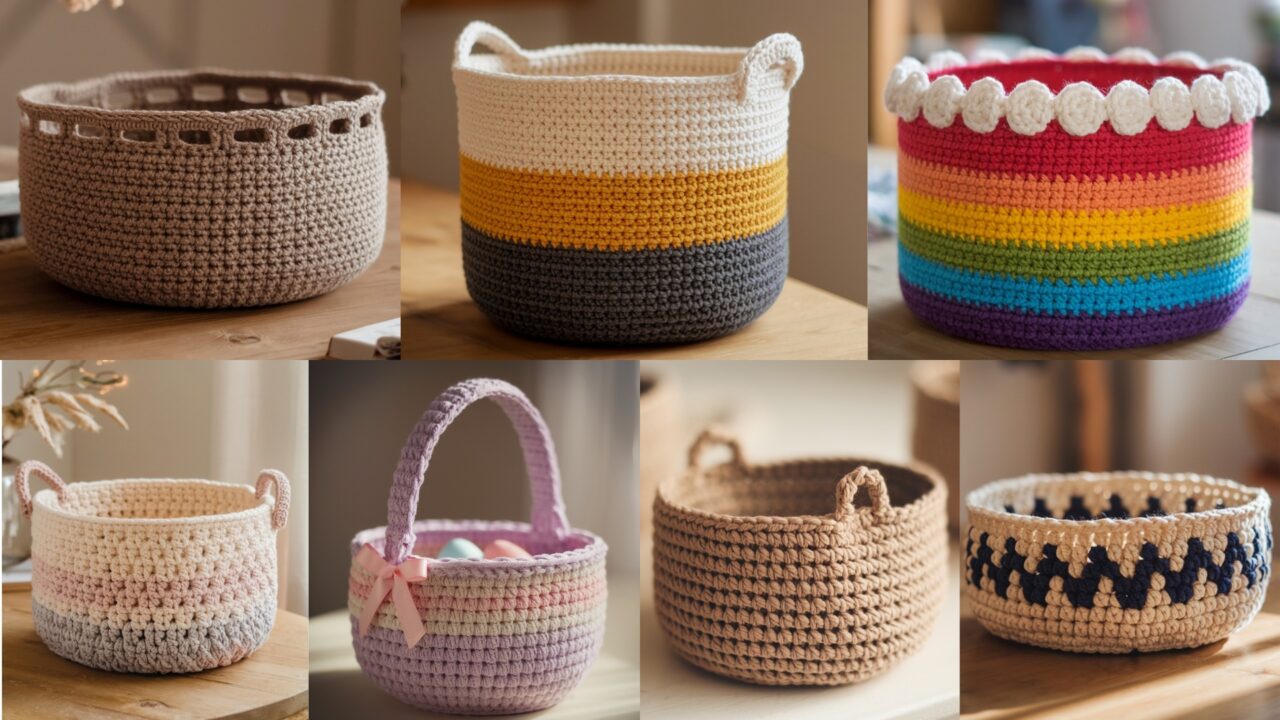
Nothing transforms clutter into calm like a set of beautiful, sturdy crochet baskets. They’re fast to make, infinitely customizable, and they solve real storage problems — from wrangling kid toys to corralling yarn. Below are seven full basket patterns with clear, step-by-step instructions, materials, sizing notes, finishing tips, and ideas for variations. Each pattern is written so you can adapt yarn, hook, and size to your needs.
Before we begin, a few universal notes that will help you get consistent results across all seven designs.
Universal notes
- Yarn & structure: For baskets you want to hold their shape, choose thick, sturdy yarn: bulky (#5) or super bulky (#6) is ideal. You can also use T-shirt yarn / fabric cord, rope, or two strands of worsted held together. If you prefer a smaller, neater basket, use worsted (#4) with smaller hook — but expect less stiffness.
- Hook: Use the hook size recommended for your yarn or one size smaller than the yarn label suggests to create a dense fabric (e.g., for bulky yarn a 6.5–8.0 mm hook).
- Base formula: Most baskets start with a flat circle (increase rounds), then switch to working up the sides without increases. A classic flat-circle increase for 6-sector round starts with 6 stitches in a magic ring, and each increase round adds 6 stitches (so rounds 1–5 give 6 → 12 → 18 → 24 → 30 sts). I’ll show specific counts so you can follow and scale.
- Finishing & stiffness: For extra stiffness: use a plastic canvas base, coat the finished basket with diluted PVA glue (white craft glue) inside and out, or line with interfacing/linen. For washable baskets use a soft liner sewn from fabric.
- Abbreviations (US terms): ch = chain, sc = single crochet, inc = 2 sc in same stitch, dec = sc2tog, sl st = slip stitch, hdc = half double crochet, dc = double crochet, FLO / BLO = front/back loop only, FPdc / BPdc = front/back post double crochet.
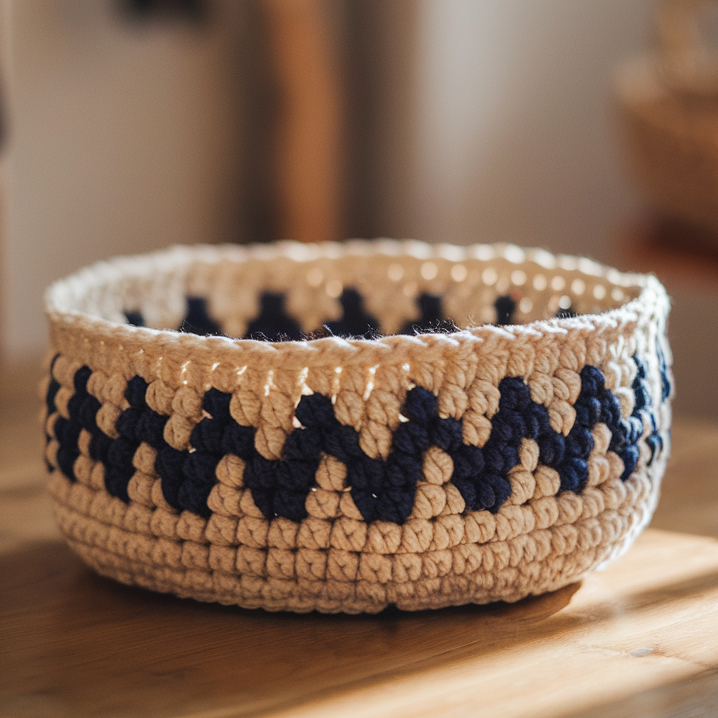
1. Crochet Granny Stitch Basket Pattern
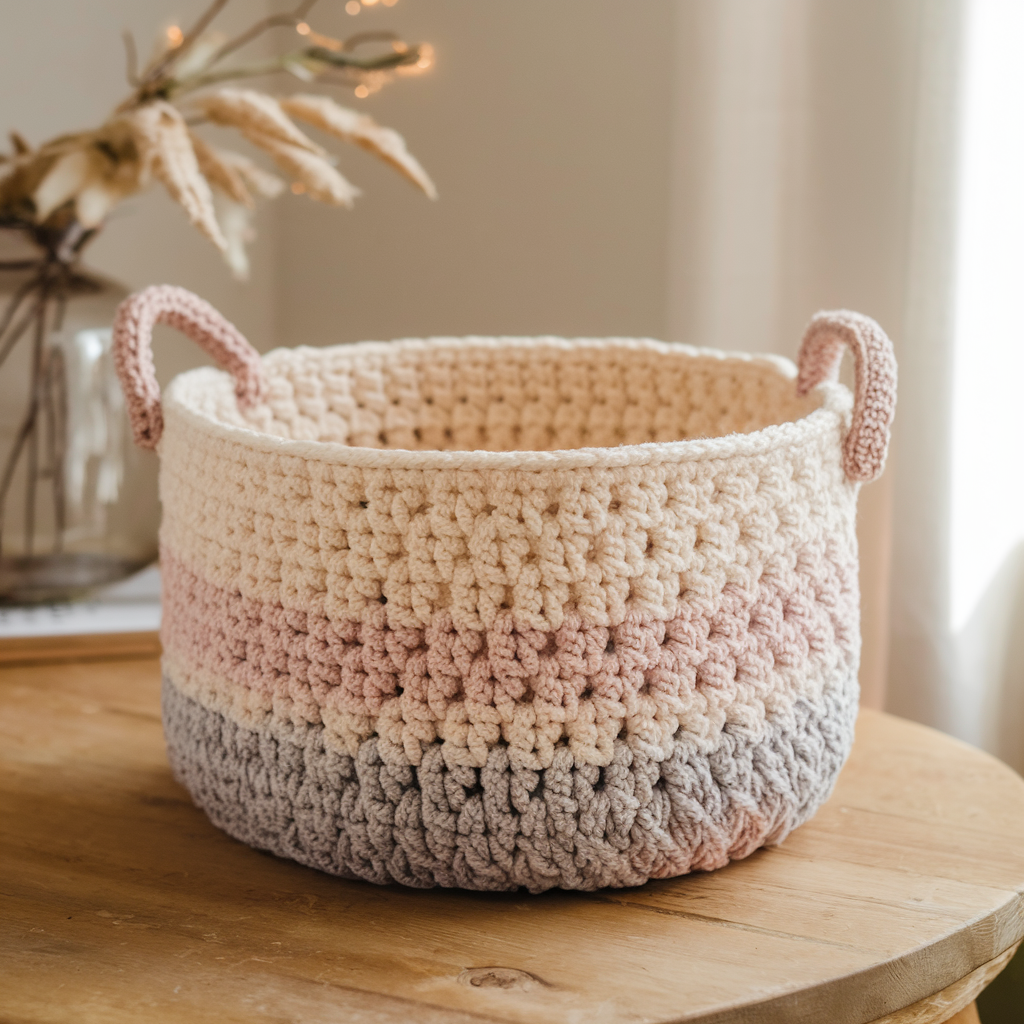
A granny-stitch basket combines the classic granny square look into a round basket — chunky, quick, and homey.
Skill: Easy → Intermediate
Finished size (sample): ~9″ diameter base, 6″ tall (adjustable)
Materials
- Super bulky (#6) yarn — about 250–350 yds (one or two skeins depending on size).
- Hook: 8.0 mm (L) or size to get dense fabric.
- Tapestry needle, scissors, optional plastic base or cardboard circle for reinforcement.
Construction overview
Worked in the round with granny clusters for the base; sides are worked up in continuous rounds using granny clusters or a round of sc for higher structure. Granny clusters create texture but can be less stiff; add a base insert for shape if needed.
Pattern — base (granny circle method)
- Magic ring: ch 3 (counts as first dc), work 2 dc, ch 2, 3 dc into ring — that’s one corner cluster. Join with sl st to top of ch-3. (You now have 1 corner cluster.)
- Round 2 (expand): Slip into the ch-2 space, ch 3, 2 dc, ch 2, 3 dc in same ch-2 sp (corner), ch 1, repeat 3 dc, ch 2, 3 dc in each ch-2 corner space around, placing ch 1 between clusters; join. You’ll have multiple corner clusters separated by ch-1 spaces. Continue to Round 3 adding a new corner between existing corners: in each ch-1 space work 3 dc, ch 2, 3 dc, and put ch-1 between clusters. Continue until the circle measures about 9″ across (for sample). Use a ruler; stopping when you reach desired base diameter. Typically 5–7 rounds of clusters for a 9″ base — check size as you go.
Notes on counts: Granny cluster rounds don’t follow the simple 6-sector formula because corners multiply; size is measured visually. If you prefer a strict stitch count, you can start with the flat circle method (see Universal notes) and then switch to granny clusters for sides.
Turn up sides
- After base is desired width, begin working up the sides. For a firmer side, work a round of sc across all sts in the last round of the base (fill in ch-1 spaces with sc). This creates a continuous round around the circle.
- Work sides: Choose one of two options:
- Textured sides: Continue granny cluster rounds but do not increase — treat each cluster as a unit around the round (work clusters into previous clusters’ spaces). This makes the piece grow up, not out.
- Firm sides (recommended): Work 8–12 rounds of sc in each st around (continuous rounds, do not join to keep the seam invisible) until basket reaches desired height (6″ sample). Working sc in BLO for one round before the top adds a soft ridge.
Finish
- Work 1 round of sl st in both loops for a neat rim, or 2 rounds of crab stitch (reverse sc) for a rope-like edge.
- Weave in ends and optionally insert a stiff base (plastic circle) or glue the inside with diluted glue for more shape.
Handles (optional)
- Create two handles by skipping a sequence of stitches on the top round (e.g., ch 6, skip 6 sts, sc next sts) or make sewn-on handles from top band (crochet a chain strap and sew).
Variations & tips
- Use two contrasting colors every two rounds for stripes.
- Make smaller versions for desk tidy use — 3–4 rounds of base (4–5″) and 3–4 rounds of sides.
- Lining: cut fabric circle and stitch to inside to protect yarn from wear.
2. Crochet Color Block Basket Pattern
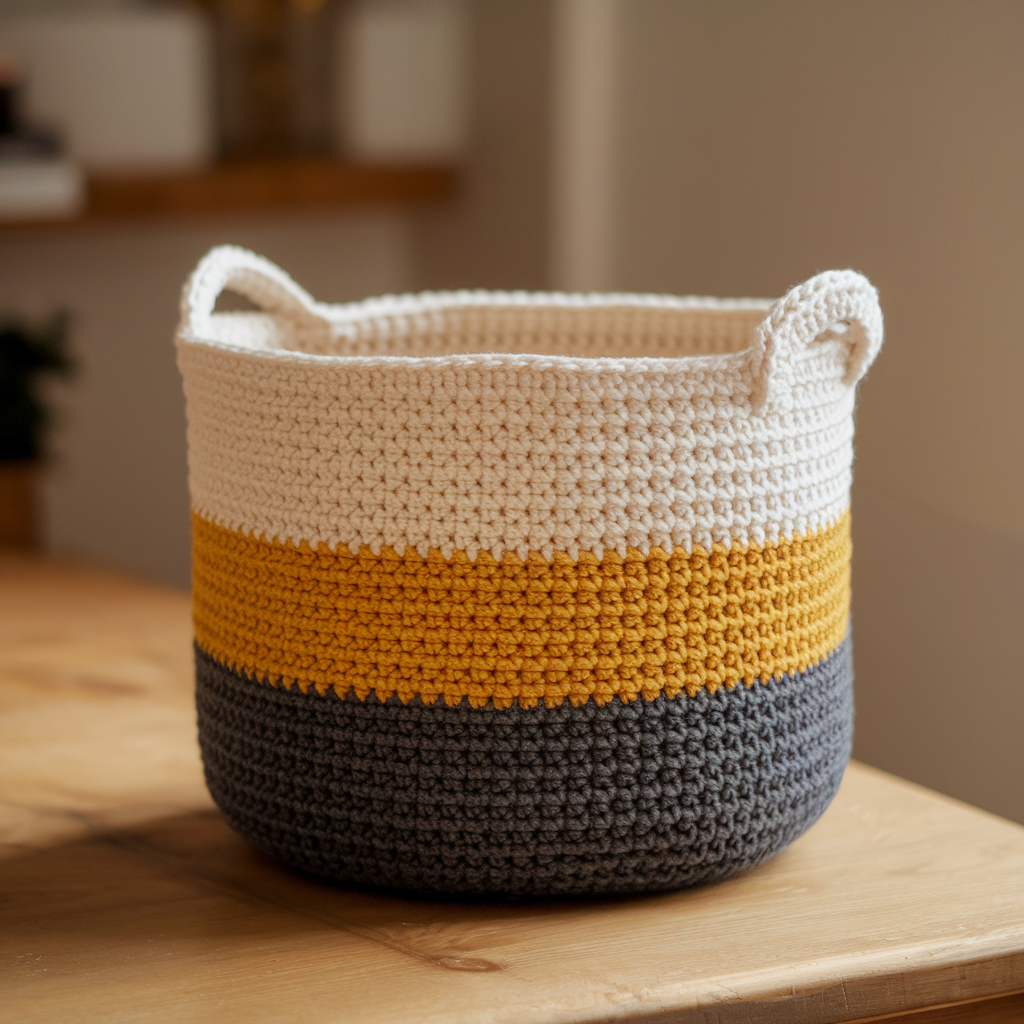
Bold, modern, and great for color-blocking using joined yarn or color changes.
Skill: Easy → Intermediate
Finished size (sample): ~8″ diameter, 7″ tall
Materials
- Bulky (#5) yarn in three contrasting colors — ~300 yds total.
- Hook: 6.5–8.0 mm.
- Tapestry needle, stitch markers, optional base disc.
Construction overview
Flat circle base (increase rounds) → work up sides in sc; color changes create vertical color-blocked panels.
Pattern — base (standard increases)
- Magic ring: 6 sc in MR — join. (6)
- Round 2: inc in each st around — 12 sc. (12)
- Round 3: sc 1, inc around — 18 sc. (18)
- Round 4: sc 2, inc around — 24 sc. (24)
- Round 5: sc 3, inc around — 30 sc. (30)
- Continue increasing by adding one more sc between increases each round until base reaches desired diameter. For an ~8″ base with bulky yarn you may stop when you reach about 42–48 sc (e.g., Round 7 gives 42 sc if you continued pattern: Round 6 → sc 4, inc = 36 sc; Round 7 → sc 5, inc = 42 sc). Stop when base measures desired width.
Turn up sides
- Once base diameter reached, work one round of sc to “fill in” and create even stitches for sides. Work in continuous rounds (no joining) for an invisible seam.
- Work sides in sc around until basket height ~3″ (for shallow bin) or ~7″ (sample). Don’t join rounds; place a stitch marker at the beginning of the round and move it up to keep track.
Color blocks
- To make vertical color blocks, decide how many panels (e.g., 3 colors → 3 panels). Divide the total stitch count by number of panels to find panel width. Example: if base is 42 sc and you want 3 vertical blocks, each block = 42 ÷ 3 = 14 sc. (Do the arithmetic: 42/3 = 14.)
- At a corner where you want color change, finish the last sc of the stitch in the old color but complete the final yarn over with the new color — this creates a clean color join. Work the next 14 sc in Color B, then switch to Color C, and so on. Continue the panel color through all side rounds so each panel forms a vertical column.
Top band and handles
- For a neat top, work 2 rounds of hdc in FLO to create a subtle rib. For an accent rim, add one round of crab stitch.
- For handles, leave out a set of stitches (e.g., skip 6–8 stitches at the top round and chain 6, sl st to rejoin) and work several rounds to reinforce handle edges. Alternatively, crochet a separate strap (ch length as desired) and sew on.
Variations & tips
- For cleaner lines, carry color up the inside when the floats are short; for long floats, break yarn at color change and weave ends.
- Try asymmetric color blocks: small stripe + large solid block for modern look.
3. Crochet Mosaic Basket Pattern
Mosaic crochet uses slip-stitch colorwork to create graphic, woven-look patterns without many floats. Great for a textured, basketry aesthetic.
Skill: Intermediate (mosaic technique)
Finished size (sample): ~9″ diameter, 8″ tall
Materials
- Bulky or super bulky yarn in two contrasting colors (Color A = background, Color B = motif) — total ~300–400 yds.
- Hook: 6.5–8.0 mm.
- Tapestry needle, graph/chart for mosaic motif.
Construction overview
Based on a base circle, then sides worked in alternating color rows and mosaic slip-stitch pattern (each round uses only one color while previous color is carried as slipped stitches).
Pattern — base
- Work base using standard increase rounds until desired diameter (see Color Block Basket for counts; sample base stop at 42 sc). Finish with one round of sc in Color A.
Establish round count
- Decide how many stitches around base (e.g., 42) and determine how motif repeats will fit (e.g., motif width 7 sts repeated 6 times = 42).
Mosaic side setup
Mosaic crochet commonly uses sets of two rounds per band: one round worked in color A (background) and the next round worked in color B with slip stitches over the background to create the motif. You’ll often work sc rows as the base and then switch to mosaic rounds.
Example motif (simple diamond repeat)
- Round structure (worked in continuous rounds):
- Round 1 (Color A): sc around.
- Round 2 (Color A): sc 2, ch 1 repeat to create a base.
- Round 3 (Color B — mosaic): sl st into next st, sc in next st following chart pattern so that Color B slips or scs create the diamond shapes. Where chart asks to “show” Color B, you work sc; where it asks to “hide” you sl st in Color A. Because you’re working in rounds, follow your chart carefully; the trick is that you only work with one color per round — you never carry both in the working row — you simply slip the stitches of the non-working color.
Practical step-by-step
- Round 1 (Color A): sc around. (e.g., 42 sc)
- Round 2 (Color A): sc around.
- Round 3 (Color B): Follow motif chart — if chart square is “color B” you sc; if not, you sl st in Color A. For clarity: when you need to sl st in Color A you insert hook, pull up loop with Color B and complete sl st (you are literally slipping on the non-working color so the fabric shows Color A). This produces mosaic look.
- Round 4 (Color A): sc around (re-set base).
- Repeat rounds 3–4 following the chart rows to build the motif vertically to height desired (e.g., 6–8 motif repeats = 8″ tall).
Finish
- Top off with a round of sc, one round of BLO hdc for a crisp edge, or add a crocheted rim (1–2 rounds FPdc / BPdc) for a woven rim look.
- Weave ends; if you used slipped stitches, you’ll have a lot of short tails — tuck them into the slipped fabric for neatness.
Variations & tips
- Mosaic works beautifully with high-contrast colors (navy + natural, black + cream).
- Use a plastic base to stabilize for heavy loads.
- Convert any mosaic chart to a small basket motif — try chevrons, diamonds, or even letters.
4. Crochet Rainbow Layer Cake Basket Pattern
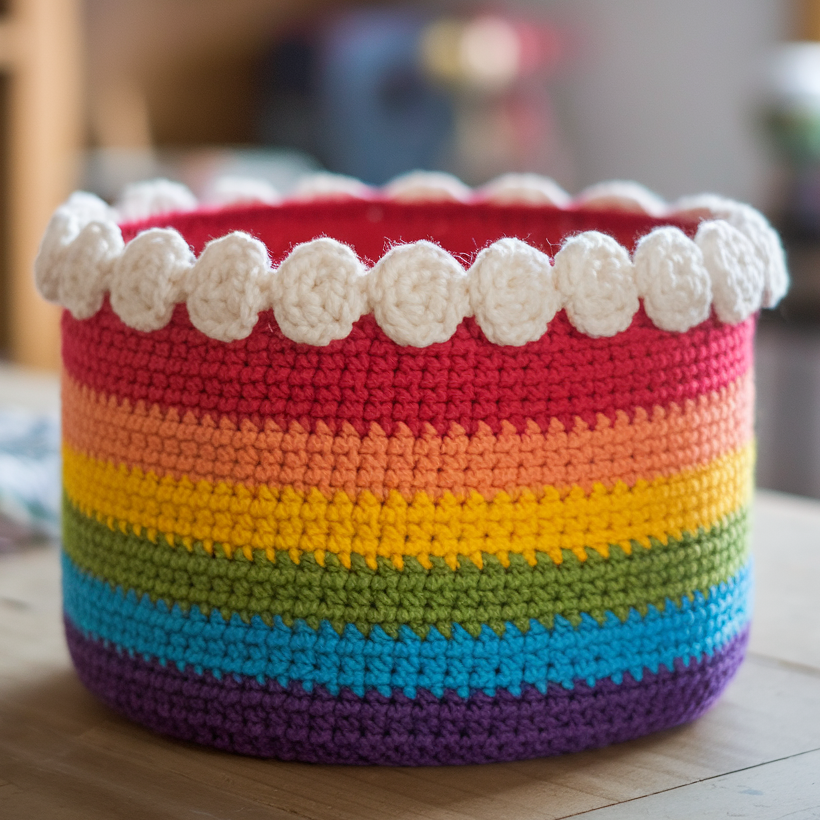
Bright, cheerful, and perfect for scrap yarn — this basket is worked in stacked horizontal color bands (layer cake) like a rainbow cake.
Skill: Easy
Finished size (sample): ~10″ diameter, 8″ tall (stacked 6 color bands)
Materials
- Bulky yarn in 6 complementary colors (approx. 40–60 yds each) — or stashbuster odds and ends.
- Hook: 7.0–8.0 mm.
- Tapestry needle, stitch marker.
Construction overview
Flat circle base, then sides worked in sc with color changes every X rounds to create horizontal bands.
Pattern — base
- Use the standard increase base until base diameter reaches about 10″ (see earlier counts). For bulky yarn that may be around 48–54 sc depending on yarn thickness. (Stop when you reach desired measurement.)
Turn up sides
- Work one round of sc to create consistent stitches.
- For sides, plan your color bands: e.g., 6 bands × ~8 rounds each = 48 rounds — but with bulky yarn you may use fewer rounds per band (4–6) because each round is thick. For sample: use 6 bands × 6 rounds = 36 rounds to reach approx. 8″ height. Decide band height before you begin.
Color changes
- To change color cleanly, at the last stitch of the round before the new color, complete the last yarn over with the new color so the new color is used from the start of the next round. This hides knots and gives a neat join.
- Work the next 6 rounds in Color B, then switch to Color C, and so on.
Top finish
- For a cake-like edge, add a round of puff stitches (3 dc puff in each 2–3 sts) in white to give a “frosting” ruffle. Alternatively, work a round of reverse single crochet for a lifted rim.
Handles & decoration
- For a tote effect, crochet two long straps in the final color and sew on; for a seasonal look, add a crocheted cherry (pom) on top, or a small tassel per color transition.
Variations & tips
- Make mini sets in pastel shades for nursery organization.
- Use self-striping yarn for a faux rainbow with fewer color changes.
5. Crochet Landsdowne Basket Pattern
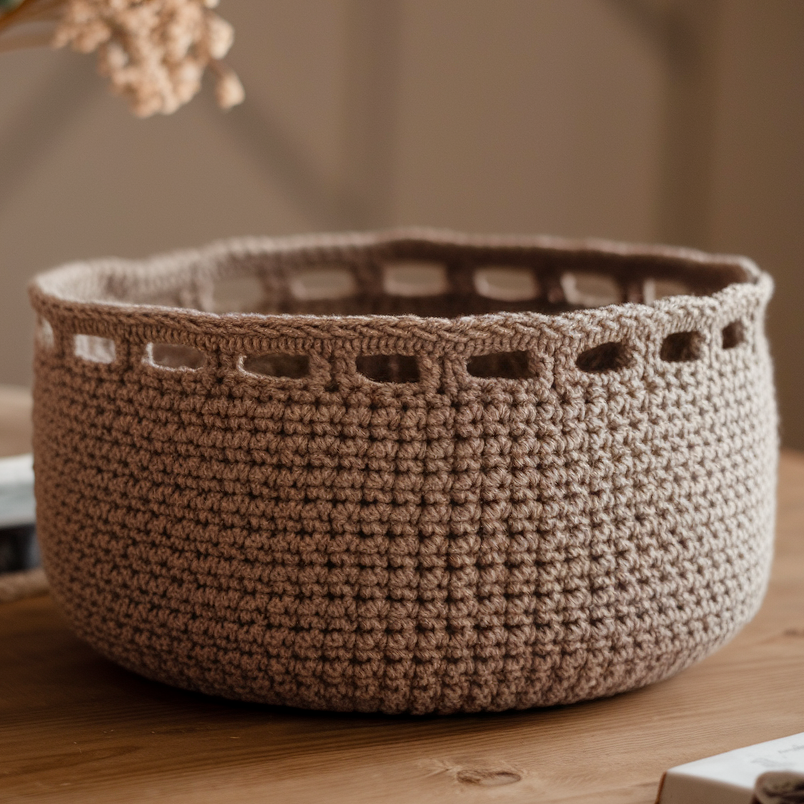
Inspired by classic woven baskets, the Landsdowne uses post stitches to create a pronounced ribbed, basket-weave look. It’s sturdy and elegant.
Skill: Intermediate (post stitches)
Finished size (sample): ~10″ diameter, 9″ tall
Materials
- Bulky or super bulky yarn (one or two colors) — ~350–450 yds.
- Hook: 7.0–8.0 mm.
- Tapestry needle, optional stiffening method.
Construction overview
Flat base using standard increases; sides worked in alternating rounds of front post and back post double crochet (FPdc/BPdc) to create vertical ribs. This “Landsdowne” look is very structural and great for heavy loads.
Pattern — base
- Work base with standard increases to desired diameter (sample stops at about 48 sc). Finish with one round of sc to set the edge.
Side setup
- Round 1 (sides start): Work one round of sc across to establish stable stitches (inserts into last round base).
- Round 2 (ribbing begins): fpdc around next st, bpdc around next st repeat across. This creates alternating ribs. Work in continuous rounds.
Detailed stitch notes
- FPdc (front post double crochet): Yarn over, insert hook behind post of stitch from previous round (from front to back to front), yarn over, pull up loop, yarn over, draw through two loops twice.
- BPdc (back post double crochet): Yarn over, insert hook from back to front to back around post, continuing as dc.
Round repeat
- Repeat FPdc, BPdc for 8–14 rounds (depending on desired height). Every few rounds you may do a plain dc round to tighten fabric. The alternating FP/BP rounds create vertical ribs that hold their shape.
Top finishing
- Work 2 rounds of sc for a neat rim. Then bind off with reverse single crochet for a corded edge.
- For handles, skip a group of FP/BP stitches and ch the width of the handle, sl st across, and then continue next round. Reinforce by working sc around handle ch.
Stiffening (optional)
- If you want the rigid basket look, combine with a plastic base and spray inside/outside with diluted glue; clamp into shape until dry.
Variations & tips
- Use two colors and alternate the color every 4 rounds for a subtle stripe between ribs.
- For a woven-look base, consider adding a herringbone band (hdc FP/BP variation) around the middle.
6. Crochet Simple Mini Basket Pattern
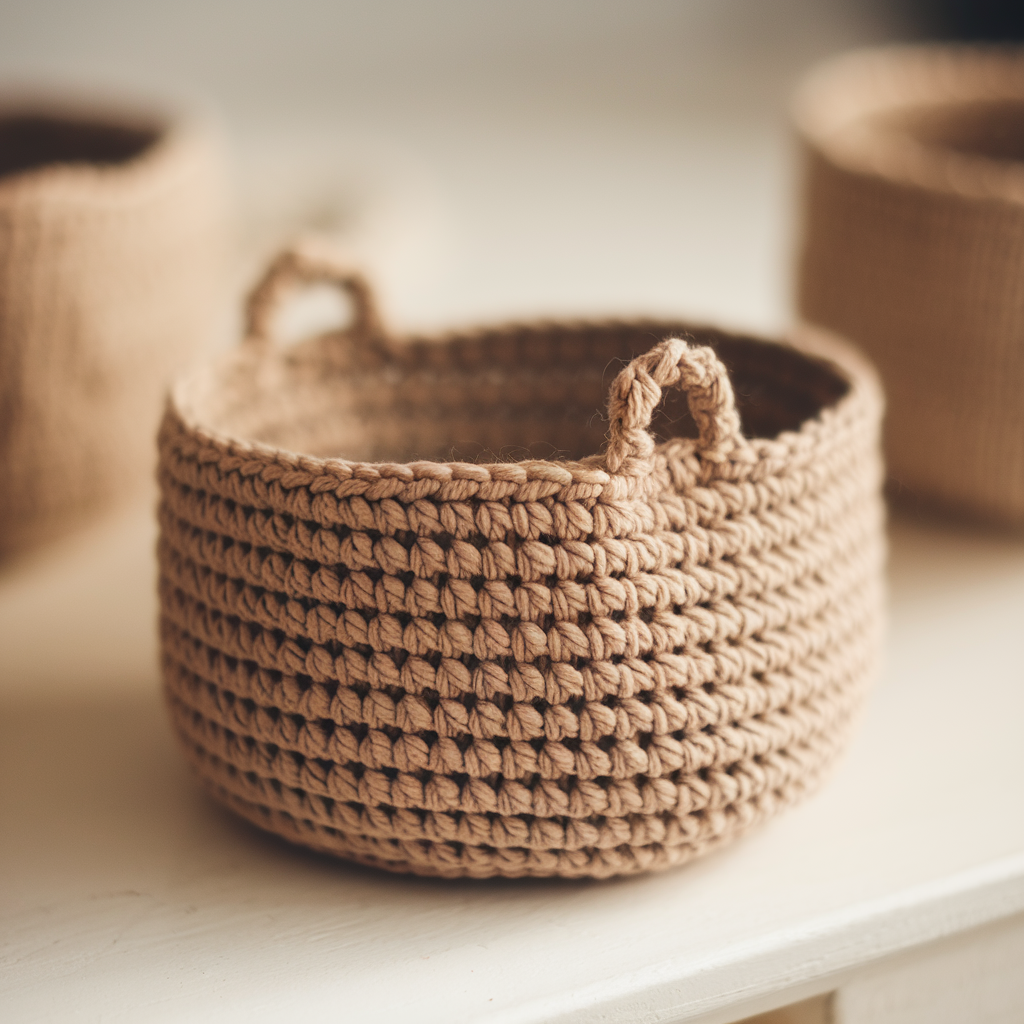
Quick, practical, and perfect for desk supplies, jewelry, or small gift containers. Fast baby-project.
Skill: Beginner
Finished size (sample): ~4–5″ diameter, 2.5″ tall
Materials
- Worsted (#4) or bulky (#5) yarn — about 50–100 yds.
- Hook: 5.0–6.5 mm (depending on yarn).
- Tapestry needle.
Construction overview
Small flat circle, few side rounds, quick finish.
Pattern
- Magic ring: 6 sc in MR. (6)
- Round 2: inc around — 12 sc. (12)
- Round 3: sc 1, inc — 18 sc. (18)
- Round 4: sc 2, inc — 24 sc. (24) — this base will yield ~4–5″ depending on yarn. Stop when base reaches desired size.
- Round 5: sc around to fill any ch-spaces and even the top.
- Rounds 6–9 (sides): sc around in continuous rounds for 4 rounds — basket height ~2.5″.
- Top round: Work crab stitch or reverse sc for a neat rim.
Handles (optional)
- Make a small tab handle: ch 6 at top round, sl st back to same spot, reinforce with one or two sc rounds over loop.
Variations & tips
- Make sets of 3 sizes nested inside one another.
- Use cotton yarn for bathroom counters — it dries well.
7. Crochet Basic Easter Basket Pattern
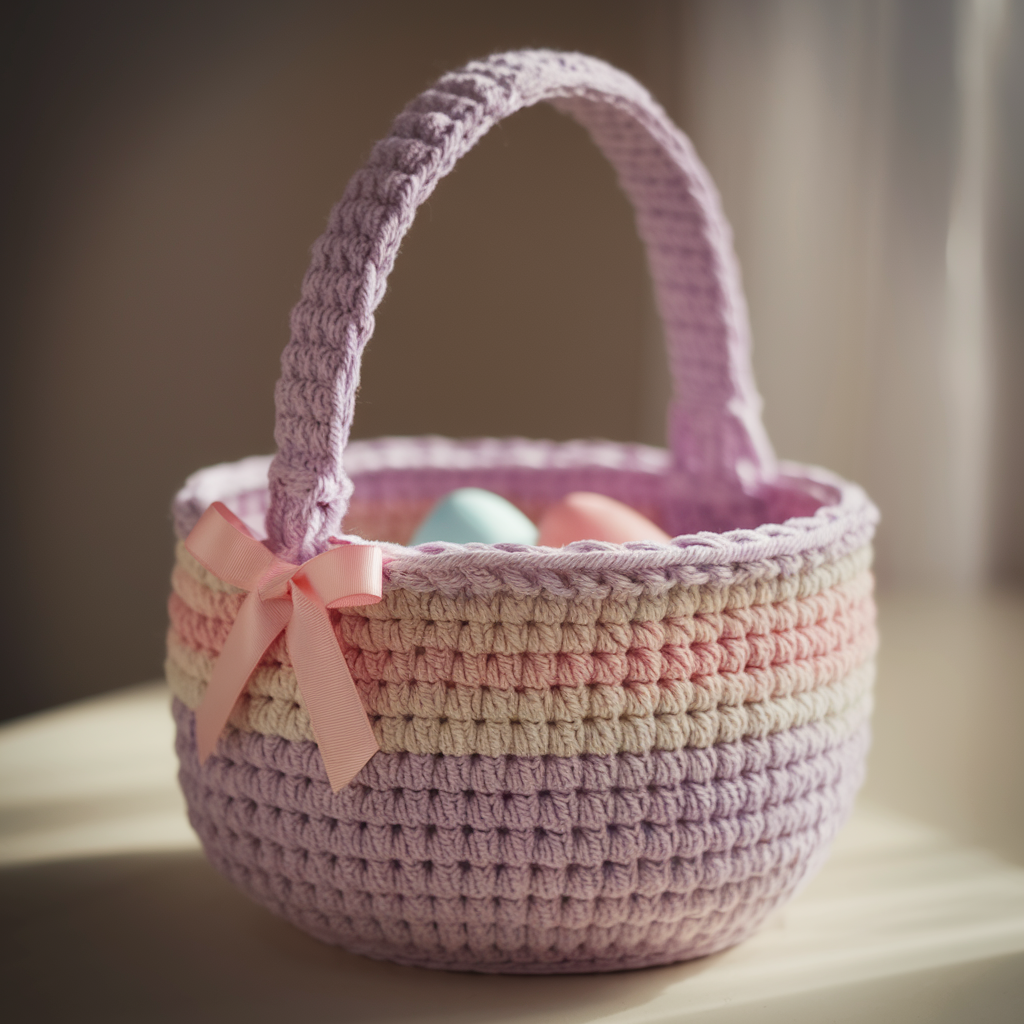
A seasonal classic: round base, tall sides, and an arched handle. Great for dyeing eggs, gifting, or spring decor.
Skill: Beginner → Intermediate (handle stability)
Finished size (sample): ~8″ diameter, 6″ tall (handle spans ~10″ high)
Materials
- Bulky (#5) or T-shirt yarn — ~250–350 yds.
- Hook: 6.5–8.0 mm.
- Tapestry needle, optional wire or rope for handle reinforcement, optional ribbon for decoration.
Construction overview
Flat circle base → sides worked up in sc/hdc → strong central handle worked in rows then sewn, optionally reinforced with rope/wire.
Pattern — base
- Use standard increase rounds until base diameter ~8″ (e.g., about 42 sc as a guide). Finish with one round of sc.
Turn up sides
- Work round of hdc across to give a slightly taller stitch and sturdier fabric.
- Work 8–10 rounds of hdc (or sc for denser) to reach height ~6″.
Handle
You have two options for a strong handle:
Option A — Crocheted, reinforced handle
- At opposite points on rim, attach yarn, ch 5 and count down the top stitches to determine handle placement (or mark the two spots 6–7″ apart depending on basket size).
- Crochet a strap: ch 45 (or enough to span desired height), Row 1: hdc in 3rd ch from hook across, turn. Row 2–6: hdc across. Fasten off leaving long tails. Fold strap in half and single crochet along edges to make a thicker strap. Sew both ends firmly to the inside top rim. Insert a piece of plastic tubing, rope, or thin wire before sewing ends closed for reinforcement if needed.
Option B — Sewn rope handle
- Cut a length of rope or braided cord to handle length, cover with a matching crochet chain or tube, then sew ends to each side inside the rim and hot glue for extra security.
Decoration
- Add ribbon bows, small crocheted flowers, or a scalloped edge: dc 3 in next st, skip 1 around for a scallop.
Finishing
- Weave in all ends and optionally line the inside with fabric (cut a round base + rectangular side strip and sew to fit) to protect yarn and give a polished finish.
Conclusion
You now have seven full, adaptable crochet basket patterns — from the homey Granny Stitch Basket to the structured Landsdowne ribbed basket and the cheerful Rainbow Layer Cake. A few final tips to make sure your baskets turn out beautifully:
- Decide purpose first. Heavier loads (toys, laundry) = thicker yarn, tighter tension, and optional plastic base. Decorative or light use = softer yarn and no stiffening.
- Swatch for structure. If you need a rigid basket, work a small swatch with your chosen yarn/hook to check density. Use a smaller hook or thicker yarn for a tighter, stronger fabric.
- Finishing matters. A sewn fabric liner, plastic base, or diluted glue treatment dramatically extends the life and utility of the basket.
- Customize! Change height, add handles, or mix stitches for a unique set. Baskets look fantastic grouped — pick two or three patterns and make a coordinated set.