Love stretch, texture, and little stitch tricks? These seven stitch patterns will give you fresh building blocks you can use for blankets, scarves, garments, bags — anything. Below you’ll find a friendly introduction (how to choose yarn/hook, gauge and foundation math), then seven complete stitch write-ups: what the stitch looks like, why it’s useful, a step-by-step how-to (with a clear repeat you can memorize), a sample swatch size and gauge suggestion, variations, common problems and fixes, and suggested projects where each stitch really shines.
Read the intro, pick one stitch to practice, and use the “variations & projects” notes to design your next project. Let’s level up!
Quick intro — yarn, hooks, gauge, and foundation math
Yarn & hook
- Use whatever yarn you already like for practicing, but match yarn weight to the stitch: finer lace/ fingering yarn for delicate lace motifs; DK/worsted for textured stitches that show clearly; bulky for dramatic cables and chunky stitches.
- Choose a hook suggested for your yarn label as a starting point. If the stitch is dense (bobble, bean, cable), try a hook 0.5–1.0 mm larger to keep fabric flexible.
Swatch & gauge (do this before a project)
Always make a 4″ (10 cm) swatch in the stitch pattern to check drape and gauge.
Example gauge math (digit-by-digit):
If your swatch gives 14 stitches = 4 inches, then stitches per inch = 14 ÷ 4. To compute stitches for a 20″ wide scarf:
- 14 ÷ 4 = 3.5 sts per inch.
- 3.5 × 20 = ?
- 3.5 × 10 = 35
- 35 × 2 = 70
- So 3.5 × 20 = 70 stitches foundation.
Round the result to match your stitch repeat (e.g., nearest multiple). If the pattern needs a multiple of 6 and 70 ÷ 6 = 11 remainder 4, increase or decrease by 2 stitches to get a multiple of 6 (so 72 or 66) depending on whether you want it slightly wider or narrower.
Abbreviations (US)
ch, sl st, sc, hdc, dc, tr, st(s), rep, … repeat, BLO/FLO (back/front loop only), inc (increase), dec (sc2tog), sk (skip), fpdc/bpdc (front/back post double crochet).
1. Crochet Elastic Stitch Pattern
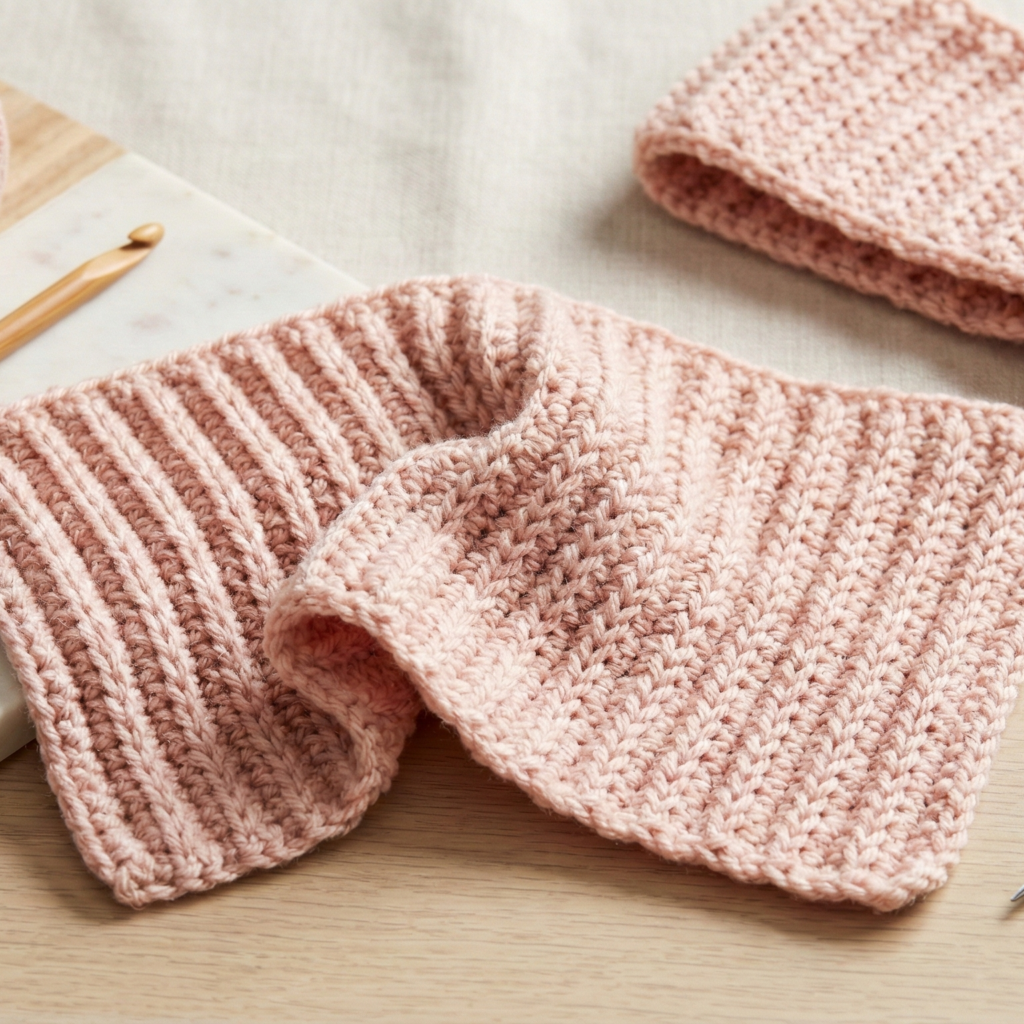
A stretchy, squishy fabric that recovers like knit ribbing — ideal for cuffs, necklines, beanies, headbands, and snug hems.
Why you’ll love it
Elastic stitch looks like ribbing and gives excellent recovery and horizontal stretch. It’s crochety but behaves a little like knit rib.
Materials & gauge suggestion
- Yarn: DK or worsted (for garments).
- Hook: 3.5–5.5 mm depending on yarn.
- Swatch: 4″ × 4″ using the repeat below.
Stitch description (worked flat in rows)
This popular elastic effect uses alternating rows of half-double crochet in back loop only (BLO) and single crochet in front loop only (FLO) to produce vertical ribs.
Repeat & foundation
- Foundation: chain any even number of stitches + 1 (turning ch if needed).
- Row 1 (setup): sc in 2nd ch from hook and across. Turn.
- Row 2 (rib row A): ch1, sc in FLO in each st across. Turn.
- Row 3 (rib row B): ch2, hdc in BLO in each st across. Turn.
- Repeat Row 2–3 for a fabric that looks ribbed and is naturally elastic.
Step-by-step sample (12-stitch sample)
- ch 13. Row 1: sc in 2nd ch from hook and across (12 sc). Turn.
- Row 2: ch1, sc in FLO across (12 sc). Turn.
- Row 3: ch2, hdc in BLO across (12 hdc). Turn.
- Repeat Rows 2–3 until 4″ height.
Tips & variations
- For a tighter rib, use sc in both rows but alternate BLO/FLO.
- To make a round tube (beanie brim), work the same pattern in the round: ch foundation, join into a ring, then round A: sc in FLO; round B: hdc in BLO. The fabric will spiral like knit rib — great for hat brims.
Troubleshooting
- Fabric too stiff? Use a larger hook.
- Ribs not defined? Tighten tension and ensure you’re consistently working BLO vs FLO.
Best uses
Hat brims, cuffs, snug waistbands, headbands, and the edges of blankets.
2. Crochet Lace Flower Stitch Pattern
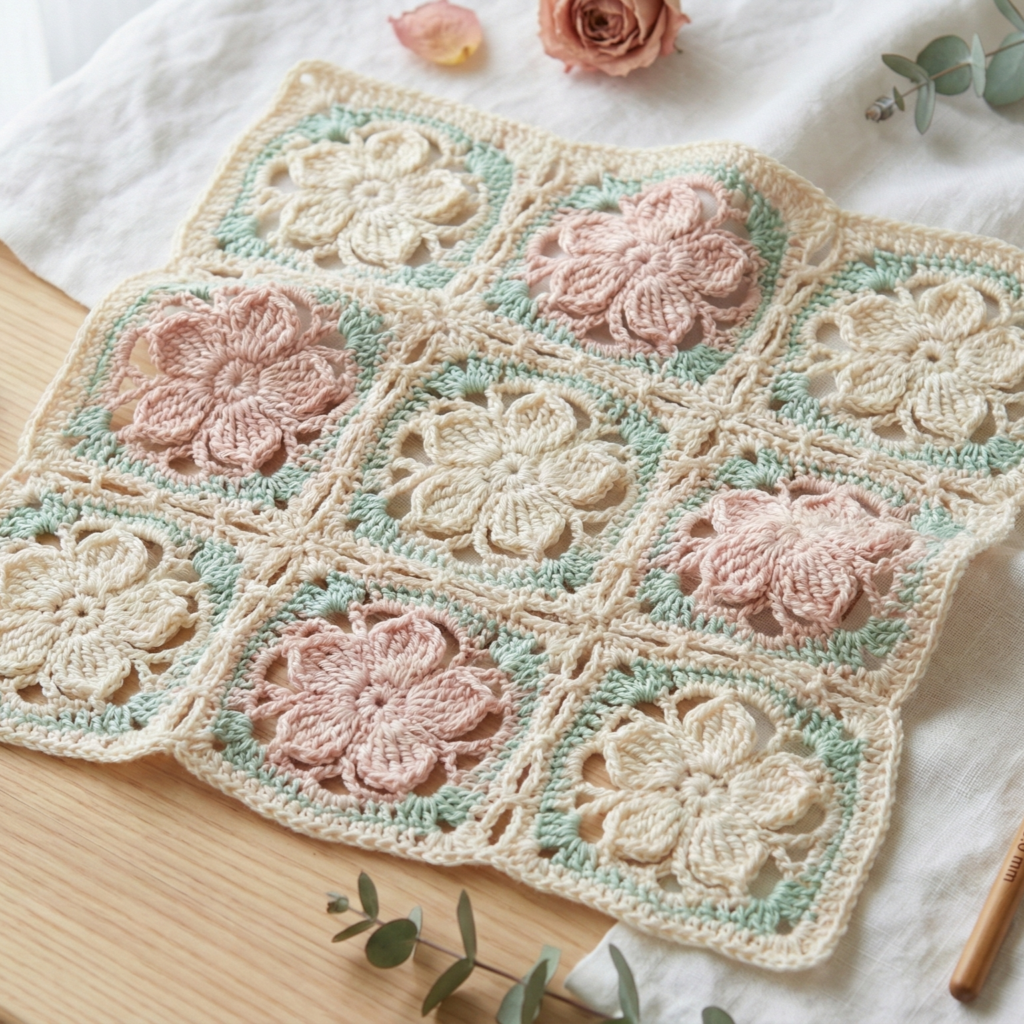
Airy, floral-looking lace made from small flower motifs or a repeated arch + petal repeat — pretty for shawls, collars, and tops.
Why you’ll love it
It makes a delicate, openwork fabric with little “flowers” that pop out. Great for lightweight garments and summer throws.
Materials & gauge
- Yarn: fingering → DK for delicate look.
- Hook: 2.5–4.0 mm depending on yarn.
- Swatch: repeat 2–3 flower units across.
Stitch overview
This version forms small five-petal flowers using short clusters worked into arches.
Repeat & foundation (flat panel)
- Foundation: chain a multiple of 8 + 1.
- Row 1: sc in next ch, ch5, skip 5 ch, sc in next ch across — forms arches. Turn.
- Row 2: in each ch-5 arch: (sc, hdc, 3 dc, hdc, sc) — this creates the “flower” petal. Join with sl st, then sc between flower tops to anchor. Turn.
- Row 3: repeat Row 1 into the new spaces created, and continue.
Step-by-step sample (one flower)
- Make a small foundation: ch 9. Row 1: sc in 2nd ch from hook, ch5, sk5, sc in last ch. Turn.
- Row 2: into the ch5 space work: sc, hdc, 3 dc, hdc, sc. This forms one petal cluster. Finish by sc at the far side to secure.
Variations
- Make larger flowers by making ch7 arches and 5-dc petal centers.
- Work in the round to make continuous motifs for doilies.
Troubleshooting
- Petals not even? Block while wet to open petals evenly.
- Fabric too flimsy? Use a slightly heavier yarn or smaller hook.
Best uses
Shawls, lace collars, summer cardigans, detachable collar panels, light curtains.
3. Crochet Mini Bean Stitch Pattern

Tiny popped bobbles in a dense field — pronounced texture on a small scale. Think pebble/dimples — cozy and interesting.
Why it shines
Mini bean creates a dense, tactile texture that’s less bulky than full bobbles. Great for structured items like bags and cushions.
Materials & gauge
- Yarn: worsted gives strong texture; DK gives smaller beans.
- Hook: for worsted use 5.0 mm; for DK use 4.0 mm.
- Swatch: make a 3″ × 3″ square to feel density.
How the mini-bean is worked
A mini bean is typically worked as a small cluster (3 loops) pulled together and closed — a short 3-loop cluster resembling an elongated puff.
Stitch repeat (flat)
- Foundation: ch multiple of 2 + 1.
- Row pattern: Row 1 sc across. Row 2: sc 1, mini-bean in next st repeat. Mini-bean = [yo, insert, pull up loop] × 3 (3 loops), yo and pull through all 4 loops on hook, ch1 to close; sc in next st. Repeat row for texture.
Step-by-step mini-bean
- Into working stitch: yo, insert hook, pull up loop (1), yo insert, pull up loop (2), yo insert, pull up loop (3) — now you have 4 loops? (depending on method). Yo and pull through all loops, ch1 to close. This leaves a small bean “bump”. Secure with a sc next to it.
- Alternate with sc rows to stabilize.
Variations
- Shift beans every other row to form a staggered pebble field.
- Use colored beans on neutral ground for polka-dot-like texture.
Troubleshooting
- Beans flattening? Pull loops up a little taller when making cluster.
- Fabric curling? Add more plain sc rows to stabilize edges.
Best uses
Potted cushion covers, structured totes, cozy mittens, baby knee patches (cute and durable).
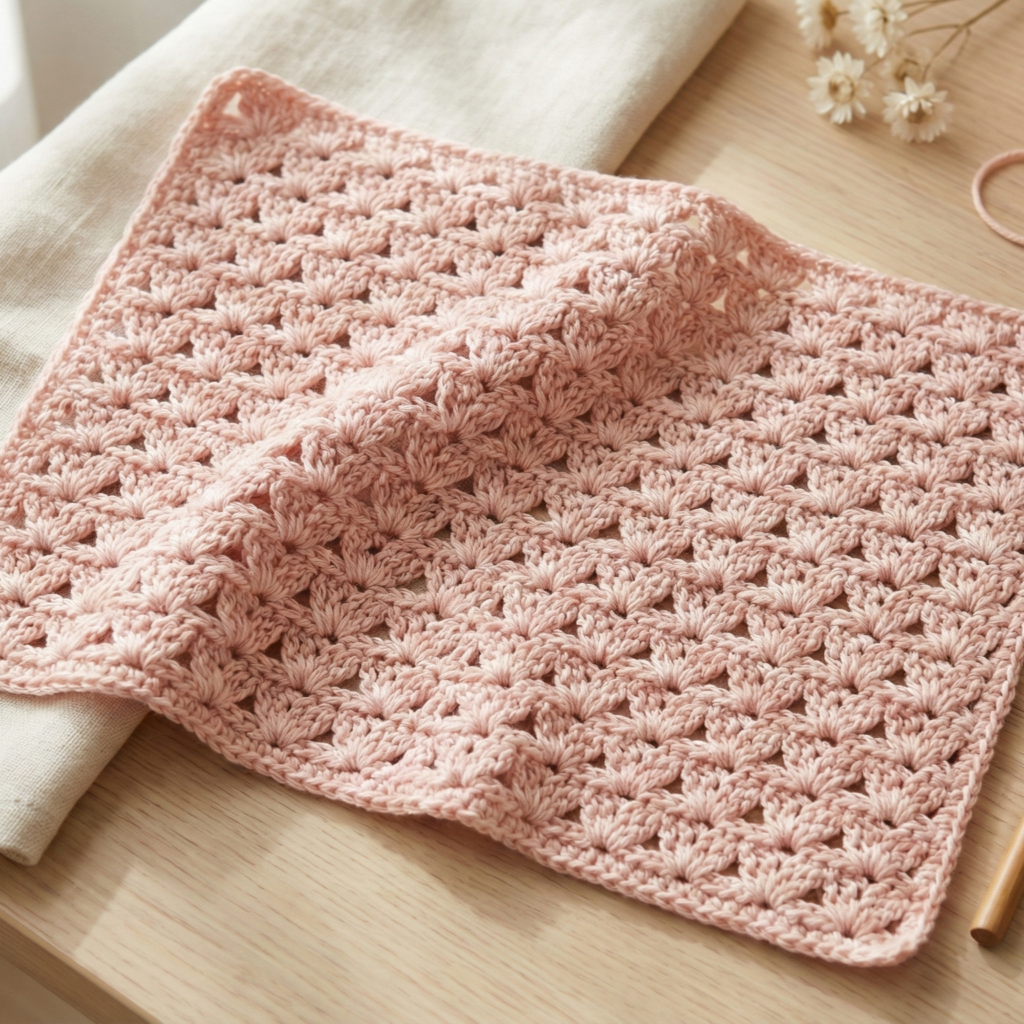
4. Crochet Tulip Stitch Pattern
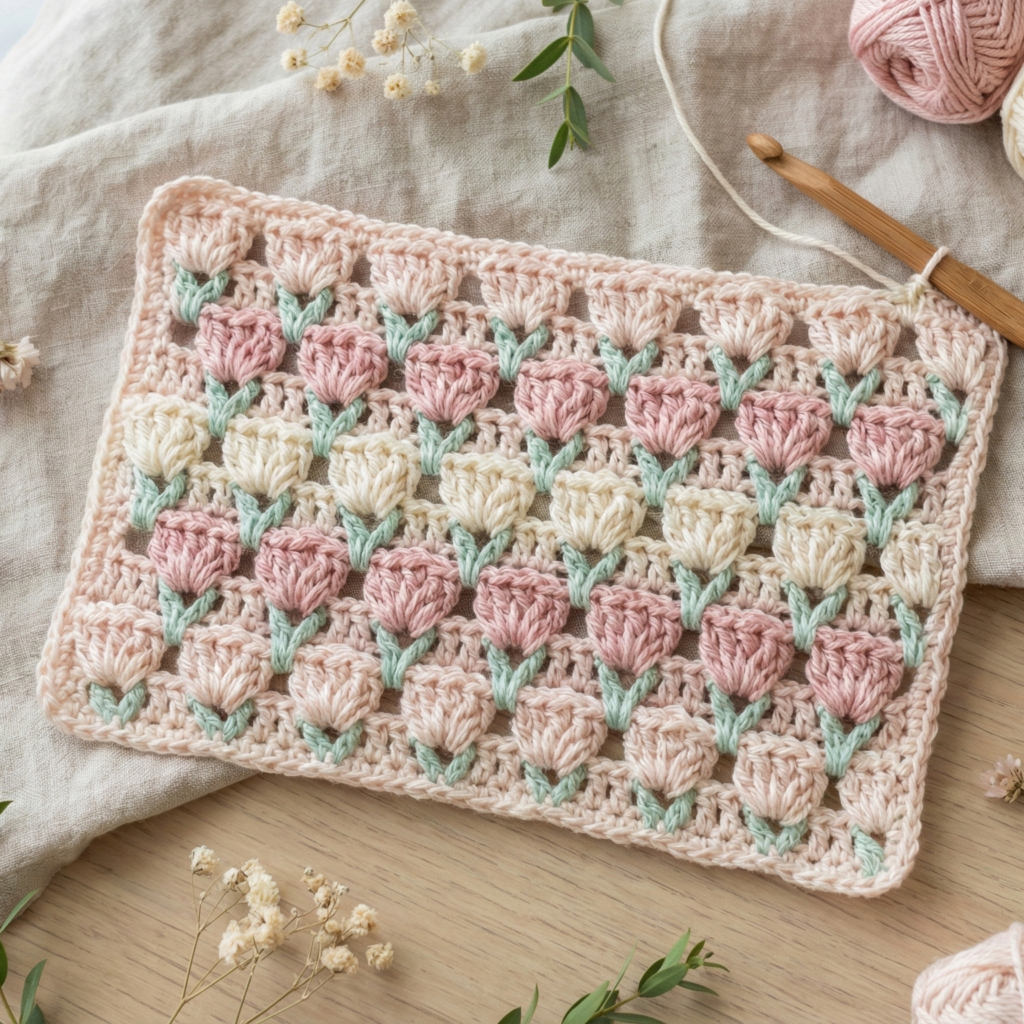
A graceful, layered petal stitch that looks like rows of tulip heads — great for feminine scarves and blanket borders.
Why it stands out
Tulip stitch creates a decorative horizontal band of petal motifs that can be dense or lacy depending on yarn/hook.
Materials & gauge
- Yarn: DK → worsted.
- Hook: 4.0–5.5 mm.
- Swatch: make 6 petal repeats across to see layout.
Stitch construction (row repeat)
This common tulip-style repeat uses a foundation of dc arches and a petal row of grouped clusters.
- Foundation: chain a multiple of 6 + 1.
- Row 1: dc across forming small arches (e.g., dc, ch2, skip 2, dc).
- Row 2 (petals): into each arch work (sc, hdc, 5 dc, hdc, sc) — this forms a tulip petal unit.
- Row 3: sc row to secure petal base, or repeat Row 1 to stack tulips in stagger.
Step-by-step sample (one petal)
- R1 arch: dc, ch2, skip 2, dc in next. (Repeat)
- R2 petal: into the ch2 space: sc, hdc, 5 dc, hdc, sc. The 5 dc creates the rounded petal top. Repeat across.
Variations
- Work stacked tulips by offsetting petal rows above/below to create overlapping tulip fields.
- Use shorter petals (3 dc) for small scalloped look.
Troubleshooting
- Petals flop? Use smaller hook for firmer petals or add a sc row beneath to support.
- Edges uneven? Keep count and place marker to ensure even spacing.
Best uses
Borders for blankets, feminine scarves, panel accents on skirts or sweaters.
5. Crochet Diagonal Box Stitch Pattern
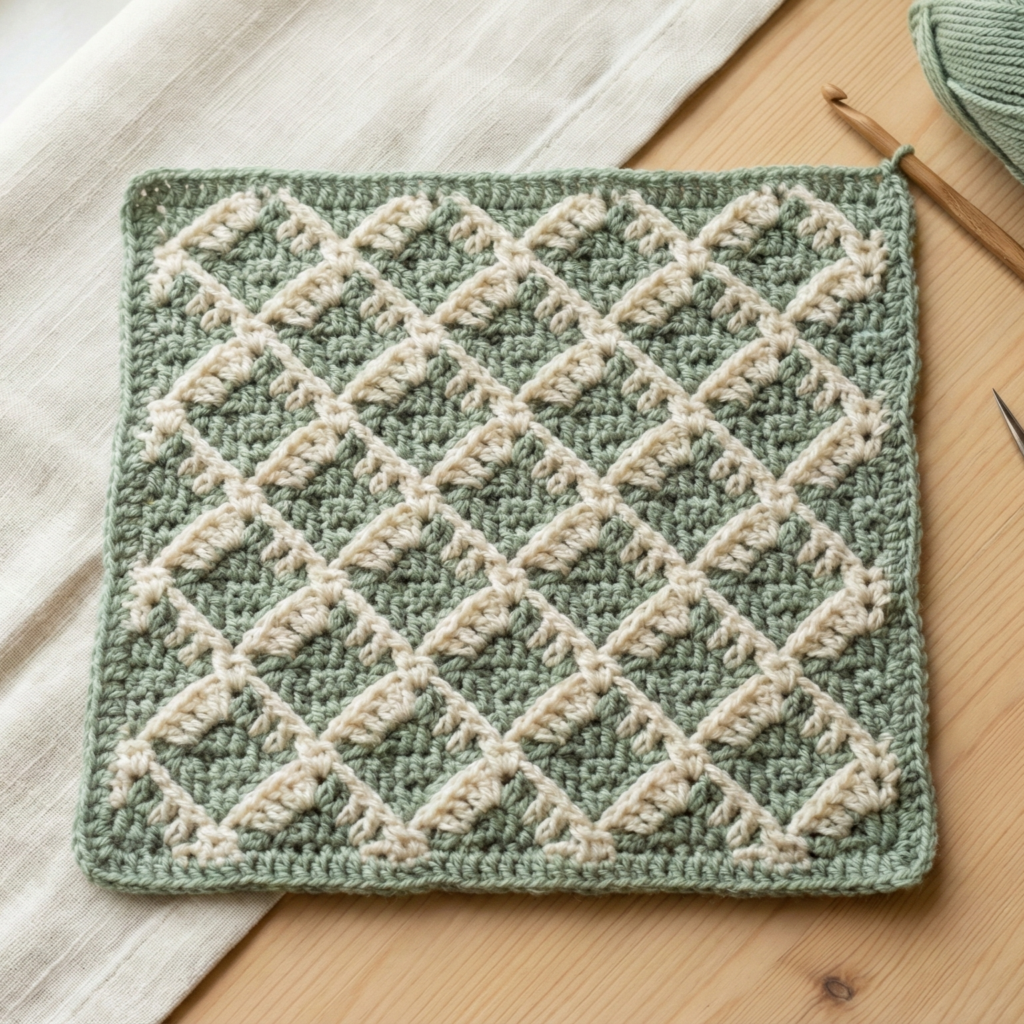
A geometric, slightly open stitch creating diamonds/boxes on the diagonal — modern and graphic, excellent for throw blankets and upholstery-style pieces.
Why it’s useful
Diagonal box stitch gives a flat but visually striking texture. It’s fairly stable and looks great in single color or two-tone colorwork.
Materials & gauge
- Yarn: worsted or aran for bold geometry.
- Hook: 5.0–6.0 mm.
- Swatch: 6 repeats across to see diagonal effect.
Stitch idea (worked in rows)
This stitch often uses chains and dc clusters offset every other row so the boxes slant diagonally.
- Foundation: chain multiple of 6 + 1.
- Row 1 (setup): dc across creating pairs of dcs and ch1 spaces (dc, ch1, dc).
- Row 2: ch3, (dc3 cluster) into ch1 space of previous row, ch1 repeat — clusters sit on diagonal.
- Row 3: churn back with dc in each cluster top and between clusters, offsetting the clusters.
Step-by-step simplified repeat (flat)
- ch 25 (example). R1: dc in 4th ch from hook (counts as dc), ch1, skip 1, dc in next ch across. R2: ch3, turn, 3 dc cluster in each ch1 space from previous row, ch1 across. R3: ch3, turn, dc across working into cluster tops and chains to lock boxes in. Repeat R2–R3.
Variations
- Make the boxes larger by making 5-dc clusters instead of 3.
- Color block every few rows to emphasize diagonal lines.
Troubleshooting
- Diagonal drifting? Keep consistent stitch counts and use stitch markers to align cluster starting points.
Best uses
Modern blankets, placemats, lamp covers, geometric scarves, and cushion panels.
6. Crochet Knit Lattice Cable Stitch Pattern
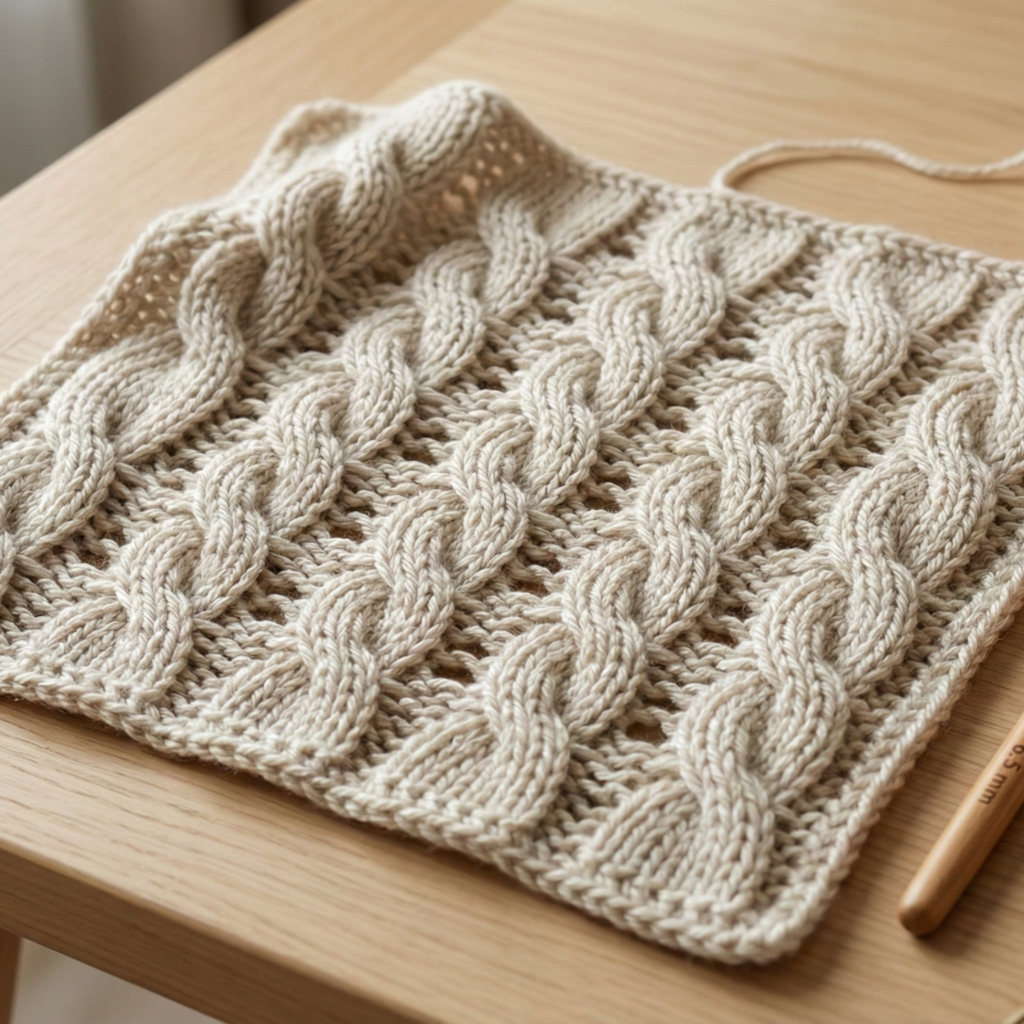
A crochet stitch that mimics knit cables + open lattice — textured, sculptural, and luxe. Uses front- and back-post stitches plus crosses to form cable twists.
Why learn it
It gives cable-like depth without knitting — perfect for sweaters, cardigans, and statement blankets.
Materials & gauge
- Bulky or worsted yarn to show cables clearly.
- Hook: 6.0 mm for worsted, 8.0 mm for bulky.
- Swatch: do at least 5 cable repeats wide to watch interaction.
Core techniques used
- Front post double crochet (fpdc) and back post double crochet (bpdc) to create raised ribs.
- Cable crossing: slip X stitches to front or back, then work the next group, then work the slipped group to achieve the twist.
Repeat & sample (worked in rows)
- Foundation: multiple of (12 sts cable panel) + edge stitches.
- Row 1: establish surface: dc across.
- Row 2: work rib columns: fpdc 6, bpdc 6 across (this sets vertical columns).
- Row 3–N: alternate rows of fpdc/bpdc to build rib.
- Cable row (every 6–10 rows): to make a left cross: fpdc 3 (hold), fpdc 3 (work), then work the held 3 — use a cable needle or spare dpn/hook to hold the 3 stitches to front/back. On crochet, you can also cross by working into post stitches out of order (careful counting).
Step-by-step little cable twist (left cross)
- Identify 6 fpdc forming a cable column (sts 1–6). To cross left: remove first 3 post stitches by inserting a stitch marker and holding them in front of the work (or slip them to a cable needle). Work next 3 fpdc in their posts. Then return to the held 3 and work them. This produces a left-leaning cable twist.
- Secure counts and then continue rib rows.
Variations
- Make smaller two-stitch cables for delicate texture.
- Mix lattice openwork between cable panels for breathability.
Troubleshooting
- Crossed cables look messy? Practice the transfer movement: on crochet you typically work into post stitches, not slip them off a needle; use lifelines or markers.
- Stitches too tight? Use a hook 0.5–1.0 mm bigger to ease manipulation.
Best uses
Chunky cardigans, statement scarves, throw blankets, cable-front sweater panels.
7. Crochet Trinity Stitch Pattern
A mesmerizing cluster stitch creating tiny, triangular three-petaled clusters that produce a rich yet lacy texture — also called the three-petal popcorn in some traditions.
Why it’s awesome
The trinity stitch makes small triangular clusters that interlock; fabric looks richly textured but remains flexible and slightly open.
Materials & gauge
- Yarn: DK → worsted.
- Hook: 4.0–5.5 mm.
- Swatch: repeat 6–8 trinity units across.
How the trinity stitch works
Each “trinity” is three small puff/petal loops worked into the same base stitch or space, closed and anchored to make a triangular petal.
Repeat & sample (worked in rows)
- Foundation: chain multiple of 3 + 2.
- Row 1: sc across to set base.
- Row 2 (trinity row): skip 1 st, in next st work trinity: (yo, insert, pull up loop) ×3, yo pull through all loops and ch1 to close, sk 1, sc in next repeat. This places triangular bumps staggered along a ground of sc.
Step-by-step trinity
- Yarn over, insert into stitch, pull up loop; repeat 3 times so you have multiple loops on the hook. Yarn over and pull through all loops on hook to finish cluster. Ch1 to close and secure. This creates a small three-loop cluster (a trinity). Anchor it with a sc to the next stitch.
- On next row, work sc across and place trinity stitches into the gaps between previous row trinities for an interlocking texture.
Variations
- Make “double trinity” (two pups together) for stronger texture.
- Work trinity stitch in the round for 3D motifs.
Troubleshooting
- Cluster pulling through is hard? Keep tension relaxed and chain1 after cluster to relieve pressure.
- Fabric puckers? Add more sc rows between trinity rows for stability.
Best uses
Cushions, textured scarves, garment panels where you want a subtle 3-D effect but not full bobbles.
Final tips — practicing & using these stitches
- Start small. Make 8″ × 8″ practice swatches before committing to big projects. You’ll learn how each stitch behaves in your yarn.
- Mark repeats. Use stitch markers to mark pattern repeats — they save headaches.
- Edge stabilization. Many textured stitches want to pull in or flare; add 2–3 rounds of sc around edges to stabilize.
- Blocking matters. Lace flower, tulip, and trinity stitches often open up beautifully with wet blocking. Do it for wearable beauty.
- Combine stitches. Try a ribbed cuff (Elastic Stitch) + body in Tulip or Diagonal Box for visual contrast. Cables framed by mini-bean borders look luxurious.
conclusion
You’ve now got seven fully described stitch patterns — each explained with step-by-step repeats, sizing guidelines, troubleshooting tips, and places they shine. Pick one to practice this week: try a 4″ swatch of the Elastic Stitch for a wearable cuff, or a 12″ panel of the Knit Lattice Cable if you want a weekend-long showstopper.