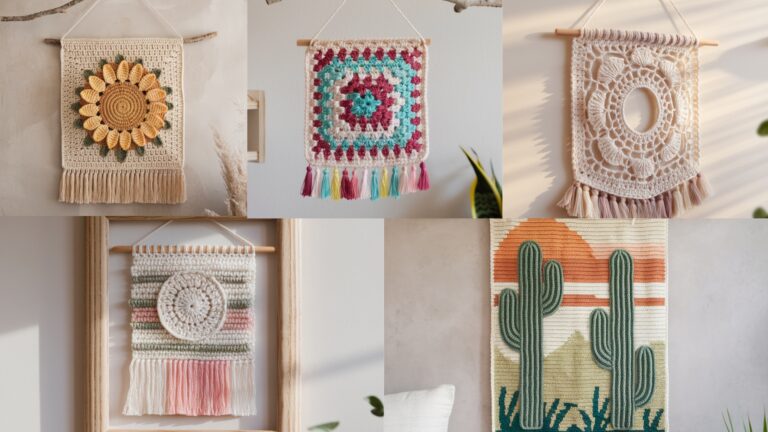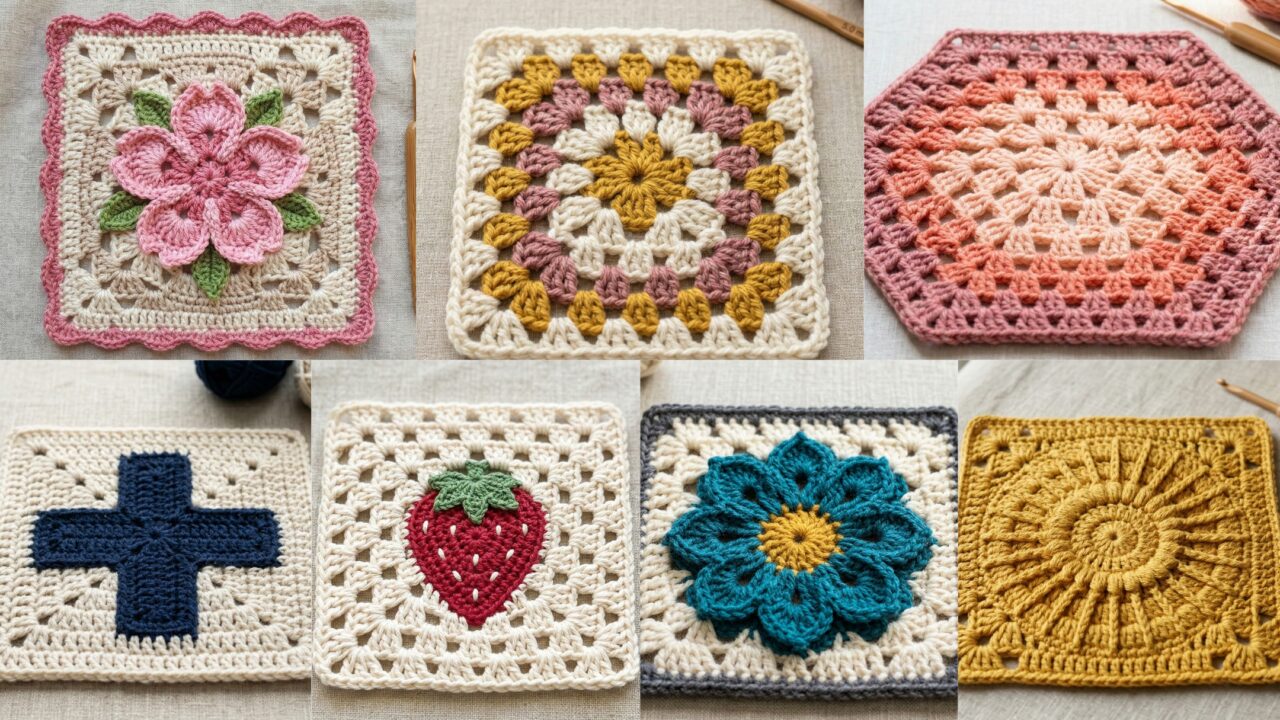
Granny squares are the ultimate crochet playground — tiny, portable, and endlessly remixable. Turn a pile of little motifs into blankets, bags, pillows, garments, or wall hangings. Below you’ll find a friendly introduction (materials, gauge math, basics), then seven full granny square patterns with long, clear step-by-step instructions: African Flower, Cross Motif, Classic Granny, Sakura, One-Color Sunburst, Granny Ombre Hexagon, and Strawberry Motif. Each pattern includes materials, abbreviations, exact round-by-round instructions, finishing tips, blocking advice, join suggestions, and project ideas — everything you need to make beautiful squares and use them in bigger projects.
Quick primer — materials, tools, sizing, and gauge math
Yarn & hook
- Yarn: DK or worsted are the most useful for granny squares. Use cotton or cotton blends for crisp stitch definition; acrylic or wool for warmth.
- Hook: follow yarn label as a starting point, then try one size smaller if you want a firm square (common choices: 3.5–5.5 mm).
- Notions: tapestry needle, scissors, stitch markers, blocking pins/blocking mat, measuring tape.
Finished sizes
- Small motif: 3–4″ (8–10 cm) — e.g., coaster, hair clip.
- Medium motif: 4–6″ (10–15 cm) — most common for blankets/pillows.
- Large motif: 6–8″+ (15–20 cm) — for quick coverlets or single-square projects.
Abbreviations (US)
- ch = chain
- sc = single crochet
- hdc = half double crochet
- dc = double crochet
- tr = treble crochet
- sl st = slip stitch
- MR = magic ring
- sp(s) = space(s)
- rep = repeat
- BLO / FLO = back/front loop only
- [] x n = repeat the bracketed sequence n times
Gauge / stitch math (example, digit-by-digit)
Always make a 4″ (10 cm) swatch in the stitch you plan to use and block it the way you will the final square.
Example: your swatch shows 18 stitches = 4″ in single crochet. You want a finished square 6″ wide. How many stitches across do you need?
- stitches per inch = 18 ÷ 4 = ?
- 18 ÷ 4 = 4.5 sts per inch.
- desired width = 6 in.
- multiply: 4.5 × 6 = ?
- 4.5 × 6 = (4 × 6) + (0.5 × 6) = 24 + 3 = 27 stitches across.
If your chosen pattern is worked in rounds you’ll use this to estimate how many rounds/increases you need to hit the target diameter.
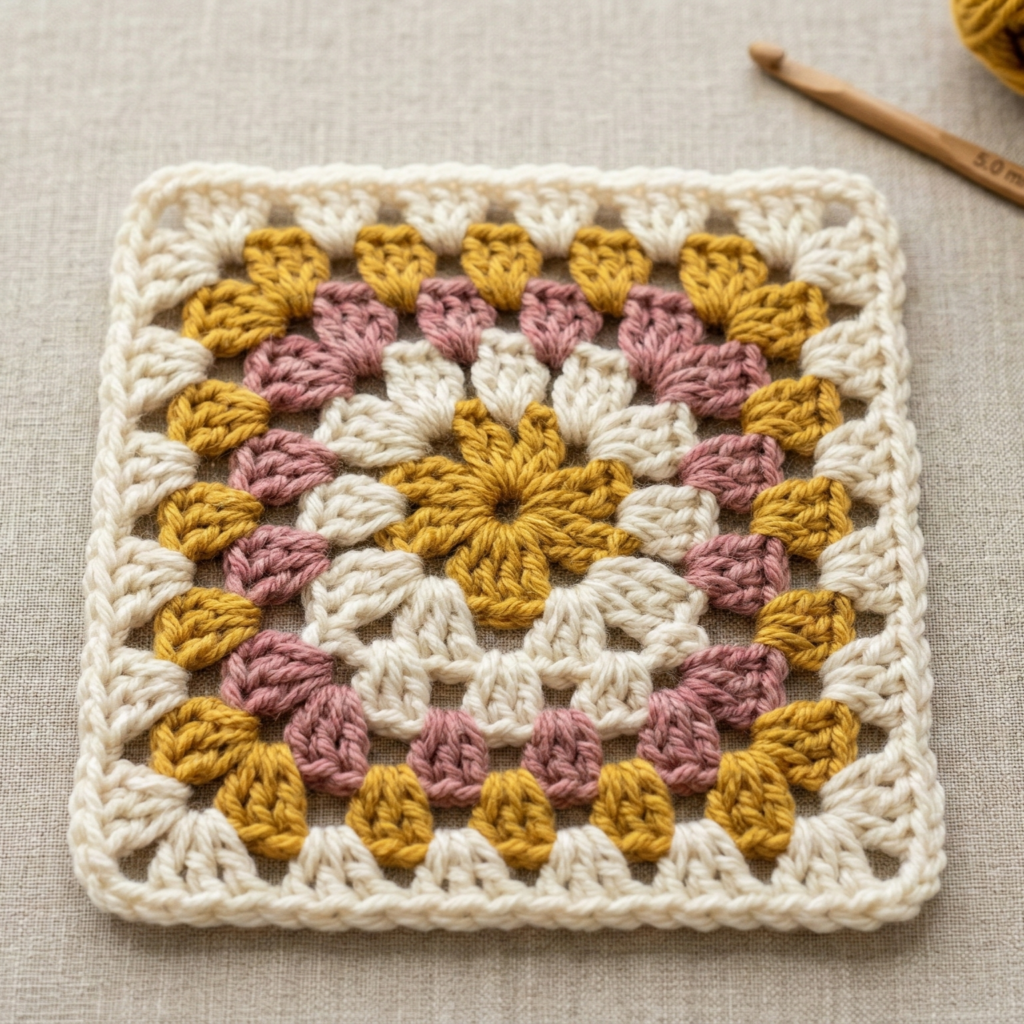
1. Crochet African Flower Granny Square Pattern
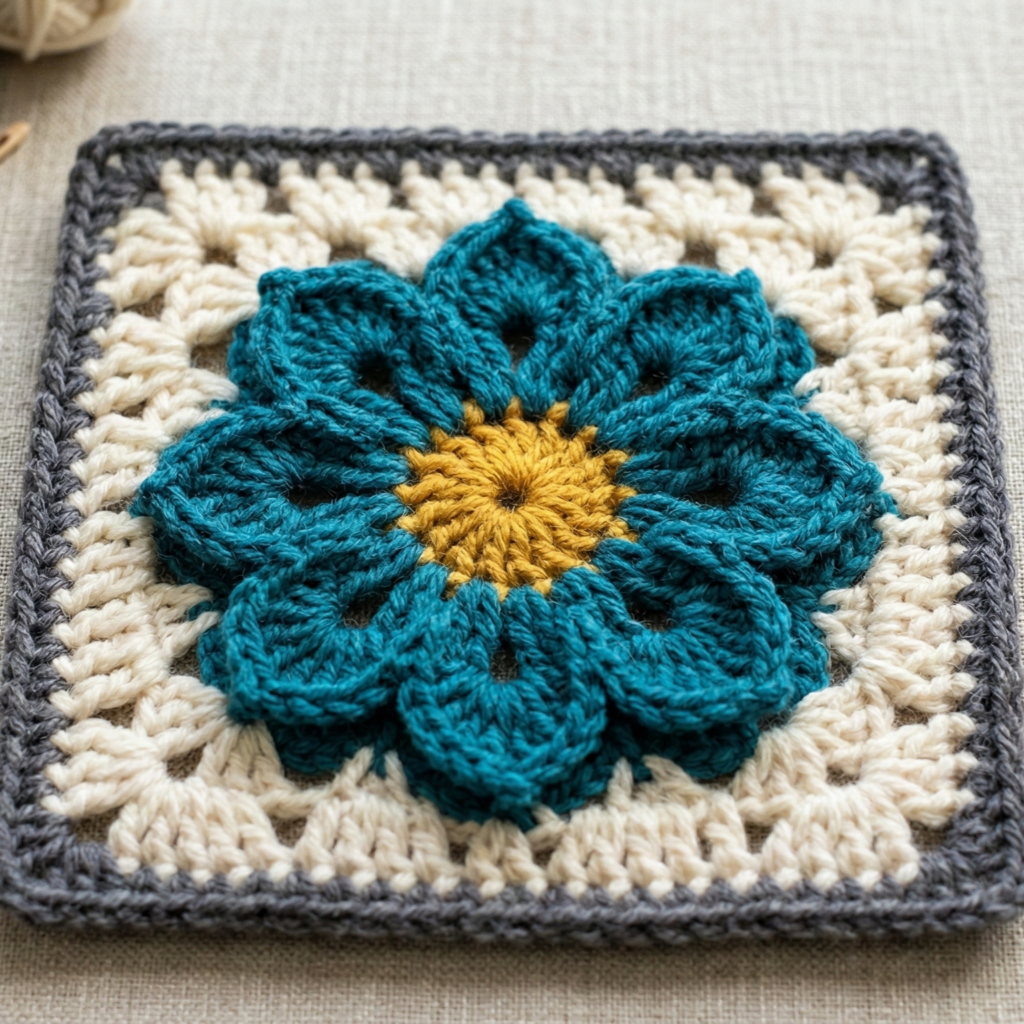
A beautiful raised floral center inside a square — the African Flower is a showy motif that looks great in solid or multi-color palettes.
Skill level: intermediate
Finished size (sample): 5″ square using DK yarn and 4.0 mm hook
Materials: DK yarn in 3–4 colors (center, petals, round-out color, border), hook 4.0 mm, tapestry needle.
Overview
This motif is built with a circular floral center (petals created by clustered stitches) that is squared up with corner rounds. Use contrasting petal and background colors for impact.
Abbreviations used specifically here
- cl = cluster (see pattern for number of dc in cluster)
- pic = picot (ch3, sl st into base, or as preferred)
Pattern — African Flower Granny Square (rounds)
Center (color A)
- MR, ch1, 8 sc in MR. Join with sl st to first sc. (8 sc)
Petal foundation (color B)
2. Ch3, 3 dc in next sc, ch3, sl st in next sc — repeat around to form 8 petal loops. Join. (8 loops)
Petal shaping (color B)
3. In each ch3 loop: (sc, hdc, 5 dc, hdc, sc) — fasten off color B. Now you have 8 rounded petals.
Squareing the motif (color C)
4. Join color C in the back of a petal base. Round 1: ch1, sc evenly around the circle , working 3 sc into spaces between petals to help square it. Join. (Adjust stitch count so your round is flat — if it ruffles add sc evenly; if it cups, add additional increases.)
- Round 2: ch3, skip 2 sts, sc in next around to form mesh, placing extra ch-3 corners where you need to start corners for squaring. Typically make 4 corner ch-3 spaces at 90° intervals — you can count petals to help placement: place a corner after every 2 petal groups if that helps to get even corners.
- Round 3 (square shaping): Work granny cluster style in corner ch-3s: (3 dc, ch2, 3 dc) in corner sp; 3 dc in next ch-3 sp or across flat sides — finish until you have a square. Fasten off and weave ends.
Finishing & tips
- Block gently to square the sides, pinning each corner to get sharp right angles.
- Use a narrow single-color border 2–3 rounds of sc to unify your blanket.
- For sturdier blankets, back with a thin cotton lining or use a bordering round of BLO sc to create a joining surface.
Variations & uses
- Make all-over African Flower blankets by alternating petal and background colors.
- Use thick cotton and a large hook (10 mm) for quick market baskets or floor pouf panels.
2. Crochet Cross Motif Granny Square Pattern
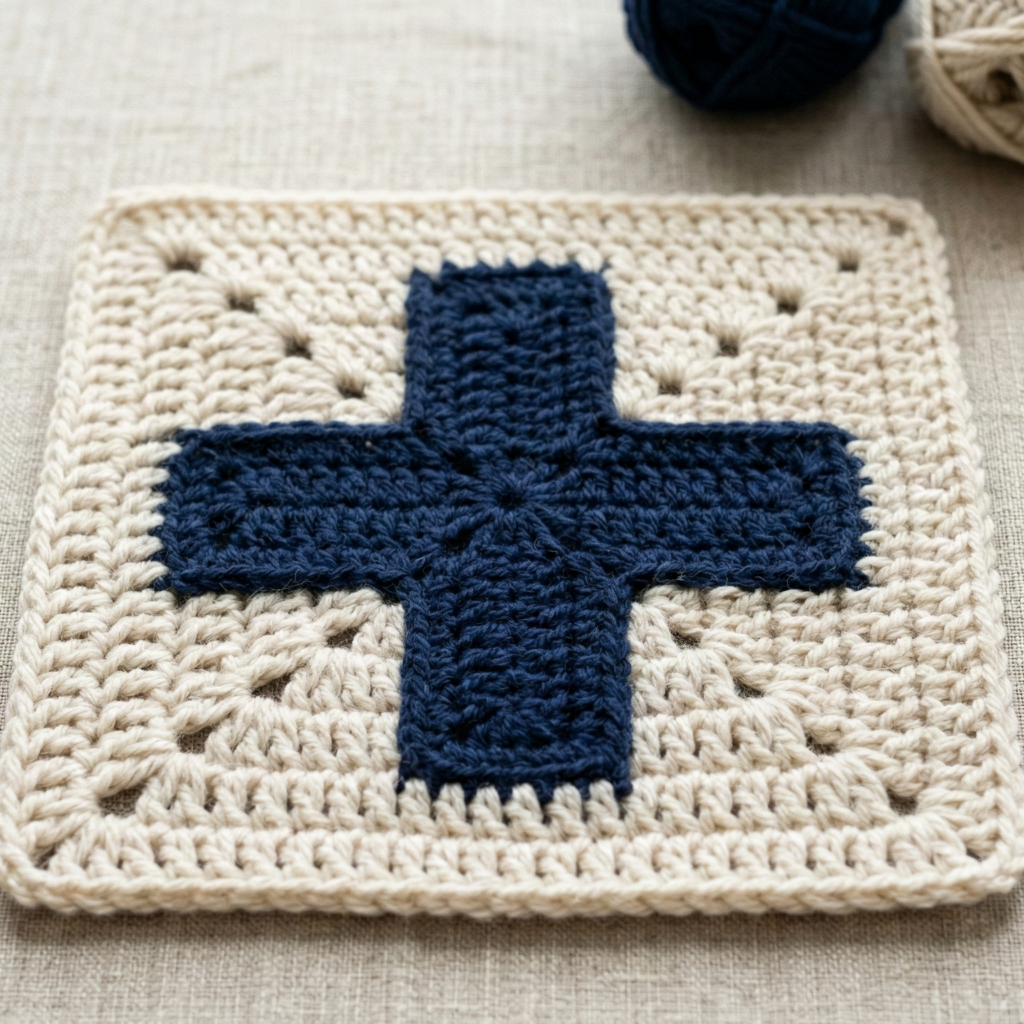
A geometric square with a bold cross in the center — great for graphic blankets and modern home décor.
Skill level: confident beginner → intermediate
Finished size (sample): 6″ square with worsted yarn & 5.0 mm hook
Materials: 2 contrasting colors (background and cross), hook, tapestry needle.
Pattern idea
Work a small central cross using color A, then build out rounds around it in color B and square up.
Pattern — Cross Motif Granny Square
Center cross (color A)
- MR, ch1, 8 sc in MR. Join. (8)
- Round 2: ch3, dc in next 3 sts to create a short bar, ch3, dc across opposite 3 sts — effectively you are creating a cross by working into stitches across the round. For clarity, work this as a small flat plus sign by marking 4 spokes; you may need to work extra short rows rather than strict rounds to make obvious cross arms. (This section is easier to shape in a small 3×3 grid approach — see variation below.)
Alternative clearer method (recommended)
Make a 3 × 3 small square grid for the cross:
- Work a small 3×3 square of sc (chain 4, sc across 3, work 3 rows to get a 3×3 patch). Use color A for the central cross shape — leave corners empty. Then join into rounds around this patch with color B, filling in the corners to make a larger granny.
Squaring (color B)
2. Join color B around the 3×3 block: pick up stitches along edges, work rounds of sc or dc in rows that add width. Create corner rounds by adding (3 dc, ch2, 3 dc) into corner points once you go round. Keep checking for flatness.
Finishing & tips
- If you prefer true granny texture, convert the center cross into granny clusters: place 3-dc clusters to form bars and create corner chains for a square.
- Border with a bold contrasting color for graphic punch.
Uses & variation
- Make a checkerboard of cross squares in alternating colorways for a modern afghan.
- Make a small set of coasters in monochrome using this motif.
3. Crochet Classic Granny Square Pattern
The classic granny square — the building block of crochet tradition. I’ll give both the traditional cluster version and a tidy modernized variant so you can pick your favorite.
Skill level: beginner
Finished size (sample): 5″ square with worsted & 5.0 mm hook
Materials: any yarn and hook you like; 1–3 colors
Classic granny square (cluster method) — step-by-step
- MR, ch3 (counts as first dc), work 2 dc, ch2, 3 dc into ring for first corner. Repeat * * 3 more times — you now have four corners. Join to top of ch3. (4 corner shells = 4 groups of 3 dc separated by ch2 corners.)
- Round 2: In each corner ch-2 sp, work (3 dc, ch2, 3 dc). Between corner blocks along sides work ch1, 3 dc in ch-1 space of previous round — you are building a chain of clusters. Join.
- Round 3+: Repeat Round 2, working (3 dc, ch2, 3 dc) in each corner ch-2 space, and placing 3-dc clusters along the side spaces to keep the square building outward. Increase the number of cluster groups along the sides as the square grows.
- Fasten off when square reaches desired size. Add 1–2 rounds of sc for a neat edge.
Modern tidy granny (solid edges)
- Work same cluster pattern but replace side ch-1 spaces with small sc bars for a neater square face. This modern approach reduces holes and gives a smoother join for blankets.
Tips
- To join squares for blankets, use join-as-you-go, whipstitch, or mattress stitch for an invisible seam.
- For uniformity, block each square to the same size before joining.
4. Crochet Sakura Granny Square Pattern
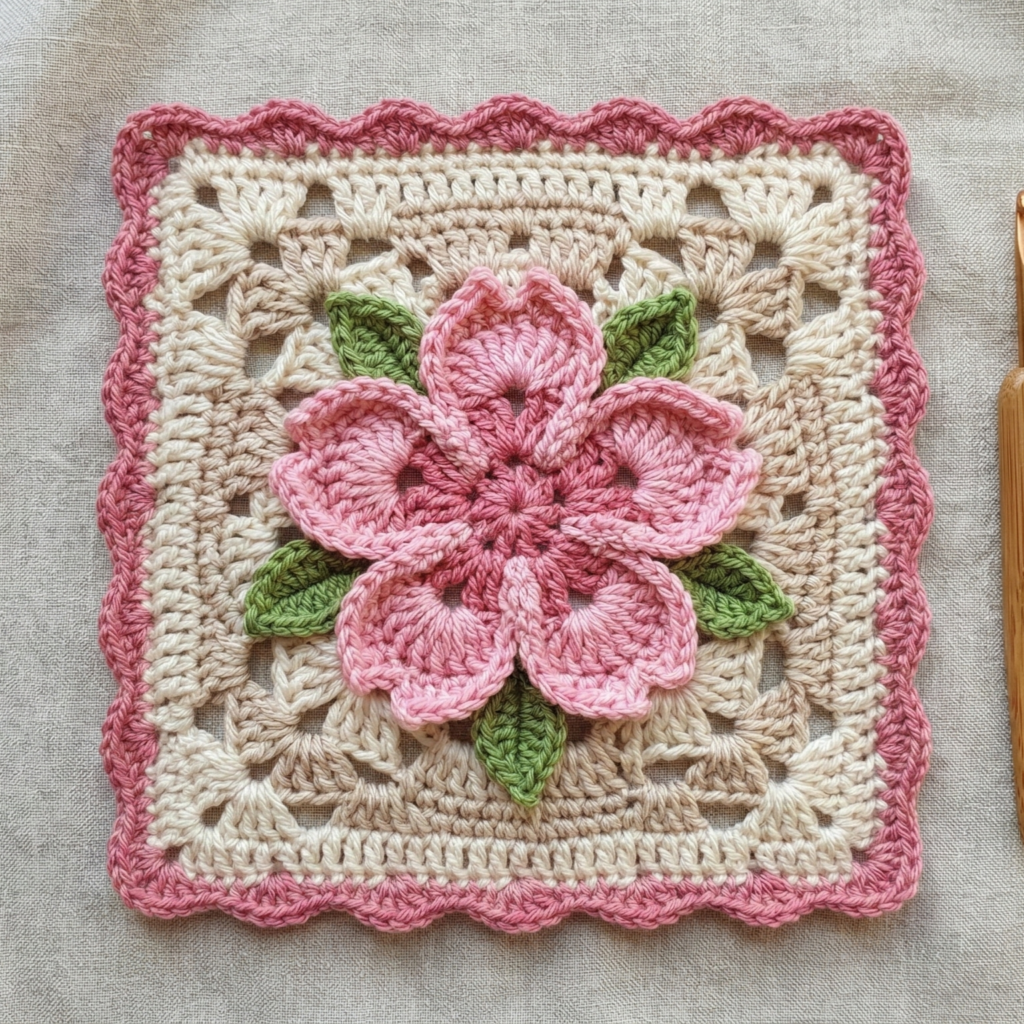
Cherry blossom (sakura) squares capture a floral, delicate mood — perfect for spring throws and baby blankets.
Skill level: intermediate
Finished size (sample): 5–6″ with DK yarn & 4.0 mm hook
Materials: DK yarn: pale pink, darker pink, green, and neutral; hook 4.0 mm
Pattern overview
This square uses a small central blossom made from petal clusters, then squared out with corner rounds and leafy accents.
Pattern — Sakura Granny Square (rounds)
Center blossom
- MR, ch1, 8 sc in MR. Join. (8)
- Make 5 petals spaced evenly: ch4, sl st into next sc around to form loops. (5 loops)
- In each loop: (sc, hdc, 3 dc, hdc, sc) to form a petal. Use darker pink for the petal bodies and lighter pink for the background.
Leaf and square rounds
4. Join green at base of a petal, ch1, sc a few sts to anchor, then add a small leaf: ch6, sc back across chain to make a leaf. Make 5–6 leaves between petals to create an organic look.
- Round out with neutral color: sc evenly around to create a round that will be squared off. Add increases strategically so you can form corner ch-2 spaces for granny corners.
- Make standard granny corner rounds: (3 dc, ch2, 3 dc) in corners, cluster in sides to keep it square.
Finishing & blocking
- Gently wet-block pinned to a 5–6″ square, shaping petals slightly.
- Add a narrow scalloped border in pink to mimic sakura fringe.
Projects
- Baby blanket in pastel sakura squares; a matching lullaby pillow would be adorable.
5. Crochet One-Color Sunburst Granny Square Pattern
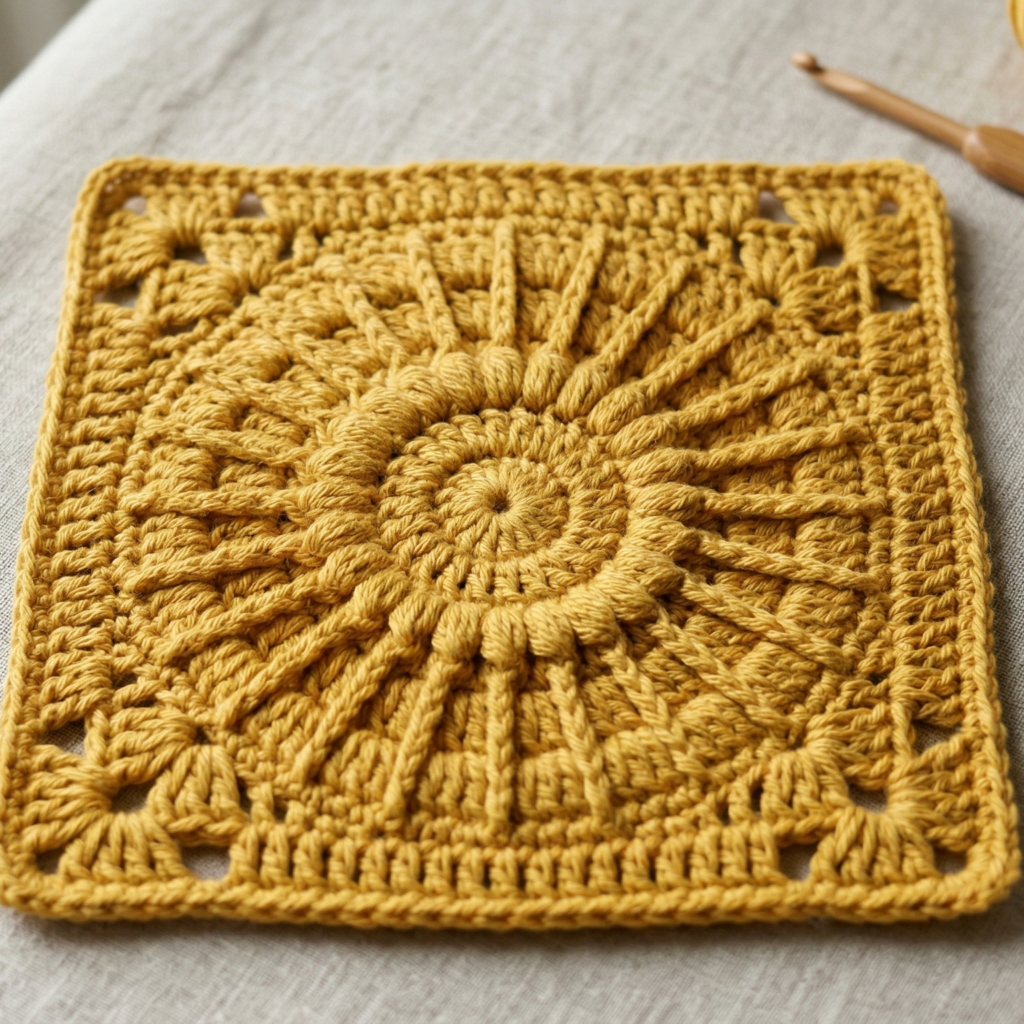
A striking single-color sunburst square made of concentric textured rounds that form a radiant centre.
Skill level: confident beginner
Finished size (sample): 6″ square with worsted & 5.0 mm hook
Materials: one solid color yarn (wool/cotton), hook, tapestry needle.
Pattern concept
Work concentric rounds of textured stitches (puff, cluster, front/post) to create a sunburst that’s then squared by corner rounds.
Pattern — One-Color Sunburst Granny
- MR, ch1. R1: 12 sc in MR. Join. (12)
- R2 (puff round): ch2, puff stitch in next st around — this creates a textured sunburst center.
- R3 (cluster round): ch3, 3 dc cluster in next puff space around, join.
- R4 (rib round): work fpdc/bpdc alternation to form radial ridges: fpdc around next dc, bpdc around next dc around. This creates strong lines.
- R5: Work sc round to stabilize.
- Squareing rounds: switch to classic granny corners — (3 dc, ch2, 3 dc) into corner ch-2 spaces while placing clusters along the sides until a square develops.
Finishing
- Block square to exact dimensions. A single-color textured blanket is very elegant and tactile.
6. Crochet Granny Ombre Hexagon Pattern
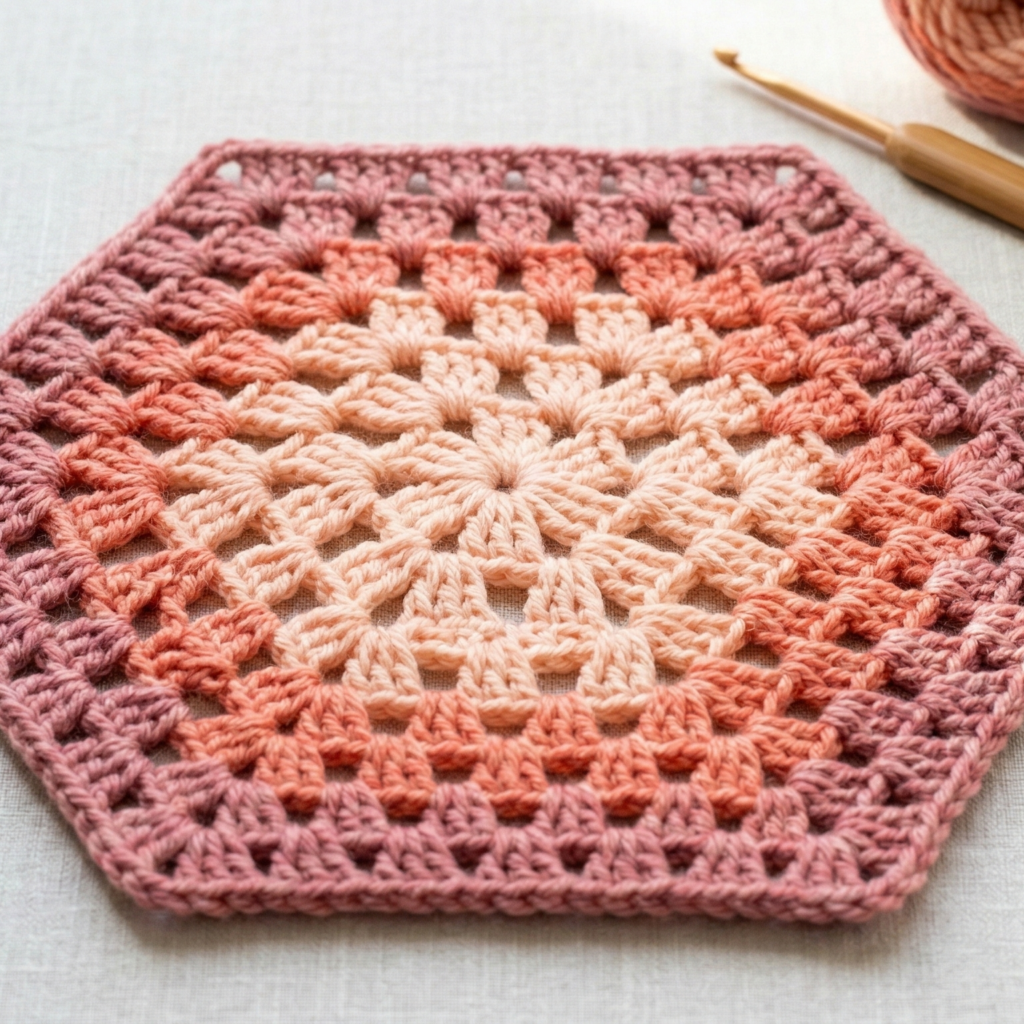
A hexagonal granny with ombre color changes — hexes join beautifully into blankets and market bags with interesting geometry.
Skill level: intermediate
Finished size (sample): 6–7″ hexagon with DK & 4.0 mm hook
Materials: gradient/ombre yarn cake or planned color changes, hook, needle.
Pattern overview
The hexagon is simply a granny built into six sides instead of four. Using ombre yarn gives a lovely color flow without lots of ends.
Pattern — Granny Ombre Hexagon
- MR, ch3 (counts as dc), work 2 dc, ch2, 3 dc into ring for first corner — repeat 6 times for six corners. Join. (6 corners)
- Round 2: In each corner space work (3 dc, ch2, 3 dc) (this is your corner). Along each side work 3-dc cluster in each ch-2 side space from the previous round. Because hexagons have more sides, increases along sides create even growth.
- Round 3+: Repeat the process: corner = (3 dc, ch2, 3 dc); sides = 3-dc clusters spaced into side chain spaces. Continue until hexagon reaches desired size.
- If working with ombre cake, simply continue rounds until you see the color shift where you like it. If changing colors manually, change at the start of a round for clean bands.
Joining hexes
- Hexes join with flat seams or join-as-you-go: when you are on the last round of one hex, you can sl st into corresponding side cluster of an adjacent hex to join seamlessly.
Uses
- Hexes make strong market bags, shawls, or modern blankets with geometric appeal.
7. Crochet Strawberry Motif Granny Square Pattern
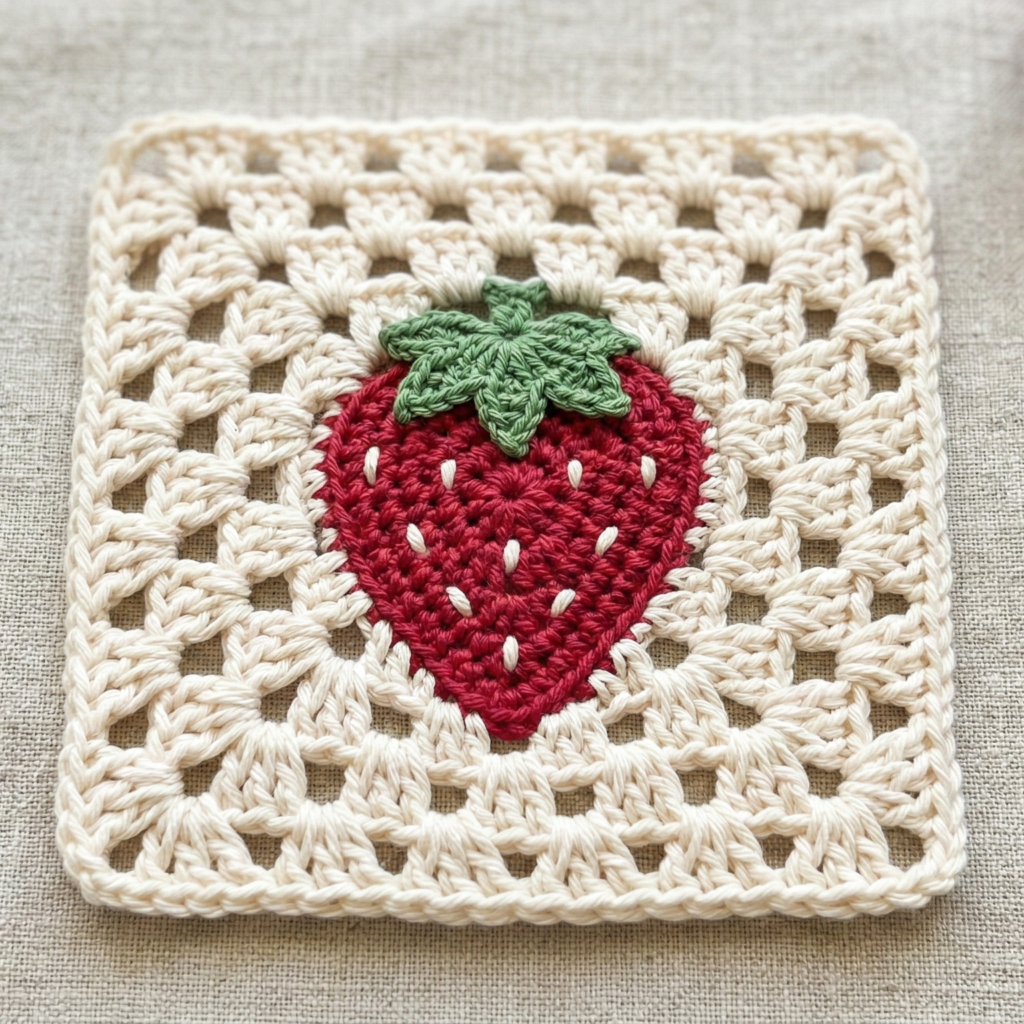
A cute motif featuring a tiny strawberry centered inside a granny square — great for kids’ projects and playful throws.
Skill level: intermediate (appliqué + motif join)
Finished size (sample): 5″ square with DK & 4.0 mm hook
Materials: DK berry red, green, cream (for seeds), hook 4.0 mm.
Pattern concept
Work a small strawberry appliqué (a tiny cone shape) and center it on a small granny square, or incorporate the strawberry directly into the square center using short rows.
Pattern — Strawberry applique + square
Strawberry (tiny)
- MR, ch1, 6 sc in MR. (6)
- R2: inc in each st → 12 (increase to make a slightly larger berry if desired).
- R3–R4: sc around twice to make height. Add small embroidered seeds with cream yarn using French knots or short satin stitches. Fasten off leaving tail.
Leaf crown
4. Join green at berry top: make 4 small leaves by ch6, sc back across chain to make a small curved leaf; fasten off.
Make the square
5. Make a small granny square to match berry size: MR, (3 dc, ch2, 3 dc) × 4 — one round gives a small square; add a second round of clusters to reach desired 5″ size.
Assembly
6. Center strawberry on the square and sew with the long tail, anchoring leaves first then the base so it sits upright. Optionally sew strawberry at a slight angle for charm.
Variation
- Make a whole blanket of strawberries by alternating plain granny squares and strawberry squares for a polka-berry effect.
Joining your squares — methods & tips
- Join-as-you-go (JAYG) — great for a seamless, flat join while you make the last round of each square. Slip stitch or single crochet the adjacent edges together as you work the final round.
- Whipstitch / Mattress stitch — invisible seam; match gauge and tension so seams lie flat.
- Continuous join with single crochet — join squares edge-to-edge with a round of sc around the whole blanket, adding sc through both layers; this makes a raised seam and tidy frame.
- Lace join (chain & sl st) — decorative and airy; good for lightweight throws.
Always block squares to a uniform size before joining. Use stitch markers or a template to align corners precisely.
Blocking, finishing, and care
- Blocking: pin each square to exact measurements on a blocking mat and spray or wet block depending on yarn. For cotton, wet blocking is effective. Let dry completely before joining.
- Weaving ends: leave long tails for sewing if you’re joining later. Use a tapestry needle and hide ends inside stitches.
- Border options: simple sc rounds, crab stitch (reverse sc), scalloped shells, or a ribbed BLO round for a modern frame.
- Care: follow yarn label — cotton squares can usually be machine washed gentle and tumble dried low, but delicate motifs (appliqués or textured puffs) may prefer air drying.
Project inspiration (what to make with these squares)
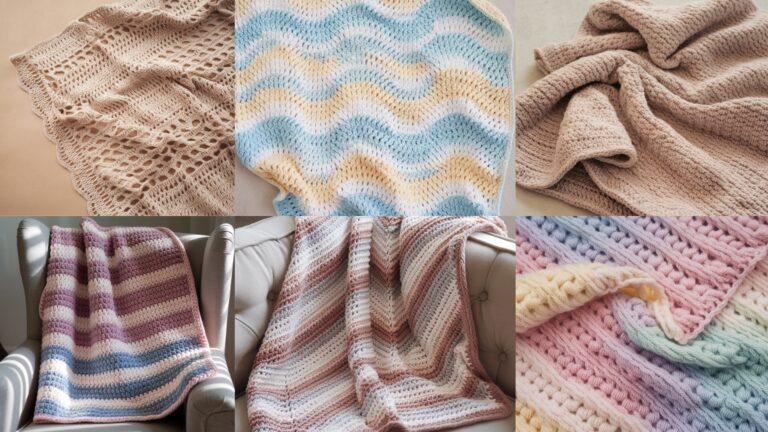
- Blankets & throws — mix and match motifs for an eclectic afghan.
- Cushion covers — 9 squares (3×3) per cushion is a quick, satisfying project.
- Bags & totes — join squares into panels and add a lining for structure.
- Scarves & wraps — long rows of granny hexagons or squares make beautiful wraps.
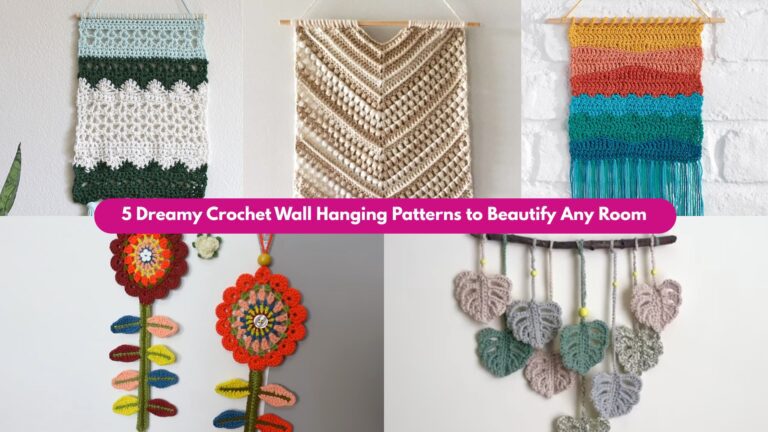
- Wall hangings — block and mount squares on a wooden dowel for instant decor.
- Garments — vest fronts or yokes built of granny squares are classic.
conclusion
Granny squares are where crochet creativity and practicality meet. The seven patterns above — from the ornate African Flower and delicate Sakura to the modern Cross Motif, the classic Granny, the textured Sunburst, the geometric Ombre Hexagon, and the playful Strawberry Motif — give you a broad toolkit of techniques: petals, clusters, puff stitches, hex shaping, appliqué, and colorwork. Use them solo or combine them — swap colors, change yarn weights, and scale motifs to create unique handmade pieces for your home or shop.