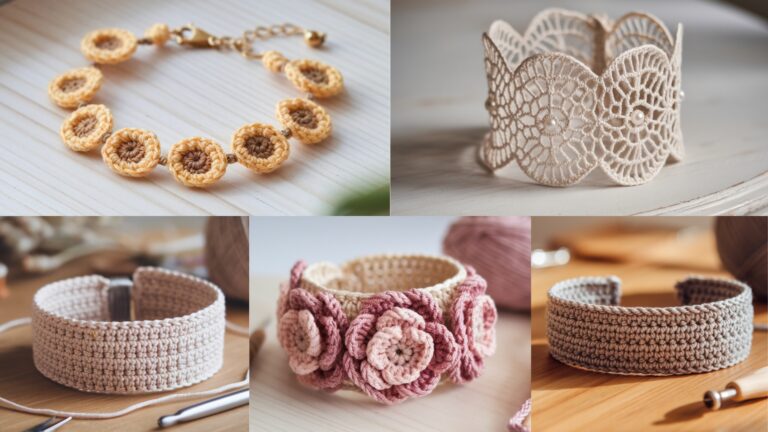
Crochet earrings are tiny works of wearable art — lightweight, fast to make, and endlessly customizable. Whether you like sweet kawaii shapes (cupcakes and lollipops), delicate botanicals (bellflower, June bloom), modern geometry (hoops, raindrops), or playful bows, this post gives you seven full patterns you can make start-to-finish. Each pattern below includes: skill level, finished size, exact materials and tools, stitch abbreviations, a step-by-step pattern (construction + assembly with jump rings / earring hooks), finishing and care tips, and ideas for variations so you can tweak color, scale, and hardware.
A few safety & finishing notes for all earrings
- Use hypoallergenic findings (stainless steel, surgical steel, titanium, niobium, or gold-filled) for sensitive ears. If you’re gifting to someone else, include a note about the metal used.
- Keep earring weight low — small stitches in fine yarn or thread + minimal beads will stay comfortable all day. Aim for < 5–6 grams per earring if possible.
- Secure small beads and metal parts with several passes of thread and a drop of fabric glue if desired. Tidy knots and weave ends inside the motif.
- If you want waterproof / water-resistant earrings, use mercerized cotton or embroidery thread and seal knots with a tiny drop of clear craft glue. Avoid submerging earrings with glued beads or metal glue.
- Always test earring balance (hang them on a small hook) before finishing so they hang straight.
Abbreviations used below (US terms)
- ch = chain
- sl st = slip stitch
- sc = single crochet
- hdc = half double crochet
- dc = double crochet
- tr = treble crochet (US)
- inc = increase (2 sc in same stitch)
- dec = decrease (sc2tog)
- MR = magic ring (magic circle)
- BLO / FLO = back/front loop only
- sp = space
- rep = repeat
1. Crochet Adorable Cupcake Earrings Pattern
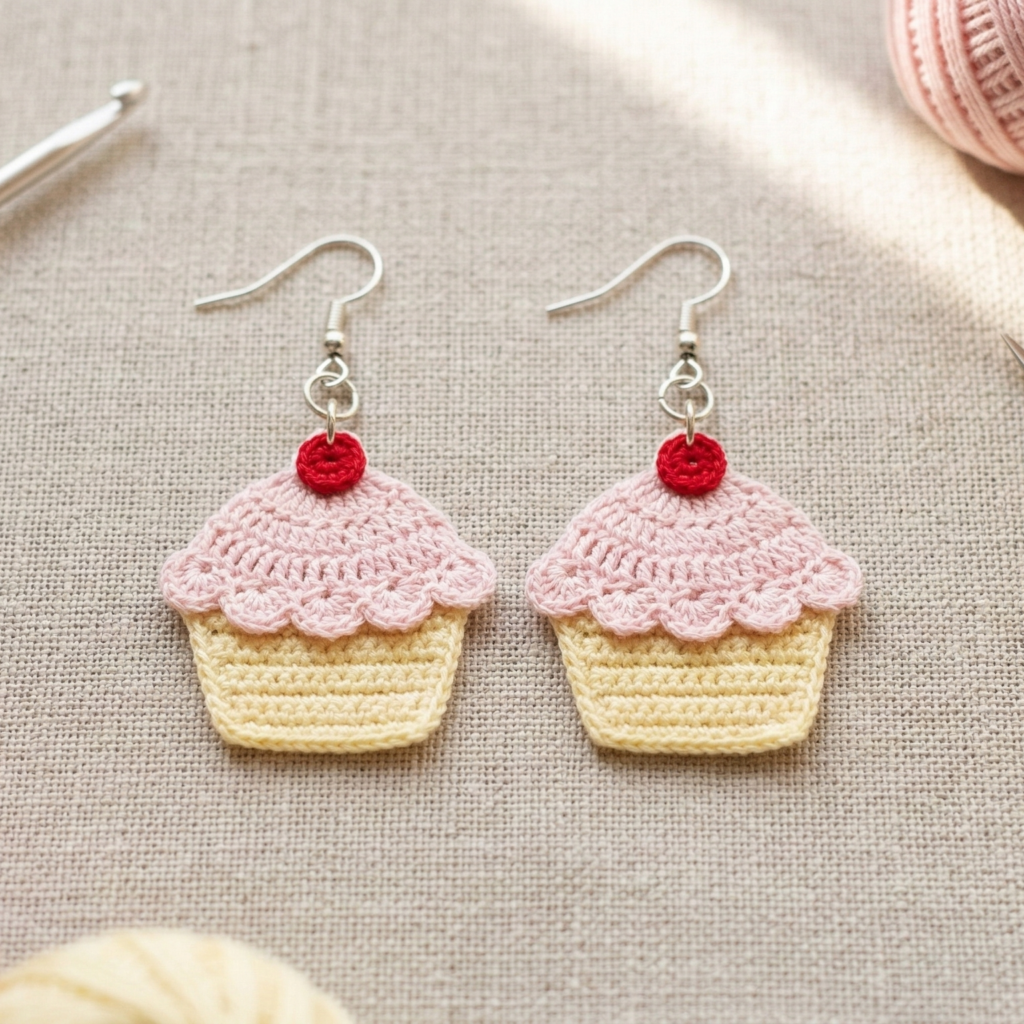
Skill level: Beginner (basic amigurumi shapes + simple assembly)
Finished size: ~1.25–1.5″ tall (3–4 cm) — small, lightweight cupcake for comfortable wear.
Materials
- Mercerized cotton or cotton-blend thread/yarn, sport/fingering weight (two colors: frosting and base) — tiny amounts (5–8 g total per pair)
- Crochet hook appropriate for thread (e.g., 2.25–3.5 mm depending on yarn)
- Tapestry needle, small scissors
- 2 small flat jump rings (4–5 mm) and 2 ear hooks (hypoallergenic) or 2 hoop connectors if you prefer hoops
- Optional: 2 tiny seed beads for cherry/decoration (securely sewn)
- Small amount of polyfill (very little) if you want a slightly puffy cupcake top (optional)
Pattern — cupcake top (frosting) (make 2)
- MR, ch1, 6 sc in MR. Pull ring closed. (6)
- inc ×6 → 12.
- sc, inc ×6 → 18.
- sc around 1 round. (18)
- sc2tog, sc ×6 → 12 — begin forming shallow dome.
- Optional bloom: work picot edging: ch3, sl st into 1st ch across rim to create a scalloped edge. Fasten off leaving long tail. If you want a puffy dome, add a tiny pinch of stuffing before closing.
Pattern — cupcake base (make 2)
- With base color, MR, 6 sc. (6)
- inc ×6 → 12.
- sc, inc ×6 → 18.
- Work 2–3 rounds sc to make the base height ~6–8 rows total (adjust to match frosting size). For a ridged wrapper effect, work sc in BLO for 2 rounds to create a rib. Fasten off leaving tail for sewing.
Assembly
- Sew frosting to base neatly — position frosting on top and whipstitch through base rounds so seam sits inside the rim. If using stuffing, insert before final stitches and close.
- Sew a tiny seed bead or make a small bobble with yarn for the cherry and sew to frosting center.
- Create a small hanging loop: sew a tiny yarn loop or attach a 4–5 mm jump ring to the back of the cupcake at the top center (weave tail through several times for security). Attach ear hook to jump ring.
Finishing & tips
- Keep the cupcake shapes small — larger versions are heavier and may pull on lobes.
- Use bright contrast colors for frosting and base; pastel frosting + metallic bead cherry looks cute.
- For earrings without stuffing (flatter look), press gently with fingers to shape and block with a light steam if using cotton thread.
2. Crochet Beautiful Bellflower Earrings Pattern
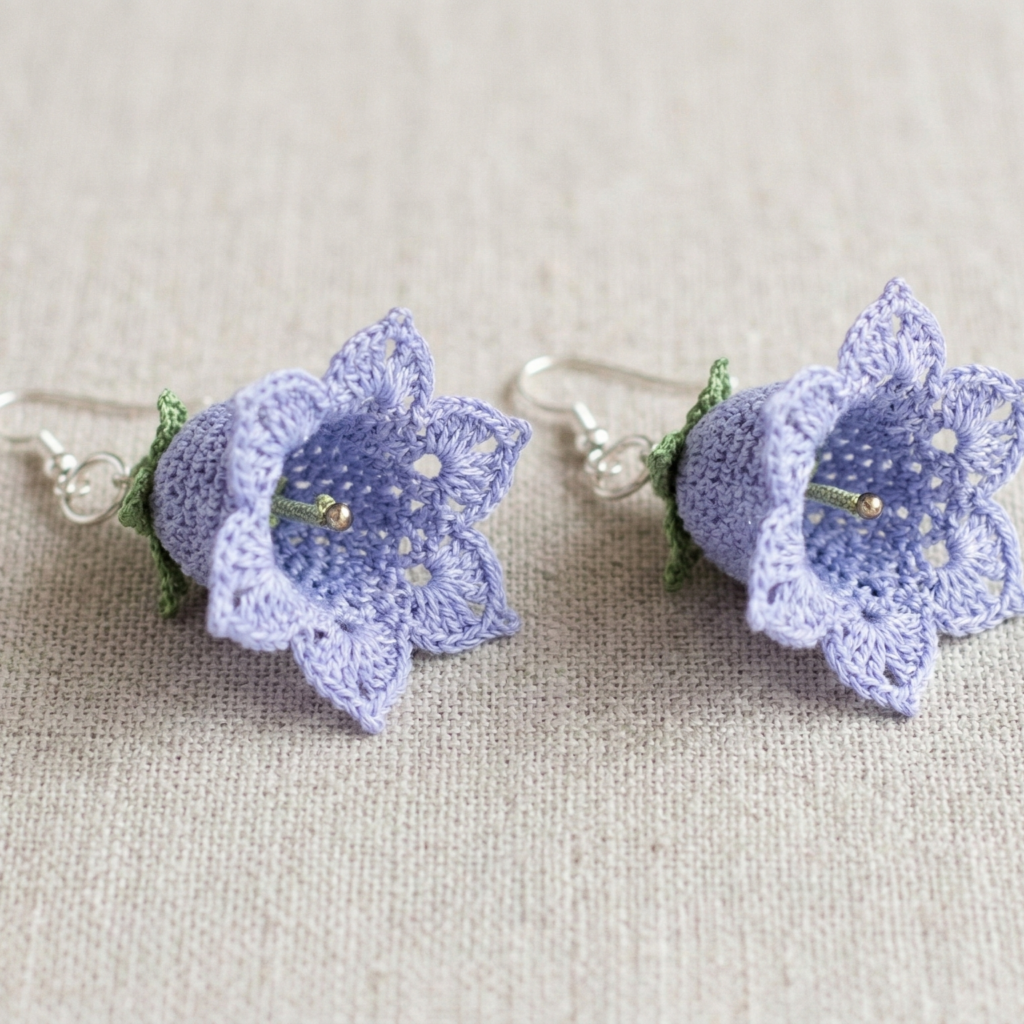
Skill level: Intermediate (shaping small petals + layered join)
Finished size: ~1.5″ diameter (4 cm) — gentle bell-shaped drop.
Materials
- Fine cotton or embroidery thread (size 10) — small amounts in flower color and a tiny bit of green for calyx if desired
- Crochet hook 1.75–2.5 mm depending on thread
- 2 small jump rings + 2 hypoallergenic ear hooks
- Tapestry needle, tiny bead for center (optional)
Stitch abbreviations used
- dtr = double treble (US) — optional for very lacy petals; you can substitute tr or dc if preferred.
Pattern — bell (make 2)
- MR, ch1, 6 sc in MR. (6)
- ch4, sl st in next st around to create 6 hanging loops for petals. Join and fasten off leaving tail for petals.
- Into each ch4 loop, work petal: (sc, hdc, dc, tr, dc, hdc, sc) — this forms a rounded bell petal. Join to base and continue to next loop. Repeat for all petals. Fasten off and weave ends.
Calyx & bead (optional)
- With green, join at base and work 1 round of sc around, then ch3, sl st in next st as small triangular sepals to sit under petals. Fasten off.
- If you’d like a bead inside the bell for a little weight and sparkle, carefully hand-sew a seed bead to the inside bottom; secure knot and hide tail.
Assembly
- Block petals slightly with steam or pin them on a damp towel to shape.
- Add a tiny jump ring to the top center by sewing a small yarn loop and threading the ring through. Attach ear hook.
Variations
- Make a layered bell: an inner smaller bell and outer slightly larger bell for depth.
- Work petals in gradient (two colors, inner petal lighter).
Finishing & care
- Avoid heavy sealing adhesives inside the bell if you want it to remain soft. Spot-clean with gentle soap and air dry.
3. Crochet June Bloom Earrings Pattern
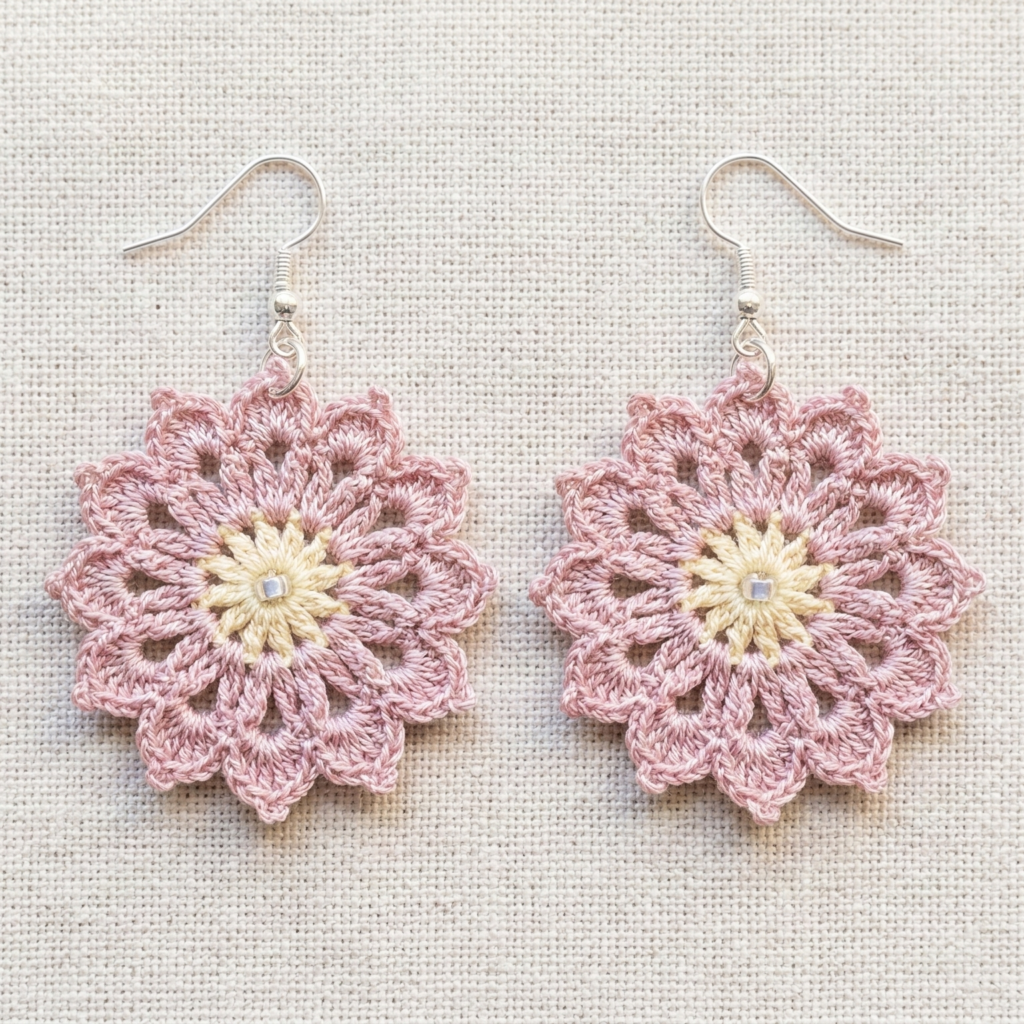
Skill level: Intermediate — lace flower motif + picot edges
Finished size: ~1.25–2″ wide depending on motif size (3–5 cm) — works well as delicate statement.
Materials
- Mercerized cotton thread (size 10) or light fingering yarn, one main color and optional contrast for center.
- Hook: 1.75–2.75 mm (thread) or 2.5–3.5 mm (light yarn)
- 2 small jump rings + 2 ear hooks (choose lightweight metal)
- Tapestry needle, small beads (optional)
Pattern — June bloom motif (make 2)
This motif is a small lace flower worked in rounds.
- MR, ch3 (counts as dc), 11 dc into MR. Join. (12)
- ch3, sl st in next dc around to form 12 ch-3 loops. Join.
- Into each ch-3 loop: (sc, hdc, dc, hdc, sc) to make petal shells. Join. (12 petals)
- Round 4 (optional lace edge): ch4, sl st into tip between petals to create tiny lacy points. Fasten off and weave ends.
Assembly
- Add a tiny bead to the center for sparkle, sewing it through to the back and securing the knot inside.
- Weave a short sturdy yarn loop behind the top petal and attach a small jump ring and ear hook.
Variations & styling
- Make the motif slightly larger by using a thicker thread or substituting tr for dc in petal centers.
- Make twin-layered blooms: sew a small 6-petal motif on top of the 12-petal motif offset for a fuller earring.
Finishing & care
- File or burnish ends of metal jump rings if rough; close jump rings securely with pliers so earrings don’t come apart.
- Block motifs to ensure petals are uniform.
4. Crochet Lollipop Earrings Pattern
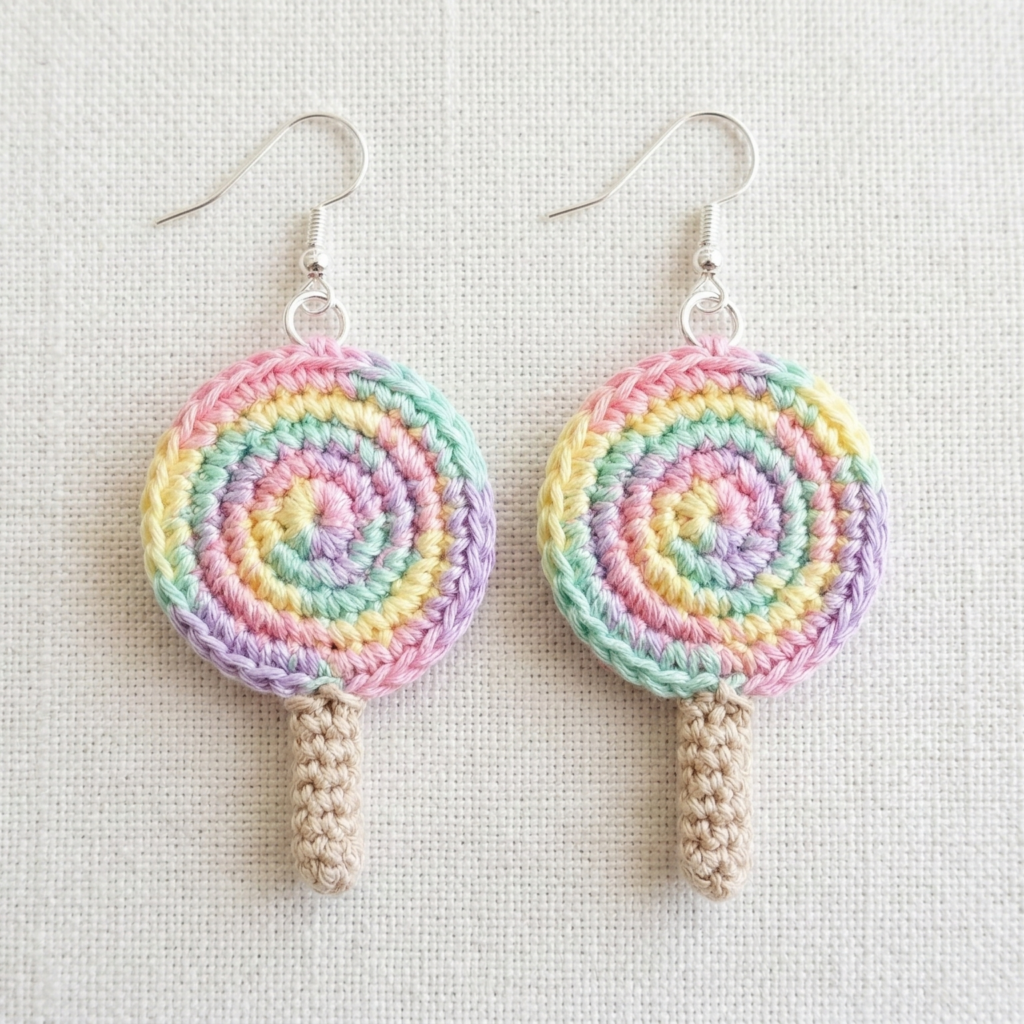
Skill level: Beginner (simple round + stick)
Finished size: ~1–1.5″ diameter for lollipop + short stick — playful, lightweight.
Materials
- Brightly colored fingering yarn or cotton thread for lollipop; small amount of beige/tan for stick
- Hook: 2.5–3.5 mm
- Two short headpins or thin metal sticks (optional) or crochet a stick with chain and sc; we recommend crocheted sticks to avoid metal weight
- 2 jump rings + 2 earring hooks
- Tiny seed beads (optional) for confetti inside lollipop look
Pattern — lollipop disk (make 2)
- MR, ch1, 6 sc in MR. (6)
- inc ×6 → 12.
- sc, inc ×6 → 18.
- 2 sc, inc ×6 → 24.
- Work 1–2 rounds sc to build disc thickness. Optional: after first round, change color in spiral to create swirl effect (carry color or change each round). Fasten off leaving tail.
Pattern — stick (make 2)
Option A — crocheted stick (recommended)
- With tan, ch10. Row 1: sc in 2nd ch from hook and across. Row 2–3: ch1, sc across to make small tube. Fold and sew to create thicker stick, or make a small chain of sc worked in the round to create a firm stick. Fasten off and weave tail.
Option B — headpin (use small light headpins) — thread through disc center and fold end to secure, but this adds metal weight; if you use pins, choose very light ones.
Assembly
- Attach stick to back of disc by sewing through a few times; secure with knot and hide tail inside disc. Optionally glue with small drop of fabric glue.
- Create a small yarn loop or sew a tiny jump ring into the top of disc and attach ear hook.
Variations & tips
- Make swirl lollipops by changing color every round in the disc and working intentionally offset increases to create spiral illusion.
- Add a translucent bead at center for sparkle.
Finishing & care
- Avoid using large metal rods; keep pieces soft and yarn-only when possible to stay light.
5. Crochet Spring Rain Drop Earrings Pattern
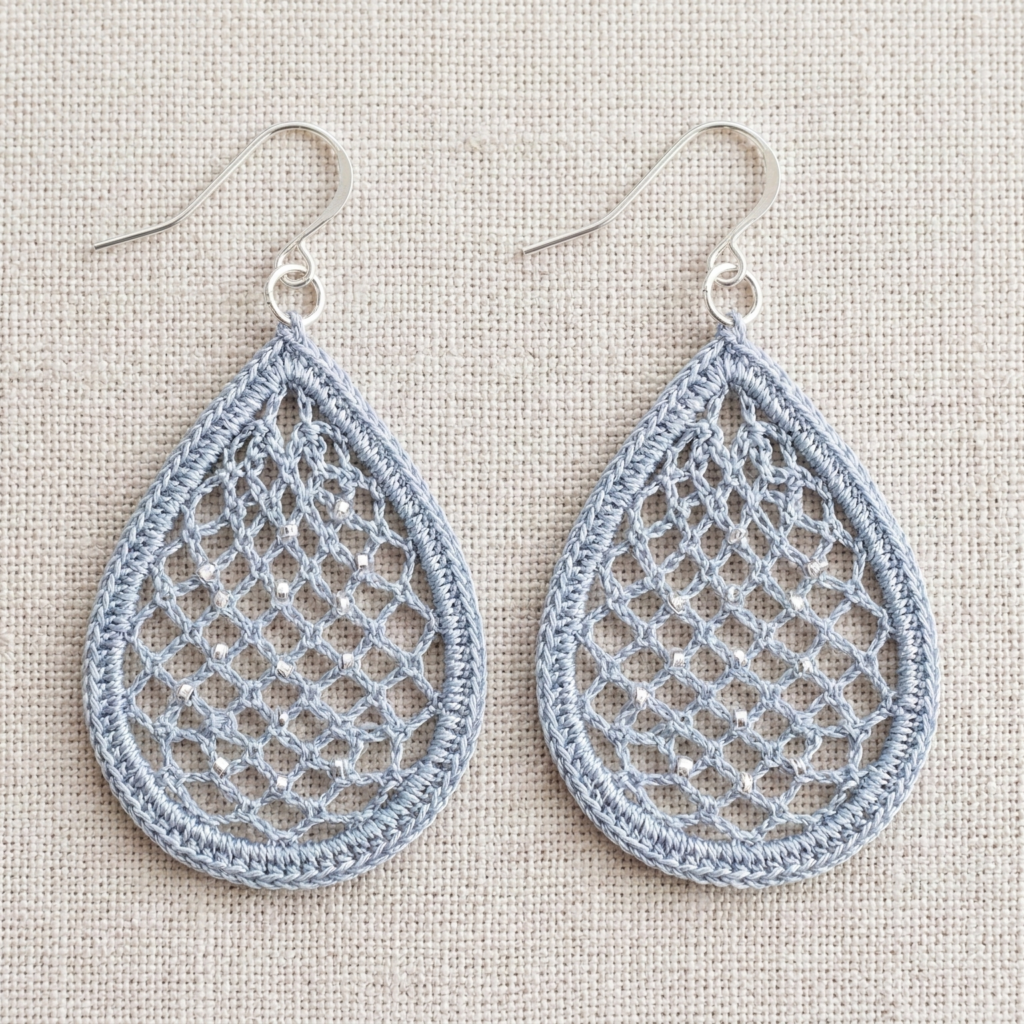
Skill level: Beginner–Intermediate (simple tear-drop shaping + open mesh)
Finished size: ~1.25–1.75″ drop (3–4.5 cm) — elegant, airy raindrop.
Materials
- Size 10 crochet thread or fine fingering yarn in color of choice (silver/blue/clear tones look great)
- Hook 1.75–2.5 mm (thread) or 2.5–3.5 mm (yarn)
- 2 small teardrop-shaped beads (optional) or leave crocheted drop plain
- 2 jump rings + hypoallergenic ear hooks
Pattern — teardrop frame (make 2)
- Ch10, sl st to first ch to make a ring (or MR 8 sc ring). For a hanging-frame look, make a foundation chain that is slightly taller than desired drop.
- Round 1: sc in each chain across, working back down the chain if you made a long chain to create a long oval frame (work in rows over chain then stich around to join and form tear). Adjust to make a teardrop shape: sc more densely at pointed end, more loosely at rounded end.
- Round 2 (mesh fill): Work ch3, skip 2, sc in next or a simple net: dc, ch2, dc spaced across center row to create airy net inside teardrop. Join and fasten off.
Alternate approach: use small wire teardrop frame wrapped in yarn, then crochet a mesh net inside and attach to frame — this gives a crisp metal outline but uses metal.
Assembly
- Attach a small jump ring at the top of teardrop and hang on ear hook. If using inner bead, sew bead securely at the bottom of teardrop center.
Variations
- Use metallic thread for shimmering raindrops.
- Add tiny crystal beads along mesh to mimic dew drops — stitch them at intersections of the mesh.
Finishing & care
- If mesh stretches, block lightly on a form to set shape. If you used a wire frame, ensure wire ends are fully wrapped and hidden.
6. Crochet Wreath Hoop Earrings Pattern
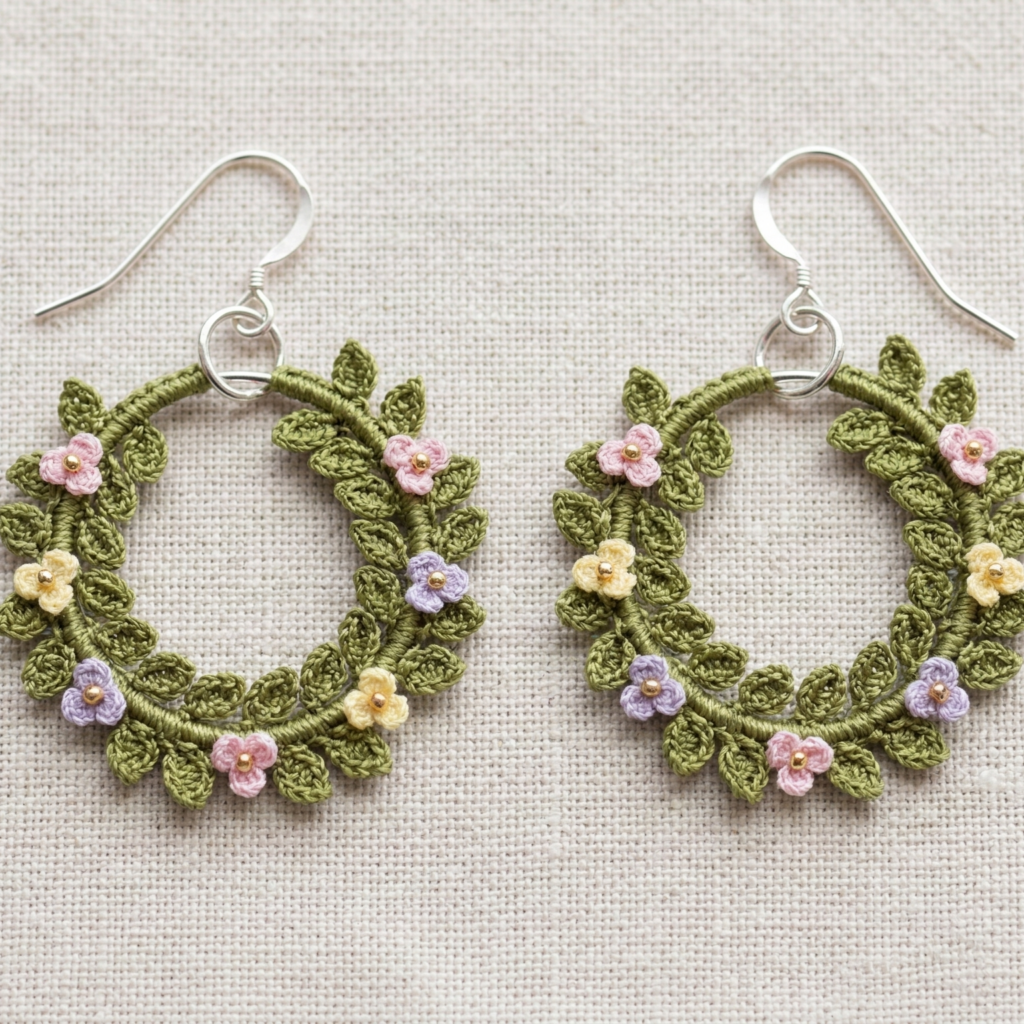
Skill level: Intermediate — working around a metal hoop or making crochet-only hoop
Finished size: hoop diameter ~1–1.5″ (2.5–4 cm) — classic hoop with a crocheted wreath or garland around.
Materials
- Small metal hoop connectors or lightweight hoop earring bases (12–20 mm) OR make an internal crochet ring (ch loop)
- Fine yarn/thread for wreath (size 10 thread or light fingering) in greens and floral colors for tiny flowers
- Hook: 1.75–2.75 mm for thread or 2.5–3.5 mm for fine yarn
- 2 ear hooks and 2 small jump rings if needed
- Tapestry needle, small seed beads (optional) for flower centers
Method A — crochet around a metal hoop (recommended for crisp round shape)
Make the wreath
- Attach thread to metal hoop by tying a small knot and weaving in.
- Work sc around the metal hoop, keeping stitches snug so the hoop is covered. Continue until hoop is fully wrapped.
- Add leaves: ch3, sc in base every few stitches to make tiny leaf spikes — or work sc, hdc, dc, hdc, sc into small loops to make fuller leaves. Alternate leaf colors for realistic look.
- Add tiny flower clusters: create tiny 3-petal flowers (MR, ch2, 3 sc in MR per petal) and sew them every few leaves; secure with bead centers if desired.
Assembly
- Attach small jump ring to hoop and then ear hook. Make sure all thread ends are woven and secured to underside of wreath.
Method B — entirely crocheted hoop
- Make a firm ring: ch24, sl st into first ch to make loop. Work 1 round sc around base to thicken. Continue as in Method A, making leaves and flowers onto the crochet ring.
Variations & styling
- Make seasonal wreaths: red/green for winter, pastels for spring, bold oranges for fall.
- Add a tiny bow at top for charm.
Finishing & care
- Avoid heavy bead clusters; keep floral bits small to maintain light weight.
7. Crochet Coquette Bow Earrings Pattern
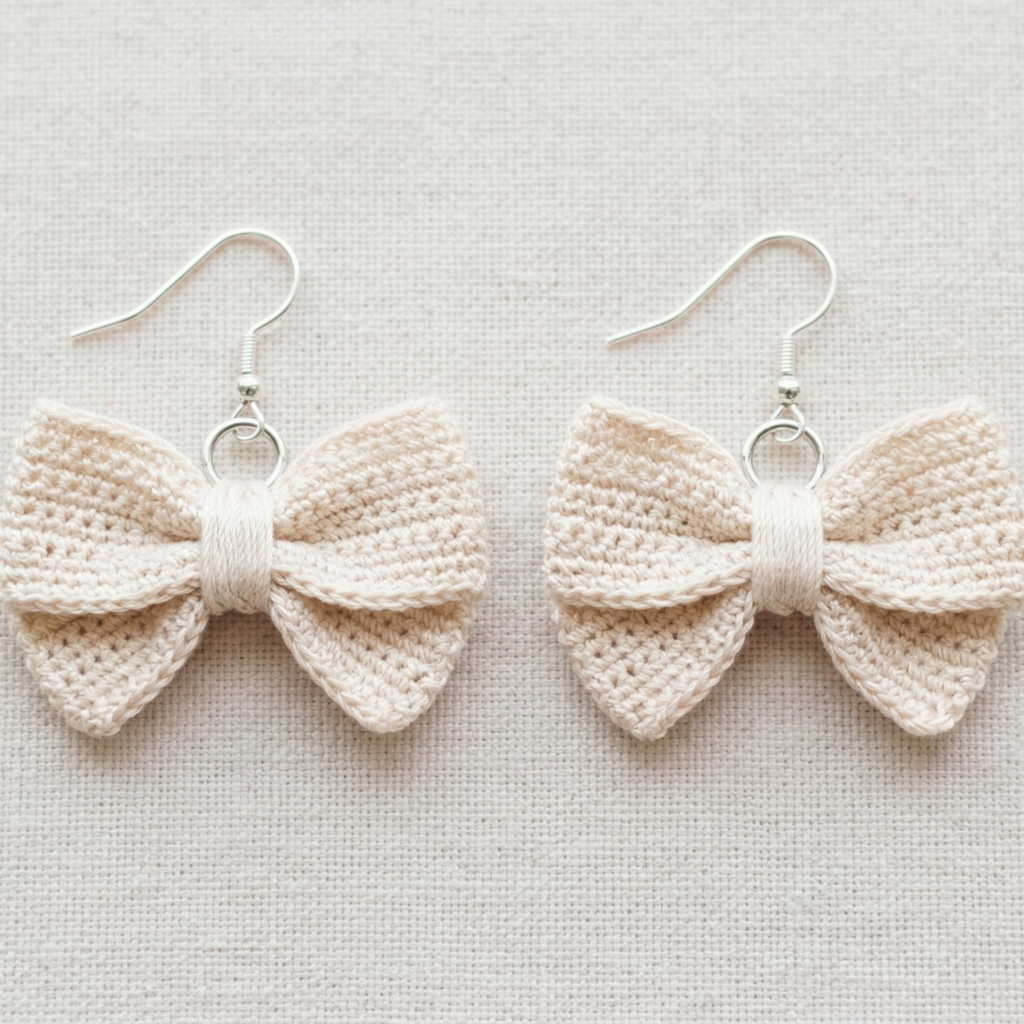
Skill level: Beginner — quick rectangles + center wrap
Finished size: bow width ~0.75–1.5″ (2–4 cm) depending on chain length — cute, classic bow.
Materials
- Fingering / sport yarn or size 10 thread for small bows — select yarn with a bit of body (mercerized cotton works great)
- Hook: 2.0–3.5 mm depending on yarn
- 2 small jump rings + 2 ear hooks
- Small piece of felt (optional) for backing to hide wrap and strengthen bow
Pattern — bow (make 2)
- Ch 14 (for tiny bow) or ch 18–22 for larger bow. Row 1: sc in 2nd ch from hook and across. Turn.
- Rows 2–4: ch1, sc across. (3–4 rows make slim bow; 6–8 rows make fuller bow). Fasten off leaving long tail.
Center wrap
- With tail, cinch rectangle in center by wrapping yarn tightly around middle ~8–12 times, tie off and hide tails in back. Alternatively, crochet a narrow strip: ch6, sc for 3 rows and wrap that around center.
Backing & loop
- Optional felt backing: cut a small oval, glue or sew to back to hide wrap and make loop attachment easier.
- Sew a jump ring to the top center (through felt or wrapped yarn) and attach ear hook.
Variations & finishing
- Make double-layer bows (larger rectangle + smaller rectangle stacked) for more dimension.
- Use metallic thread or a thin ribbon woven through the bow for glam.
Conclusion
Crochet earrings are perfect small projects that let you practice motifs, shape, and color — and they make fantastic gifts or market items. This set of seven patterns covers cute novelty (cupcake, lollipop), romantic/floral (bellflower, June bloom, hibiscus), elegant geometry (raindrop, wreath hoop), and playful fashion (coquette bow). Pick a few shapes that match your style, test scale with scrap yarn first, and always prioritize lightness and secure attachment for comfortable, safe wear.
General care & finishing checklist
- Secure every metal finding: close jump rings with pliers; knot and weave yarn tails several centimeters before trimming.
- Seal knots if needed with a dot of clear craft glue; hide glue inside the motif where possible.
- Store earrings flat in a small box or earring card to preserve shape. Avoid rough handling that crushes lace motifs.
- Describe metal type when gifting (e.g., “stainless steel hooks — hypoallergenic”).
Gifting & presentation
- Mount pairs on earring cards, tuck into a tiny organza bag, and add a handwritten care note (avoid water / remove before sleeping / clean with damp cloth).
- Create matching sets: pair earrings with a small pendant, charm, or keyring made from leftover yarn for a coordinated gift.