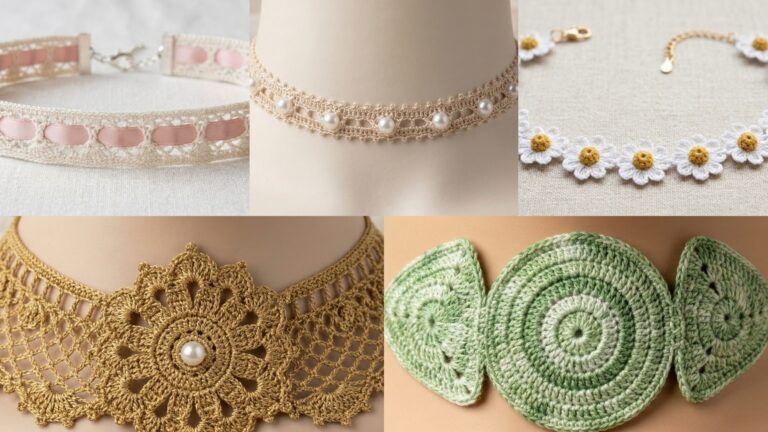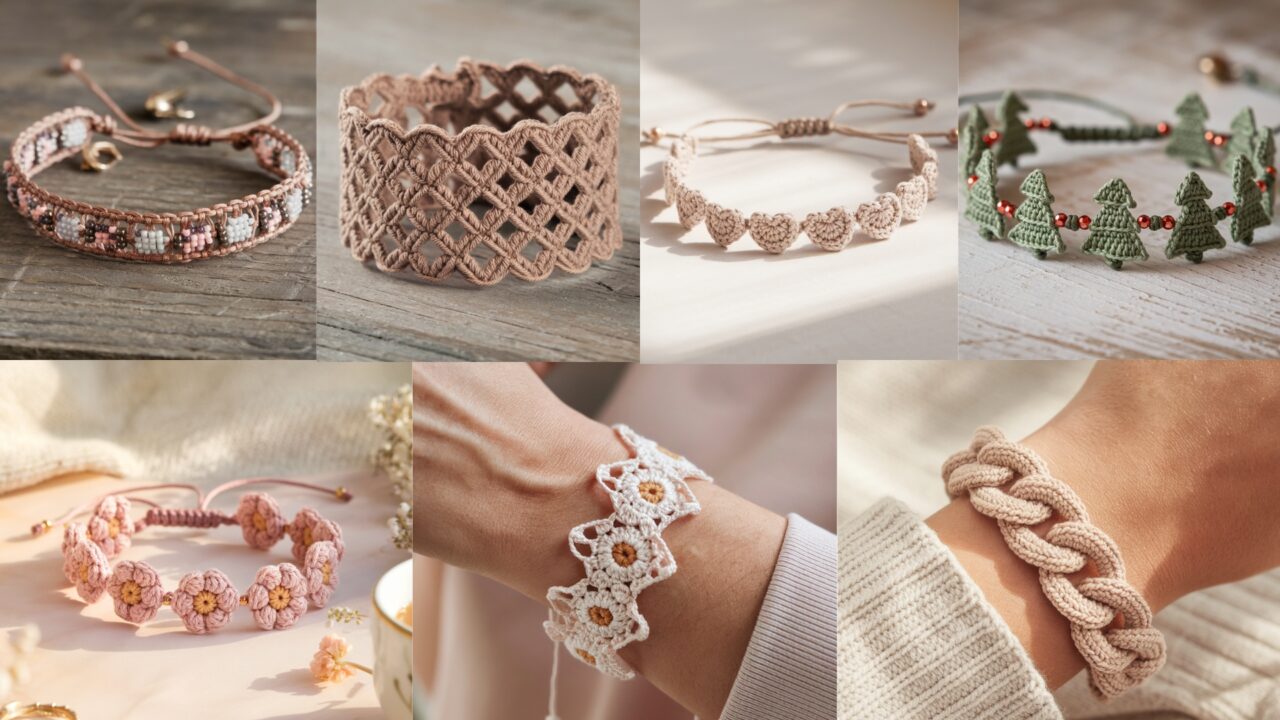
Crochet bracelets are the perfect small-project playground: quick to stitch, lovely to wear, and endlessly customizable. They’re ideal for using small yarn scraps, practicing new stitch textures, adding beads or metal findings, and putting together thoughtful handmade gifts. This set of seven boho-inspired bracelet patterns mixes delicate lace, textured Ottoman-style ribs, beadwork, and charm-driven chains — all tuned to a natural, earthy aesthetic you can wear every day.
Each pattern below includes: a brief overview, skill level, recommended materials and finishes, a finished-size guideline, a detailed step-by-step construction guide you can follow (with sample stitch counts you can adjust), plus variation ideas, finishing tips, and styling suggestions. US crochet terms are used throughout.
General notes (read first)
- Abbreviations (US): ch = chain, sc = single crochet, hdc = half double crochet, dc = double crochet, tr = treble, sl st = slip stitch, sk = skip, BLO/FLO = back/front loop only, st(s) = stitch(es), MR = magic ring.
- Yarn & thread: For fine bracelets, use fingering/sock, 2-ply brooks, or size 10 crochet thread. For chunkier boho bracelets, DK or light worsted or even cotton cord works. Cotton holds shape and looks natural.
- Hooks: 1.75–3.5 mm depending on yarn weight. For thread use 1.5–2.25 mm hooks.
- Closures: lobster/clasp + jump ring, toggle, button & loop, or tie strings. For metal chains, use jewelry pliers and crimps.
- Finished length: Typical adult bracelets are 7–7.5 in (18–19 cm). Make 6.5–7 in for narrower wrists and add 0.5–1 in for clasp overlap. When using beads, consider bead diameter in length.
- Tension & adjust: Bracelets are forgiving — if fabric is too loose, go down a hook size or add a row. If too stiff, go up a size.
- Safety: If bracelets are for small children keep closures simple/soft and avoid small choking hazards (beads, charms).
1. Crochet Heart Chain Bracelet Pattern

Overview
A romantic-but-boho bracelet that strings a row of tiny crocheted hearts across a slim chain or cord. It’s delicate, tactile, and great in neutral cotton or soft metallic thread for an elevated look.
Skill level: Confident beginner (small motifs + simple join + basic jewelry finishing)
Materials
- Size 10 cotton crochet thread or fingering-weight cotton (approx. 10–15 yds total)
- Steel hook 1.5–2.25 mm (for thread) or 2.5–3.0 mm for fingering yarn
- Thin waxed cord or a narrow chain (optional backing)
- Small lobster clasp + jump ring OR button for closure
- Yarn needle, small pliers if using chain
Finished size guideline
- Bracelet length: 7 in (18 cm) standard; make motif number to match wrist circumference.
Step-by-step construction (one sample method: motif-join-on-cord)
- Make the hearts (tiny, flat heart motif) — make 6–9 hearts depending on wrist size:
- MR; ch 1, work 6 sc into ring; sl st to join (6).
- Ch 3, 3 dc in same st, ch 3, sl st into next st repeat to form two lobes; finish by sl st to secure and shape a heart. (Alternate: small 5-st heart pattern.) Fasten off leaving a 10–12 in tail for joining. Block hearts lightly with starch for crisp shape if using thread.
- Prepare base cord or chain: Cut a length of waxed cord or use a thin chain ~8–9 in (allow extra to attach clasp). If using a crochet tube instead of cord, chain to desired length and slip-stitch the ends together forming a loop.
- Arrange and attach hearts: With long tails, sew each heart along the cord spacing them ~0.5–0.75 in apart. If using a chain, sew through chain links or use jump rings to attach the top of each heart. Use small felt backing dots behind stitches for neatness.
- Finishing: Attach a lobster clasp and jump ring to ends of cord/chain. Trim and weave tails. Optionally add a tiny bead dangle at clasp for weight and polish.
Variations
- Work hearts in gradient tones for an ombré wristlet.
- Make a wider cuff by joining two parallel cords and strewing hearts across both.
- Create a double-wrap bracelet by making a longer cord and clustering hearts at top.
Finishing & care
- Trim tails and weave securely; if using metal chain, patina may occur — wipe with soft cloth. Hand wash cotton versions and reshape.
Styling tip
- Wear alone for a sweet, minimalist look or stack with leather cords and bead bracelets for boho layering.
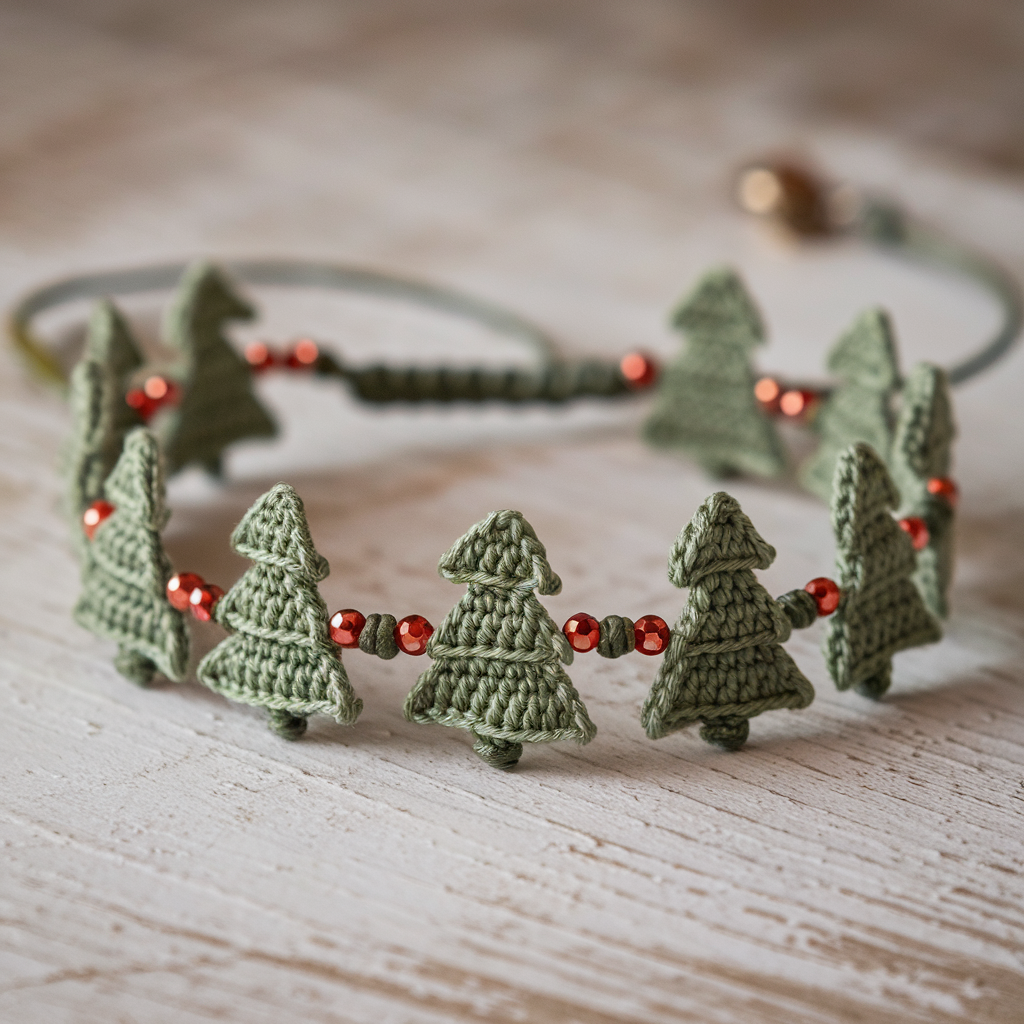
2. Crochet Christmas Tree Bracelet Pattern
Overview
A playful seasonal bracelet of tiny stylized trees or triangular motifs interspersed with tiny seed-bead “ornaments.” Use muted greens and warm wood or brass beads for a natural, not overly-garish, holiday vibe.
Skill level: Confident beginner → intermediate (tiny motif shaping + bead stringing)
Materials
- Fingering or sport weight cotton or crochet thread for motifs (greens + brown accent).
- Small seed beads (2–3 mm) in red/gold (optional).
- 2.25–3.5 mm hook (depending on yarn).
- 7 in inner circumference elastic cord OR waxed cord + clasp (for non-stretch version).
Finished size
- ~7 in circumference; if using elastic, cut a 6.5 in elastic and test fit before knotting.
Step-by-step construction (appliqué & bead string)
- Make tiny tree motifs (6–8 trees): A simple triangular motif: ch 6; Row 1: sc in 2nd ch from hook across (5 sc); Row 2: ch1, sc2tog, sc to last two sts, sc2tog — you’ll shape into small triangle over 3–4 rows. Fasten off and weave ends. Alternatively make a small two-round motif that looks like a stylized pine.
- String beads (optional): On a long thread/yarn tail (or while using elastic), string small beads at intervals that will sit between trees as ornament accents; plan spacing (e.g., bead, 4–6 mm cord, tree, bead…).
- Join trees to cord: Use a thin waxed cord or elastic. If elastic, loop through bottom of each tree and knot tightly, or sew tree bases onto a crochet band that has elastic threaded through. If using cord, tie or stitch trees in place and secure with a tiny dab of clear-drying craft glue under the stitch for durability.
- Closure: For elastic, tie surgeon’s knot and hide tail in a bead or under a tree. For cord, finish with lobster clasp and jump ring.
Variations
- Mini garland: add tiny star charm between every other tree.
- Make evergreen mix: small tree + holly leaf appliqué repeats.
Finishing & care
- Protect beads and knots with a tiny dab of clear nail polish on knots for strong hold; hand wash if needed.
Styling tip
- Great as a holiday gift or paired with cozy knitwear and brass rings.
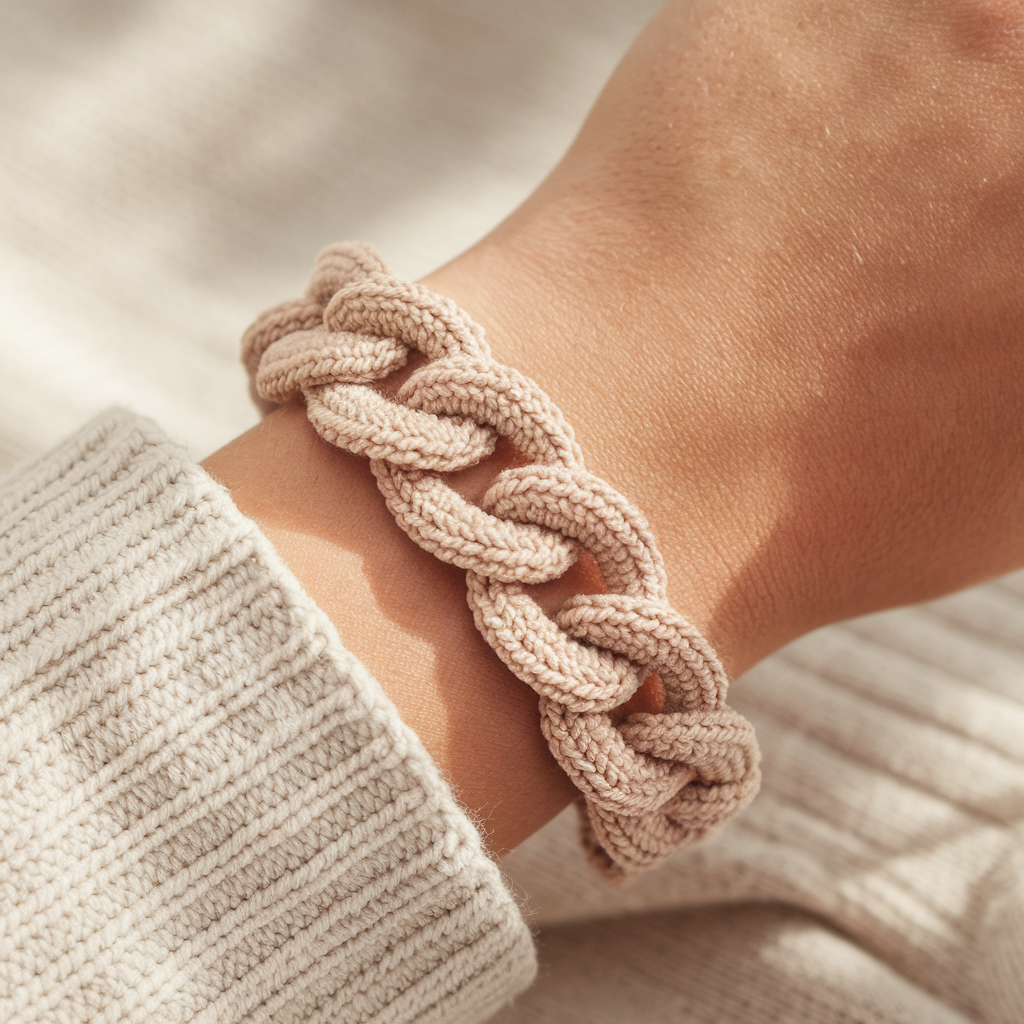
3. Crochet Lovely Ottomania Bracelet Pattern
Overview
“Ottomania” references the Ottoman stitch family — broad, squishy ribbed texture reminiscent of the Ottoman stitch (repeating clusters and ribbing). This bracelet is rich in texture and looks artisan-made and substantial while remaining soft.
Skill level: Intermediate (post stitches or ribbing, shaping into cuff)
Materials
- Fingering to DK cotton or cotton-bamboo blend (or slightly thicker for chunkier cuff).
- Hook: 2.75–3.5 mm.
- Small sew-on snap or toggle closure (or make it a slip-on cuff if stretchy).
- Tapestry needle.
Finished size
- Width: 0.75–1.25 in (20–32 mm); circumference: 7 in; make cuff slightly larger than wrist if non-elastic.
Step-by-step construction (ribbed cuff style)
- Foundation chain: Chain to the desired finished circumference minus seam overlap; for example ch 56 for a 7 in circumference with fingering yarn (make a gauge swatch to determine exact chain counts). Join into round careful not to twist.
- Ribbing rounds: Work rounds of front-post and back-post stitches or fpdc/bpdc to create vertical ribs: e.g., fpdc around next st, bpdc next st repeat round. Work 10–14 rounds to reach desired cuff height (0.75–1.25 in).
- Texture row (Ottoman band): Add one or two rounds of cluster stitches: (yo, insert, draw up loop x4, yo, pull through all) cluster spaced every 4th rib for Ottoman-like bumps — this creates the Ottomania texture.
- Edge finish & closure: Fold cuff if desired and seam ends together with mattress stitch to create a neat join. For snap closure, sew snap on one end and matching snap on inner side allowing cuff opening. Alternatively, create a chain tab and tiny buttonhole.
Variations
- Make wider cuff (2 in) for a bolder statement.
- Use variegated cotton for subtle stripeing across ribs.
Finishing & care
- Block cuff flat to set ribs. Hand wash recommended for longevity. If seamed, secure seam with extra hidden backstitches.
Styling tip
- Pairs beautifully with layered bracelets — slide Ottomania next to thin metal bangles for a textural contrast.
4. Crochet Bracelet with Beads Pattern
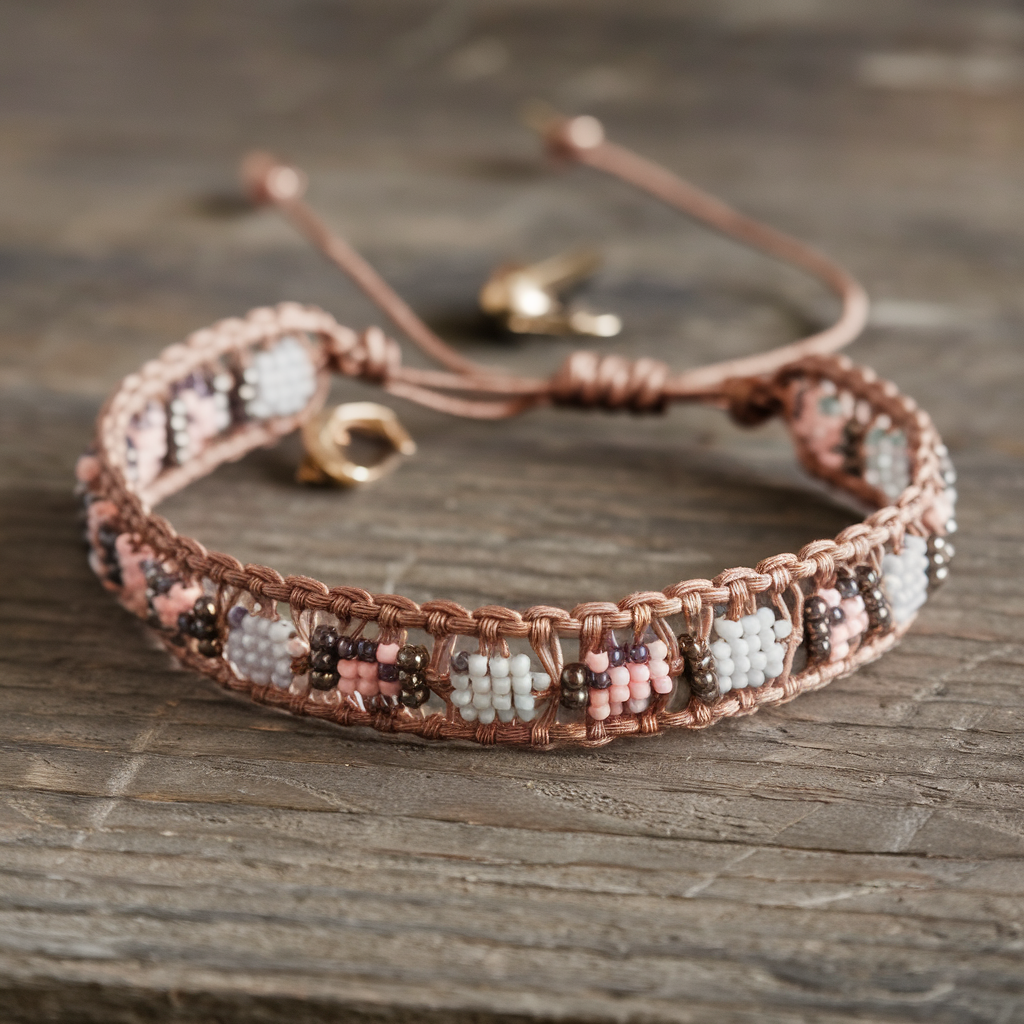
Overview
A refined beaded crochet bracelet where beads are worked onto the chain so they become an integral, elegant part of the fabric — think pearl-like accents or matte stone beads on a soft cotton cord.
Skill level: Confident beginner — simple beading + crochet chain
Materials
- Thin cotton thread or fingering yarn; seed beads (2–3 mm) pre-strung on thread if possible
- Hook: 1.75–2.5 mm (for thread) or 2.5–3.0 mm for fine yarn
- Lobster clasp + jump rings OR elastic cord (for slip-on style)
- Beading needle (if using yarn and bead hole is small)
Finished size
- 7 in final length; plan bead count accordingly.
Step-by-step construction (bead-on-chain method)
- Pre-string beads: Prior to crocheting, string all beads onto yarn or thread in the order you plan to use them. For a 7 in bracelet with beads every 4 stitches, calculate bead count accordingly.
- Foundation row: Make a chain (or a narrow crochet cord) with beads placed: to add a bead, slide the next bead close to the hook, then ch 1 or sc to secure bead in place — common instruction: slide bead up, ch1, sc in next ch; repeat pattern across length.
- Body rounds: Work 2–3 rounds of sc around the chain to create a narrow band that houses beads centered on the front. If you want beads embedded on both sides, alternate positioning in subsequent rounds.
- Attach clasp: Use short jump rings to attach a lobster clasp to each end of the band — for thread work, create a small crochet loop or wrap a tiny length of chain as a loop to hook the clasp.
Variations
- Use gemstone rounds for a luxe look.
- Alternate bead sizes for a textured linear effect.
- Make double-strand: one beaded row + one plain cord braided together.
Finishing & care
- Keep beads secured by knotting and weaving tails into interior. Avoid harsh chemicals on beads; hand wash.
Styling tip
- Minimal enough for everyday wear; pairs well with simple linen shirts or dressy blouses.
5. Crochet V-Stitch Bracelet Pattern

Overview
A lacy V-stitch bracelet is airy, feminine, and surprisingly durable when worked in cotton. The V-stitch forms small open diamonds — perfect for a delicate boho vibe and easy to scale in width.
Skill level: Beginner → confident beginner (open stitch pattern, even tension important)
Materials
- Fingering or sport cotton yarn (or size 10 thread for lace look)
- 2.25–3.5 mm hook depending on yarn
- Button closure or tiny lobster clasp + ring
- Yarn needle
Finished size
- Width sample: 0.5–1 in depending on number of V repeats; length 7 in.
Step-by-step construction (flat strip method)
- Foundation chain: Chain a multiple that fits your stitch pattern + 2 turning chains. Example: For 10 V-stitch repeats to approach 7 in circumference, ch 40 + 2.
- Row 1: sc in 2nd ch from hook across (or sc base row to give structure). Turn.
- Row 2 (V-stitch row): ch 3 (counts as dc), skip 1 ch, (dc, ch 1, dc) in next ch (forming V), skip 1 — repeat to end; turn.
- Row 3: sc in ch spaces and top of dc to anchor pattern; alternate rows of V-stitch and sc anchor rows as desired to create a band height ~0.5–1 in.
- Join into bracelet: Seam short ends with mattress stitch or slip-stitch into a loop. Add a small button on one side and make a loop with chain or picot on the other to fasten. If adding a clasp, create short chain tabs and affix jump rings.
Variations
- Make a double-wrap version using a longer strip and button it into two wraps.
- Add tiny beads into the ch-1 spaces of each V for gentle sparkle.
Finishing & care
- Block gently to open the lace slightly. Hand-wash recommended to preserve shape.
Styling tip
- Feminine and airy — ideal for pairing with floral dresses and delicate rings.
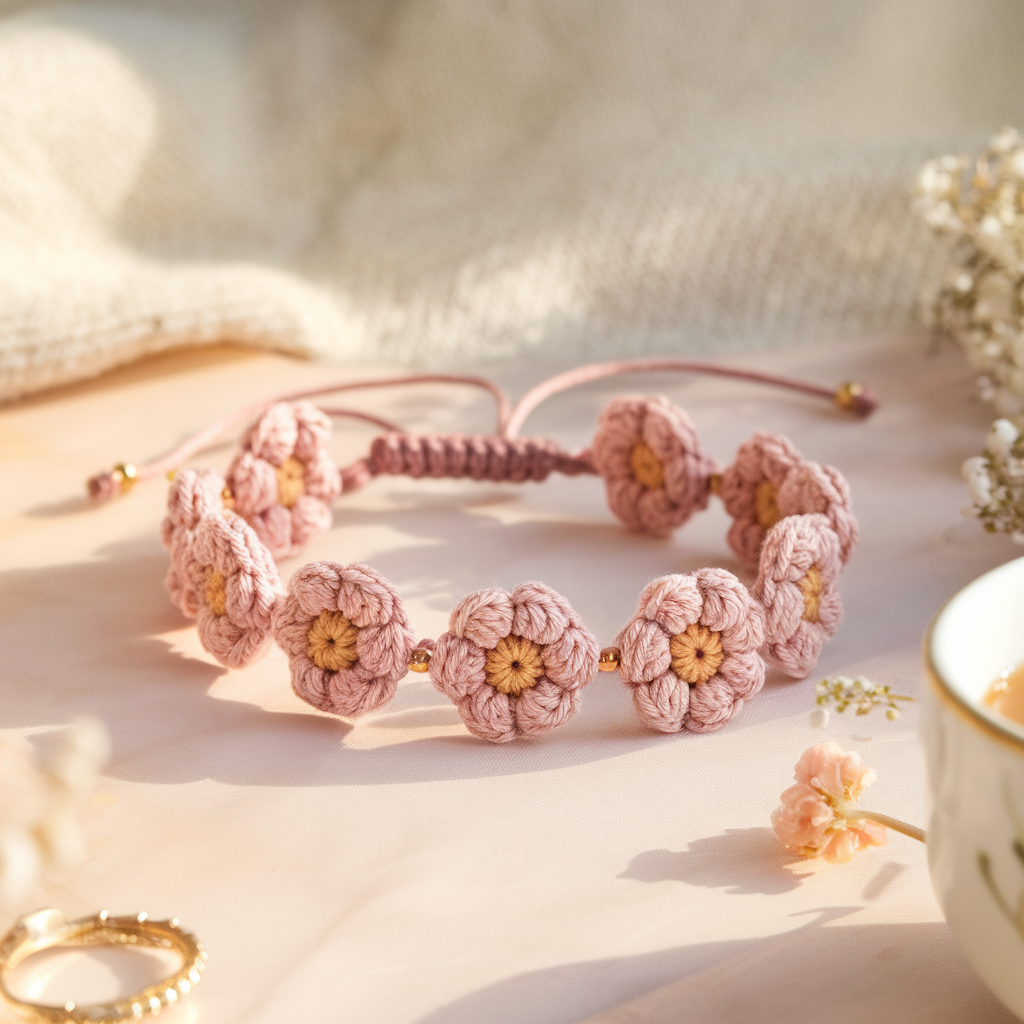
6. Crochet Boho Chic Floral Lace Bracelet Pattern
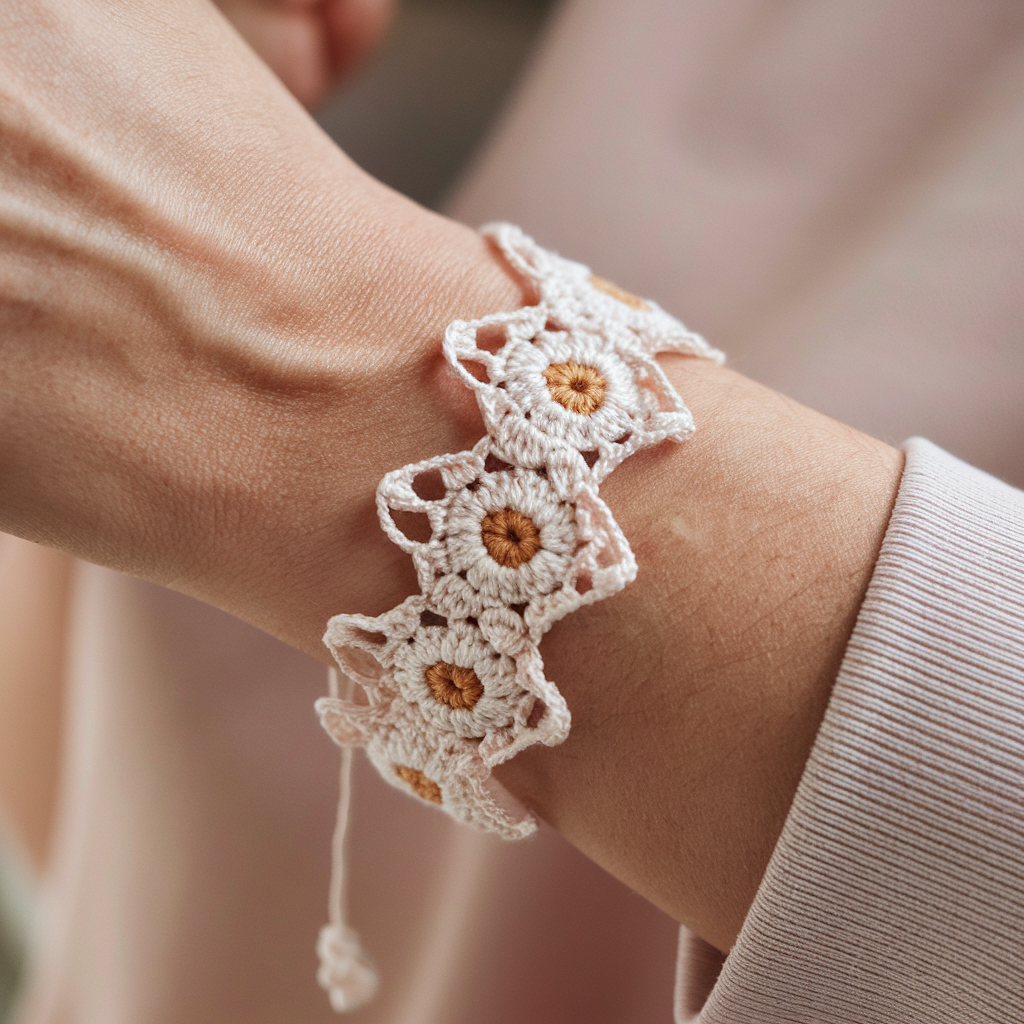
Overview
A narrow lace strip of interconnected tiny floral motifs (mini rosettes) joined to create an elegant lace bracelet — looks couture but makes a lovely rustic-boho statement when worked in natural fibers.
Skill level: Intermediate (motif making + join-as-you-go technique)
Materials
- Fine cotton thread or fingering cotton (2–3 colors optional)
- 1.75–2.75 mm hook depending on thread
- Small button toggle or metal clasp
- Tapestry needle, optional light starch
Finished size
- Width: 0.75–1 in (depending on motifs); length ~7 in.
Step-by-step construction (join-as-you-go floral motif chain)
- Make floral motifs (mini rosettes): Each small motif: MR; ch1, work 6–8 sc in MR; sl st. Then create petal round by making small loops and filling them with (sc, hdc, dc, hdc, sc) to form tiny petals (diameter ~0.6–1 in). Make enough motifs to wrap the wrist slightly overlapped — for example 8–10 motifs.
- Join-as-you-go: As you finish each motif, instead of fastening off, use sl st to join to previous motif at two or three evenly spaced join points so motifs form a tight lace band. Continue joining until band reaches circumference.
- Edge & closure: Work a neat outer round of sc around entire band to give a stable edge, then create a small buttonhole on one end (chain loop) and sew a small button on the other. Alternatively attach tiny lobster clasp with jump rings.
- Optional backing: For comfort, sew a narrow strip of cotton felt to the inside to prevent irritation from joins. Choose cotton felt and hand-stitch with small stitches.
Variations
- Add contrasting centers in motifs for color pop (e.g., mustard or terracotta centers).
- Make a cluster bracelet with three rows of motifs for a cuff.
Finishing & care
- Lightly starch if you want crisper petals; otherwise wash gently and reshape. Weave in motif join tails well.
Styling tip
- An elegant boho accessory — wear with a linen blouse, leather sandals, and a low pendant for curated layering.
7. Crochet Curb Chain Bracelet Pattern
Overview
This design combines metal curb-chain links (jewelry chain) with short crochet elements in between links — a mixed-media bracelet fusing rustic yarn and industrial metal for a modern boho-chic look. It’s durable, fashionable, and easy to assemble with jewelry findings.
Skill level: Intermediate (basic crochet + jewelry assembly)
Materials
- Thin curb chain (7 in length) — choose brass, antique finish, or sterling depending on budget
- Small jump rings and lobster clasp (if chain not pre-measured)
- Fingering yarn or waxed cord for crochet bits (contrasting neutral — ecru, tan)
- Small hook 2.0–3.0 mm, pliers
Finished size
- Chain length 7.5 in including clasp; crochet pieces sized ~0.25–0.5 in each.
Step-by-step construction (chain + crochet links)
- Prepare chain: If the chain is a continuous length, remove a few links to fit wrist with clasp space; attach lobster clasp to one end and a jump ring on the other.
- Crochet mini links: Make small short crochet tubes or small rings that will slip over individual chain links: e.g., ch 6, join into ring, work 6–8 rounds sc in the round to make a snug little band. Make 6–10 such bands.
- Attach to chain: Slip each crochet band over an individual curb chain link and distribute evenly along chain length either every link or every other link. For extra security, sew one or two invisible stitches through the chain link and through the crochet band interior using fine thread.
- Finishing: Crimp jump rings and close securely; hide tails inside crochet band. Inspect link attachments and test strength.
Variations
- Use leather cord instead of crochet rings for an edgier feel.
- Add 1–2 dangling charms between crochet bands for movement.
Finishing & care
- Avoid wetting metal — wipe with dry cloth. For rustic metal finishes, allow patina as part of the look.
Styling tip
- A great unisex piece — pairs with denim, leather jackets, and beaded anklets.
Final finishing & production tips (applies to all bracelets)
- Measure carefully: Test-fit on a wrist or use a sizing strip to ensure comfortable fit; account for metal clasp overlap.
- Secure weaving: Weave in loose tails at least 1 in into interior stitches and add a tiny knot hidden in fabric if using slippery thread.
- Reinforce attachment points: When sewing motifs or beads into place, use a small felt backing or extra pass of thread to distribute stress.
- Packaging & care: If selling, include care instructions (hand-wash or gentle washing for yarn pieces; avoid submerging metal parts). Provide a small card with bracelet length and materials.
- Gift sets: Coordinate 2–3 bracelets (e.g., beaded + Ottomania + curb chain) for stacked arm candy bundles.
Conclusion
These seven boho crochet bracelet patterns give you a little of everything — from romantic heart chains and delicate V-stitch lace to textured Ottoman ribs, beaded refinement, seasonal cheer, and mixed-media curb chain pieces. They’re all friendly to small-batch making (perfect for markets or gift sets) and scale nicely: use thread for lace and delicate pieces or switch to cotton cord for a chunkier, more rustic look.