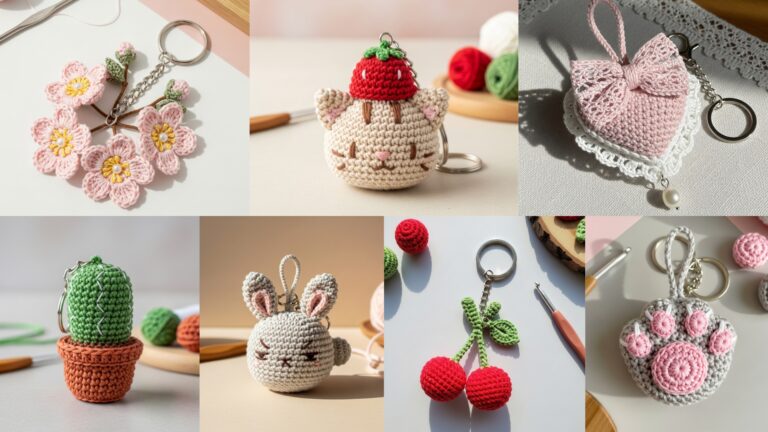
Small, fast and delightfully giftable — crochet keychains are perfect beginner amigurumi projects. Below is a single practical introduction (materials, sizing, hardware and safety), followed by seven complete patterns: Oreo, Mushroom with Duck Hat, Handmade Toast Chef, Penguin, Heart Cookie, Mini Bag, and Tiny Paw. Each pattern contains: skill level, materials, finished size, a clear step-by-step construction guide (with rounds/rows), assembly/attachment instructions, finishing and variation ideas. Tone is clear and friendly so you can paste this into a blog post.
materials, hardware, sizing, safety, abbreviations
Materials overview
- Yarn: For keychains use worsted/light worsted (4) or DK (3) for quick results. Cotton or cotton blends are crisp and washable. Acrylic is inexpensive and has good stitch definition. For tiny, neat amigurumi use DK or sport weight.
- Hooks: For worsted yarn use 3.5–4.5 mm; for DK/sport use 2.5–3.5 mm. Use a hook slightly smaller than the yarn label suggests to create a dense fabric so stuffing won’t show.
- Stuffing: A small amount of polyester fiberfill. Use just enough to shape — over-stuffing makes seams bulge.
- Notions: 1 key ring or lobster clasp per item, short chain or jump ring, tapestry needle, stitch marker, small scissors, optional safety eyes (3–6 mm) or embroidery floss for facial details. Felt, hot glue or fabric glue (optional).
- Hardware sizes: Typical key rings 25–30 mm (1″–1.25″) and small lobster clasps are convenient. You’ll also need a short chain or a jump ring to attach the crochet piece to the key ring for better movement.
Sizing
Finished sizes for these patterns are intentionally tiny — ~1.25–2.5 in (3–6 cm) depending on yarn/hook and how many rounds you crochet. I’ll give round counts that produce approx sizes when using DK yarn and a 3.0 mm hook; adapt if you use heavier yarn.
Safety & durability
- If the keychain will be given to small children, do not use glued-on beads or unsecured small parts. Embroider eyes and facial features instead of safety eyes.
- Always sew attachments (like key rings or jump rings) through several passes of yarn and knot/secure on the inside. For heavy use, pass a short metal jump ring through a small crocheted loop (worked into the top) and reinforce with stitches.
- If you use glue (felt or small parts) let it cure fully before handing over the piece.
General technique notes
- Amigurumi: Work in continuous (spiral) rounds unless the pattern explicitly says to join; use a stitch marker to mark beginning of round. Continuous rounds avoid a visible seam and are standard for small toys.
- Magic ring (MR): Most pieces begin with a MR; it lets you close the center hole tightly. If you prefer you may chain 2 and work into first chain for a small ring, but MR is recommended.
- Tension: Use a slightly smaller hook than you normally would to tighten fabric and keep stuffing from showing.
- Weaving tails: Weave in tails thoroughly inside the piece or through several interior stitches; then trim.
Abbreviations (US)
- MR — magic ring
- ch — chain
- sc — single crochet
- hdc — half double crochet
- dc — double crochet
- sl st — slip stitch
- inc — 2 sc in same st (increase)
- dec — sc2tog (decrease)
- st(s) — stitch(es)
- R — round (or Row if worked flat)
1. Crochet Oreo Keychain Pattern
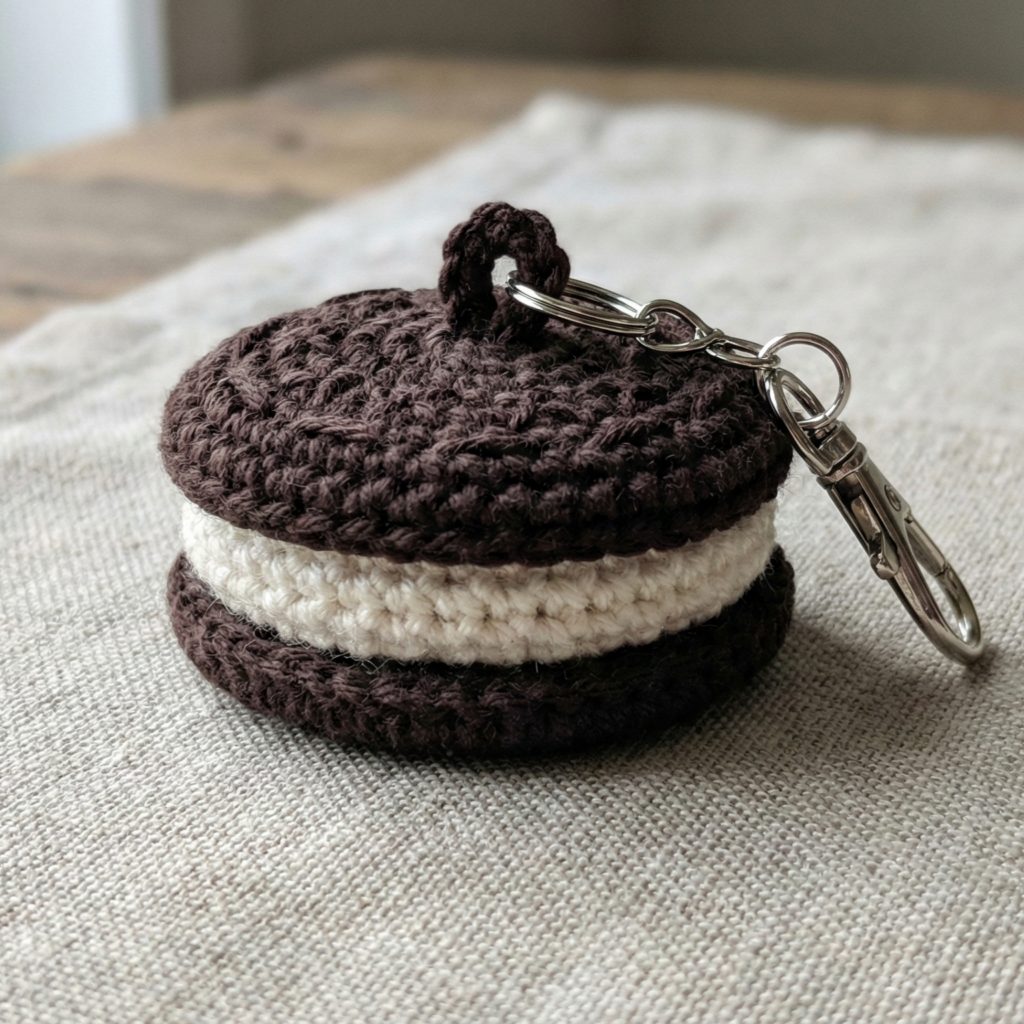
Skill level: Beginner
Finished size: ~1.5 in (3.5–4 cm) diameter (DK yarn, 3.0 mm hook)
Materials
- DK or sport yarn: dark brown or black (cookie), off-white (filling). Small amounts of each.
- 3.0 mm hook (or size to get tight stitches).
- Fiberfill, tapestry needle, stitch marker.
- 1 small jump ring + 1 key ring or lobster clasp.
Construction — two cookies + cream filling (worked in the round)
Cookie disc (make 2, identical): work in dark brown
MR
R1: 6 sc in MR (6)
R2: inc around (12)
R3: sc 1, inc around (18)
R4: sc 2, inc around (24)
R5: sc 3, inc around (30)
R6: sc around (30) — optional R7: sc around for thickness (30)
Fasten off leaving tail for sewing.
Cream filling (flat, slightly smaller diameter): work in off-white
MR
R1: 6 sc in MR (6)
R2: inc around (12)
R3: sc 1, inc around (18)
R4: sc 2, inc around (24)
R5: sc around (24) — stop here so cream is a little smaller than cookies.
Fasten off leaving tail.
Assembly
- Insert a small amount of stuffing into the cream disc — just a thin pad so the sandwich looks slightly raised.
- Place one cookie disc RS up, place cream disc centered on it, then top with second cookie disc RS down (so RS faces out). Using the long tail of one cookie, whipstitch around all three layers or mattress stitch through edge stitches to join them, leaving a small gap.
- Add a little more stuffing if you want the sandwich puffy, then finish joining and secure.
- At the top of the sandwich (center of edge), sew a small crocheted loop or firmly stitch a jump ring in place. To make a crocheted loop: attach yarn at the seam, ch 6, sl st to base to form a small loop, fasten and weave in; pass jump ring through loop and attach key ring. Alternatively sew a jump ring through the seam several times using strong thread/yarn and backstitch it so it is secure. Trim ends.
Variations & finishing
- Add embroidered lines or small white speckles to mimic an Oreo pattern.
- Make mini Oreo pairs in different colors or make a Halloween version with orange filling.
Care
- Spot clean when possible; hand wash gently and dry flat if needed.
2. Crochet Cute Mushroom with Duck Hat Keychain Pattern
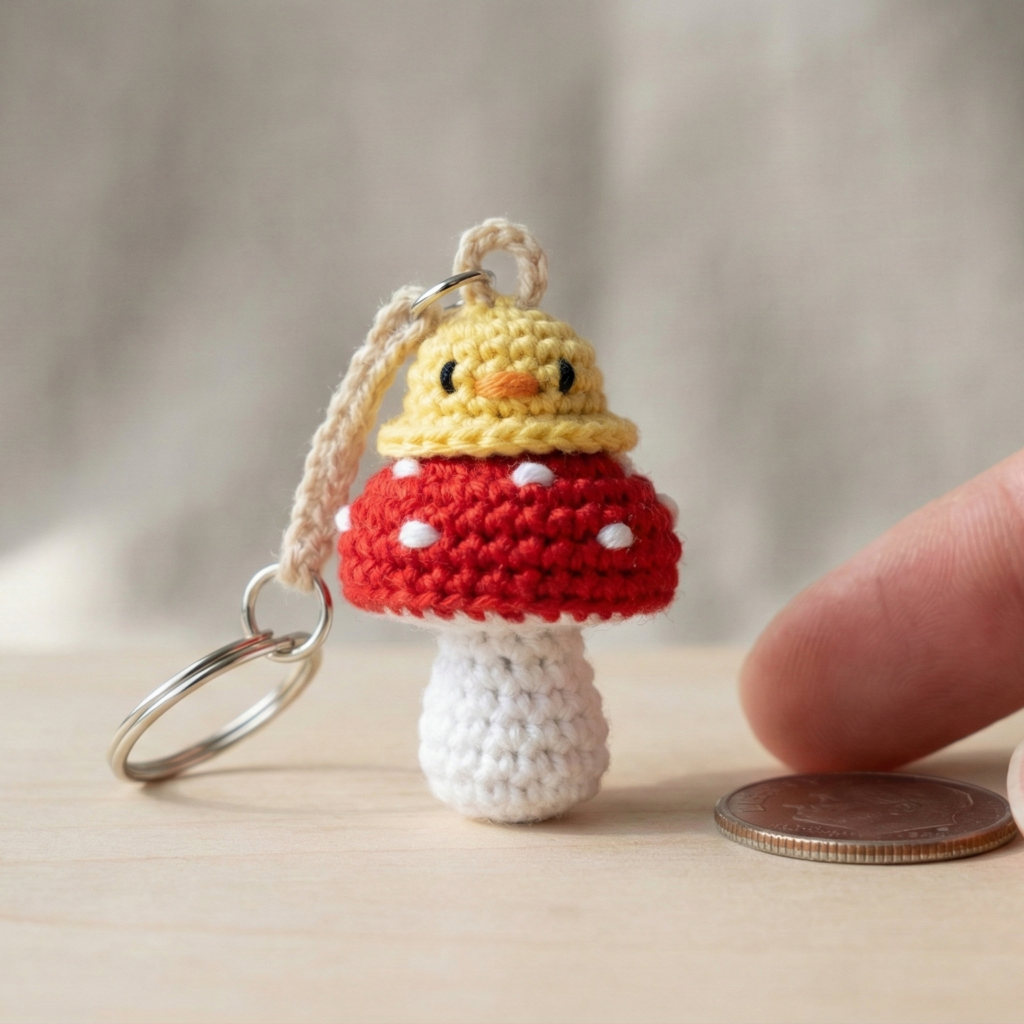
Skill level: Beginner → confident beginner (combining two small elements)
Finished size: ~2 in tall (cap included)
Materials
- DK yarn: red (cap), white (spots and stem), yellow (duck hat), orange or black for duck beak/eyes if embroidered.
- 2.75–3.0 mm hook.
- Small amount of fiberfill, tapestry needle, stitch marker.
- Small jump ring + key ring.
Construction overview
Make a mushroom body (stem + cap) and a tiny duck hat as a separate small cap that sits on top of the mushroom cap as an accent.
Mushroom stem (worked in the round, white):
MR
R1: 6 sc in MR (6)
R2: inc around (12)
R3: sc 1, inc around (18)
R4–R6: sc around (18) — for height
R7: sc 1, dec around (12)
Stuff lightly, do not close fully — leave opening for joining cap.
Mushroom cap (worked in the round, red):
MR
R1: 6 sc in MR (6)
R2: inc around (12)
R3: sc 1, inc around (18)
R4: sc 2, inc around (24)
R5: sc 3, inc around (30)
R6: sc around (30)
Optionally R7: sc around (30) for a fuller cap. Fasten off leaving tail for sewing.
White spots (make 5–7 small spots):
MR; 6 sc in MR; sl st and fasten off leaving tail to sew to cap. Make several and sew evenly onto cap.
Assembly
- Insert a little stuffing into the stem and continue to lightly stuff the cap as you sew. Sew the cap onto the stem opening, easing the cap to the stem top with small whipstitches so the seam is neat.
- Make the tiny duck hat (yellow) — a scaled-down cap: MR; 6 sc; R2: sc 1, inc (9); R3: sc 2, inc (12) — fasten off, weave tail and sew onto top center of red cap. Add tiny embroidered beak and eyes on the hat front (tiny dots) or make a tiny bobble for the duck head if you want more character. Alternatively crochet a tiny duck head separately (mini ball) and sew to hat.
Attachment
- Create a small loop at cap top before final closure, or attach a jump ring through the seam between cap and stem (stitch it well). Pass the jump ring through the loop and attach the key ring.
Variations & finishing
- Make the duck hat removable by sewing it lightly with a few stitches that can be cut later.
- For safety and durability for kids, embroider features and avoid buttons.
Care
- Spot clean. Hand wash and reshape.
3. Crochet Handmade Toast Chef Keychain Pattern
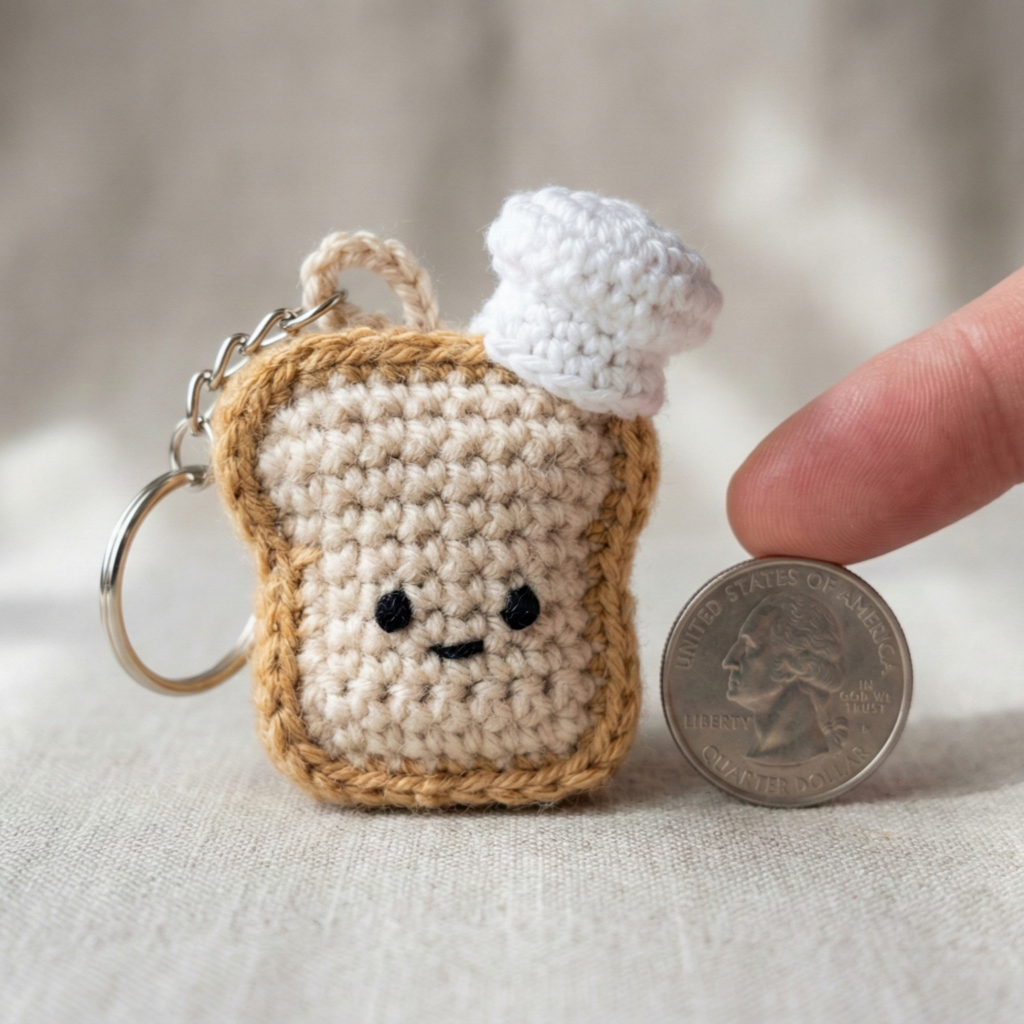
Skill level: Beginner → confident beginner (small appliqué details)
Finished size: ~2.0 in tall (toast slice)
Materials
- DK yarn: light beige (toast), darker tan (toasted edge), small bits of white/black/other for chef hat and face.
- 3.0 mm hook.
- Small amount of stuffing, tapestry needle.
- Mini key ring + jump ring.
Construction — toast body (flat, worked as two identical pieces)
Toast slice (make 2): hint: a slight rounded rectangle with a curved top
Start with a chain base sized to your gauge for width (example ch 10). Work in rows to create a rounded top:
Row1: ch10, sc in 2nd ch from hook and across (9 sc). Turn.
Row2–R5: sc across (9) — build height for the body.
Now round the top with increases to create curve: R6: ch1, inc in first st, sc across 7, inc in last st (11)
R7: sc across; R8: sc across. Adjust to make a gentle dome at top. Fasten off. Make a second identical piece.
Edge toast scorch (optional): Using darker tan, work a single crochet border around the piece (with RS facing) to create a toasted rim.
Chef hat (tiny):
MR; 6 sc; R2: sc 1, inc (9); R3: sc around; make a short band for the base of the hat (ch 6 join and sc around) then sew crown to band and attach to toast top.
Face (embroidery): Use black embroidery floss to stitch small eyes (two French knots or small straight stitches) and a tiny smile.
Assembly
- With RS facing out, place the two toast pieces together and whipstitch around three sides, leaving the top (where the chef hat will attach) open for stuffing. Lightly stuff, then sew top closed and sew the chef hat onto top center. Alternatively, sew post stuffing as the last step.
- Create a loop for the key ring by crocheting a small chain loop at the top seam (ch6, sl st to base), or securely sew a small metal jump ring into the top seam (stitch through the ring several times to secure). Attach key ring.
Variations
- Add an embroidered little spatula or chef’s scarf (tiny rectangle) for character.
- Make a peanut butter and jelly version with appliqué.
4. Crochet Penguin Keychain Pattern
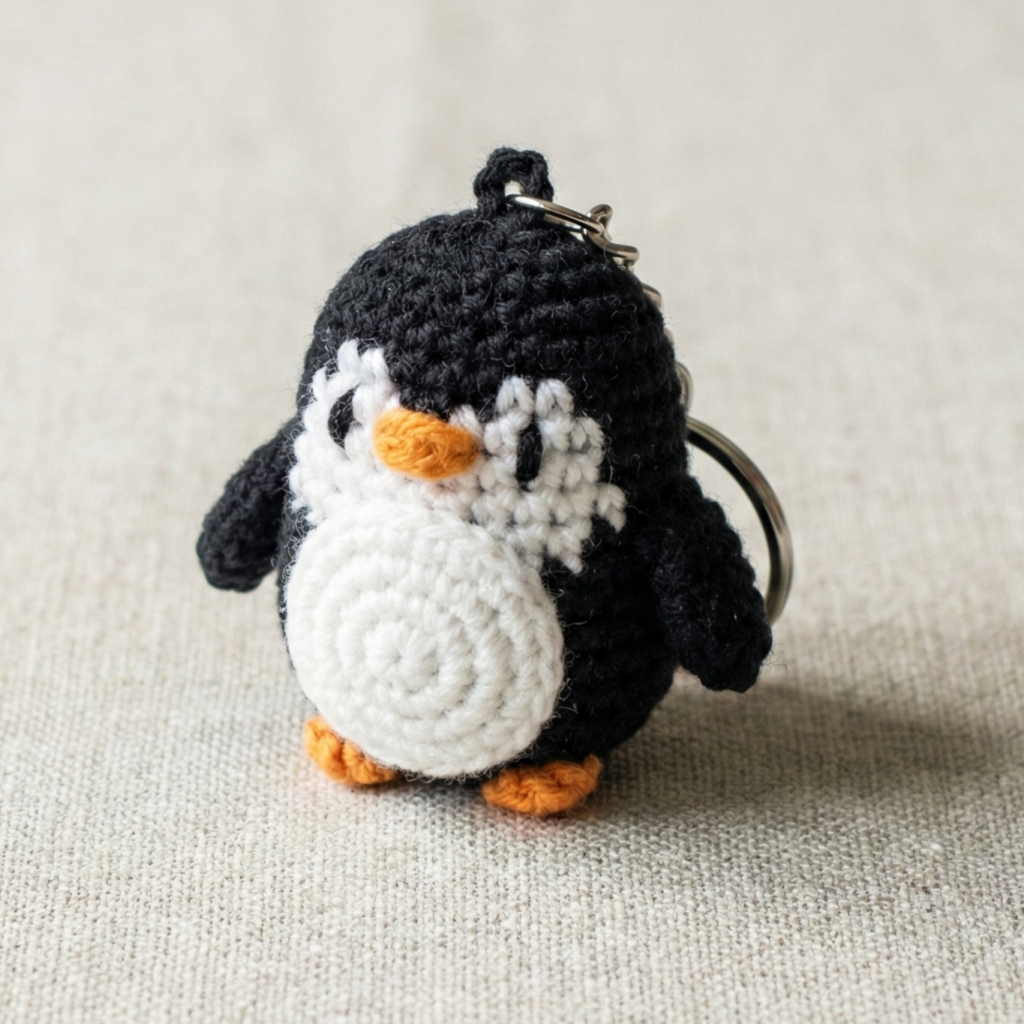
Skill level: Beginner (simple color changes and small amigurumi shaping)
Finished size: ~1.75–2 in tall
Materials
- DK yarn: black, white, orange (beak/feet).
- 2.75–3.0 mm hook.
- Tiny stuffing, tapestry needle.
- Optional 2–3 mm safety eyes (or embroidered eyes).
- Key ring + small jump ring.
Construction — body in the round, color changes for belly
Body (worked in black, change to white for belly):
MR (black)
R1: 6 sc in MR (6)
R2: inc around (12)
R3: sc 1, inc (18)
R4: sc 2, inc (24)
R5–R7: sc around (24) — height for chest
R8: sc 3, inc (30) → this flares slightly for body
R9: sc around (30)
Now switch to white for belly (insert white yarn at appropriate point):
R10: sc around in white (30)
R11: sc 3, dec around to begin taper (24) — if you want a distinct belly shape, on RS embroider or surface stitch a white oval rather than changing color across whole rounds; that keeps the back black. For a classic penguin do white rounds on the front only — easier method: work black body, then make a white oval patch and sew to front. (That is a beginner-friendlier approach.)
Head shaping: continue black above chest and begin decreasing for neck/head if worked continuous, or make body as one piece and add a small head separately and sew on.
Beak (orange, tiny): MR; 4 sc in MR; work 2 rounds sc (4), flatten and sew to front center above belly. No stuffing.
Feet (make 2): ch4; sc in 2nd ch and across (3 sc); fasten leaving tail; sew to base.
Optional wings (make 2): small ovals: ch6, sc 5, 2–3 rows shaping to make tiny wing, sew on sides.
Assembly
- If you made the body as one piece with head separate, sew head to top of body and stuff lightly before closing. If continuous, shape as you decrease to close top.
- Sew beak and feet in position. Embroider small eyes or install safety eyes before closing head (if using safety eyes).
- Attach key ring: either sew a small loop of yarn into the crown seam and pass a jump ring through it, or insert a jump ring into the top seam and secure with multiple stitches. Attach key ring.
Variations & finishing
- Make a penguin wearing a tiny scarf by crocheting a small chain and tying it around the neck.
- For a toddler-safe version, embroider eyes.
5. Crochet Heart Cookie Keychain Pattern
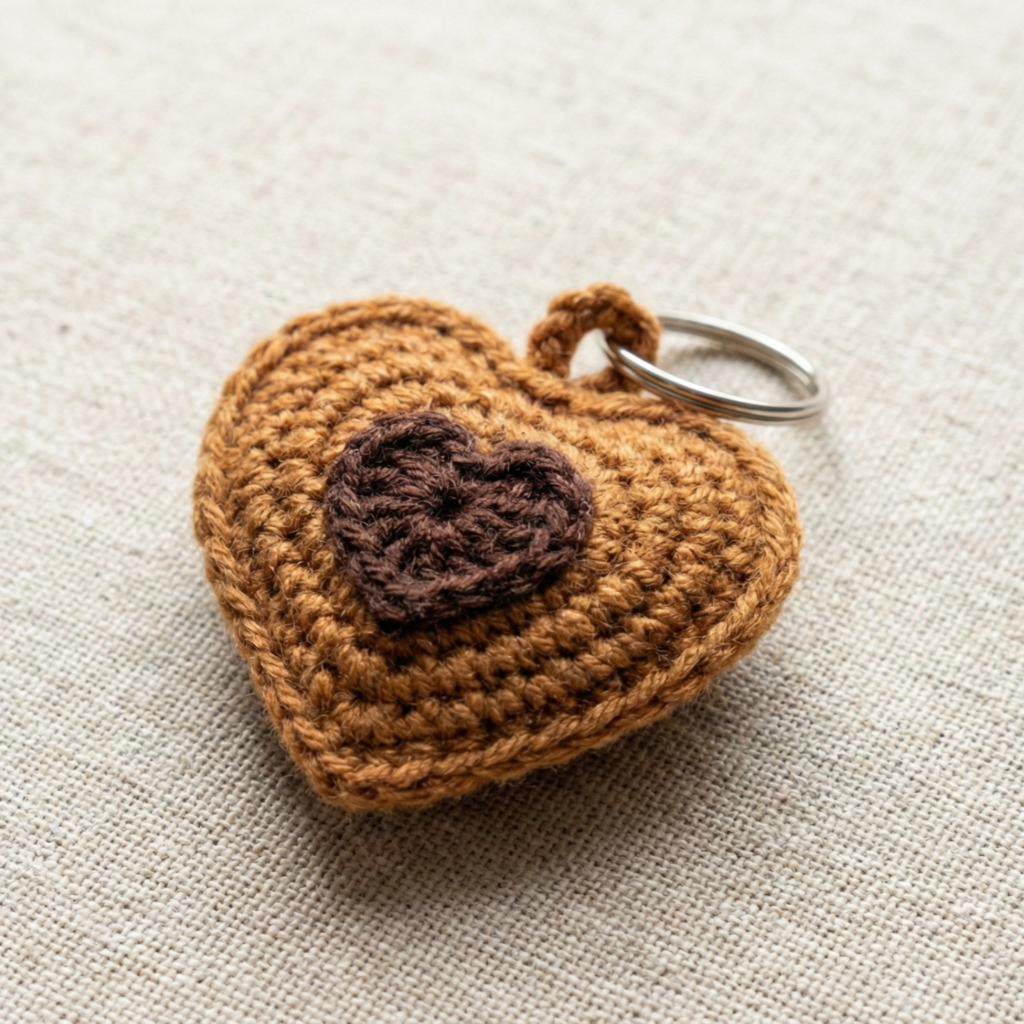
Skill level: Beginner
Finished size: ~1.5 in (heart width)
Materials
- DK yarn: warm brown (cookie) and pink or red for heart icing/applique.
- 2.75–3.25 mm hook.
- Fiberfill small pinch, tapestry needle, felt backing (optional).
- Key ring + jump ring.
Construction — heart cookie (worked flat in two identical pieces)
Heart shape (make 2): simple small heart chart:
Row1: ch6, sc in 2nd ch from hook, sc in next 3, 3 sc in last ch (turn to other side of chain), sc in next 3, sc in last ch (approx heart base) — fasten and shape with a round of sc to tidy and adjust shape. (If you prefer more precise shaping follow a tiny heart chart: MR, ch3, 6 dc cluster etc.)
Alternatively use this small amigurumi heart (worked in the round):
MR
R1: 6 sc in MR (6)
R2: inc around → 12
R3: sc 1, inc → 18
R4: sc 2, inc around (24) — now divide to shape two lobes by working half rounds and shaping decreases; this is slightly more advanced. For absolute beginner, the flat two-piece heart method is easiest.
Icing applique: in pink, embroider a small smaller heart or scalloped edge onto one side.
Assembly
- Place two heart halves RS together and whipstitch around leaving small gap; stuff lightly and finish closing.
- Attach a small felt circle to the back if you plan to glue the key ring; otherwise sew a short loop (ch6) at the top seam, secure and run jump ring through loop; attach key ring.
Variations
- Add a tiny bead in the center of the icing for shine (securely sewn).
- Make chocolate, sugar or lemon cookie versions with different yarn colors.
6. Crochet Mini Bag Keychain Pattern
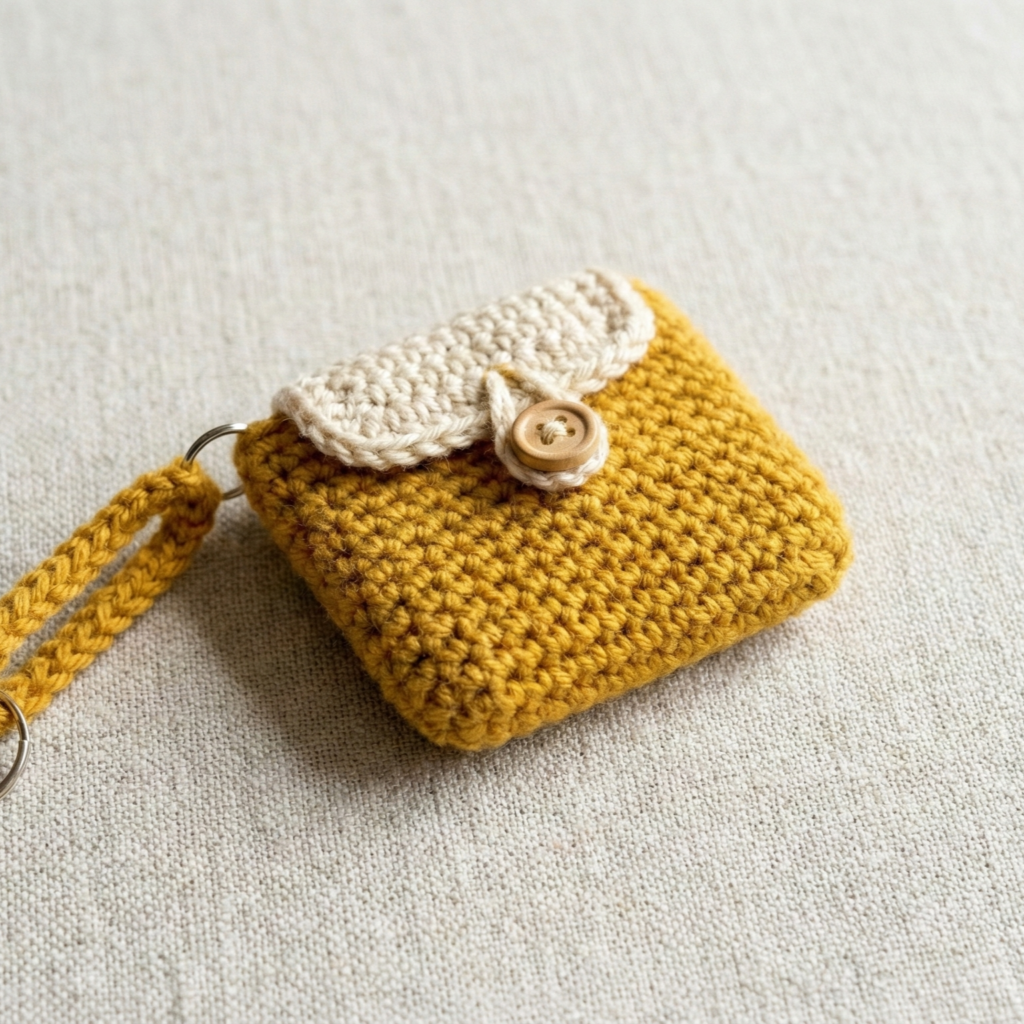
Skill level: Beginner (worked flat then seamed)
Finished size: ~1.75–2 in tall
Materials
- DK yarn (main color for bag, contrast for flap/strap).
- 3.0 mm hook.
- Small amount of felt for lining (optional), small button for flap (optional), key ring + jump ring.
Construction — small pouch style (worked flat, folded into bag)
Front/back panel (make 2): chain 12 (or adapt to gauge for desired width), Row1: sc in 2nd ch from hook and across (11 sc). Turn. Row2–R6: sc across until panel measures desired height (~1.25–1.5 in). Fasten off. Make second panel.
Flap (optional): chain 8, sc 7; Row2: sc across; work 2–3 rows then shape with decreases to make peaked flap or curve.
Strap (tiny): ch 20, sl st back to form small loop strap or work a 1-row i-cord.
Assembly
- With RS together, whipstitch two panels along sides and bottom, leaving top open. Alternatively use slip stitch join so the edge is neat.
- Add a felt lining cut slightly smaller than interior and sew inside (optional).
- Add flap: sew flap to one top edge and add a small button on front to close (or a snap sewn through lining).
- Attach strap: sew strap to one side seam and loop a jump ring through strap top and attach key ring. For strength, fold strap base into seam and stitch multiple passes.
Variations
- Add tiny appliqué flower, tiny granny square pocket on front, or embroider initials.
- Make a tiny crossbody bag with a longer chain if you want a bag that actually fits tiny items.
7. Crochet Tiny Paw Keychain Pattern
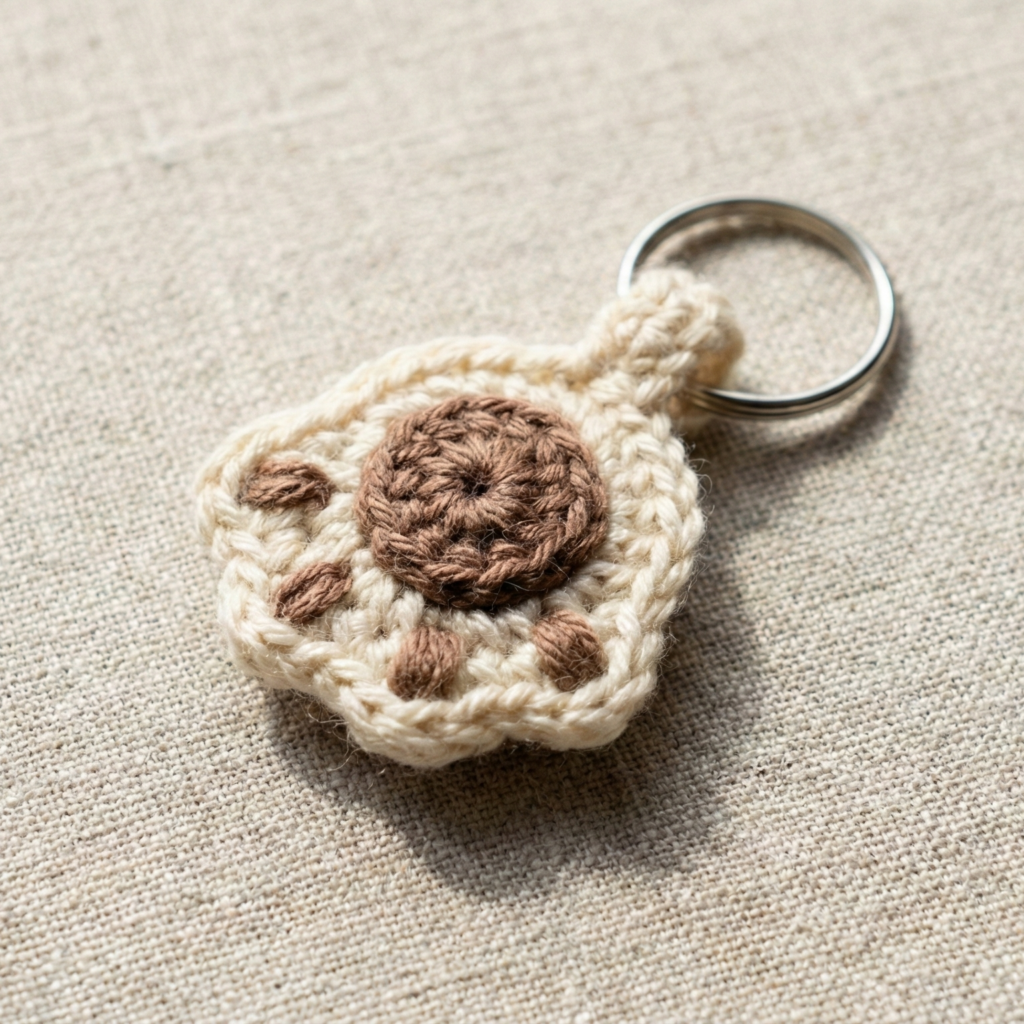
Skill level: Beginner — small circular motif with appliqué toes
Finished size: ~1–1.25 in diameter
Materials
- DK yarn: main paw color (cream or brown) and darker color for pads (chocolate).
- 2.75–3.0 mm hook.
- Tapestry needle, small jump ring + key ring.
Construction — paw base + pads (worked in the round)
Base round (paw): (cream)
MR
R1: 6 sc in MR (6)
R2: inc around (12)
R3: sc 1, inc around (18) — stop here for ~1 in diameter.
Pad appliqués: (make 1 large pad + 3–4 small toes) in dark brown
- Large pad: MR; 6 sc in MR; R2: inc around (12); flatten and fasten leaving tail for sewing.
- Little toes (make 4): MR; 5 sc in MR; fasten leaving tail.
Assembly
- Sew large pad to center of paw base, then sew the little toes along the top arc. Secure all tails and weave into the piece.
- If you like a little thickness, back the paw with a felt circle and sew through the felt to reinforce.
- Create a small loop at the top of the paw by chaining 6 and attaching to the top seam, or sew a jump ring through the felt and reinforce with stitches. Attach key ring.
Variations
- Make animal family sets (dog paw, cat paw in different colors).
- Attach to a small tassel for extra length on the key ring.
Conclusion
You now have seven beginner-friendly keychain patterns that are quick to make and fun to gift or sell. A few final practical tips:
- Make test miniatures: a 2–3 round sample helps you confirm finished sizes before committing to yarn and gauge.
- Secure hardware properly: stitch jump rings through seams several times, or create a crocheted loop and run the jump ring through it and sew it closed. Metal bits take stress — make sure stitches go through multiple plies of yarn and knot inside.
- Avoid gluing for longevity: sewing is stronger. Use glue sparingly (felt attachment) and only after sewing where possible.
- Weave tails inside: bury tails in the stuffing and weave them through interior stitches for security.
- Embroider for safety: if the item will go to a small child, embroider eyes and small parts instead of using glued or pressed-in pieces.
- Care & labeling: include a small card with fiber content and care instructions — e.g., “hand wash cold, reshape and lay flat to dry.”
- Photography suggestions for your blog: show each keychain on a neutral background, a close-up of stitch detail, and in situ (hanging on keys, clipped to a bag). Include a short materials list and a time estimate (e.g., “~20–40 minutes each”).