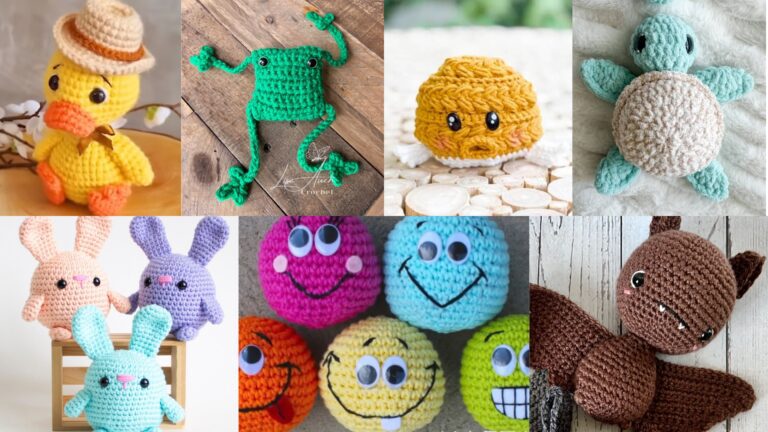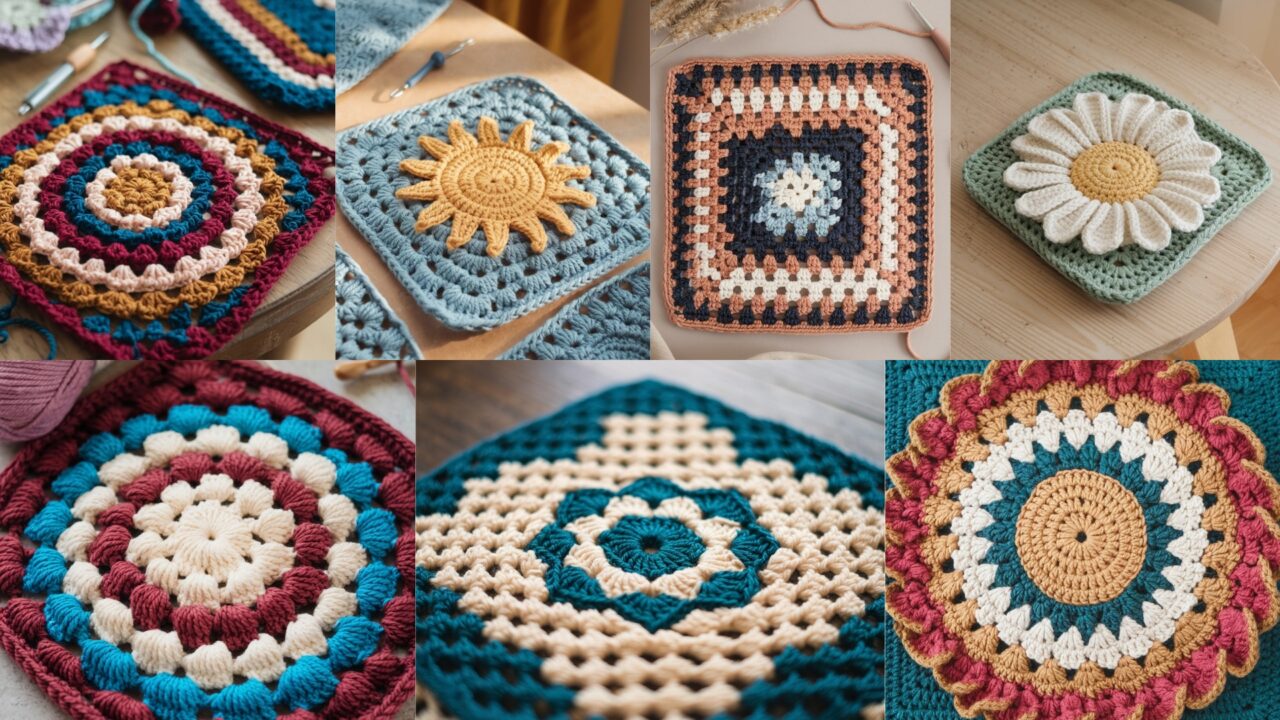
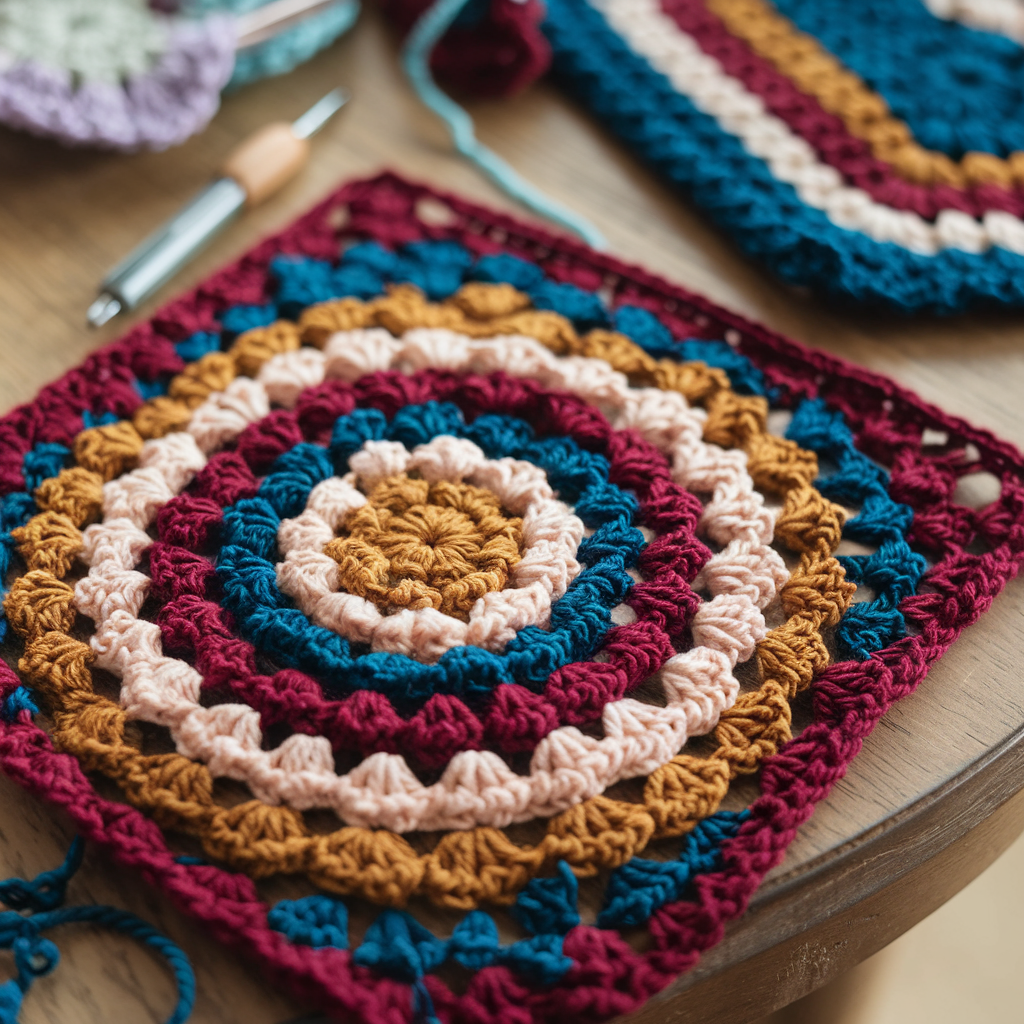
Nothing says timeless crochet like a granny square — but add flowers, texture, or a modern color twist and you suddenly have a project that feels fresh and irresistible. Below you’ll find seven flower-forward granny square patterns you can mix-and-match into blankets, cushions, bags, or wearable panels. Each pattern contains: a short description, skill level, materials list, stitch abbreviations (US terms), finished size & gauge guidance, a step-by-step pattern (round-by-round), joining and border suggestions, blocking/finishing tips, and ideas for variations. These are written so you can start crocheting immediately — have fun and play with color!
Quick notes that apply to all patterns
- Terminology: US crochet terms are used throughout (sc = single crochet, dc = double crochet, hdc = half double crochet, tr = treble, sl st = slip stitch, ch = chain).
- Yarn & hook: Most patterns assume worsted weight (Category 4) and a 4.0–5.0 mm hook unless noted otherwise. Adjust hook to suit your tension and yarn weight.
- Gauge: Granny squares are forgiving, but if you’re joining many squares into a blanket, make a few and block them first to ensure consistent size.
- Magic ring: Most flower centers are easiest worked from a magic ring; a ch-4 loop can substitute.
- Colors: I label main color as MC and contrasting colors as CC1, CC2, etc. Use as many colors as you like.
- Finishing: Always weave in ends securely and lightly block squares to even stitches and open lace. When joining, choose the method that complements the blanket’s look — whipstitch for invisible seams, join-as-you-go for fewer finishing steps, or surface slip-stitch for bold grid lines.
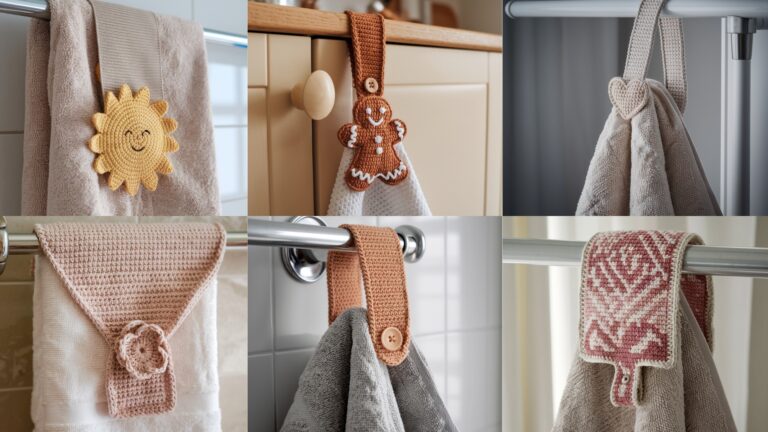
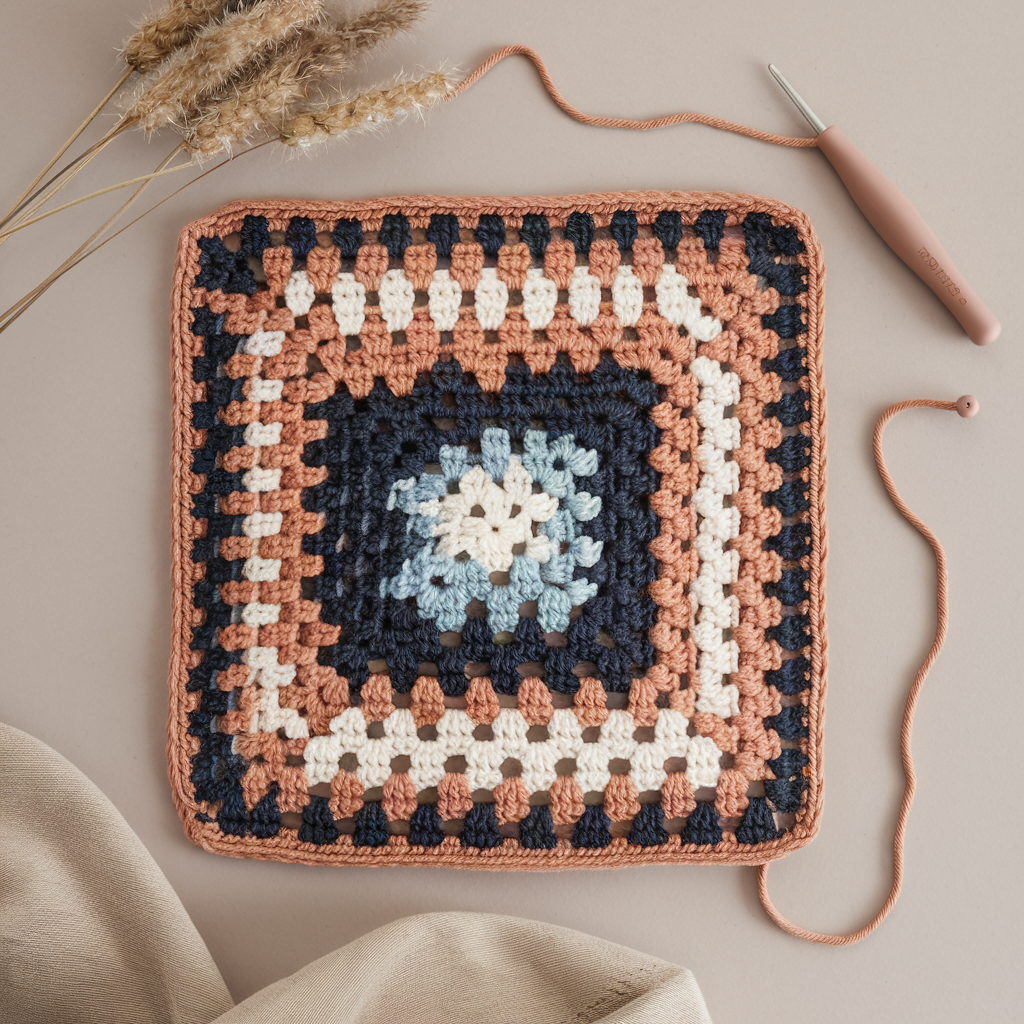
1. Crochet Sun Granny Square Pattern
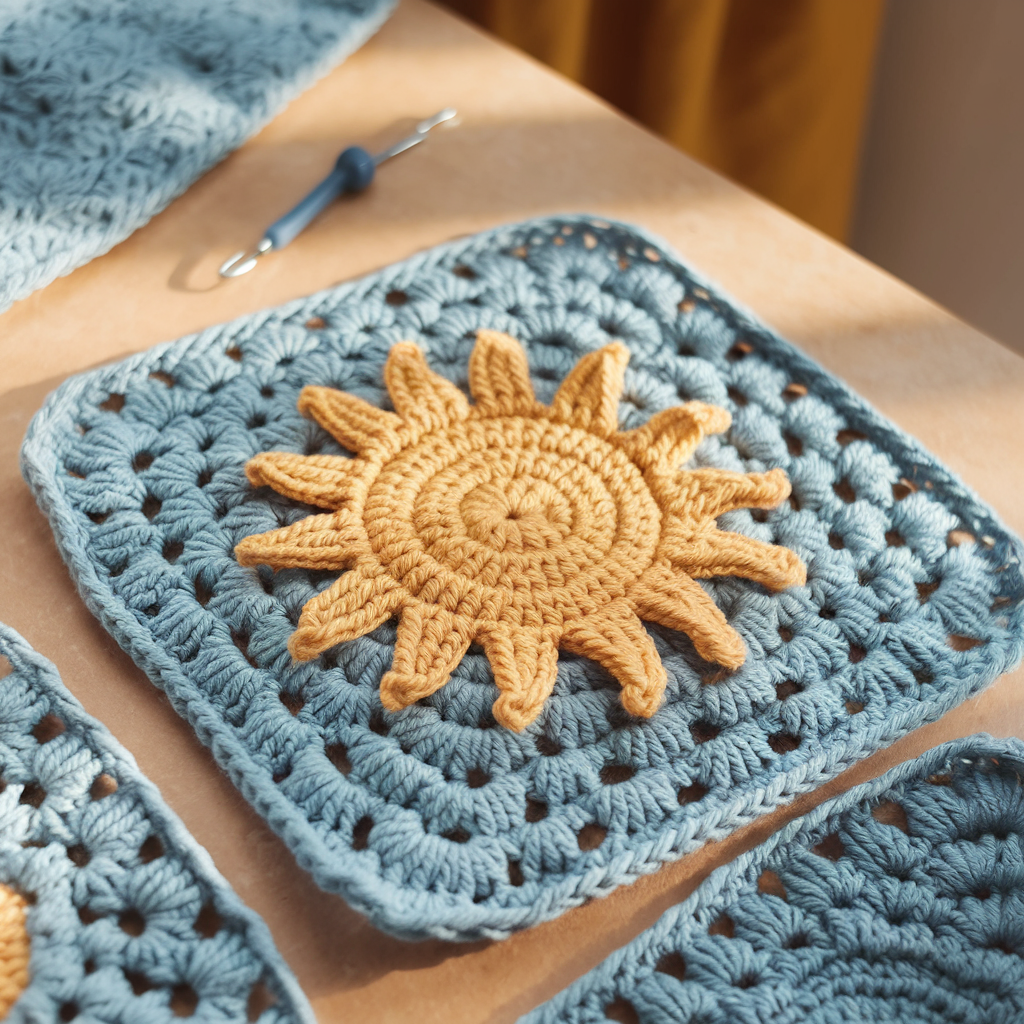
Description: A sunny floral center radiates into classic granny rounds — bright, cheerful, and perfect for summer throws or kitchen accessories.
Skill level: Easy–Intermediate
Materials
- Worsted weight yarn in 3 colors: center (CC1), sun rays (CC2), background (MC) — ~30–40 yards per square total.
- Hook: H/8 (5.0 mm) or size to match gauge.
- Yarn needle, scissors, blocking pins.
Abbreviations (US)
- ch, sl st, sc, hdc, dc, tr, sp = space, st = stitch, rep = repeat
Finished size (approx.)
- 8″ square (with H/8 and worsted). Adjust by changing hook or number of rounds.
Pattern (worked in rounds, change color at ends of rounds)
Center (Sun disc) — CC1
- MR, ch 1, 8 sc into ring. Join with sl st to first sc. (8)
- Ch 1, 2 sc in each st around. Join. (16)
- Sc in next st, 2 sc in next around. Join. (24) — F/O CC1.
Rays (make a petal/ray round) — CC2
4. Join CC2 in any st: ch 3, (dc, tr, dc) all in same st (petal), sl st in next st — repeat around to create 12 small rays. Adjust petals per number of sts so rays are evenly spaced. Join and F/O.
First Granny Round — MC
5. Join MC in any ch-space between rays (or in a stitch if you used sl st anchors): ch 3 (counts as dc), work (2 dc, ch 2, 3 dc) into the same space to form the first corner. Move to next ray-ch-space: (3 dc, ch 2, 3 dc) — repeat for 4 corners. Join to top of ch-3. (You now have a granny-square beginning.)
Granny Expansion Rounds — MC (repeat for size)
6. Change to MC (or alternate colors): For each round, in every corner (3 dc, ch 2, 3 dc). In side spaces, work 3 dc in each side space (or 3 dc separated by ch-1 spaces if you prefer a lacier look). Repeat until square reaches desired size — usually 3–5 granny rounds beyond the flower.
Edge finish
7. Round of sc or hdc around for a tidy edge; place 3 sc in each corner ch-2 for neatness. Optionally add crab stitch (reverse single crochet) for a polished finish.
Blocking
8. Block to square shape using pins and a spray of water or steam (check yarn care). Blocking opens the rays and shapes corners neatly.
Variations & tips
- Use a variegated yarn for CC2 to create ombré rays.
- Work a contrasting join (join-as-you-go with a bright color) to make the square pop.
- For a delicate look, replace some dc clusters with hdc clusters.
2. Crochet Two-Color Solid Granny Square Pattern
Description: A modern twist on the classic solid granny: two colors create bold geometry while maintaining the simplicity of the granny square.
Skill level: Beginner–Easy
Materials
- Two contrasting worsted yarns (MC and CC) — ~30–45 yards per square.
- Hook: G/6 (4.0 mm) or H/8 (5.0 mm).
- Yarn needle, blocking tools.
Abbreviations
- ch, sl st, sc, dc, tr, rep
Finished size
- ~7–9″ depending on gauge.
Pattern (solid granny with color changes for banding)
Center & first rounds
- MR, ch 3 (counts as dc), work 2 dc into ring, ch 2, 3 dc into ring, ch 2 — repeat for 4 clusters (classic granny center). Join and F/O CC if starting with CC.
Round 2 — switch to MC
2. Join MC in any corner ch-2: ch 3, (2 dc, ch 2, 3 dc) in same ch-2 (corner). In side spaces between cluster groups, work 3 dc in each side space. Repeat around; join. (Solid granny, now MC dominates.)
Round 3 — stripe with CC
3. Switch to CC: join in any ch-2 corner space, repeat corner cluster (3 dc, ch 2, 3 dc) in corners and 3 dc in side spaces. Join and F/O CC.
Continue alternating MC/CC
4. Alternate colors every two rounds (or every round for stark striping) until desired size. For a banded effect, use one color for 2–3 rounds, then switch.
Final border
5. For a crisp modern finish, use a contrasting color for 2 rounds: Round 1 sc around, Round 2 reverse sc (crab stitch) for a neat lateral edge.
Tips
- Carry color along back (tapestry crochet style) if you want fewer ends to weave in — float the unused color across the row and catch it at intervals.
- For a solid visual square, keep tension even and block lightly.
3. Crochet 3-D Daisy Granny Square Pattern

Description: Bold raised daisy petals sit on a traditional granny background — eye-catching texture that’s fantastic for baby blankets, cushions, and statement afghans.
Skill level: Intermediate (post stitches & layered petals)
Materials
- Worsted yarn in 3 colors: center (CC1), petals (CC2), background (MC).
- Hook: 4.0–4.5 mm recommended.
- Yarn needle, blocking tools.
Abbreviations
- ch, sl st, sc, hdc, dc, tr, fpdc (front post double crochet), epc = elongated petal cluster (explained below)
Finished size
- ~8″ square (dependent on yarn/hook).
Pattern
Center
- MR with CC1: ch 1, 8 sc in ring. Join. (8)
- Rnd 2: sc in next st, ch 2 around to create spaces for petals. Join.
First petal layer (CC2) — worked into ch-2 spaces
3. Join CC2 into a ch-2 space: [sc, hdc, dc, hdc, sc] all into the same ch-2 space (small petal). Sl st into next ch-2 space and repeat around for 8 small petals. Join and F/O CC2.
Second petal layer (3-D effect)
4. To make the petals 3-D, crochet a second, slightly larger petal layer worked behind the first: rejoin CC2 to the back loop of the previous round (or into the base round) and make taller petals: ch 1, [sc, hdc, dc, tr, dc, hdc, sc] into each petal position. These taller petals will sit behind the first round, creating a layered daisy. Join and F/O.
Secure petals
5. Add a few surface stitches at petal bases on the back to secure layers so they don’t flip.
Granny frame (MC)
6. Join MC in any space between petals: ch 3 (counts as dc), work (2 dc, ch 2, 3 dc) into same space to form the corner. Move to next petal gap and work (3 dc, ch 2, 3 dc). Repeat for 4 corners. Join.
7. Continue with classic granny expansion: in each corner (3 dc, ch 2, 3 dc); on sides, place 3 dc in each side space. Repeat for 2–4 rounds to reach final size.
Edge
8. Sc around for a tidy finish; add a narrow lace round if desired (e.g., ch 3, skip 1, sl st for open picots).
Blocking & shaping tips
- After stitching petals, lightly shape with fingers and block — pin petal tips outward to encourage 3-D effect. Use small dots of fabric glue under petal tulips only if absolutely necessary (test on scrap).
Variations
- Use boucle or fluffy yarn for petals to make soft, fuzzy daisies.
- Make smaller petal repeats (12 petals) for a fuller floral bed.
4. Crochet Spike Stitch Granny Square Pattern
Description: Spike stitches (long stitches worked into previous rows’ lower posts) create elongated floral rays and dramatic vertical texture in a square format.
Skill level: Intermediate (spike stitches and stitch counting)
Materials
- Worsted weight yarn in MC and 2 accent colors for spike highlights.
- Hook: H/8 (5.0 mm).
- Tapestry needle, blocking pins.
Abbreviations
- ch, sl st, sc, hdc, dc, sp-st = spike stitch (detailed below)
Spike stitch how-to (brief)
- Insert hook into the body of the fabric several rows below (or into the round below), yo and pull up to the usual height, then complete the stitch (e.g., pull up to height for dc then yo and finish). Spike stitches create tall elongated verticals.
Finished size
- ~9″ square (varies).
Pattern
Center medallion
- MR, ch 3, 11 dc into ring (12 sts). Join. (12 dc)
- Rnd 2: ch 3, dc in each dc around; join. (12 dc) — this creates a tiny round medallion.
Spike round
3. Rnd 3: ch 1, sc in same st, ch 3, make a spike dc by inserting hook into center of last round (or into the base of the first round) pulling up a loop to dc height, yo and complete dc; ch 1, sc in next st — repeat around to create alternating sc and spike dc (this puts vertical spikes radiating out). Join.
Forming square
4. Next rounds: Use the spikes as visual anchors and work granny clusters between spikes: join new color if desired and work (3 dc, ch 2, 3 dc) into corner spaces created every quarter. On between spaces, work 3 dc in the side space between spike-clusters. Repeat to expand.
Accent rounds
5. To emphasize spikes, work a contrasting color round of spike stitches every 2–3 rounds: insert spike into the same lower round for tall vertical columns. This creates a woven, geometric floral effect.
Finish
6. Finish with 1–2 rounds of sc or a scalloped edge (shells) to complement the spikes.
Tips
- Mark beginning of rounds with stitch markers because spike placement depends on precise counting.
- Spike stitches can pull fabric — keep tension relaxed on the spike loop to avoid warped squares.
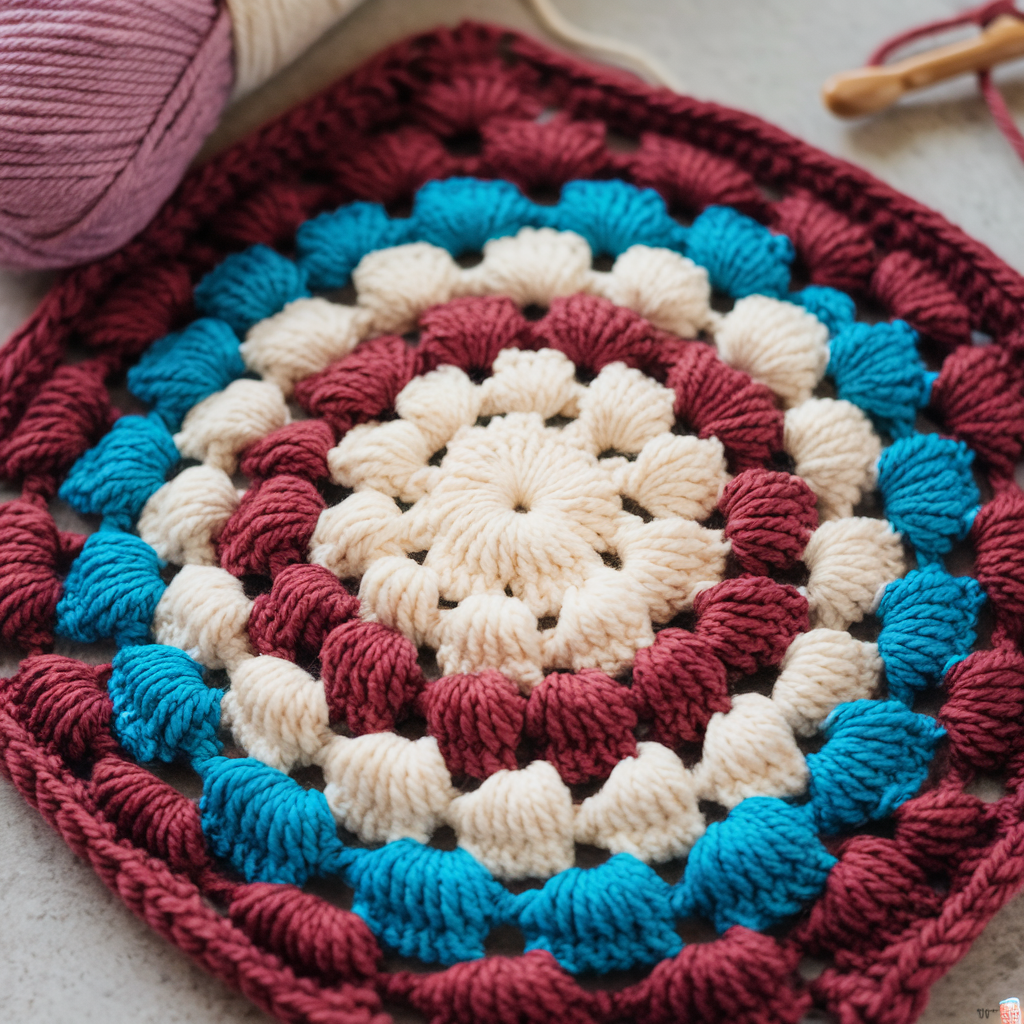
5. Crochet Large Sunburst Granny Square Pattern
Description: A dramatic, oversized sunburst (many petal rows and textured clusters) expands into a large square ideal for statement blankets or singular focal pillows.
Skill level: Intermediate (multi-round petal shaping and cluster stitches)
Materials
- Worsted weight in 3–4 colors (center, inner petals, outer petals, background).
- Hook: 4.5–5.0 mm for loft and drape.
- Stitch markers, tapestry needle, blocking supplies.
Abbreviations
- ch, sl st, sc, hdc, dc, tr, puff, cluster
Finished size
- Typically ~10–12″ depending on rounds.
Pattern
Center wheel
- MR with CC1: ch 2, work 12 hdc into ring. Join. (12 hdc)
- Rnd 2: ch 2, hdc in each st around. Join. (12) — this gives a dense disc.
Inner petal round
3. Switch to CC2: ch 3, (dc, tr, dc) in next st (tall petal), sl st in next st — repeat to form 6–8 tall petals. Join.
Sunburst expansion
4. Add a textured round: using a puff or popcorn stitch at each petal tip: in top of petal work puff (yo insert, draw loop) x3 times, finish puff, sl st into next base — this makes raised centers.
Transitional granny frame
5. Join MC in a space between petals: ch 3, (2 dc, ch 2, 3 dc) into the space to create corner. Work 3 dc in side gaps and repeat for 4 corners. This takes the circle to a square foundation.
Large rounds & texture
6. Work multiple rounds of clustered granny (3 dc clusters) to expand. Add occasional rounds of front-post double crochet to create ridged texture radiating from center. For a sunburst look, use a lighter color outward and a darker background to make center glow.
Edge treatment
7. Wide picot or lace border (e.g., sc, ch 3, sl st around) helps define the large square. Alternatively, do a 3-round shell border for softness.
Blocking
8. Because this is large and textured, wet-block heavily and pin into a true square — this ensures corners lie flat.
Variations
- Replace some round clusters with mesh (dc, ch 1, skip) for airflow in summer wraps.
- Mix yarn weights for the inner sunburst and outer grannies to make the center pop.
6. Crochet Mosaic Granny Square Pattern
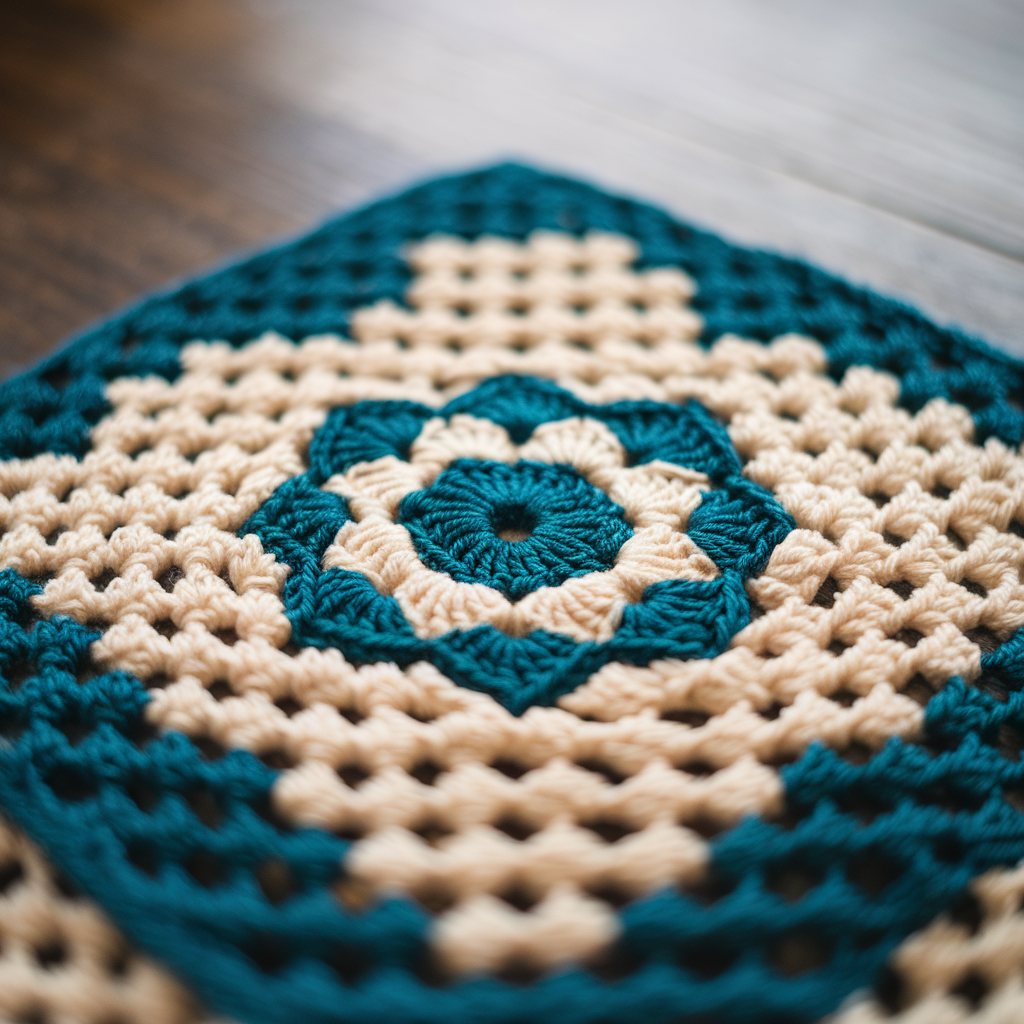
Description: Mosaic crochet uses slip-stitch colorwork to create crisp floral motifs with only one color worked per row — perfect for graphic flower squares without many carried floats.
Skill level: Intermediate (chart reading & mosaic technique)
Materials
- 2–3 colors of worsted yarn (A = background, B = motif color, optional C accent).
- Hook: 4.0 mm (G/6) or size to match yarn.
- Printed mosaic chart (optional but recommended).
Abbreviations
- ch, sl st (worked into the stitch below), dc, rep
Finished size
- ~8″ square.
How mosaic works (brief)
- You work full rows in one color. Where the chart indicates a filled square, you work a slip stitch (or dc worked into the stitch below) to carry the motif forward while keeping only one color in hand per row. This method creates the look of tapestry crochet but is lighter and less yarn-heavy.
Pattern (example floral mosaic)
Foundation
- Ch 36 + 2 for turning (multiple depends on chart). Work 1 row dc in Color A. Turn.
Mosaic repeat
2. Follow a simple 8-row chart where Rows 1–4 are worked in Color A (background) and Rows 5–8 in Color B for the flower petals. On motif rows, wherever a motif square appears, work a dc into the stitch below or a sl st into the stitch below (this captures the look of contrast). On non-motif squares, work dc in the current row normally.
Square framing
3. Once the central mosaic panel is done (e.g., 8–12 rows depending on chart), switch to MC and work granny rounds (3 dc clusters in corners) to expand to square size, or crochet a sc border to frame the mosaic panel.
Finishing
4. Because mosaic uses many color changes on separate rows (not carried), there are few floats to weave — simply weave the ends of color joins. Light blocking will flatten the mosaic.
Tips
- Start with a small 8×8 chart to practice mosaic technique.
- Use high-contrast colors for sharp motifs; for subtle results, keep hue similar.
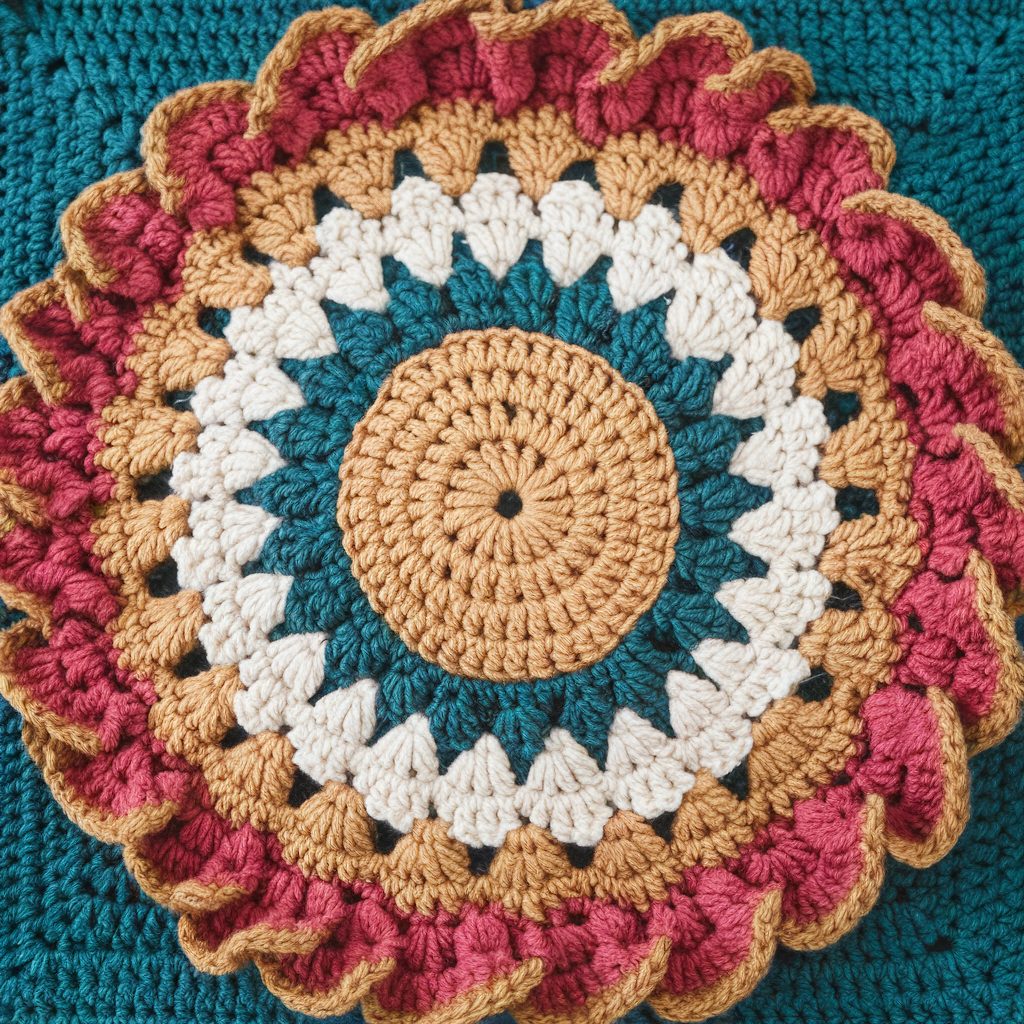
7. Crochet Turkish Granny Square Pattern
Description: Turkish-style granny squares marry circular medallions, layered star flowers, and geometric rounds for a richly textured floral tile — beautiful in warm color palettes.
Skill level: Intermediate–Advanced (many stitch types & color changes)
Materials
- Several colors of worsted yarn (4–5 color palette recommended).
- Hook: 4.0–4.5 mm.
- Stitch markers, tapestry needle, blocking equipment.
Abbreviations
- ch, sl st, sc, dc, tr, puff, cluster, picot
Finished size
- ~8–9″ depending on rounds.
Pattern overview (turkish medallion → square)
Central star/flower
- MR with CC1, ch 3, work 12 dc into ring. Join. (12)
- Rnd 2: ch 1, sc, ch 3 around to create lacy spokes. Join.
- Rnd 3: Join CC2 in ch-3 spaces and make petal clusters: [dc, tr, dc] in each ch-3 space — this yields a starburst flower. Join.
Layering & texturing
4. Add rounds of puff or cluster stitches between petals to build height: e.g., puff in each petal tip, then a round of sc in back loops only to create a ledge.
Making it square
5. To convert the round medallion to a square, work 4 corner formations: In four evenly spaced places around the flower, create extended corner groups: 3 dc, ch 2, 3 dc in the same spot to mark corners. Between these corner groups work even numbers of dc clusters and ch-1 spaces to form straight sides. The goal is to place corner groups at 90° intervals so the round begins to read as a square.
Expansion rounds
6. Continue alternating textured rounds (post stitches, puff stitches) with granny cluster rounds, always ensuring corners have (3 dc, ch 2, 3 dc). Use contrasting colors to accent ridge lines and petal outlines.
Finish & border
7. Strong outer borders reinforce the square shape: two rounds of hdc/sc then a decorative lace round (picot scallop) finishes Turkish tiles beautifully.
Blocking
8. Heavy blocking is recommended. Pin each corner evenly and gently steam or wet-block according to yarn label.
Variations
- Use metallic thread or silk blends for one round to add luxury.
- Arrange tiles in a medallion layout where Turkish squares alternate color schemes for dramatic quilts.
Joining & Blanket Building Tips
- Join-as-you-go (JAYG): Great for granny-based squares — finish the last round of a new square by slip-stitching into the adjacent squares’ edge spaces to join without sewing. This creates a seamless fabric.
- Whipstitch (invisible seam): Place squares right sides together and whipstitch through back loops only for a flatter seam.
- Single crochet join: Join squares with sc through both layers for a visible ridge — use a contrasting color to emphasize grid lines.
- Continuous join (returning join): Work a single long chain across edges and sc into squares for a knitted seam look.
- Border ideas: 2–3 rounds of sc/hdc to neaten, crab stitch for a firm finish, scallop or shell for feminine edge, or a wide rib border using fpdc/bpdc to echo texture from squares.
Blocking, Care & Finishing
- Blocking: Wet-block or steam-block squares to even stitches and square corners. Pin to measurement and let dry fully.
- Weaving ends: Use a tapestry needle to bury tails through braid of stitches; knot discreetly for durability.
- Care: Machine washable if yarn allows (use gentle cycle, cold, and mesh bag). Otherwise hand-wash gently and dry flat.
- Labeling: If selling, include fiber content and care instructions.
Color & Design Tips
- Palette ideas: For vintage florals, use muted palettes (mustard, rose, olive, cream). For modern, go bold (teal, chartreuse, magenta, black). For subtle texture use tonal values of one color.
- Contrast: High-contrast centers (light center, dark petals) make flower motifs pop; tonal changes produce a softer look.
- Mix & match: Combine a few different flower squares (e.g., Sunburst + Mosaic + Turkish) in a single throw for an eclectic, handmade collage. Keep a unifying color (MC) to tie them together.
Conclusion
There you go — seven flower-forward granny square patterns to spark creativity and build beautiful projects: the sunny Sun Granny, graphic Two-Color Solid granny, layered 3-D Daisy, vertical Spike Stitch square, dramatic Large Sunburst, crisp Mosaic tile, and ornate Turkish granny. Each square has its own personality: some are delicate and lacy, some sculptural and textured, and others bold and graphic. Mix and match them into throws, cushion fronts, bags, or wearable panels — and remember that color, blocking, and joining method will make or break the final look.