Blankets and scarves live and die by their stitch choices — the right texture can turn a simple rectangle of yarn into a heirloom. Below you’ll find seven reliable, beautiful stitch patterns that work exceptionally well for blankets and scarves: Lotus, Star, Arcade, Herringbone Single, Block, Wheat, and Wave. For each stitch I give: a short description of the look and best uses, skill level, materials, a very clear step-by-step stitch pattern (with a sample swatch count you can copy), notes about sizing and how to scale for blankets or scarves, finishing tips, and variations.
All patterns use US crochet terms. If you want UK conversions, tell me which stitch and I’ll convert it.
Before you start — materials, gauge & general tips
- Yarn: For blankets and scarves I generally recommend worsted weight (#4) for a balance of warmth and stitch definition. Sport/DK (#3) is lovely for lighter scarves. Cotton gives crisp definition; acrylic or wool gives drape and warmth.
- Hook: Use the hook recommended on your yarn label as a starting point. For denser, cozier fabric go down one hook size; for looser drape go up one.
- Swatch: Always make a 4″×4″ swatch in the stitch pattern and block it. Measure how many stitches and rows per inch for width and length planning.
- Border: Most stitch patterns look neater with a 1″ border of sc or hdc all around — this stabilizes edges and makes joining blocks simpler.
- Abbreviations (US): ch = chain, sc = single crochet, hdc = half double crochet, dc = double crochet, tr = treble crochet, sl st = slip stitch, st(s) = stitch(es), sk = skip, rep = repeat, BLO/FLO = back/front loop only.
1. The Lotus Stitch Pattern
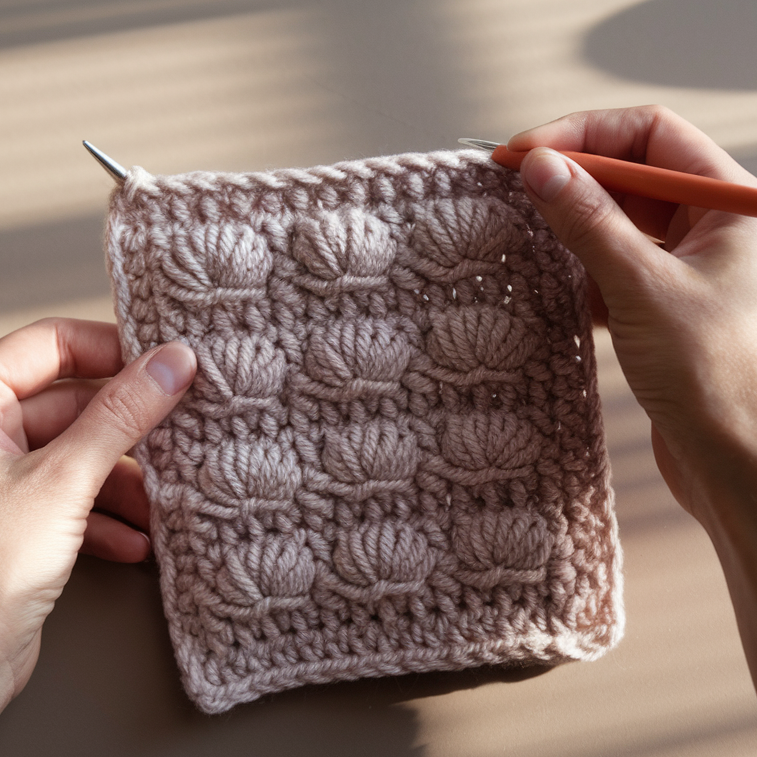
Look & use: Very floral, raised petal clusters; excellent for a decorative blanket panel or a textured scarf. The raised petals create a 3-D “bloom” look that stands out on solid colors.
Skill: Intermediate (puff/petal clusters + working into clusters)
Sample swatch: chain 25 (multiple of 6 plus 1). Hook 4.0 mm with worsted.
How the stitch works (short)
The Lotus stitch builds a round of “petal loops” on a base row, then works tightly packed puff- or cluster-stitches into those loops; alternating rounds offset petals to create a full bloom.
Stitch pattern (step-by-step — sample swatch)
Make foundation chain 25.
Row 1 (base row): sc in 2nd ch from hook and in each ch across. (24 sc) Turn.
Row 2 (create loops): ch 1, sc in next st, ch 4, sk next st — repeat across, ending with sc in last st. You’ll create 12 ch-4 loops (because 24 sts / 2 = 12 loops). Turn.
Row 3 (inner petal row): Join yarn in first ch-4 loop; ch 1, (yo and pull up loop three times into the loop to make a 3-loop puff) — complete puff (yo and pull through all loops), ch 1, sl st into same loop to anchor — repeat in each ch-4 loop across. You’ve made 12 small petals. Fasten off and weave if you want a single row of petals, or continue for the full lotus look:
Row 4 (covering row): Turn the work and join yarn at base; work one row of sc across working into the base scs so petals stand on top. (24 sc) Turn.
Row 5 (outer petals): Create new loops between the petals: sc in next sc, ch 5, sk next sc across (12 ch-5 loops). Then work larger puff clusters into these ch-5 loops: (ch 1, 5-loop puff, ch 1, sl st) in each loop. This produces an outer row of larger petals. Fasten off and weave.
Tips to scale for a blanket or scarf
- Multiple repeats: Repeat the 6-st repeat across your sofa blanket width. For a large blanket, chain to your desired width (measure with swatch to determine stitches per inch), making sure the total ch = (6 × number of repeats) + 1 for the sample repeat logic.
- Row height: Each petal row adds texture — run several petal rows across the width for a denser design, or alternate lotus panels with plain dc rows to let the petals shine.
- Blocking: Block gently to flatten petals lightly and open their shapes.
Variation ideas
- Use two colors and work petals in a contrast color for stronger floral definition.
- Swap puff clusters for 3-dc shells if you prefer a semi-flat motif.
2. Star Stitch Pattern

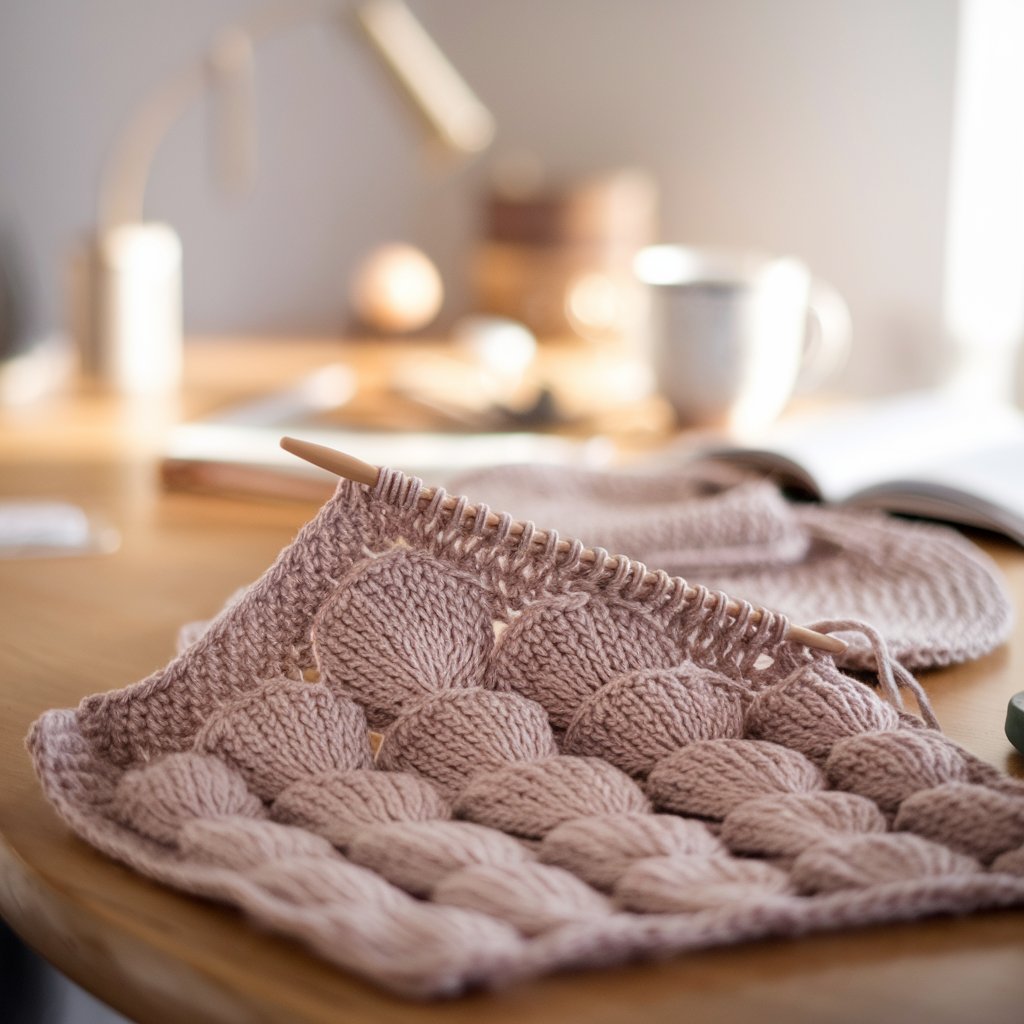
Look & use: Tiny star motifs that create a dense, slightly dimpled textured cloth — classic for cozy scarves and baby blankets.
Skill: Intermediate (pulling loops and closing star clusters)
Sample swatch: chain 25 (multiple of 2 + 1). Hook 4.0 mm, worsted.
How the stitch works
The Star stitch forms small 6- or 8-pointed stars by pulling up a specified number of loops across a set of chains/stitches and then drawing those loops together to form a star. Rows alternate with plain sc or hdc rows to stabilize.
Stitch pattern (step-by-step — sample swatch)
Make foundation chain 25 + 1. (I’ll show the classic method where each star uses 6 loops.)
Row 1 (foundation): sc in 2nd ch from hook and across (25 sc). Turn.
Row 2 (start stars): To make one star: Insert hook into next stitch, yo and pull up a loop (leave it on hook), insert hook into next stitch, yo and pull up loop — repeat 6 times total across 6 starting stitches so you have 6 pulled loops on hook. Yo and pull through all 6 loops (one loop left on hook). Ch 1 to close the star; sl st into the next stitch to anchor. Repeat across.
(Practically: each star consumes the stitch where its loops were pulled; work evenly across row.) Turn.
Row 3: ch 1, sc across the tops of the stars (or hdc across for taller texture) to stabilize and create spacing. Turn.
Row 4: Repeat Row 2 but offset stars so each star nestles between two stars from previous star row — this makes a dense field of stars.
Tips to scale & tension
- The star stitch uses more yarn and makes dense fabric — it’s warm and perfect for scarves and winter blankets.
- Because each star pulls loops from several stitches, use a slightly larger hook than for plain sc to avoid a tight, stiff fabric if wanted. Conversely, use a smaller hook for a compact star field.
- Test a 4″ swatch to confirm the number of stars per inch then calculate chains accordingly.
Variation ideas
- Work star rows separated by 1–2 plain sc rows for a lighter drape.
- Use sport/DK yarn and a smaller hook to make cheery star scarves.
3. Arcade Stitch Pattern
Look & use: Delicate, open arches that look like little arcade arches — great for lacy scarves, throws, and lightweight blankets.
Skill: Beginner → Intermediate (basic shells & chain arches)
Sample swatch: chain 30 (multiple of 5). Hook 4.0 mm, worsted or DK for a lacy throw.
How the stitch works
Arcade stitch uses shell clusters (dc shells) separated by chain arches. Repeating this across gives a rhythmic scalloped lacy pattern.
Stitch pattern (step-by-step — sample swatch)
Chain 30 (a multiple of 5 gives nice balance).
Row 1: dc in 4th ch from hook and in each ch across (this gives a tall base row). Turn.
Row 2 (arc row): ch 3 (counts as dc), sk 2 sts, (5 dc) in next st (shell), sk 2 sts, ch 3, sl st in next st — repeat across. You’ll create shells and small chain arches between them. Turn.
Row 3 (fill row): ch 3, dc in top of each shell and dc across the sl st spaces to create a stable top; this evens the top and readies for next arc row. Turn.
Row 4: Repeat Row 2, but offset shells into the chain 3 spaces from the row below so the shells stack into alternating rows. Repeat Rows 2–4 for the pattern.
Tips for blankets & scarves
- More open: Use DK yarn and a 5.0 mm hook for airy scarves.
- Denser: Use worsted yarn with a smaller hook or add an extra filling row between arc rows for warmth.
- Edge: Finish with a single round of sc to stabilize scalloped edges.
Variation ideas
- Vary shell size (3-dc, 5-dc, 7-dc shells) to create different “arcade” scales.
- Use two colors: background one color, shells another for a striking scalloped blanket.
4. Herringbone Single Crochet (HBSC) Stitch Pattern
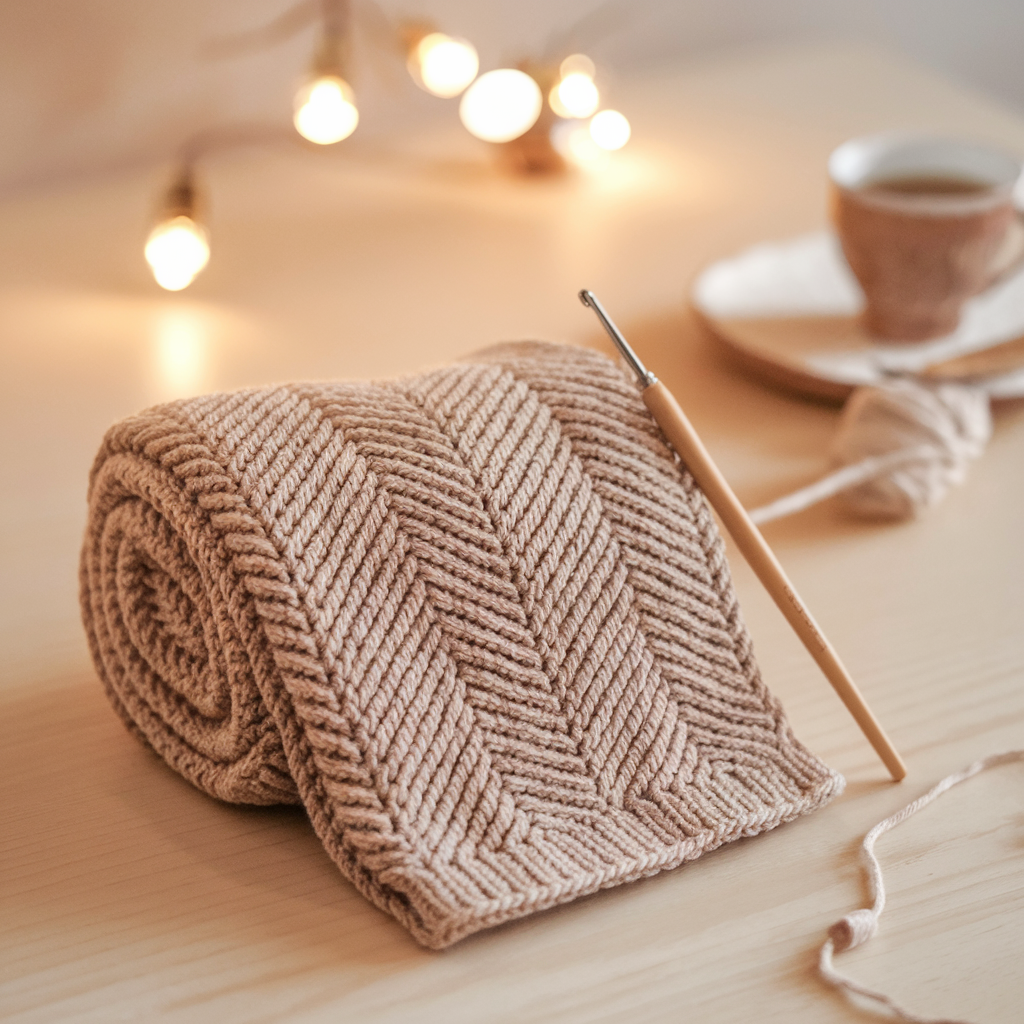
Look & use: Slanted, knit-like fabric with a subtle chevron/diagonal texture — excellent for dense, drapey scarves and cozy blankets.
Skill: Beginner → Intermediate (technique different from regular sc)
Sample swatch: chain 30. Hook 4.5 mm gives a loose, drapey herringbone with worsted yarn; use 4.0 mm for denser fabric.
How the stitch works
HBSC is made by inserting the hook into stitches in a particular order and drawing up loops so each stitch crosses the next — the technique gives a diagonal / knit appearance. It’s worked in rows.
Stitch pattern (step-by-step — sample swatch)
Chain 30.
Row 1 (foundation): sc in 2nd ch from hook and in each chain across. (29 sc) Turn.
Row 2 (HBSC row — explanation): ch 1 (does not count as st). Insert hook into next stitch and draw up a loop (leave on hook), insert hook into next stitch and draw up a loop (now you have 3 loops on hook including the loop from previous row if any). Yarn over and pull through all loops on hook — that completes one HBSC. Repeat across. Practically: each HBSC uses two stitches from the previous row: you draw up a loop in stitch A, then stitch B, then yo and pull through all loops. Continue across. At the end you’ll have one stitch left: sc into last st to finish edge if needed. Turn.
Row 3: ch 1, repeat HBSC row across. Repeat Row 2 for length.
Short alternative phrasing (common technique): Yarn over, insert hook in next stitch and pull up a loop, insert hook in following stitch and pull up a loop, yarn over and pull through all 3 loops on hook.
Tips & finishing
- HBSC creates a firm yet flexible fabric that looks knit. It can be a tiny bit narrower than plain sc — add a few extra chains in the foundation for desired width.
- For a scarf, HBSC provides tidy, warm fabric with little openwork. For blankets, it creates a plush, structured surface.
Variation ideas
- Use HBSC with a contrasting color border; the diagonal texture looks great when rotated on a bias blanket (work squares and join on the diagonal).
5. Block Stitch Pattern
Look & use: Rectangular “block” or waffle-like texture that reads as small squares — beautiful on throw blankets and modern scarves.
Skill: Beginner (cluster and chain shaping)
Sample swatch: chain 32 (multiple of 4). Hook 4.0 mm, worsted.
How the stitch works
The Block Stitch alternates between short clusters and chain spaces to create little solid blocks separated by recessed lines — visually neat and simple to memorize.
Stitch pattern (step-by-step — sample swatch)
Chain 32 (multiple of 4).
Row 1 (foundation row): sc in 2nd ch from hook and across (31 sc). Turn.
Row 2 (start blocks): ch 1, [sc in next st, ch 2, sc in next st] repeat across — this establishes little chain grooves. Turn.
Row 3 (block row): Ch 1, sc in each of next 3 sts; repeat across. Turn.
Row 4 (groove row): Ch 1, sc in first st, ch 2, sk next st, sc in next 2 sts — arrange so chain-2 spaces fall between groups of 3 sc you made in Row 3. Turn.
Row 5: Repeat Row 3. Continue Rows 4–5 (groove / block alternation) for length.
Alternate pattern: many block stitch versions use dc clusters and skipped stitches; this simplified sc/ch approach yields clear blocks and is excellent for beginners.
Tips for blankets & scarves
- Blocks make a great grid for color blocking — change color every N rows to create framed panels.
- Because the block stitch has tiny chain channels, it breathes nicely and blocks to a smooth fabric.
Variation ideas
- Swap sc blocks for hdc or dc to vary block height and scale.
- Make large blocks by repeating the block region (e.g., 6 sc in a block) for a chunkier textured throw.
6. The Wheat Stitch Pattern (also called the Knit or Moss-like Wheat)

Look & use: A knit-like, very textured stitch with a soft braided appearance — perfect for scarves and close, warm blankets.
Skill: Beginner → Intermediate (worked in rows, simple repeat)
Sample swatch: chain 31 (odd number often used). Hook 4.5 mm for drape with worsted.
How the stitch works
Wheat stitch is built by alternating single crochet and chain spaces in such a way that the stitches interlock and slant — the fabric resembles a woven wheat field or a knit surface.
Stitch pattern (step-by-step — sample swatch)
Chain 31.
Row 1: sc in 2nd ch from hook, ch 1, sk 1 ch, sc in next ch repeat to end. (This creates a foundation of sc with ch-1 spaces.) Turn.
Row 2: ch 1 (does not count), sc in next ch-1 space, ch 1 repeat across, ending with sc in top turning chain. Turn.
Row 3: Repeat Row 2. The repetition of working sc into previous row’s ch-1 spaces and leaving ch-1 spaces in the next row produces the woven knitlike texture.
A more compact wheat stitch uses hdc in place of sc and alternates front/back loop work for extra depth; both create similar “wheat” results.
Tips for scarves & blankets
- Wheat stitch gives firm fabric with a subtle surface texture; it’s excellent for reversible scarves because the back looks similar.
- It’s also easy to pick up for color striping.
Variation ideas
- Work the wheat stitch in two contrasting colors (change color every 2 rows) for a basketweave effect.
- Try working in BLO or FLO on alternate rows for pronounced ribs.
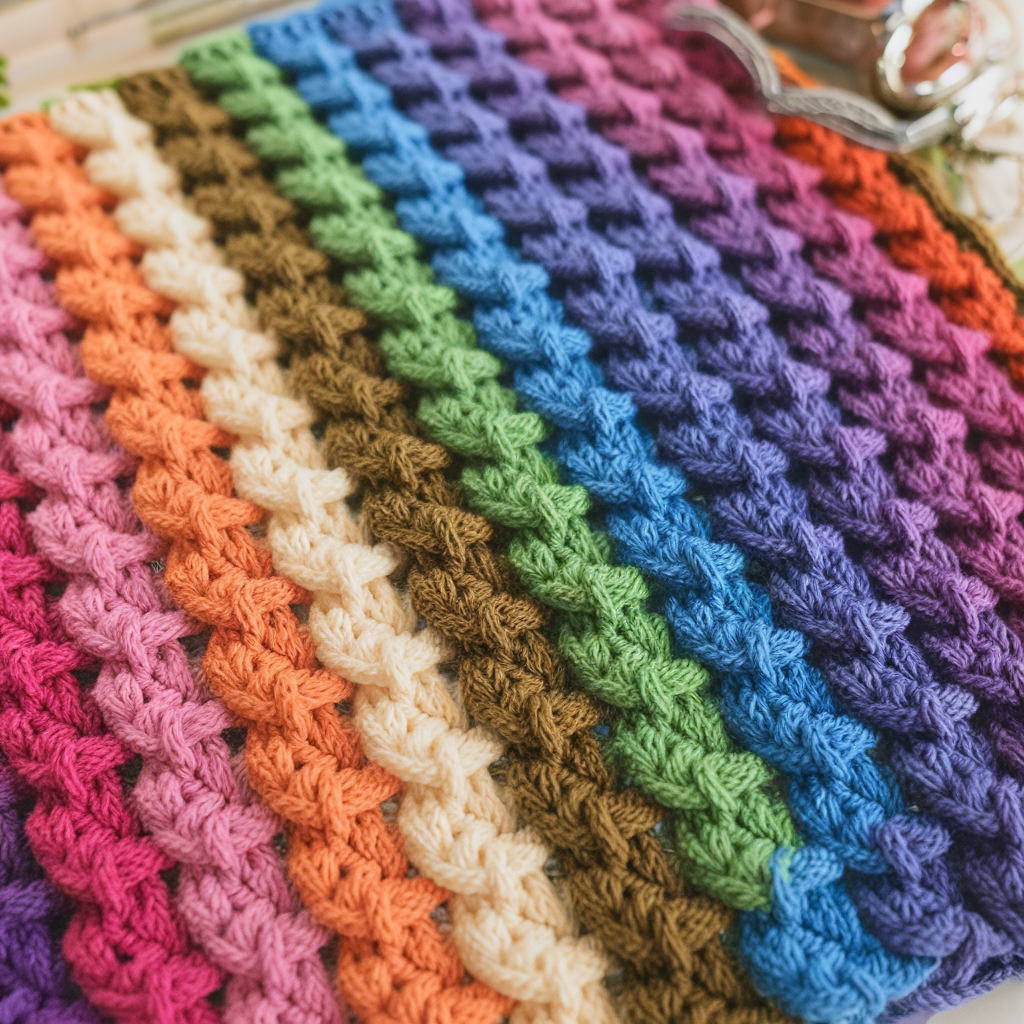
7. Wave Stitch (Chevron / Ripple) Pattern
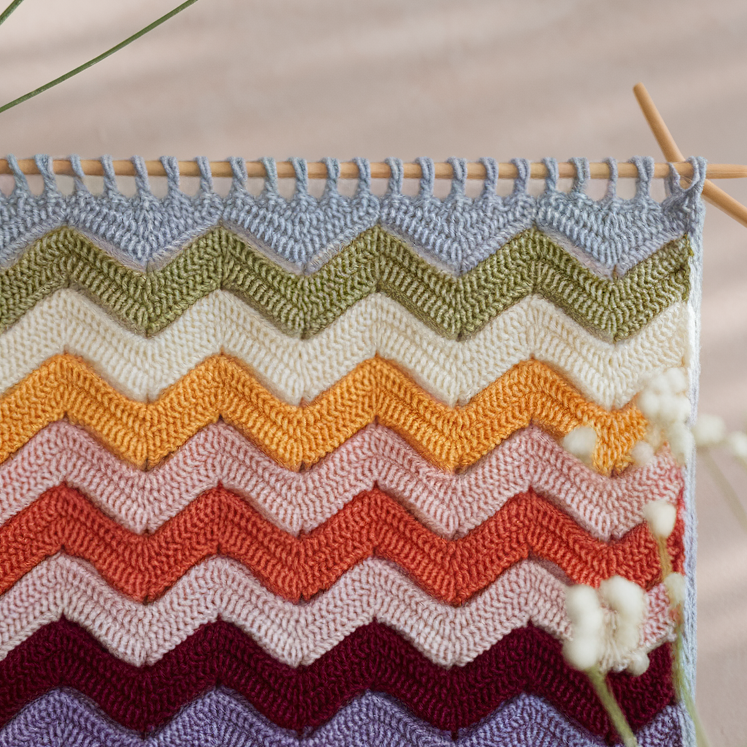
Look & use: Classic peaks and valleys — a chevron or ripple makes long, flowing blankets and scarves that are visually exciting. Great for stripes and color changes.
Skill: Beginner → Intermediate (decreases/increases for chevrons)
Sample swatch: chain 52 (multiple of 14 + 2 for turning — I’ll give a standard 14-st repeat). Hook 5.0 mm for drapey ripple in worsted.
How the stitch works
Wave/chevron uses increases (usually 3 dc in one stitch) at the peaks and decreases (dc2tog) at the valleys to shape the zigzag. The rest of each row is filled with dc or hdc to make a continuous cloth.
Stitch pattern (step-by-step — sample swatch)
Chain 52 (multiple of 14 + 2).
Row 1 (foundation): dc in 4th ch from hook and across (counts as your first row of dc). Turn.
Row 2 (chevron shaping): ch 3 (counts as dc), dc in next 4 sts, dc3 in next st (increase/peak), dc in next 4 sts, dc2tog over next 2 sts, dc in next 0 sts — the dc2tog sequence makes the valley. The exact placement of peaks/valleys follows the 14-st repeat; repeat across then dc in last turning chain. Turn.
Row 3: ch 3, dc across, following the pattern set by Row 2 so that your increases and decreases line up to form chevrons. Repeat Row 2 for pattern length. Typical repeat: [dc 4, 3 dc in same st, dc 4, dc2tog twice] — tweak counts so the numbers add up to 14 per repeat.
Because chevrons rely on precise placement of increases/decreases you’ll want to work a small swatch and mark the increase and decrease locations to confirm your repeat math. For the sample chain 52 you’ll have 3 full repeats across (3 × 14 = 42) plus 10 extra sts to complete edge shaping — adjust foundation if necessary.
Tips for neat edges
- Use turning chains consistently: chain-3 counts as first dc.
- When starting a new color stripe, carry yarn up the side or fasten off and weave in ends for clean horizontal stripes.
- Block to open peaks and valleys into tidy points.
Variation ideas
- Make the ripple shallow (smaller peaks) by using 2-dc increases and single-decrease (dc2tog).
- Use a gradient yarn for stunning striped effects without changing skeins.
Finishing, Borders, and Sizing for Blankets & Scarves
Finishing edges: Common options include:
- Single crochet border: 1–3 rounds of sc for a clean frame.
- Reverse single crochet (crab stitch): gives a twisted rope edge.
- Simple scalloped border: skip 2, 5 dc in next st, skip 2, sl st around for a decorative edge.
Blocking: For laceier stitches (Arcade, Wave) gently wet-block your finished blanket to even stitches and open scallops. Waffle or dense stitches (HBSC, Wheat) generally need less blocking but benefit from light flattening.
Sizing quick guide
- Scarf (adult): 6–8″ wide × 60–70″ long for long scarf; 8–10″ wide × 40–48″ for short cowls.
- Throw blanket: 50″ × 60″ is standard — calculate stitch multiples across with your swatch.
- Baby blanket: 30″ × 36″.
Calculate chain: (stitches per inch from swatch) × desired width (in inches) + border stitches and any extra for pattern repeat (round up to the nearest multiple required by stitch).
Common mistakes and troubleshooting
- Edges pulling in: Usually caused by inconsistent tension or missed increases/decreases. Count stitches frequently across repeat rows.
- Uneven scallops or petals: Block your swatch; practice tension on the cluster/puff stitches before committing to a large project.
- Fabric too stiff: Try a larger hook or softer yarn.
- Fabric too loose/open: Use a smaller hook or add a denser filler row (e.g., sc row every few pattern repeats).
Quick styling & color ideas
- Monochrome subtlety: Use neutral yarn (cream, charcoal) to show off texture—excellent for HBSC or Lotus.
- Striped chevrons: Wave stitch rips are ideal for bold multi-color stripes.
- Spot color: Use a contrasting color for only the petals or the block squares to make the pattern pop.
- Gradient yarns: Work beautifully in Star and Wave stitches where color transitions sweep across peaks and valleys.
Conclusion
Each of these seven stitches brings a distinct personality to blankets and scarves:
- Lotus: floral, sculptural, statement panels.
- Star: dense, cozy, great for babies and winter scarves.
- Arcade: lacy, rhythmic, perfect for wrap scarves and lightweight throws.
- Herringbone Single Crochet: knit-like, warm, elegant for modern throws.
- Block: graphic, modern grid useful for colorwork.
- Wheat: soft, reversible, great for cozy scarves that look handknit.
- Wave/Chevron: dynamic, stripe-friendly, endlessly adaptable.