

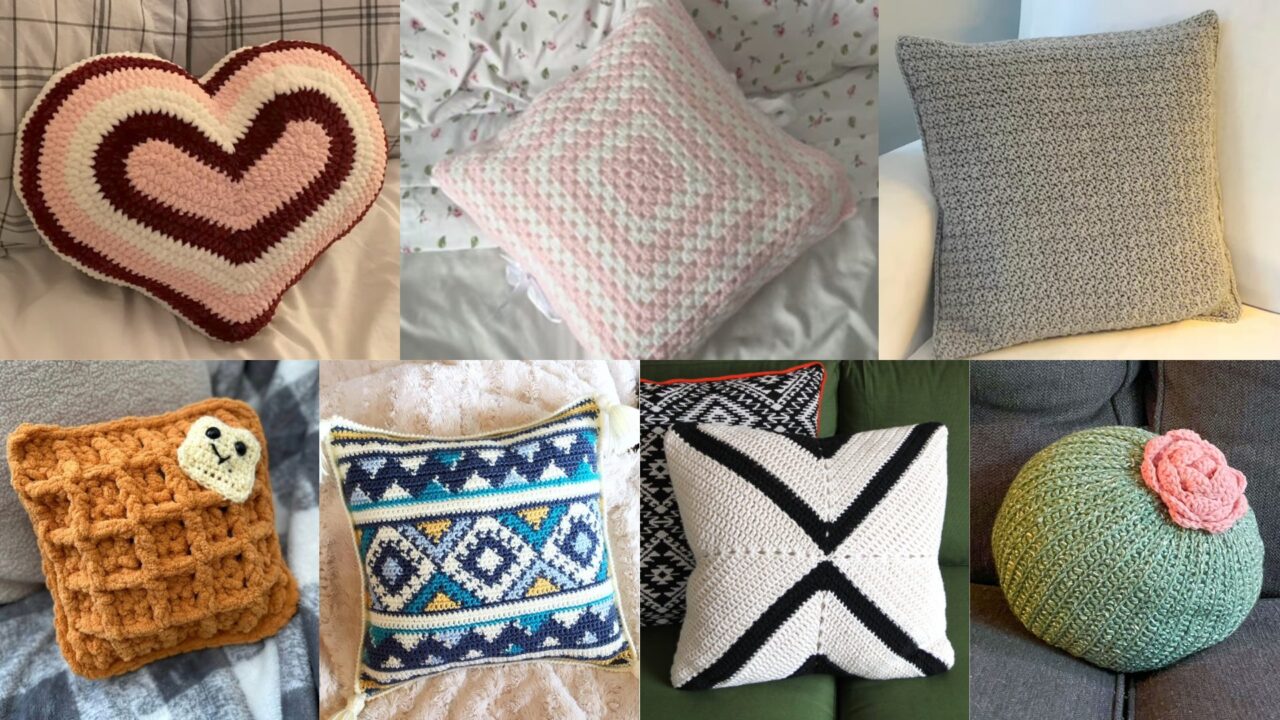
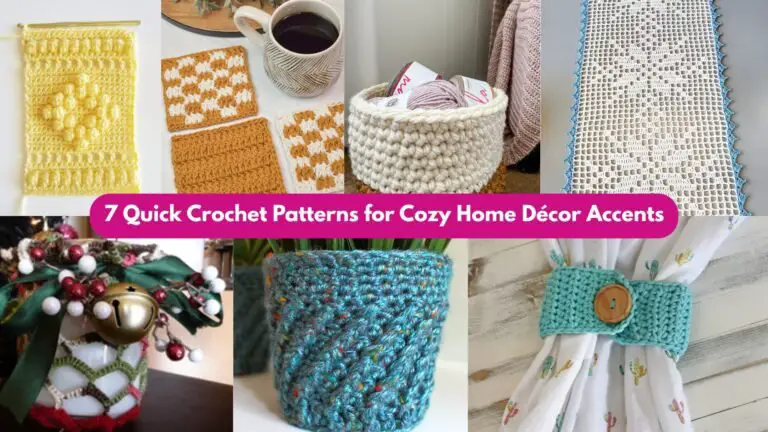
A crochet pillow is one of the fastest, most satisfying ways to refresh a room — small project, big visual impact. Whether you love clean modern lines, romantic frills, cozy texture, or playful novelty, this collection of seven pillow patterns gives you styles that suit living rooms, bedrooms, nurseries, and outdoor lounges. Each pattern below includes a clear skill level, materials list, finished-size guidance, detailed step-by-step instructions, finishing notes, and practical tips so you can make beautiful, durable pillows that look store-bought but feel handmade.
Quick stitch legend (US terms): ch = chain, sl st = slip stitch, sc = single crochet, hdc = half double crochet, dc = double crochet, tr = treble crochet, sk = skip, st(s) = stitch(es), BLO = back loop only, FLO = front loop only, beg = beginning.
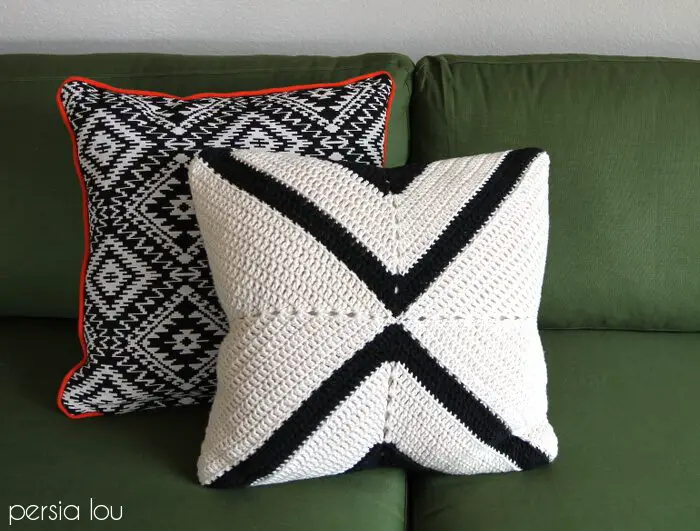
1. Modern X Crochet Pillow Pattern
Skill level: Beginner–Intermediate
Materials:
- Worsted weight (4) cotton or acrylic (200–300 g total depending on size and color)
- Crochet hook 5.0 mm (or size to obtain gauge)
- Pillow insert (16″–18″ square) or stuffing
- Yarn needle, scissors, stitch markers (optional)
Finished size: Make cover to fit a 16″ (40 cm) pillow insert; adjust rounds/rows to change size.
What you’ll make
A sleek square pillow with a bold “X” texture worked in surface slip stitch or contrasting panels for modern impact.
Step-by-step — Panel method (clean, easy for beginners)
Front panel (make 2 if you want a reversible X):
- Foundation: Ch 41 (this will be approx. 16″ wide with worsted yarn — adjust chain for desired width). Row 1: sc in 2nd ch from hook and across, turn. (40 sc)
- Body: Work rows of hdc (or sc for denser fabric) until piece measures half the desired height plus 1/2″ for seaming (for 16″ pillow, work until panel is ~9″). Keep edges neat by working 2 extra sc at the beginning and end of each row.
- Create X (surface slip stitch method): With contrast color, mark diagonal lines visually: fold the panel diagonally to find corner-to-corner lines. Insert hook at a corner and work surface slip stitches (or sl st) following the diagonal across the panel to form one diagonal of the X. Repeat the opposite diagonal. For a crisp X, make two passes with sl st (one on each side of the diagonal), slightly offset, or use two contrasting colors for thicker lines.
Back panel: Make a second panel in the same size using the same stitch (or a single solid panel with no X).
Assembly:
4. Place panels right sides together (if one panel has X, put X on the outside). Seam three sides with sc edge or whipstitch, leaving one side open.
5. Insert pillow form. Finish by seaming the last side — for a hidden closure, leave about 6″ open and create a simple envelope overlap on the back or add a zipper before seaming.
Finishing
- Block panels lightly to square up before seaming if using natural fibers.
- Weave in ends; if using surface slip stitch, secure yarn tails well so the X lines don’t snag.
Tips
- For a graphic look, use black X on a white or neutral panel. For softer modern, use tonal colors.
- If you prefer a totally flat X, use chain and sc in the design lines instead of surface slip stitch.
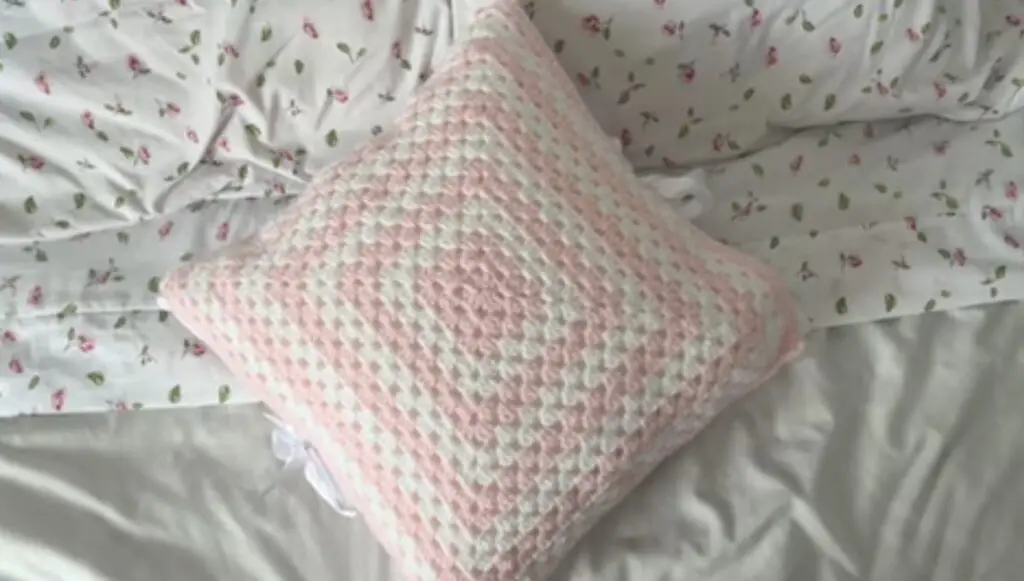
2. Coquette Pillow Crochet Tutorial
Skill level: Intermediate (lace + edging)
Materials:
- Sport or DK cotton or cotton-blend (150–250 g)
- Crochet hook 3.5–4.0 mm
- Pillow insert 16″ or 18″ square
- Tapestry needle, blocking pins
Finished size: 16″–18″ square, depending on your insert and gauge.
What you’ll make
A romantic, vintage-inspired pillow with lacy crochet body and delicate scalloped edging — perfect for a bedroom or sitting nook.
Step-by-step — Lacy square with scallop edge
Center body (make 1 large square):
- Center ring: ch 6, sl st to form ring. Round 1: ch 3 (counts as dc), work 15 dc into ring, join. (16 dc)
- Round 2 (increase round): ch 3, dc in same st, 2 dc in each st around; join. Work until piece forms a square: after each full round convert increases to create corners — e.g., work (2 dc, ch 2, 2 dc) in each corner space; between corners work groups of 3 dc in spaces to expand in square shape. Aim for square approx. 16″.
- Lace rounds: Work several rounds of mesh or shell lace: e.g., ch 3, sk 2 dc, dc in next around, or shell rounds like 5 dc in one st, sk 2 for open scallops. Repeat to desired depth of lace.
Scalloped edge:
4. Work an even round of sc to stabilize the edge. Then skip 2 sts, 5 dc in next st (shell), skip 2 sts, sc in next st repeat to create scallops around the entire square. Adjust spacing if needed to end evenly.
Back panel: Make a plain square of same size using hdc or sc for stability (or use a fabric cover for backing).
Assembly:
5. Place front and back panels together, seam three sides using sc or whipstitch; insert pillow; finish last side. For a polished look, add piping between seams or a hidden envelope back.
Finishing
- Block the lacy front panel carefully pinned to square measurements so scallops sit evenly.
- If you want the lace to hold shape, lightly stiffen with diluted fabric stiffener on the front only.
Tips
- Use mercerized cotton for crisp lace and pleasant sheen.
- Small crochet motifs (tiny rosettes) can be sewn onto one corner for extra coquette charm.
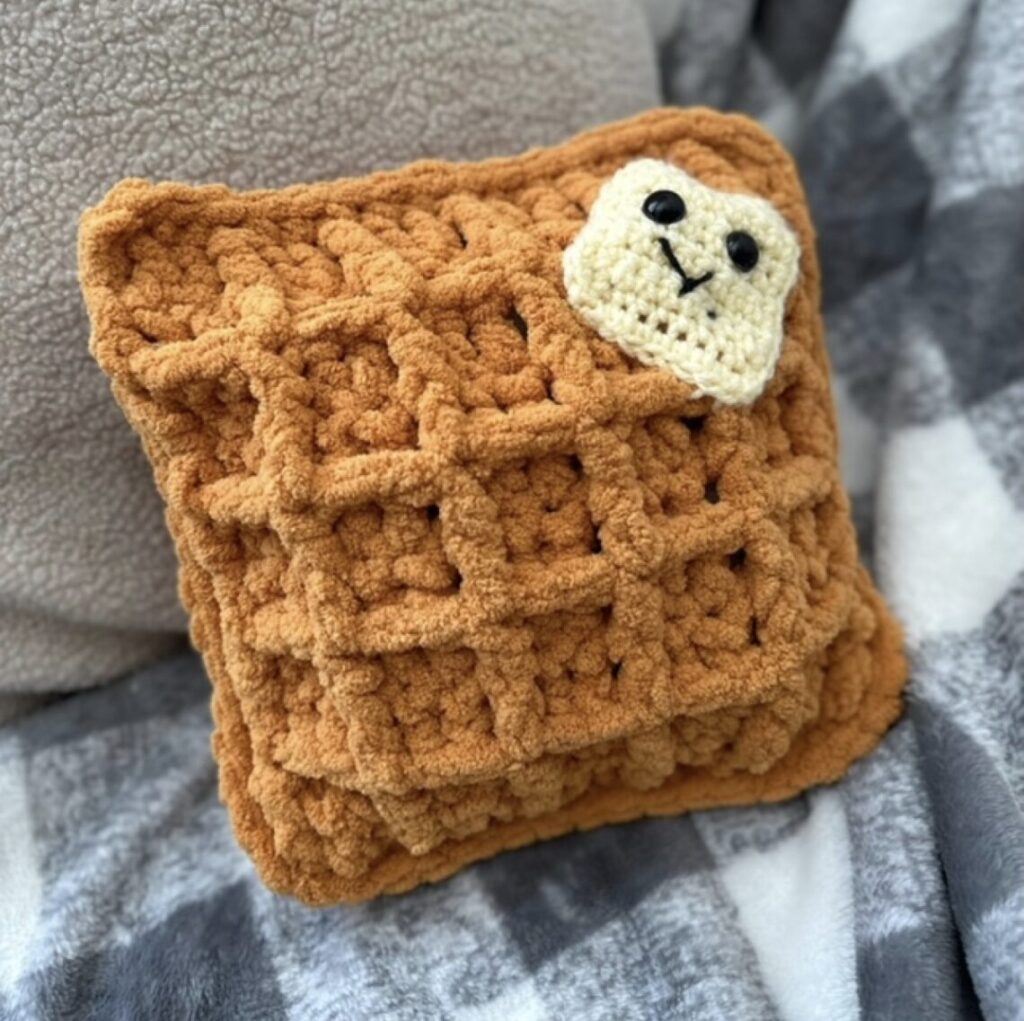
3. Crochet Waffle Pillow Pattern
Skill level: Beginner–Intermediate (textured stitch)
Materials:
- Bulky weight (5) yarn for extra squish, or worsted (4) for lighter pillow (300–400 g)
- Crochet hook 6.0–8.0 mm (check yarn label)
- 16″–18″ pillow insert
- Tapestry needle, measuring tape
Finished size: 16″ square (adjust stitch count for larger sizes).
What you’ll make
A cozy textured pillow cover using the waffle stitch for deep, tactile texture — great for a sofa or reading chair.
Step-by-step — Waffle stitch rectangle (make two panels)
Waffle stitch refresher: Waffle stitch uses front post double crochet (fpdc) and regular dc to create the grid texture.
Front panel (make 2 for both sides or make one textured front and one plain back):
- Foundation chain: Ch 33 (multiple of 3 + 1) for approx. 16″ — adjust for size. Row 1: dc in 4th ch from hook and across. Turn.
- Row 2: ch 3, fpdc around next dc (front post), dc in next 2 sts; repeat across, end with dc in last st. Turn.
- Row 3: ch 3, dc across. Turn.
- Row 4: repeat Row 2. Continue alternating Row 2 and Row 3 until the panel measures desired height (16″). The fpdc rows create the raised waffle squares.
Back panel: Make a second panel using same stitch for a fully textured pillow or use sc rows for a smooth reverse.
Assembly:
5. With panels aligned, seam three sides using sc for a neat ridge; insert pillow; seam final side. For an easy removable cover, add a zipper on one side or create an envelope back (make back panel slightly wider and overlap).
Finishing
- Blocking not necessary for acrylic/bulky yarns, but gently steam for cotton if needed to even stitches.
- Weave in ends into the waffle valleys to hide them.
Tips
- Use wool or wool-blend yarn for a warm, wintery pillow; cotton for a cooler, summery version.
- Try two-color waffle by alternating colors every 4–6 rows for a checkerboard look.
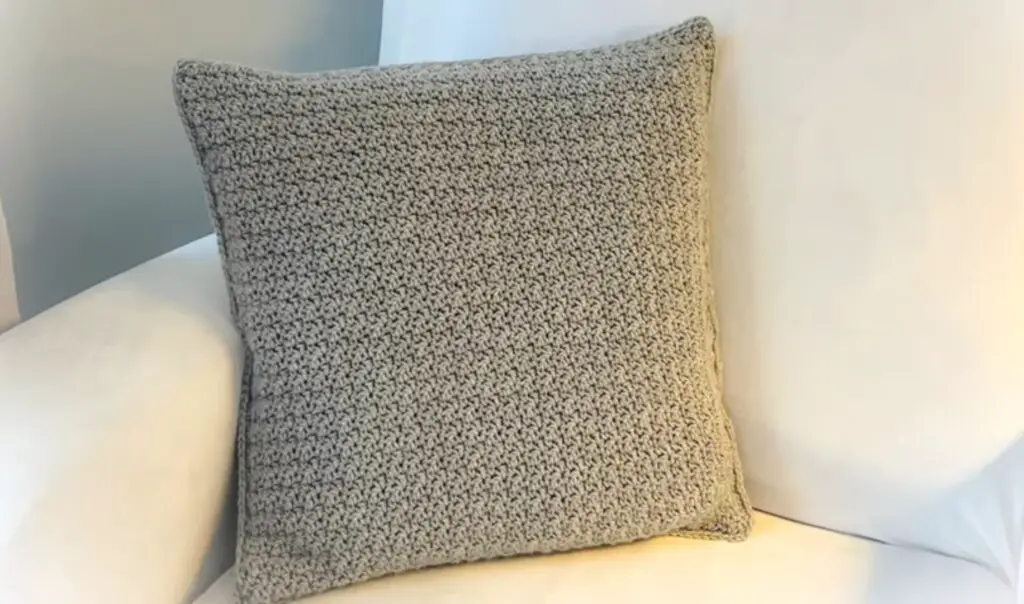
4. Simple Crochet Pillow Tutorial
Skill level: Beginner
Materials:
- Worsted weight yarn (200–300 g)
- Crochet hook 5.0 mm
- 16″ pillow insert or fiberfill to stuff
- Yarn needle
Finished size: 16″ square (adjust chain foundation for other sizes).
What you’ll make
A classic, quick square pillow using basic stitches — perfect when you need a fast decor refresh.
Step-by-step — Basic sc pillow cover
Front panel:
- Foundation: ch 33 (or desired width + 1). Row 1: sc in 2nd ch from hook and each ch across. Turn.
- Rows: Work sc in each stitch across each row until panel measures the desired height (for 16″ pillow, aim ~16″ high). Keep tension even to avoid wavy edges.
Back panel: Make a second panel of same size. Alternatively, make the back slightly larger for an envelope closure by adding 4–6 extra rows on one of the back pieces.
Assembly:
3. Place right sides together, seam three sides using sc. Insert pillow and seam final side. For envelope: overlap back panels and sew only sides.
Finishing
- Quick block by stretching lightly while damp or steam to square edges.
- Add a row of decorative sc or a simple pompom trim around the edges for personality.
Tips
- Use a larger hook for a looser, more relaxed fabric; smaller hook for firmer structure.
- Make matching or mismatched covers in different colors for an easy set.
5. Aztec Throw Pillow Pattern
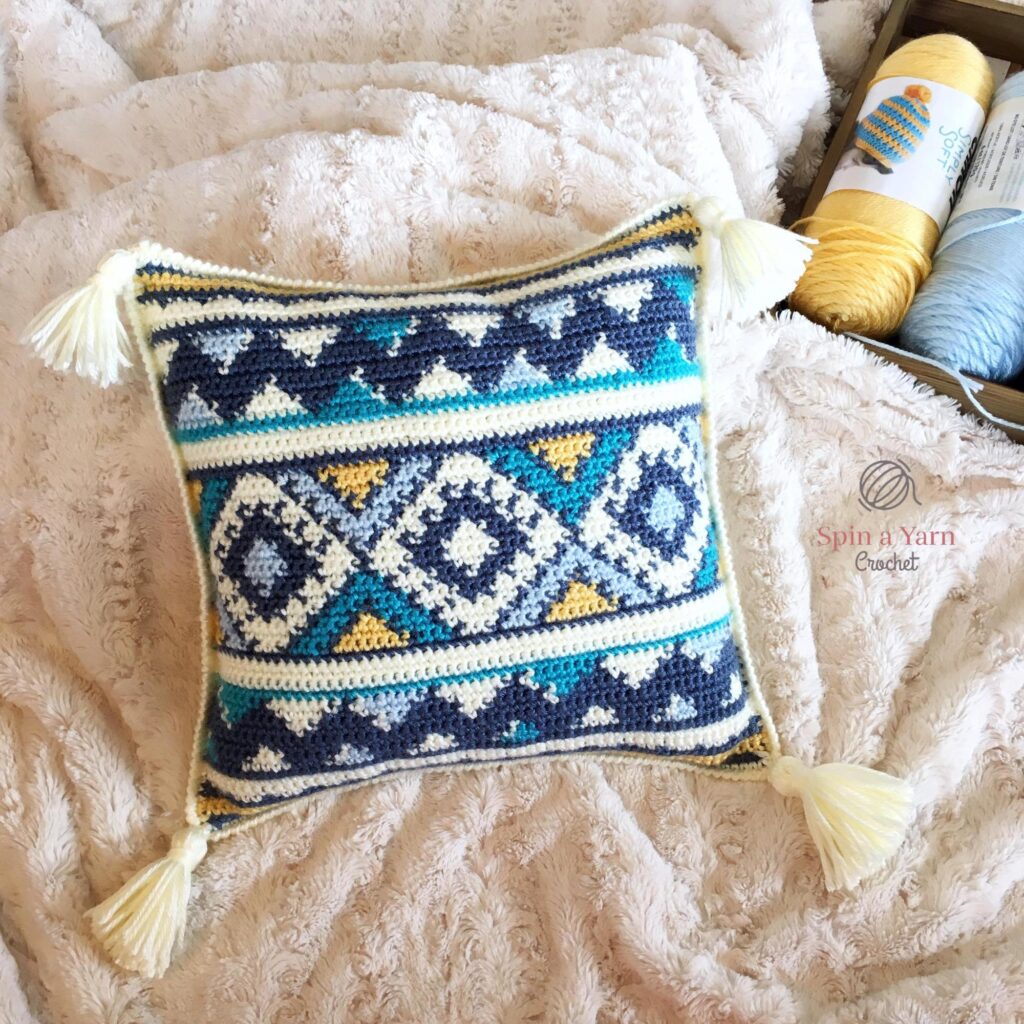
spinayarncrochet.com
Skill level: Intermediate (colorwork + mosaic or tapestry crochet)
Materials:
- Multiple colors of worsted weight yarn (A: main, B/C/D: contrast colors) — ~300–400 g total depending on pattern complexity
- Crochet hook 4.5–5.0 mm
- Pillow insert 18″ square recommended for a bold visual
- Tapestry needle, stitch markers
Finished size: 18″ square (pattern scales well).
What you’ll make
A bold pillow with Aztec-inspired geometric motifs using tapestry crochet or mosaic crochet for crisp colorwork.
Step-by-step — Mosaic crochet (clean edges, fewer floats)
Charting first: Draw or use a simple geometric motif (diamonds, chevrons, triangles). Mosaic crochet uses slipped stitches on contrast rows creating geometric blocks.
Front panel:
- Foundation: With main color A, ch 49 (or width to match pattern chart). Row 1: dc in 4th ch from hook and across. Turn.
- Mosaic repeats: Follow a chart row by row — typical mosaic technique: work one or two rows in main color, then a contrast row where you slip stitches and work dc in specific positions to create the motif. Each contrast row is worked with contrast color but the previous two rows’ stitches create the pattern foundation. (If unfamiliar, standard mosaic tutorial pattern: Row A (MC) work dc; Row B (CC) sl st in X, dc in Y as charted.)
- Continue following chart until panel reaches desired height (18″).
Back panel: Make a panel in solid color A or repeat a simpler portion of the motif for cohesion.
Assembly:
4. Seam and finish as previous pillows. For a professional finish, insert a zipper into one side before seaming.
Finishing
- Block the front gently to square the motifs.
- Tidy floats on the back by weaving into the construction (mosaic avoids long floats).
Tips
- Use high-contrast colors for a striking Aztec vibe (black + bright rusts/teals) or try tonal palettes for modern minimalism.
- If tapestry crochet feels complex, create the motif using intarsia-style small panels sewn together.
6. Heart Pillow Crochet Tutorial

Skill level: Beginner–Intermediate (shaping)
Materials:
- Soft worsted yarn (200–300 g) — cotton for crisp shape or acrylic for plush softness
- Crochet hook 4.0–5.0 mm
- Fiberfill stuffing or small pillow insert (size depends on your heart pattern)
- Yarn needle
Finished size: Approx. 12″ wide (adjust pattern scale).
What you’ll make
A charming heart-shaped pillow — sweet for nursery décor, seasonal gifts, or couch accents.
Step-by-step — Flat heart sewn together (two heart halves)
Make two identical heart halves:
- Foundation chain: ch 12. Row 1: sc in 2nd ch from hook and across (11 sc). Turn.
- Row shaping: Row 2: ch 1, sc across but at the two points where heart lobes form, work additional increases: e.g., in the center of row, ch 1, turn and work (sc, hdc, dc, hdc, sc) to form a little bump. Continue and use increases at ends to create rounded lobes. (If you prefer exact shaping, use a standard crochet heart chart: start with a small center circle, then work shells to create lobes.)
- Repeat to create second half.
Alternatively — single-piece heart with increases and decreases:
4. Start with magic ring and work increasing rounds to form the lobes, then shape the lower V by decreasing and closing rounds. (Many heart charts available — choose one and scale to desired size.)
Assembly:
5. Place both halves wrong sides together and seam around leaving a 2–3″ opening. Stuff firmly with fiberfill to give a plush shape. Finish seaming and weave in ends.
Finishing
- For a finished look, add a border of sc around the entire heart to hide seam irregularities.
- Add decorative elements: a small crocheted bow, embroidered initials, or a pompom tail.
Tips
- If making for a baby, use soft, hypoallergenic stuffing and securely weave ends so no small parts come loose.
- Make smaller hearts as sachet covers by leaving a small opening to insert scented sachet material.
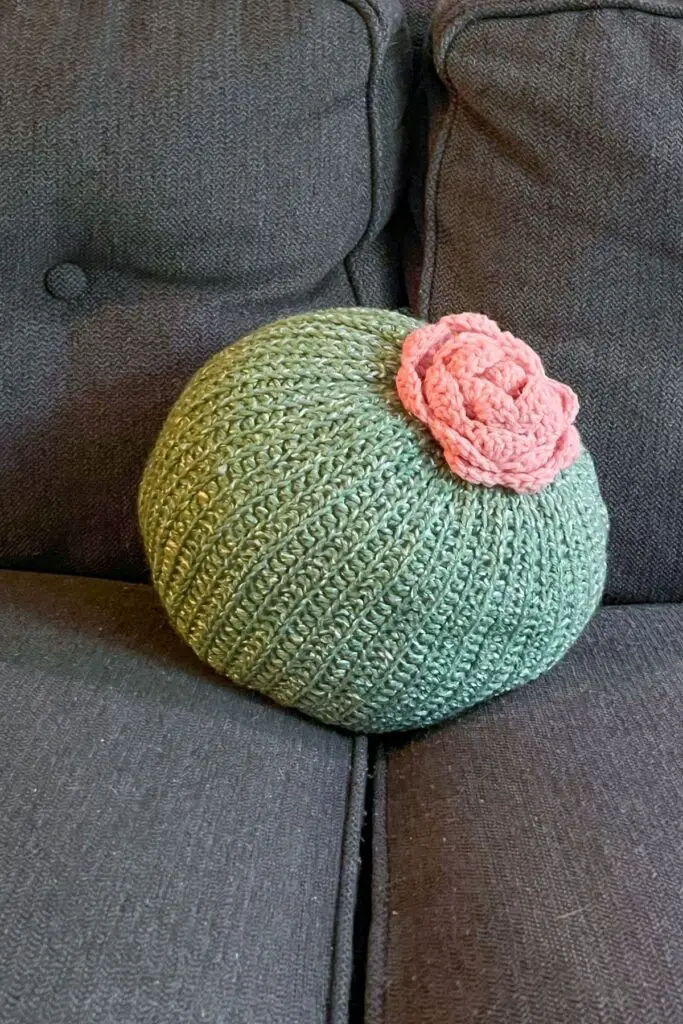
7. Crochet Cactus Pillow Pattern
Skill level: Intermediate (3D applique + shaping)
Materials:
- Worsted or aran yarn in cactus green, pot color, and a contrasting background color (200–300 g total)
- Crochet hook 4.0–5.0 mm
- Small pillow insert 12″–16″ (or stuffing if making 3D cactus)
- Yarn needle, small beads or felt flowers for embellishment
Finished size: 12″–16″ square depending on chosen cactus size.
What you’ll make
A fun novelty pillow with raised crochet cactus appliqué — great for a kid’s room, patio seating, or quirky decor.
Step-by-step — Applique + panel method
Background panel:
- Ch 33, sc across to create a 12″ square (or adjust chain for desired pillow width). Work rows of sc until panel is square.
Cactus applique:
2. Simple flat cactus shape: ch 2, work 6 sc in 2nd ch from hook to make a small round base. Work rounds increasing to make an oval. After you have an oval base, work taller rounds on the top half to build cactus height, forming two small arm bumps by increasing similarly on both sides as you work up. Alternatively, crochet small tubular shapes (icord or crocheted tubes) for cactus stem and arms and sew them onto the panel for 3D effect.
3. Texture: Use boucle or a slightly fuzzy yarn for cactus body, or work single crochet through the back loop only (BLO) to create ridges. You can also work vertical ribbing by alternating fpdc and bpdc (front/back post dc) to give a ribbed cactus look.
4. Pot: Crochet a small trapezoid or semicircle in pot color (sc rows) and sew at the cactus base. Add a thin chain rim for pot lip.
Assembly:
5. Sew the cactus applique securely to the background panel with matching yarn. Add small felt flowers or seed bead “flowers” on cactus arms. Make a back panel and seam into a pillow, or sew the applique onto a pre-made fabric pillow cover.
Finishing
- If applique is raised, stitch around edges with small stitches to keep it flat where desired.
- Add a small layer of felt behind applique before sewing if you want stiffness and less stretch.
Tips
- Mix yarn textures: a fuzzy yarn for cactus and smooth cotton for the pot create a nice contrast.
- For outdoor-safe cactus pillow, use acrylic or cotton/acrylic blend yarn and seal seams well.
General Finishing & Care Notes (applies to all pillows)
- Sizing: Match your cover tightly to the pillow insert (usually 1″ smaller than insert yields a plump pillow) or exactly to insert size for a relaxed look.
- Closure options: Envelope back (easy, no hardware), zipper (polished, removable cover), or buttoned flap (decorative). Zippers are installed before final seaming.
- Blocking: Natural fibers benefit from gentle wet-blocking to square pieces and open stitch patterns. Acrylic may be lightly steamed.
- Weaving ends: Weave tails into the wrong side or into mattress stitch seams. For high-traffic pillows, secure tails with a small dab of clear fabric glue for extra hold.
- Care: Follow yarn care: cotton and acrylic are usually machine-washable on gentle, but delicate/lacy pillows or those with embellishments should be hand-washed and laid flat. Avoid tumble drying for natural fibers.
- Stuffing: Use a high-quality pillow insert for shape longevity. If stuffing with fiberfill, stuff tightly and evenly, and consider making an inner fabric liner to protect filling.
Conclusion
These seven crochet pillow patterns bring a mix of modern minimalism, vintage romance, tactile texture, playful novelty, and bold geometric style — perfect for switching up your home décor through the seasons. Each pattern is intentionally adaptable: change yarn weight, swap colors, scale patterns up or down, or combine ideas (e.g., waffle texture with a modern X overlay) to create a custom look. Pick one as a weekend project or make a coordinated set for an instant room update. Happy crocheting — and enjoy the cozy glow a handmade pillow brings to any space.
Hệ thống thanh toán của xn88 đăng nhập được tích hợp các công nghệ bảo mật hiện đại, đảm bảo rằng mọi giao dịch đều được mã hóa bảo vệ an toàn. Điều này giúp người chơi yên tâm thực hiện giao dịch mà không lo lắng về việc thông tin cá nhân hay tài khoản bị xâm nhập. Với hệ thống thanh toán nhanh chóng, an toàn và tiện lợi, nhà cái đã xây dựng lòng tin cùng sự hài lòng tuyệt đối từ cộng đồng người dùng. TONY12-11A
Với tầm nhìn trở thành nền tảng giải trí đa phương tiện số 1, 188v bet liên tục cập nhật những công nghệ cá cược tiên tiến nhất. Hệ thống nổ hũ với tỷ lệ RTP cực cao tại đây hứa hẹn sẽ mang lại những cơ hội đổi đời cho các nhà đầu tư may mắn. TONY01-06S
188v có chính sách hoàn tiền cược thua lên tới 20% cho thành viên mới – giảm thiểu rủi ro và tăng cơ hội trải nghiệm. TONY01-16
Slot tại slot365 có mức cược linh hoạt: từ 1.000 VNĐ đến 500.000 VNĐ/vòng – phù hợp mọi túi tiền. TONY02-25O
Đăng ký tài khoản tại xn88 chỉ mất khoảng 2 phút với các bước đơn giản. Bạn cần cung cấp thông tin cơ bản như email, số điện thoại và thiết lập mật khẩu an toàn. Sau khi đăng ký, hệ thống sẽ gửi mã xác nhận qua SMS hoặc email để hoàn tất quá trình tạo tài khoản. TONY02-28H