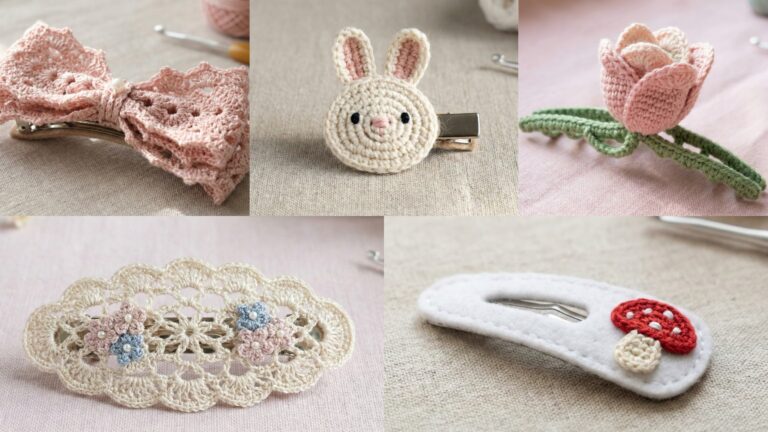
Crochet hair accessories are a fast, satisfying way to add handmade charm to your wardrobe — and many projects are quick enough to finish in an evening. From feminine flower claws and dainty scrunchies to statement headwraps and delicate crowns, the pieces in this collection are designed to be approachable for confident beginners and rewarding for intermediate makers.
This post contains seven full, clear, step-by-step patterns using US crochet terms. For each accessory you’ll find: materials and alternatives, a short explanation of how the piece is constructed, detailed instructions (with stitch counts and rounds for a standard size), finishing and attachment notes, fitting/adjustment tips, and variation ideas. Where fit matters, I provide measurements and simple ways to modify the size.
Before we begin: here are the abbreviations and a few quick notes to keep everything consistent.
Abbreviations (US terms)
- CH = chain
- SL ST = slip stitch
- SC = single crochet
- HDC = half double crochet
- DC = double crochet
- TR = treble (UK double)
- BLO = back loop only
- FLO = front loop only
- ST(S) = stitch(es)
- INC = increase (2 stitches in same stitch)
- DEC = decrease (as specified)
- RS = right side, WS = wrong side
Notes
- Patterns are written for a standard adult/regular size unless noted. If you prefer a child size or an oversized accessory, I include simple adjustments for each pattern.
- Yarn suggestions favor cotton or cotton blends for hair accessories because they hold shape and are gentle on hair. Acrylic and blends are fine where indicated.
- Use a hook size that produces a neat fabric; for small accessories a slightly tighter tension keeps shapes crisp.
1. Crochet Flower Hair Claw Pattern

Overview
A soft crochet flower attached to a standard plastic or metal hair claw. The flower is layered (two large petals + center) so it reads well on camera and in person.
Skill level: Beginner–Intermediate
Estimated time: 45–75 minutes
Materials
- Cotton DK/worsted (Category 3–4) main color (MC) — ~20 g
- Small contrast yarn for center (optional) — ~5 g
- 1.75–2.5 mm tapestry needle for sewing
- 3.5 mm (E/4) crochet hook (adjust for yarn weight and desired tightness)
- 1 standard medium hair claw clip (2–3 in / 5–7.5 cm wide)
- Hot glue (or strong fabric glue) or sewing thread to attach
- Scissors, stitch marker
Finished size
- Flower diameter: ~3.5–4 in (9–10 cm) — good for medium claws. Adjust by using thicker yarn or larger hook.
Construction concept
Make two layered flowers: a larger base flower and a slightly smaller top flower. Sew/ glue the center and attach to claw.
Pattern — Flower (Base layer; make 1)
Work in rounds, RS always facing.
- With MC, make a magic ring. Rnd 1: CH 2 (counts as first DC), work 11 DC into ring. Join with SL ST to top of CH 2. (12 DC)
- Rnd 2: CH 2, skip next st, SL ST in next st — make 12 CH-2 spaces around (use CH-spaces as petal anchors). Join.
- Rnd 3 (petals): Work petals into each CH-2 space: (SC, HDC, 3 DC, HDC, SC) in next CH-2 space. Repeat around (12 petals). Join. Fasten off, weave tail.
Pattern — Top flower (Smaller; make 1)
- With same MC or contrast, magic ring. Rnd 1: CH 2, 8 DC into ring, join. (8 DC)
- Rnd 2: CH 2, SC in next DC, CH 2 repeat around to create 8 CH-2 spaces. Join.
- Rnd 3: Petals: (SC, HDC, 2 DC, HDC, SC) in each CH-2 space — repeat 8 times. Join. Fasten off leaving long tail for sewing.
Center (optional)
- With contrast yarn, CH 3, join to form small ring, work 6 SC in ring, SL ST, fasten off leaving tail. Or use a small button/bead.
Assembly & attachment
- Stack the small flower on top of the larger flower, align petals, and sew through centers with tapestry needle and tail from top flower.
- Sew or glue the center disc/button over the join to hide stitches.
- Position flower over outer surface of claw (flat area). Secure by sewing through holes if the clip has holes, otherwise use a small amount of hot glue on the claw’s flat surface and press the flower in place. For durability, reinforce with a few stitches through the fabric edge of the flower to the clip (wrap thread around inner teeth carefully so it stays concealed).
- Trim and weave ends neatly.
Variations & finishing
- Make petals larger by adding extra DCs to the petal sequence (e.g., 4 DC instead of 3).
- Add a second contrasting row of tiny picot edging for a delicate look: after final round, (SL ST, CH 3, SL ST) in petal peaks.
- For a boho style, use thicker, slubby cotton and a larger claw.
Care
- Hand wash gently; avoid high heat if glued.
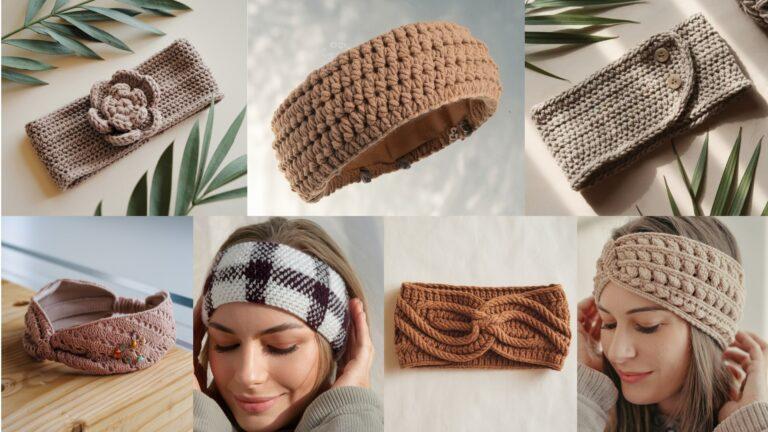
2. Crochet Red Headwrap with Pearl Accents Pattern

Overview
A comfortable, slightly stretchy headwrap (also called turban/headband) with a twisted front and sewn-on pearl accents. Works for hair control and as a statement accessory.
Skill level: Beginner (with basic sewing)
Estimated time: 1.5–2.5 hours
Materials
- Cotton/viscose blend worsted (Category 4) — ~50 g (single color, red)
- 4 mm (G) crochet hook
- Small flat-back faux pearls or pearl beads (10–16 pieces)
- Yarn needle, strong thread for sewing beads, scissors, measuring tape
- Optional: wide elastic (for more secure hold) approx. 1 in × 8 in
Finished size
- Headwrap length (unstretched): 21–22 in (fits medium head circumference of 22–23 in). Width: ~4–5 in across at widest point.
Construction concept
Work a wide band flat, seam ends with twist at front (or create an integrated twist by folding), embellish with pearls sewn on the twist. Optional elastic at back for extra grip.
Pattern — Headwrap Band (one piece)
Work flat, RS facing up.
- CH 52 (medium). For Small, CH 48; Large, CH 56–60. This yields approx 21–23 in unstretched depending on yarn. Adjust chain to match your preferred length.
- Row 1: SC in 2nd CH from hook and across. Turn. (51 SC for M)
- Rows 2–18: SC across. (Adjust number of rows to reach approx 4–5 in width. For a taller wrap, do 20–24 rows.)
- Fasten off leaving long tail for seaming.
Creating the twist and seam
Option A — Twist & sew:
- Lay band flat with RS up. Fold so ends meet but with one end twisted 180° (the classic headwrap twist).
- Overlap ends by 1 in and whipstitch through both layers across the seam to close, keeping twist position stable.
- For cleaner finish, fold raw seam edges inside and blind stitch.
Option B — Integrated twist (no seam at front):
- Fold band in half lengthwise, sew long edge using whipstitch but leave the center 1.5–2 in open.
- Turn tube right side out through opening, then flatten and twist center and sew opening closed — this creates an evenly distributed twist.
Adding elastic (optional)
- Attach a 1 in wide elastic piece of 7–8 in inside the back seam to secure in high-movement situations. Tuck raw ends under fold and sew securely.
Bead/pearl embellishment
- Plan pearl placement along the twisted front: a clustered triangle of 3–5 pearls centered with lines of pearls radiating outward looks elegant.
- Using strong sewing thread, hand-sew each pearl through the band, knotting securely on the WS.
- Reinforce each bead stitch with a small dab of fabric glue if desired.
Variations
- Make the band lacy: substitute rows of HDC with Row: CH 2, DC in next st for airy texture.
- Swap pearls for small buttons or metallic studs.
- Use two-tone yarn or crocheted stripes (change color every 4 rows) for a modern look.
Finishing & care
- Weave ends inside. Hand wash or machine gentle cold in a mesh bag; reshape while damp.
3. Crochet Flower Bun Wrap Hair Tie Pattern

Overview
A soft elastic hair tie covered by a crochet wrap with an attached flower — perfect for buns. The wrap slides over a standard elastic and is removable for washing.
Skill level: Beginner
Estimated time: 45–90 minutes
Materials
- Soft cotton or bamboo yarn (DK/worsted) — ~20 g main color, small contrast for flower
- 3.5 mm (E) crochet hook
- 1 standard hair elastic (no-metal preferred) — 2–3 in diameter
- Tapestry needle, scissors
Finished size
- Wrap length: approx 6 in circumference (to snugly slip over elastic). Flower diameter: ~2.5–3 in.
Construction concept
Create a tubular band that slides over the elastic; separate flower attaches to tube with sew-on/stitch-through so the flower can be moved or removed.
Pattern — Tube (slip-on cover)
- With MC, CH 9, join with SL ST to form loop (avoid twisting).
- Round 1: CH 1, SC in each CH around, join. (8 SC)
- Rounds 2–14: SC around (8 sts per round) — lengthen/shorten rounds to fit your elastic snugly. Stitch count constant.
- Fasten off leaving long tail.
Finishing tube
- Fold the tube over the elastic and stitch short edges closed with whipstitch, inserting elastic before fully closing. The tube should be tight enough to hold on but stretchable to remove for washing.
Flower (make 1)
- Magic ring, CH 2, work 10 DC into ring. Join. (10 DC)
- Rnd 2: (SC, CH 3, SC) in next DC — creates 10 small loops. Join.
- Rnd 3 (petals): Into each CH-3 space work (SC, HDC, 3 DC, HDC, SC). Join, fasten off leaving tail.
- Sew flower to tube seam or on top of the tube, or attach with a small button so it can be removed.
Variations
- Leave flower detachable by sewing a snap button on the flower back and the tube (so the flower can be swapped).
- Make a trio of mini flowers for a clustered look.
Care
- Remove from elastic for washing; machine delicate or hand wash.
4. Crochet Blue Snap Hair Clip with White Flower Pattern

Overview
A slim, stiff crochet cover for a snap clip finished with a small white flower — the clip is mostly decorative and slides into hair easily.
Skill level: Beginner
Estimated time: 30–60 minutes
Materials
- Cotton DK yarn: Blue (main), White (flower) — small amounts
- Crochet hook: 2.5–3.5 mm (choose slightly smaller than yarn to keep fabric compact)
- 2 snap hair clips (approx 2 in / 5 cm long)
- Tapestry needle, strong craft glue optional
Finished size
- Cover fits a 2 in snap clip; adjust chain length to fit longer/shorter clips.
Construction concept
Crochet a narrow flat strip slightly wider than the snap clip; fold and sew edges to form a sleeve, slide clip in and sew on flower.
Pattern — Clip cover (per clip)
- Measure clip length. CH (clip_length_in_stitches + 2). For a 2 in clip with medium yarn, CH 12.
- Row 1: SC in 2nd CH from hook and across. Turn.
- Rows 2–8: SC across (make enough rows to be approx clip width + 1–2 mm). Keep it snug.
- Fold the strip over the clip (RS outwards) and whipstitch along short edge to form a sleeve. Insert clip (open) into sleeve, align, and stitch the long open edge closed by stitching through the sleeve and the clip metal if you want the clip permanently attached. Alternatively, sew only the sleeve closed around clip edges so it can be removed.
Flower (small white, make 1 per clip)
- Magic ring, CH 2, work 6 DC into ring. Join. (6 DC)
- Rnd 2: CH 2, SL ST in next DC around to create loops. Join.
- Rnd 3: (SC, HDC, 3 DC, HDC, SC) in each loop — 6 petals. Join. Fasten off leaving tail.
- Sew flower onto top center of clip sleeve. Add a small pearl or bead in center for polish.
Variations & tips
- Use metallic thread for a subtle sparkle; embroider a Swiss dot in the flower center.
- For more hold, stitch through the body of the clip if the clip design allows (be careful not to hinder clip function).
5. Crochet Green Daisy Bandana Pattern

Overview
A triangular bandana with a row of daisies (appliqué) along the front edge. Wear as a neck scarf or hair bandana.
Skill level: Beginner–Intermediate
Estimated time: 2–3 hours
Materials
- Cotton worsted yarn: green (bandana), white (daisies), yellow (centers) — ~70–100 g green + small amounts for daisies
- Crochet hook: 4.0 mm (G)
- Yarn needle, scissors
Finished size
- Triangle base width (across forehead or neck): ~20–22 in for medium; adjust chain start for smaller/larger.
Construction concept
Crochet an isosceles triangle by starting at top center of forehead and increasing at each row edge. Make daisy appliqués separately and sew along the lower edge.
Pattern — Bandana (triangle)
- CH 2. Row 1: SC 2 in 2nd CH from hook (makes a small base). Turn. (2 SC)
- Row 2: CH 2, work SC in each st, INC at both ends (work 2 SC in first and last st) to increase width by 2 sts each row. Turn.
- Repeat Row 2 until triangle base measures ~20–22 in (or desired width). For measured approach: keep increasing until flat measurement across base = desired size.
- Fasten off and weave in ends.
Daisy appliqué (make 8–10)
- With white, magic ring, CH 1, make 6 SC into ring, join. (6 SC)
- Rnd 2: In each SC work (CH 3, SL ST back into the same st) to create a small loop petal. Repeat 6 times. Join. (6 petals)
- Center: With yellow, make a small circle: magic ring, 6 SC, SL ST, fasten off.
- Sew yellow circle to center of white petals with thread. Flatten and sew daisies along bandana base, spacing evenly (approx every 2–2.5 in), so daisies sit across the forehead when worn.
Edge finishing
- Work one round of SC around the triangle edge for a neat border.
- Optionally add small picot trim: (SC, CH 3, SL ST in sc) along lower edge for a delicate finish.
Variations
- Use alternated colored petals (pink daisies or mint petals).
- Make a smaller neck-sized bandana by reducing the number of increase rows.
Care
- Cotton bandanas machine wash warm on gentle cycle; reshape while damp.
6. Crochet Flower Crown Pattern

Overview
A delicate adult-sized floral crown made from a flexible crocheted band and a mix of small flowers and leaves. Perfect for festivals, photos, or child-size dress-up.
Skill level: Intermediate (basic shaping & sewing)
Estimated time: 2–4 hours
Materials
- Cotton or cotton blend DK yarn in 3–4 colors (green for leaves/band, plus 2–3 flower colors) — ~50–80 g total
- Crochet hook: 3.5–4.0 mm (E–G)
- Soft floral wire (optional) or non-kinking craft wire for structure — 18–22 gauge (if you want the crown to hold shape)
- Floral tape and hot glue (optional)
- Tapestry needle, scissors
Finished size
- Circumference: Adjustable; standard adult 22–23 in. Crown should be slightly flexible.
Construction concept
Create a thin crocheted base band (tube or flat strip), add small flowers and leaves sewn on; for structure either slip a piece of floral wire inside a tube band or wrap wire along the back and sew components onto it.
Pattern — Band (tube method)
- CH 36 (measure to fit head circumference; for a snug adult 22–23 in this is usually a good starting point; reduce by 4–6 chains for a smaller head).
- Join into a loop with SL ST, careful not to twist. (If you prefer a flat band, work flat and then join ends.)
- Round 1: CH 1, SC in each CH around. Join. (36 SC)
- Rounds 2–6: SC around to create a 0.5–1 in tall band (adjust rounds for wider band).
- If inserting wire: leave an opening, thread wire through the inner circumference, then sew opening closed securely. For non-wire method, stitch a second row of SC in BLO to give a firm edge.
Leaves (make 8–12)
- With green, CH 6. Row 1: SC in 2nd CH from hook, HDC in next, DC in next 2, SL ST in last. Turn and SL ST across back side to base. Fasten off leaving tail.
- Flatten leaf and sew at an angle to band for natural placement.
Small flowers (pearls or rosebuds) — make 8–12 variety
Simple 5-petal flower
- Magic ring, CH 2, in ring (DC, CH 1, DC) 5 times (5 petals). Join. Fasten off and sew center.
Tiny rosette - CH 26. Row 1: DC in 3rd CH from hook and across, then roll strip and stitch the spiral to form rose; sew to band.
Assembly
- Arrange leaves and flowers along band before sewing; a clustered arrangement at one side looks romantic, or space evenly for boho style.
- Sew each flower and leaf with strong thread; if using wire, anchor components around the wire.
- Add small beads or faux pearls to the centers if desired.
Adjusting fit
- Make band longer for larger heads, or add a ribbon tie threaded through the back for adjustable fastening.
Variations
- Make all-white flowers for a bridal look; use pastel colors for a spring crown.
- For a sturdier festival crown, use thicker yarn and wrap wire more tightly.
Care
- Spot clean; remove wired components before washing.
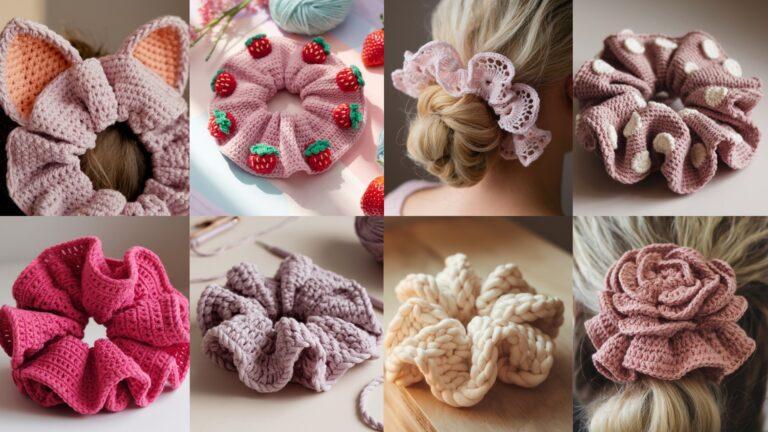
7. Crochet Lily of the Valley Flower Scrunchie Pattern

Overview
A lush scrunchie featuring tiny bell-shaped “Lily of the Valley” flowers clustered around a wide elastic base. The flowers are small and lightweight so the scrunchie remains functional for daily wear.
Skill level: Intermediate (many small repeats + attachment)
Estimated time: 2–3 hours
Materials
- Soft cotton or bamboo DK yarn: green for leaves and stems, white for flowers, yellow for tiny centers — small amounts (< 30 g each)
- 3.5 mm (E) crochet hook
- 1 wide hair elastic (~2–2.5 in diameter) or standard scrunchie elastic
- Tapestry needle, small beads (optional)
Finished size
- Scrunchie diameter (unstretched): ~3–4 in; stretched fits common ponytail sizes.
Construction concept
Crochet a tube to cover the elastic, then add multiple tiny bell flowers around the outer edge using short flower motifs sewn to the tube. Add leaves sparsely for balance.
Pattern — Tube cover
- CH length to wrap around elastic comfortably: CH 8, join to form ring (ch count small because tube wraps around elastic).
- Round 1: SC in each CH around. Join. (8)
- Rounds 2–24: SC around until the tube height reaches about 1.25–1.5 in. This will cover elastic fully. For wider scrunchie, add rounds.
- Insert elastic into tube and sew closed edges to form scrunchie base, stuffing slightly if necessary for poof.
Lily of the Valley flower (make ~14–20)
Flower motif (tiny bell)
- With white, CH 4, join with SL ST to form ring.
- Round 1: CH 2, 6 HDC into ring. Join. (6 HDC)
- Round 2: Work into each HDC: (CH 2, SL ST in same loop) to create tiny loops. Join. Fasten off leaving tail for sewing.
- Optionally add a tiny yellow French knot or tiny bead to the center with embroidery thread.
Leaves (small; make 8–12)
- With green, CH 6. Row 1: SC in 2nd CH from hook, HDC next, DC next, HDC next, SC in last. Fasten off leaving tail.
Assembly
- Arrange flowers around the outer circumference of the scrunchie; leave small gaps for leaves. Use tapestry needle and matching thread to sew each flower through the back center into the tube fabric so it sits upright.
- For more volume, stitch a pair of flowers together slightly overlapping.
- Stitch leaves in between flower clusters to mimic natural growth.
- Reinforce all sewing passes; tie knots on inside and hide ends.
Variations
- Use lighter weight yarn and make more tiny flowers for a very delicate look.
- Create a pastel array — tiny pink, blue, and cream bells for a springtime scrunchie.
Care
- Hand wash recommended. Remove if using glued beads.
Final Finishing Tips (applies to all accessories)
- Weave in ends carefully. Hair accessories are handled frequently — use a tapestry needle to weave tails well into the fabric and knot securely where needed.
- Test attachments. If you glue an embellishment, test clip function and wear before gifting. For heavy embellishments, prefer sewing for longevity.
- Choose hair-friendly yarns. Cotton and bamboo are gentle on hair and hold shape well; super-smooth acrylics are budget-friendly but can be slippery.
- Adjust fit by measurement. When in doubt, measure your head/clasp against the finished piece before sealing seams.
- Make extras to gift. These accessories are small projects (many are one-sitting projects) and make lovely handmade gifts or boutique items.
Conclusion
These seven crochet hair accessory patterns give you a wide range of styles — from classic floral claws and elegant pearl headwraps to whimsical crowns and delicate scrunchies. Each design is intentionally approachable, with clear materials lists, step-by-step construction, and practical finishing advice so you can make professional-looking accessories even if you’re a confident beginner.
Pick a project that matches your mood and yarn stash, and you’ll be surprised how quickly you can build a small collection of wearable, handmade pieces.


Your article helped me a lot, is there any more related content? Thanks! https://accounts.binance.info/register-person?ref=IHJUI7TF
Your article helped me a lot, is there any more related content? Thanks! https://www.binance.com/uk-UA/register?ref=XZNNWTW7
Thank you for your sharing. I am worried that I lack creative ideas. It is your article that makes me full of hope. Thank you. But, I have a question, can you help me? https://accounts.binance.com/si-LK/register-person?ref=LBF8F65G
Thank you for your sharing. I am worried that I lack creative ideas. It is your article that makes me full of hope. Thank you. But, I have a question, can you help me?
Thank you for your sharing. I am worried that I lack creative ideas. It is your article that makes me full of hope. Thank you. But, I have a question, can you help me?
Thank you for your sharing. I am worried that I lack creative ideas. It is your article that makes me full of hope. Thank you. But, I have a question, can you help me?
Your point of view caught my eye and was very interesting. Thanks. I have a question for you.
I don’t think the title of your article matches the content lol. Just kidding, mainly because I had some doubts after reading the article.