Earrings are small objects with big personality. Across cultures and centuries, they’ve signaled identity, celebration, and style — and they’re one of the fastest, most satisfying ways to turn yarn into wearable art. In this post we treat each pair like a short film: we set the scene (what it looks like and why it works), look at the materials and tools like cast and crew, and then roll the camera on carefully staged step-by-step instructions, troubleshooting, and presentation — all written so you can make a beautiful pair in an afternoon, or an evening with a cup of tea.
Below you’ll find seven distinct styles — from boho fringe to delicate lace snowflakes, vintage daisy granny squares to playful lime slices — each designed to teach a technique (fringe, blocking/stiffening, applique, shaping) while producing a wearable, giftable result. Read the intro for each pattern to feel the inspiration, then follow the step instructions like a shot list.
1. Crochet Boho Style Earrings Pattern
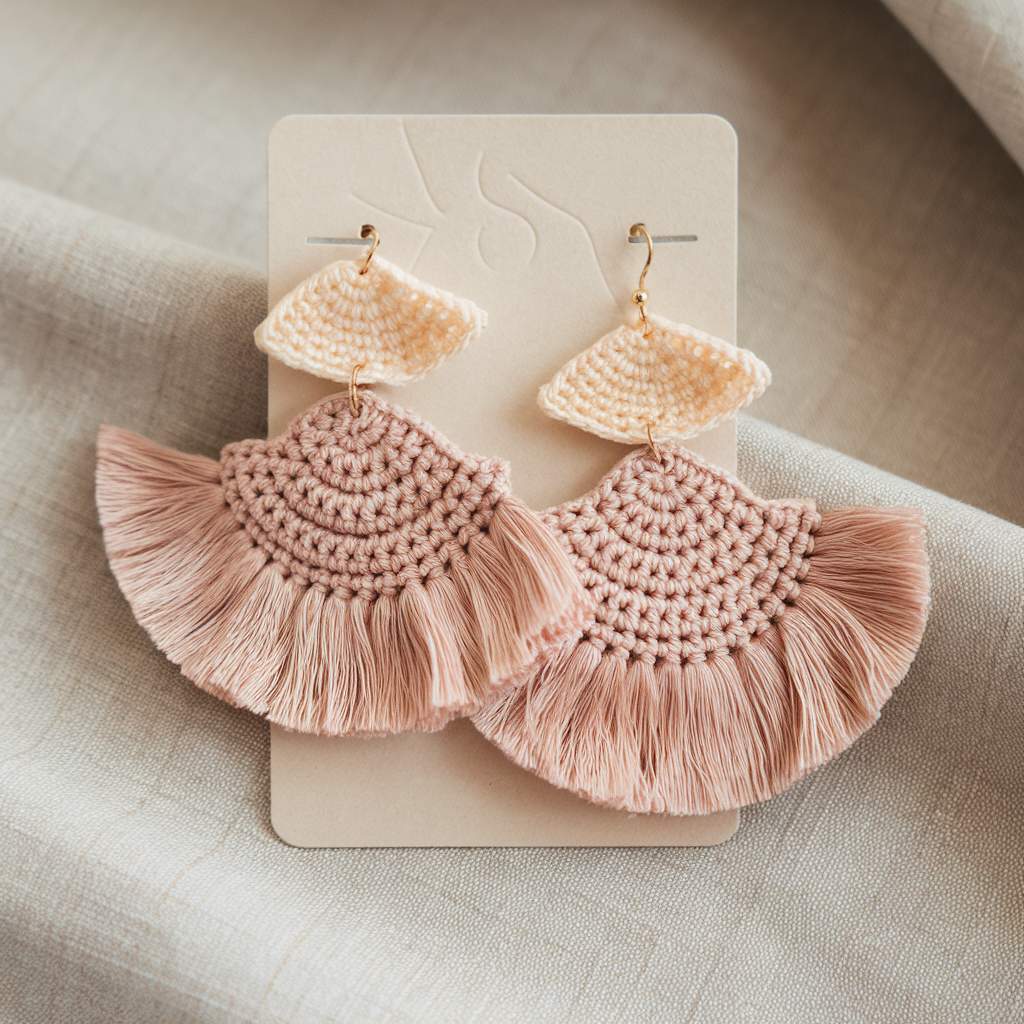
Scene: Breeze through festival fields — long, textured fan-tops and soft fringe that moves when you turn your head. Boho earrings are all about motion, texture, and a handcrafted feel.
Skill level: Beginner → Intermediate
Finished look: Tapered fan top with a long or short fringe; lightweight and customizable with beads.
Time: 25–45 minutes per pair (depending on fringe length and beadwork)
Cast & crew — materials + tools
- Cotton fingering yarn or size-10 crochet thread (10–15 yards total). Choose a soft cotton for comfort.
- Hook: 1.75–2.5 mm (match thread or use 2.0 mm for general fingering).
- 2 earring hooks (nickel-free / sterling / gold-filled).
- 4 small jump rings (3–4 mm), optional tiny wooden or metal beads for fringe ends.
- Tapestry needle, sharp scissors, small block or pin board for shaping (optional).
Techniques you’ll practice
- Magic ring (MR) or small closed center.
- Fan / cluster stitches (dc clusters).
- Lark’s head knot for fringe.
- Attaching jump rings and earring hooks.
Director’s notes — design choices
- Shorter fringe = more refined; longer, layered fringe = drama.
- Use a neutral fan top with colored fringe for sophisticated contrast or a full-ombre yarn for a blended look.
Shot list — step-by-step pattern (pair)
Fan top (make 2):
- MR: Form a magic ring. Work 6 sc into the ring. Pull tight and join with sl st to first sc. (6)
- Ch 1, sc in next st, ch 3, skip next st — repeat until you have 3 ch-3 loops evenly spaced (work 6 sc total, spacing loops by skipping alternate sc). Sl st to close. This forms three small loop anchors.
- Into each ch-3 loop, work: sl st, ch 1, 5 dc in loop, sl st into base — creating three small fans across the circle. After working the third fan, ch 2 and sc evenly across the outer curve to tidy (about 8–10 sc depending on tension). When you reach the top center, leave a loop free to anchor a jump ring: wrap yarn around a small jump ring once, secure with sl st so the ring sits locked into fabric. Fasten off and weave ends.
Fringe:
4. Cut 12–18 strands of yarn ~3.5–4.5″ long (folded yield half-length drop). For tapered look: cut longer center strands (4.5″) and shorter edges (3.0–3.5″).
5. Fold each strand in half and attach with a lark’s head knot across the straight lower edge of the fan. Space evenly — use a stitch or the ch-2 row as anchors.
6. Trim fringe to shape (straight across, V/tapered, or layered). Optionally slide small beads onto double strands before knotting to secure bead placement.
7. Attach earring hook: use the jump ring anchored into the fan top. Close jump ring securely (use pliers). Repeat for second earring.
Finishing & staging
- Lightly steam or block the fan top if using cotton to open stitches. Do not stiffen fringe.
- To gift: place on a velvet small earring card with a twine tag.
2. Crochet Snowflake Earrings Pattern
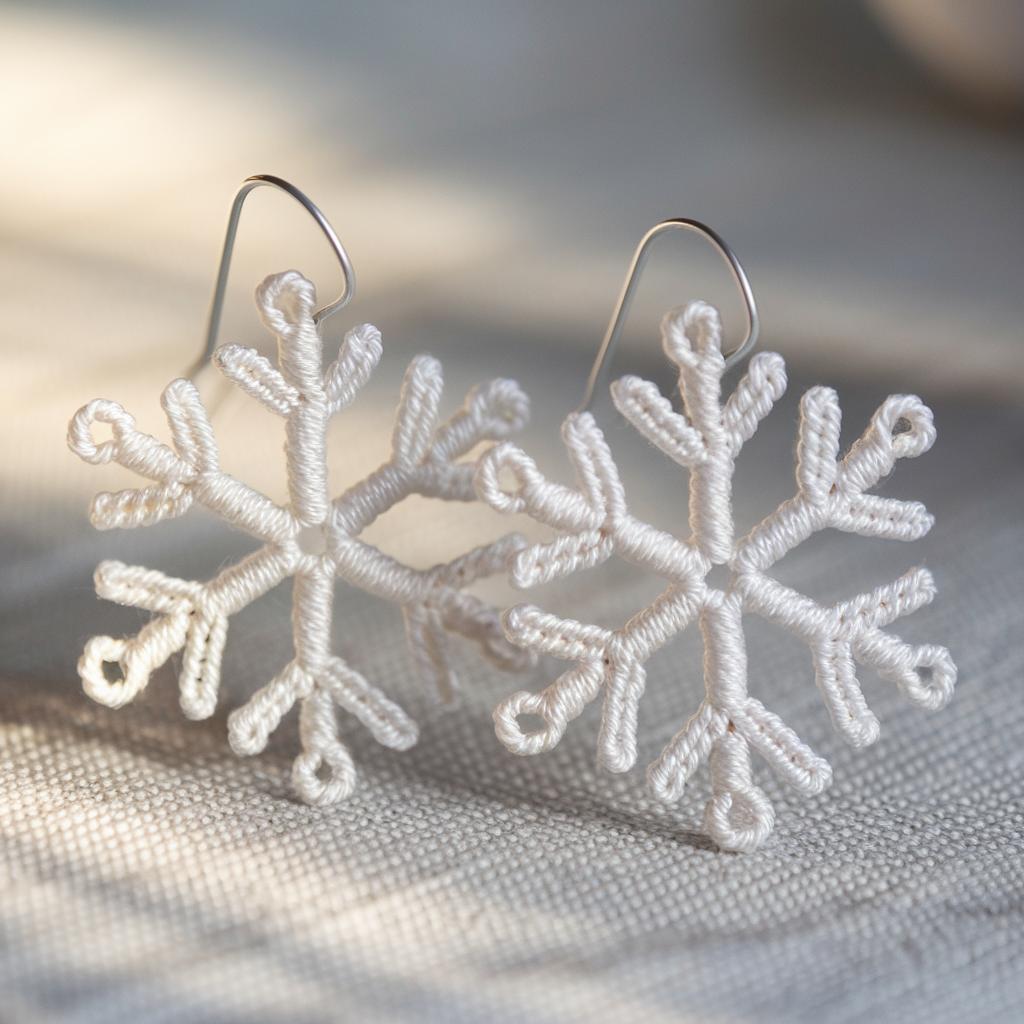
Scene: Hypothermic sparkle — intricate lace motifs that catch light like frost crystals. These are delicate, elegant, and ideal for holiday gifts or bridalwear.
Skill level: Intermediate (fine thread and picots)
Finished look: Star/snowflake with pointed arms and picot tips. Stiffened for shape.
Time: 35–60 minutes per pair (including blocking & drying)
Cast & crew — materials
- Size 10 crochet thread (metallic thread optional for sparkle).
- Hook: 1.5–2.25 mm.
- 2 earring hooks, 2 small jump rings.
- Foam block or firm pin board, rustproof pins.
- Stiffener: diluted PVA (white glue 1:2 glue:water) or fabric stiffener spray.
- Optional: small rhinestone or sequin for center.
Techniques you’ll practice
- Working small round motifs.
- Picots and small lace clusters.
- Blocking and stiffening for permanent shape.
Historical aside (short)
Snowflake jewelry and lace have roots in delicate needlecraft traditions; this pattern takes inspiration from vintage lace medallions, but scaled down for earrings.
Shot list — step-by-step pattern (one snowflake; make 2)
- MR: Make magic ring. Ch 3 (counts as dc). Work 11 dc into MR. Pull ring tight, join to top of ch-3. (12 dc)
- Ch 5, sl st into next dc — repeat around to create 12 ch-5 loops. Join and fasten off tail or keep working.
- Into each ch-5 loop: (sc, ch 3, (2 dc, ch 2, 2 dc) in loop, ch 3, sc). Sl st back into base to secure the arm. This yields 12 pointed arms.
- On the point of each arm add a picot: ch 3, sl st into 3rd ch from hook (or ch 3, sl st into last worked stitch) for crisp tips.
- Optional gem: sew a small sequin or crystal to the center using matching thread.
- Blocking & stiffening: Pin each snowflake to foam in the exact shape you want. Spray with diluted PVA/starch thoroughly and leave to dry 6–12 hours. When dry, remove pins — your snowflake holds its form.
- Attach jump ring at one arm tip (pick an arm that will sit at top when worn) and then to earring hook. Close jump ring.
Troubleshooting
- If snowflake curls during drying, re-pin and respray ensuring even tension across arms.
- Metallic thread requires gentle handling; don’t over-starch — it can flake.
3. Crochet Daisy Granny Square Earrings Pattern
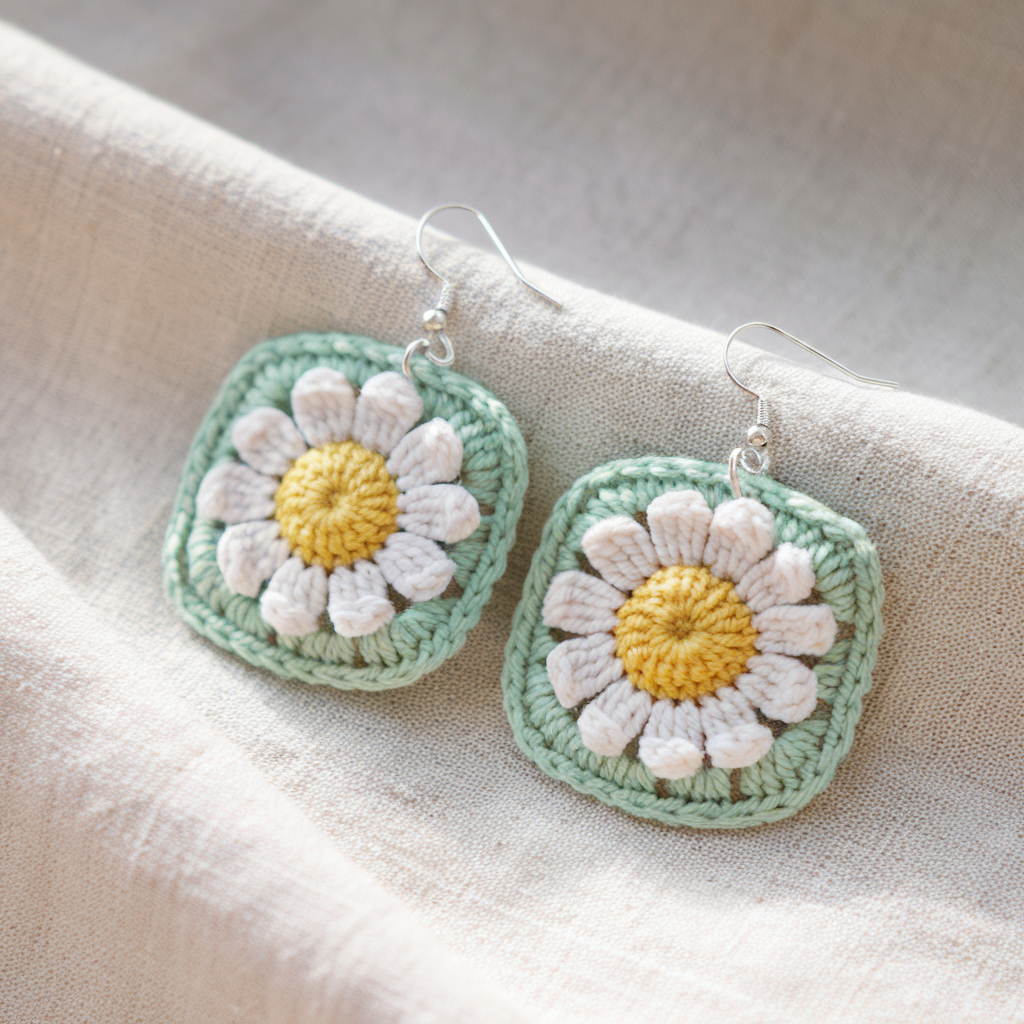
Scene: A tiny garden square — vintage charm in miniature. The daisy granny square is a cheerful, nostalgic design that suits everyday wear and handmade market sets.
Skill level: Beginner → Intermediate
Finished look: Tiny square with a yellow daisy center and small border; light and wearable.
Time: 20–35 minutes per pair
Materials
- Fingering/sport cotton yarn in yellow (center), white (petals), and a contrast color for the square (tiny amount each).
- Hook: 2.5–3.5 mm.
- 2 earring hooks, 2 jump rings.
- Tapestry needle, scissors, small block for light shaping.
Techniques you’ll practice
- Magic ring, small dc clusters, chain spaces like granny.
- Forming a square from a round and light blocking.
Shot list — step-by-step pattern (make 2)
Daisy center:
- MR: With yellow, MR; ch 1, work 8 sc into ring. Pull tight and join. (8 sc)
- Switch to white for petals. In each sc do: (sl st, ch 3, dc, ch 3, sl st into same sc) — repeat across 8 sc to create 8 tiny petals. Fasten off white and weave tail to back.
Form the tiny granny square:
3. Attach contrast color at the petal edge. Ch 3 (counts as dc), dc in same base stitch, ch 1, 2 dc in next petal base — continue around making 8 clusters with ch-1 spaces. Join with sl st. (creates a small round of clustered stitches).
4. To make tiny corners for a square shape: sc in cluster space, ch 3, sc in next cluster space — repeat around; where you want a corner insert (every 2 clusters) work (2 dc, ch 2, 2 dc) into the ch-3 space from previous row — this produces corner projection and forms a square silhouette. Fasten off and weave ends.
5. Edge neatness: one round of sc around the entire square flattens the shape. Light block if desired.
Assembly:
6. Sew a small jump ring into the top corner’s sc (stitch the ring into the fabric with a few secure stitches) and attach to earring hook.
Packaging idea
- Make 3–4 colorways and mount on a mini card for a gift set.
4. Crochet Feather Earrings Pattern
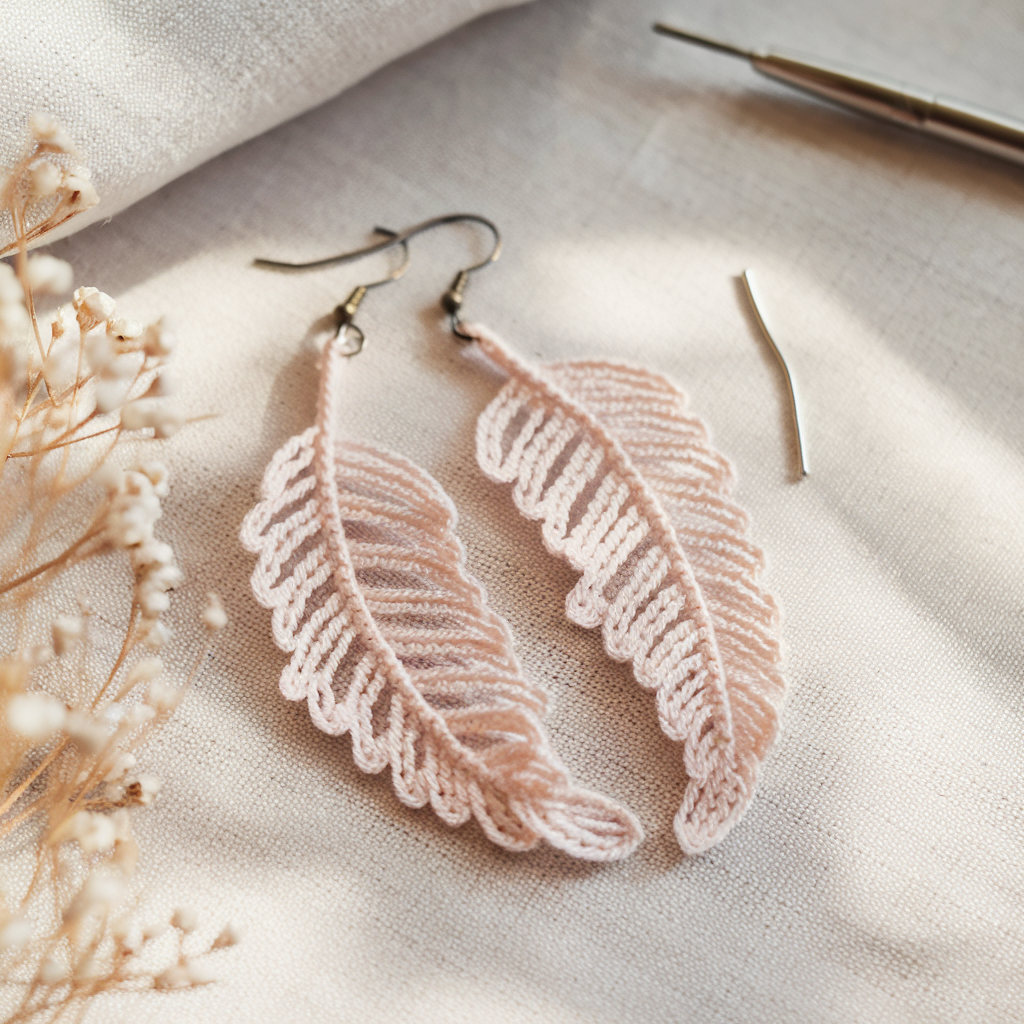
Scene: Quiet, sophisticated—feathers sway and elongate the neck line. This design leans into shaping, symmetry, and soft blocking for a natural curve.
Skill level: Intermediate
Finished look: Lacy feather with delicate barbs and a soft curve.
Time: 30–60 minutes per pair (including blocking)
Materials
- Cotton fingering or light lace yarn (6–10 yards per earring).
- Hook: 1.75–2.5 mm.
- 2 earring hooks, small jump rings.
- Foam block and stiffener for setting shape.
Techniques you’ll practice
- Working ovals/tube bases, mirror stitching both sides, picot accents, blocking to hold curve.
Shot list — step-by-step pattern (one feather; make 2)
- Chain foundation: Ch 18 (this sets feather length; modify for longer/shorter feathers).
- Work along chain on one side: sc in 2nd ch from hook and in next 16 ch (17 sc), then continue around the end and work back along the opposite side of the chain with sc in each returning ch to produce an oval loop (total 34 sc if mirrored). This oval is the spine. (If you prefer, join rounds and work in spiral for smoothness.)
- Create barbs along one edge: Attach yarn at one end; ch 3, dc in next st, ch 3, sl st into next st — repeat along the length to create longer bars. Mirror on opposite side but stagger the chains slightly so barbs interlock like a feather.
- Add texture and picots: On longer barbs sometimes do ch 4 and finish with a picot (ch 3, sl st into 3rd ch) for decorative tips. Mix sizes for a natural look.
- Edge finish: Work sc around the entire outline to secure barbs and tidy shape. Keep tension even so barbs do not collapse. Fasten off, leaving a long tail.
- Blocking & stiffening: Pin the feather into a gentle curve on foam board. Spray lightly with diluted PVA or starch and let fully dry. This gives the feather a soft hold while keeping it flexible.
- Assemble: Use long tail to sew small jump ring to the stem base. Attach to hook.
Variation & styling
- Add a short chain at the top for increased swing. Make clusters of 3 micro-feathers for layered earrings.
5. Crochet Cherry Blossom Earrings Pattern
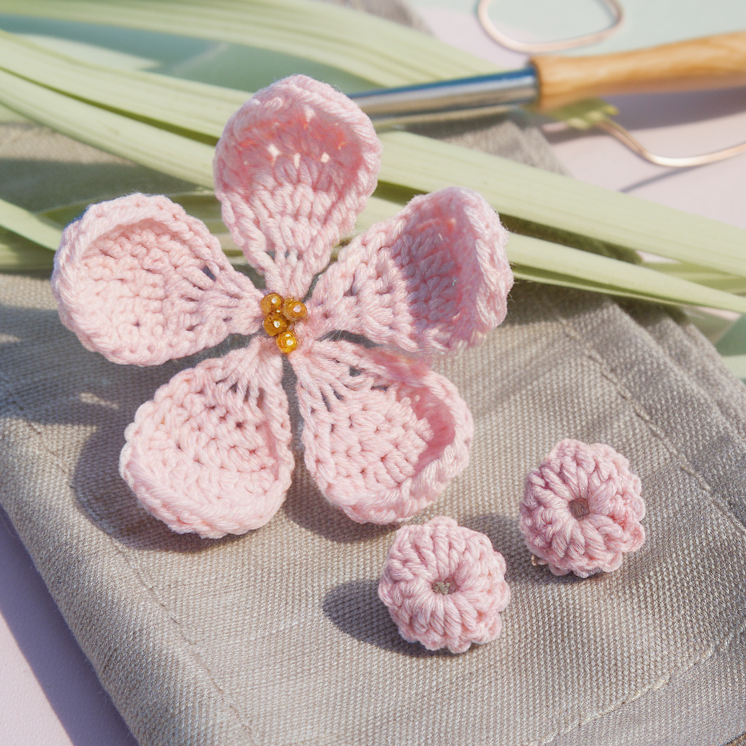
Scene: Spring in your palm — tiny five-petal blooms, soft pink, a seed bead at the heart. Romantic and wearable, these translate well to brooches, hairpins, or earrings.
Skill level: Beginner → Intermediate
Finished look: Flat five-petal blossom with optional leaf and bead center.
Time: 20–35 minutes per pair
Materials
- Fingering cotton/thread in pink and pale green.
- Hook: 1.75–2.5 mm.
- Tiny seed bead for center or embroidery floss for a French knot.
- 2 earring hooks, jump rings.
- Tapestry needle, scissors.
Techniques you’ll practice
- Small petal shaping, sewn-on bead, tiny leaf creation, neat finishing.
Shot list — step-by-step (one blossom; make 2)
- MR: With pink, MR. Ch 1, work 8 sc into ring, pull tight, sl st to join. (8)
- For each petal (work into consecutive sc): (sl st, ch 3, 3 dc, ch 3, sl st into same sc) — repeat 5 times using 5 adjacent sc for five petals. This produces round, puffy petals spaced tightly. Fasten off and weave ends to backside.
- Leaf (optional): With pale green, ch 6; sc in 2nd ch, hdc in next, dc in center ch, hdc next, sc in last ch. Fasten off leaving tail to sew leaf to back.
- Add bead center: Sew one or several tiny seed beads to center, or embroider a small French knot with embroidery thread.
- Backing: if delicate, glue a small felt circle to the back to protect stitches and provide base to sew ring through.
- Attach jump ring through top stitches and hang on hook.
Presentation & pairing
- Attach a blossom to hairpin and gift as a tiny spring set; include care note about keeping dry.
6. Crochet Heart Earrings Pattern
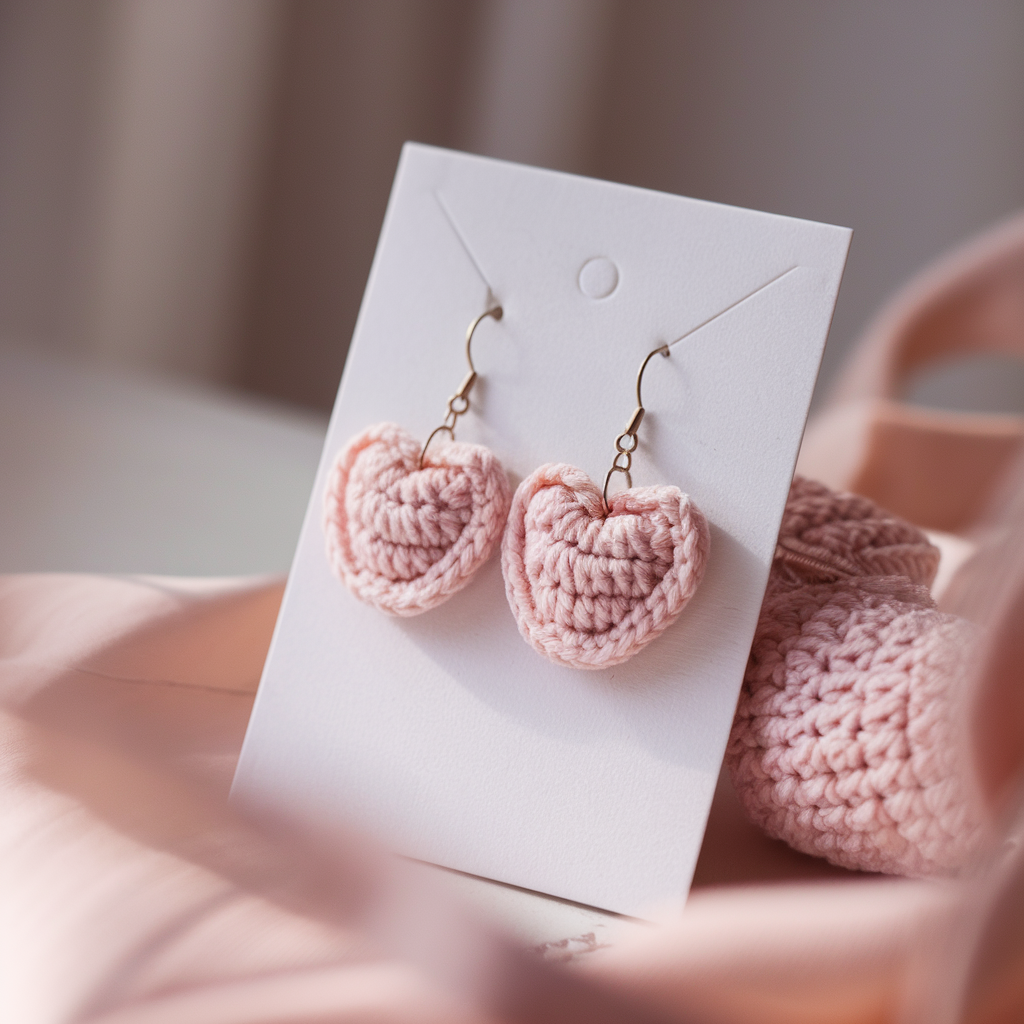
Scene: Classic, tidy, and always appropriate — tiny hearts that read both romantic and minimal.
Skill level: Beginner
Finished look: Small flat heart, smooth edges, solid enough to attach findings.
Time: 15–25 minutes per pair
Materials
- Cotton or fingering yarn / crochet thread.
- Hook: 2.0–3.0 mm.
- Jump rings and hooks.
- Small block to shape (optional).
Techniques you’ll practice
- Small shaping from magic ring, sc/dc shaping, embedding jump rings.
Shot list — step-by-step (flat heart method)
- MR: Make magic ring. Ch 1. Into ring work: 2 sc, ch 2, 2 dc, ch 2, 2 sc. This gives two little top bumps and a lower curve — a tiny heart silhouette. Pull ring closed and join. (Counts: 2 sc + (2dc pair) + 2 sc roughly).
- To neaten, work a round of sc around the heart — place 1 sc in each sc and 1 sc in each ch space, smoothing corners. Fasten off.
- Optionally make a slightly larger heart in a second color and sew the small one on top for a layered look. Sew a jump ring to the top center and attach hook.
Styling & gift idea
- Mount a trio of different-colored hearts on a single card for a Valentine’s set.
7. Crochet Lime Slice Earrings Pattern
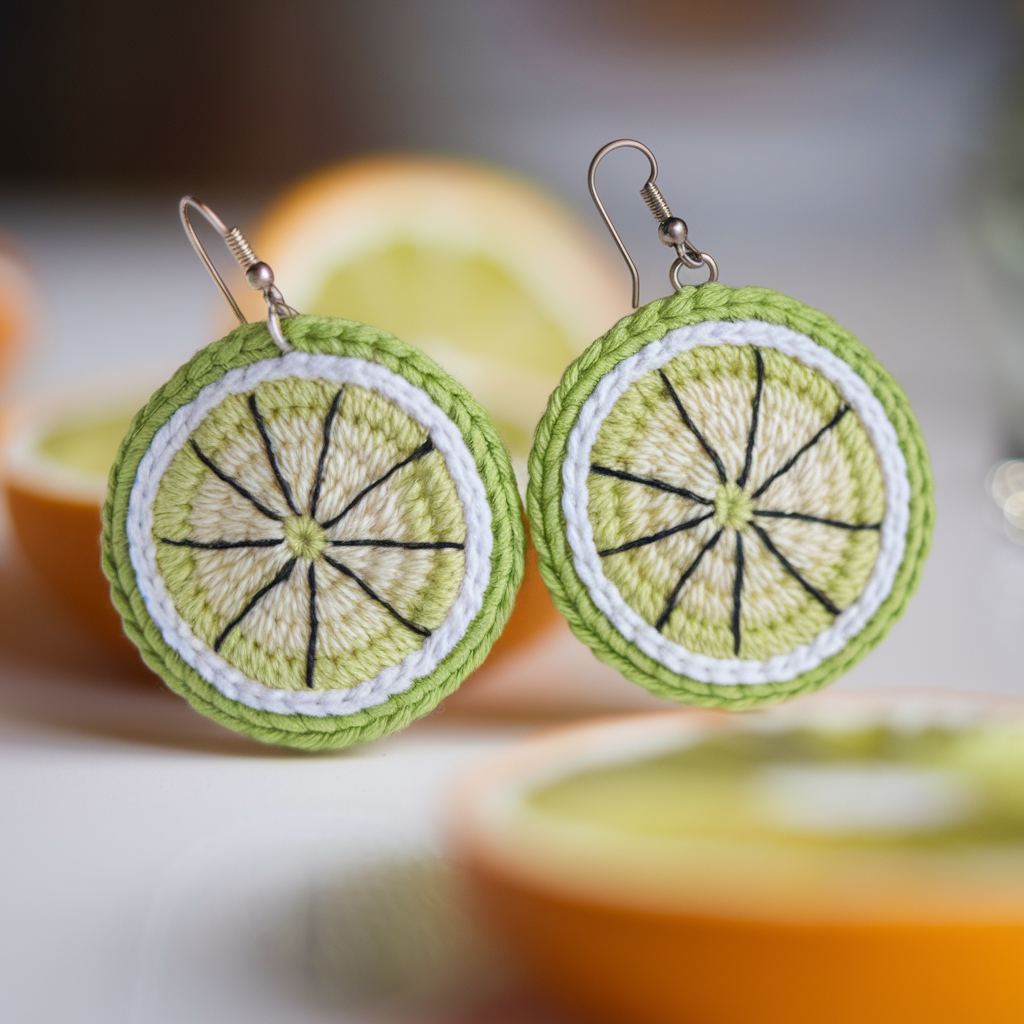
Scene: Playful and citrus-bright — tiny wheel-sliced appliqués, slightly stiffened, like candy earrings. Fun, summery, and highly visual.
Skill level: Beginner
Finished look: Small round slice with embroidered segment lines; slightly stiffened.
Time: 25–40 minutes per pair (including drying time)
Materials
- Cotton fingering yarn in pale green (flesh), white (segment ring), and darker green (rind).
- Hook: 2.0–3.0 mm.
- Stiffener: spray starch or diluted PVA.
- 2 jump rings, earring hooks, tapestry needle.
- Blocking mat and pins.
Techniques you’ll practice
- Small round increases, color change, surface embroidery for segment lines, blocking & stiffening.
Shot list — step-by-step (one slice; make 2)
- MR: With pale green, MR. Ch 1. Work 6 sc into ring. Pull tight and join. (6)
- Round 2: sc, inc around → (sc in next stitch, then inc in following) — repeats yield 9–12 total depending on fit. Aim for 12 sc as a balanced center. (If starting from 6 sc: inc in every 2nd st → 9 sc; better to do inc every stitch? For neatness: do inc in each stitch for 12.) Simpler: Work 2 sc in each st → 12 sc total.
- Round 3 (inner ring): Switch to white; sc in each st around (12). Join.
- Round 4 (rind): Switch to darker green; sc in next 2, inc in next — repeat to increase to 16 sc (sc sc inc pattern across). Join and fasten off leaving a tail. (16)
- Surface embroidery: With pale green or white embroidery thread, stitch 6–8 short straight lines from center outward to indicate lime segments. Add a circle of tiny backstitches in exact center for the pith. Use evenly spaced radial stitches for realistic slice.
- Blocking & stiffening: Pin slice perfectly round on mat, spray with diluted PVA/starch, smooth with fingers and let dry until firm. Remove pins carefully.
- Attach jump ring at top: sew the jump ring into top stitches with a few secure passes and close. Attach hook.
Variations
- Make orange, lemon, grapefruit colorways.
- Glossy finish: after stiffening, brush with clear craft varnish for a candied look — test on a spare piece first.
Assembly, safety, and care
- Findings: Use hypoallergenic earring hooks (gold-filled, sterling, surgical steel) for comfort. Always close jump rings snugly with pliers.
- Weight: Keep earring motifs lightweight — cotton thread and small shapes are best. Avoid heavy beads on long fringe or large metal chains for everyday wear.
- Stiffening: For lace snowflakes, feather shaping, and lime slices, block and apply diluted PVA/starch. For pieces worn daily, spot-test to ensure stiffness holds but remains flexible enough to avoid cracking.
- Attachment: When sewing jump rings into crocheted fabric, stitch over the ring several times so it can’t pull free. Consider gluing a small felt backing over the sewn area for reinforcement.
- Care: Advise recipients to keep crochet jewelry dry, remove before sleeping/showering, and store on an earring card or padded surface to avoid crushing. Hand wash gently if necessary and reshape while damp.
Styling & presentation — the gallery sequence
- Boho fans: wear with linen dresses or festival outfits. Gift on a small kraft card tied with twine.
- Snowflakes: best with eveningwear; present in a tiny gift box with tissue and a care note about hand wash only.
- Daisy granny squares: everyday, fresh; make multicolor sets for seasonal markets.
- Feathers: elegant with neutral wardrobes; present as a “miniature nature set” with matching micro-feathers.
- Cherry blossoms: romantic sets with hairpin or brooch for a springtime gift.
- Hearts: Valentine’s classics; small sets of colorways make great stocking stuffers.
- Lime slices: summer novelty — pair with a citrus-scented mini soap or card that says “You make life zesty.”
Conclusion
This collection demonstrates how tiny crochet pieces can deliver maximal charm. Each pair teaches a technique — textural fans, stiffened lace, embroidery, shaping — that scales up to other projects. Treat each pair like a short documentary: plan the scene (materials), stage the shot (step-by-step), and edit carefully (finish and present). The result is wearable art that’s personal, portable, and perfect for gifting or selling.