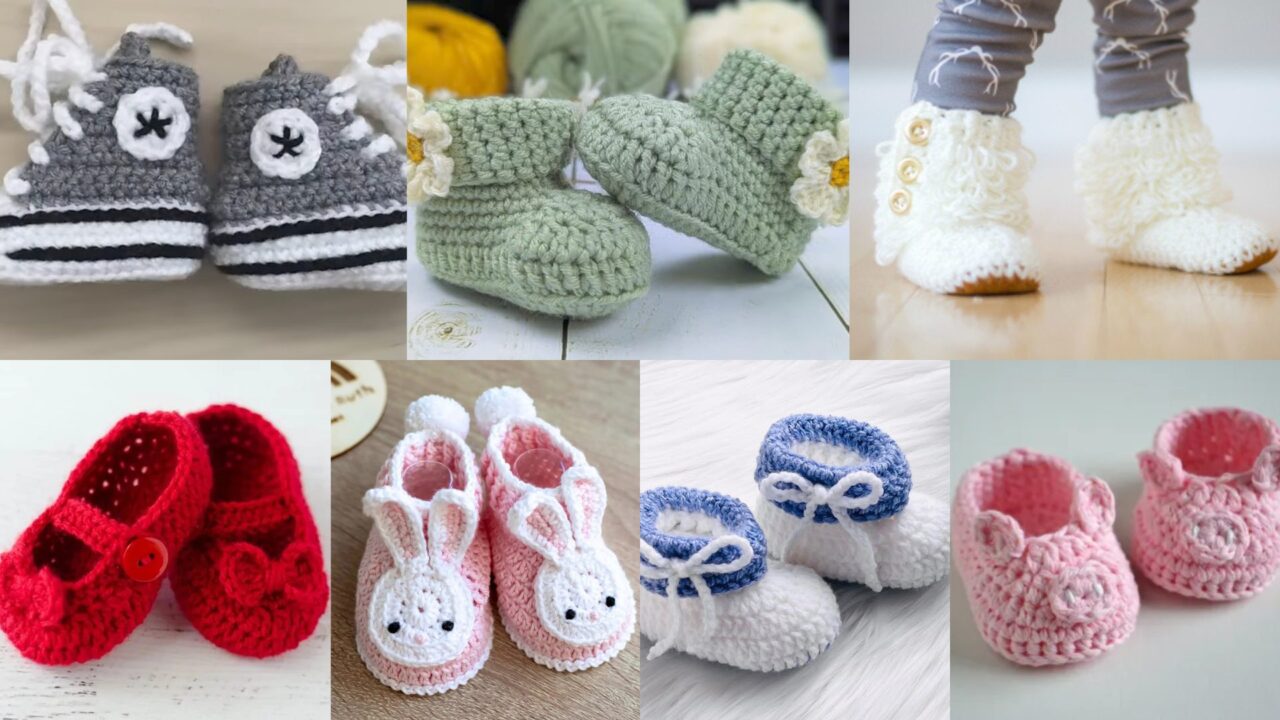
Handmade baby booties are tiny treasures: fast to make, adorable to gift, and practical for keeping a newborn’s feet warm. Below are seven sweet bootie patterns — each written with a clear Skill level, a Materials list, a long, step-by-step tutorial (with a newborn-size example), Variations to customize the look, and Final tips to ensure the finished pair is comfy and durable. Before you start, make a quick gauge swatch: baby booties are sensitive to gauge because the fit matters. If your swatch measures differently, follow the pattern shape but adjust stitch counts to match your tension.
1. Mary Jane Crochet Baby Booties Pattern
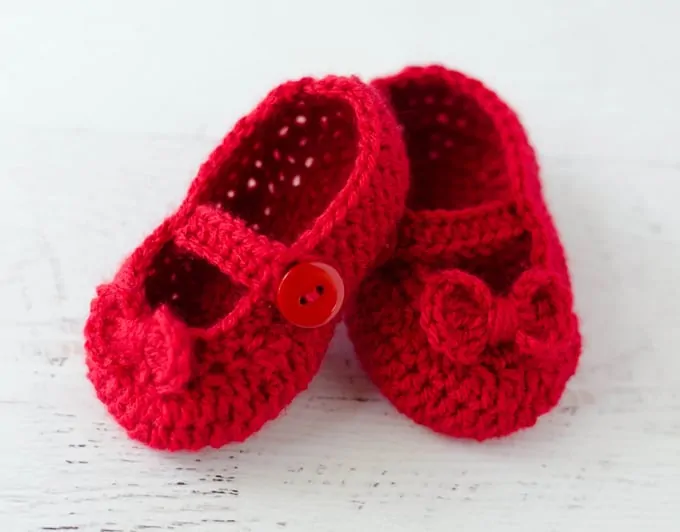
Skill level: Beginner → Intermediate
Materials
- DK / light worsted baby-friendly yarn (soft cotton or acrylic), about 50–70 yards
- Hook: 3.5 mm (E) or size that gives proper gauge
- Tapestry needle, scissors, small button (8–12 mm)
- Optional: small piece of non-slip fabric for sole
Finished size (newborn example)
Length ≈ 3.25″ (8.5 cm). To adjust size, change hook/yarn or increase rounds.
Step-by-step (newborn size example)
Sole
- Make a magic ring. Rnd 1: ch 1, 6 sc into ring. Pull tight and do not join if working spiral; join with sl st if you prefer joined rounds. (6)
- Rnd 2: inc in each st around. (12)
- Rnd 3: [sc in next st, inc] repeat around. (18)
- Rnd 4: [sc in next 2 sts, inc] repeat around. (24)
- Rnd 5: [sc in next 3 sts, inc] repeat around. (30) — this oval should be close to a newborn sole. Measure: length should be ~3.25″ — adjust by adding one more round of increases if needed for a longer sole.
Upper (work back and forth across sole)
6. Mark the front half of the sole (for toe shaping) — turn sole so heel faces you. Join yarn at the first stitch of the toe half (approx stitch 1 at toe area). Rnd/Row 1: ch 1, sc across the toe stitches only (count depends on your increases; for 30-st sole approx 16–18 sts for toe section), turn.
7. Row 2–4: ch 1, sc across (3–4 rows) to build toe height. On last row work an even decrease row (sc2tog at both ends) to shape top slightly. Fasten off.
Heel and sides
8. Rejoin at heel edge on sole underside. Work sc around the remaining sole stitches (the heel/arch area) up one side, across heel top in rows to form a short cuff, then down the opposite side, joining to the toe section so top and bottom meet. Usually 6–8 rounds of sc builds the side height. Fasten off.
Mary Jane strap
9. Attach yarn to outer side about 1.5″ from toe. Ch 10 (or ch enough to fit comfortably over the instep — test on foot), sl st to opposite side to form strap loop point, or make second strap with buttonhole: ch 3, sc back to strap base and fasten off. Sew a small button that aligns with strap.
10. Weave in ends and block lightly if desired.
Variations
- Make the sole firmer by doubling yarn for sole rounds or adding a thin felt or leather sole sewn to the bottom.
- Use a scalloped edge or picot around the top for a delicate finish.
- Add a small bow, puff stitch flower, or embroidered initial on the toe.
Final tips
- Try the bootie on a soft fabric foot form (or measure against a newborn sock) before finishing the strap length.
- Use child-safe buttons or stitch a small loop of yarn instead of a hard button for baby safety.
2. Newborn Cute Baby Booties Crochet Tutorial
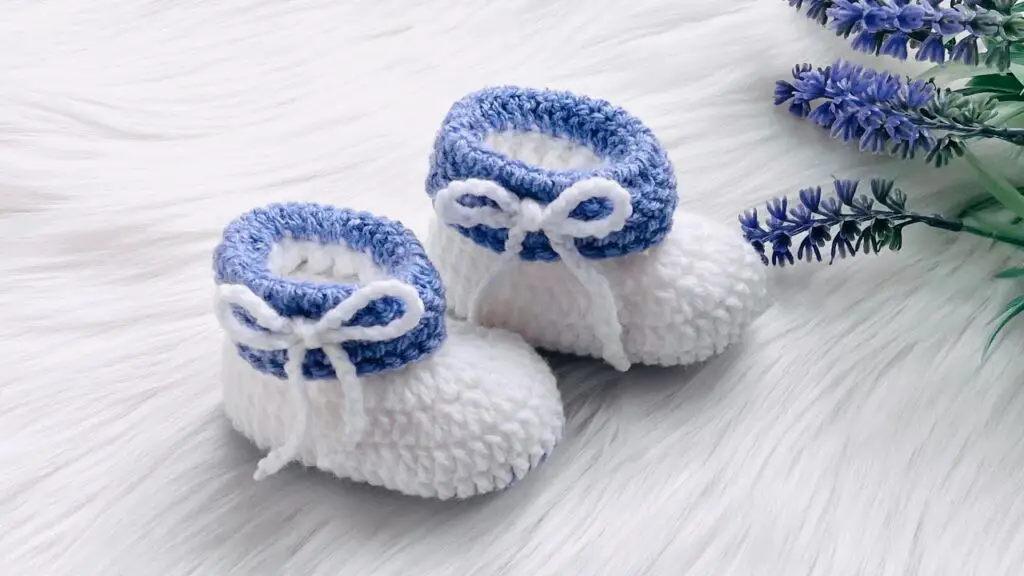
Skill level: Beginner
Materials
- Soft DK baby yarn (50–70 yds)
- Hook: 3.5 mm (E)
- Yarn needle, scissors
Finished size (newborn)
Length ≈ 3–3.5″ (7.5–9 cm)
Step-by-step (simple round bootie)
- Sole: Work the same sole as in Mary Jane through the round that yields ~30 stitches (steps 1–5 above).
- Turned upper (short cuff style): After the sole, join yarn at the toe and work sc across toe stitches; continue in rounds around the whole sole without increasing for 6–8 rounds — this forms a short, almost slipper-like upper.
- Cuff: Switch to hdc or sc in BLO for 4–6 rounds to create a neat cuff that can be folded up. Fold the cuff up for a turned look or leave unfolded for a low top.
- Finish: Fasten off, weave in ends. Optionally add a tiny pompom or embroidered heart on top.
Variations
- Work cuff in contrasting color for a sporty stripe.
- Add a small sewn ribbon bow at the front.
Final tips
- For newborns, keep openings easy to slip on — avoid rigid closures.
- Use machine-washable yarn for easy care.
3. Bunny Crochet Baby Booties Pattern
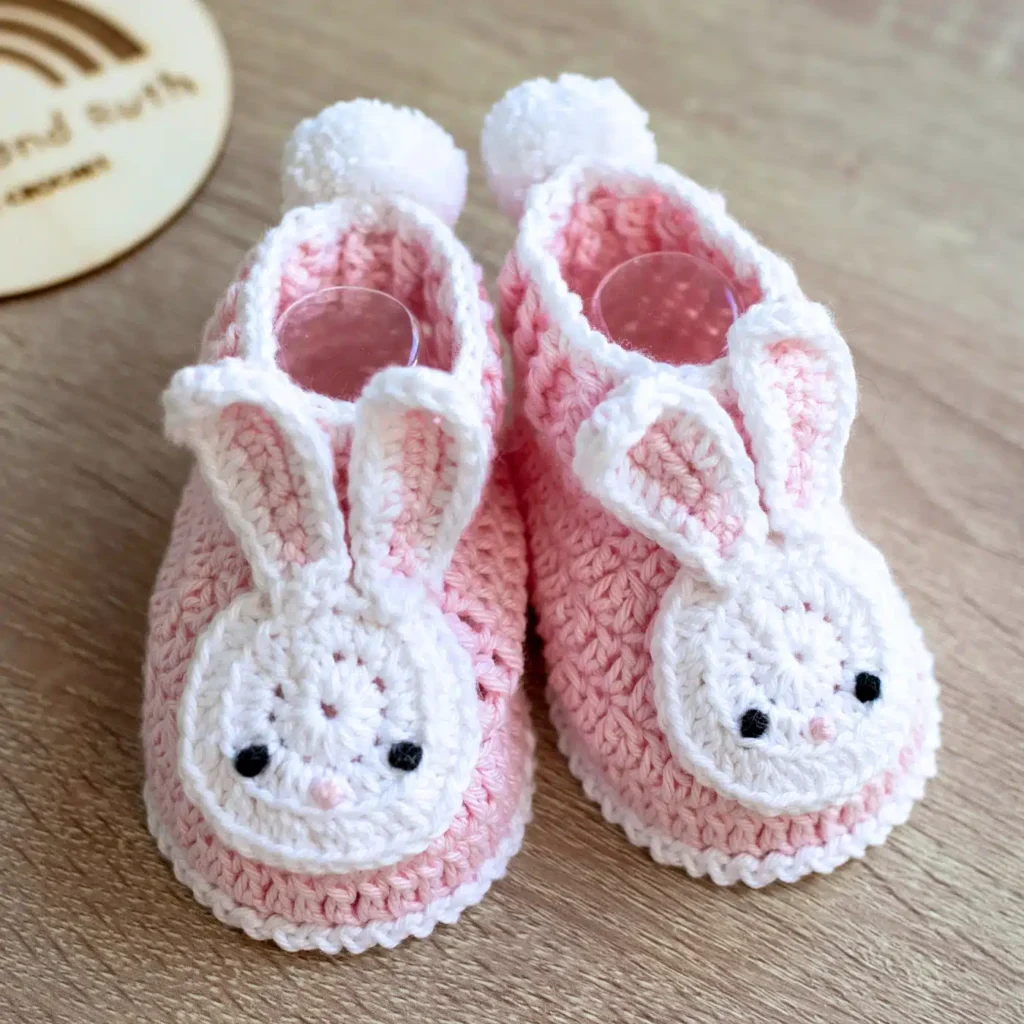
Skill level: Intermediate (appliqué and shaping)
Materials
- DK baby yarn main color + small amount of white or pink for ears/tail
- Hook: 3.5 mm (E)
- Yarn needle, scissors, small pompom or small circle of white yarn for tail, stitch marker
Finished size (newborn)
Length ≈ 3.25″
Step-by-step
Base & upper
- Make sole and basic upper exactly as in the Mary Jane/Newborn tutorial (steps 1–8 from Mary Jane). Use a slightly taller cuff to provide space for ears appliqué.
Bunny ears (make 2 per bootie)
2. Magic ring, ch 1. Round 1: 6 sc into ring, pull tight, join. (6)
3. Round 2: ch 1, inc, sc in next around (9).
4. Rnd 3: sl st to shape ear tip: ch 1, sc around but on last round do a sc3tog at the tip to make a tapered ear (or work single crochet decreases to shape into a pointed ear). Fasten off leaving long tail. Fold slightly lengthwise and sew ear to front side seam of bootie top, so the ear stands on the cuff. Repeat for the second ear.
Bunny tail
5. Make a tiny pompom or a small round puff: either make a 1″ pompom from matching yarn and sew to heel back, or crochet: MR, 6 sc; fasten off, stuff slightly and sew.
Finishing
6. Position ears and tail symmetrically; sew securely with yarn needle and strong stitches. Weave in ends.
Variations
- Embroider little closed eyes on the front toe for a sleeping bunny look.
- Make inner ear contrast with pink slip-stitch embroidery.
Final tips
- Sew appliqués very securely—ears can be tugged by curious fingers.
- Consider lightly reinforcing the seam where the tail is sewn using extra yarn wraps.
4. Crochet Daisy Baby Booties Tutorial
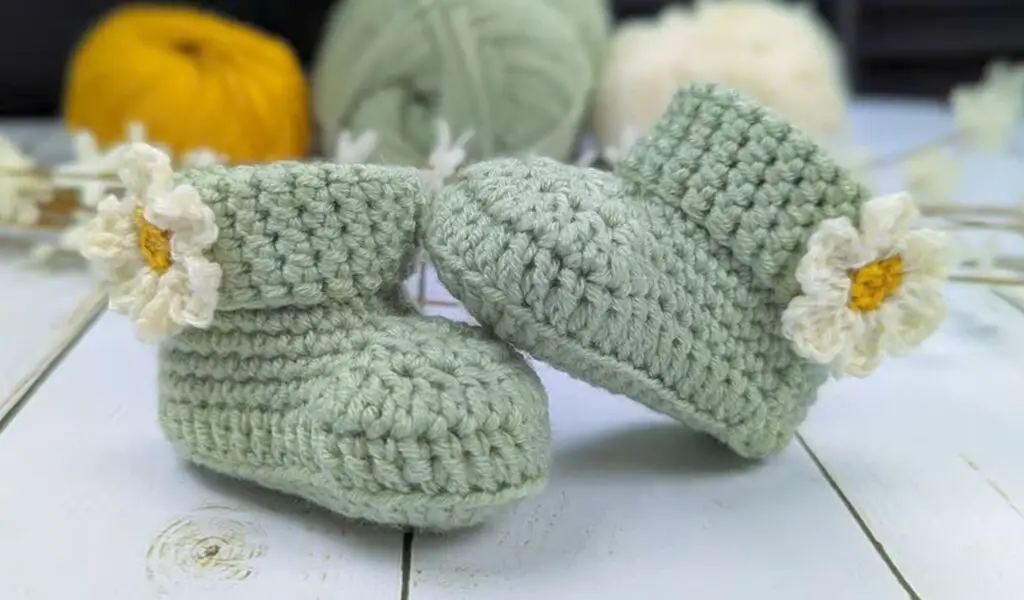
Skill level: Beginner → Intermediate
Materials
- DK baby yarn in main color + small amount of yellow and white for daisy
- Hook: 3.5 mm (E)
- Yarn needle, scissors
Finished size (newborn)
Length ≈ 3–3.5″
Step-by-step
Base & upper
- Make sole and basic upper from the Newborn tutorial (same as earlier).
Daisy applique
2. Make a small daisy: MR, ch 1, 6 sc into ring, join (6). Change to white. Petal round: [ch 3, 3 dc in next st, ch 3, sl st in same st] repeat in each of the 6 center stitches to create 6 petals. Fasten off leaving a tail to sew. Make a tiny yellow french knot or small puff in center: MR, sc 6 with yellow or use an embroidered French knot.
3. Position daisy on the toe or outer side panel and sew securely.
Finishing
4. Weave in ends and gently block to flatten daisy if needed.
Variations
- Add two daisies per bootie for a twin-flower look.
- Work the petal round with smaller chains (ch 2 + 3 dc) for petite petals.
Final tips
- Keep appliqués centered and stitch through both daisy and bootie fabric for durability.
- Use colorfast yarn for multi-color work and prewash if unsure.
5. Piggy Baby Booties Crochet Pattern
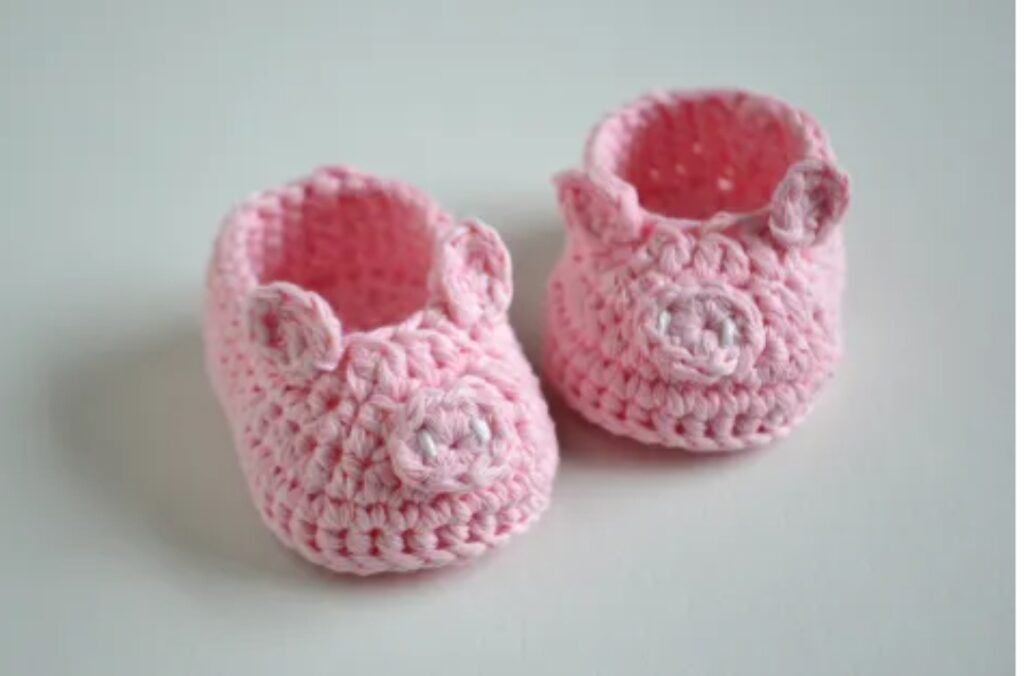
Skill level: Intermediate
Materials
- DK yarn in pink (main), small amounts of darker pink for snout and inner ear
- Hook: 3.5 mm (E)
- Small safety eyes or embroidery thread for eyes (for newborns I recommend embroidered eyes, not hard safety eyes)
- Yarn needle, scissors, stitch marker
Finished size (newborn)
Length ≈ 3.25″
Step-by-step
Base & upper
- Follow the Mary Jane/Newborn sole + upper instructions to the point where the cuff stands (steps 1–8).
Snout & nose
2. Snout (make 2): MR, ch 1, 6 sc into ring, join (6). Rnd 2: inc in each st (12). Fasten off and stuff lightly. Position centered on toe and sew down the middle to create a shallow snout. Embroider two tiny nostrils with darker pink or add a little stitched “U” shape for snout detail.
Ears
3. Ears (make 2 per bootie): ch 5, sc in 2nd ch from hook, sc across (4 sts), ch 1, turn; sc across for 2 rounds, fold slightly and sew along base to create ear shape. Attach either side of snout region.
Eyes
4. Embroider small closed or open eyes above the snout using black embroidery thread (small stitches) for safety, or use tiny safety eyes if the booties are a keepsake and never for unsupervised infants.
Tail (optional)
5. Tiny curled tail on back: make a short chain of 6–8, then sc back along chain to curl it, sew onto heel.
Finishing
6. Secure all pieces very well with strong stitching and weave in ends.
Variations
- Make piggy in pale gray for a hipster pig instead of classic pink.
- Add little hooves with a darker pink band around the cuff bottom.
Final tips
- Avoid attaching small hard embellishments on newborn items that will be used unsupervised. Use stitched details whenever possible.
- Reinforce attachment points with multiple passes of needle and yarn.
6. Crochet Converse Baby Booties Tutorial
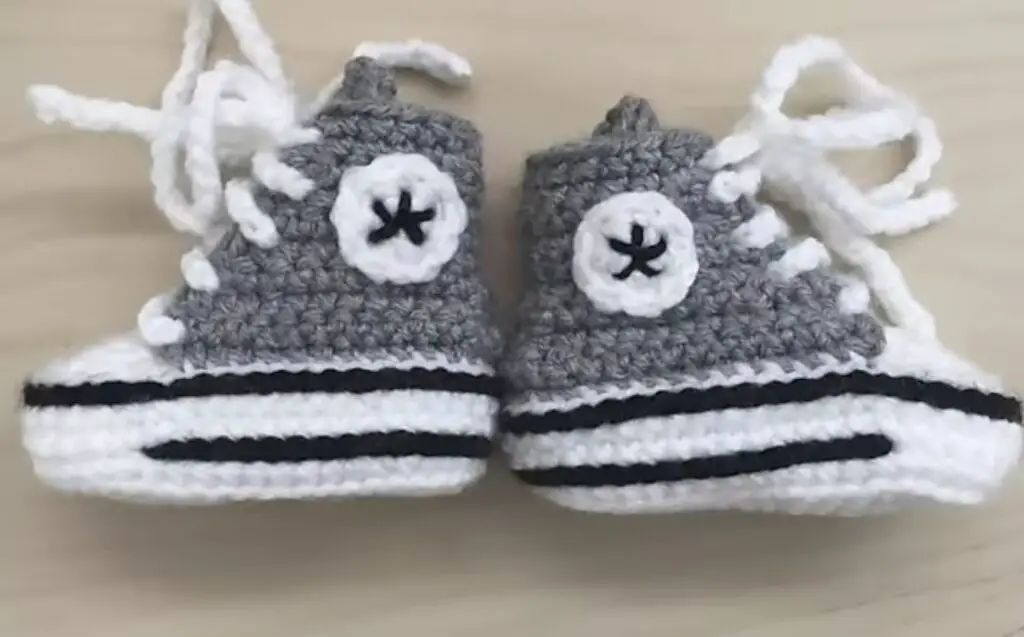
Skill level: Intermediate
Materials
- DK yarn in main sneaker color + white for toe band and sole edge + a contrast color for the stripe and tongue
- Hook: 3.5 mm (E)
- Yarn needle, small eyelets (optional), embroidery thread for logo/star
Finished size (newborn)
Length ≈ 3.25–3.5″
Step-by-step
Sole
- Work an elongated sole shape: MR, ch 1, 6 sc into ring; Rnd 2: inc around (12); Rnd 3: sc in next, inc (18); Rnd 4: sc in next 2, inc (24); Rnd 5: sc in next 3, inc (30) — oval sole similar to other booties. Adjust rounds to create elongated shape typical of sneakers.
Upper & tongue
2. Join at toe and work a rectangle in sc or hdc to make the upper tongue area: sc across the toe stitches for 4–6 rows to form tongue. For side panels, join at side edges and work sc up to create a shoe collar.
3. For the classic Converse look, switch to white and work 2 rounds of sc around the base (the shoe ‘sole’ stripe). Then switch to main color and continue for shoe body.
4. Add a short flap (tongue) centered in front by attaching yarn at the top of toe and working a small rectangle of sc/hdc, then fold into place and sew.
Eyelets and laces
5. For eyelets, make small chain loops or embroider tiny holes; you can also use small metal eyelets if you have a setter. Thread a thin chain or ribbon as laces — weave crisscross and tie in a bow.
Logo and finishing
6. Embroider a tiny star or circle logo on the ankle side using contrasting yarn or thread. Weave in ends and block gently.
Variations
- Make high-top or low-top versions by varying ankle height.
- Add a thin felt sole glued and stitched under for extra durability.
Final tips
- Keep the interior soft — line with a soft fabric if the outer yarn is textured.
- If you add real eyelets, ensure the back side is covered/finished so they don’t scratch baby skin.
7. Toddler Loop Boots with Suede Sole Crochet Pattern
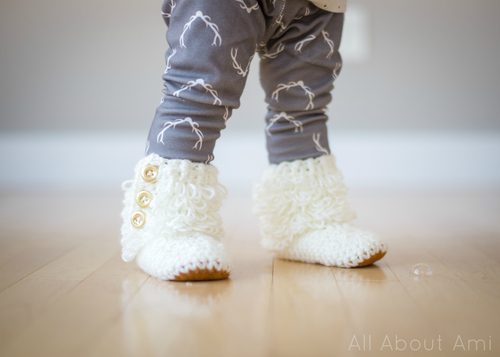
Skill level: Intermediate → Advanced (requires attaching a suede sole)
Materials
- Worsted weight yarn for boot upper (200–300 yds for toddler size)
- Hook: 4.0 mm (G) or size to match yarn
- Thin suede or faux suede for sole (precut or purchase sole pieces), strong thread and needle for sewing leather, optional leather rivets, non-slip pads
- Yarn needle, scissors, stitch markers
Finished size (toddler)
This pattern scales to toddler sizes; example for toddler 12–18 months: length ≈ 4.5–5″ (11.5–12.5 cm). Adjust by increasing rounds in sole.
Step-by-step (overview, because sewing on a sole varies by supplier)
Sole & upper
- Work a sole sized to the toddler length: follow the sole-increase progression but continue increases until the base reaches desired length (measure against a toddler foot). Example counts will be larger (e.g., 42–48 sts around).
- Build sides in sc or hdc for a higher boot shaft (work 10–14 rounds depending on desired height). Add a loop row (ch loops) at the back for pull-on loop: on the last round, mark center back and make a short chain loop of 6–8 ch, sl st back to secure — this forms the pull tab.
Attaching suede sole
3. Cut suede sole to match outer edge of crochet sole. Use small running stitches with strong thread around the perimeter to sew suede to crochet base. If using pre-punch holed sole, match holes and stitch through both materials. For extra durability, use a backstitch and reinforce heel and toe areas. Optionally use small rivets where leather is thick.
4. Finish top edge with a folded cuff or ribbing: work sc in BLO for 4–6 rounds and fold to create a neat cuff. Add decorative loop details or buttons as desired.
Variations
- Make looped texture on shaft with loop stitch or chain loop rows for a campy “hiker” look.
- Glue a thin rubber pad to suede sole for grip.
Final tips
- Practice sewing on scrap material before attaching final sole — leather/faux suede requires sturdy needles and patience.
- Prewash and stretch test yarn to ensure the sole seam remains secure after washing; handwash boots with suede soles instead of machine washing.
Conclusion
There you have seven adorable and practical baby-bootie patterns — from classic Mary Janes and bunny appliqués to sporty Converse-style and toddler boots with real suede soles. Each design is approachable and customizable: change colors, add appliqués, or strengthen the sole depending on how the booties will be used. These little handmade shoes make memorable gifts and are quick projects that let you experiment with shaping, colorwork, and small-scale construction.
Happy stitching — enjoy making tiny shoes that are as sweet as they are useful!


