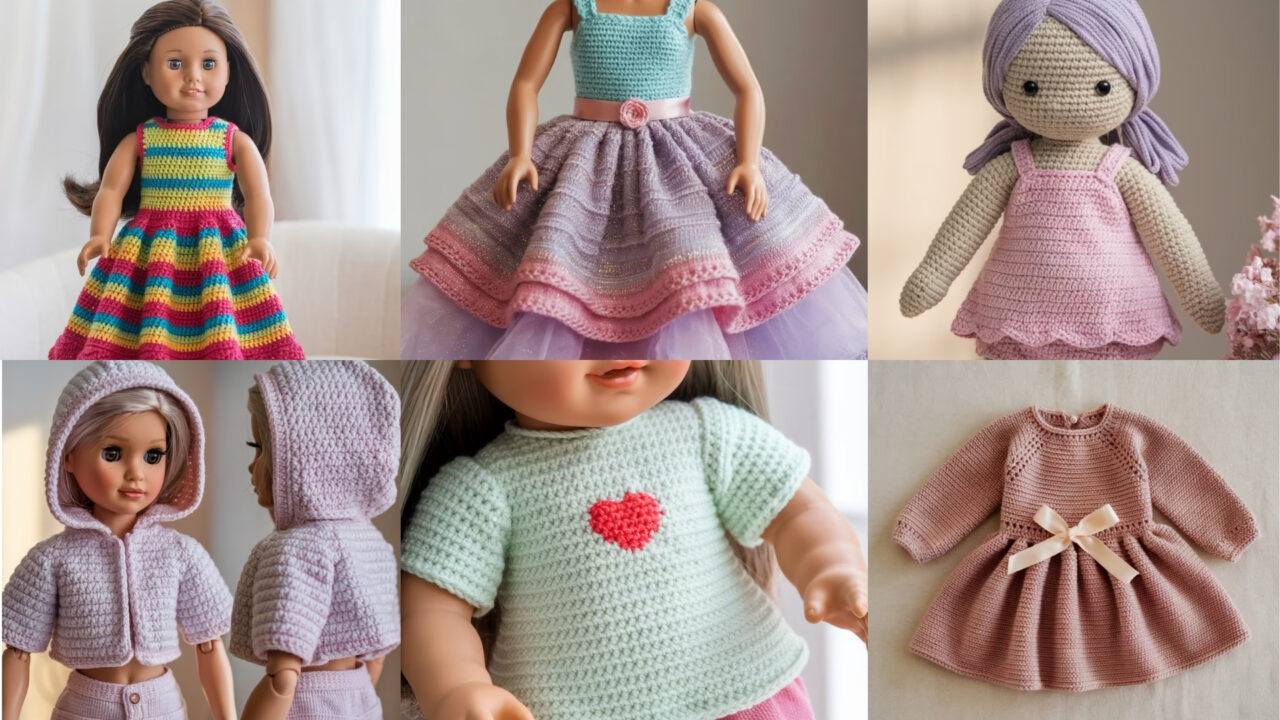
Doll dressing is therapy that also makes for excellent gifts. These seven patterns cover cozy (woolen frock), sparkle (princess shimmer), casual (heart T-shirt), cute (bow dress), outerwear (jacket), basics (dress + panty set), and bright party wear. Each pattern below uses simple stitches so beginners succeed and advanced makers can add flair.
Before you dive into stitches and sparkles, read the universal section — it contains the maths that keeps everything from turning into a mitten.
UNIVERSAL NOTES — read this (seriously)
Which doll size are we using as sample?
I’ll give a clear sample set of counts for an 18″ doll (think American Girl / similar). Typical 18″ doll measurements used here (measure your doll to confirm): chest circumference ≈ 12.0″, waist ≈ 11.5″, neck-to-hem (dress length) variable. If your doll is a different size, follow the scaling notes below.
Swatch / gauge (do this):
Make a 4″ × 4″ swatch in the stitch you’ll use, block it the way you’ll finish the garment, and count:
- stitches per inch = (stitches across 4″) ÷ 4
- rows per inch = (rows across 4″) ÷ 4
Sample gauge I’ll use in examples (replace with your swatch numbers):
- Gauge: 16 sc = 4″ → 4 sts/in
- Row gauge: 16 rows = 4″ → 4 rows/in
Always plug your own swatch numbers into the short equations I use.
Basic sizing math (example):
- Desired finished bust/hip circumference = doll measurement + ease. For a snug doll top use 0.25–0.5″ ease; for looser garments add 1.0″ ease.
- Stitches needed = (finished circumference in inches) × (sts per inch).
Example (for sample 18″ doll top): chest 12.0″ + 0.5″ ease = 12.5″. With 4 sts/in → 12.5 × 4 = 50 stitches around.
Abbreviations (US): ch, sc, hdc, dc, tr, sl st, st(s), MR = magic ring, inc = 2 sc in same st, dec = sc2tog, BLO/FLO = back/front loop only, rep = repeat.
General fit tips:
- Work garments loosely if the yarn is stiff; tighter if yarn is stretchy.
- Try the garment on the doll before finishing edges — fix hem length or armhole depth while it’s still floppy.
- Use small snaps, Velcro dots, or ribbon ties for closures — buttons often need back-of-neck reinforcement to avoid tearing yarn.
1. Crochet Woolen Doll Frock Pattern
A cozy long-sleeve frock that looks hand-me-down chic. Warm yarn, simple shaping, full skirt.
Skill level: Confident Beginner
Materials (sample): DK wool or acrylic-wool blend (soft but firm), 3.5 mm hook, tapestry needle, small snaps or hook & loop for back, scrap of ribbon for waist tie (optional). ~100–150 yds.
Sample finished size (18″ doll): chest ≈ 12.5″ finished, dress length ≈ 9″ from shoulder to hem (knee-length).
Sample math (bodice circumference)
- Doll chest 12.0″ + 0.5″ ease = 12.5″.
- Stitches needed = 12.5″ × 4 sts/in = 50 sts around. (12.5 × 4 = 50.)
Construction overview
Top-down yoke worked in the round (simple raglan increases), then separate body and sleeves. Skirt worked with gradual increases for fullness.
Step-by-step (top-down raglan yoke)
- Neck ring: Make an adjustable neck chain or MR: ch 30, sl st to form a loop (30 ch loop) — this is just a starter; if you prefer MR, make 14 sc in MR then work increases; the chain-loop method eases neck sizing. For our sample we’ll work a chained neck opening that produces approximate neck circumference — test on doll.
- Round 1 (yoke start): sc in each ch around (30 sc). Place marker. (This gives a modest neck; if too small measure and adjust.)
- Yoke raglan increases: We want final bust = 50 sts. We’ll increase on 4 raglan points (shoulders + underarms) each increase round adds 4 sts (1 per raglan). If initial neck = 30 sts and target 50, we need 20 more stitches; 20 ÷ 4 = 5 increase rounds. So do 5 increase rounds spaced evenly:
- Increase round pattern: (sc around to marker, inc, sc few, inc, sc few, inc, sc few, inc) — place increases at four cardinal points. Practically: Round: sc (n) times, 2 sc in next st repeated 4 times. Adjust n so increases space evenly. After 5 such rounds you’ll reach ~50 sts.
- Finish yoke: Once you reach 50 sts and yoke height fits the doll’s shoulders (measure short distance from neck to underarm ~2″ = 8 rows), mark underarms and divide for body & sleeves.
- Split for sleeves & body: Place markers at the 4 raglan seams. Slip st to first underarm marker and join yarn; work body in rounds on the main body stitches (excluding sleeve stitches). Sleeves are worked separately in the round from markers.
- Body: Continue sc (or hdc for quicker coverage) in rounds; for a fuller skirt, add increase rounds at waist: e.g., Round A: sc 9, inc around to add fullness (adds 1 inc every 10 sts → 5 increases etc). Work increases until skirt fullness is achieved then continue even for skirt length (to reach 9″).
- Sleeves: Join yarn at underarm marker and pick up sleeve stitches, work in rounds decreasing or shaping as needed to elbow then wrist. For fitted sleeves sc around for the required length. Add cuff with BLO hdc for a ribbed look.
- Finishing: Add small snap at back or simple lapped seam with a ribbon tie. Add a ribbon waist belt. Weave ends, block lightly on doll.
Fit & variations
- For short sleeve version stop sleeves at 2–3″ length.
- Add lace hem: 1 rnd sc, 1 rnd shell (5 dc) for a ruffled edge.
2. Crochet Disney Princess Royal Shimmer Doll Dress Pattern
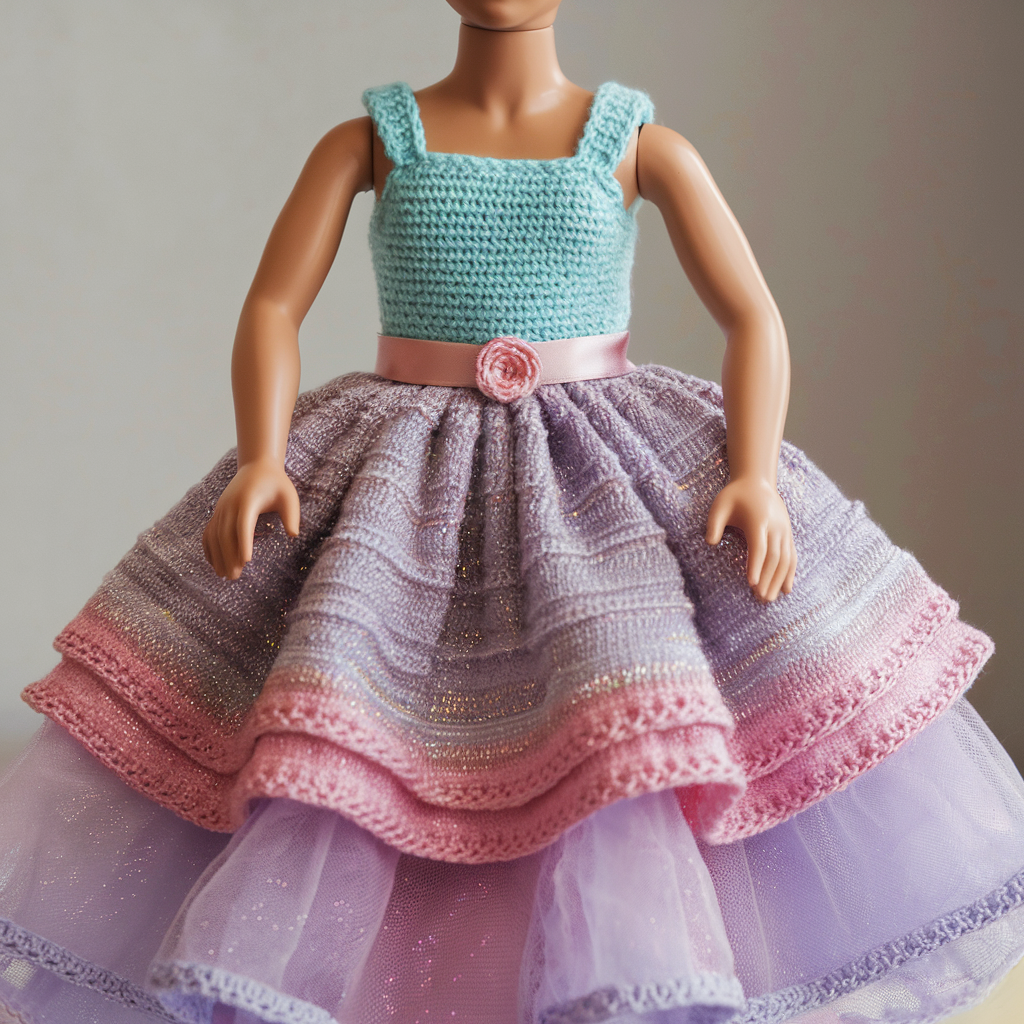
A sparkly party dress with a fitted bodice and layered shimmery skirt. (No actual Disney copyrighted character details — just princess-esque shimmer.)
Skill level: Intermediate (beads/lurex optional)
Materials: DK or sport yarn + one strand of metallic thread held together for sparkle (optional), 3.25–3.5 mm hook, small snap. Approx 150–200 yds. Use fine tulle or organza for underskirt if you want structure.
Sample finished size: fitted bodice ~12.5″ circumference; full skirt length ~10–11″ (floor-length on many dolls).
Bodice math (sample)
Same as Pattern 1: target 12.5″ circumference → 50 sts around at bodice top.
Construction idea
- Bodice: crochet short tube in dc for shape, add back opening.
- Skirt: join to lower edge and work multiple rounds with increases for fullness; optionally attach tulle underskirt.
Step-by-step (bodice then skirt)
- Bodice tube: Ch 51 (50 stitches + turning) and join into a ring (avoid twist). R1: dc in each ch around (50 dc). R2–R6: dc around to create a fitted tube (taller bodice may need 6–8 rows). Add a small button/snap at back or leave a slit and make a chain tie.
- Armhole shaping (optional): If you want shoulder straps rather than a strapless look, work two strap sections: fold tube flat, seam back leaving a small slit for closure and make straps later by chaining and sc across.
- Skirt attachment: Join yarn at lower edge. To create a full skirt, increase aggressively:
- Round 1 of skirt: dc in next 2 sts, inc in next st repeat around → this adds roughly 1 increase per 3 sts. With 50 sts, increases ≈ 16 → new count ≈ 66 sts.
- Round 2: dc in next 2 sts, inc again → increases more; repeat for 2–4 rounds until skirt is as full as desired (each round multiplies fullness).
- Layering & shimmer: For extra volume, sew a gathered tulle underskirt that’s slightly shorter than crochet skirt and attach it under the crochet rounds. Alternatively hold a strand of metallic thread with your work for the first 2 skirt rounds.
- Finishing touches: Add a picot edge, sequined trim, or tiny rosette at the waist (crochet 3–4 ch loops rolled into flower) to make it royal. Add a sash ribbon.
Fit tips & variations
- For a ball gown silhouette, make 6–8 increase rounds and add a reinforced waistband.
- Avoid heavy beads if the doll will be posed — they can pull the yarn out of shape.
3. Crochet Doll Heart T-Shirt Pattern
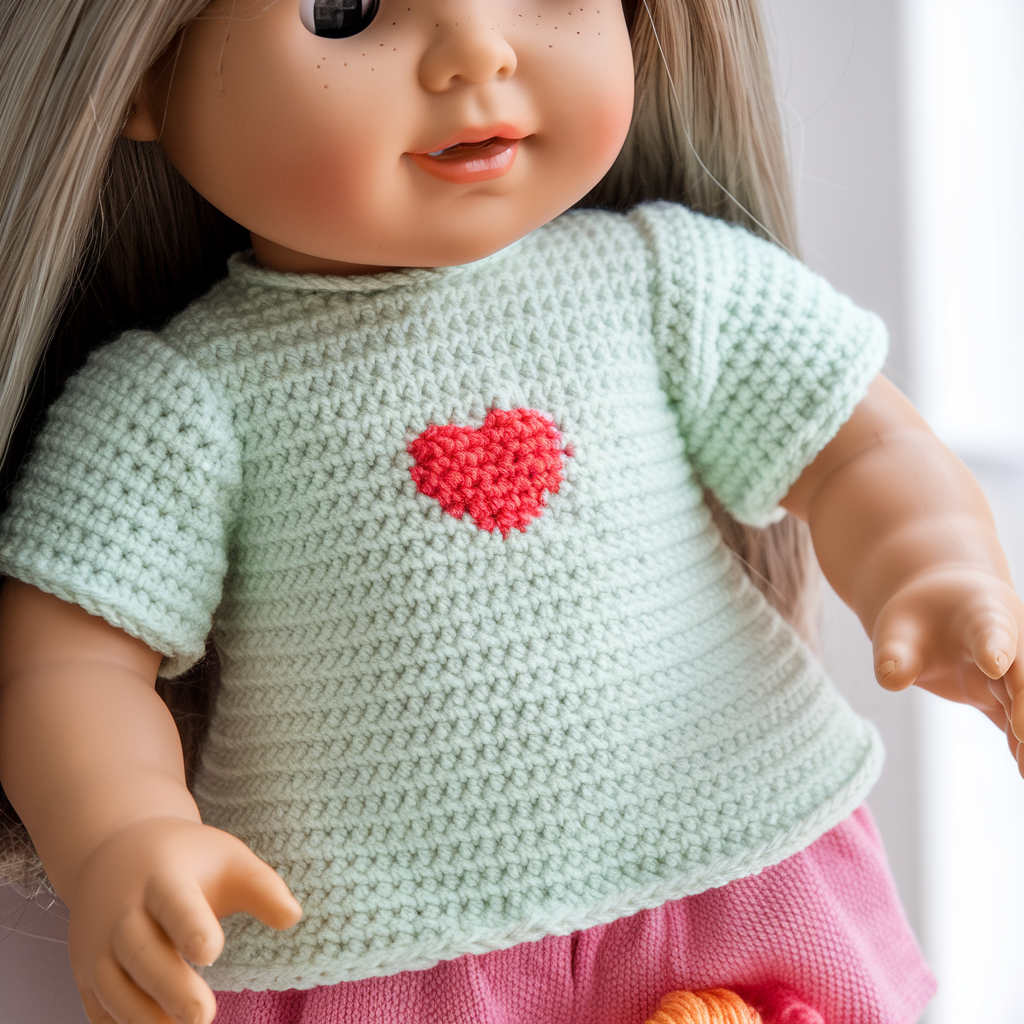
A casual crochet T-shirt with a heart motif on the front. Works flat or in the round.
Skill level: Confident Beginner
Materials: worsted or DK cotton, 3.5–4.0 mm hook, tapestry needle. Approx 80–120 yds.
Sample finished size: short-sleeve tee, chest circumference ≈ 12.5″ finished.
Construction idea
Worked flat as two panels (front/back) then seamed at shoulders/sides. Add intarsia heart or surface embroidery.
Step-by-step (flat panels)
Front & Back panels (each)
- Stitches for width: 12.5″ finished × 4 sts/in = 50 sts around → half panel = 25 sts. So ch 26 for each panel foundation. (Compute: 50 ÷ 2 = 25; ch26 to get 25 sc across.)
- Row1: sc in 2nd ch from hook and across (25 sc). Turn.
- Work Rows 2–Rows 12 (or until underarm height ~3.5″ from shoulder): sc across. (Estimate rows: 3.5″ × 4 rows/in = 14 rows; adapt.)
- Armhole shaping: For short sleeves, leave top 2″ open for armholes: continue sc across but stop 3–4 stitches short at edges or bind off small side sections to create slight armholes, or just seam and leave a straightforward opening.
- Neckline shaping: For front panel, after desired shoulder height, decrease a few stitches at center to make a rounded neckline (sc2tog at center 2–3 times).
Sleeves (make 2)
6. Ch 16 (for small sleeve circumference), join and work in rounds for 4–6 rounds to create short sleeves, or make a rounded sleeve by crocheting a small rectangle 16 × 6 rows and seaming.
Heart motif (intarsia or surface):
7. Use charted intarsia while crocheting front or embroider a heart after finishing. For surface embroidery, chain a little heart and stitch, or use duplicate stitch.
Assembly
8. Seam shoulders and sides with mattress stitch leaving armholes. Attach sleeves and seam underarm. Add small trim around neck with sc rounds.
Variations
- Make a long-sleeve version by working sleeves longer and adding rib cuffs.
- Use stripes for a nautical look—change color every 4 rows.
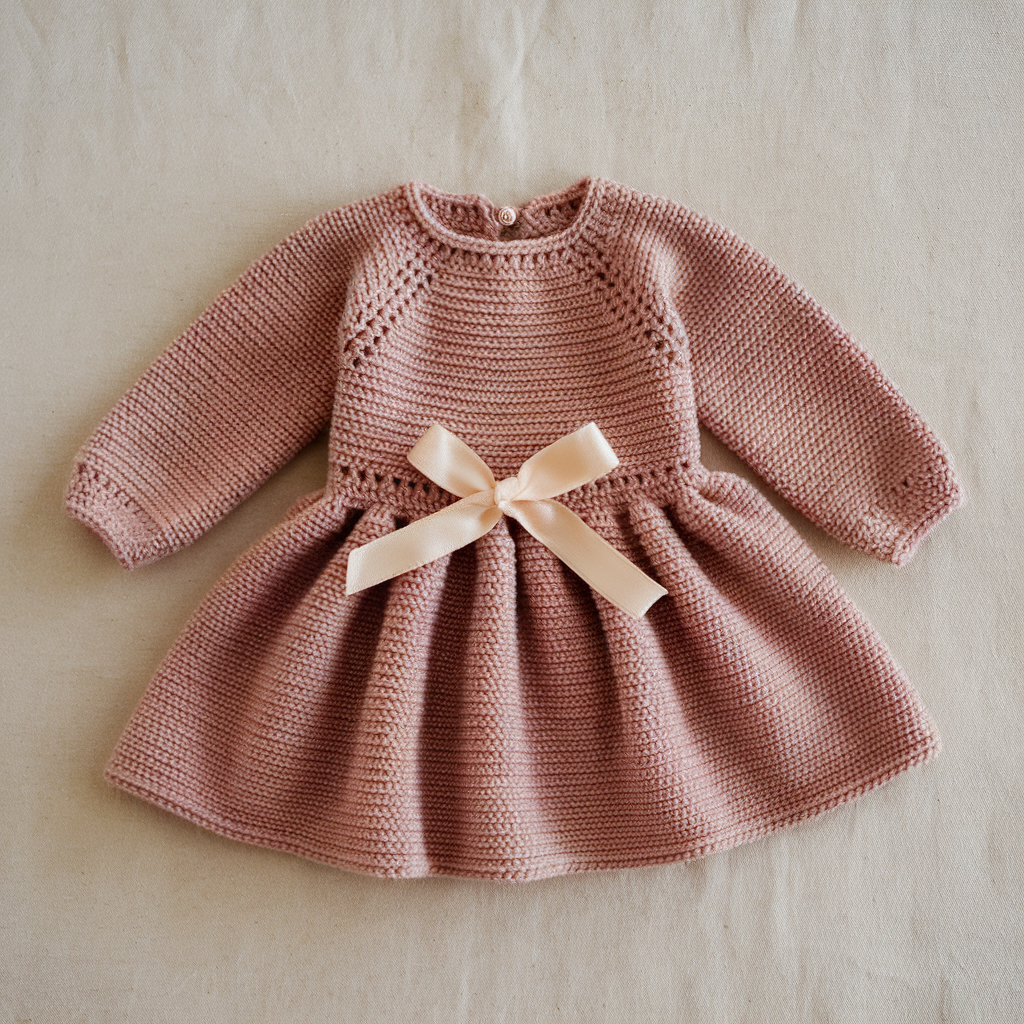
4. Crochet Doll Dress with a Bow Pattern
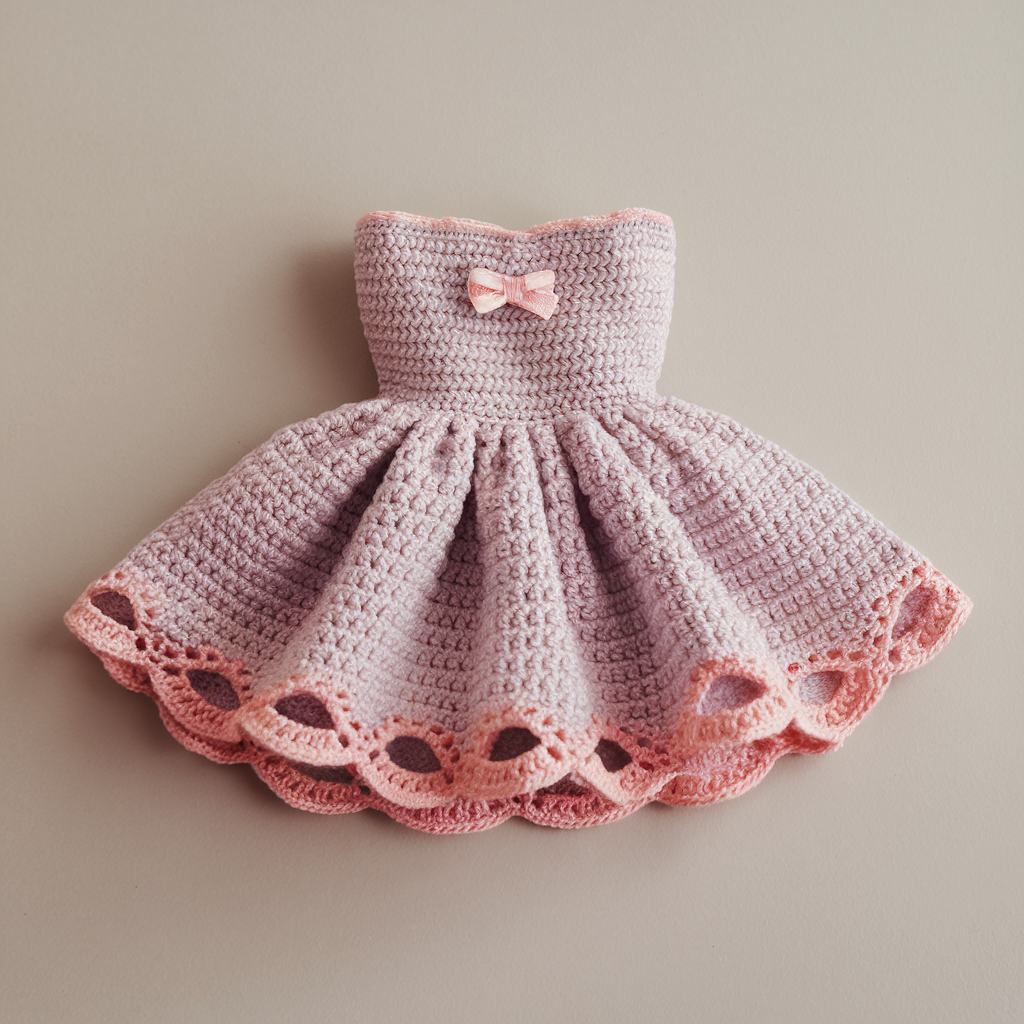
A cute easy dress with a removable decorative bow (or wearable as a bow-front dress).
Skill level: Confident Beginner
Materials: DK cotton, 3.5 mm hook, small snap or Velcro for back closure, safety pin or stitch to attach bow. ~100 yds.
Sample finished: bodice 12.5″ circumference; skirt length 6–7″ for playful mini dress.
Construction (tube dress + bow)
- Bodice tube: Ch 51 and join (50 sts) or MR 50 sc. Work 6–8 rounds of hdc for a neat fitted bodice.
- Skirt: Join yarn and work increase round: sc 4, inc around to add flare; repeat one or two times. Continue even until desired skirt length.
- Bow: Make a rectangle: ch 18, sc rows until the rectangle measures ~1″ tall (or a size proportional to doll). Pinch center and wrap with a small crocheted band (ch 6, sc rows) to form the bow. Sew a small snap or loop on the back of the bow so it’s removable and can be pinned to the dress with a tiny safety pin or sewn loop.
- Finishing: Add a lace or picot hem, weave ends, and add back closure.
Fit tips
- Bow on front by sewn-on snap allows mixing outfits: clip it on jacket, hat, or dress.
- For a sash bow, make longer band to tie into bow.
5. Crochet Doll Jacket Pattern
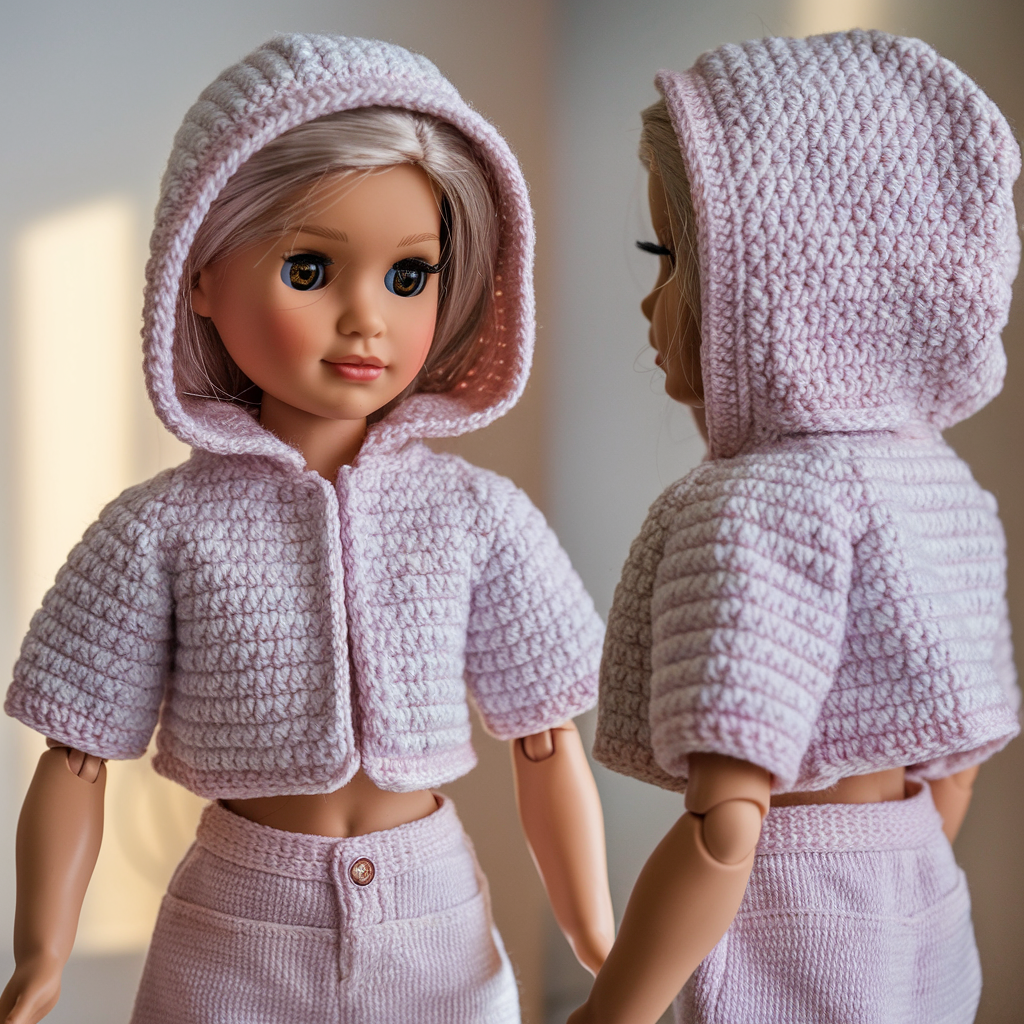
A cropped jacket with simple shaping — great for layering over any doll dress.
Skill level: Beginner → Confident Beginner
Materials: worsted or DK yarn, 3.5–4.0 mm hook, small buttons (optional), ~80–120 yds.
Sample finished: cropped to waist, chest opening with small overlap for buttons: chest circumference finished 12.5″.
Construction idea
Worked flat in back and two front panels, then seamed. Add collar or hood optionally.
Step-by-step (flat panels)
Back panel
- Ch 26 for half-body width (25 sts across) — remember 25 × 2 = 50 sts around. Row1: sc across 25 sc. Turn.
- Row2–Row12 (or until back height ~4–5″): sc across to desired length. Fasten off.
Front panels (make 2)
3. Ch 13 (12 sts across). Row1: sc across 12 sc. Repeat until panel height matches back. For left/right front, you can shape neckline by decreasing 1 st at neck edge for the last 6–8 rows.
Sleeves
4. Make small rectangles for sleeves: ch 16, sc across 16 for about 4–5 rows to create short sleeve that is folded and seamed.
Seaming
5. Seam shoulders and sides with mattress stitch leaving armhole openings. Sew sleeves into armholes and seam underarm. Add a small collar by picking up stitches around the neck and working a rib (BLO hdc) for 6–8 rows.
Closure
6. Sew on three small buttons and corresponding loops, or use tiny snaps.
Variations
- Add pockets by crocheting small squares and sewing to front.
- Make a hood by picking up stitches around neckline and working back & forth increasing for hood shape.
6. Crochet Doll Dress and Panty Pattern

A two-piece set: sweet dress with little panty/undergarment — great for modest play.
Skill level: Confident Beginner
Materials: DK cotton, 3.25–3.5 mm hook, small elastic or stitch count to keep panty snug. ~80–120 yds.
Dress (simple pull-on sundress)
- Bodice chain: ch 51 (50 sts), join; R1–R6 dc for bodice height. Add straps by chaining and joining to back. For skirt attach yarn and increase every 4th st to create slight flare. Finish with scalloped hem.
Panty (briefs)
- Make a small oval: ch 20, sc across to form base. Work 4 rounds even to get width. Fold and seam the center back leaving a leg openings. Finish with elastic or tight sc in the leg openings for snug fit.
Assembly & fit
- Try panty on doll before adding waist elastic or before closing completely. The panty should be snug but not so tight it splits yarn. Use a narrow ribbon threaded through a chain waist for adjustability.
7. Crochet Bright Doll Dress Pattern
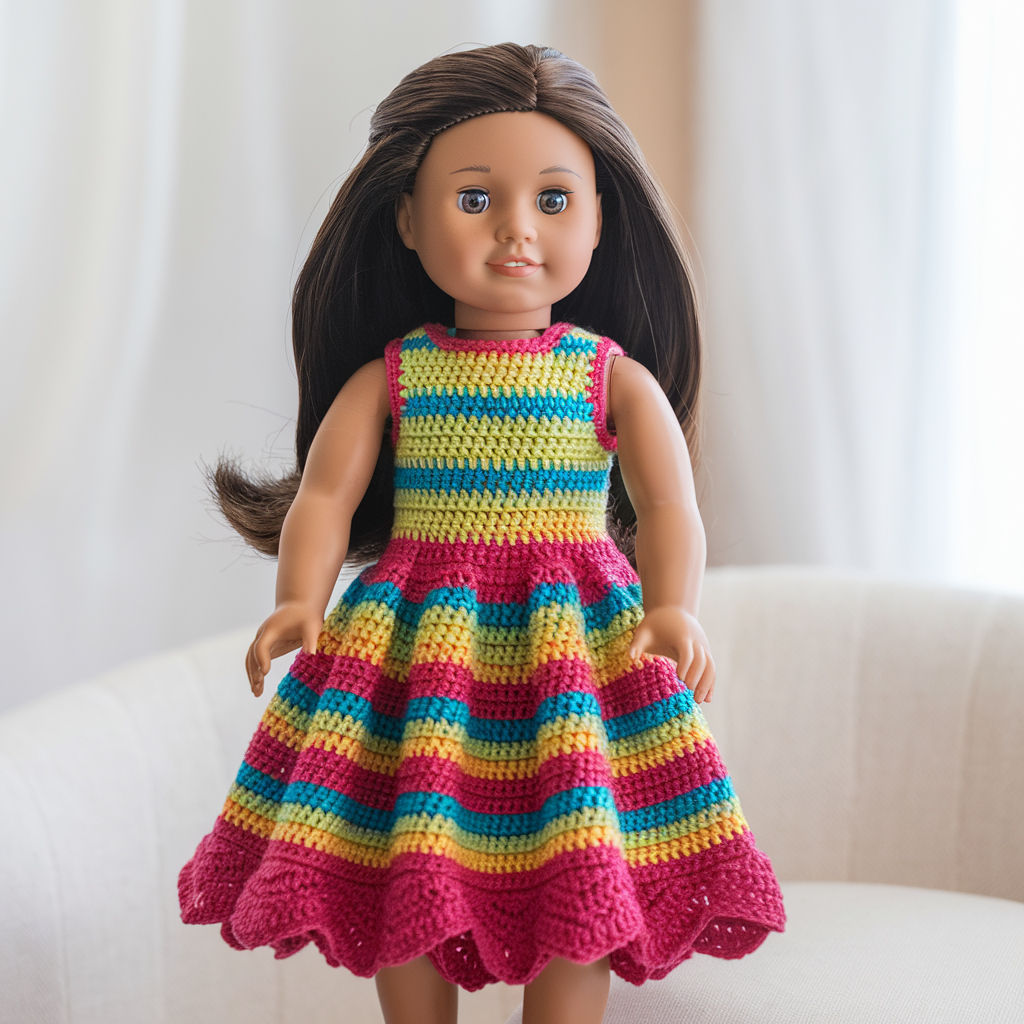
A playful colorful dress that uses stripes and a bold hem — quick and cheerful.
Skill level: Confident Beginner
Materials: variety of DK cotton in bright colors, 3.5 mm hook, ~100–150 yds.
Sample finished: bodice same as other patterns (50 sts), skirt mid-length ~6–7″.
Construction
- Bodice tube: ch 51 join, dc rounds 6–8 rows. Change color for a stripe every 2 rows.
- Skirt: join bright contrasting color and do increase round (sc 3, inc) to add flair. Repeat 2–4 increase rounds for full skirt.
- Hem: Add contrasting scallop edge or fringe.
Variations
- Use variegated yarn for a rainbow effect.
- Swap in a dup of lace for a vintage-y hem.
SCALE-UP / SCALE-DOWN QUICK GUIDE (if your doll is not 18″)
- Measure the doll chest circumference (C_doll).
- Choose ease (E): 0.25–0.5″ for snug tops; 1.0″ for casual/loose fit; 2.0″+ for oversized looks.
- Finished circumference = C_doll + E.
- Stitches needed = (Finished circumference) × (sts per inch from your swatch). Round to nearest even number if your stitch repeat requires it.
- If pattern uses increases every N stitches, adjust increase pattern to reach desired final count.
Example quick swap: If doll chest = 11″ and your gauge is 4 sts/in and you want 0.5″ ease: (11 + 0.5) × 4 = 46 sts total. Half-panel = 23 stitches if working flat.
Finishing & fasteners — practical notes
- Closures: small snaps and Velcro dots are easiest. Buttons need reinforced backing (small leather patch or extra stitches).
- Seams: mattress stitch gives a neat join that sits flat; for tiny seams whipstitch is fastest.
- Blocking & shaping: steam-block lightweight yarns to settle stitches. Wool items can be wet-blocked gently.
- Care tags: add small paper tags with yarn content and wash instructions (hand wash wool; cotton machine gentle) — people like this.
conclusion
There. Seven adult-playable doll-clothes patterns that actually fit dolls and survive being changed a dozen times a day. The single most important things: measure your doll, swatch, and test fit before finishing.