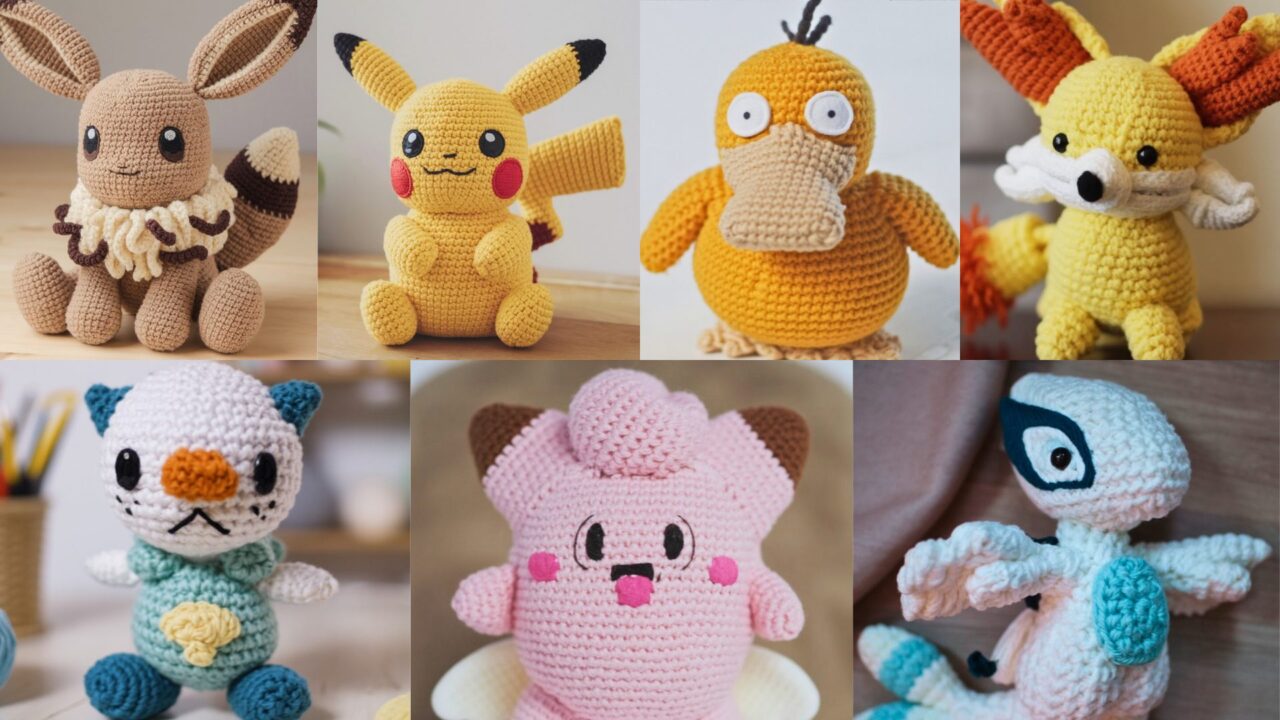
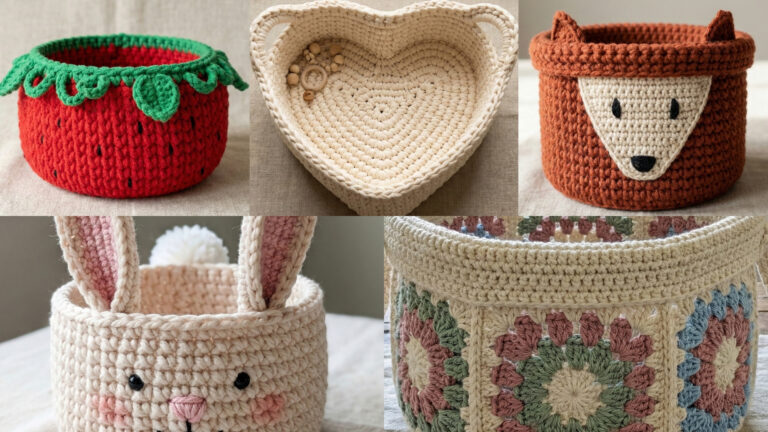
If you love cuddly handmade creatures, Pokémon are an irresistible playground for amigurumi. This collection of seven detailed patterns walks you through making pocket-sized versions of Pikachu, Oshawott, Eevee, Fennekin, Lugia, Clefairy, and Psyduck. Each pattern includes skill level, finished size, materials, clear round-by-round instructions (US terms), assembly notes, safety tips, and variation ideas so you can customize color, size, and personality. I’ve written these patterns to be beginner-friendly where possible and detailed enough for more experienced makers to tweak. Ready your hook and stuffing — let’s bring these Pokémon pals to life!
1. Pikachu Amigurumi Crochet Pattern
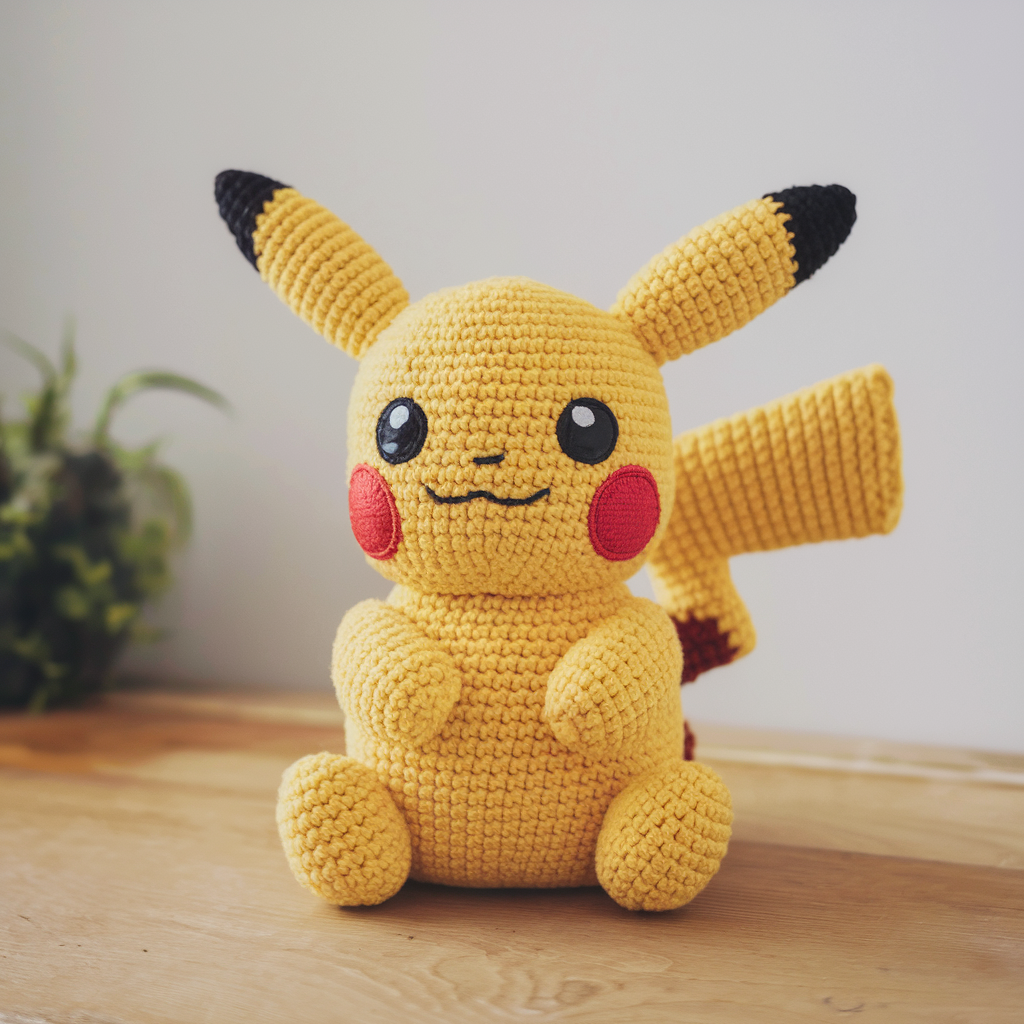
Skill level: Beginner–Intermediate
Finished size: ~6″ (15 cm) tall using worsted weight yarn & 3.5–4.0 mm hook (adjust with yarn/hook)
Materials
- Worsted weight (#4) yarn: yellow, brown, black, red (small amounts)
- Hook: 3.5 mm (E) or 4.0 mm (G) to make a tight fabric
- Safety eyes: 6–8 mm (or embroider eyes)
- Polyfill stuffing
- Tapestry needle, stitch marker, scissors
- Optional: small piece of felt for cheeks if not crocheting
Abbreviations (US)
- MR = magic ring, ch = chain, sl st = slip stitch, sc = single crochet, inc = 2 sc in same st, dec = single crochet decrease
Head
- MR, 6 sc into ring. (6)
- Inc each st around. (12)
- Sc, inc around. (18)
- 2 sc, inc around. (24)
- 3 sc, inc around. (30)
6–11. Sc around for 6 rounds (30). - 3 sc, dec around. (24)
- 2 sc, dec around. (18)
- Insert safety eyes between rounds 8–9 about 7–8 sts apart. Place blush/cheeks markers at appropriate spots.
- Sc, dec around. (12)
Stuff firmly. - Dec around to close. (6) — fasten off and weave end.
Body
- MR, 6 sc into ring. (6)
- Inc each st around. (12)
- Sc, inc around. (18)
- 2 sc, inc around. (24)
5–10. Sc around for 6 rounds. (24) - 2 sc, dec around. (18)
- Sc, dec around. (12)
Stuff firmly and leave tail for sewing. Do not fully close — leave opening to sew to head.
Arms (Make 2)
- MR, 6 sc into ring. (6)
2–6. Sc around for 5 rounds (6). Stuff lightly and flatten, ch 1 and sl st through both loops to form a flat hand. Fasten off leaving tail.
Legs (Make 2)
- MR, 6 sc into ring. (6)
- Inc in each st (12)
3–6. Sc around for 4 rounds (12). Flatten at top for a flat foot. Fasten off leaving tail.
Ears (Make 2)
- With yellow: ch 2, 4 sc in 2nd ch from hook (or MR 4). (4)
- Sc, inc twice. (6)
- Sc around for 3–4 rounds to desired length (6). For black tips, switch to black for last 1–2 rounds and work BLO to give a pointed effect. Fasten off leaving tail.
Tail
- Chain 6–10 depending on desired tail length; sc back along foundation chain, working increases on angled sides to make a zig-zag/lightning shape. Alternatively crochet two flat panels, stuff lightly, and seam together.
Assembly
- Sew head to body securely — center head on body opening.
- Sew arms to sides of body about one round below head seam.
- Sew legs to bottom front so Pikachu can sit.
- Attach ears to top of head, angled slightly outward.
- Sew tail to back center.
- Embroider or sew brown stripes across back as Pikachu markings (two short brown strips). Add small embroidered mouth and nose with black yarn. Sew or attach red cheeks (crochet small circles or felt).
Safety & Finishing
- For toys for young children, embroider eyes and mouth rather than using safety eyes. Secure seams well.
- Use a small amount of blush (fabric-safe) for cheeks or crocheted circles.
Variations & Tips
- Make mini Pikachus using sport yarn & smaller hook.
- Poseable version: insert pipe cleaners or thin wire in arms/legs for adjustable limbs (not recommended for kids).
- To make Pikachu sitting, add a small flat base by crocheting a disc and attaching the feet to it.
2. Oshawott Amigurumi Crochet Pattern
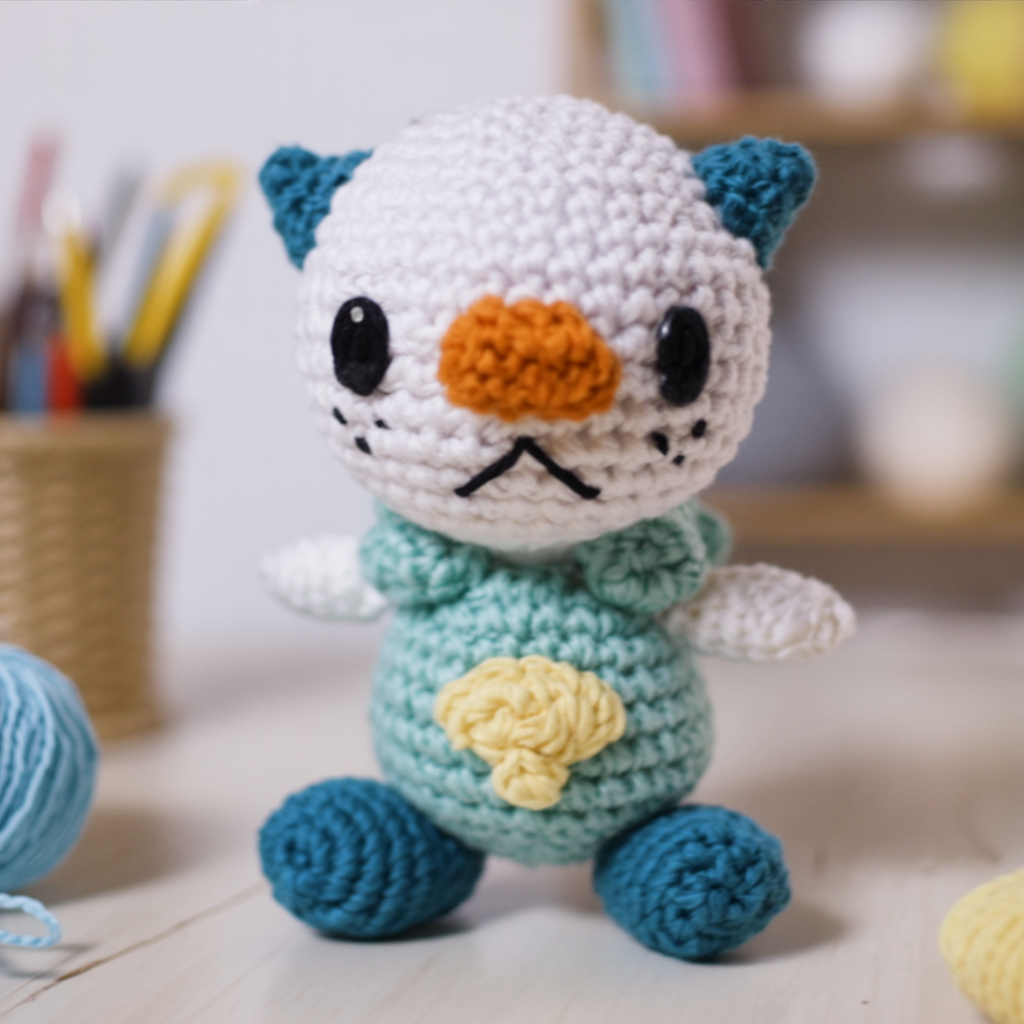
Skill level: Intermediate (small shaped muzzle + shell appliqué)
Finished size: ~5–6″ (13–15 cm) tall
Materials
- Worsted weight yarn: white (face/body), light blue (body), dark blue (shell), navy (ears details), black for eyes
- Hook: 3.5–4.0 mm
- Safety eyes 6 mm (or embroider), polyfill, yarn needle, stitch marker
Head / Body (worked as one spherical body with slight egg shape)
- MR, 6 sc. (6)
- Inc each st around. (12)
- Sc, inc around. (18)
- 2 sc, inc around. (24)
- 3 sc, inc around. (30)
6–9. Sc around for 4 rounds (30). Switch to light blue on round 6 to make top of body white and lower body blue. - 3 sc, dec around. (24)
- 2 sc, dec around. (18)
- Sc, dec around. (12) — stuff as you go.
- Dec to close to 6 stitches and finish.
Muzzle (white oval)
- MR, 6 sc. (6)
- Inc each st (12)
- Sc, inc around (18). Flatten and leave tail. Sew onto front of head slightly lower than center. Add small embroidered nose and a smile.
Flippers (Make 2)
- MR, 6 sc. (6)
- Sc, inc around. (9)
3–5. Sc around for 3 rounds, shape by decreasing at the base to make a paddle. Fasten off with long tail to sew.
Feet (Make 2 small ovals)
- Ch 6, sc in 2nd ch from hook and across (5). Turn.
2–3. Sc across for 2–3 rows. Flatten and sew to bottom front.
Shell (“Scalchopper”)
- With dark blue, MR, 6 sc. (6)
- Inc each st (12)
- Sc, inc around (18)
- Sc around for 1–2 rounds, then surface crochet a circle or add a darker appliqué edge. Sew centered on chest.
Assembly
- Attach muzzle centered on front, slightly lower than eye line.
- Sew flippers on either side of body. Attach feet to base.
- Sew shell appliqué to chest. Embroider small facial details: eyebrows, smile.
Tips
- Use a small amount of felt inside muzzle to keep shape stable, sewn in place.
- For a squishier look, use a soft puffy yarn for body.
3. Eevee Amigurumi Crochet Pattern
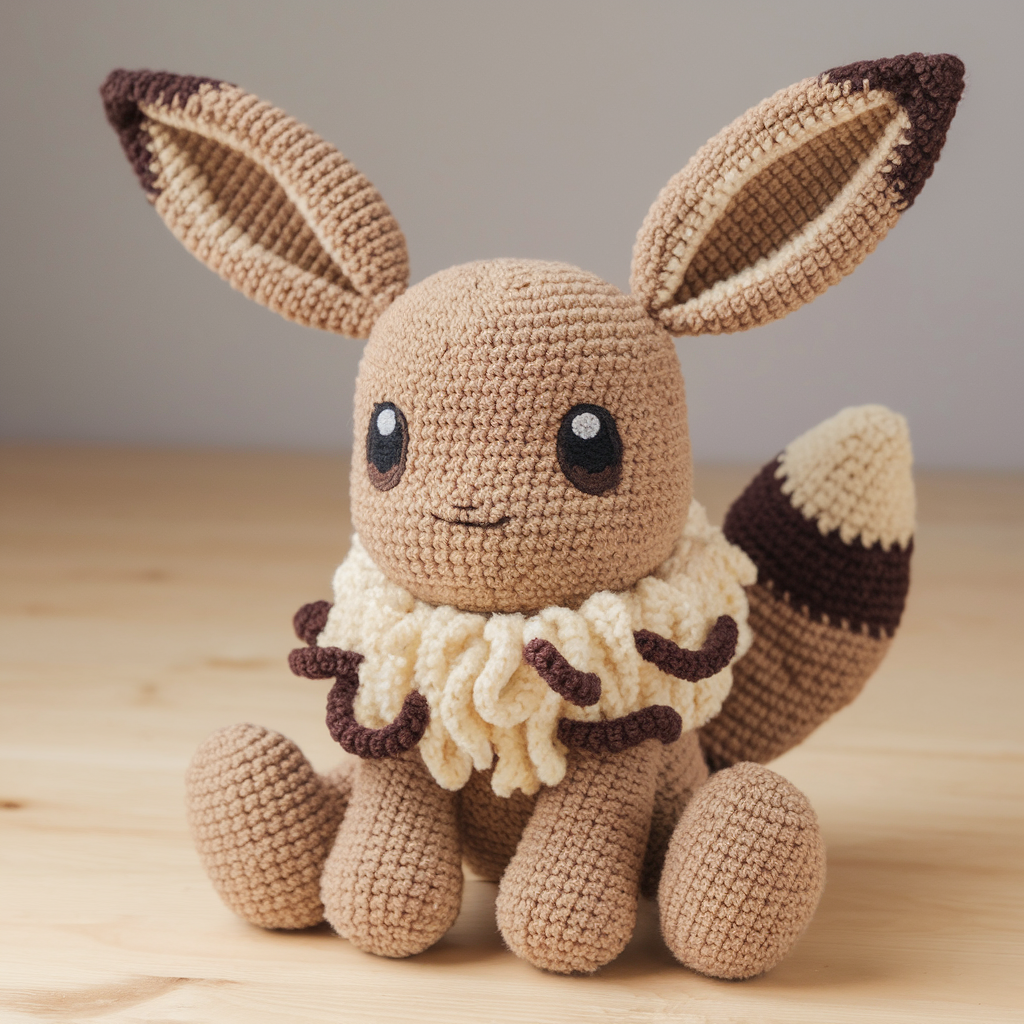
Skill level: Intermediate (collar shaping and long ears)
Finished size: ~6–7″ (15–18 cm) tall
Materials
- Worsted weight yarn: brown (body), cream (collar, inner ear), dark brown (ear tips & tail tip)
- Hook: 3.5–4.0 mm
- Safety eyes 6–8 mm, polyfill, yarn needle, stitch marker
Head
Follow the same spherical head instructions as Pikachu but slightly larger (work increases to 36 sts before even rounds):
- MR 6, inc to 12, sc inc to 18, 2 sc inc to 24, 3 sc inc to 30, 4 sc inc to 36. Work 4–6 rounds even, then decrease in reverse.
Place eyes between rounds 9–10 spread about 8–9 sts.
Body
Start smaller, similar to Pikachu but proportioned slender:
- MR 6, inc to 12, sc inc to 18, 2 sc inc to 24. Work 6–8 rounds even, then decrease after shaping for neck.
Ears (Make 2 long ears)
- Ch 2, 4 sc in 2nd ch (or MR). (4)
- Sc, inc twice (6)
3–8. Sc around increasing at base slightly if you want broader ear base. For inner ear, use cream and sew into ear to give layered look. Add dark brown tip with color change in last 1–2 rounds.
Tail (big bushy tail)
- Ch 8, sc back along chain (7), then work rounds around to make a flat, wide tail. Add increases on outer edges to give a triangular bushy shape. Add dark tip with last 2 rounds in dark brown. Lightly stuff and sew to back.
Collar (fluffy cream collar)
Make a ruff: ch 16, into chain sc, ch 3, skip 1 to make loops; or crochet small puff stitches around a chain to give fur effect. Make enough length to wrap around neck and sew into place.
Legs & Arms
Similar to Pikachu, but slightly narrower; make 2 legs, 2 arms. For sturdier sitting, place legs slightly turned out and use a short stitch seam.
Assembly
- Attach head to body firmly.
- Sew ears to top of head, positioned slightly forward and angled out.
- Add collar by sewing base around neck, cover seam.
- Attach tail centered at back.
- Embroider tiny nose and mouth; add whisker dots if desired.
Tips & Variations
- Make baby Eevee by using DK yarn and smaller hook.
- To create different Eeveelutions, change ear/ tail colors and add small details (flame for Flareon, electric tuft for Jolteon).
4. Fennekin Amigurumi Crochet Pattern
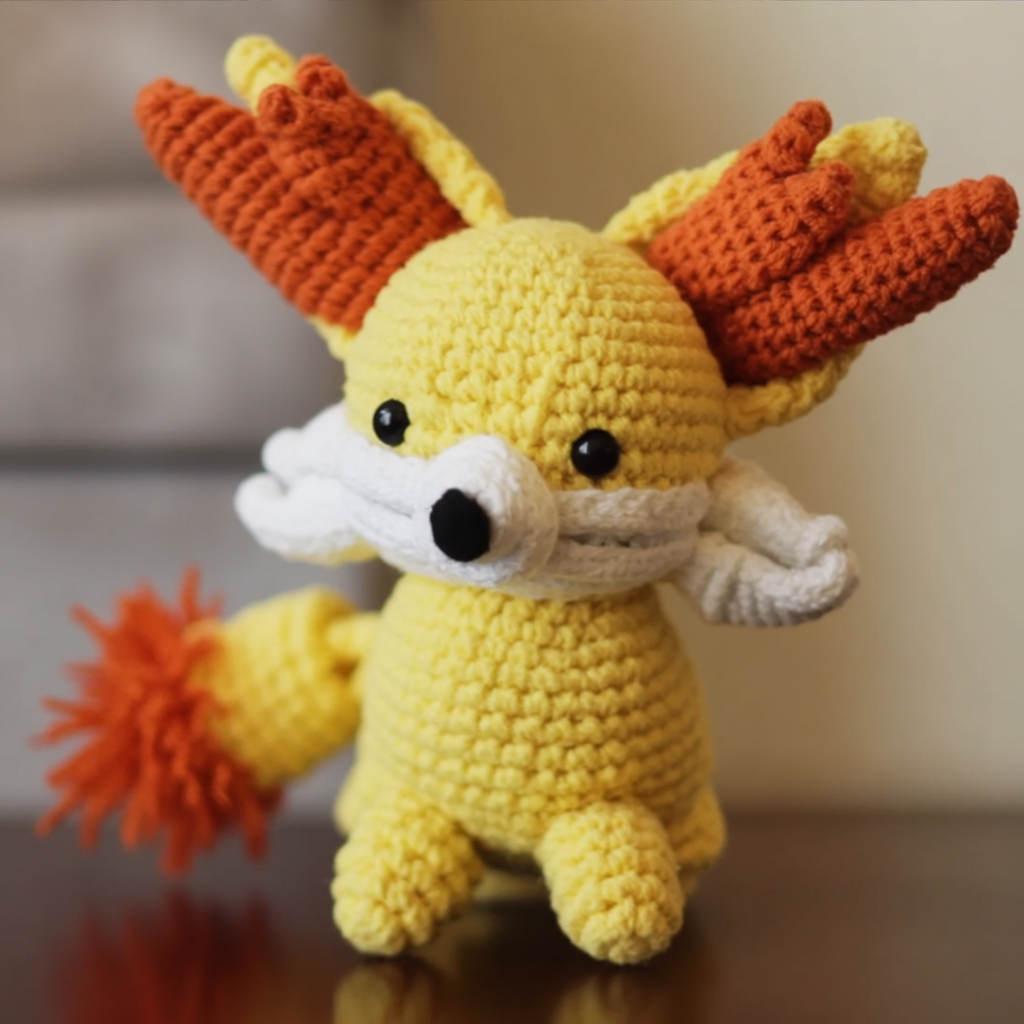
Skill level: Intermediate (shaping of muzzle and large ears)
Finished size: ~5–6″ (13–15 cm) tall
Materials
- Worsted yarn: pale cream (body), orange (ear tufts & tail), dark orange or red for inner ear shading
- Hook: 3.5–4.0 mm
- Safety eyes 6 mm (or embroidered), polyfill, yarn needle
Body & Head
Work head as a slightly elongated sphere (wider than tall) with white muzzle sewn on (same technique as Oshawott muzzle but more tapered). Body slightly pear-shaped.
Large Ears (make 2)
Because Fennekin’s ears are prominent, make them from two layered pieces:
- Inner ear: cream, ch 8, sc back along chain, then work rounds around the chain to form a long triangular panel.
- Outer ear: orange, same size but add extra row at base so orange shows when sewn. Sew inner to outer and stuff lightly at base to give rigidity. Add extra tuft of orange yarn that is sewn into the ear opening.
Tail
Make a long tapered tail with color changes: start cream, change to orange at the tip and add tuft.
Legs and Arms
Small legs and arms as simple tubes or flattened ovals.
Assembly & Face
- Sew muzzle with small embroidered nose and mouth.
- Position ears high and slightly forward.
- Attach tail to back and add a few embroidered accent lines on tail to make it feathery.
Tips
- Use wire inside ear base for posing (not for small children).
- Use fuzzy/eyelash yarn for ear tufts for extra fluff.
5. Lugia Amigurumi Crochet Pattern
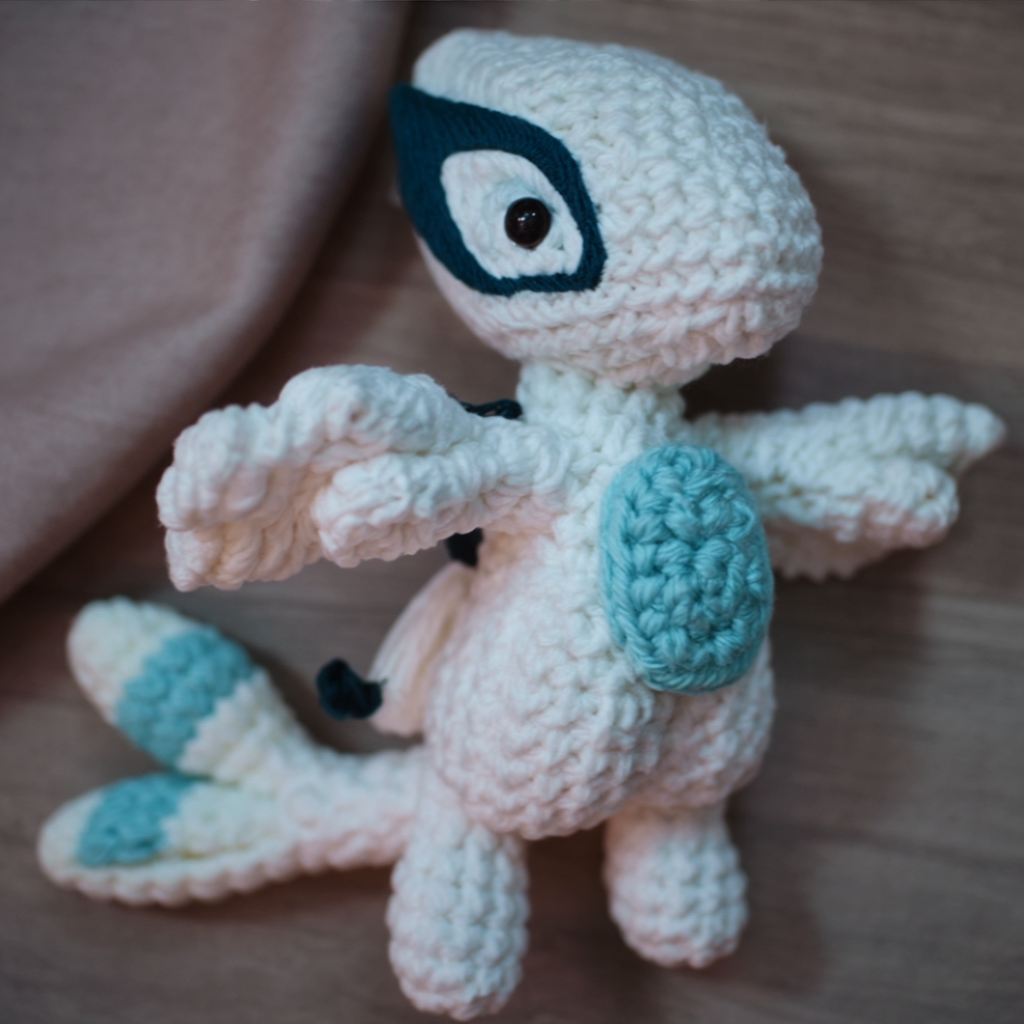
Skill level: Advanced (wing shaping, long neck & tail)
Finished size: ~10–12″ (25–30 cm) wingspan depends on yarn/hook — this is a larger project.
Materials
- Worsted or aran weight yarn: white (body), pale blue (belly, wing accents), navy (eye markings)
- Hook: 4.0–5.0 mm
- Safety eyes 8–10 mm or embroidered eyes, polyfill, wires for wing pose (optional), yarn needle
Body & Neck
Lugia is dragon-like with a long neck. Work an elongated body with the head worked as smaller oval and the neck as a tube connecting head and body.
Head
Start MR 6, inc to 12, 18, 24 — keep rounds short and sew head to a long neck tube of 6–8 rounds at consistent stitch count.
Body
Work a larger oval shaped body by increasing to 40–50 sts depending on desired size, work even rounds for body height, then decrease towards tail end.
Wings (Make 2)
Wings are large and flat with a fin-like shape:
- Chain a long foundation (ch 30–40 depending on wingspan).
- Work rows of hdc/dc back and forth, decreasing on one side to form a tapered fin. Add pale blue decorative stripes via surface crochet or color changes. Make two identical panels and seam around lightly, stuffing the base only for stability. Optionally insert thin wire into wing channel to pose wings.
Tail
Long tapering tail worked in rounds, gradually decreasing to a point. Add finlets on the tail top by crocheting small pointed triangles sewn along the dorsal side.
Legs & Feet
Short stout legs with three toes: make a small tube and crochet separate toe pieces (three little arcs) and sew to foot base.
Assembly
- Attach neck and head to body.
- Sew wings to shoulder area; reinforce with extra stitching. If using wire, enclose wire in a crocheted channel.
- Attach tail and legs. Embroider navy eye markings and add small embroidered mouth.
Tips & Variations
- Because Lugia is large, consider sewing a fabric lining for wings for cleaner seams.
- For collectors, make a smaller keychain-sized Lugia using DK yarn and 2.5–3.0 mm hook.
6. Clefairy Amigurumi Crochet Pattern
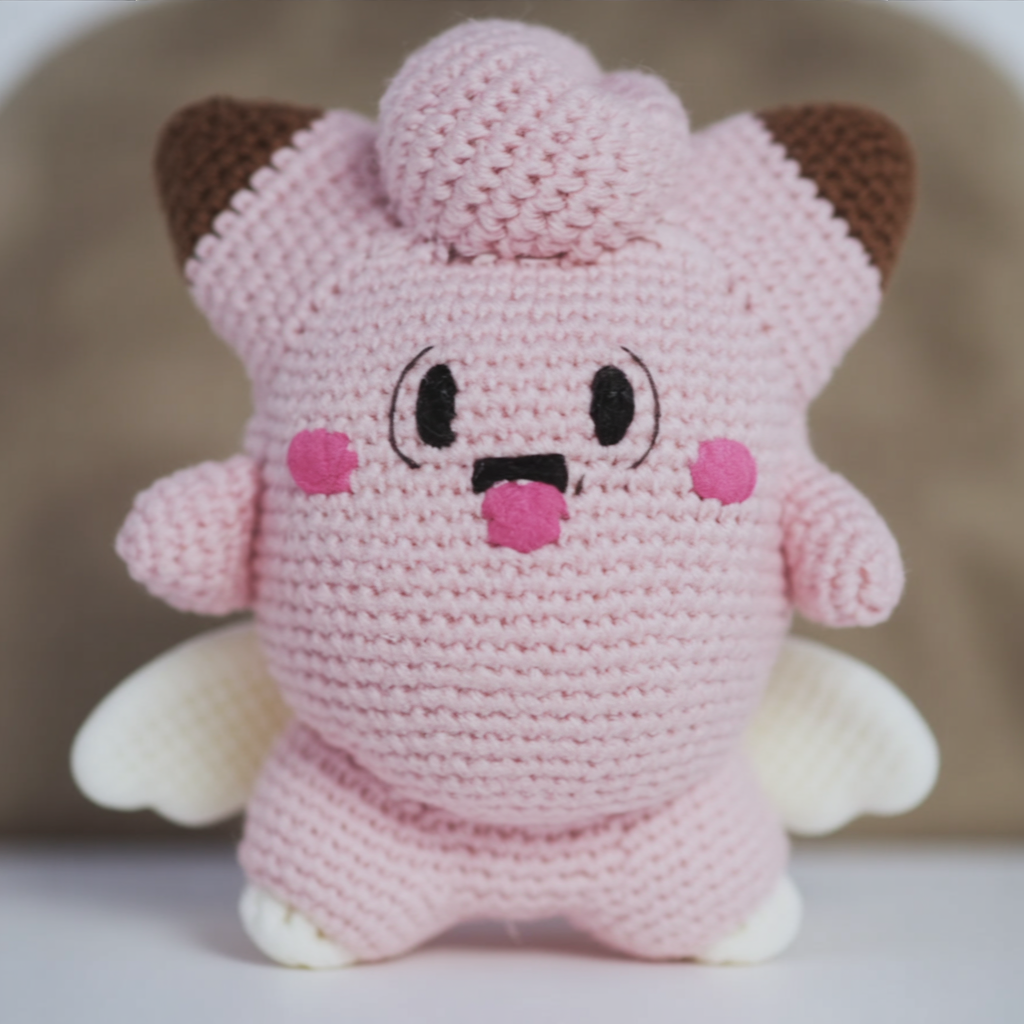
Skill level: Beginner–Intermediate (simple rounded shapes + small wings)
Finished size: ~5″ (12–13 cm) tall
Materials
- Worsted yarn: pale pink, darker pink for cheeks, white for wings
- Hook: 3.5–4.0 mm
- Safety eyes 6–8 mm (or embroidered), polyfill, yarn needle
Head & Body (joined/seamless)
Work a round head and slightly squat body; Clefairy has a single rounded silhouette so you can crochet head and body as one piece or join head to body.
Head
- MR 6, inc to 12, 18, 24, 30; sc around for several rounds then begin to decrease as for a sphere. Insert eyes between rounds 7–8.
Body
After decreasing the head, join new color/continue to create a small body by increasing slightly and then decreasing to close at bottom.
Arms
Make small short stubs (MR 6, sc around 2–3 rounds) and flatten to create little hands.
Feet
Make tiny ovals (ch 5, sc across 4, 3 rows) and flatten.
Ears & Head Tuft
Small triangular ears: ch 3, sc across then work rows and decrease to make a pointed ear. Clefairy has a tuft at top — crochet a small bobble cluster and sew centered on head.
Wings (Make 2)
Small rounded wings:
- MR 6, inc to 12, sc, inc around to shape a small oval. Flatten and sew to back.
Assembly
- Place arms to sides, feet to bottom.
- Sew wings slightly below shoulder line.
- Add rosy cheeks: embroider small circles or sew crocheted rounds.
- Add a tiny mouth and sparkle in the eye with a white embroidered dot.
Tips
- For a kawaii look, use larger-than-proportion eyes and big cheeks.
- Use velvet chenille yarn for a squishy, plush Clefairy.
7. Psyduck Amigurumi Crochet Pattern
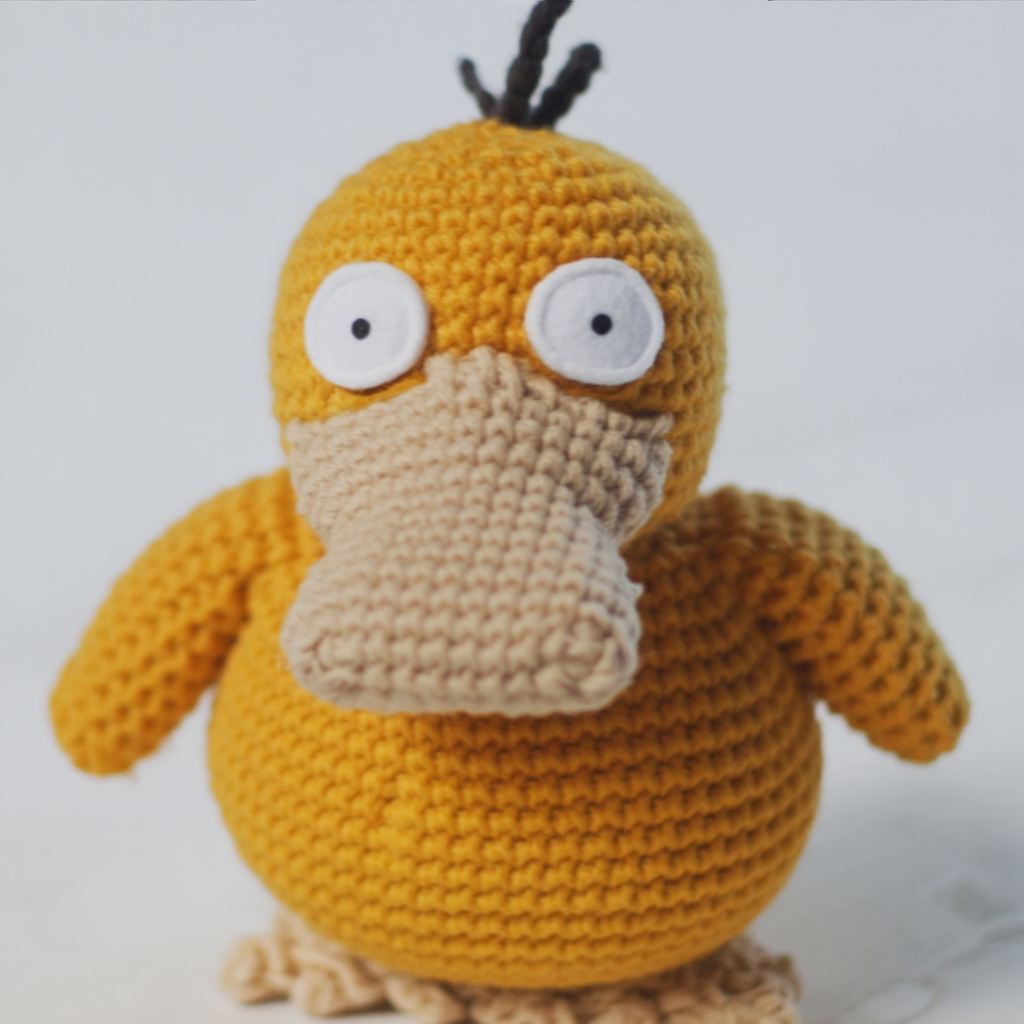
Skill level: Beginner–Intermediate (flat bill shaping)
Finished size: ~6–7″ (15–18 cm) tall
Materials
- Worsted yarn: yellow, orange for bill, black for eyes (or safety eyes)
- Hook: 3.5–4.0 mm
- Polyfill, yarn needle, stitch marker
Head & Body (one piece)
Psyduck has a round head/body, so work a large sphere a bit deeper than wide:
- MR 6, inc to 12, 18, 24, 30, 36. Work even for several rounds (36) to create the large bulbous head/body. Then decrease bottom and leave opening for stuffing.
Bill (flat, oval)
- Ch 12, sc in 2nd ch and across (11). Turn.
2–4. Sc across for 3 rows to make a flat oval. Round the ends by adding sc in side stitches to make an oval shape. Use orange yarn and stuff lightly if you want a slightly 3D bill. Sew centered on front of head with a small gap at top to create the confused Psyduck expression.
Feet & Arms
- Small triangular feet: ch 6, sc across (5), work a few rows and shape into webbed toes by sc two sections and leaving a small dividing stitch.
- Arms: MR 6, sc around 3–4 rounds and flatten.
Top Feather
Make three little spikes: ch 4, sc back along chain; make three and sew to top center.
Eyes & Expression
- Place safety eyes above bill or embroider round eyes for toy safety. Embroider little eyebrows to give Psyduck the classic puzzled look.
Assembly
- Sew bill firmly to face.
- Attach arms at sides low and feet at bottom front.
- Add top feather tuft.
Tips
- Use a smaller hook than yarn label suggests for tight stitches to keep stuffing concealed.
- To create the classic arms-holding-head look, crochet arms slightly longer so you can sew them positioned up near the head.
Conclusion
There you go — seven detailed, step-by-step amigurumi Pokémon patterns you can make today. Each pattern is designed to be approachable while giving room for your creativity: adjust yarn weight and hook size to scale, swap colors to make variants, and add embroidered or felt details to personalize each Pokémon. For safety, choose embroidered features for toys intended for small children and securely attach all small parts. If you’d like, I can convert any single pattern into a printable format, create photo-step illustrations for a particular pattern, or give stitch-count rounds charted for easier tracking — just tell me which one and I’ll write that next (no charge, no CTA). Happy crocheting — may your hook be swift and your stuffing even!


