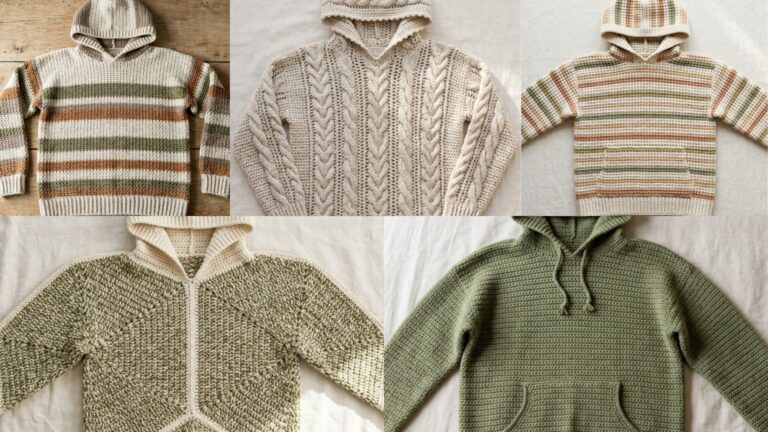
A crochet collar is one of the quickest ways to add instant vintage charm to a plain dress, blouse, or sweater. Detachable collars are especially lovely — they let you change the mood of an outfit in seconds and are excellent small projects that show off lace, motifs, scallops, and tiny stitches.
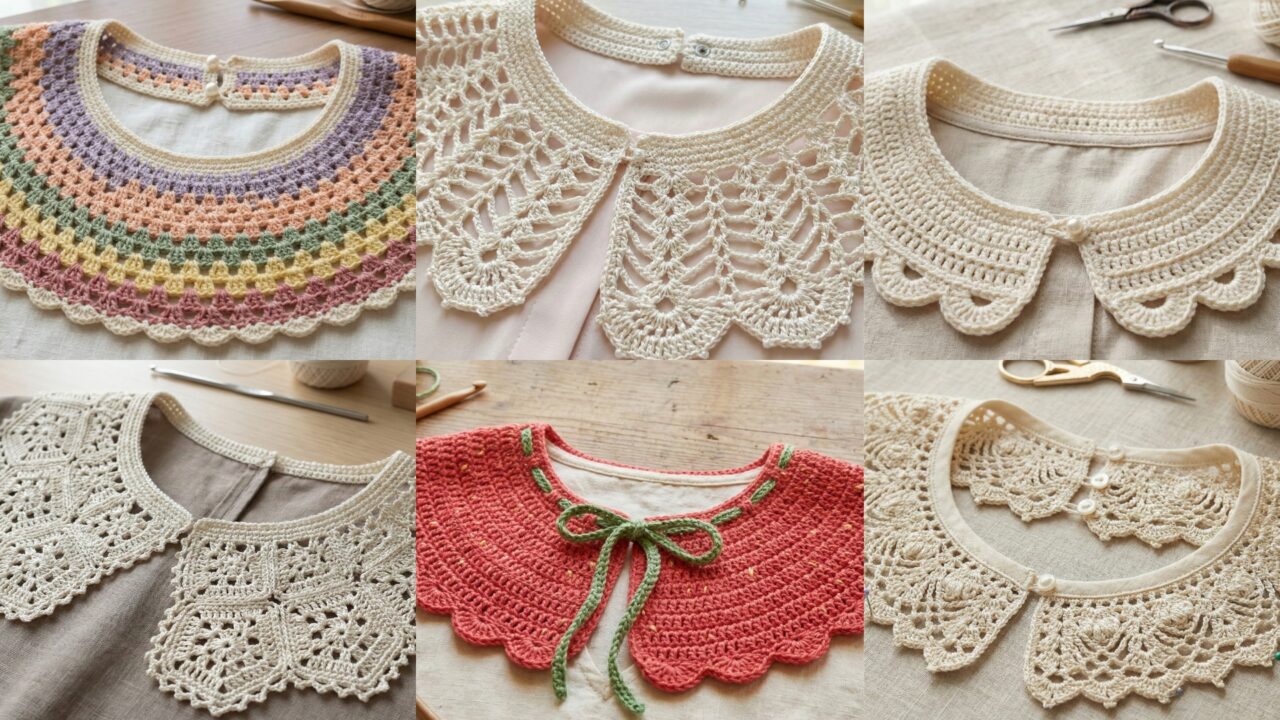
Below you’ll find a friendly introduction (materials, measuring, how collars are constructed and attached, care), then six full collar patterns with materials lists, skill level, stitch notes, step-by-step instructions, fitting tips, and finishing ideas: Feminine Vintage, Colorful Granny Square, Scallop Peter Pan, Cottagecore Strawberry, Lace Pentagon, and Detachable Romantic Lace. Each pattern is written so you can follow it start-to-finish and adapt for child/teen/adult sizes.
Quick Introduction — yarn, hooks, measuring, construction approaches & care
Yarn & fibre choices
- Fine cotton / mercerized cotton (lace, fingering, or sport) — crisp stitch definition and a classic vintage look. Great for small lace collars.
- Lightweight acrylic or blends (sport / DK held single) — easier care and softer drape; good for everyday detachable collars.
- Thread (#10 crochet thread) — for very fine, antique-style collars.
Choose a fibre that suits how you’ll wear the collar: washable cotton for daily wear, finer thread for a delicate heirloom piece.
Hooks & notions
- Hooks: 1.5–4.0 mm depending on yarn weight (smaller hooks for thread).
- Notions: tapestry needle, stitch markers, small buttons/snaps/brooch pin for attachment, measuring tape, fine blocking pins and board for lace collars.
How to measure & size (practical)
- Measure neckline circumference where the collar will sit (e.g., top of a crew-neck sweater). Write that number down.
- Decide collar style: snug close-to-neck (Victorian style), open drape (Peter Pan), or wide flat lace. This determines depth (how far the collar extends from neckline): 1–3 in for subtle; 3–6+ in for statement collars.
- Swatch and calculate: make a 2″–4″ swatch in your stitch and measure stitches-per-inch (spi). Example multiplication done carefully (digit-by-digit):
- If gauge = 5 sc = 1 in and neckline = 15 in, then required stitches = 5 × 15.
- 5 × 10 = 50
- 5 × 5 = 25
- 50 + 25 = 75 stitches.
Use the nearest stitch multiple required by the pattern repeat (e.g., multiple of 6). If needed, increase or decrease the foundation to fit.
- If gauge = 5 sc = 1 in and neckline = 15 in, then required stitches = 5 × 15.
Collar construction approaches
- Worked in rounds along a foundation chain (most common for detachable collars): you work a base row sized to fit the neckline, then build outward (toward the shoulder/edge) in lace/shell patterns.
- Motif assembly: join granny squares, pentagons, rosettes into a collar panel and shape edge.
- Worked flat & seamed: make two mirror halves and seam at center back; useful for unusual shapes.
Attachment options
- Buttons or snaps sewn at the center back (discreet) — good for fully circular collars.
- Small hooks & eyes for hidden closure.
- Sew-on loops at collar tips to button to blouse buttons if blouse already has buttons.
- Brooch / decorative pin for a single fastening at the front (adds vintage flair).
Blocking & finishing
- Lace collars benefit greatly from careful wet-blocking to open motifs and set shape. Use pins to achieve the exact scalloped edge.
- Weave ends securely and tack the collar inside with a couple of tiny stitches if you want it semi-permanent.
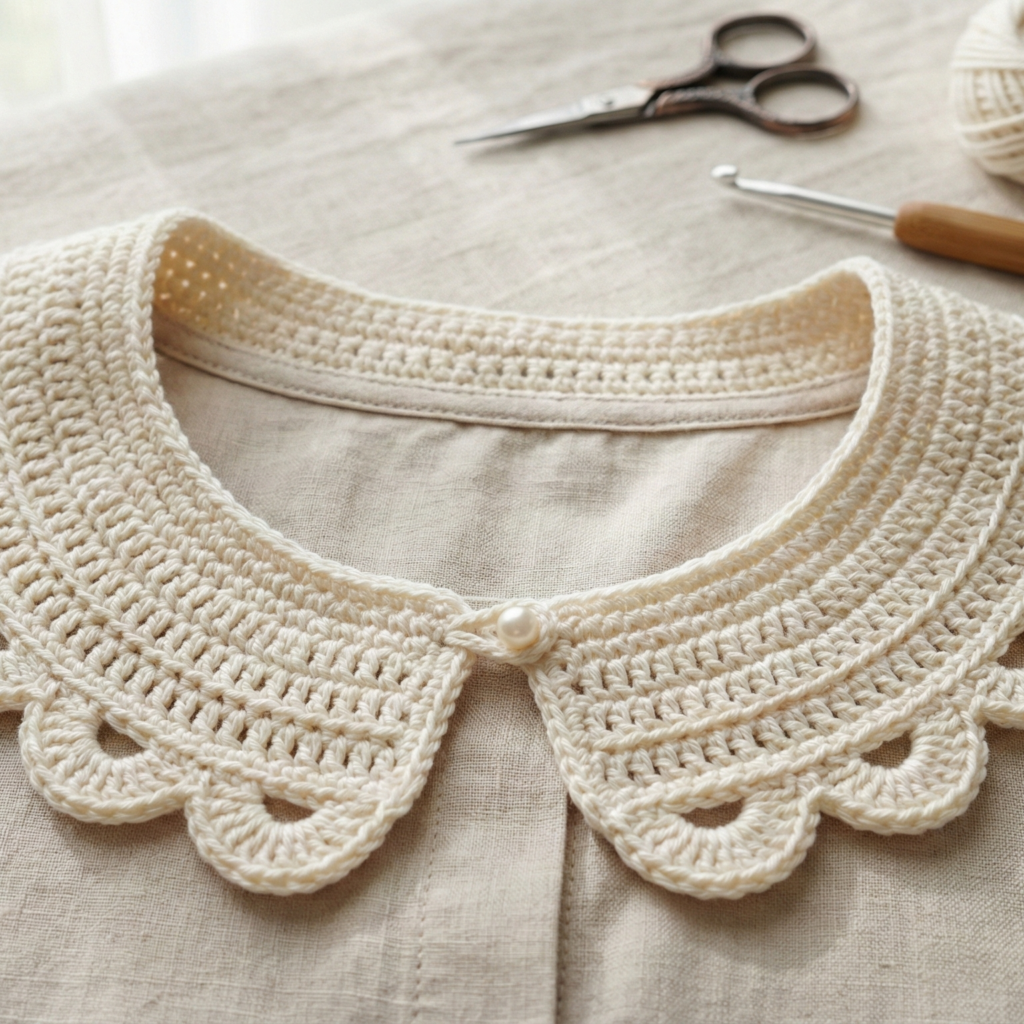
1. Crochet Feminine Vintage Collar Pattern
A delicately lacy, slightly pointed vintage collar with small scallop edging—classic and very wearable.
Vibe: delicate, lacy, vintage-romantic
Skill level: intermediate (lace repeats + blocking)
Materials (adult)
- Mercerized cotton sport or fingering (approx 150–200 yd)
- Hook: 2.5–3.5 mm (match yarn label & swatch)
- Small buttons or snaps (2) for back closure, tapestry needle, blocking pins
Stitches & abbreviations (US)
ch, sc, hdc, dc, tr, picot (ch3 sl st in 1st ch), sl st, rep
Construction overview
Make a foundation chain sized to the back-neck circumference (measured earlier), join and work a base band that will sit against the neckline. Then work outward in a repeating lace panel (shells and picots) to desired depth, finish with scalloped picot edge.
Step-by-step
- Measure & foundation
- Measure neckline (example 15″). Swatch gauge: suppose gauge = 6 dc = 1″ (adjust to your swatch). Calculate foundation stitches: 6 × 15 = 90 dc (or nearest multiple required). If pattern stitch repeat is 6, 90 is fine. Chain 90 + 2 turning ch.
- Work the base band (1/2 inch stability)
- R1: sc in 2nd ch from hook and across to form a stable band. Join with sl st to form a ring (careful not to twist). Work 2–3 rounds sc in the round for a firm inner band. Place a stitch marker at center back if you want to mark closure.
- Set up lace repeat
- R4 (set): ch3 (counts as dc), sk 2, (2 dc, ch2, 2 dc) in next (shell), sk 2, dc in next — repeat around. Join. This places shells across the band.
- Build outward (repeat lace rows)
- R5: ch3, dc into each dc and into ch2 spaces work (ch3, sc in top of shell, ch3) to create small arches.
- R6: ch1, sc across arches and into shell tops, work (sc, 3 dc, sc) in shell center to create raised shell.
- Alternate these two rows (or similar) for 6–10 rounds until collar depth reaches desired measurement (e.g., 2½–3½ in). Keep checking fit.
- Scalloped picot edge
- Final round: sc, skip 1, 5 dc in next, skip 1, sc in next around to make scallops. Then picot: sc, ch3, sl st in first ch at peaks for vintage picot points. Fasten off.
- Closure
- At center back inner band, sew on two small buttons spaced ¾–1″ apart (or sew snaps). On the opposite side create two small button loops (ch6, sl st to band, fasten). Alternatively, leave plain and secure with a small brooch in front.
- Block
- Wet-block gently: pin scallops evenly and allow to dry. The picots will open beautifully.
Variations
- Add a row of tiny embroidered pearl dots along shell tops for luxe look.
- Use fingering silk blend yarn for a special-occasion collar.
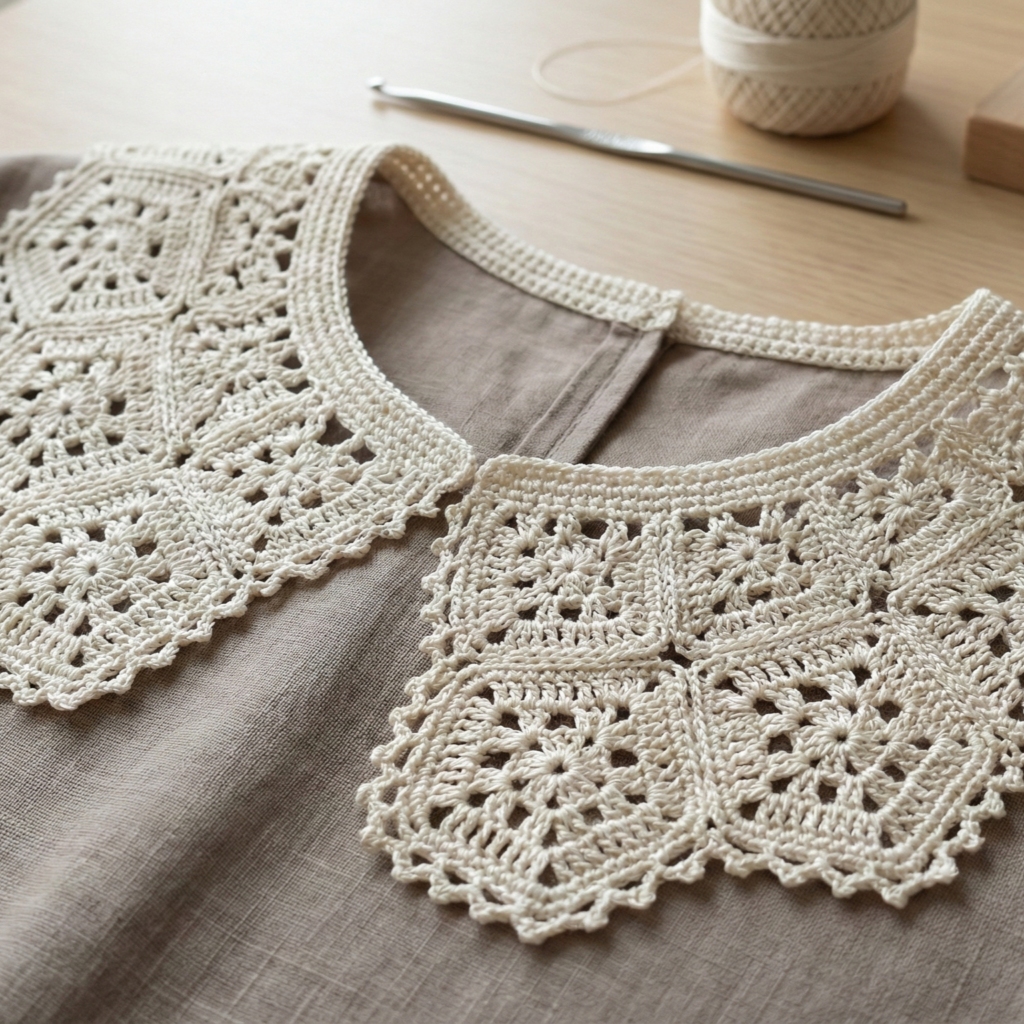
2. Crochet Colorful Granny Square Collar Pattern
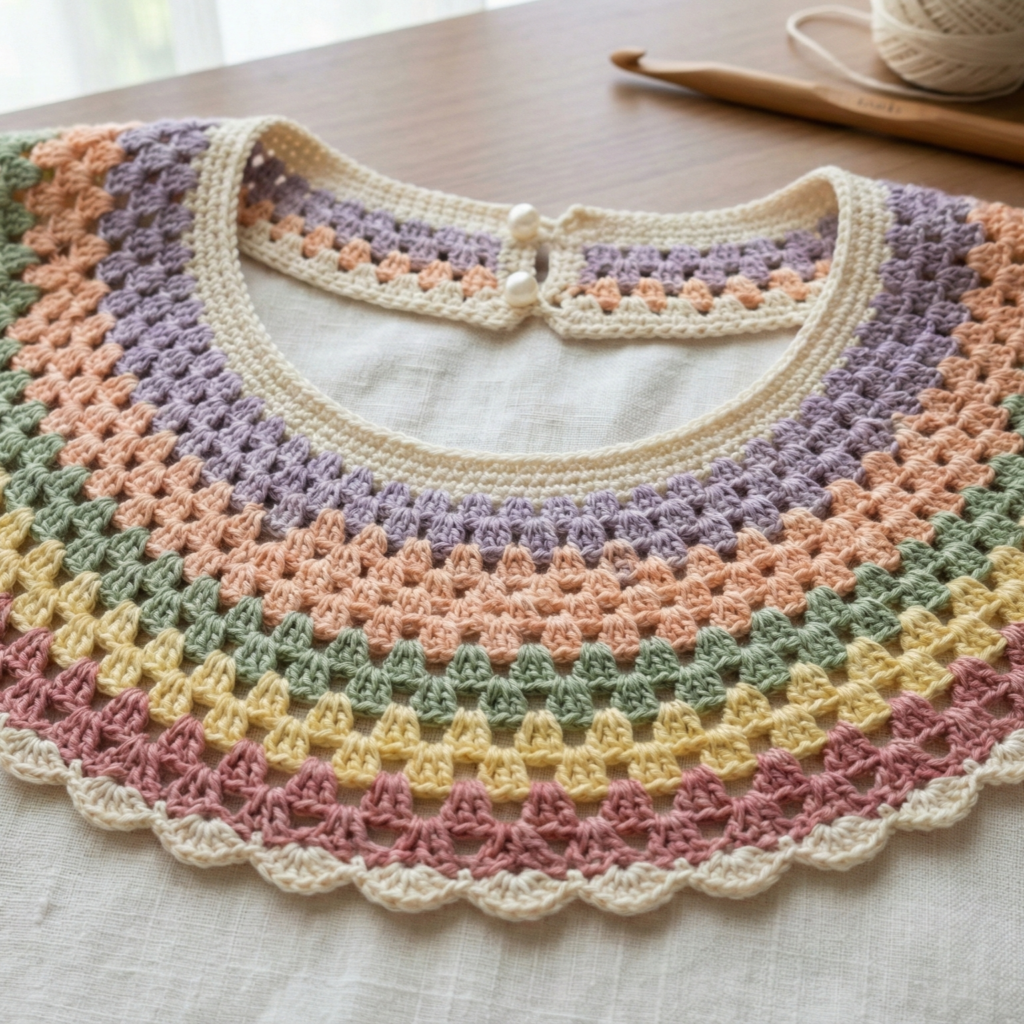
A playful, scrap-friendly collar made from tiny granny squares joined into a round yoke — bright, cottagecore, and great for using left-over yarn.
Vibe: colorful, playful, cottagecore
Skill level: confident beginner → intermediate (motif making + joining)
Materials
- DK yarn in multiple colors (make ~24–36 small squares depending on layout)
- Hook: 3.5–4.0 mm
- Tapestry needle, small snaps or buttons, felt backing (optional)
Construction overview
Make small granny squares (about 2½–3″ each), arrange in a crescent/semicircle for the collar, join squares, add a neat band for interior and a scallop edge.
Step-by-step
- Make granny squares
- Classic small granny (3 rounds): MR, ch3, 2 dc, ch2, (3 dc, ch2) ×3, join. Round 2: make (3 dc, ch2, 3 dc) in corners, 3 dc in sides separated by ch1 for squares ~2½–3″. Make as many as needed for your collar layout—example layout for adult small collar: 6 squares along front row, 3 above them (staggered), total 18 squares (arranged into a fan).
- Block squares
- Block each square to uniform size for neat joins.
- Layout
- Arrange squares on table into the collar shape you want: a single row that curves around the neckline or a two-tier yoke (one inner row, one outer). For a fuller collar, use two concentric rows joined together.
- Join squares
- Use join-as-you-go while making final round of a square to attach to neighbors, or use mattress stitch for a flat join. Join squares into the final semicircular panel.
- Add inner band
- Along the straight inner edge that will sit at the neckline, pick up stitches and work 3 rounds of sc for a stable inner band. If your blouse already has buttons, add small loops at the center back (ch6 loops) to fasten to blouse buttons, or sew on snaps.
- Edge finishing
- Work a final decorative round of shells across the outer curved edge: sc, ch3, 5 dc in next ch-space, ch3, sc for pretty scallops. Block again if necessary.
- Optional felt backing
- For sturdiness and to hide seams, glue or sew a thin felt backing to the inner band.
Variations
- Make all squares in a single color for an elegant tonal collar.
- Make miniature granny hearts in contrasting color sewn into squares for a themed collar.
3. Crochet Scallop Peter Pan Collar Pattern
A soft, rounded Peter Pan collar with evenly spaced scallops — ideal for a school-girlish or vintage look.
Vibe: classic, soft, youthful
Skill level: confident beginner
Materials
- Sport or DK cotton (approx 100–150 yd)
- Hook: 3.25–4.0 mm
- Tiny snap or button for front closure
Construction overview
Work a rounded band sized to the neckline, then work outward in semicircular scallop repeats to form the classic Peter Pan rounded collar.
Step-by-step
- Foundation & inner band
- Measure neckline circumference. Make a chain equal to measured circumference × spi (or chain to a comfortable fit). Join to work in rounds (or work a flat strip and seam). Work 2–3 rounds sc for a firm base.
- Place center back marker
- Mark center back and optionally center front if you plan a front overlap and button closure.
- Shaping into a rounded collar (row by row)
- Row 1 (set): ch3, skip 2, sc repeat to create small arches. Rounds in the round or rows if you made a flat strip.
- Row 2 (scallop foundation): in each arch work sc, hdc, 3 dc, hdc, sc to form a scallop.
- Row 3: for a fuller scallop, into each 3-dc group work (sc, ch3, sc) or (5 dc) to enlarge. Work enough scallop rounds until collar depth (distance from inner band to scallop peak) ≈ 1–2 in for modest, 2½–3 in for dramatic Peter Pan.
- Edge tidy
- Finish with one round sc in BLO to create a gentle ridge and a neat edge.
- Closure
- If you want to fasten at front, leave a small opening and sew a tiny button on one side and a loop (ch6) on the other. Alternatively, make it detachable with snaps at the center back and a small brooch for front fastening.
- Blocking
- Wet block to shape scallops evenly.
Variations
- Add a small crocheted bow at center front.
- Work the scallops in a contrast color for a framed look.
4. Crochet Cute Cottagecore Strawberry Themed Collar Pattern

A charming collar sprinkled with tiny strawberry appliqués and a scalloped edge — perfect for cottagecore outfits.
Vibe: whimsical, cottagecore, playful
Skill level: intermediate (appliqués + sewing)
Materials
- DK cotton (cream or white base + red, green, yellow for strawberries)
- Hook: 3.5 mm for body, 2.75–3.25 mm for tiny appliqués
- Tapestry needle, small snaps for closure
Construction overview
Work a plain base collar (semi-circular) in sc or hdc, then crochet tiny strawberries and leaves and sew them on in a scattered pattern. Finish with a simple scalloped edge.
Step-by-step
- Base band
- Make foundation chain to match neckline (use swatch to calculate spi). Join and work 3 rounds of sc for a stable inner band.
- Build collar semicircle
- R4: ch2, dc around with evenly spaced increases to create a smooth semicircular flare outward: dc3, inc repeat around. Continue 2–3 rounds until collar depth ~2–3 in.
- Small scalloped border
- Work a round of small shells: sc, skip 1, 5 dc in next, skip 1, sc around. This will create tiny scallops.
- Make tiny strawberries (make 8–12)
- Tiny strawberry (in red): MR, ch1, 6 sc in ring (6). R2: inc around → 12. R3: sc around to make a little dome. Fasten off leaving tail. With green, make a small 5-point calyx: ch6, sl st into base at intervals to form leaf loops, or work (sc, hdc, sc) in successive loops for leaves. Sew calyx to top of strawberry; tack lightly stuffed if you prefer plush look.
- Arrange & attach
- Pin strawberries across collar in a balanced scatter (often more along one side or evenly spaced). Sew each strawberry onto collar securely with matching yarn. Sew a small yellow embroidery seed stitch on each fruit to look like seeds.
- Closure & finishing
- Add tiny snaps at center back for detachable wear or make a tiny loop + button. Block lightly.
Style tips
- Use pastel base (cream, light mint) for a soft cottagecore palette.
- For a subtler look, make single tiny strawberry at one side as a focal accent.
5. Crochet Lace Pentagon Collar Pattern
A geometric lace collar made of pentagon motifs joined in a circular band — a dramatic, architectural take on vintage lace.
Vibe: modern-vintage, geometric elegance
Skill level: intermediate → advanced (motif shaping + joining)
Materials
- Lace-weight or fingering cotton (approx 200–300 yd)
- Hook: 2.0–3.25 mm depending on yarn
- Blocking board, pins, small snaps
Construction overview
Crochet 5-sided pentagon motifs (3–4 rounds each) then join them edge to edge into a circular collar; add a final lace scallop round.
Step-by-step
- Make pentagon motif (make many)
- MR, ch3 (counts as dc), work a 5-point round: (2 dc, ch 2, 3 dc) in ring repeat 5 times → five lobes. Join.
- R2: in each ch-2 space work (sc, ch3, sc, 3 dc, ch3, sc) to form a pentagon with a central lacy space. Work one more decorative round if you like to expand motif to desired size (~2–2.5 in).
- Block motifs
- Block each pentagon to exact size for neat joining.
- Layout & join
- Arrange motifs in a circle that will sit around the neckline. For a close collar, you may need ~10–12 motifs depending on size. Join-as-you-go on final round or sew with mattress stitch so seams are flat.
- Inner band addition
- Once motifs are all joined into a circular band, pick up stitches along the inner edge and work 2–3 rounds of sc for a stable interior band that sits against the neck.
- Outer lace edging
- Work a final decorative outer round: picot clusters or layered shells to create a crisp lace outer border (e.g., *sc in each st, ch4, sl st in 2nd ch from hook for picots in scallop peaks).
- Closure & block
- Sew small snaps on center back for detachable wear. Wet-block the finished collar to open the lace and define pentagon points.
Variations
- Make motifs in tonal gradient for ombré effect.
- Use metallic thread for a holiday statement collar.
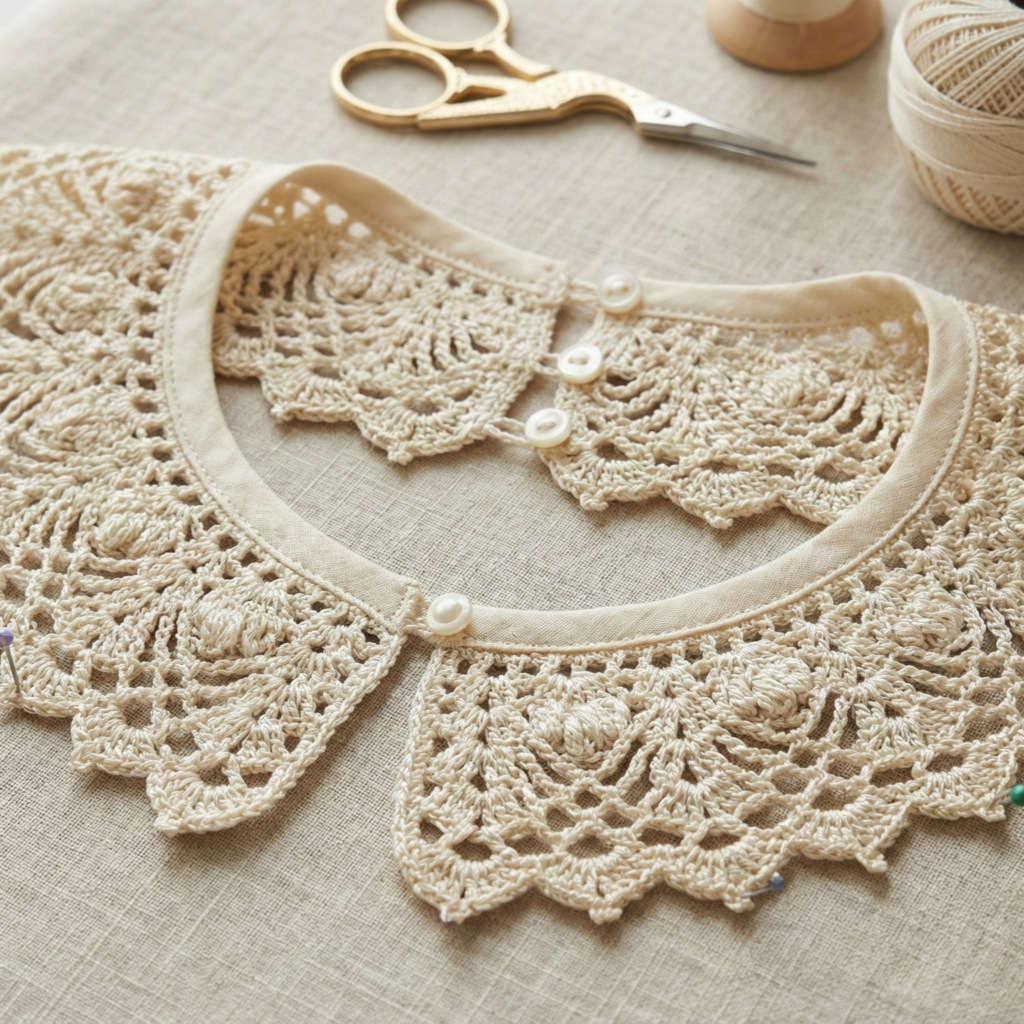
6. Crochet Handmade Detachable Romantic Lace Collar Pattern
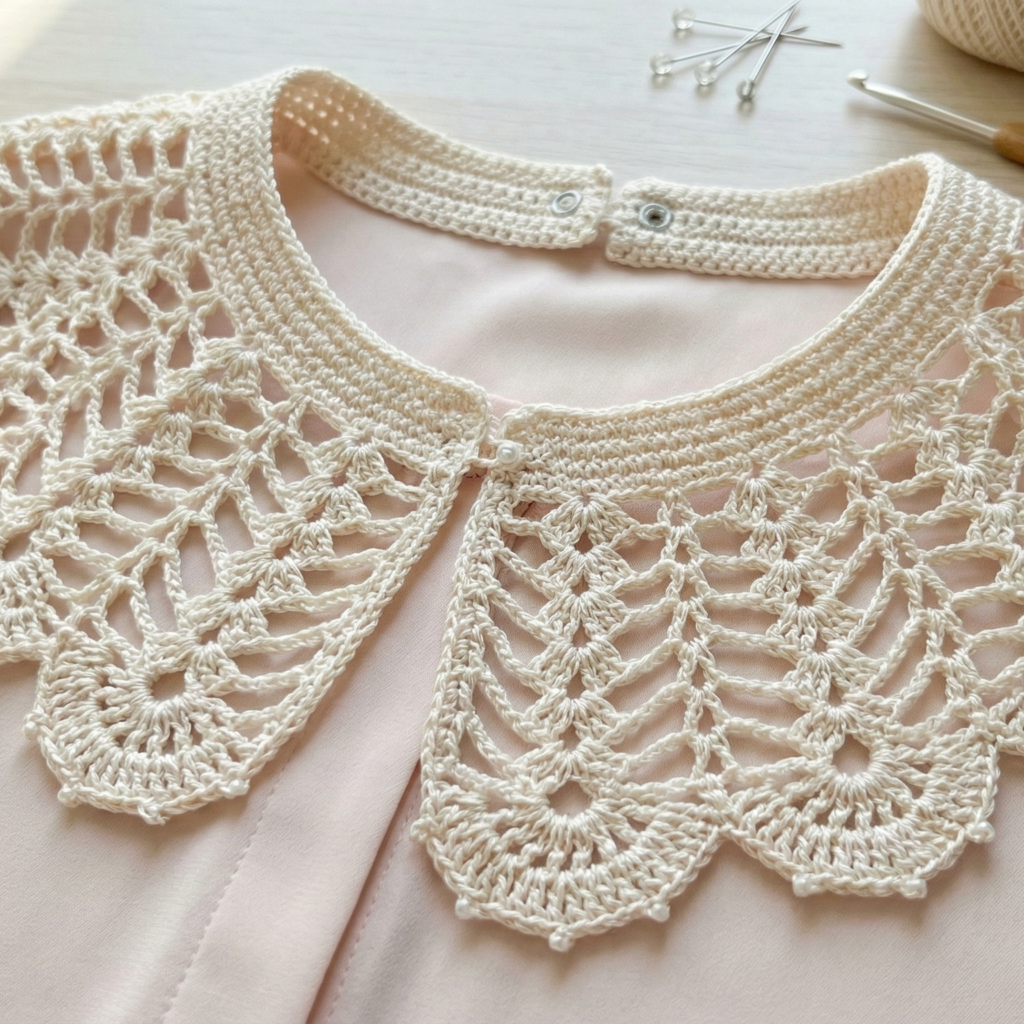
A fully detachable romantic lace collar built in continuous rounds with airy arches and a dramatic picot scallop—made to be pinned or snapped to clothing.
Vibe: dreamy, romantic, wearable with blouses and dresses
Skill level: intermediate (long lace repeats + blocking)
Materials
- Fingering cotton or lace thread (approx 250–350 yd)
- Hook: 2.5–3.25 mm
- Tiny snaps or sew-on studs for detachable option, blocking supplies
Construction overview
Work a lace collar in the round: inner band, alternating arch & shell rows for openwork, then a broad layered scalloped edge with picots. Add snap placements on inner band for easy attachment.
Step-by-step
- Inner band (measure & foundation)
- Chain to match neckline using swatch to compute stitches. Join carefully, work 3 rounds sc for a firm band. Mark center back.
- Lace body (repeat pattern)
- R1 (arch row): ch6, skip 3, sc in next around, forming long arches.
- R2 (shell row): into each arch work (sc, hdc, 5 dc, hdc, sc) to create petals.
- R3 (bridging row): ch2, sc across the shell tops with small ch-spaces between to create delicate laddering.
- Repeat R1–R3 multiple times. Each repeat adds a layer of lacy arches; build until collar reaches desired depth (3–4 in for a statement collar).
- Grand scalloped edge
- Final round: sc into shell top, ch3, 7 dc in next ch-space (big shell), ch3, sc in next shell top around. In each 7-dc shell, work small picots on peak: (dc, picot, dc) at the center for romantic points.
- Add snaps
- On the inner band at center back, and optionally near the shoulder seam areas, sew small snaps so the collar can be fastened to the garment. If the blouse already has buttons, you can make tiny loops at inner band instead.
- Blocking
- Block generously: pin each scallop peak to form dramatic points and allow to dry fully so the collar keeps its romantic shape.
Finishing touches
- Add tiny bead accents (seed beads) at scallop peaks if desired—but avoid beads for children’s garments.
conclusion
You now have six full vintage-inspired collar patterns to choose from — each with a different personality:
- Feminine Vintage for elegant dresses and special occasions.
- Colorful Granny Square to brighten a plain blouse and use stash yarn.
- Scallop Peter Pan for a sweet, youthful look.
- Cottagecore Strawberry for whimsical, seasonal dressing.
- Geometric Lace Pentagon for modern-vintage architecture.
- Detachable Romantic Lace for dramatic evening styling.
Quick styling tips:
- Wear a delicate lace collar over a plain crew-neck sweater for instant vintage vibes.
- Pin a brooch at the collar point for an extra focal detail.
- For everyday wear choose cotton or washable blends; for heirloom or formal pieces pick fine cotton or thread and block carefully.