

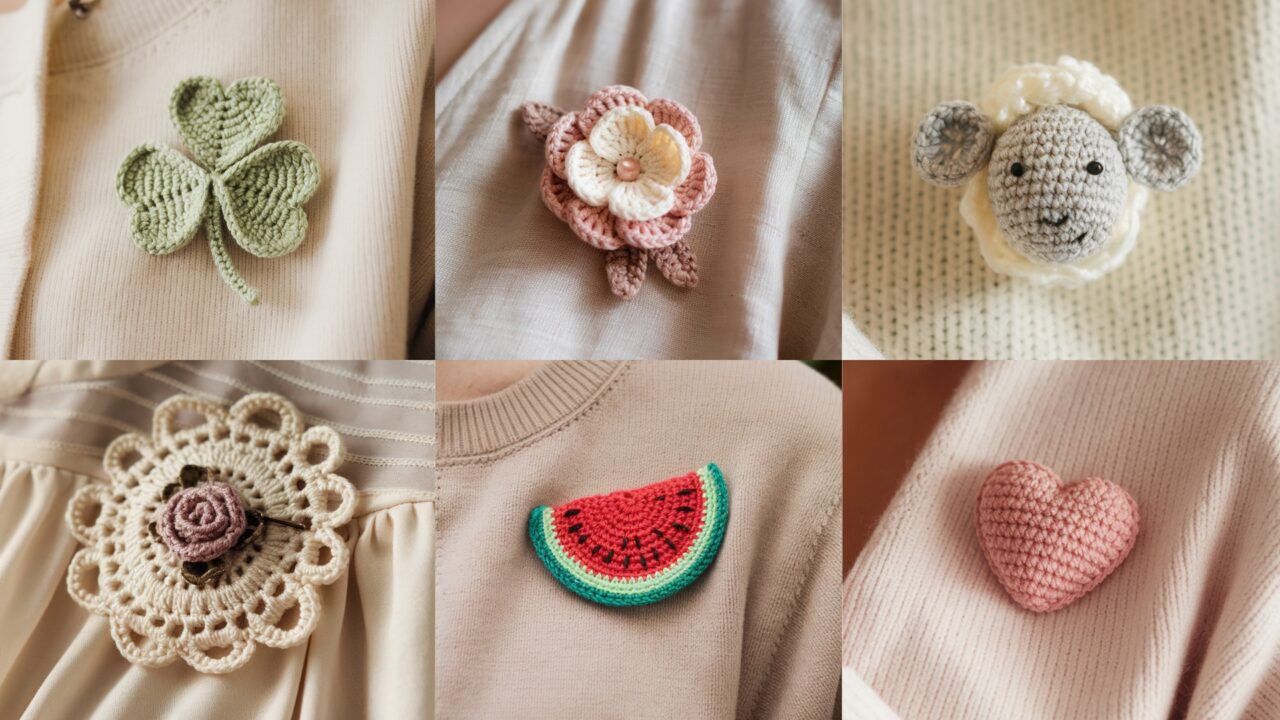
A handmade crochet brooch is a tiny piece of wearable art: small to make, high on charm, and a perfect way to personalize jackets, bags, hats, or gift wrap. Brooches let you experiment with texture, color, and mixed materials (buttons, beads, tiny embroidery) while staying small and portable. In this post you’ll find six fully worked ideas — from soft Mori-style floral brooches to kawaii animals and vintage lace-inspired designs — each with a clear materials list, skill level, step-by-step instructions, finishing/assembly (how to attach a secure pinback), variations, and styling tips.
All patterns use US crochet terms. If you want any single pattern expanded into printable step-by-step cards or diagrams, tell me which one and I’ll convert it.
Common notes (applies to all brooches)
- Abbreviations (US): CH = chain, SL ST = slip stitch, SC = single crochet, HDC = half double crochet, DC = double crochet, TR = treble crochet, BLO = back loop only, FLO = front loop only, INC = increase (2 sc in same st), DEC = decrease (sc2tog), MR = magic ring, st(s) = stitch(es).
- Finishing: Always attach metal pinbacks (safety brooch pins or locking pinbacks) on the wrong side and reinforce with extra stitches and a small felt circle under the pin for durability and to protect clothing.
- Safety: If brooches are intended for children, avoid beads or small parts that could detach — use embroidery instead.
- Tools: Tapestry needle, small sharp scissors, fabric glue (optional), needle & thread for sewing pinback, small felt circles (same color as backing).
- Yarn: Recommendations will vary — cotton or cotton blends are excellent for crisp shapes; soft wool/bamboo for Mori-style softness; acrylic for bright colors and easy care.
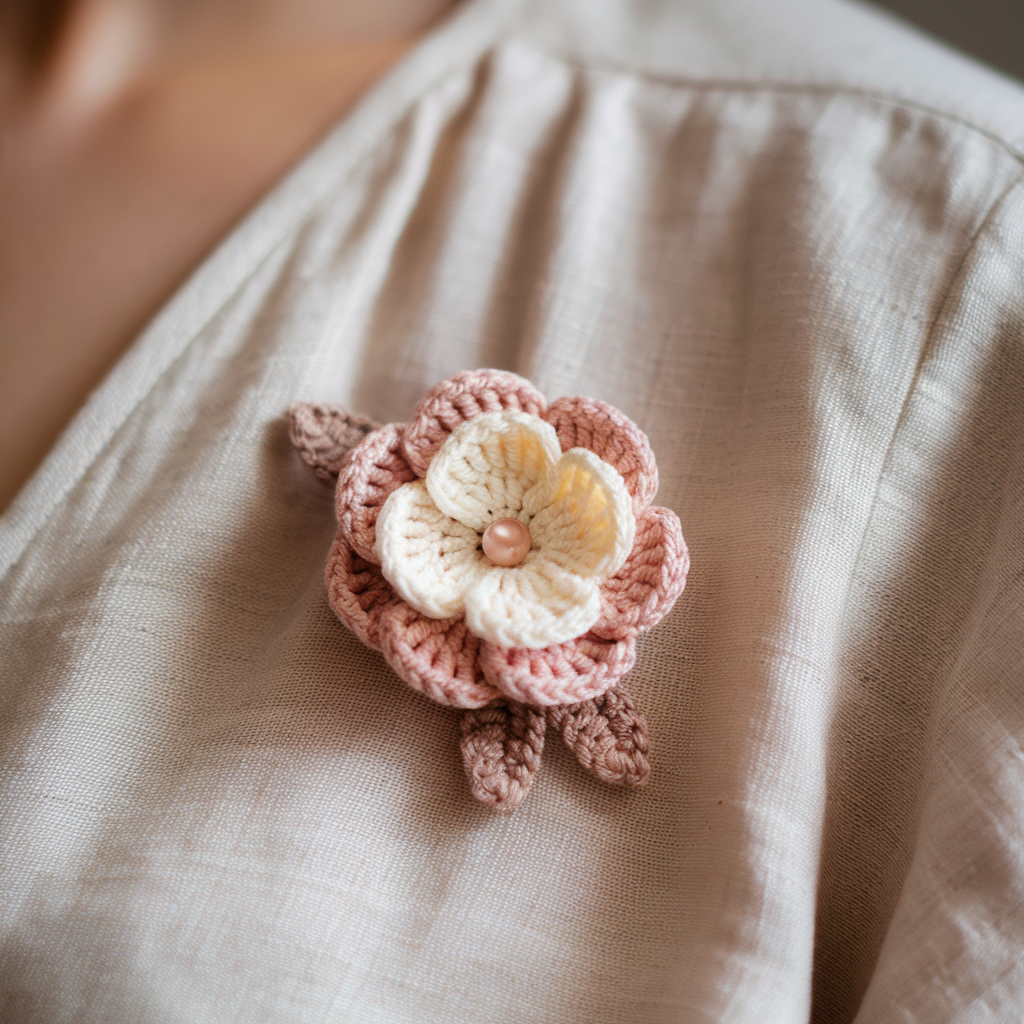
1. Crochet Mori Style Flower Brooch Pattern
Skill level: Beginner–Intermediate
Estimated time: 45–90 minutes
Style notes: Mori (woodland/cottagecore) aesthetic calls for soft muted colors, layered petals, and natural touches (tiny seed bead centers or embroidered stamen). Use soft yarn (bamboo-cotton, alpaca blend or soft wool) and warm, earthy tones.
Materials
- Soft fingering/sport or DK yarn (main petals): 5–10 g (choose muted cream, moss green, dusty rose)
- Contrasting thin yarn for small leaves (green): small amount
- 2.5–3.5 mm crochet hook (adjust for yarn)
- Tapestry needle, small amount of stuffing (optional for lifted center), sewing thread
- Small seed beads (optional), or embroidery thread for center details
- 25–30 mm locking pinback + small felt circle
Finished size
- Flower diameter ≈ 1.5–2.5 in (adjust rounds or petal size for larger/smaller).
Pattern concept
Layered petals: small inner rosette, medium petals, larger outer petals; attach tiny leaves behind and add embroidered/studded center.
Step-by-step
Inner rosette (center)
- MR, CH 1. R1: 8 SC into MR, pull tight. (8) SL ST to join. Fasten off or continue depending on preferred center height.
- Optionally add a tiny puff: with same yarn, YO, insert, pull up loop, repeat 3 times, YO pull through all loops, CH 1 to form a puff; fasten off and tuck in.
Petal round A (small petals)
- Rejoin yarn to any stitch of rosette. CH 2, (3 DC, CH 2, SL ST into same base st) — this creates a petal (3 DC cluster with a picot/arch). Move to next st and repeat around for 8 small petals. Fasten off.
Petal round B (medium petals)
- Attach yarn between petals, CH 1, SL ST to position at midpoint between petals. CH 3, (DC, HDC, DC) in the span, CH 3, SL ST — creates a fuller petal between previous petals. Repeat around to make 8 medium petals. Fasten off.
Outer petal round C (large petals)
- Rejoin at back, CH 1, SL ST to base of a medium petal, CH 4, (TR, DC, TR) in same base, CH 4, SL ST — repeat around to create dramatic outer petals. End and weave in ends.
Leaves (make 2–3)
- With green, CH 6. R1: SC in 2nd ch from hook, HDC, DC, HDC, SC across (5 sts). Fasten off leaving tail; flatten and sew leaf to back of flower so leaves peek from under.
Center finishing
- Add two options: (A) Sew 3–4 seed beads into the center and surround with embroidered French knots; or (B) embroider a cluster of French knots or bullion knots with embroidery floss for soft stamen.
Assembly & attaching pinback
- Cut a 1 in diameter felt circle. Place felt on back of flower (WS). Center pinback over felt and sew pinback through felt and crochet fabric with strong sewing thread (make multiple passes). Tie off and secure with a drop of fabric glue on knot for extra security. Trim excess thread.
Variations & styling
- Make a cluster of 3 small Mori flowers on one pin for a brooch bouquet.
- Work petals in gradient yarn for ombré petals.
- Add a small bell or wooden bead at back as a charm.
Care
- Hand wash gently depending on fiber; reshape while damp. Avoid drying in direct sun for delicate colors.
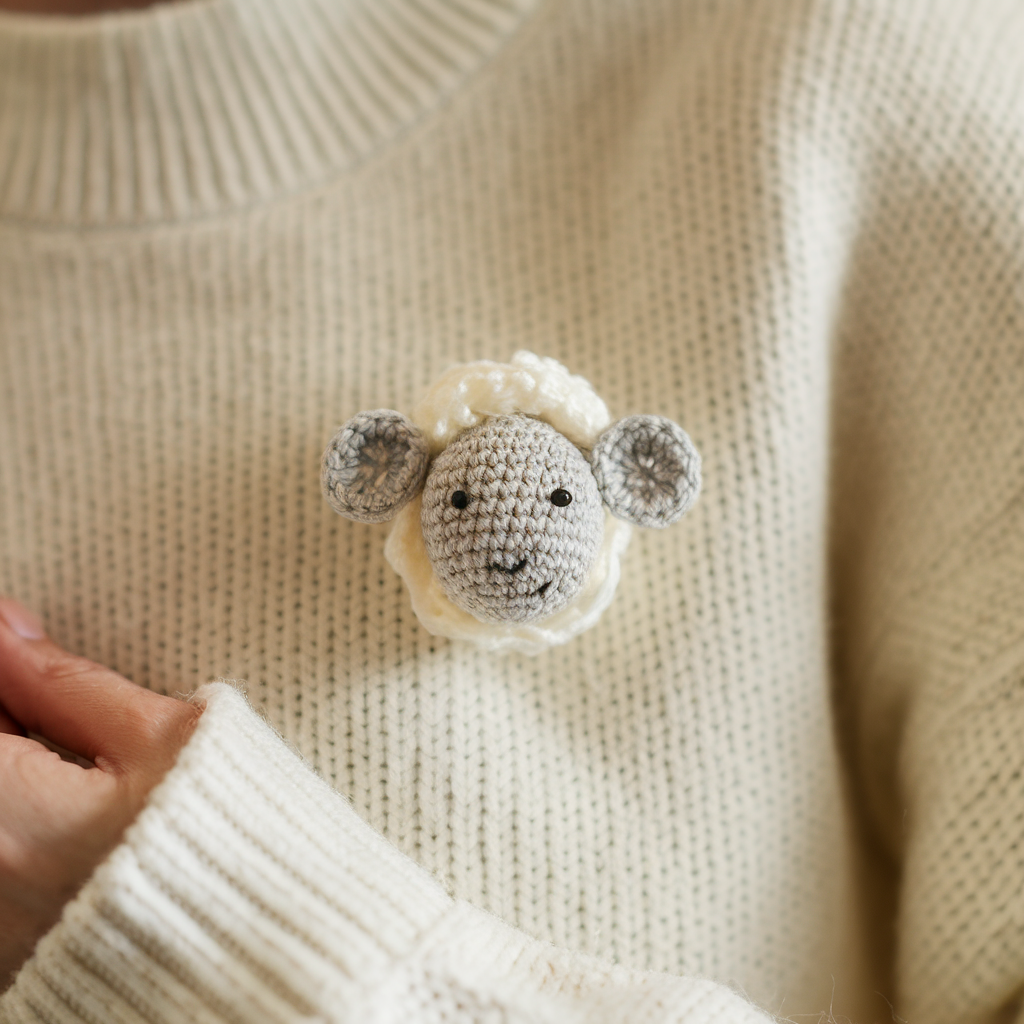
2. Crochet Cute Sheep Brooch Pattern
Skill level: Beginner–Intermediate (amigurumi basics)
Estimated time: 45–75 minutes
Style notes: A fluffy textured sheep uses loop stitch or popcorn clusters for the fleece and tight stitches for the face. Adorable, kid-friendly (but avoid small beads if for children).
Materials
- DK yarn: main fleece color (soft white/cream) ~10 g; face/ear color (light gray or beige) ~5 g
- 2.75–3.5 mm crochet hook for tight fabric
- Small amount of stuffing
- Embroidery thread black for eyes & mouth (or 3–4 mm safety eyes adults only)
- 20–25 mm brooch pin + felt circle
Finished size
- Sheep body ≈ 1.5–2 in wide.
Pattern concept
Make a small oval base (head), cover with loop stitches (or small popcorns) for the fleece, add simple flat face, ears and tiny legs as appliqués.
Step-by-step
Head/body base (flat oval)
- MR, CH 1. R1: 6 SC in ring (6). R2: INC in each st (12). R3: SC 1, INC around (18). R4: SC 2, INC around (24). R5–R6: SC around in continuous rounds to create a short cylinder/oval. Fasten off leaving tail.
Fleece texture (loop stitch method)
- Rejoin white yarn. Work a round of loop stitches: insert hook, YO, pull up a loop leaving a long loop on surface, complete SC into same stitch to anchor. Repeat across rounds covering the oval base. Make 3–4 rows of loops for a fluffy look. If loop stitch is unfamiliar, use 3-loop popcorn: (YO, insert, pull up loop) × 3, YO pull through all, CH 1 to close popcorn, then anchor with SL ST.
- Work evenly until base is fully covered with loops/popcorns. Fasten off.
Face (flat applique)
- With contrast yarn (gray), MR, 6 SC in ring (6). R2: SC, INC around (9). Flatten ring and sew onto lower front of head. Alternatively work an oval: CH 6, SC across, 3 rows, fasten off and sew.
Ears (make 2)
- With face yarn, CH 4; R1: SC in 2nd ch and across (3). CH 1, turn; R2: SC2TOG, SC (2). Fasten off and sew ears to head sides.
Legs (optional tiny)
- Make two small tubes: MR, 4 SC, R2–R3 SC around (4) — tiny legs sewn to base.
Embroider face
- Using black embroidery thread, stitch small closed eyes (two short vertical satin stitches or French knots) and a tiny smiling mouth. If using safety eyes, set them at round 3–4 before covering with fleece layer.
Assembly & pin attachment
- Place felt circle behind sheep. Sew felt to the back of the sheep with matching thread through only a few stitches to keep it tidy. Center pinback on felt and sew multiple passes to anchor. Reinforce with a second felt circle if needed.
Variations & tips
- Make different sheep breeds by changing loop size (longer loops = woollier sheep).
- Convert to magnet by gluing a flat magnet to the felt instead of pinback (use strong epoxy and warn users about magnet safety).
Care
- Hand wash; reshape loops with steam if needed.
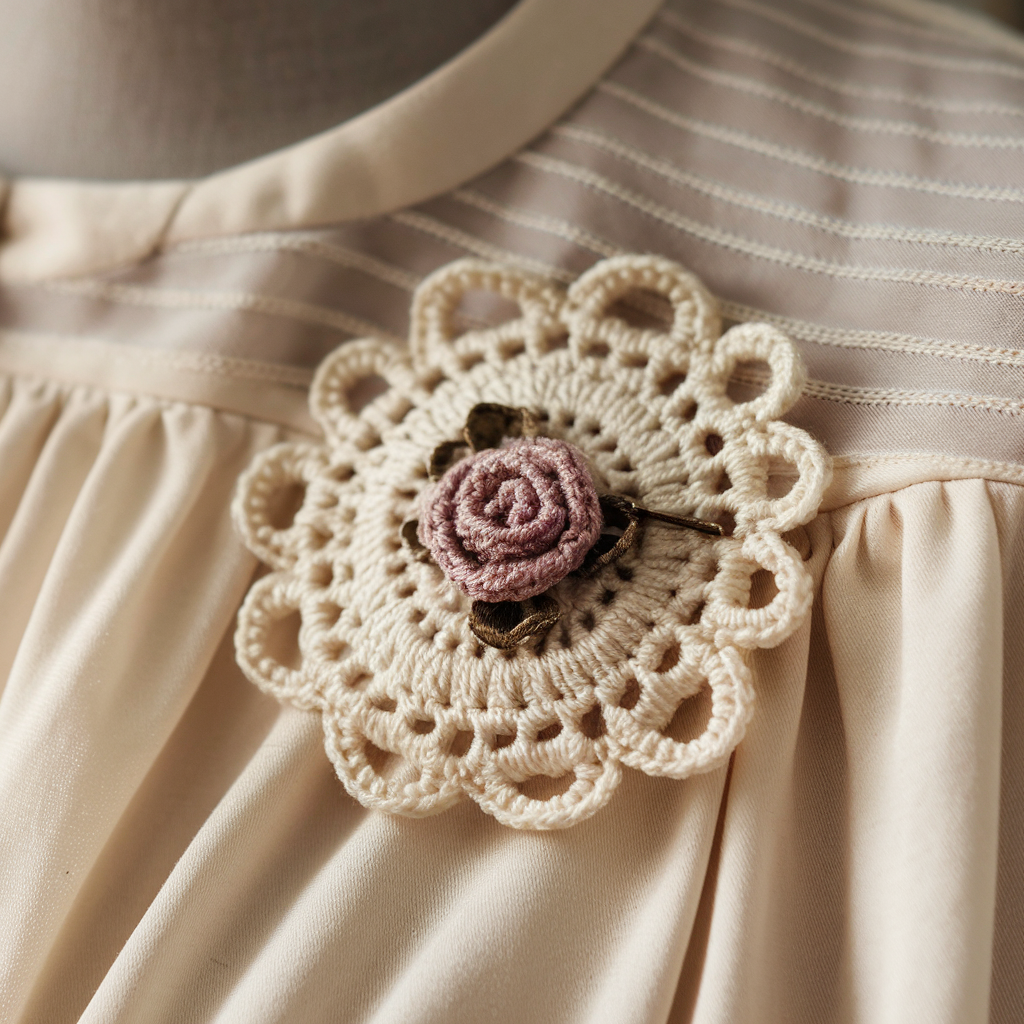
3. Crochet Vintage Brooch Pattern
Skill level: Intermediate (fine thread, lace & assembly)
Estimated time: 1.5–3 hours
Style notes: Vintage brooch evokes cameo, lace, and filigree: work a lace base (size 10 cotton thread or fine fingering yarn) and add a central cameo-like motif (a small rose or profile silhouette). Use an antique brass tone pinback for authentic feel.
Materials
- Size 10 crochet cotton thread or fingering-weight yarn — main color cream/ivory ~10 g; contrast color for cameo ~small amount
- 1.5–2.5 mm crochet hook for lace definition
- Small flat button or polymer clay cameo (optional) or crochet tiny rose for center
- Antique brass locking brooch pin 30 mm or decorative pinback with filigree bezel
- Felt circle and sewing thread
Finished size
- Approx 2–2.5 in diameter (large enough to be vintage statement but still wearable).
Pattern concept
Create a round lacy medallion with picot shells and a center motif; optionally mount a small cameo or crochet a tiny rose and attach to center. Back with felt and attach ornate pin.
Step-by-step
Lace medallion base
- Magic ring. R1: CH 1, 12 SC in ring, SL ST to join. (12)
- R2: CH 3, skip next st, 5 DC shell in next st, CH 2, SL ST in same st — create shells spaced by small loops. Repeat around to form 6 shells. Join.
- R3: Join contrasting thread behind shells, CH 1, SC into center of each shell, CH 4 picot loop (CH 3, SL ST into top of SC) to create airy loops. Repeat around.
- R4: With main color, make a decorative scallop: into each CH-4 loop work (SC, HDC, 3 DC, HDC, SC) then SL ST into next shell top. This builds ornate raised scallops.
- R5: Optionally work outer picot beads: SL ST, CH 3, SL ST between scallops to create small points.
Center cameo / rose
Option A — small polymer clay cameo (pre-made) glued/sewn to center; secure from back with thread.
Option B — crochet a tiny rose:
Tiny rose: CH 15. R1: HDC in 2nd ch from hook and across (14). R2: [SC in next 2, HDC in next 2, DC in next 4, HDC next 2, SC next 4] across to shape petals. Roll strip tightly from one end and sew base to form rose.
Sew rose/cameo tightly into middle of medallion.
Backing & pin
- Cut felt circle slightly smaller than medallion. Place felt on back and tack down along several points to keep medallion flat. Center ornate pinback or brooch bezel and sew through felt and medallion with strong thread. Use multiple stitches and reinforce with a second felt circle if the pin is heavy.
Finishing touches
- Add a subtle metallic embroidery around scallops with fine metallic thread for extra vintage shine.
- If you want extra durability, glue a thin cardboard disc between the crochet and felt (inside) before sewing pinback (avoid if you intend to wash).
Styling & variations
- Make a matching set (earrings, pendant) using smaller medallions.
- Use tinted tea-dyed thread for an antique patina.
Care
- Spot clean gently. Avoid machine washing and heavy abrasion. If polymer cameo used, avoid high heat.
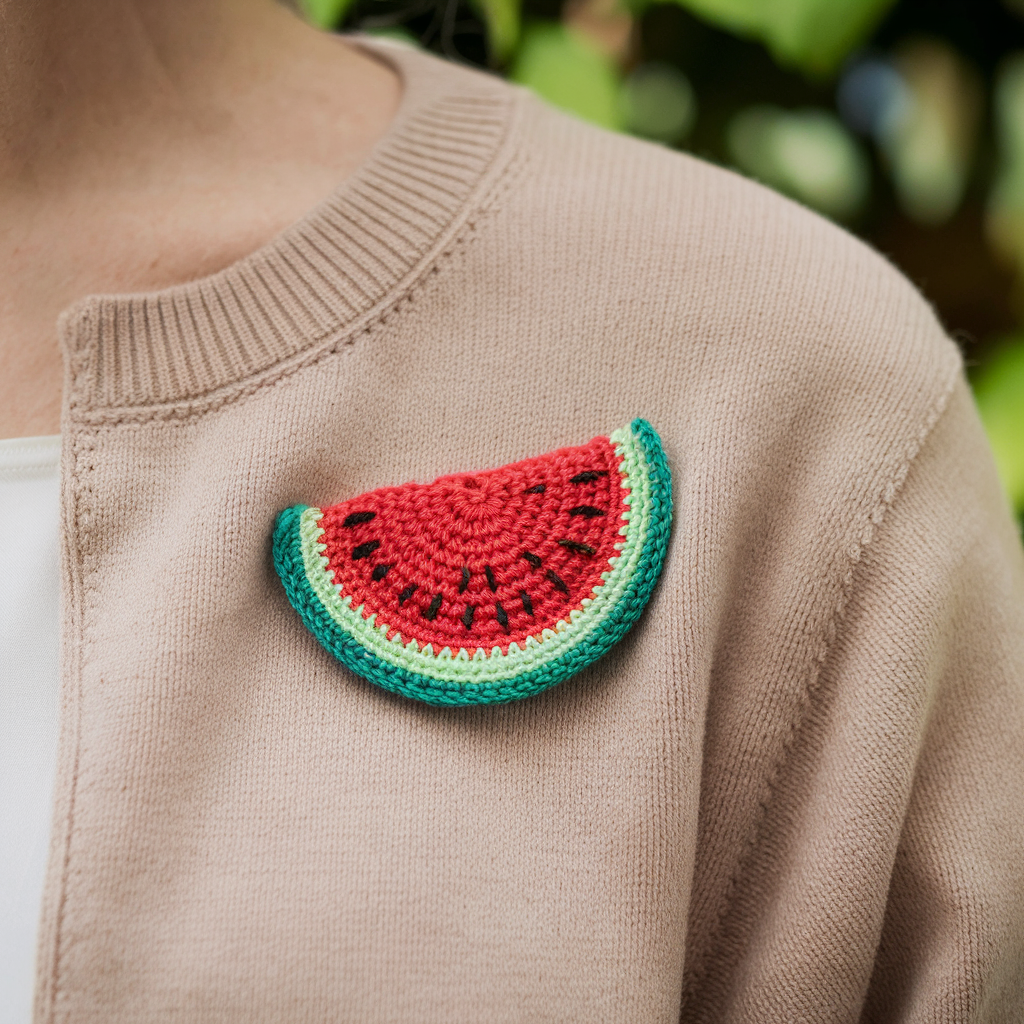
4. Crochet Watermelon Brooch Pattern
Skill level: Beginner–Intermediate
Estimated time: 45–75 minutes
Style notes: Fun, summery watermelon slice or wedge — bright pink/red flesh, white rind line, and green outer rind; add tiny embroidered black seed details for character.
Materials
- DK yarn: watermelon pink (or red), white (thin), green (outer rind) — small amounts
- 3.0–3.5 mm hook
- Black embroidery thread for seeds or small black seed beads (adults only)
- Felt circle, brooch pin
Finished size
- Wedge ≈ 1.5–2 in wide (mini slice).
Pattern concept
Crochet a semi-circular wedge worked in increasing rows (flat) with color changes for rind and flesh; add seeds, a tiny green stem or leaf, then back with felt and attach pin.
Step-by-step
Wedge (flat semi-circle)
- Foundation: MR, CH 1. R1: 6 SC in MR (6). R2: INC in each st (12). R3: SC 1, INC around (18). R4: SC 2, INC around (24). Continue increasing until wedge width ~ desired size (typical wedge uses R6–R7 giving 36–42 sts). This creates a circular disc.
- Convert disc to wedge: after disc reaches size, fold or remove half of the circle by stopping increases on one side and working straight rows to create a semicircle/wedge. Simpler method: work a full circle then slice in half: complete disc then fold and sew through center lines to cut shape. Cleaner method below:
Alternate clean wedge method: Work half-circle from the start: CH 3, work a semi-circular mesh by increasing only along one edge — but for simplicity, make a circle then trim/sew.
- Color changes: Work most rounds in flesh color (pink). For the rind, switch to white for 1 round near the outer edge, then to green for the final 2–3 rounds for a visible rind.
- Fasten off and weave ends.
Seeds & details
- With black embroidery thread, stitch short teardrop seed shapes across the pink section (6–10 tiny seeds). If using beads, sew them on securely with several passes of thread (adults only).
- Optional leaf: small leaf CH 5; SC in 2nd ch, HDC, DC, HDC, SC to create a tiny leaf sewn near the rind.
Firming & backing
- Cut felt wedge the same shape or slightly smaller. Place felt on wrong side and whipstitch around the perimeter to join. This hides backs and gives a firm substrate for the pin. Sew pinback onto felt with strong thread. Reinforce with extra stitches.
Variations & styling
- Make a set of fruit brooches (kiwi, citrus, strawberry) in matching sizes.
- For a kawaii look, embroider tiny happy faces on the pink flesh (two small French knots for eyes and a tiny smile).
Care
- Spot clean with damp cloth. Avoid machine wash if seeds are bead-attached.
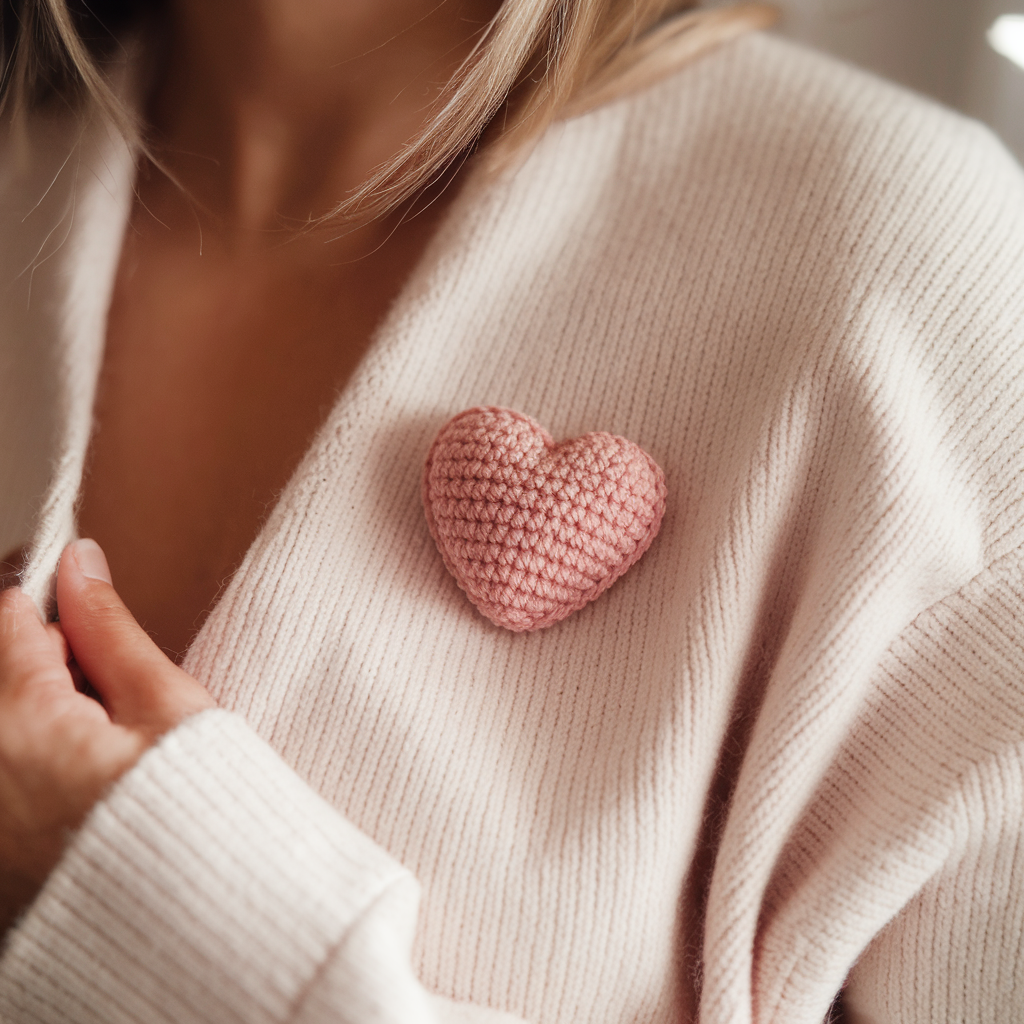
5. Crochet Heart Brooch Pattern
Skill level: Beginner
Estimated time: 30–60 minutes
Style notes: Versatile — hearts can be flat appliqué hearts, puff-filled hearts (3D), or textured using star/puff stitches. Great for gift tags, Valentine’s, or layering on scarves.
Materials
- Worsted or DK yarn — small amount (5–10 g) in chosen color (red, blush, cream).
- 3.5–4.0 mm hook
- Small amount of stuffing (optional for 3D heart)
- Felt circle and pinback
Finished size
- Flat heart ≈ 1.5–2 in wide; stuffed heart slightly thicker.
Pattern concept
Two options: (A) flat double-heart: crochet two identical heart halves and sew; (B) puff heart: work textured puff pattern for surface.
Step-by-step — Flat heart (simple & effective)
Half heart motif (make 2)
- CH 4, sl st to join to form ring. R1: CH 2 (counts as hdc), 3 DC in ring, CH 1, 1 DC, CH 1, 3 DC, HDC in top of CH 2 to form one lobe. Fasten off leaving tail.
- Make another identical half. Place right sides together and sew along edges leaving the top open if you want a small pocket; otherwise sew completely and fasten ends.
- Alternatively make a single flat heart by working: CH 6, work across forming half-heart on each side and join in center (many simple flat heart charts exist — adapt to desired size).
3D stuffed heart
- Make two identical flat hearts and sew around leaving a small gap. Stuff lightly and finish sewing. Attach felt and pinback as usual.
Textured heart using puff stitches
- Work a small square using puff stitches (e.g., 4×4 puff grid), then cut and sew into heart shape by shaping rounds: use puff stitch square, then shape outer edges by decreasing puff placements and seaming, then back and pin.
Finishing & pinback
- Back with felt and attach pin securely. For extra polish, edge the heart with a round of SC in contrasting color (decorative topstitch).
Variations & styling
- Add names or initials with surface embroidery for personalized brooches.
- Combine small hearts into a layered trio on one pinback for an impact brooch.
Care
- Gentle hand wash; reshape while damp.
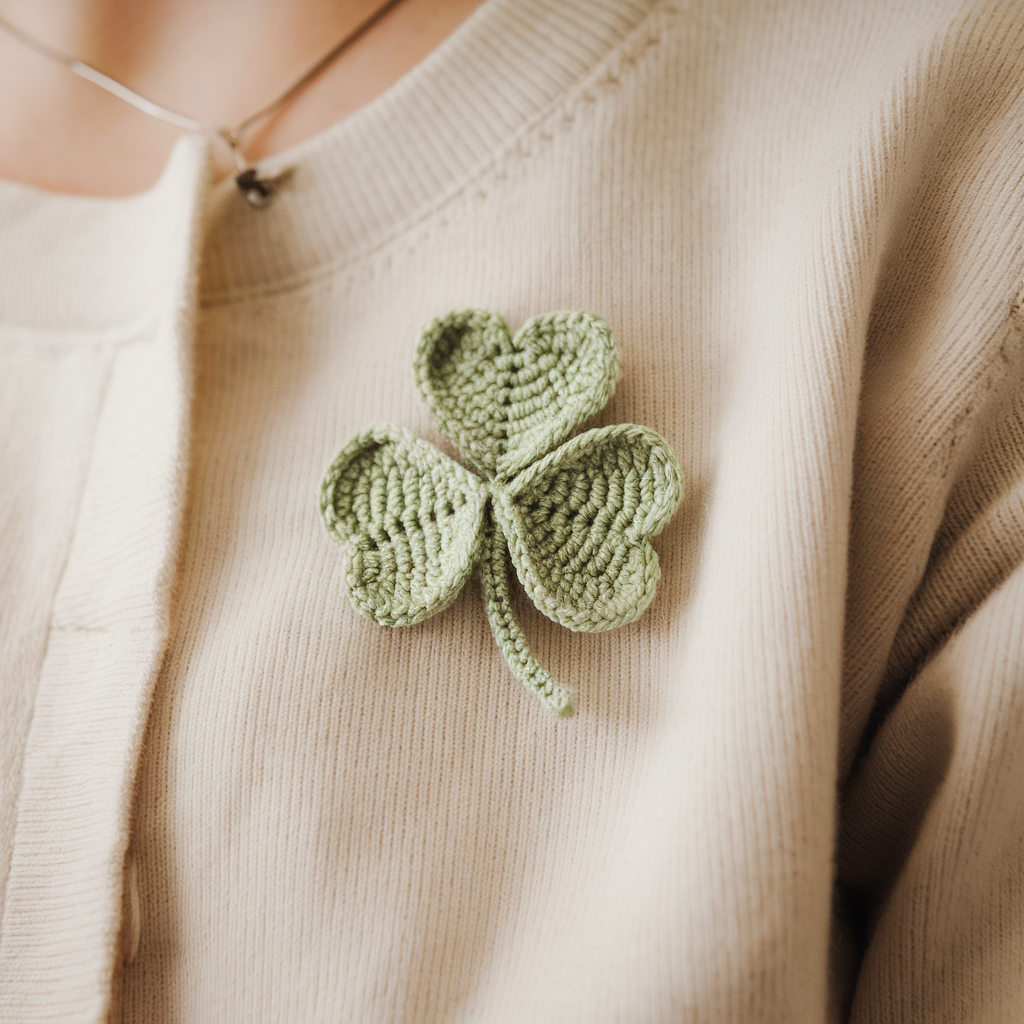
6. Crochet Shamrock Brooch Pattern
Skill level: Beginner
Estimated time: 30–60 minutes
Style notes: Charming three-leaf clover — perfect for spring, St. Patrick’s Day, or nature-inspired accessories. Work flat leaves and a tiny stem, sew together and back with felt.
Materials
- DK or fingering yarn in two greens (leaf green + darker green for accents) — small amounts
- 3.0–3.5 mm hook
- Tapestry needle, felt backing, pinback
Finished size
- Shamrock ≈ 1.5–2 in across.
Pattern concept
Make three heart-shaped leaves (small) and a stem; assemble into a clover and attach pin.
Step-by-step — Leaf (make 3)
- CH 6. R1: SC in 2nd ch from hook, HDC, DC, HDC, SC — creates tapered leaf. Fasten off leaving tail for sewing.
- Alternative leaf (more rounded): MR, CH 1, 8 SC in ring, then shape with SC/HDC/DC around to form rounded leaf; flatten and sew.
Assembling clover
- Arrange three leaves with points meeting in center, overlapping slightly. Sew leaves together through centers with matching yarn and small whipstitches.
- Add a short stem: CH 6, then HDC in every chain back; sew stem to underside so it extends from the base of the leaves.
Decorative finish
- Add small French knots of lighter green in leaf centers or surface embroidery vein lines for realism. Add tiny bead dew drops (adult-only) if desired.
Backing & pin
- Felt circle behind clover, sew on pinback with secure stitches. Reinforce.
Variations & styling
- Use felt in contrasting color behind for pop.
- Add a tiny ribbon loop and hang as a charm instead of a pin.
Care
- Hand wash; reshape.
Final finishing tips for ALL brooches
- Pinback security: Stitch through felt multiple times—don’t rely on a single pass. Use strong polyester thread and tie off inside the felt. Add a drop of fabric glue or fray-check on knots inside the felt for long-term durability.
- Felt backing: Cut felt slightly smaller than the brooch face so it is hidden but large enough to support the pin. For very light brooches, a single felt circle is fine; for heavier appliqués (cameo/metal), use two felt circles sandwiching the pin for even load distribution.
- Washing & care: Most handmade brooches are best spot-cleaned. If yarn is washable, remove metal findings or enclose them in a small plastic bag before gentle laundering. Avoid heat on polymer cameos or glued elements.
- Presentation: Attach your brooch to a small card for gifting (stitch pin through card), or attach to a kraft tag and add care instructions (fiber content, wash gentle).
- Scale & proportion: For statement brooches, increase rounds/petal sizes; for delicate pins, work with finer thread and smaller hooks.
Conclusion
Crochet brooches are delightful, portable projects that let you explore motifs, texture, and assembly techniques while producing thoughtful wearable art. The six patterns here — from the soft Mori-style flower to a fluffy sheep, an antique lace medallion, a playful watermelon slice, classic hearts, and a luck-bringing shamrock — provide a wide creative playground. Each brooch is scalable, customizable, and perfect for gifting, market stalls, or adding handmade flair to your wardrobe.


888slot freebet PP, WM, EVO, DG, AG, Microgaming, SA, VIVA Gaming,… các NPH Live Casino tiềm năng mang đến cho người chơi hàng loạt cơ hội nhận thưởng gấp 40 lần tiền cược ban đầu. Bạn có thể thử sức với các trò chơi mới lạ như: Fast Baccarat, Speed Roulette, Fan Tan,…
Sau khi đăng ký thành công, bạn có thể đăng nhập vào tài khoản của mình và bắt đầu nạp tiền để tham gia các trò chơi tại đây. Từ đây, bạn sẽ có cơ hội trải nghiệm các dịch vụ đa dạng, phong phú mà nhà cái mang lại. Quá trình đăng ký tại ưu đãi 188v vô cùng đơn giản, nhanh chóng và bảo mật, giúp người chơi dễ dàng tiếp cận và tham gia cá cược chỉ trong vài bước ngắn gọn.
Can you be more specific about the content of your article? After reading it, I still have some doubts. Hope you can help me. https://accounts.binance.com/kz/register?ref=K8NFKJBQ
Thanks for sharing. I read many of your blog posts, cool, your blog is very good.
Thanks for sharing. I read many of your blog posts, cool, your blog is very good.
Thanks for sharing. I read many of your blog posts, cool, your blog is very good. https://accounts.binance.com/pt-BR/register-person?ref=GJY4VW8W
I don’t think the title of your article matches the content lol. Just kidding, mainly because I had some doubts after reading the article. https://www.binance.com/register?ref=IXBIAFVY
Your article helped me a lot, is there any more related content? Thanks! https://accounts.binance.com/register-person?ref=IHJUI7TF
Your article helped me a lot, is there any more related content? Thanks!