Tunisian crochet makes rich, dense fabrics that are perfect for blankets: warm without being heavy, textured without bulk, and instantly charming whether you choose a baby blanket or a large throw. In this post you’ll find six distinct Tunisian blanket designs — each explained with clear materials guidance, examples for finished sizes, a detailed step-by-step method you can follow, helpful variations, finishing and blocking notes, and project ideas.
Everything below uses US terms for Tunisian stitches (Tunisian Simple Stitch = TSS, Tunisian Knit Stitch = TKS, Tunisian Purl = TPS, etc.). If you haven’t used Tunisian before I include links in the text only as technique names — but the steps explain what to do. Before starting any blanket, make a 4″ × 4″ swatch in your chosen stitch to measure stitches per inch and rows per inch — that makes scaling accurate.
Quick, general notes (read before you start any design)
- Hook: Tunisian requires a long Tunisian/Afghan hook or a hook with a cable (Tunisian hook). Use the hook recommended for the yarn unless a different gauge is desired.
- Yarn: Most projects here assume worsted (Aran/weight 4) or DK (weight 3). Use cotton for warm-weather blankets, acrylic/wool blends for snuggly throws.
- Gauge example (approx): With worsted weight + 6.5 mm Tunisian hook in TSS you might get ~12–14 sts = 4″ and ~8–10 rows = 4″. Use your swatch to calculate final counts.
- How to size: Decide finished width and height, measure stitches-per-inch from swatch, multiply to get required stitch counts/row counts. I include examples for common sizes (baby 36″ × 36″, lap/throw 48″ × 60″, couch throw 50″ × 70″).
- Terminology: Tunisian fabric tends to be less stretchy horizontally than knitted fabric; plan for slightly wider dimensions if you want drapier results.
- Finishing: Tunisian blankets often need careful blocking and an edging round (sc or crab stitch) to stabilize edges.
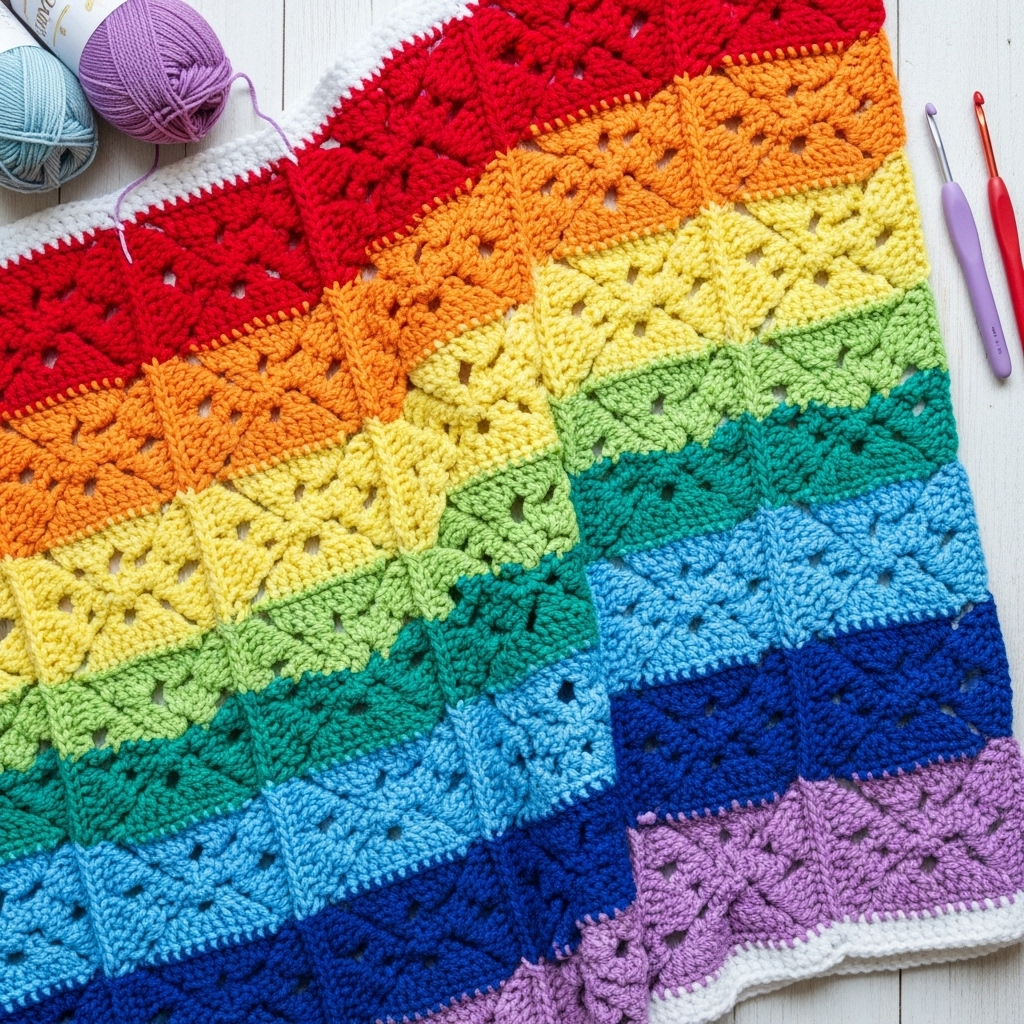
1. Crochet Rainbow Tunisian Entrelac Baby Blanket Pattern
Why this design?
Tunisian entrelac gives the look of interwoven squares (entrelac) but worked with Tunisian technique — small rectangular blocks are worked and joined-as-you-go. The rainbow treatment makes a cheerful baby blanket with lots of color-play.
Skill level: Intermediate — requires comfortable Tunisian technique and join-as-you-go.
Materials (example baby blanket ~36″ × 36″)
- DK or light worsted in rainbow colors (7–9 colors), about 600–800 yds total (depending on yarn).
- Tunisian hook 5.5–6.5 mm.
- Tapestry needle, blocking tools.
Gauge (example sample in TSS): 12 sts = 4″, 8 rows = 4″. Make a swatch in your main stitch (TSS) before planning.
Design concept & geometry
- Work small squares/rectangles — for a 36″ blanket use 9 by 9 squares at 4″ each (9 × 4″ = 36″). Adjust with your gauge.
- Each small square is worked in Tunisian Simple Stitch (or TKS for knit-like look) and joined to neighbors using a slip-stitch join-as-you-go method.
Step-by-step
- Swatch & size planning
- Make a TSS swatch and count sts per inch and rows per inch. Decide square size (example: 4″ squares). Compute stitches per square = stitches-per-inch × square width; rows per square = rows-per-inch × square height. For the example gauge above: stitches per square = (12/4) × 4 = 12; rows per square = (8/4) × 4 = 8. So each square is 12 sts × 8 rows.
- Make the first row of squares (foundation row)
- Work a strip of N squares end-to-end on the hook or individually and join: easier workflow is to make each square individually then join-as-you-go along the edges.
- To make one square: Chain the number of stitches for square width (12), pick up vertically to make Tunisian foundation (or use Tunisian simple stitch foundation):
- Tunisian foundation: Ch 13, insert hook into 2nd ch from hook and do a forward pass picking up loops across (12 loops); return pass then continue Tunisian rows for number of rows (8 rows). At end, you have a square panel.
- Fasten off leaving a tail for joining.
- Join-as-you-go
- Make the first square (bottom-left). For the second square to its right, work the square until the last forward pass; before finishing the return pass, align the new square edge to the edge of the first square and sl st to the last post of previous square every few stitches while doing return pass — this secures them firmly. Alternatively, sew with mattress stitch after making a series of squares.
- Continue making one square after another to form the first row of 9 squares.
- Build successive rows
- Turn and make the next row of squares above, joining their bottoms to the tops of the row below using the same join-as-you-go method: at the point where the new square’s edge touches existing squares, join with sl st or whipstitch.
- Work color order in a rainbow gradient across rows or create vertical stripes — play with color placement.
- Finishing the outer edges
- Once all squares are joined into a 9 × 9 grid, work a border round in TSS or sc around the entire blanket to unify edges: 1–2 rounds of sc in worsted weight, or a decorative Tunisian border (e.g., a round of simple Tunisian single crochet worked as a finishing row if you prefer).
- Block gently to square the blanket.
Variations & design notes
- Make rectangles instead of squares (e.g., 4″ × 6″) for a staggered effect.
- Use TKS for each square to get a knit-like texture, which makes entrelac look even more woven.
- Try a muted rainbow for a modern nursery palette.
Finishing & care
- Weave in tails and block to measurements. Machine-washable yarns make easy-care baby blankets; follow yarn care.
Project ideas
- A 36″ baby blanket, a lapghan 36″ × 48″ (adjust number of squares accordingly).
2. Crochet Tunisian Mitered Throw Blanket Pattern
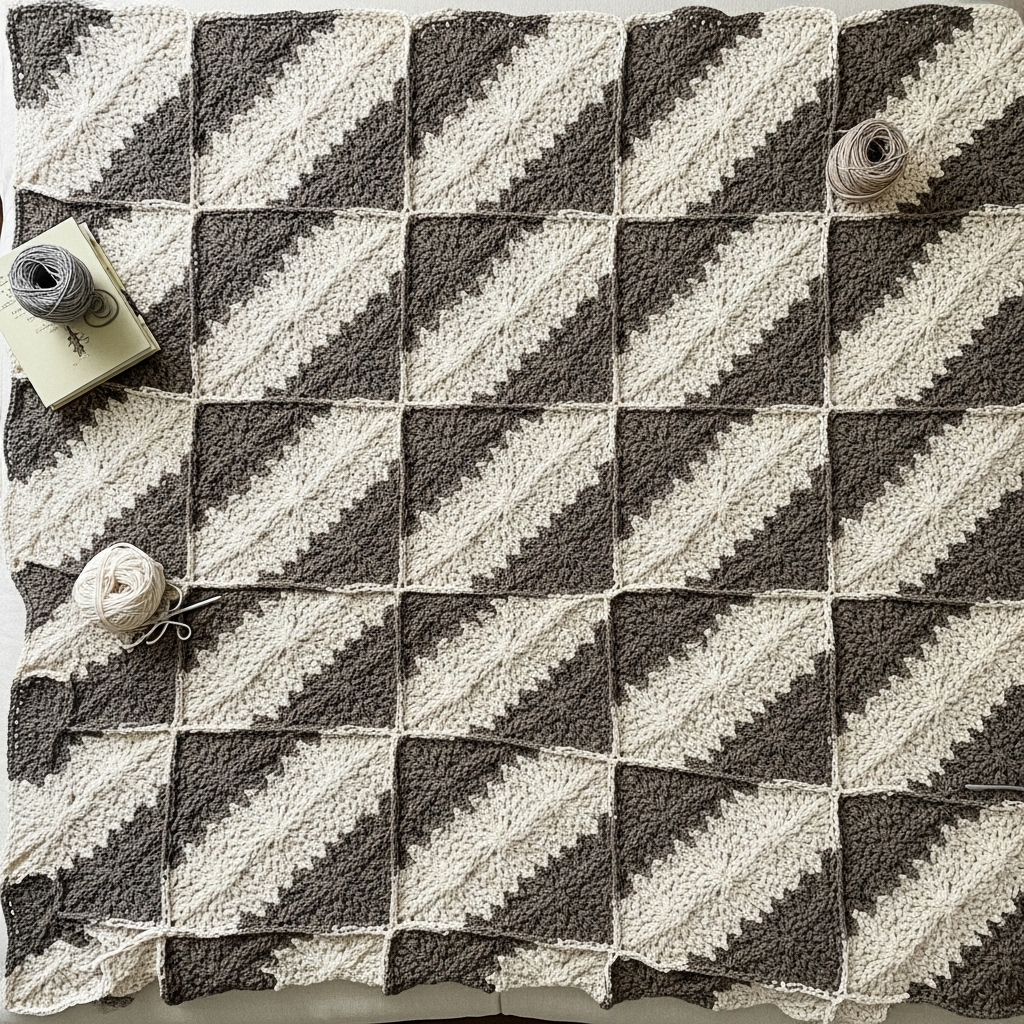
Why this design?
Mitered Tunisian squares create centered decreases similar to mitered knitting — the diagonal seam produces a classic chevron-in-a-square look. Assembled into a grid, the result is a sophisticated throw.
Skill level: Advanced — requires shaping in Tunisian stitches (increasing/decreasing), good counting.
Materials (example throw ~48″ × 60″)
- Worsted weight yarn, 1500–2200 yds depending on size.
- Tunisian hook 6.5–8.0 mm (size to match desired gauge).
- Tapestry needle, blocking mats.
Gauge (example TKS): 10 sts = 4″, 8 rows = 4″. Adjust for a tighter stitch for sharper miter lines.
Design concept
- Work many mitered squares (center decrease/increase to produce miter), then join into a larger throw. Sample: 12 × 15 mitered squares of 4″ each produce ~48″ × 60″.
Step-by-step — make one mitered Tunisian square
- Determine square size in stitches & rows using swatch as described earlier.
- Miter method (center decrease)
- Option A — working over a central column (recommended): Work a rectangular panel as two triangular halves worked back and forth, decreasing one stitch each row at the center to shape a miter.
- Practical approach: A common Tunisian miter uses two Tunisian panels worked simultaneously from opposite edges to the center and joined, but a simpler and robust method is:
- Start: Chain the number of stitches for the diagonal width + 1 (e.g., for a 12-st square chain 13).
- Row 1 forward pass: pick up loops across (12 loops), return pass.
- Row 2 forward pass: pick up loops across as usual but work a decrease at the center by skipping one center stitch on the forward pass (i.e., pick up 1 less loop than previous row so the top of fabric narrows). On return pass work standard return.
- Continue: repeat forward passes while decreasing 1 loop at the midline each repeat until you reach the apex; then reverse by increasing at the midline to build the other half. This creates a centered V shaping.
- Note: It takes practice to do controlled decreases on the forward pass — keep track with stitch markers.
- Alternative simpler approach: Work standard Tunisian squares and seam them on the bias to create a miter look visually. This is easier if shaping is unfamiliar.
- Assembly
- Make required number of mitered squares. Block each square flat and square.
- Join squares with mattress stitch or whipstitch for an invisible join. Align diagonals for the chevron/miter effect.
- Border
- Add 2–3 rounds of sc or a Tunisian border to unify the throw. A wide ribbed border in Tunisian rib (alternating TSS and TPS rows) looks excellent.
Variations
- Use color gradients that radiate outward from the miter center on each square for a starburst effect.
- Make larger mitered panels (8″ miter per block) to speed assembly.
Finishing & care
- Block with attention to diagonal lines to keep miters visually crisp. Machine-washable fibers allow easy maintenance.
Project ideas
- Cozy sofa throw, baby play mat, or bed throw (scale squares accordingly).
3. Crochet Spiral Tunisian Blanket Pattern
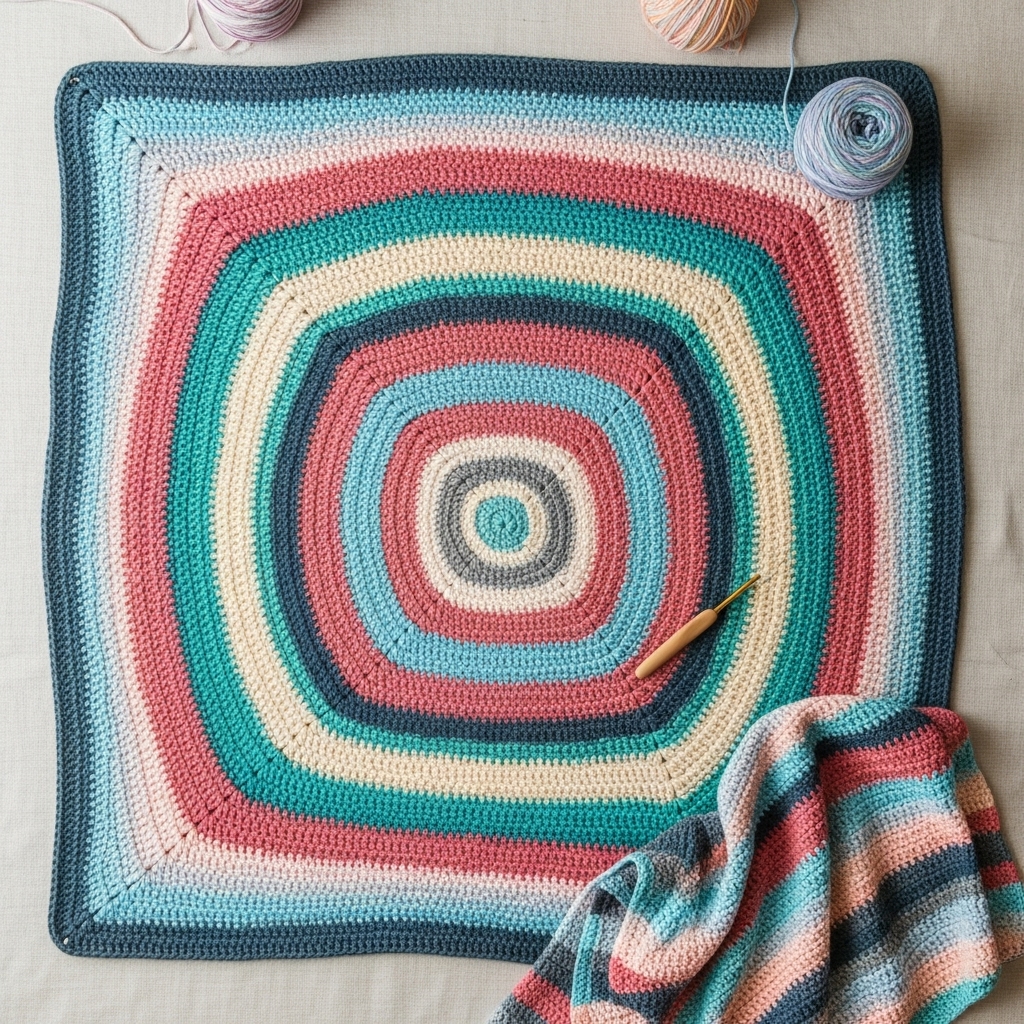
Why this design?
A spiral motif can be created in Tunisian tapestry or by joining strips in a spiral arrangement. The spiral gives a dynamic, modern look. This approach is great for colorwork and gradient effects.
Skill level: Intermediate — color management and seaming/assembly required.
Materials (example lapghan ~48″ square)
- DK or worsted yarn in gradient colors or 6–8 contrasting hues.
- Tunisian hook suited to yarn (5.5–7.0 mm).
- Tapestry needle, blocking tools.
Design approaches (two workable methods)
Method A — Center-out Tunisian spiral (tapestry-style, single panel)
Tunisian crochet traditionally builds in rows; to make a center-out spiral you can work a fabric of rectangular panels that emulate concentric rings, or you can adopt tapestry Tunisian in a log-cabin style that spirals.
- Log-cabin spiral approach (recommended)
- Make strips: Work several Tunisian strips (long panels) of different widths in your colors — e.g., start with a small center square strip in color A, then add longer strips in color B, C, etc., and sew them around the center like log-cabin blocks forming a spiral.
- Strip dimensions: Plan strips such that each new strip wraps around the previous assembly. For example, start with a 6″ square, then make a 6″ × 18″ strip to form the next band, then a 18″ × 24″ strip for the next, etc.
- Joining: Join each strip as you go with mattress stitch to make a spiral assembly. This is effectively a Tunisian log-cabin spiral.
- Method B — Color-spiral via stitch-pattern shifting
- Work a large square in Tunisian Simple Stitch; change color at strategic row counts to make a spiral illusion: e.g., color bands that step outward one stitch each time. This is complex in charts; the log-cabin strip method is more approachable.
Step-by-step (log-cabin spiral example)
- Center square: Make a small TSS square (e.g., 6″ × 6″ in color A).
- First band strip: Crochet a strip whose width equals the center square’s side and length equals 3× center side (i.e., 6″ × 18″) in next color B.
- Attach strip: Sew strip to one side of center. Continue around center adding strips on successive sides to form a spiral rectangle that gradually expands.
- Repeat until you have the desired finished dimension (e.g., 48″ × 48″). You’ll trim ends and square up at the end.
- Finish border: Work a wide Tunisian rib border or sc rounds to unify.
Variations
- Make a colorful sunburst spiral for a modern nursery.
- Use Tunisian knit stitch for a softer, more drapey spiral unit.
Finishing & care
- Block strips before assembly to make joining easier and edges even. A final border hides seam joins and stabilizes edges.
Project ideas
- Bold gradient throw for contemporary living spaces.
4. Crochet Chevron Tunisian Blanket Pattern
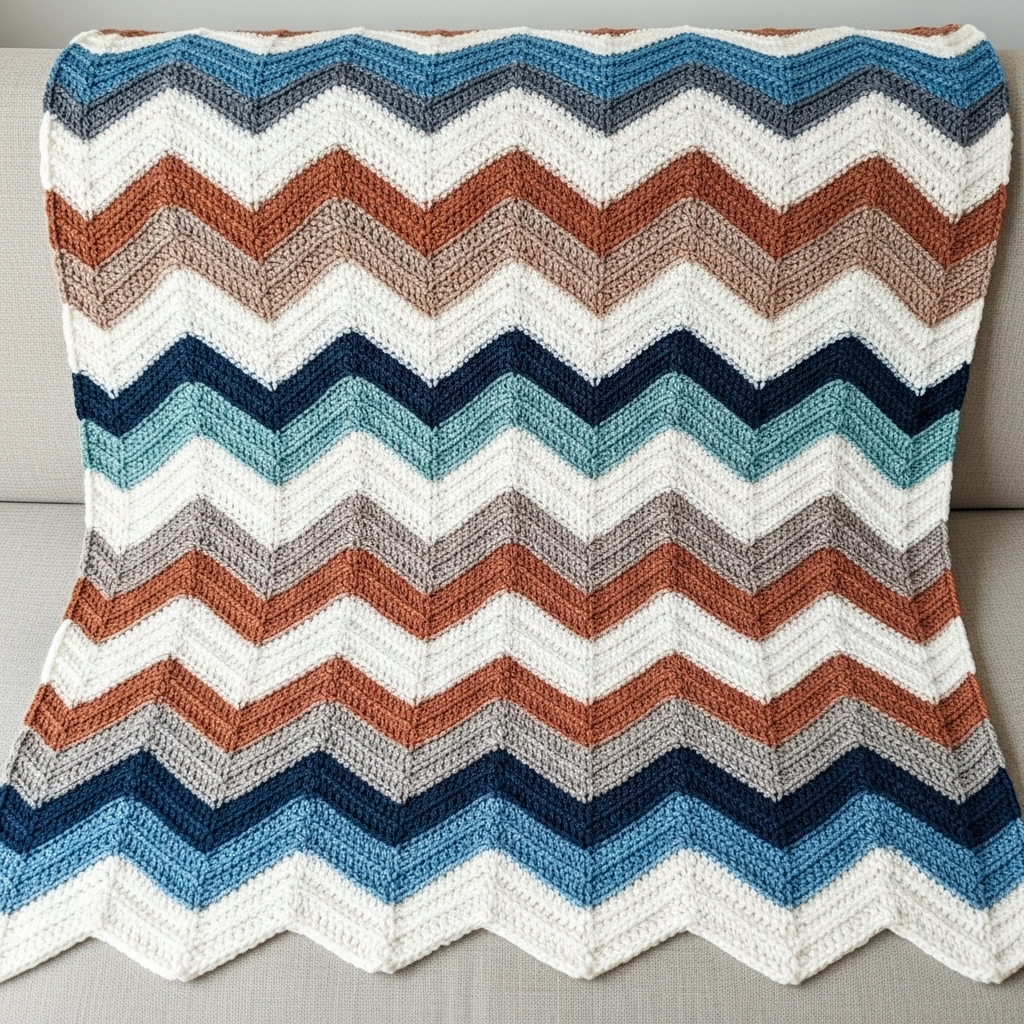
Why this design?
Chevron (zigzag) patterns look excellent in Tunisian because the stitch’s vertical structure makes crisp chevrons. You can make large chevrons with color stripes or textured chevrons using decreases/increases.
Skill level: Intermediate
Materials (example throw ~50″ × 60″)
- Worsted yarn in two or more colors, 1800–2400 yds total.
- Tunisian hook 6.5–8.0 mm.
Design concept
- Use repeated increases and decreases in Tunisian stitch rows to form peaks and valleys. Best executed as one wide panel worked in TSS with intentional increases/decreases at chevron points.
Step-by-step
- Swatch & plan
- Decide chevron repeat width (for a crisp chevron a multiple of basic repeat is necessary). Example: use a 24-st chevron repeat across panel. From swatch compute stitches required for desired blanket width.
- Foundation chain
- Chain the total stitches for full width (for example if you want 200 sts across, chain 201).
- Row construction (basic chevron shaping)
- Forward pass: pick up loops across as TSS forward pass (one loop per foundation ch).
- Return pass: work standard return pass (k2tog style decreases are executed on forward passes in Tunisian).
- Chevron shaping: On successive forward passes, decrease by 1 or 2 loops at chevron valley and increase by making extra loops (or using post stitches) at peaks. Practically, to create a valley:
- On the forward pass, when you reach the valley position, skip a chain or miss picking up a loop to reduce one loop — that produces a vertical decrease. To create the matching peak later, pick up an extra loop or use a yarn-over addition on a later forward pass to create increased width. These maneuvers create diagonal edges forming zigzags.
- Because managing loop counts on a long Tunisian hook can be tricky, many makers prefer to work chevrons as a sequence of vertical panels joined, or to use color stripes to emphasize chevrons created by joining mitered triangles (a hybrid approach).
- Alternate and easier method — modular chevrons
- Make long rectangular strips of triangular chevron segments (e.g., right-leaning triangle panels) and join them in alternating directions to create a zigzag across the blanket. This reduces complicated loop management.
- Border
- Add a 2–4″ Tunisian rib border to flatten chevrons and stabilize edges.
Variations
- Work chevrons in TKS for knit-like look.
- Use color stripes to highlight peaks and valleys.
Finishing & care
- Block carefully to open chevron points; secure the edges with a firm border.
Project ideas
- Large living-room throw, bed runner, or statement piece folded over an armchair.
5. Crochet Corner-to-Corner Tunisian Pixel Blanket Pattern
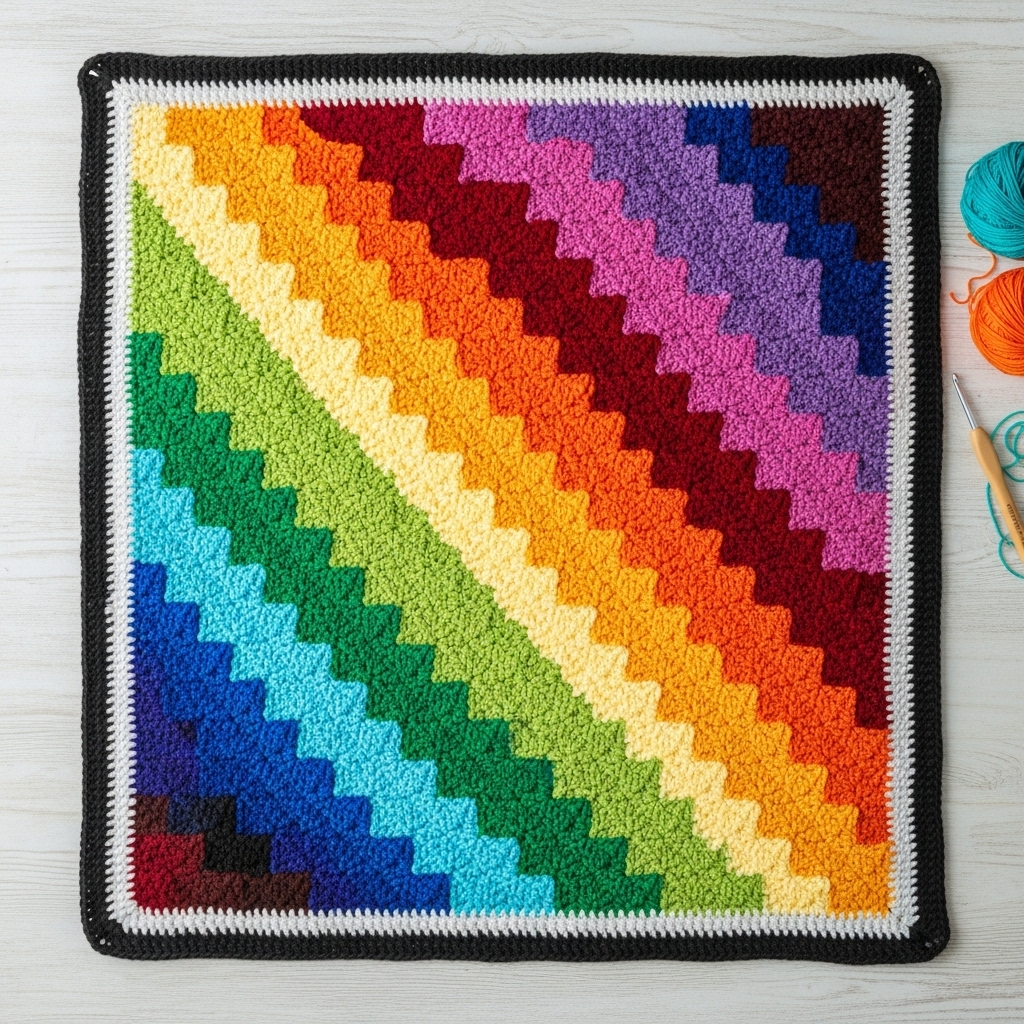
Why this design?
This design adapts the popular corner-to-corner (C2C) pixel/graphghan concept to Tunisian crochet so you can create pixel-art or photo-style blankets with the dense canvas that Tunisian provides.
Skill level: Intermediate → advanced (color changes and pixel planning).
Materials (example lapghan ~48″ × 48″)
- DK or worsted yarn in multiple colors per design.
- Tunisian hook 6.5–8.0 mm.
- Chart or pixel graph for your image.
Design concept & approaches
- True C2C is a knit/crochet-on-the-diagonal technique worked in small blocks (granny-like). Tunisian C2C can be implemented by making many small Tunisian squares (pixels) and joining them diagonally as you go, or by using Tunisian mosaic/pixel technique where you work rows that represent diagonal stripes of pixels.
Two practical methods
Method A — Pixel squares joined-as-you-go (most straightforward)
- Decide pixel size in stitches (for example each pixel = 2″ square).
- Make pixel squares in the required colors using TSS panels sized to pixel dimensions (e.g., 6 sts × 6 rows).
- Join squares diagonally: assemble squares in diagonal rows (the traditional C2C layout) by sewing or slip-stitch joining. This yields a classical pixel C2C look using Tunisian panels.
Method B — Tunisian intarsia/graphghan stripes
- Work the entire blanket as a large Tunisian panel. Use tunisian tapestry or color-carrying intarsia techniques to change color within rows to create pixel-art horizontally.
- To achieve diagonal C2C effect, plan rows such that each row increases in pixel count according to the C2C chart — but this requires complex color management and is advanced.
Step-by-step (Method A example for a 48″ blanket)
- Decide pixel and grid: If pixel = 2″, to cover 48″ you need 24 pixels per side → 24 × 24 grid = 576 squares. Pixel size in stitches: measure stitches-per-inch from a TSS swatch; for example if 12 sts = 4″ then 6 sts = 2″ → each pixel is 6 sts × rows-per-pixel rows.
- Make 576 small squares — yes this is labor intensive but modular and beginner-friendly.
- Assemble: join squares into diagonal strips: row 1 has 1 square, row 2 has 2 squares, … up to 24 squares; then down again if making a full square. This gives the corner-to-corner arrangement.
- Finish with a border round and block to square.
Variations
- Use fewer color changes by grouping pixels into larger blocks for a mosaic look.
- For simpler motif: choose a geometric motif or text rather than full photo.
Finishing & care
- Press and block each square before assembly to ensure consistent tension. A final wide border unifies the piece.
Project ideas
- Photo blanket (converted to simplified pixel art), geometric modern mosaic, or game-themed pixel blanket for kids.
6. Crochet Tunisian Cable Throw Blanket Pattern
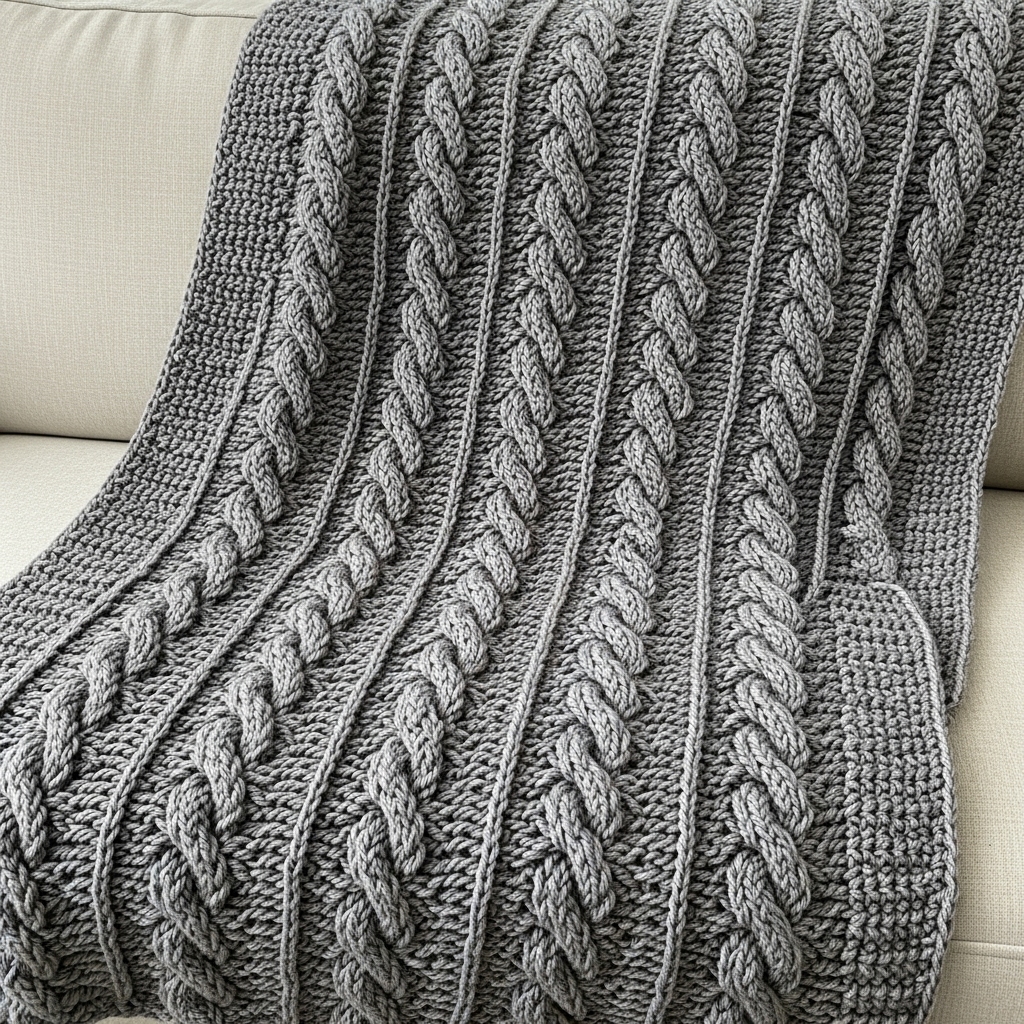
Why this design?
Cables in Tunisian crochet produce dramatic, sculptural ridges and vertical columns that read like classic knitted cables but with Tunisian firmness. This gives a luxurious textured throw.
Skill level: Advanced — requires crossed Tunisian post/cable techniques.
Materials (example throw ~50″ × 60″)
- Bulky or worsted yarn (bulky shows cable relief best), 2000–3000 yds.
- Tunisian hook 7.0–9.0 mm.
Stitch & technique notes
- Tunisian cables are typically made by crossing groups of Tunisian Knit Stitches (TKS) or using front-post/back-post T stitches and temporarily placing loops on a cable needle or holding groups to cross. Because Tunisian stitches remain on the hook, cable crossing is executed during the return pass or in special cross rows.
Step-by-step (basic Tunisian cable panel)
- Gauge & panel planning
- Decide cable motif width (e.g., 12-st cable panel) and how many repeats across throw. For a 50″ width with 4.5 sts/in, you might plan 225 sts across (use your swatch). Cable panels of 12 sts plus spacer sts make up the width.
- Start foundation
- Chain foundation for full width and work a few TSS rows to establish base.
- Cable cross technique (one method)
- Panel building: Work TKS across panel for a number of rows to create vertical ribbed columns.
- Cable cross row: On a row where you want the cable to cross, instead of working the TKS in order, work into the post of a later stitch before an earlier stitch to cross them:
- Example: For a left-crossing cable where you want stitches 3–6 to cross with 7–10, work TKS into posts of stitches 7–10 first (pulling their loops forward), then work into posts of stitches 3–6; the order of working changes which group lies in front.
- More structured approach: slip groups off the hook onto a cable needle equivalent (or a separate cord), work next group, then replace earlier group onto hook and work them; this simulates cable needle crossing.
- Repeat cable and spacer columns
- After a cross, work several rows of plain TKS to form a cable column, then cross again every 8–12 rows (depending on cable size) to create repeating cable twists.
- Full throw assembly
- Repeat cable panels and apply spacer panels (TSS or ribbing) between cables. Work entire throw as one wide panel or make narrower panels and seam.
Alternative simpler approach — surface-cabled look
- Make faux-cables by using post stitches (FPdc/BPdc) as surface columns on a TSS ground and cross them using surface slip-stitch crosses. This avoids manipulating live loops but yields a cable-like surface.
Variations
- Combine small braided cables and large rope cables.
- Use reversible cable patterns for a double-sided throw.
Finishing & care
- Block to open cable texture; bulky yarns may benefit from hand-wash only. Add a dense border to keep edges square.
Project ideas
- Heirloom sofa throw, luxurious bed throw, or chunky cable afghan.
Final finishing: Edges, blocking, and care for Tunisian blankets
- Edging: Tunisian edges can curl slightly. Work a round of sc, crab stitch (reverse sc), or a Tunisian border (pick up stitches along edge and work a Tunisian rib or Tunisian single crochet round) to stabilize edges.
- Blocking: Wet block natural fibers. For acrylic, steam-block carefully (check yarn instructions). Block strips/panels before assembly for precise joins.
- Joining panels: Mattress stitch gives a neat join that’s mostly invisible. For a decorative finish, use a crocheted join (slip-stitch seam or 3-needle bind-off–like method) in a contrasting color.
- Care: Use yarn-appropriate care instructions. Many Tunisian blankets use acrylic blends for easy care; wool blends add warmth at the cost of hand-washing.
Conclusion
Tunisian crochet gives blanket makers tremendous creative range: the modular, colorful energy of rainbow entrelac, the tailored geometry of mitered squares, the movement of a spiral, the classic punch of a chevron, the pixel-perfect storytelling of a corner-to-corner Tunisian pixel, and the luxurious depth of Tunisian cables. Each of these six patterns can be adapted for a tiny baby blanket or scaled up to a lavish living-room throw simply by changing gauge, square size, or the number of repeats.