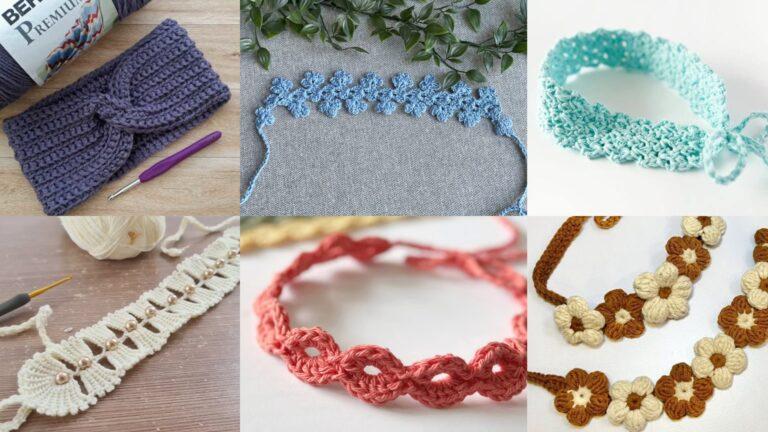
Crocheted shorts are a fantastic warm-weather project: quick to work, endlessly customizable, and perfect for mixing textures, colors and yarn weights. Below you’ll find a single practical introduction (materials, sizing & gauge primer, abbreviations and safety/care notes) followed by six full patterns — each with skill level, materials and yardage, sample gauge, stitch multiple, step-by-step construction (waist → body → leg openings → finishing), fitting and sizing notes, variations and care. I give concrete numeric examples so you can scale each pattern to the size you need.
Before you start — materials, sizing & gauge primer, abbreviations
Common materials
- Yarn: lightweight cotton, cotton blends or bamboo for breathable summer shorts; fingering/ sport held double, DK or light worsted depending on desired drape and stitch definition.
- For lightweight lacy shorts (beach/cover): sport or DK yarn, ~350–550 yards total (adult sizes).
- For structured everyday shorts: DK/light worsted ~450–700 yards.
- For dense fitted shorts: worsted ~600–900 yards.
- Hooks: 3.5–5.5 mm depending on yarn and desired fabric.
- Elastic (1″ / 2.5 cm) for optional casing, drawstring cord, tapestry needle, stitch markers, measuring tape, safety pin.
- Optional: lining fabric for modesty (especially for lacy openwork shorts).
Sizing & gauge primer (read before you start)
- Choose finished hip circumference (FH) — shorts are measured across hips, not waist, unless you want high-waisted fit. Typical finished hip targets (light ease included):
- XS: 32 in
- S: 36 in
- M: 40 in
- L: 44 in
- XL: 48 in
- Make a 4″ × 4″ swatch in the stitch pattern you will use and block it the way you will finish the shorts. Measure horizontally stitches per inch (spi) and vertically rows per inch (rpi).
- Convert finished hip to stitches:
- Example (digit by digit): Desired FH = 40 in, measured spi = 4 sts/in. Multiply digits:
- 40 × 4 = (40 × 4) = (4 × 4) × 10 = 16 × 10 = 160 stitches.
- If your stitch pattern requires a multiple (e.g., multiple of 4), make sure your total matches that multiple; adjust to nearest valid multiple.
- Example (digit by digit): Desired FH = 40 in, measured spi = 4 sts/in. Multiply digits:
- Decide waistband ease: for elasticized waist pick 2–4 in negative ease at waist depending on stretch (i.e., waistband measurement smaller than body measurement so elastic stretches). For pull-on stretch fabric, calculate waist separately.
Abbreviations (US)
- ch = chain
- sl st = slip stitch
- sc = single crochet
- hdc = half double crochet
- dc = double crochet
- tr = treble (UK treble = US dc; here US used)
- inc = increase (2 sc in same st)
- dec = decrease (sc2tog)
- BLO / FLO = back loop only / front loop only
- RS / WS = right side / wrong side
- rep = repeat
Safety & finishing notes
- If shorts are made with lacy/open stitches, consider a separate fabric lining or wearing as cover-ups.
- Elastic casings should be stitched securely and tested for comfort.
- Wash a swatch the same way you will wash the garment — cotton can shrink. Prewash yarn if you want minimal shrinkage after making the shorts.
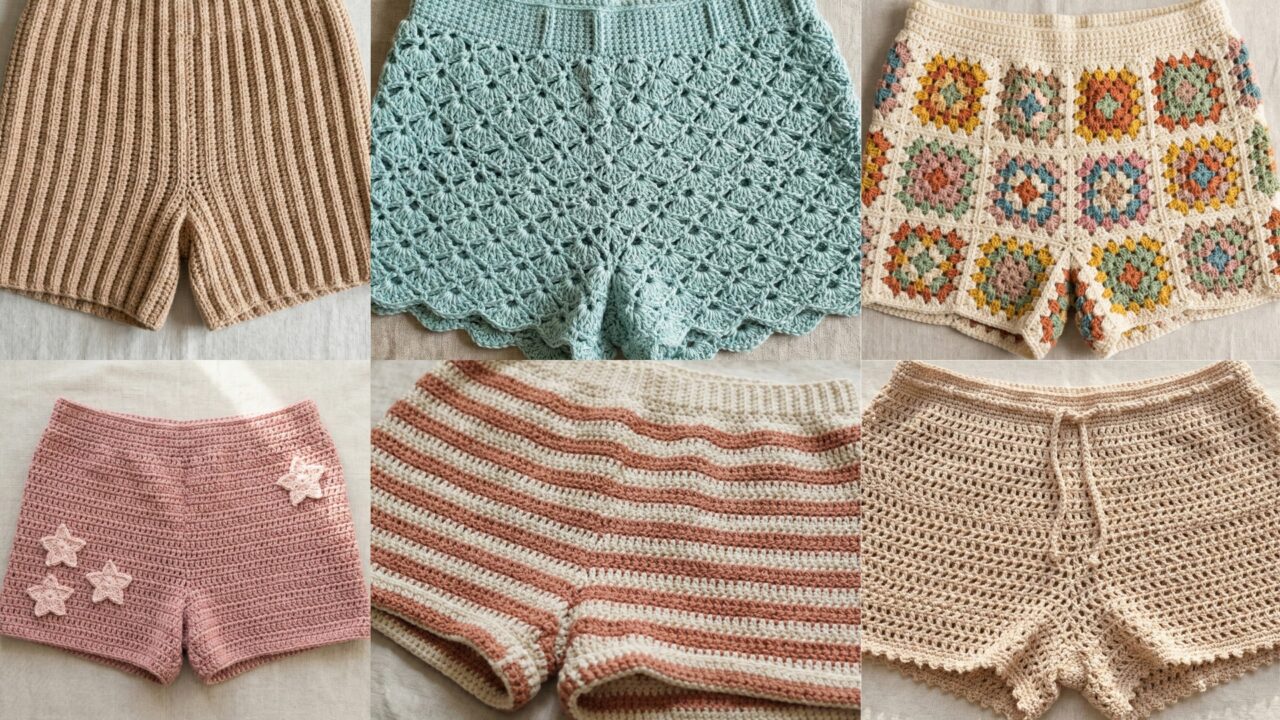
1. Crochet Striped Shorts Pattern
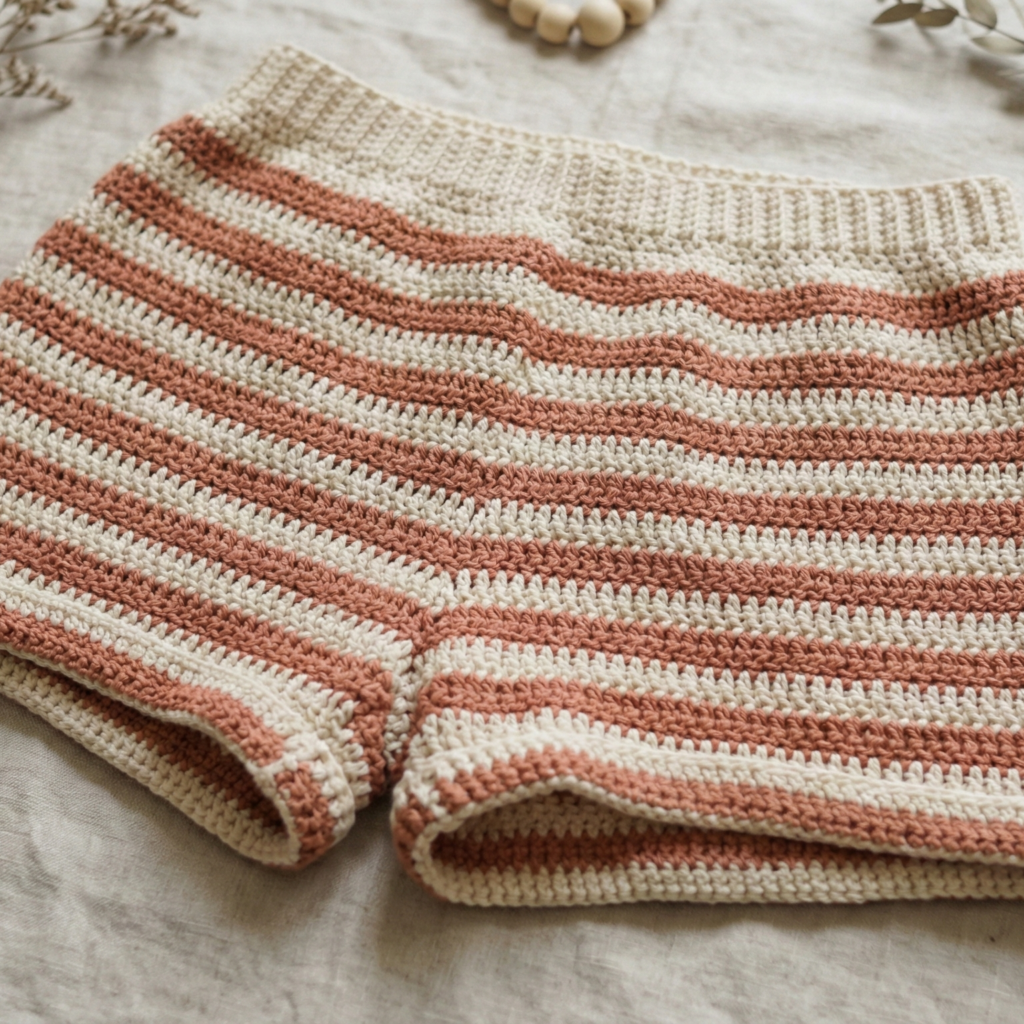
Vibe: Casual, sporty stripes — great for colorblocking and stash busting.
Skill level: Confident beginner.
Materials (sample adult M)
- DK cotton (2 colors): MC (main) 300 yd, CC (contrast) 150 yd.
- Hook: 4.5 mm (adjust to gauge).
- Elastic 1″ (waist), yarn needle, stitch markers.
Sample gauge (in half-double crochet pattern): 4.5 sts × 2.8 rows = 1″ (spi ≈ 4.5). Make a 4″ swatch and confirm.
Pattern multiple: No strict multiple — the pattern is worked in rounds; aim for total hip stitches = FH × spi and then round to nearest even number.
Construction overview
Worked in joined rounds from waistband down (top-down) with color changes every few rounds for stripes. You will shape the crotch by separating front/back panels and working each leg in the round then joining at the rise to finish the gusset and waistband.
Step-by-step (example adult M; FH = 40 in, sample spi = 4.5 → stitches target)
Calculate stitches (digit math)
- FH 40 in × spi 4.5 sts/in = 40 × 4.5 = 40 × 4 + 40 × 0.5 = 160 + 20 = 180 stitches around the hip. Round to nearest even number — 180 is fine.
Waistband (elastic casing)
- Ch foundation to make a ring of 180 sts: chain 182 (180 + 2 turning ch) and join to work in the round (careful not to twist) OR use foundation hdc.
- Round 1: hdc in each chain around to form base round. Join.
- Rounds 2–6: Work in BLO hdc (back loop only) to create a band ridge. This will fold to form casing. Work 5 rounds (or until band height ≈ 1.25″–1.5″). Fold the band up and seam inside with slip stitch or whipstitch leaving a small opening to insert elastic.
- Insert elastic using safety pin; overlap elastic ends 1″ and stitch securely; close slit.
Body / hip area
5. With MC, join below band and work rounds of hdc (or dc for airiness) changing color every 4 rounds for stripes: e.g., MC 4 rounds, CC 2 rounds repeat until you reach the desired short length before leg separation. For length example, aim for 10″ from waist to crotch (measure based on wearer).
Leg separation & rise shaping
6. To create crotch opening, calculate front and back panel counts. For balance, split hip stitches into two leg openings + front and back rise. Example: allocate 2 × leg openings of 38 sts each and leave center front/back rise stitches. A simple method: mark two sections for leg holes each 38 sts wide (chose based on thigh size), remove those stitches to work legs separately, and continue body joining top and bottom with decreasing rows to create gusset.
Work legs
7. Join yarn at first leg opening and pick up 38 sts around opening evenly. Join in round. Work rounds of hdc for the leg tube until desired inseam (e.g., 3.5–4.5″ for shorts) — adjust for desired length. Finish with 2 rounds BLO sc for neat cuff. Repeat other leg.
Gusset & finish
8. Rejoin both legs to the body by reattaching to the remaining rise stitches and work a few rounds of hdc to smooth the transition, decreasing if necessary at inner leg seams to shape the gusset. Fasten off and weave ends.
Edging
9. Work a round of sc around leg openings and waistband top for a tidy finish. Optionally add a drawstring: ch 80, sc back to create cord, weave through casing or create buttonholes.
Variations
- Use wider stripes, gradient yarn, or change stitch to shell/bobble for texture.
- Make high-waisted version by extending waistband and not adding elastic (use stretch fabric).
Care
- Cotton can shrink; hand wash or machine wash gentle and dry flat.
2. Crochet Stria Shorts Pattern
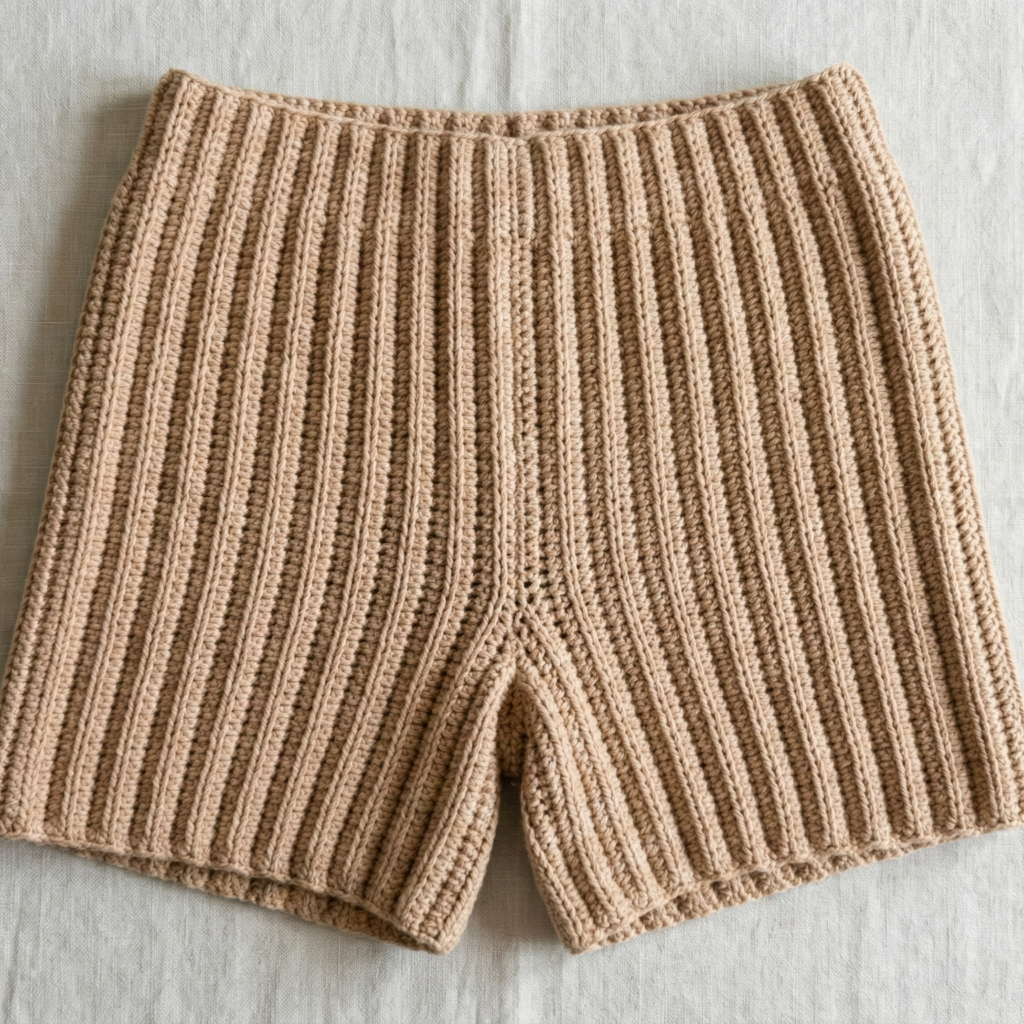
(Stria = textured vertical ribs + flattering fit)
Vibe: Vertical ribbing for slimming lines and a structured, modern silhouette.
Skill level: Intermediate (post stitches & shaping).
Materials (sample adult M)
- DK cotton or cotton blend ~500 yd.
- Hook: 4.5 mm (or 5 mm for looser fabric).
- Elastic 1″ optional.
Sample gauge: 4 sts × 5 rows = 1″ in ribbed stitch (spi ≈ 4).
Pattern multiple: multiple of 2 (rib repeats).
Construction overview
Worked top-down in rounds using front-post/back-post dc ribbing or alternating hdc in BLO for vertical texture. Seamless top-down decreases at crown of shorts not needed; shaping achieved by increases/decreases to fit waist → hip → leg openings.
Step-by-step
Stitch idea (vertical stria rib)
- Round pattern: fpdc in next st, bpdc in next st repeat — this produces pronounced ribs.
Calculate hip stitches (digit math example)
- FH 40 in × spi 4 = 160 stitches. If using rib multiple 2, 160 is fine.
Waistband
- Work 2 rounds of sc or hdc in BLO to form base. For fitted top, work 6 rounds of BLO hdc and fold as a casing similarly to Pattern 1, or work rib directly and skip casing if you prefer no elastic.
Body with ribs
2. Begin ribbing round: fpdc, bpdc repeated across rounds for vertical ribs. Continue in rounds until hip depth (e.g., 2–3″ below waist) then continue down to desired short length.
Shaping for hips and thighs
3. If you are increasing for hips, add evenly distributed increases rounds: e.g., every 6th round add 8–12 increases evenly across to allow for hip fullness. To calculate: if waist stitches = 140 and hip target = 160, need 20 increases. Spread over 5 rounds → 4 inc each round at evenly spaced intervals.
Leg separation & finishing
4. Mark inner leg seams and create leg openings similar to Pattern 1 (pick up stitches around openings and work legs down). Alternatively work the shorts as a tube and after reaching desired length flatten and seam inner leg to create leg openings.
Edge finishing
5. Work a few rounds of sc in smaller hook around leg openings and optional picot or shell for feminine touch.
Variations
- Alternate color ribs for subtle striping.
- Add high-rise band by making longer waistband and additional shaping.
Care
- Block to even the ribs; wash per yarn instructions.
3. Crochet Shell Stitch Shorts Pattern

Vibe: Feminine, lacy shell motifs — great as beach cover-ups or paired with a slip.
Skill level: Intermediate (pattern repeats and shaping).
Materials (sample adult M)
- Sport or DK cotton ~500 yd (lacy needs more yarn).
- Hook: 4.0–4.5 mm.
- Optional lining.
Sample gauge: 5 shell repeats (each repeat = 6 sts) × 3 rows = 4″ (spi ≈ 5).
Pattern multiple: multiple of 6 + 1 (for shell repeat and turning stitch).
Construction overview
Worked bottom-up or top-down; here I use top-down for easier waist fitting. The shell pattern (clusters of dc) creates airy fabric — add a cotton lining if wearing alone.
Step-by-step
Foundation — calculate stitches
- FH 40 in × spi 5 = (40 × 5) = 200 stitches around hip. But shell multiple is 6 + 1, so choose a total close to 200 that fits pattern: 6 × 33 = 198; plus 1 = 199 — round up to 199 stitches. If you prefer even number, adjust to 6 × 34 + 1 = 205. Choose 205 for easier work.
Top band
- Ch foundation 205 + 2 turning ch, join carefully. Work 2 rounds sc for a firm top edge. Optionally form casing by working additional rounds BLO and folding.
Main shell body
2. Row pattern (worked in rounds): Example shell = skip 2, 5 dc in next st, skip 2, sc in next, but when working in rounds you’ll convert to stitches: Round 1: sc, ch2, skip, shell (5 dc) in next st, ch2 repeat to align shells. Use your chosen shell chart and test a repeat panel to ensure alignment. Work shells in a 3–4 round repeat as per design.
- Continue shell rounds until desired short length (e.g., 11–12″ from waist for mid-thigh shorts). Measure as you go.
Leg openings
4. For shell shorts, you can make the garment as a tube and then seam the inner leg opening: fold tube flat and seam from hem up the inner thigh for desired leg hole length (e.g., seam 3–4″ up). Alternatively pick up stitches at folded edge and leave a slit for the legs and work legs down as small u-tubes.
Finishing
5. Work a scalloped shell edge around leg openings to echo the shell motif. Add lining: cut fabric pieces to short shape and hand sew into interior for modesty.
Variations
- Work shells in different sizes (larger shells for more pronounced scallops).
- Use linen blend for breathable summer shorts.
Care
- Gentle washing recommended for cotton lace; dry flat.
4. Crochet Beach Shorts Pattern

Vibe: Relaxed, quick, breezy — ideal for warm weather and beach layering.
Skill level: Confident beginner.
Materials (sample adult M)
- Lightweight cotton or bamboo DK ~400–600 yd.
- Hook: 4.5 mm (loose gauge for drape).
- Elastic 1″ optional; cord for drawstring.
Sample gauge: 4.25 sts × 3.2 rows = 1″ in dc mesh (spi ≈ 4.25).
Pattern multiple: multiple of 3 (for mesh repeats).
Construction overview
Worked bottom-up as a relaxed short with drawstring waist or elastic casing. Mesh or V-stitch body keeps it airy.
Step-by-step
Calculate hip stitches
- FH 40 in × spi 4.25 = 40 × 4.25 = 40 × 4 + 40 × 0.25 = 160 + 10 = 170 stitches. If multiple of 3, 3 × 56 = 168; 3 × 57 = 171. Choose 171 stitches.
Leg cuffs & rise
- Start with cuff for each leg: ch 38 (for thigh circumference chunk), join and work 2–3 rounds sc or hdc in BLO to form cuff. Work leg tube until just above mid-thigh.
- After both legs worked, join them by making a tube: fold and seam crotch or join by picking up stitches between legs to close gusset.
Waist
3. Work mesh pattern up to waist (V-stitch, dc, ch1, dc) in rounds. Add 4–6 rounds of tighter sc in BLO to create a casing. Fold and sew to form elastic channel, or add drawstring by weaving a crocheted cord through chain-spaces.
Length
4. Beach shorts often shorter: keep inseam 2–4″. For coverage, lengthen as desired.
Edging
5. Add picot or small shell around leg openings for playful finish. Consider adding side slits for ease.
Variations
- Make matching beach cover-up set with a crop top.
- Use variegated cotton for ombre beach vibes.
Care
- Quick drying cotton/bamboo; machine wash gentle.
5. Crochet Granny Square Shorts Pattern
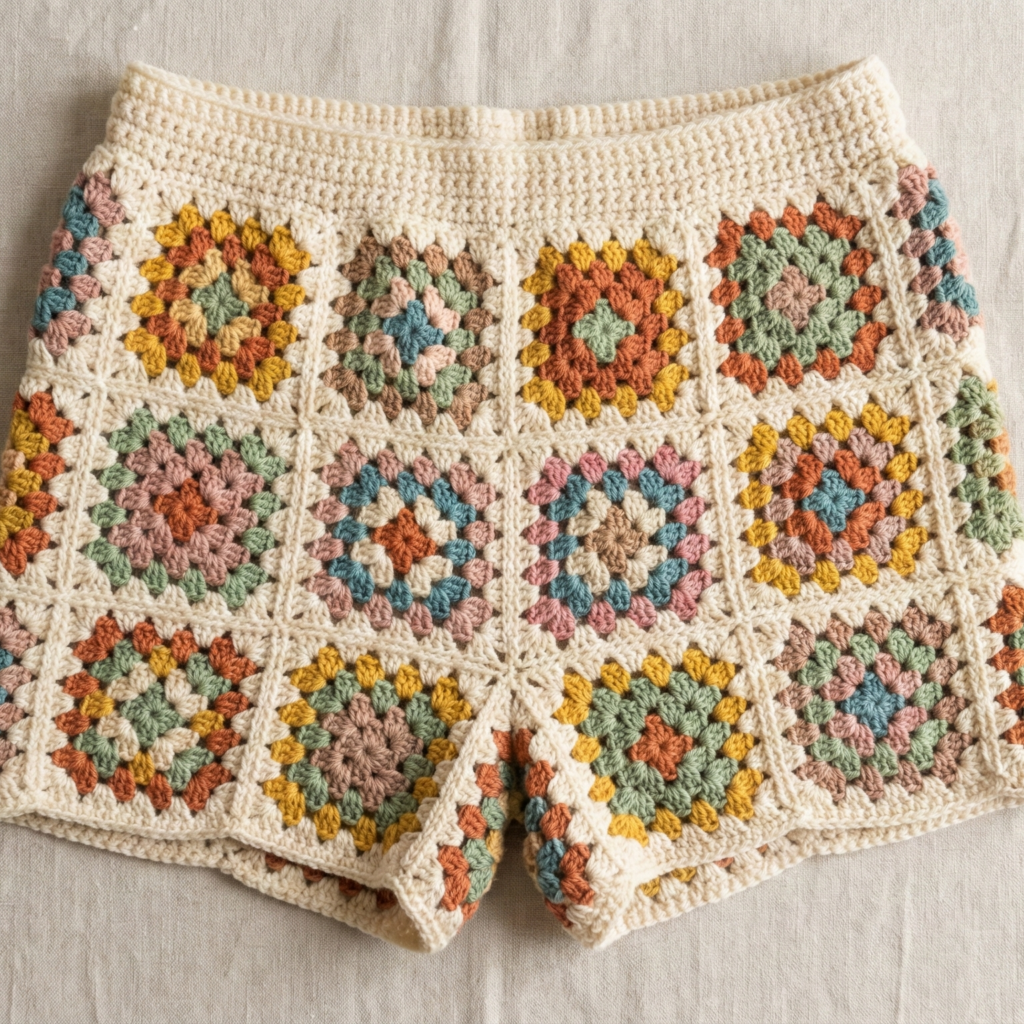
Vibe: Retro, boho patchwork made from granny squares — highly customizable and stash-friendly.
Skill level: Confident beginner (many motifs, joining).
Materials
- DK/worsted scraps in multiple colors ~600–900 yd total depending on number of squares.
- Hook: 4.0–5.0 mm.
- Lining fabric optional.
Square size & count idea
- If you make 4″ squares and need shorts width of about 20″ per front panel, you’ll need 5 squares across (5 × 4″ = 20″). For a typical shorts layout use 2 panels (front/back) each 5 squares across × 3 squares tall = 30 squares total. Adjust square counts for sizing.
Construction overview
Make granny squares, block them to uniform size, join into rectangular panels, assemble into shorts with waistband, add casing or elastic, and finish leg openings. Lining recommended for coverage.
Step-by-step
Make squares
- Classic granny: MR; Round 1: ch3, 2 dc, ch2, 3 dc, ch2 × 3; join. Round 2: work classic granny corners to expand. Work until square ≈ desired size (example 4″).
- Make required number of squares for front & back layout. Block every square to same size.
Layout & joining
3. Arrange squares in grid: e.g., 5 across × 3 down for front; same for back. Join squares using whipstitch, mattress stitch, or join-as-you-go. For neat seams use same color outer border around each square so seams look consistent.
Assembly
4. After joining vertical columns into panels, seam left/right edges to make tube but leave inner leg openings: fold panels and seam inner thigh sections up to desired height to form leg holes (e.g., seam from bottom 6–8″ upwards). Join front and back at the sides and crotch.
Waistband
5. Add an upper border of sc (2–3 rounds) to create an elastic casing. Insert elastic or crocheted drawstring.
Lining
6. If making for modesty, cut fabric panels to fit inside and hand sew in.
Finishing
7. Add tassels or pom-poms at sides for boho flair.
Variations
- Make larger squares for bold graphic blocks.
- Use the same color squares for a more modern look.
Care
- Depending on yarn fibers; acrylic and cotton are easy care; block back to square if laundry distorts shapes.
6. Crochet Shorts with Star Motifs Pattern
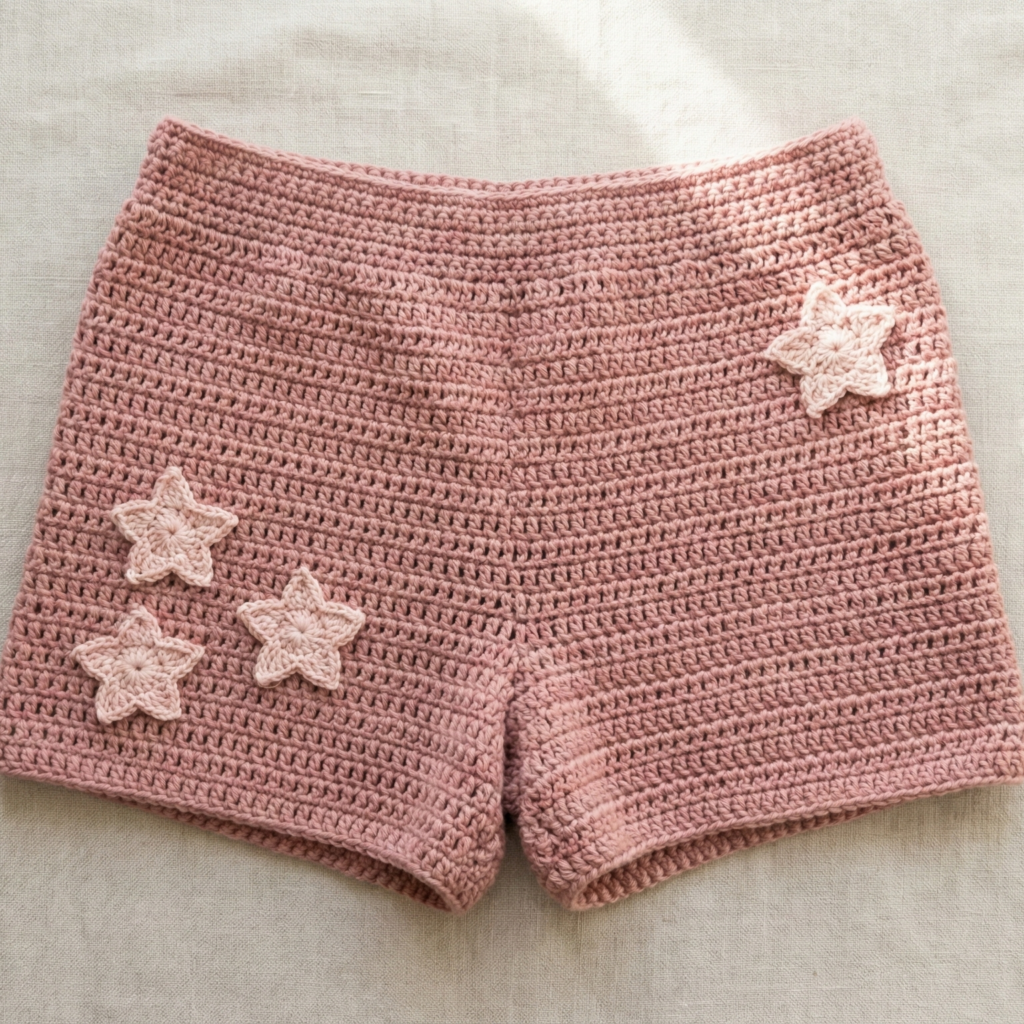
Vibe: Playful stars integrated into shorts front/back for a statement piece.
Skill level: Intermediate (motif placement & tapestry/overlay crochet).
Materials (sample adult M)
- DK yarn MC ~450 yd, contrast for stars ~100–150 yd.
- Hook: 4.5 mm.
- Optional lining.
Gauge & multiple: pattern uses repeated vertical panels; aim for hip stitches per pattern multiple 8 (for star repeat chart). Calculate hip stitches as described and adjust to a multiple of 8.
Construction overview
Work top-down in rounds using a body of simple dc or hdc. Use overlay/crochet-on-the-surface techniques to embroider stars after the main body is made, or work star motifs as appliqués sewn onto the shorts. Alternately use tapestry crochet for integrated stars as you work the rounds.
Step-by-step (overlay star appliqué approach)
Calculate stitches
- FH 40 in × spi 4 = 160 sts. Multiple of 8 — 160 is fine.
Waist & body
- Work waistband as in Pattern 1 (elastic casing or foldover band), then work even rounds of hdc until the shorts reach length required before leg separation.
Stars as appliqués
2. Make small 5-point star appliqués (worked flat):
- Start MR. Round 1: ch3, 3 dc, ch2, sl st into ring × 5 to create five petal bases.
- Round 2: In each petal: ch4, 3 dc in same petal base, ch4, sl st — tension to shape star points. Make required number of stars and block flat.
- Place stars symmetrically on front panels (e.g., two on each front thigh), pin and sew securely with matching yarn.
Or — Tapestry stars integrated
4. If comfortable with colorwork, follow a chart and carry CC across rounds to make stars in place — mind floats of yarn and catch them every few stitches.
Legs & finishing
5. Create leg openings and finish edges as in Pattern 1. Optionally line with fabric.
Variations
- Make star clusters using gradient colors for celestial look.
- Add metallic thread for sparkly stars (hold single strand for subtle shimmer).
Care
- If using metallic thread or embroidery, hand wash recommended.
Final fit & alteration tips (applies to all patterns)
- Try-on as you go. Shorts sizing varies with wear preference (looser vs. fitted). Especially for top-down patterns, try on after waistband and after hip rounds to adjust increases, length, or crotch shaping.
- Crotch depth & rise: For a comfortable fit, add 1″–2″ to crotch depth for movement. Test by sitting and moving in progress garment.
- Elastic vs. drawstring: Elastic gives secure fit; drawstring allows adjustable comfort. For elastic, measure wearer’s waist and subtract desired negative ease (e.g., for 28″ natural waist and snug fit choose 26″ elastic).
- Lining: Lacy shorts need lining. Sew lining before final waistband casing for neater interior finish.
Conclusion
Handmade crochet shorts let you combine style and practicality — from sporty stripes and slimming ribs, to feminine shells, breezy beach covers, retro granny-square patchwork, and playful star motifs. Pick the pattern that suits your yarn stash, season and modesty needs:
- Striped Shorts — versatile, colorblocked and sporty.
- Stria Shorts — vertical ribs for a flattering, structured look.
- Shell Stitch Shorts — feminine and lacy for beach or festival wear.
- Beach Shorts — relaxed, airy, and quick to work.
- Granny Square Shorts — creative, patchwork and perfect for scraps.
- Star Motif Shorts — statement-making with appliqués or tapestry colorwork.
Swatch first, calculate stitches using the digit-by-digit method above, measure as you go and add lining where needed.