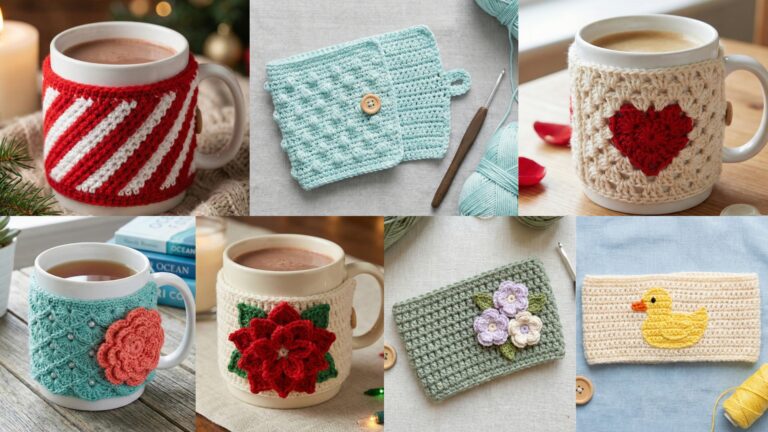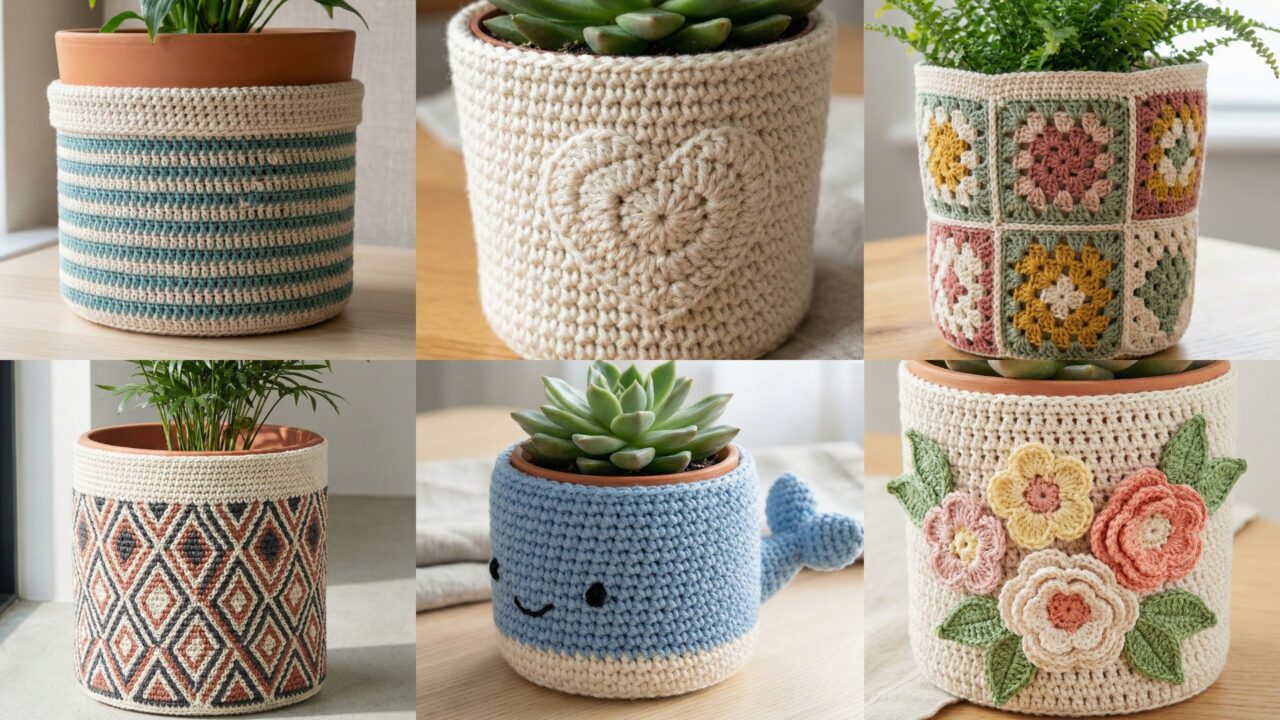
Plant pot covers are a fast, satisfying way to refresh a corner, hide a plain nursery pot, or give a potted gift personality. Below you’ll find a full blog-ready post with a friendly introduction (tools, sizing, yarn & general techniques), followed by six detailed patterns — Heart, Sweet Stripes, Floral, Cute Whale, Mosaic, and Granny Square plant pot covers. Each pattern includes skill level, materials and yardage guidance, finished-size notes, stitch and shaping tips, a clear step-by-step construction guide you can follow right away, variations, finishing and care. Tone is clear, helpful and human — written so readers can make and adapt these covers for many pot sizes.
Quick intro — tools, yarn, sizing & general tips
Why make pot covers?
They’re decorative, removable, washable (if made from cotton), and let you mix seasonal colors, patterns, and textures without replanting. Covers are best for decor only — if your plant needs watering into the pot, remove the cover first or add a plastic liner so the crochet doesn’t stay constantly wet.
Tools & materials (general)
- Yarn: For plant pot covers choose cotton or cotton-blend yarn — it’s sturdy, washable, and holds shape. For chunky, structured covers you can use t-shirt yarn or held-together worsted (2 strands). Typical weights: DK, worsted, or bulky for chunkier covers.
- Hooks: Match hook to yarn label and your desired drape; many of the examples below use 3.5–5.5 mm hooks. For tight fabric use a smaller hook.
- Notions: tapestry needle, stitch markers, measuring tape, scissors. Optional: fabric liner, hot glue/gun (for attaching non-washable appliqués), small beads or buttons for accents.
- Extras: plastic pot vs terracotta — terracotta breathes so keep cover removable for watering; plastic pots can stay inside a handmade cover.
Sizing a pot cover
- Measure pot height (H) and circumference at largest point (C).
- Aim for finished cover height = H + 0.5–1 in (cover sits slightly above rim or flush).
- To compute starting stitch count for bottom-of-pot circle: make a gauge swatch (stitches per inch). Multiply target base diameter by stitches per inch and use an increasing circle formula or rounds. Alternatively, start with Magic Ring increases and measure as you go — stop increasing when the flat base equals the pot base size.
Construction approaches used here
- Flat circle base + tube sides worked in the round, vs
- Rectangle folded & seamed (useful for tall or rectangular pots), vs
- Panel motifs joined (granny/mosaic).
Finishing & care
- Weave ends securely; if you add glued elements, hand-wash only.
- Cotton covers: machine wash gentle, reshape and air dry. T-shirt yarn may need line drying to avoid shrinking.
1. Crochet Heart Plant Pot Cover Pattern
Charming, slightly romantic — a pot cover with a heart panel or full heart shape that looks great on small succulents or a medium herb pot.
Skill level: confident beginner
Materials (sample Small pot ~3–4″ diameter, 4–5″ tall)
- Worsted cotton (~100–150 yd).
- Hook: 4.0 mm.
- Tapestry needle, stitch markers.
- Optional: thin plastic liner if you plan to mop up watering.
Finished (example)
- Base diameter ~3.5 in, height ~4.5–5 in. Adjust by working more rounds.
Stitch notes
- Base: worked as a flat circle with sc or hdc for density.
- Sides: sc in rounds or hdc for a firmer fabric.
- Heart motif: worked separately as a heart appliqué and sewn on, or worked as a raised panel using post stitches.
Step-by-step — base + tube + heart appliqué
A. Base (flat circle)
- MR, ch1, 6 sc in MR. Pull tight, sl st to join. (6)
- R2: ch1, 2 sc in each st around — 12 sc.
- R3: sc 1, inc around — 18 sc.
- R4: sc 2, inc — 24 sc.
- R5: sc 3, inc — 30 sc. Continue increasing until base matches pot base diameter (measure frequently). Example for 3.5 in base you’ll often stop around 32–36 sc depending on your gauge.
B. Sides (work up the pot)
- Starting in next round, stop increasing and work even rounds of sc (or hdc for a looser fabric) around. Work until tube height ≈ pot height minus 0.5 in (so cover sits nicely). For a folded rim, work 6 rounds in BLO and fold over.
C. Heart appliqué (simple small heart)
- MR, ch2; R1: 3 dc in MR, ch2, sl st; repeat to make two lobes: (3 dc, ch2, sl st) × 3 to form the top of the heart (you’ll build 3 sets). Pull tight and shape. Or use small heart pattern: ch 5, 3 dc in 2nd ch from hook, 3 dc in next, 2 dc in next, sl st to ch base to create heart. Make one large enough to center on the pot side.
- Sew heart to cover: center at front and whipstitch through back loops for a neat finish. Weave in ends.
D. Optional raised heart (panel)
- Instead of applique, use surface slip-stitch or front post stitches to draw a heart outline and fill with sc or shell pattern for texture.
E. Finishing
- Block lightly if cotton. Insert pot and enjoy.
Variations
- Add a row of scalloped edge at top for frill.
- Make heart in contrasting color and add small seed bead at center for sparkle.
2. Crochet Sweet Stripes Plant Pot Cover Pattern
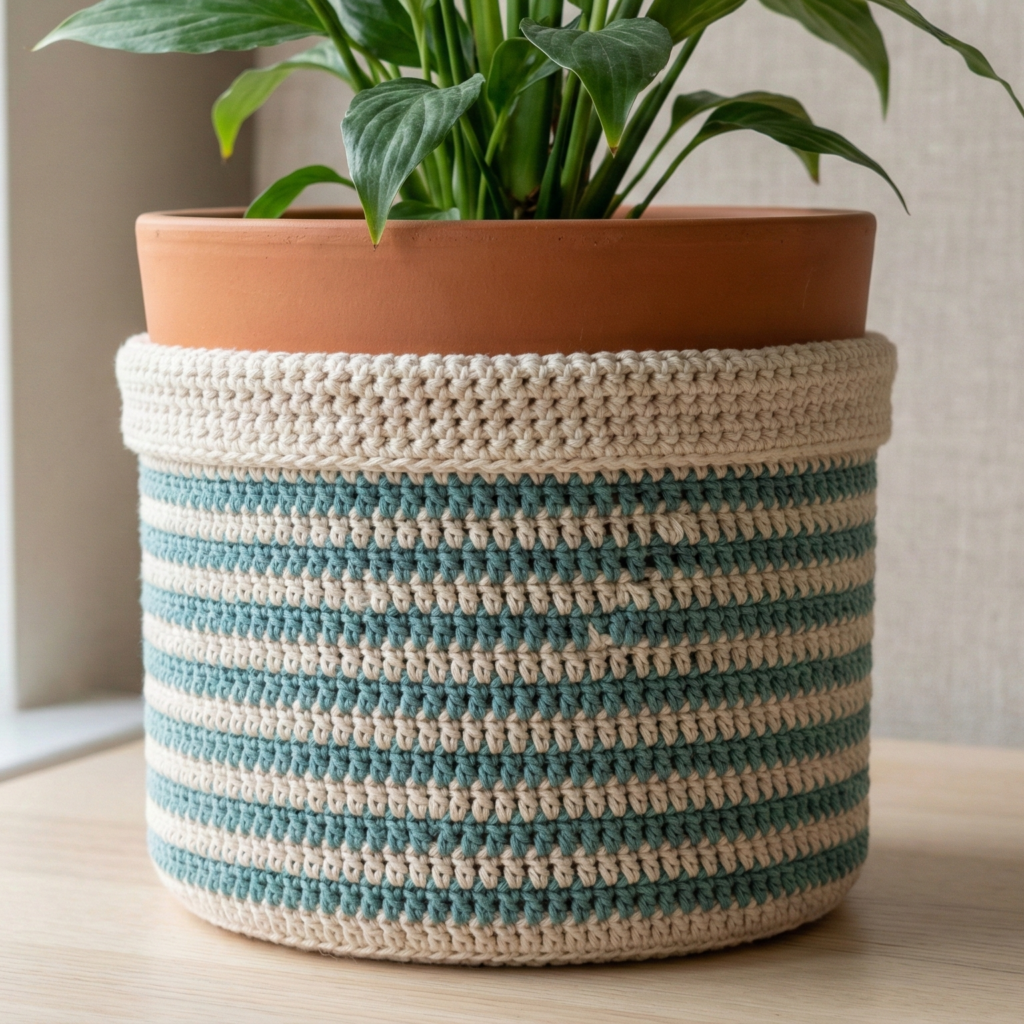
Clean and modern — horizontal stripes with a neat band. Great for midsize planters and easy to scale.
Skill level: confident beginner
Materials (sample Medium pot ~5–6″ diameter, 6–7″ tall)
- Two or three colors worsted cotton (~200–300 yd total).
- Hook: 4.5 mm.
- Stitch markers optional.
Finished (example)
- Fit for a 5 in diameter pot, height 6 in.
Stitch notes
- Use sc or hdc for a dense fabric; change color at the start of rounds for clean stripes. Carry floats inside if colors change frequently (or fasten off each color).
Step-by-step — flat base, striped tube
A. Base
- MR, ch1, 6 sc. R2: inc each → 12 sc. R3: sc1, inc → 18 sc. R4: sc2, inc → 24 sc. R5: sc3, inc → 30 sc. Continue to desired base diameter for your pot.
B. Start stripes
- Join Color A at first stitch after base (or continue in same color then change). Work sc rounds even for 2–3 rounds for band; then at the start of next round switch to Color B. Work 3–4 rounds in Color B, then back to Color A, etc. Repeat to create desired stripe pattern and height. Common stripe heights: 2–4 rounds per color.
C. Shaping notes
- For a straight-sided cover work even rounds. For a tapered cover, add an occasional decrease round (e.g., sc 4, dec) spaced out to make slight waisting.
D. Top finish
- Work 1–2 rounds of sc in a neutral color for a tidy top edge. For a folded cuff, work extra BLO rounds in the same color and fold down.
E. Finishing
- Weave ends or carry colors up interior for neater finish. Block if desired.
Variations
- Use variegated yarn for one stripe for watercolor effect.
- Make wider stripes for bold modern look (6–8 rounds per color).
3. Crochet Floral Plant Pot Cover Pattern
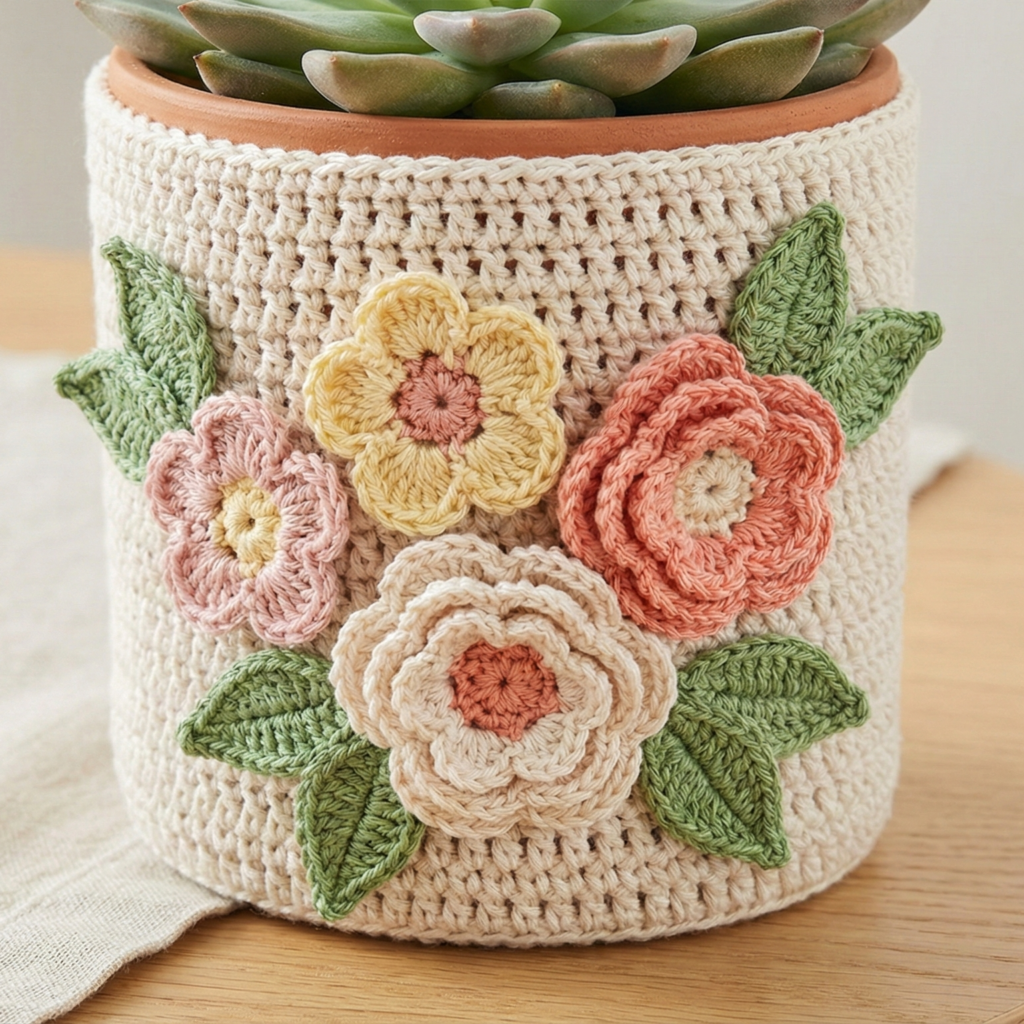
Delicate, decorative — layered flowers and leaves sewn onto a basic cover make this one a showstopper.
Skill level: intermediate (appliqués + assembly)
Materials (sample Small–Medium pot)
- Worsted cotton in a base color and several contrast colors for flowers and leaves (~200 yd total).
- Hook: 4.0 mm.
- Tapestry needle, small buttons for flower centers (optional).
Finished (example)
- A 4–5 in diameter cover with 3–6 small floral appliqués.
Stitch notes
- Base: sc/hdc tube.
- Flowers: small layered petals (shell stitches or puff/petal stitches).
- Leaves: simple leaf shapes made with ch/sc/dc shaping.
Step-by-step — base + flower & leaf appliqués
A. Base
Make a base and tube as previous examples (flat circle to match pot bottom, then sc up for sides to desired height). Use a neutral base to make flowers pop.
B. Small 5-petal flower (appliqué)
- MR, ch1, 6 sc in ring — join.
- Join petal color in a sc space: (ch 2, 3 dc, ch 2, sl st into next st) repeat 5 times for 5 petals. Fasten off and weave tail. Add a small button or embroidered french knot at center.
C. Layered blossom (larger)
- Make a center mini circle, then in the next round place larger petals: (ch 3, 5 dc cluster, ch 3, sl st) for ruffled layered look. Two rounds of petals offset create fullness.
D. Leaves
- With green: ch 6, sc in 2nd ch from hook, hdc next, dc next, tr next, sc last — shape and sew into place. Or work small pointed leaves: ch 6, sl st back along chain, increase a bit mid-leaf for fuller shape.
E. Placement & assembly
- Arrange flowers and leaves around the pot cover (clustered or scattered). Sew each piece by hand, anchoring petals through base to avoid flapping. If using buttons, sew them on last.
F. Finishing
- Weave ends and secure buttons. Light block to flatten and shape petals.
Variations
- Add bead centers for sparkle (securely sewn).
- Make a ring of flowers near rim for a floral crown effect.
4. Crochet Cute Whale Plant Pot Cover Pattern
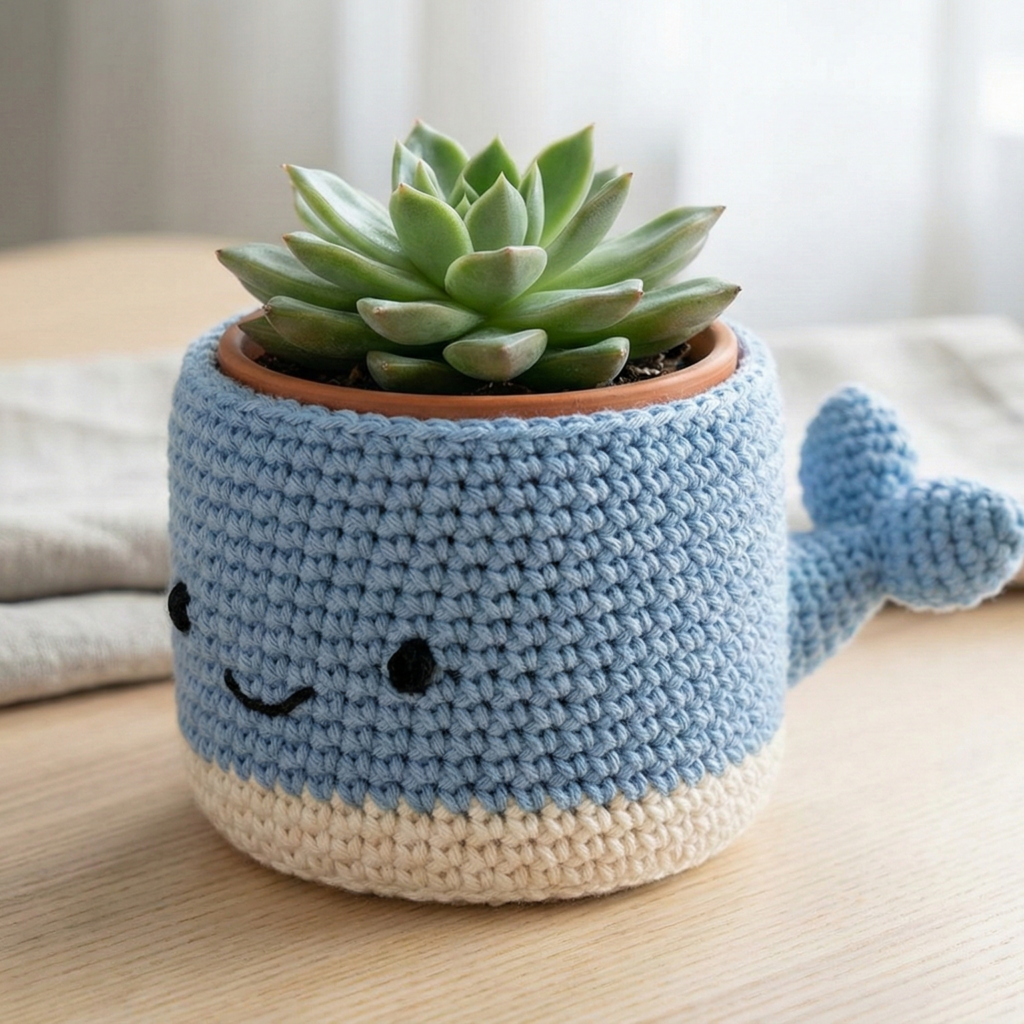
Whimsical and delightfully adorable — a whale applique peeking from the side of the pot cover. Perfect for children’s rooms or nautical vibes.
Skill level: intermediate (shaping & applique)
Materials (sample small pot)
- Worsted cotton: main cover color and small amounts of navy/light blue/white for whale ~150–200 yd total.
- Hook: 4.0 mm.
Finished (example)
- 3–4 in diameter pot cover with a whale ~2.5–3 in long.
Stitch notes
- Whale is made as small flat shapes: body, tail, fin, and tiny embroidered eye and spout.
Step-by-step — base + whale applique
A. Base cover
Make a round base and tube as standard.
B. Whale body (appliqué)
- Ch 10, sc in 2nd ch from hook and across (9 sc). Row 2–4: ch1, sc across to make a rectangle ~1–1.25 in wide. To get body shape, after Row 4 decrease one side by skipping first st for two rows to taper the tail end. Fasten off.
- Tail: ch 8, sl st to form a small loop or ch 6 and work small shell-shaped tail: (2 dc, ch2, 2 dc) in one chain — sew to tapered end.
- Fin: ch 6, sc across, shape into small rounded fin and sew to top side.
- Eye and smile: embroider a small eye with black yarn and a smile with white.
C. Water spout (tiny puff)
- With white, make 2–3 small picots or tiny puff stitches above the whale and sew in place.
D. Attach whale to cover
- Place whale low on cover as if peeking out near rim. Whipstitch securely through body. Use felt backing behind whale only if you want to protect stitches from wear.
E. Finish
- Weave ends and optionally glue a small felt circle behind whale for stability.
Variations
- Make a school of tiny fish appliqués around a larger whale.
- Use variegated yarn for a fun pattern on the whale body.
5. Crochet Mosaic Plant Pot Cover Pattern
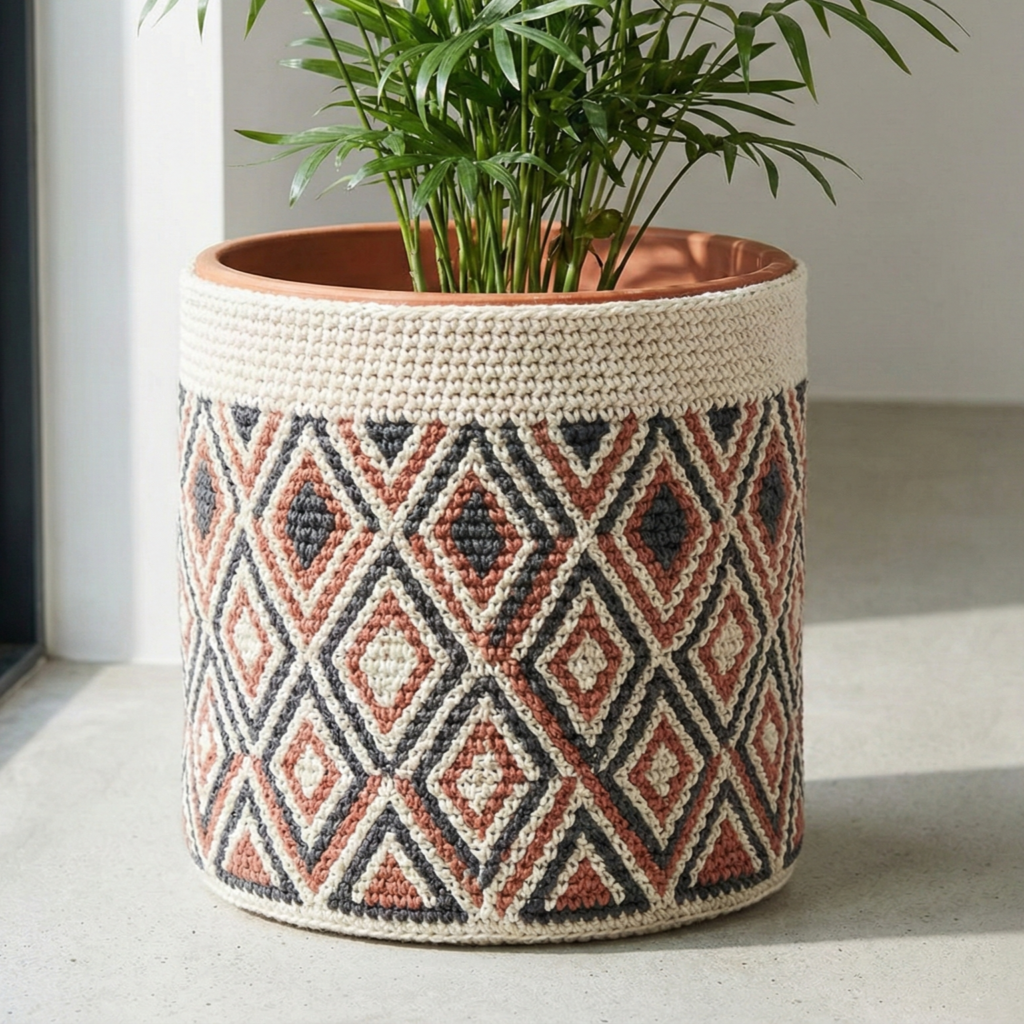
Sleek, geometric and modern — mosaic crochet lets you create crisp color-block motifs that wrap around a pot.
Skill level: intermediate → advanced (mosaic crochet / color charting)
Materials (sample medium pot)
- Two or three contrasting cotton colors worsted yarn — ~250–350 yd total.
- Hook: 4.0 mm.
- Chart or graph paper handy for planning squares.
Finished (example)
- For a 5″ pot diameter, height 6″: wrap mosaic pattern around side.
Stitch notes
- Mosaic crochet works one color per round using slip stitches to create color blocks; floats are short and manageable.
Step-by-step — design & execution
A. Plan your mosaic chart
- On graph paper mark the number of stitches per round (e.g., 36 sts per round around your base) and the number of rounds that will be covered. Each cell = 1 stitch × 1 round. Sketch the geometric pattern (chevrons, diamonds, or checker blocks) to fill the rectangle of width (circumference) × height (rounds).
B. Base & starting round
- Work a base circle to match pot bottom. Then work a few even sc rounds to start vertical wall and set stitch count to match chart width (count stitches and adjust using increases/declines if needed).
C. Mosaic technique simplified
- Working in single crochet (sc): Round A (Color 1): sc across stitches where Chart A indicates Color 1, sl st in same st and pull next color for sl st moves — follow mosaic tutorial rules: typically work sc only in stitches where your current color is filled; where your color is not needed, you slip-stitch in the next st (in the previously worked color) to carry the pattern.
- Round B (Color 2): switch to color 2 and work sc in pattern positions; the arrangement of sc vs slip creates the mosaic block.
D. Continue rounds
- Continue following chart round-by-round till desired height. Because mosaic uses one color round at a time, floats are short and color changes are managed row-wise. Carry yarn inside as you go or fasten off and rejoin depending on length of floats.
E. Band & finish
- Finish with a round of sc in a single color and optionally a folded band (BLO rounds) for neatness.
F. Blocking & shaping
- Block gently to even mosaic pattern. Because mosaic tends to be slightly stiff, it holds shape nicely around pots.
Variations
- Use neutral + one accent color for a minimalist look.
- Do a vertical color gradient by changing colors slowly across rounds.
6. Crochet Granny Square Plant Pot Cover Pattern
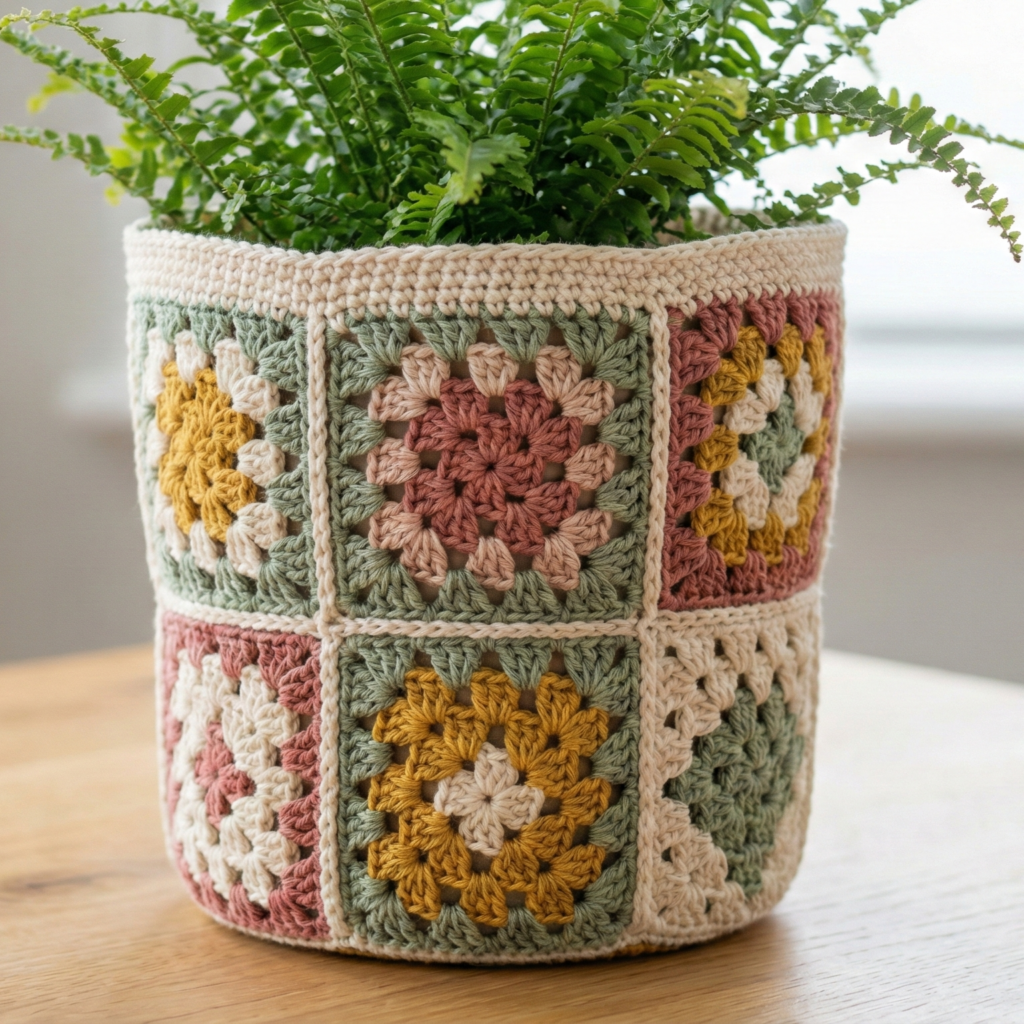
Classic and cozy — construct a cylindrical cover from granny squares for a vintage-meets-modern look.
Skill level: confident beginner → intermediate
Materials (sample)
- Scraps or full skeins of worsted cotton for squares (~250–350 yd total depending on number of squares).
- Hook: 4.0–5.0 mm.
Finished (example)
- For a medium pot, use a grid of 3 × 3 squares (each ~2.5–3 in) to make a wrap-around tube.
Stitch notes
- Make identical granny squares (or alternating designs) and join-as-you-go or whipstitch to form side panels. Add a round base or make a separate round base and sew to the panel.
Step-by-step — squares → panel → base
A. Make granny squares
- Classic small granny (3 rounds): MR, ch3, 2 dc, ch2, 3 dc, ch2 × 3 → join for round 1. Round 2: in each ch2 corner do (3 dc, ch2, 3 dc); sides 3 dc in side spaces. Repeat for 3–4 rounds until square reaches desired size (e.g., 3 in). Make enough squares to cover circumference × height layout. For a 3×3 wrap make 9 squares.
B. Join squares into panel
- Lay out squares in desired arrangement and join with whipstitch or join-as-you-go so you have one long rectangle (columns sewn to rows) that will wrap into a tube. Join rows to each other to make a flat rectangle of desired height.
C. Form tube
- Fold rectangle to bring short ends together and seam with whipstitch to make a tube. Check circumference by fitting around pot.
D. Base
Option 1: Crochet a circle base sized to inner diameter and whipstitch to bottom of the granny tube.
Option 2: Sew in a pre-cut cardboard or felt circle inside first, then sew bottom squares to it for stability.
E. Finishing
- Pick up stitches around top and work 2–4 rounds of sc for a neat finish — optionally fold to create rim. Weave ends.
Variations
- Use alternating solid and floral granny squares for a scrappy vibe.
- Line with fabric for a cleaner interior and to keep small drainage water from running into yarn.
Conclusion
Those six plant pot covers give you a wide range of styles — romantic hearts, clean stripes, floral bouquets, whimsical whales, crisp mosaics, and retro granny wraps. A few final practical tips:
- Measure first — every pot is slightly different; crochet covers are forgiving but measuring prevents surprises.
- Cotton is your friend — it’s washable and holds up to humidity better than acrylic.
- Liners matter — if you water directly into the pot, use a plastic nursery pot or a washable inner liner so yarn doesn’t stay wet.
- Scale easily — increase base rounds for larger pots, or add more granny squares to widen a panel.
- Gift sets — pair a plant with a handmade cover for a thoughtful, inexpensive gift.