Storage baskets are the quiet heroes of a tidy home — they hide clutter, corral small items, and inject texture and color into every room. Crocheting your own baskets is fast, satisfying, and makes organization feel joyful. Below you’ll find everything needed to make six distinct basket styles: from soft, spa-ready lace to chunky, structural trays and picnic-ready heart baskets.
Each pattern includes:
- Skill level and finished sample size
- Materials and suggested yarns / hooks
- Step-by-step construction (base → walls → rim → handles/dividers)
- Lining, stiffening, and finishing tips
- Variations and styling ideas
Quick primer — yarn, hooks, structure and design choices
Yarn choices
- 100% cotton (worsted or bulky) — best all-round: sturdy, washable, and holds shape. For sculptural baskets hold two strands of worsted or use t-shirt yarn.
- T-shirt yarn / fabric strips — ideal for very firm, modern baskets and trays.
- Cotton cord / macramé cord — strongest option (for heavy loads).
- Blended yarns (cotton/acrylic) — usable for decorative baskets; avoid very fuzzy novelty yarns for structure.
Hook & hardware
- Hook sizes range from 5 mm → 12 mm depending on yarn thickness.
- Tapestry needle, stitch markers, scissors, measuring tape.
- Optional: plastic canvas, thin MDF or cork base cut to shape; fabric for liner; Velcro or snaps for removable liners; wooden or leather handles.
Construction approaches
- Round baskets: start with a flat circular base (magic ring + increases), then work walls straight up.
- Oval/rectangular: start with an oval base (chain foundation + increases at ends) or work a rectangle then pick up stitches for walls.
- Panel / motif: join granny squares or lace panels into a box — great for decorative baskets.
- Use tighter tension and smaller hooks for denser fabric; use thicker yarn or doubled strands for stiffness.
Stiffening & lining
- Plastic canvas: cut to base shape and stitch or glue inside base for a rigid bottom.
- Fusible interfacing + fabric liner: press onto cotton lining and stitch into basket for a clean interior.
- Spray starch or diluted white glue: for lacy baskets that need extra structure — pin to shape and let dry.
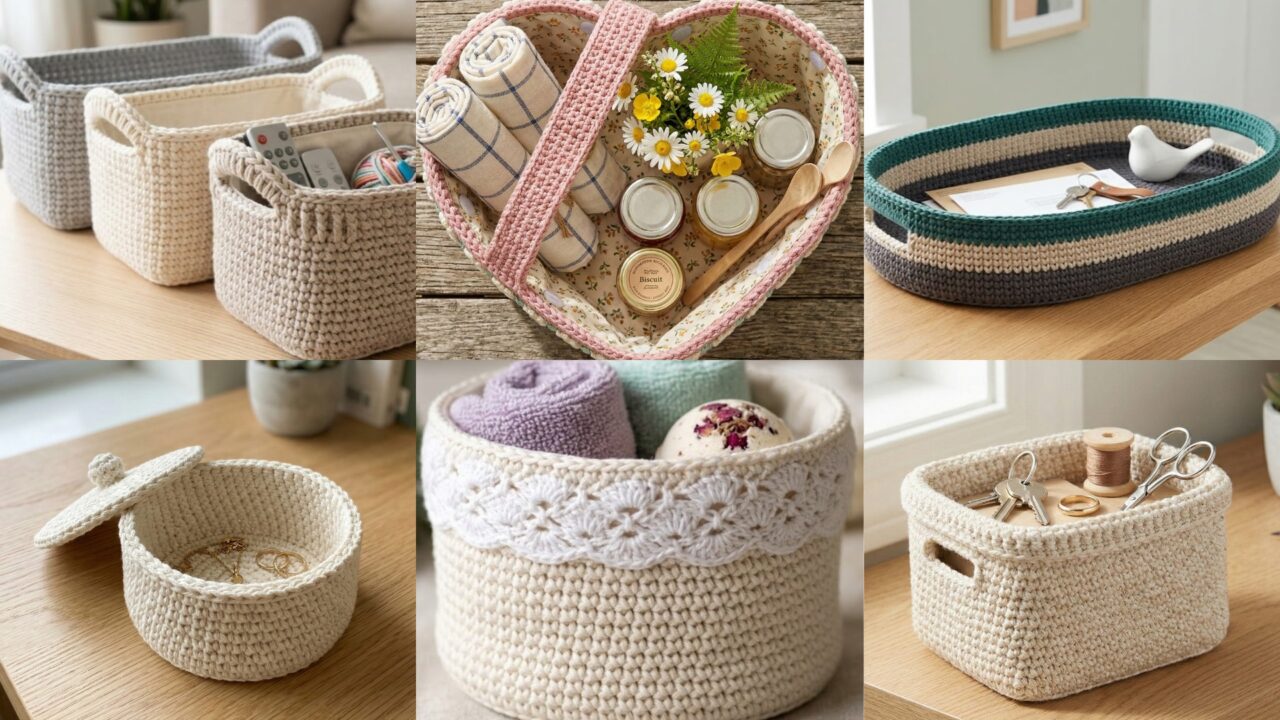
1. Crochet Spa Lace Storage Basket Pattern
A soft, attractive basket to hold rolled towels, toiletries, or bath bombs — looks spa-luxurious while still practical when lined.
Skill level: confident beginner → intermediate
Sample size: Diameter 10″ × Height 8″ (25 × 20 cm)
Yarn & tools: DK cotton held double or worsted cotton; 5.5–6.5 mm hook; tapestry needle; optional interfacing & lining
Stitch palate used
- sc for base and rim (firm)
- v-stitch (dc, ch1, dc) and shell (5 dc) for lacy body
Materials
- ~500–700 yd worsted cotton or DK held double (adjust for size)
- 5.5–6.5 mm crochet hook
- lightweight cotton fabric for liner, fusible interfacing (optional)
- plastic canvas circle (10″) optional
Step-by-step
Base (dense and flat)
- MR. R1: 8 sc in MR — join.
- R2: inc in each st = 16 sc.
- R3: sc1, inc around = 24.
- R4: sc2, inc around = 32.
- R5: sc3, inc around = 40.
- Continue increasing similarly until base = 10″ diameter (measure as you go). For DK double strand you’ll reach this diameter in fewer rounds than single DK.
- Optionally, slip an appropriately cut plastic canvas disc under the base and stitch around its edge from the inside to anchor it (use tapestry needle and yarn).
Wall transition
- RNext: sc in BLO around one round to create a neat turning ridge (this helps connect lace body later).
Lacy body (v-stitch & shell mix)
- R1 (body): ch3, [dc, ch1, dc] in next st (v-stitch), skip 1, sc in next — repeat around, join. This forms open texture.
- R2: Work shells into v-spacers: in each v-space work (sc, 5 dc, sc) to build the shell rows. Continue alternating v-round and shell round until basket height ≈ 8″.
- If the lace begins to feel floppy for use, add a lining with interfacing — see lining section below.
Rim (firm finish)
- Switch to single crochet (with the same yarn or slightly thicker strand) and work 2–3 rounds sc evenly to stabilize the lip.
- Optional decorative round: picot or crab stitch for a polished spa look.
Lining & finishing
- Create a round fabric lining: cut fabric circle + side band to match basket height + seam allowances. Fuse interfacing to fabric’s outer face if you want structure. Sew a small seam to form the cylinder and hand sew bottom to base. Tuck and whipstitch the lining to the inside top edge, or sew in place from the outside with a ladder stitch.
Variations
- Make a smaller version as a jewelry tray; make taller as a towel holder.
- Work one or two rounds in contrasting color near the top for a modern stripe.
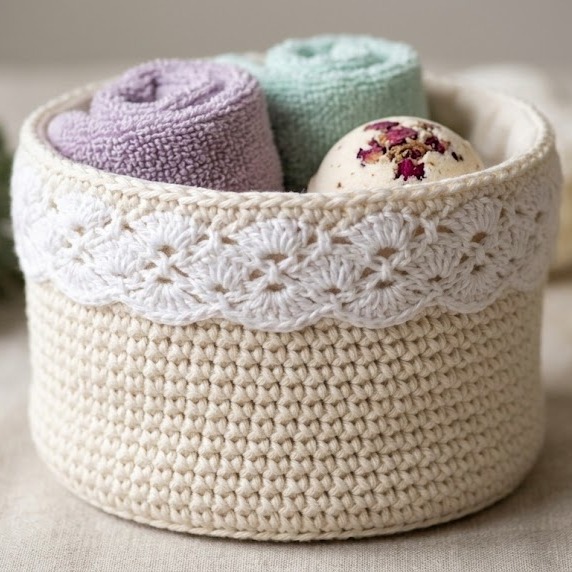
2. Crochet Small Stylish Storage Basket with Handles Pattern
A compact basket with built-in handles — perfect for remote controls, craft supplies, or bathroom counters.
Skill level: confident beginner
Sample size: Diameter 8″ × Height 6″ (20 × 15 cm)
Yarn & tools: bulky cotton or worsted held double; 8 mm hook; tapestry needle
Stitches used
- sc for backbone (dense), hdc rounds for slight texture, optional front-post ribbing for handles
Materials
- ~300–500 yd bulky cotton OR worsted x2 held together
- 8 mm hook (or adjust for tension)
- Two wooden or leather strap handles (optional) + small rivets or heavy thread for attachment
Step-by-step
Base
- MR, 6 sc. R2: inc around = 12. R3: sc1, inc = 18. R4: sc2, inc = 24. Continue until base = 8″.
- Optional: insert a 7.5–8″ round of plastic canvas inside base and stitch through outer edge to secure.
Walls — worked strongly
- From base edge, work 6–8 rounds of sc (or hdc for a little height) to create a sturdy foundation for handles.
Handles placement
- Determine handle placement opposite sides: mark two spots directly across from each other; plan for handles to sit ~1.5″ down from rim (or flush with rim).
- Continue working walls up to desired height (6″ total): sc in each st around for dense walls. When you reach the marked handle rows, work front-post/back-post stitch rounds (fpdc/bpdc) for extra structural rim:
- For reinforced handle area: work fpdc in the stitches forming the handle top for 4–5 rounds to create a raised rib that resists stretching.
Attaching handles
- If using leather or wooden handles, sew the end tabs through the raised rib area with heavy thread or small rivets. For yarn handles, crochet long straps: ch to desired length, sc back along chain in multiple rows to build thickness, then sew ends to inside of basket across reinforced stripe using many passes.
Rim
- Finish with one round sc and one round reverse single crochet (crab stitch) for neatness.
Lining & finishing
- Add a stiff cotton lining if the basket will hold small items that could fall through. Optional: affix a non-slip felt disc to the basket base.
Variations & styling
- Use two contrasting yarns for a modern colorblock.
- Make a set in graduated sizes to nest inside one another.
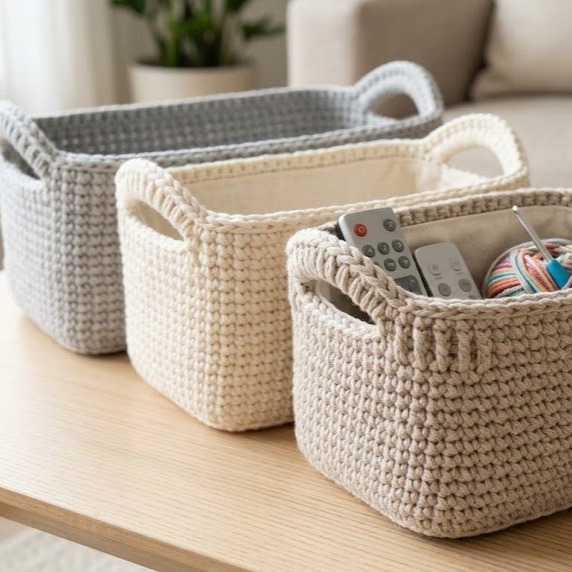
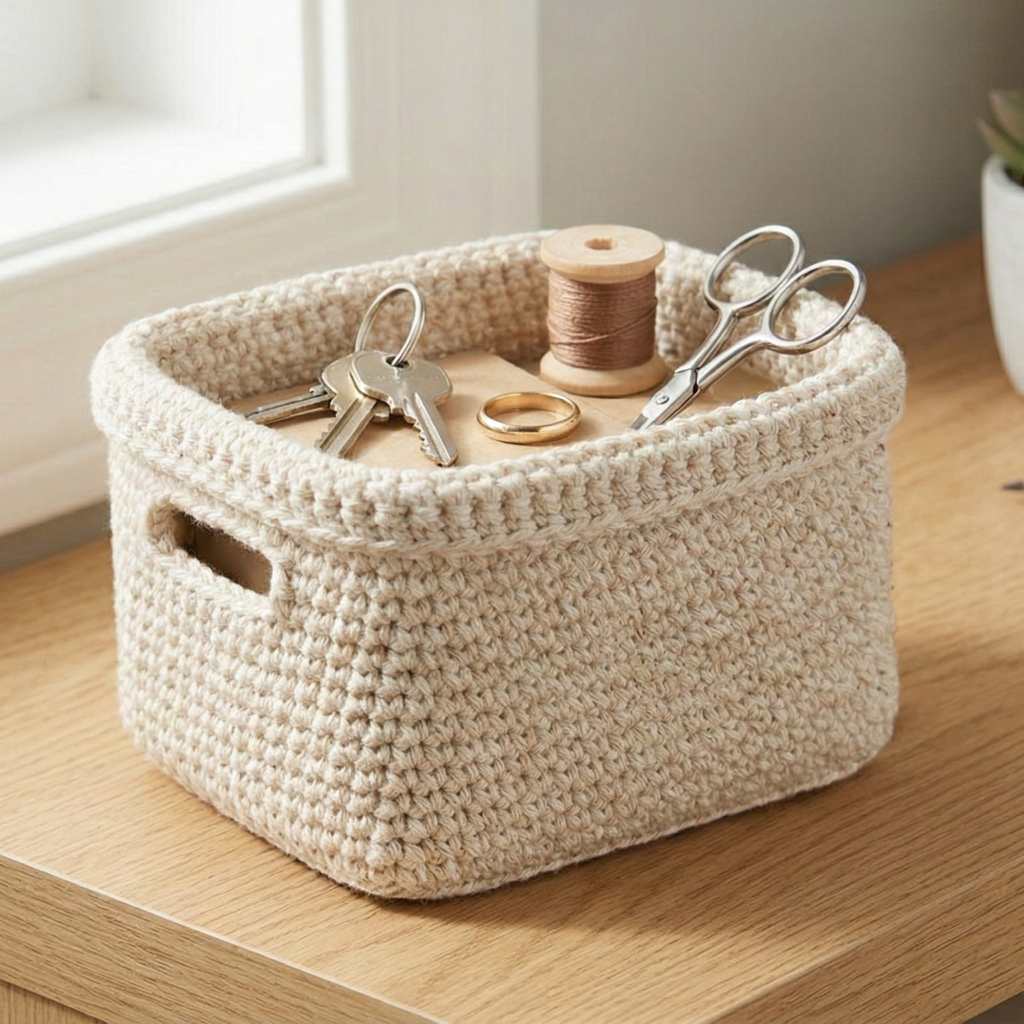
3. Crochet Tri-Color Storage Tray Basket Pattern
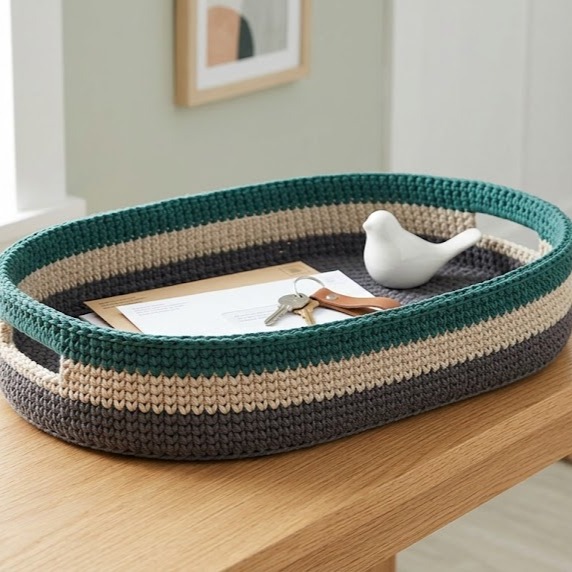
A low, wide tray for mail, keys, or as a decorative catchall — colorblocking in three bands gives contemporary style.
Skill level: confident beginner
Sample size: 12″ long × 9″ wide × 3″ high (30 × 23 × 8 cm) — oval or rectangular tray
Yarn/tools: worsted cotton, 5.5–7 mm hook; plastic canvas optional for base stability
Construction overview
An oval base increases into shallow sides; three color bands are worked as you shape the walls.
Materials
- Approx. 600 yd worsted cotton in 3 colors (A, B, C)
- 6 mm hook (adjust)
- Plastic canvas oval or scrap of thin MDF for base (optional)
- Tapestry needle
Step-by-step (oval base)
Foundation oval base
- Chain 23 (or desired base length in sts; adjust for width/length ratio).
- Row 1: sc in 2nd ch from hook and across to end; continue working around the chain to form an oval: sc in each side and work 3 sc in last chain to turn, then work down other side, working 3 sc in opposite chain to form the rounded end. Join to first sc. (This creates an oval base.)
- Round 2: sc evenly around all stitches, placing 2 or 3 sc in each end turning sc to maintain flatness. Continue increasing rounds with increases concentrated at ends (every other stitch at ends) until base equals approx 12″ × 9″.
- Optionally sew a cut plastic canvas oval to interior base for extra stiffness.
Walls (tri-color bands)
- Decide band heights (e.g., 2″ Color A, 1″ Color B, 2″ Color C). Start Color A: work sc rounds up for the first band. Change to Color B when desired height reached, continuing sc. Change to Color C for final band and finish.
- For a slightly sloped wall, proceed without increases. If you want steeper walls, add a few evenly spaced increases in first wall round.
Rim & reinforced corner
- Work 2 rounds of sc in Color C, then one round of sc in BLO for a tidy foldable rim. For extra structure, trap a narrow strip of heavy interfacing or sew in a stitched rope into the last round.
Handles (optional)
- For small side cutouts, skip 6–8 stitches on both long sides and chain across to form a gap, then sc back across. Reinforce edge of hole with extra sc rounds to avoid stretching.
Variations
- Make a rectangular box by keeping the base rectangular and working up walls with corner increases to keep right angles.
- Try one color per quadrant for a playful look.
4. Crochet Rectangle Storage Basket Pattern
A utilitarian rectangular basket ideal for bookshelf storage, shoebox replacement, or pantry bins. Straight edges and a firm rim make it stackable.
Skill level: intermediate
Sample size: 10″ × 7″ base × 8″ high (25 × 18 × 20 cm)
Yarn/tools: worsted cotton, 6–8 mm hook (or t-shirt yarn and 10–12 mm hook), plastic canvas for base
Materials
- ~800–1000 yd worsted or t-shirt yarn
- 8 mm hook (worsted doubled or bulky yarn)
- Plastic canvas rectangle cut to 10″ × 7″ (optional)
- Sturdier lining fabric (canvas) recommended
Step-by-step
Rectangular base (worked flat)
- Chain foundation equal to base width in sts: for example ch 30 (for 10″ at gauge). Row 1: sc across. Row 2–n: sc rows, increasing one stitch at each end every few rows to build a rectangle? (Better approach: work in the round for a seamless base.)
Seamless rectangle base method (recommended):
- Start with ch 31, join into a loop being careful not to twist, then work in rounds: R1 sc across foundation, at return corner do 3 sc in last chain to round the corner and continue along bottom row; at next corner do 3 sc in last chain, etc. This creates a continuous rectangular tube that flattens into a base with rounded corners. Increase in corner group sizes in subsequent rounds to flatten out until base measures 10″ × 7″.
- Insert plastic canvas base if desired; stitch it into place with yarn.
Walls
- Work sc rounds up the sides until basket height = 8″. For the first 2 rounds, use a smaller hook to create a stiff base-to-wall join.
Corners & reinforcing
- Add a firm rim: sc in BLO one round, then fold and sc through both layers to create a boxed rim. This locks shape.
Lining & base cover
- Cut canvas liner to match inside dimensions plus seam allowance. Use fusible interfacing to stiffen if needed; sew the liner and slip into the basket; tack to the rim with whipstitch.
Handles
- For wide rectangular baskets, add cutout handles by skipping stitches for two handle openings on opposite sides and finishing the hole edges with multiple sc rounds. Reinforce by sewing leather tabs beneath each handle inside.
Variations
- Make deeper rectangle for shoe storage; add compartments by sewing internal canvas dividers.
5. Crochet Heart Cottagecore Picnic Storage Basket Pattern

Pretty and whimsical heart-shaped basket — perfect for picnics, gift baskets, or seasonal decor.
Skill level: intermediate → advanced (shaping)
Sample size: width across lobes 12″ × depth 8″ × height 6″
Yarn/tools: worsted cotton or chunky held doubled, 6–8 mm hook; tapestry needle; plastic canvas optional for base
Materials
- ~800–1000 yd cotton or t-shirt yarn
- 6–8 mm hook
- Cotton lining for picnic use, Velcro snaps for removable liner
Construction overview
Make a heart-shaped base (either by joining two round halves or following a heart increase chart), pick up stitches around perimeter and build walls, sculpt the tip and lobes carefully, and finish a sturdy rim and handles.
Step-by-step (Method A: two-circle join — simpler)
Make two circle halves
- Make two identical circle bases ~6″ diameter each (use MR increases akin to round baskets). These two circles will form the two lobes of the heart.
Join to make heart base
- Align circles side by side, touching edges. Use continuous slip stitch or whipstitch to join the touching edge along the connection seam — this creates a figure-8 base which when viewed from above approximates a heart. Pull the outer perimeter into a smooth heart shape by smoothing the join and adding filler stitches where necessary.
- For a neater approach, flatten the joined seam and add a short triangular piece at the bottom to shape the tip of the heart.
- Optionally place cut plastic canvas shaped to the new heart base as reinforcement. Cut canvas in heart shape that fits inside, stitch through holes to anchor.
Pick up stitches & build walls
- Pick up stitches around the outer edge of the heart base; sc around in rounds to build walls. When you approach either lobe, distribute stitch counts so walls remain even.
- Work sc rounds until basket height is about 6″. For extra firmness at the top, add two rounds of sc in tighter tension and then fold one round inward and sc through both layers to finish a boxed rim.
Handle & closure
- Add wide strap handles sewn across the top from one lobe to the other; reinforce with many passes or small rectangles of leather.
- Make a removable cotton liner shaped as a heart and sew small snaps into the liner and basket rim to keep it in place.
Variations & styling
- Work small hearts as set of baskets for party favors.
- Embellish with crochet flowers or tiny pom poms along edge.
6. Crochet Small Mini Circle Storage Basket Pattern
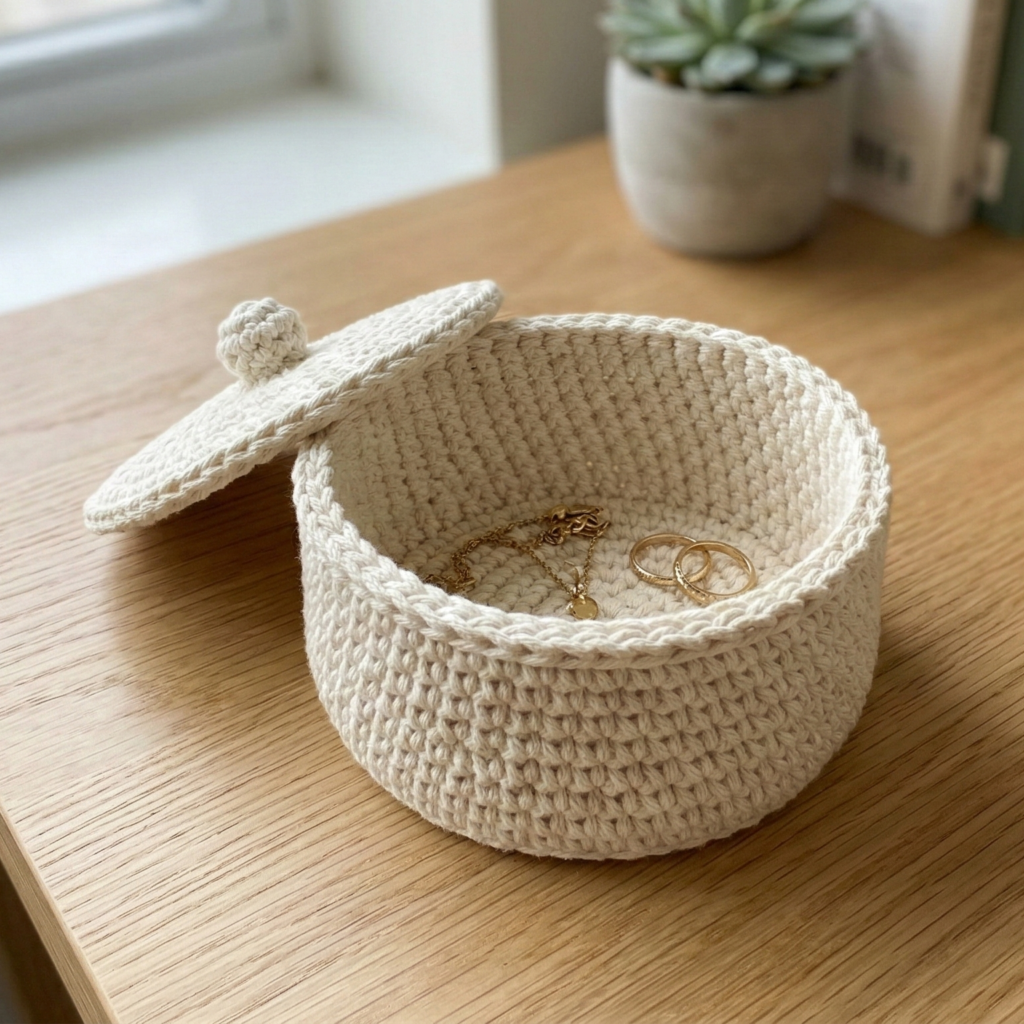
A tiny circular basket — ideal for jewelry, desk supplies, or to hold small toiletries — quick to make in an evening.
Skill level: beginner
Sample size: diameter 4–5″ × height 2–3″
Yarn/tools: worsted or bulky cotton, 5–8 mm hook
Materials
- ~150–250 yd cotton (single strand) or t-shirt yarn for quick small piece
- 5–8 mm hook (depending on yarn)
- Tapestry needle
Step-by-step
Base
- MR, 6 sc. R2: inc around = 12. R3: sc1, inc = 18. R4: sc2, inc = 24. For a 4″ base you may stop at 4–5 rounds depending on gauge.
Walls
- Work sc in rounds for 4–6 rounds to reach a height of 2–3″. Keep tension tight so sides are stable.
Rim
- Finish with one round sc and one round of reverse sc (crab stitch) for a neat twisted rim.
Variation — lid
- For a small lid: make a flat circle same diameter but with slightly fewer increase rounds so it sits inside the top edge; add a tiny knob (small puff or loop) at center for a handle.
Uses & variations
- Use as a small planter cover (place waterproof cup inside), jewelry dish, or gift container.
- Make multiples in coordinating colors for desktop organization.
Lining, stiffening and finishing — general recommendations
Lining
- For decorative openwork baskets (Spa Lace), lining is essential for functional storage. Use lightweight cotton, fusible interfacing for stability, and top-stitch the liner to the basket rim or tack it invisibly so you can remove for washing.
Stiffening
- Plastic canvas at base adds immediate stability — cut to shape, seat it under stitches and stitch around edge.
- Fusible interfacing attached to a fabric liner gives structure without adding bulk.
- For temporary stiffening while blocking lace baskets, use diluted white glue or spray starch, pin the basket to shape and let dry.
Washing & care
- Cotton baskets: gentle machine wash in cool water (unless canvas inserted), reshape while damp and dry flat.
- T-shirt yarn: machine washable but may stretch slightly — reshape.
- If your basket has glued parts (like glued canvas), spot clean instead.
Final design & styling ideas
- Make a nested set — three baskets sized to stack inside each other for pretty storage and gifted as a set.
- Color coordinate baskets with room palettes: neutral cotton for bathrooms, bold colorblocks for kids’ rooms.
- Add embroidered labels or stitched tags to sides to indicate contents (TOYS, YARNS, LINENS).
conclusion
There you have it: six full, practical crochet storage basket patterns for every corner of the home — from the airy Spa Lace Basket to the sturdy Rectangle Basket and the whimsical Heart Cottagecore Picnic Basket. Each design includes construction notes for base → walls → rim and practical advice for lining, stiffeners, and finishing so your finished basket is both beautiful and useful.