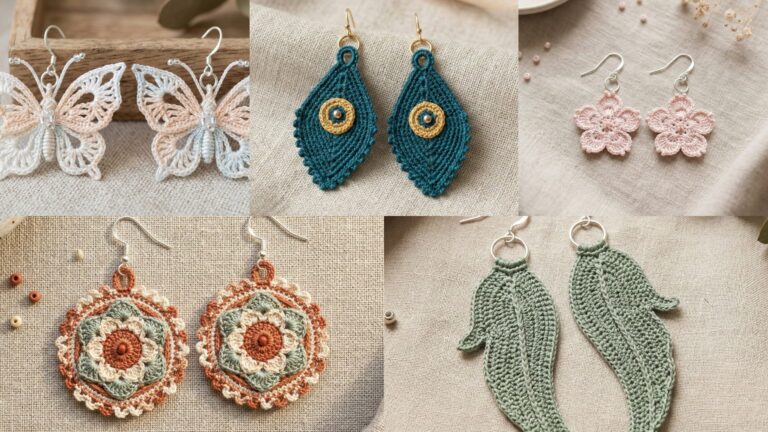
Whether you want a flowery market bag, a neat crossbody for commuting, or a cute granny-squares shoulder bag for festival season, these six designs deliver. Each pattern includes realistic materials, finishing tips, and precise instructions for the bag body and the strap — because a lovely bag with a limp strap is just a purse-shaped disappointment.
Quick universal notes (read this — it saves time)
- Abbreviations (US): ch, sc, hdc, dc, tr, sl st, st(s), sk, BLO/FLO, inc (2 sc in same st), dec (sc2tog), MR = magic ring.
- Yarn choices: For durable bags, prefer cotton or cotton blends for structure and washability. Use worsted weight (#4) or DK (#3) depending on pattern unless specified. Lining and interfacing are recommended if you plan to carry heavier items.
- Hooks used: Most samples use 4.0–5.0 mm hooks. Use a smaller hook than the yarn label suggests for a denser fabric if you want a more structured bag.
- Strap strength: If you want a strap that survives months of use, either:
- Crochet a dense, wide strap and line it with cotton webbing (sew the webbing into the strap), or
- Make a short, dense strap and insert a leather or fabric strap, or
- Use a metal D-ring + straps combo (instructions given where relevant).
- Gauge & sizing: Always swatch 4″ in the stitch pattern and wash/block. Use stitches-per-inch × desired width to calculate foundation chains if you change yarn or size. I include sample counts for a medium bag; adapt as needed.
- Closures & hardware: Magnetic snaps, zippers, wooden toggles, and button closures are all fine. I give options for each bag.
- Lining: I recommend lining all bags that will carry small objects or coins. A simple sewn cotton lining with a pocket takes 30–60 minutes and prevents snagging and sag.
- Finishing: Weave and hide ends, reinforce strap attachment with back-and-forth stitching, and consider topstitching the opening when you attach the lining.
1. Crochet Wild Flower Shoulder Bag Pattern
A medium shoulder bag covered in little wildflower appliqués — romantic but still useful. Strap is a sturdy, crocheted tubular strap with optional leather webbing insert.
Skill level: Confident Beginner
Finished size (sample): approx 11″ wide × 9″ high × 3″ deep (body only) — strap drop ~11–12″ (shoulder).
Yarn & tools: worsted cotton (approx 350–450 yds), 4.5 mm hook for body; 3.5–4.0 mm for firmer strap; tapestry needle; stitch markers; optional 1″ leather or cotton webbing 24″ for strap reinforcement; small amount of yarn in 4–6 colors for flower appliqués; lining fabric approx 12″ × 18″.
Gauge (example): 14 sc = 4″ in worsted on 4.5 mm.
Construction overview
Work a dense rectangle in sc or hdc for the bag body, shape a gusset for depth, add many tiny flower appliqués sewn on after blocking, crochet a tubular strap (3-step: crochet tube → insert webbing → close ends), line the bag, and attach closure.
Step-by-step
Body (worked flat, then seamed)
- Calculate foundation chain for width. Using example gauge 14 sc = 4″ → 3.5 sc/in. For 11″ width: 11 × 3.5 = 38.5 → ch 40. (Round to even number.)
- Foundation row: ch 40, sc in 2nd ch from hook and across (40 sc). Turn.
- Row 2–Row 24 (or until height = 9″): ch1, sc in BLO (or sc across for denser fabric) across; turn. Adjust number of rows to reach 9″ height. Blocking may relax dimensions — check after finishing.
- Gusset (depth): To make a 3″ depth, make a strip: ch 14, sc 13 across, join to form a loop and work in rounds for height equal to bag height (9″). Or add the gusset later by seaming sides leaving a 3″ fold. Preferred: make a strip of 3″ wide × 11″ long and join around body bottom.
- Seam: Fold main rectangle so that the bottom edges meet the gusset; whipstitch or mattress stitch the side seams and bottom join. Make sure corners are neat. Use extra passes where strap will attach.
Strap — tubular with webbing insert (strong)
- Option A (reinforced): Prepare webbing length 24″ (or match desired strap drop). Crochet a tube sized slightly larger than webbing: ch (webbing_width_in_sts + 2) to wrap webbing. Example: ch 10; join; R1: sc around for 12–14 rounds until tube length equals webbing length. Slip webbing inside and stitch small hand-sewn tacks to secure at ends. Sew tube ends into bag top with multiple stitches.
- Option B (all-yarn but reinforced): Crochet a 6–8 stitch wide strip (ch 10, sc across) and then slip-stitch edges together to make a flat strap. Fold and whipstitch ends into the bag seam. For extra strength, crochet the strap with tight tension and add a line of back-and-forth securing stitches where it meets the bag.
Wildflower appliqués
- Tiny flower (make 12–18): MR, ch1, 6 sc in MR, sl st to close. Round 2: ch3, sl st in next st around to make 6 loops. Round 3: in each loop (sc, hdc, 3 dc, hdc, sc) → 6 petals. Fasten off and weave ends. Block flat.
- Arrange flowers in a pleasing scattered pattern on the front panel and sew them on with matching yarn, sewing through petals and bag fabric for stability.
Closure & lining
- Sew in a zipper at the top opening (recommended) or install a magnetic snap (mark center). If magnetic snap, reinforce bag top with a small rectangle of interfacing or stitched felt between lining and bag.
- Cut lining fabric 12″ × 18″, sew sides and bottom, press seams, turn right-side out; insert into bag and whipstitch top edge to bag top edge, sewing through both layers for a neat finish.
Finishing & variations
- Add a small interior pocket by sewing a rectangle and topstitching.
- For a boho look, make the strap longer and add tassels at ends.
- For a more structured bag, carry two strands of yarn held together or use heavier-weight yarn.
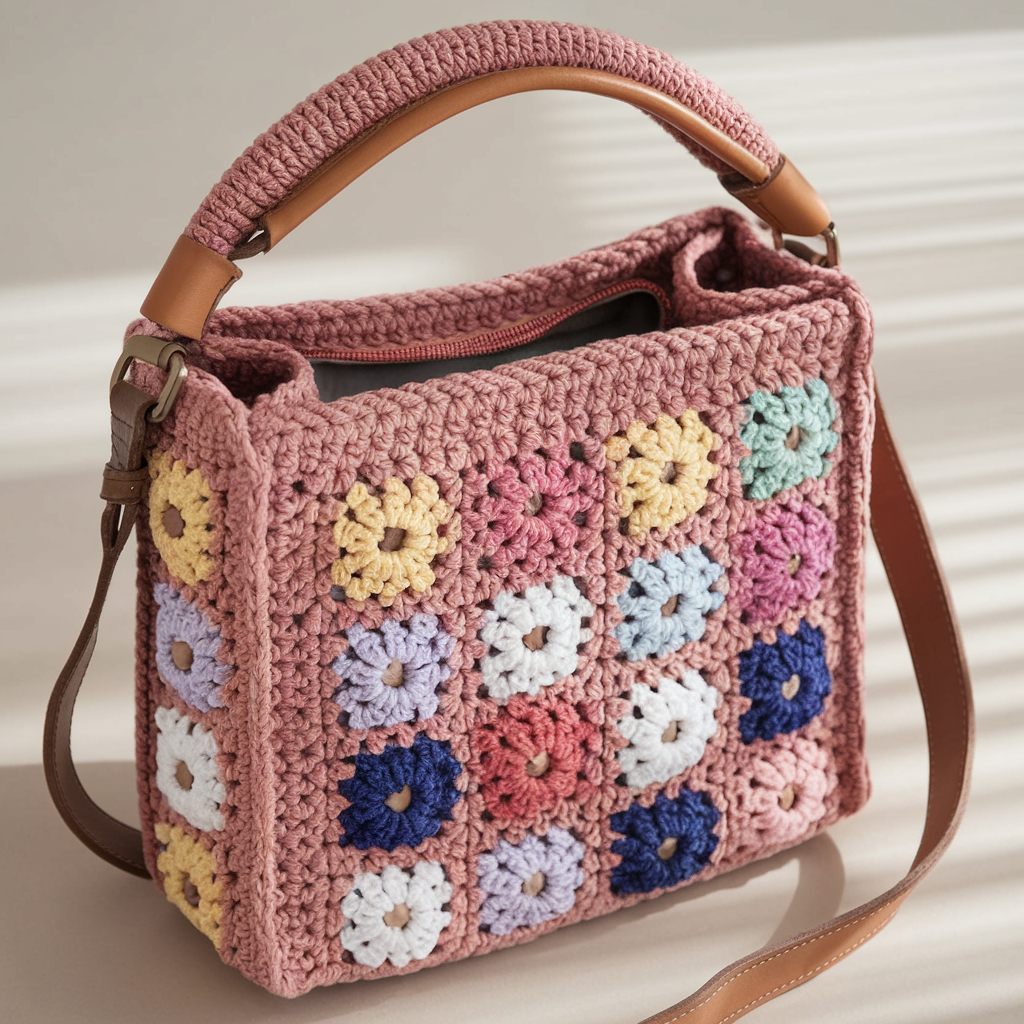
2. Crochet Beginner-Friendly Shoulder Bag Pattern
A simple, fast, practical shoulder bag that beginners can make in an afternoon. Strap is a simple wide hdc strap worked directly onto the bag.
Skill level: Beginner
Finished size (sample): 10″ wide × 8.5″ high × 2.5″ deep; strap drop ~10–12″.
Yarn & tools: worsted cotton ~300–400 yds, 5.0 mm hook (larger hook gives speed and drape), tapestry needle, optional magnetic snap.
Gauge (example): 12 hdc = 4″ on 5.0 mm.
Construction overview
Work a rectangle in hdc for a soft bag; make a simple narrow gusset; pick up stitches and crochet strap across top edges and join in center to form shoulder strap directly attached to front and back for strength.
Step-by-step
Body
- Foundation: Using example gauge, for 10″ width, stitches = 10 × 3 = 30 ch. Ch 30. Row1: hdc in 3rd ch from hook and across (28 hdc). Turn.
- Rows 2–Rows 22: ch2, hdc across. Stop when height ≈ 8.5″.
- Gusset: Work a strip ch (g_usset_width_in_sts) = ch 10 (~2.5″) and join to make a loop. Work hdc rounds until strip length equals bag width (10″). Join to bag by sewing edges or attach by sc around bottom seam. Easier for beginners: fold rectangle and sew sides leaving a bottom flap for depth (box the corners for 2.5″ depth).
Strap (worked directly)
- Pick up stitches across top edge of front panel: join yarn in corner, ch1 and pick up loops (or sc) evenly across top edge to create a foundation of 30–36 sts for strap width.
- Row 1–Row 24 (or until strap drop desired): Work hdc rows back and forth to create a wide strap about 1.5–2″ wide. At the midpoint of strap length, you can fold strap in half and sc through both layers for extra durability (optional).
- Attach strap to back: When strap length is achieved, sew strap ends to back top edge and reinforce with additional hand stitches in an X pattern.
Closure & lining
- Add a simple flap and button closure: work a flap by picking up sts along back top and crocheting a triangular flap; add button and loop on front. Or sew in a zipper for secure closure. Lining optional but recommended.
Variations & finishing
- Use variegated yarn for a colorful beginner-friendly bag.
- Add a pocket inside or outside by crocheting a rectangle and sewing it on.
3. Crochet Shoulder Bow Bag Pattern
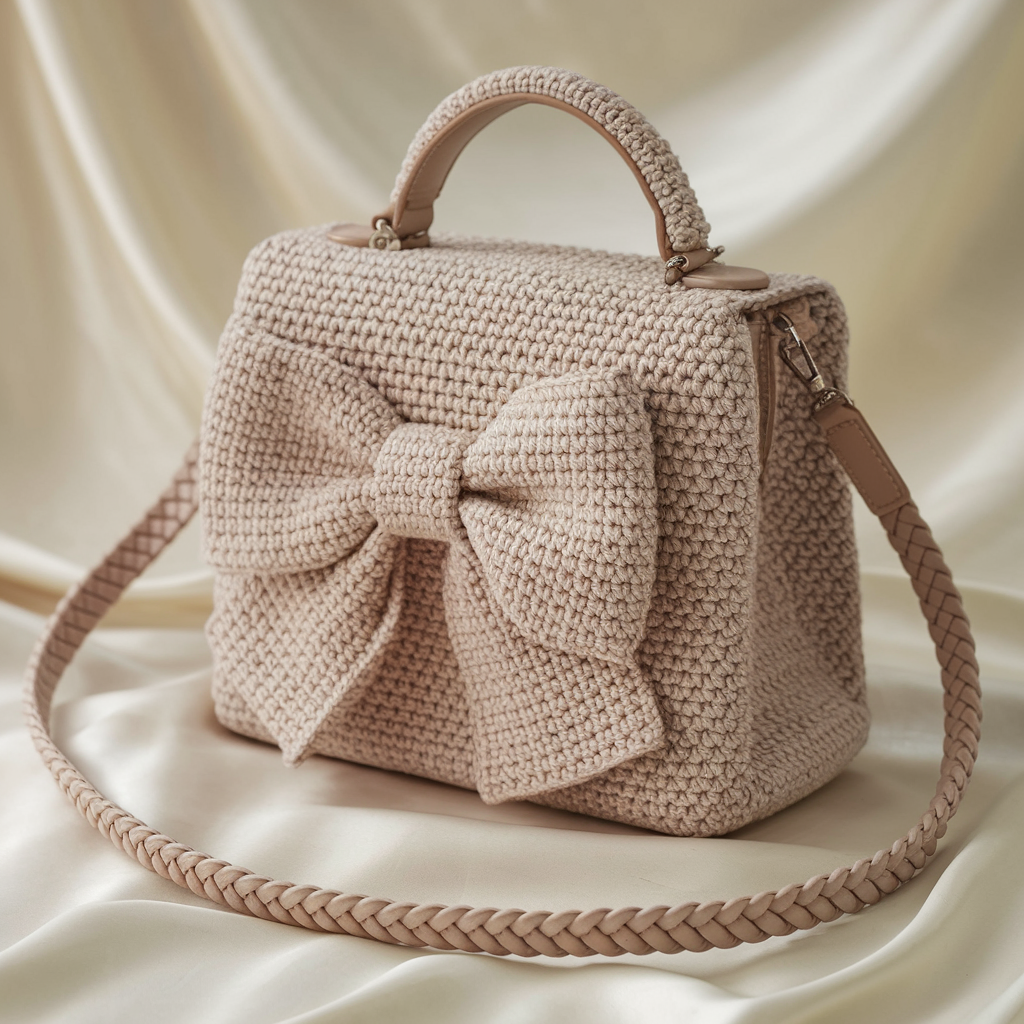
A cute shoulder bag with an oversized bow feature across the front and a braided strap — fashionable, statement piece.
Skill level: Confident Beginner
Finished size (sample): 9–10″ wide × 7–8″ high × 2.5″ deep. Bow approx 6″ wide. Strap drop ~10″.
Yarn & tools: worsted cotton or cotton blend, 4.5 mm hook; tapestry needle; optional interfacing for bow stability.
Gauge (example): 14 sc = 4″ at 4.5 mm.
Construction overview
Make a structured rectangular bag, create a large bow (crocheted rectangle pinched and wrapped), and attach a braided strap (three flattened strips braided and sewn).
Step-by-step
Bag body
- Foundation: ch 38 (for ~10″ width using example gauge). Row1: sc in 2nd ch from hook across (37 sc). Turn.
- Rows 2–Rows 26: ch1, sc across until you reach ~7–8″ height.
- Gusset or boxed corners: Fold and sew sides as previous patterns or add a tube gusset for depth.
Bow
- Bow rectangle: ch 40, sc across 39 sts, work 6–8 rows (height ~2.5″) to create rectangle 6″ × 2.5″. Fasten off.
- Bow center wrap: ch 8, sc across and wrap around center of rectangle, pulling tight to form bow shape. Sew wrap closed in back, tuck ends inside and weave. For firmer bow, insert a rectangle of thin interfacing or craft felt inside bow before wrapping.
- Attach bow: Sew bow to front of bag centered with several passes through bag fabric and bow body so it’s secure.
Braided strap (strong & decorative)
- Make three strips: ch 8, sc across rows until each strip length = desired strap length divided by 3 (e.g., if strap needs to be 36″ long, work strips of ~36″ then end).
- Braid strips: lay three strips flat and braid them tightly. Flatten braid with a few lines of stitching down the length to keep flattened. Sew braid ends into side seams of bag and topstitch to secure. For strength, insert a narrow cotton webbing into braid before tacking up ends.
Lining & closure
- Add a zipper or flap with magnetic snap. Attach lining as previous.
Variations & finishing
- Use satin yarn or yarn + metallic for glittery evening bag.
- Replace braided strap with chain + leather for a luxe look (sew ends of bag strap to chain connectors).
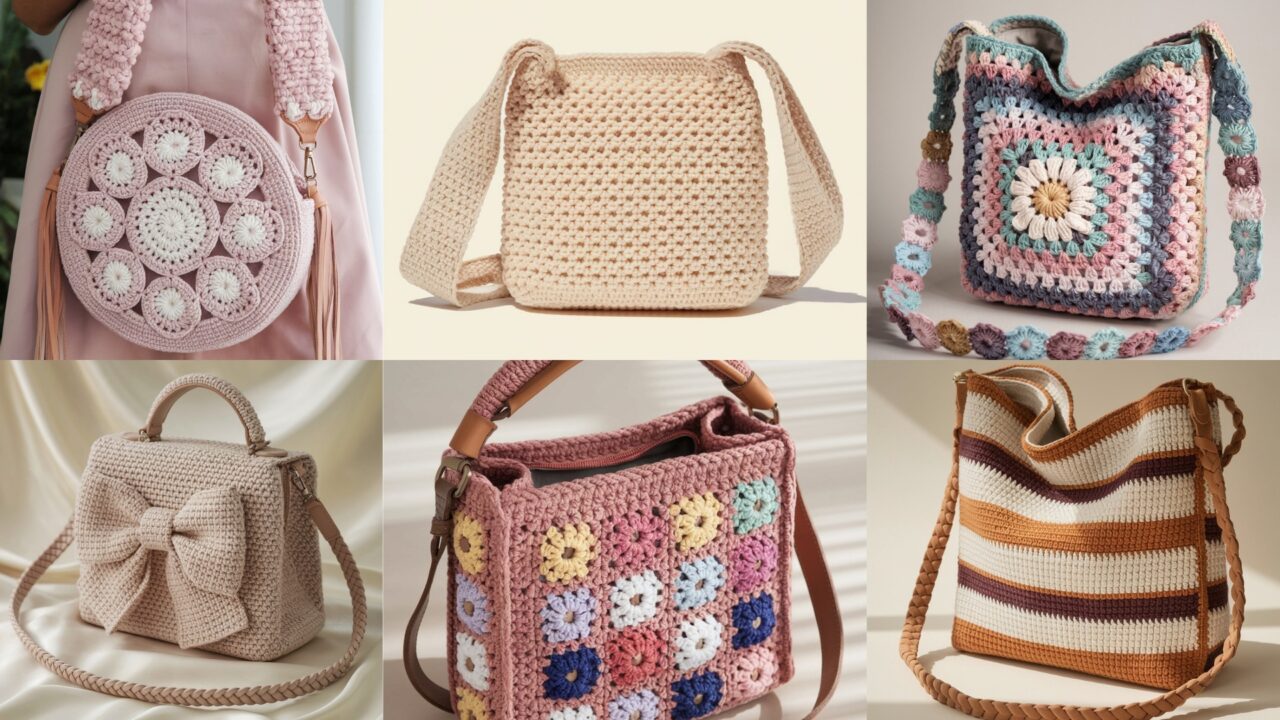
4. Crochet Daisy Granny Shoulder Bag Pattern
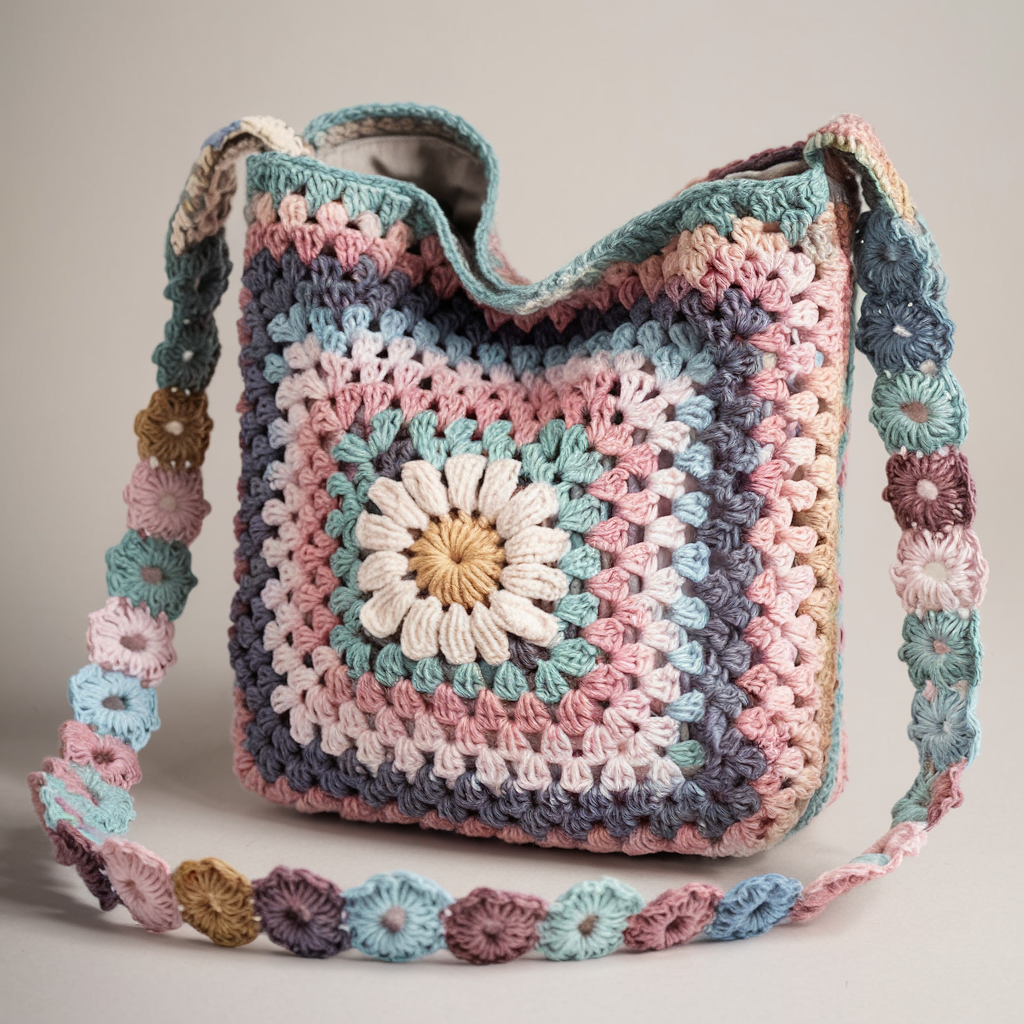
A classic granny-squares bag where each square has a daisy center — festival-ready or city-chic depending on colors. Strap crocheted as a chain of joined granny motifs for visual continuity.
Skill level: Confident Beginner → Intermediate (joining motifs)
Finished size (sample): 12″ wide × 10″ high with dropped strap ~12–14″.
Yarn & tools: worsted cotton in 3–5 colors, 4.0–4.5 mm hook; tapestry needle; lining.
Gauge (example): one finished granny square = ~4″ across.
Construction overview
Make granny squares with daisy centers. Join squares into panels for front/back and a strip for the base. Create a strap by joining several granny squares end-to-end or by crocheting a sturdy strap and embellishing with small daisies.
Step-by-step
Daisy granny square (make 18–24 squares depending on layout)
- Center (daisy): MR, ch1, 8 sc in MR; sl st to join. Round 2: ch3, (2 dc, ch2, 3 dc) in same st to form first petal cluster? Simpler: work little petals around: ch3, sl st in next st to make 8 loops, then in each loop do (sc, hdc, 3 dc, hdc, sc) — forms 8 petals. Fasten off and change color.
- Square rounds: Round 3–Round 4: work classic granny-type shell rounds to grow square to approx 4″ (3 rounds of 3-dc clusters and turning corners with ch2). Block squares to exact size.
Assembly
- Layout squares into panels: e.g., front 3 × 3 (9 squares), back 3 × 3 another 9. Make a base strip of 3 squares seam bottom.
- Join-as-you-go or whipstitch squares together into panels. For strength, when joining, go through both loops and add a second pass across seams.
- Seam side panels and attach base by sewing. Make corners neat.
Strap — granny chain / motif strap
- Option A (motif strap): Make 6–8 small 2″ granny motifs and join end-to-end to desired length; sew strap ends into side seams and reinforce.
- Option B (embellished strap): Crochet a 2–3″ wide strap in hdc for strength, and sew small daisy appliqués across the strap at intervals.
Lining & closure
- Line and add zip or button flap as desired.
Variations & finishing
- Use tonal shades for a sophisticated look or bright contrasting for festival season.
- Sew a leather patch at bottom corners to prevent wear.
5. Crochet Striped Shoulder Bag Pattern
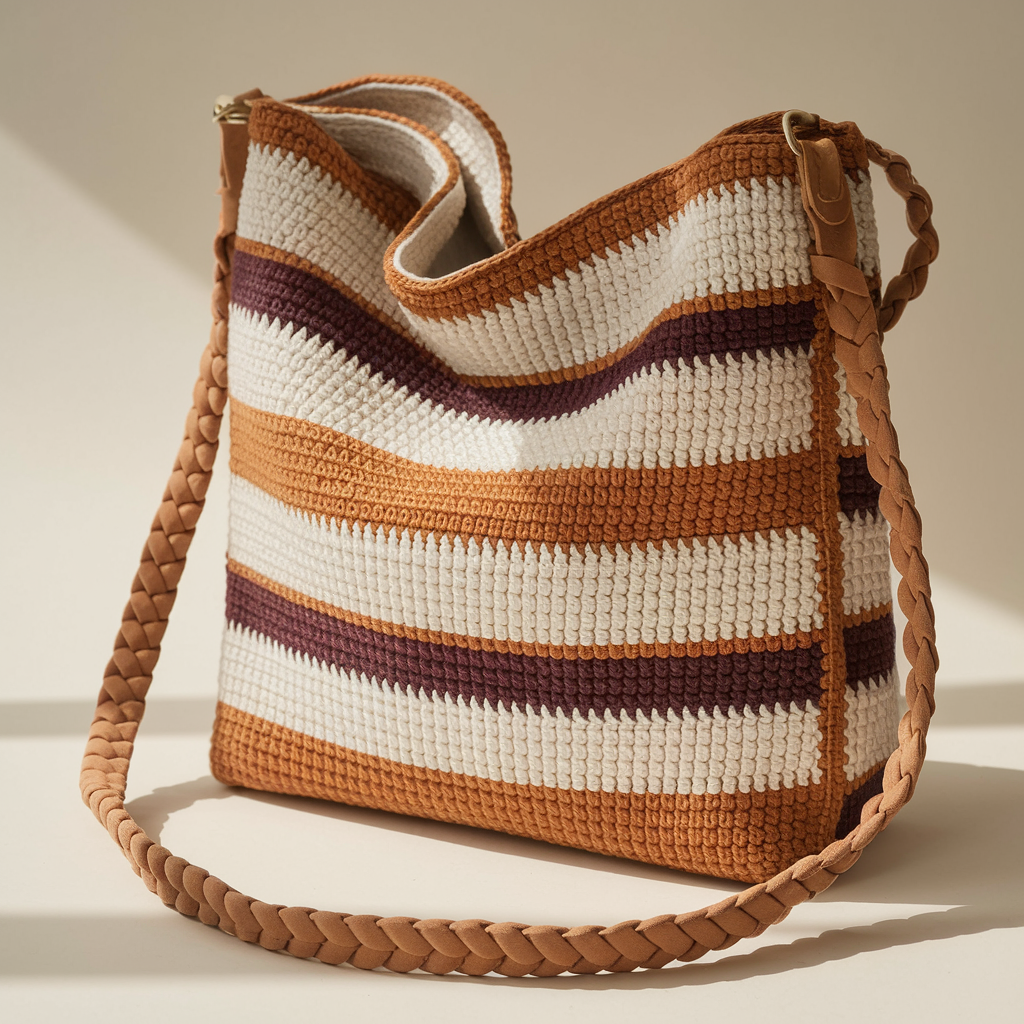
A clean, modern striped bag with top zipper and a double-strand strap (two thin straps braided or twisted). Straps crocheted as two long cords then braided for comfort and style.
Skill level: Confident Beginner
Finished size (sample): 11″ × 9″ × 2.5″ with a strap drop of ~11–12″.
Yarn & tools: worsted yarn in 3 colors (approx 400–500 yds total), 4.5 mm hook; tapestry needle; lining fabric; zipper.
Gauge (example): 14 sc = 4″.
Construction overview
Work body in alternating color stripes, box the corners for depth, crochet two long cords (or i-cord) for straps, braid cords together, and attach securely to bag.
Step-by-step
Body
- Foundation: ch 44 (for ~11″ width). Row1: sc across.
- Striping: Work sc rows in color A for 4 rows, switch to color B for 4 rows, color C for 4 rows; repeat until desired height (9″). Carry yarn up side or cut and weave for clean stripes.
- Boxed corners / gusset: Fold bag and mark corners. Fold corner to make triangle; measure across edge to desired depth (2.5″). Seam across triangle base and repeat for other corner. Or crochet a separate gusset and join.
Straps — braided cords
- Crochet three thin cords in contrasting colors: ch (desired length ÷ 3) × stitches to make cords long enough (or make one long cord and split into three). Easiest: make 3 i-cords or chains reinforced with sc: ch 120 (for 40″ cord accounting braid), sc back across chain to make a cord; make three cords.
- Braid cords, flatten with a few rows of sc across the braid length to keep braid tight. Sew braid ends into sides and secure with cross-stitching. Add small leather or yarn wrap at each end for tidy finish.
Zipper & lining
- Sew zipper into top opening before lining or hand stitch through lining top and bag top to hide zipper tails. Lining recommended for clean zipper finishes.
Variations & finishing
- Add a tassel or pom at zipper pull.
- Use neutral stripes for an everyday bag or neon stripes for summer.
6. Crochet Daisy Motifs Shoulder Bag Pattern
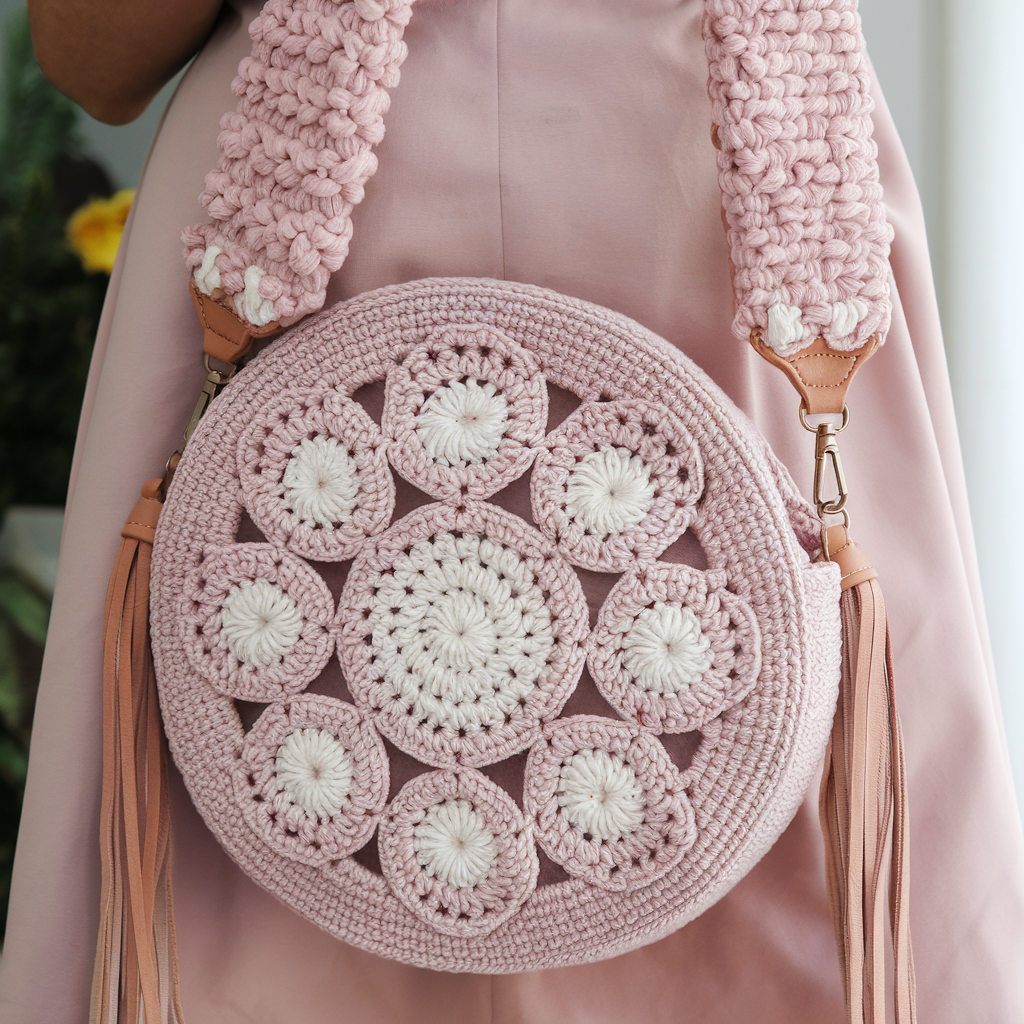
Another floral bag, but this time built from joined daisy motifs in a circular medallion formation — retro chic. Strap is wide and crocheted in a dense pattern to match texture.
Skill level: Intermediate (motif join + shaping)
Finished size (sample): 12″ diameter circular bag (bucket style) with strap drop ~11″.
Yarn & tools: worsted cotton (500–700 yds), 4.0–4.5 mm hook; tapestry needle; optional base circle of faux leather for structure; lining fabric round.
Gauge (example): one daisy motif ~4″ across after blocking.
Construction overview
Make circular daisy motifs (centered medallions), join in a round to form a circular bag. Crochet a dense wide strap (hdc in rows) and attach to top edges.
Step-by-step
Daisy motif (make ~12–16 depending on layout)
- Center: MR, ch1, 6 sc in MR; join.
- Petals: Round 2: ch3, sl st in next st ×6 to make loops. Round 3: in each loop (sc, hdc, 3 dc, hdc, sc) → 6 petals. Round 4–5: grow motif into a medallion by adding rounds of dc clusters and corner chain spaces to make a round motif of ~4″. Block flat.
Assembly into circle
- Arrange motifs in a circular mosaic pattern (e.g., one center motif surrounded by 6, then outer ring). Join motifs with join-as-you-go or whipstitch to create a round panel. Join two panels back-to-back (or make a deep single-panel lined bucket) leaving top edge open. For a sturdy base, crochet a round circle in sc to the desired diameter and stitch it to motif panel’s bottom.
Strap — wide and dense
- Pick up stitches around top edge and work hdc rounds that extend into a wide strap (approx 2.5–3″ wide) by working back-and-forth rows until strap length comfortable. Fold strap in half along centerline and sc through both layers at attachment points for reinforcement. Sew strap base multiple passes through top edge for strength.
Lining & closure
- Use a round lining to fit inside and slipstitch to top edge; add a drawstring or zipper to close the bucket.
Variations & finishing
- Insert a round faux leather base for structure and a polished finish.
- Make a smaller clutch by halving motif counts and adding a short wrist strap.
Universal tips for straps (so they don’t fail)
- Always reinforce strap anchors: stitch through both bag fabric and lining in multiple passes (X stitch or box stitch).
- For long-term strength, insert webbing into strap and hand sew webbing ends into bag seam.
- If you want an adjustable strap, add metal slide adjuster and use a webbing or leather insert — crochet a tube around the strap end to hide hardware for a polished look.
Lining, closures & hardware — practical notes
- Zipper: Sew into the bag opening before you stitch the lining down for clean seams. Use a zipper that’s slightly shorter than the bag width and finish ends with bar tacks.
- Magnetic snap: For quick closure, use magnetic snaps — but reinforce with interfacing between lining and bag to prevent pull-through.
- D-rings & toggles: Use D-rings for detachable straps or to add a short crossbody option. Sew on a small inner tab of webbing before attaching metal D-ring for strength.
Care & durability
- Cotton bags: machine wash gentle (inside-out laundry bag) or hand wash; reshape and air dry flat. Avoid high-heat dryer.
- Reinforcement: If you carry heavy items daily, consider sewing a fabric or leather panel on the inside bottom to spread load.
- Storage: Avoid hanging heavy crochet bags when empty — straps can stretch. Store flat or stuffed to preserve shape.
Conclusion
There you go: six distinct shoulder-bag blueprints, each with a reliable strap plan and finishing notes so you don’t create a cute object that disintegrates at the first market run. Pick your project by how much time you want to spend: the Beginner-Friendly shoulder bag is fast and forgiving; the Daisy Motifs and Wild Flower bags take more time but produce show-stopping results. Always swatch, choose cotton or cotton-blend for daily use, and reinforce strap anchors like you mean it.