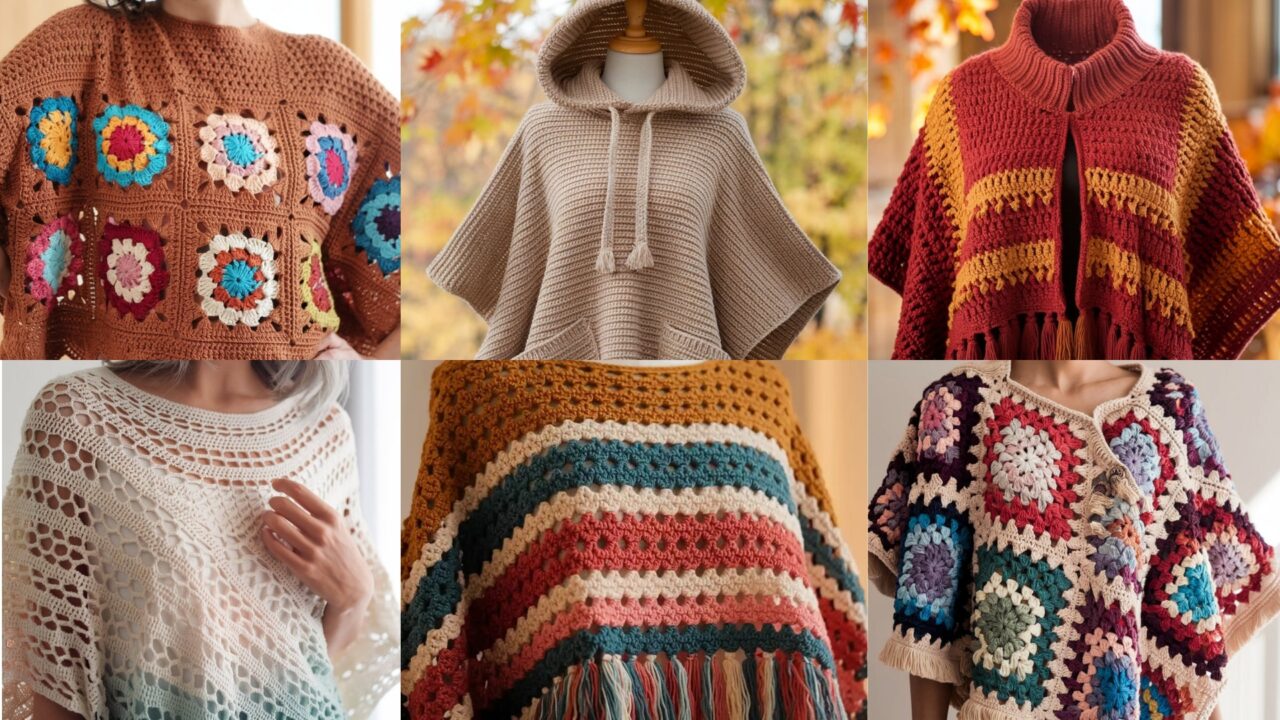
Ponchos are the perfect layer: effortless, flattering, and endlessly adaptable. Below are six full, beginner-friendly but detailed crochet poncho patterns you can make for different seasons and styles — Granny Stripe, Open Shells, Harvest Moon Ruana, Hooded Poncho, Retro Bloom, and Granny Square. I write in US crochet terms and include materials, gauge/sizing guidance, step-by-step construction for the body + edging + finishing, alteration tips, and care notes. Each pattern is written as a one-piece or simple joined piece so you can finish a polished poncho in a weekend (or a few evenings).
Before you start, read the short “how to size” notes so you can easily adapt each pattern to the intended wearer.
Quick sizing & gauge notes (read before you begin)
Yarn & hook recommendations (general):
- Spring/Summer: DK / light worsted (#3) cotton or cotton-blends, hook 4.0 mm (G).
- All-season: worsted (#4) acrylic/cotton blends, hook 5.0 mm (H).
- Winter: bulky (#5) wool/acrylic, hook 6.0–8.0 mm (J–L).
Gauge: Gauge is flexible for ponchos, but you’ll get the best drape if you swatch. Example reference gauges:
- DK on 4.0 mm: ~5–5.5 sc (or 4 dc) per inch.
- Worsted on 5.0 mm: ~4–4.5 sc (or 3.5–4 dc) per inch.
How to size your poncho (simple math):
- Measure desired chest/opening width (A). A loose poncho commonly uses top opening 20–25″ (for slip-over head) and total across front+back about 40–48″ for a comfortable drape. Ruana/cape styles can be wider (60″+).
- Make a gauge swatch and calculate stitches per inch (spi) for the stitch pattern you’ll use (granny clusters, shells, etc.).
- Stitch count formula: Desired width (in inches) × spi = foundation chain (round up to pattern multiple; e.g., multiples of 3, 6 or 12 depending on pattern).
- For ponchos worked as rectangle folded or as square with neck opening, calculate panel width accordingly.
Common finishing options: fringe, tassels, buttoned front, side slits, hood, or ribbed collar.
1. Crochet Granny Stripe Poncho Pattern
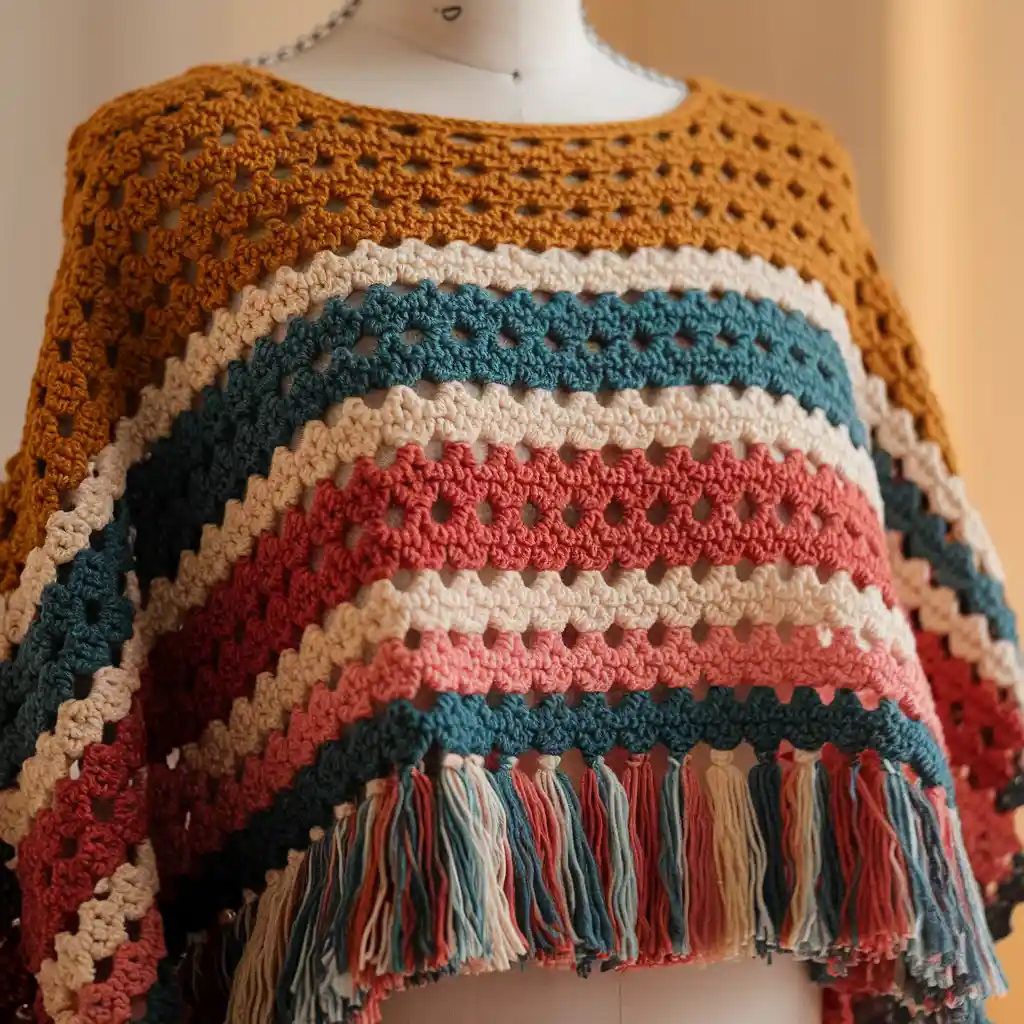
Classic, colorful, and endlessly customizable. This pattern uses rows of classic granny clusters worked in stripes — lightweight but warm when using worsted yarn.
Finished look
A relaxed, boxy poncho that hits around mid-hip (adjust length as desired). Great for layering over tees or sweaters.
Materials (medium/one-size)
- Worsted weight yarn: 4–6 colors, ~700–900 yds total (adjust by size/length).
- Hook: 5.0 mm (H-8)
- Tapestry needle, scissors, optional fringe maker.
Stitch glossary & repeat
- Granny cluster: (dc, dc, dc) in same space.
- Pattern multiple: multiple of 3 + 2 (for turning chain / edge space).
Gauge (for planning)
- 4 dc clusters ≈ 2.5″ wide (this is approximate — make a 4-cluster swatch to measure).
Construction overview (rectangle folded with neck opening)
We’ll work a rectangle that becomes front + back when folded; we’ll leave a neck slit in the center or cut after finishing.
Step 1 — Foundation
- Decide desired panel width (W) = half of total poncho width (for front or back). Example: total 46″ → each panel 23″.
- Make a chain to match width: chain a multiple of 3 plus 2 (e.g., 3 × 24 = 72 + 2 = 74 ch). Check your swatch and math.
Step 2 — Row 1 (base row)
- Row 1: in 4th ch from hook (counts as dc3 cluster foundation), dc3 in same chain (cluster), skip 3 ch, dc3 in next ch repeat across until last 3 ch, end with dc1 (or dc3 if space). Chain 3, turn.
Step 3 — Row pattern (granny stripe rounds)
- Row 2: Work a cluster (dc3) into the space between clusters from previous row (the ch-space), chain 1, dc3 in next ch-space, chain 1 across. At edges, work a cluster or sc to create straight edge. Chain 3, turn.
- Repeat Row 2, changing color every 3–6 rows to create stripes.
Tip: For a neat vertical edge, at the beginning of each right-side row make a sc in the turning chain space; at the end, make a sc in the top of turning chain.
Step 4 — Work until length achieved
- Continue stripes until the panel reaches desired drop length (e.g., 23–25″ for mid-hip). The rectangle should be long enough so that when folded over shoulders it gives desired front/back length.
Step 5 — Neck opening & finishing
Option A — Center slit before seaming:
- Fold panel in half widthwise. Measure center and mark neck slit width (usually 8–10″ for easy head-through). From the top open edge, seam down both sides leaving center slit unseamed — or sew from top down leaving circle for neck.
Option B — Cut/opening after seaming: - Seam sides together leaving a section unstitched for neck opening (use mattress stitch or whipstitch).
Step 6 — Collar or ribbed edging (optional)
- Pick up stitches around the neck opening and work a few rounds of BLO hdc to create a soft rib collar (4–6 rounds). Join color and finish.
Step 7 — Fringe (optional)
- Attach fringe along the hem: cut 12–16″ lengths, fold and knot at regular intervals. Trim evenly.
Variations & tips
- Use a lighter DK yarn for summer (longer, airy drape).
- For a more fitted look, inset decreases to create arm shaping.
- To make a hooded granny strip poncho, pick up stitches at the neck opening and work a hood (see hood pattern below).
2. Crochet Open Shells Poncho Pattern
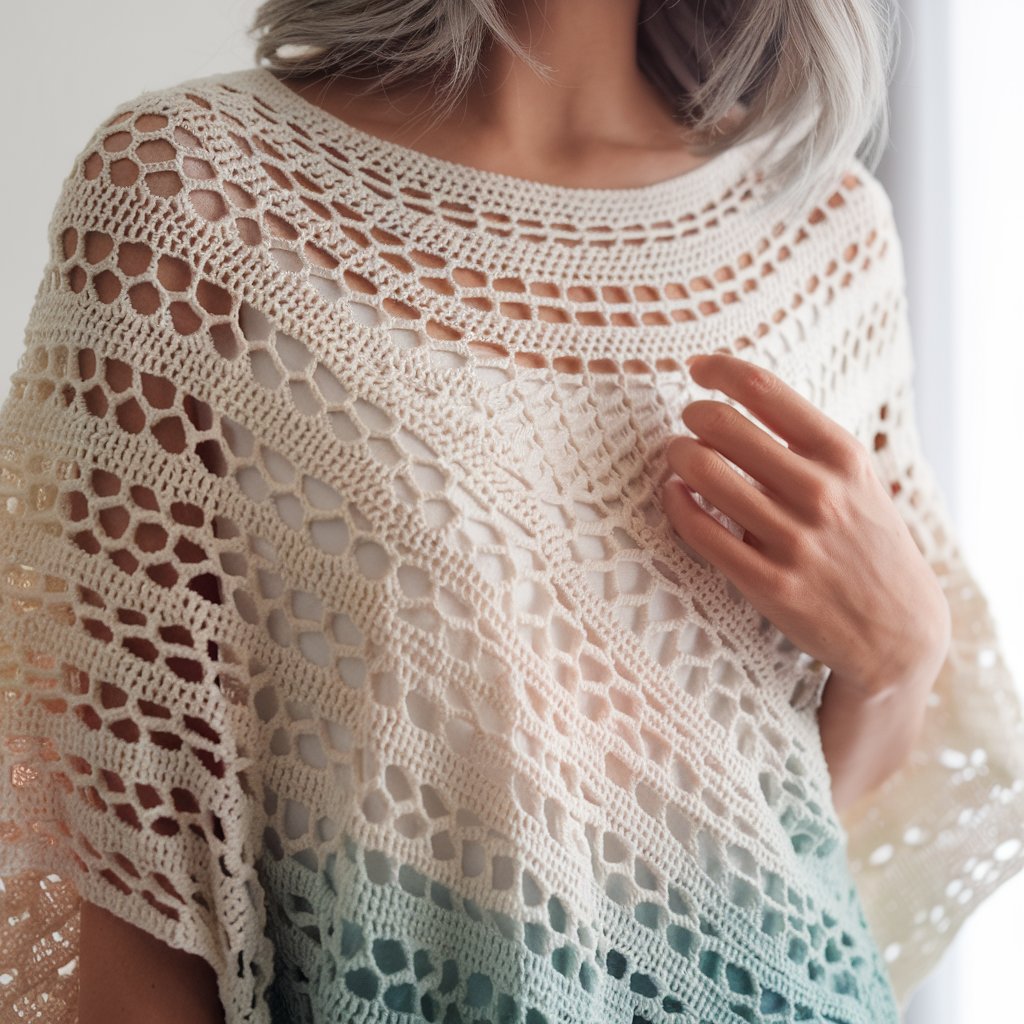
Lacy, breathable and feminine — shells give pretty texture for spring and summer. Works well in cottons and bamboo blends.
Materials
- DK or light worsted cotton yarn ~800–1000 yds (for full width and length)
- Hook: 4.0 mm (G-6)
- Stitch markers, tapestry needle
Stitch glossary
- Shell: (5 dc) in same st or space (adjust to 3 dc shells for lighter look).
- Pattern multiple: multiple of 6 + 1 (for our 5-dc shell setup).
Gauge
- 1 shell = approx 1″–1.25″ depending on yarn.
Construction overview (worked as triangle-oriented rectangle with slip-over neck)
We’ll create a rectangular panel in shells then fold, or make a simple triangular poncho for drape.
Option A — Rectangular shell panel (folded)
- Chain foundation: multiple of 6 + 1 to reach width (e.g., chain 121 for ~30″ each panel).
- Row 1: sc in 2nd ch from hook, ch 3, skip 3, (5 dc) in next ch (shell), skip 3, ch 3, sc in next ch across. Turn.
- Row 2 (start shell placement): sc in first sc, ch 3, (5 dc) in next sc base, ch 3, sc in next sc across. Repeat until desired length.
- Work open shells until panel is long enough to fold into front + back length.
Option B — Center-out triangle (fast summer poncho)
- Start with a small chain for top center of neck (or a magic chain) and increase shells at each end of the row to work in triangular pr increases to desired length. This produces a simple A-line poncho.
Step — Armhole / neck slit
- Fold panel and seam sides to create armholes (small seam length, depending on desired armhole size). For looser fit, leave longer open sides.
Edging
- Finishing round: sc around hem and work a scallop (ch 3, sl st back) or picot edge for polish.
- Optional: tie tassels to corners and sides.
Styling & tips
- Shell size determines openness — increase shells for more lace.
- For drape, swap to softer yarn (bamboo) and a slightly larger hook.
3. Crochet Harvest Moon Ruana Poncho Pattern
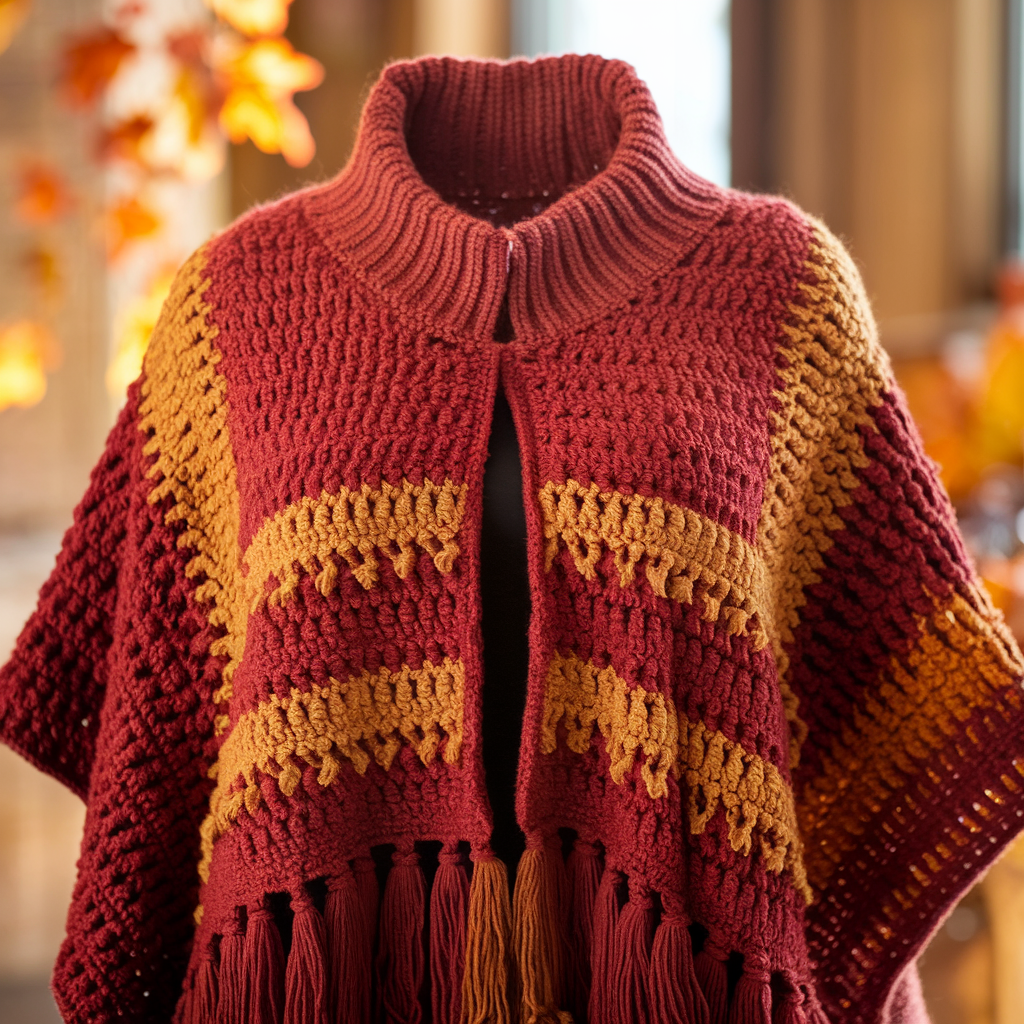
A ruana is a rectangular wrap with a central neck split — roomy, cozy and perfect for layering. This Harvest Moon Ruana uses textured stitches to give fall warmth.
Materials
- Bulky yarn (#5) ~1000–1200 yds for a roomy ruana in adult sizes.
- Hook: 8.0 mm (L-11) for cozy fabric.
- Optional fringe yarn.
Finished dimensions (example)
- Blanket rectangle: 60″ wide × 30″ deep (folded in half to create front/back with neck opening).
Stitch choice
- Use a simple textured repeat like V-stitch (dc, ch 1, dc in same st) alternating with sc rows for stability.
Construction overview (large rectangle with centered neck slit)
- Chain foundation to desired width (e.g., 120 ch for 60″ at gauge). Use multiples of 2 if using V-stitch pattern.
- Row 1 (V-stitch base): dc in 4th ch, ch 1, dc in same ch (V), skip 2 ch, (dc, ch1, dc) in next ch repeat. Turn.
- Row 2: sc across row to stabilize (or make sc rows between V rows for texture).
- Repeat V-stitch and sc rows until rectangle length is ~30″ (or your desired depth).
Neck opening
- With rectangle complete, fold rectangle in half widthwise. Mark center back/top and cut a centered neck slit approximately 9–12″ depending on head size and collar preference. Reinforce slit edges by slip-stitching around or picking up stitches and working 2–4 rounds of hdc to create a stable neck band.
Optional collar
- Pick up stitches around the neck slit and work 6–8 rounds of BLO hdc or ribbing to form a collar that can be rolled or left flat.
Edging & fringe
- Add a 1-2″ border of sc or crab stitch around all edges for a neat finish.
- For a harvest vibe, attach long fringe across the hem.
Variations
- Add buttons and button loops down one front side to make a convertible wrap.
- Use a subtle color fade or variegated yarn to mimic autumn tones.
4. Crochet Hooded Poncho Pattern
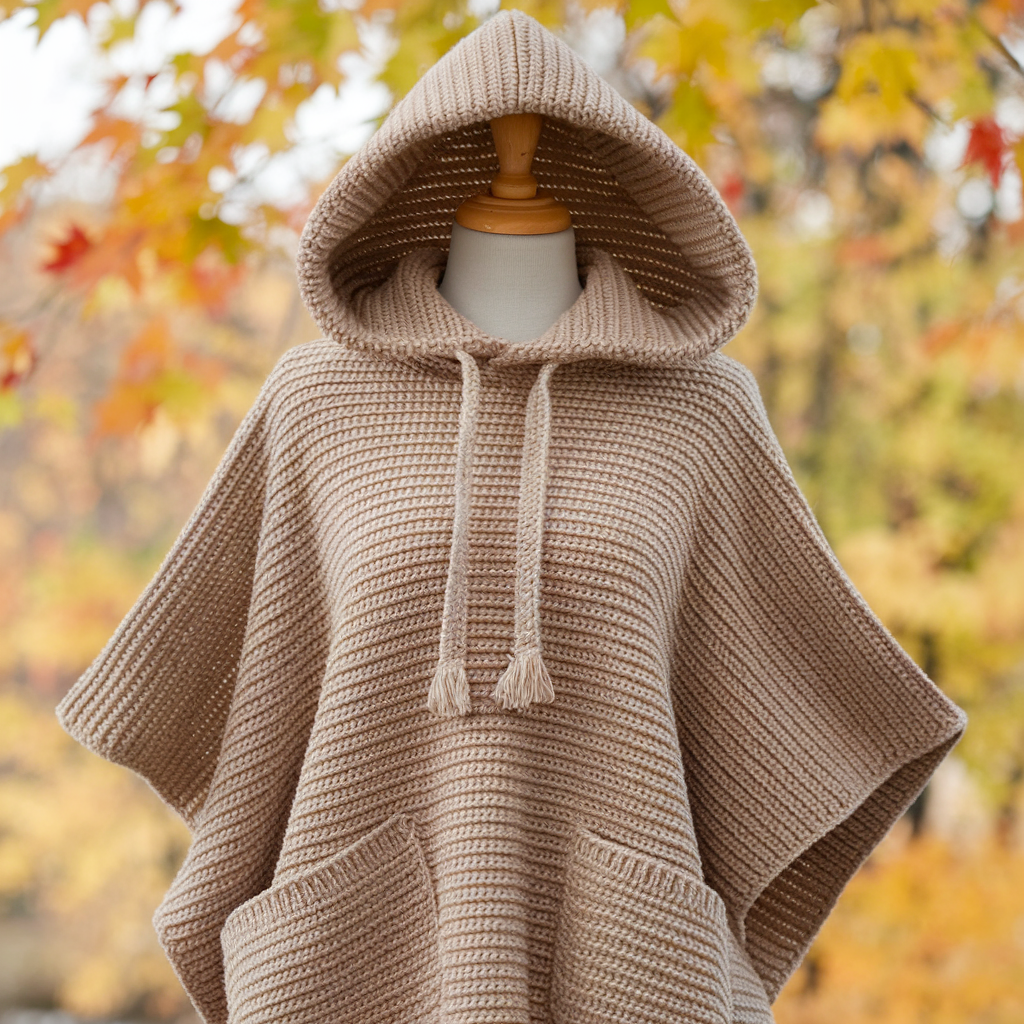
Functional and cozy — this one includes a hood and a relaxed fit. Great with a sport or worsted weight yarn.
Materials
- Worsted yarn ~900–1100 yds (depending on size/length)
- Hook: 5.0 mm (H-8)
- Tapestry needle, optional drawstring cord.
Construction overview (worked as rectangle + hood)
We’ll work two panels joined into body with hood worked separately then attached.
Step 1 — Body panels (two identical panels)
- Chain foundation to desired panel width (e.g., 28–30″ for half body). Use pattern multiple based on chosen stitch (we’ll use a simple 2×2 rib of dc and hdc or shell rows). Example multiple of 4.
- Row pattern (example casual rib): Row 1: sc across, row 2: dc in FLO across (gives vertical ribs). Alternate for 12–16 rows for depth.
- Work panels until desired length (e.g., 26–28″ from neck to hem). Make two panels.
Step 2 — Join panels for body
- Put panels together RS facing; seam the top 6–8″ from top on each side to create arm openings (or seam less for open poncho). Leave center neck open.
Step 3 — Hood
- For hood size: pick up stitches along neck edge (or create new chain length equal to neck perimeter / 2).
- Work hood flat: ch length equal to neck width. Row 1: dc across. Continue in dc until hood depth (back of hood to forehead) = 10–12″ (adult).
- Shape crown: fold hood in half and work decreasing rows across crown: dec 1 st at each end of every other row until about 6–8 sts remain. Fasten off and seam crown closed.
Step 4 — Hood finishing
- Attach hood to neck seam with slipstitch or whipstitch.
- Pick up 1–2 rounds of sc around face opening and work a few rounds of front loop rib or scallop. Optionally add a drawstring through a front row (weave cord through BLO stitches).
Step 5 — Hem & optional pockets
- Add a border around hem.
- Add two patch pockets sewn to front lower panel if desired.
Styling tips
- Make hood lining in contrast color for personality.
- Add faux fur trim for winter version.
5. Crochet Retro Bloom Poncho Pattern
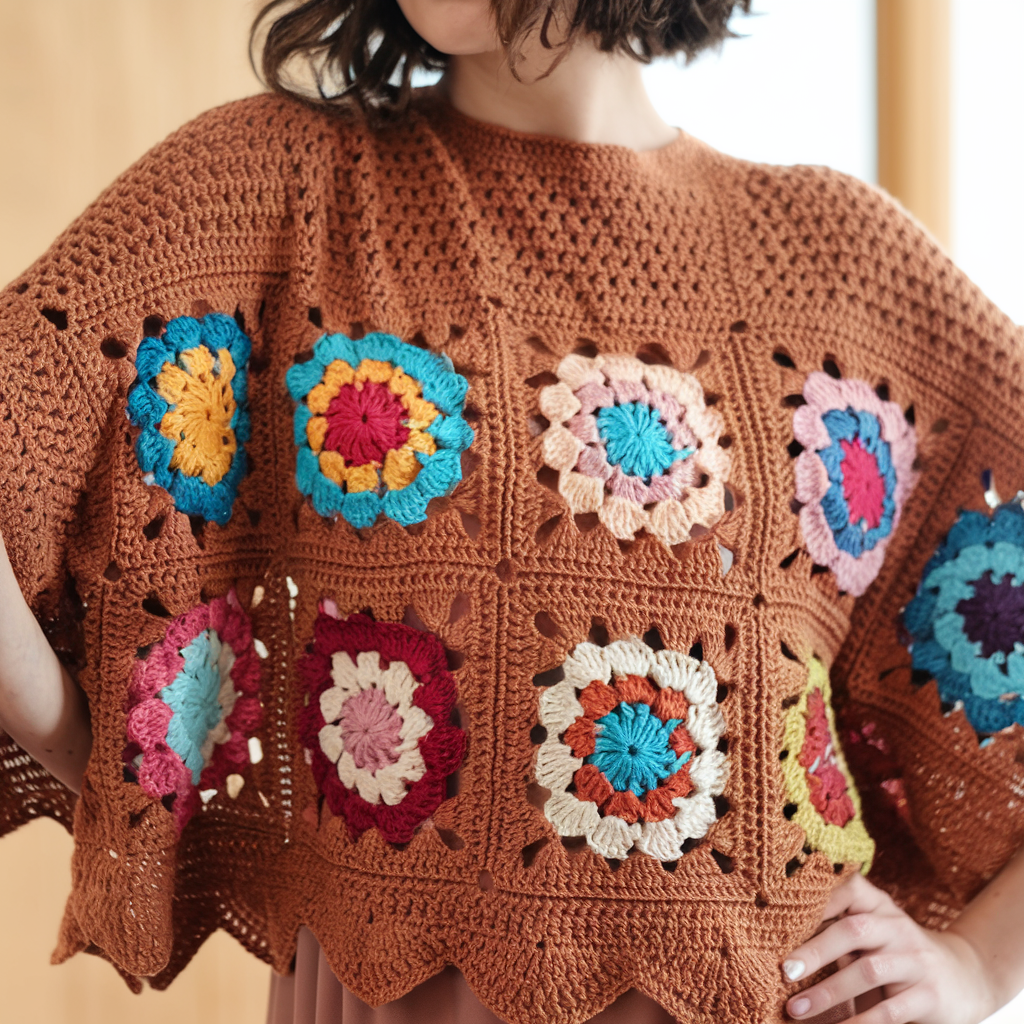
A playful, vintage-inspired poncho with bold floral motifs (appliqué or granny-style blooms) scattered over a solid body.
Materials
- Worsted yarn for body ~800–1000 yds, small amounts for flower appliqués in contrast colors.
- Hook: 5.0 mm (H-8)
- Tapestry needle, small buttons for centers (optional).
Structure
- Solid panel body (worked in dc or hdc rows) with applied flower motifs sewn on afterward.
Flower applique (make many)
- Magic ring, ch 1, 10 sc into ring, sl st (10).
- Round 2: ch 2, 5 dc in same st (petal), sl st in next st repeat around making 5–6 petals. Fasten off.
- Make 6–12 flowers and press flat with finger; sew onto body.
Body panel
- Chain width multiple for desired size (e.g., 80 ch for 40″ width). Work rows of dc until panel is desired drop (e.g., 24–28″). Make two panels and seam shoulders leaving neck opening, or work as a single long rectangle and fold for ruana effect.
Placement & assembly
- Layout flowers on panel before sewing — random placement or a grid. Attach with whipstitch at petal base and hide yarn tails inside. Add buttons or bead centers if not for small kids.
Edging
- Work a scallop edge around hem to echo flower shapes: sc, ch 3, sl st repeat.
Variation
- Crochet large center flower and make mini blooms for contrast. Use two-tone petals for a 60s feel.
6. Crochet Granny Square Poncho Pattern
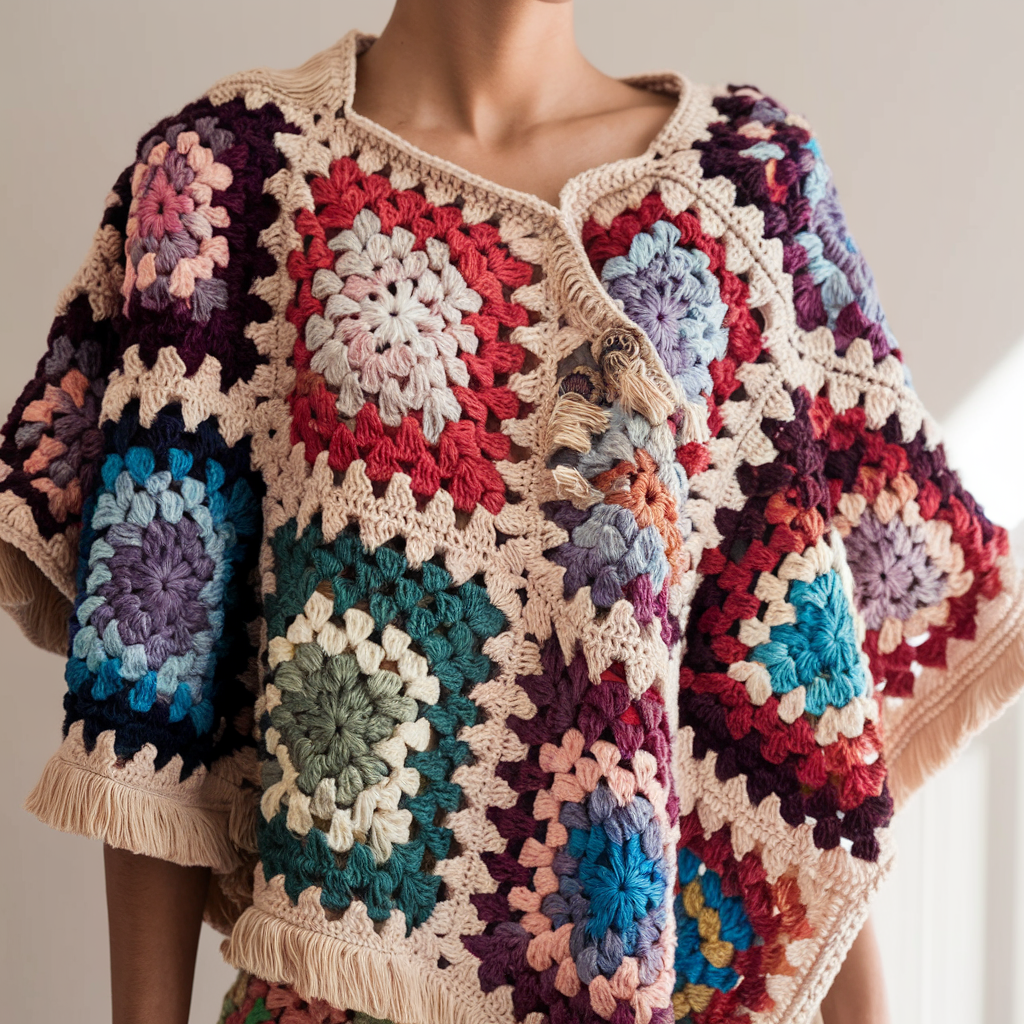
A modern-classic mashup — large granny squares joined into a poncho. Great for stash-busting and patchwork creativity.
Materials
- Worsted yarn in several colors (250–800 yds depending on number of squares)
- Hook: 4.5–5.0 mm (depending on yarn)
- Tapestry needle, blocking mats
Size & layout
- Use 6–9 large granny squares (e.g., 12″ squares) arranged as a poncho: 3 squares across top row; 3 squares below; join and cut neck opening.
Granny square (large)
- Round 1: MR, ch 3 (counts as dc), work 11 dc into ring, sl st to join (12 dc).
- Round 2: ch 3, 2 dc in same st, ch 2, skip next 2 dc, (3 dc in next st) repeat to make corner clusters — create 4 corners with ch-2 spaces.
- Round 3+: Continue granny rounds: 3 dc in space between cluster, ch 1 across, at corners work 3 dc, ch 2, 3 dc. Repeat until square measures ~12″. Fasten off and weave ends. Block square before joining.
Assembly
- Lay out squares in desired configuration. Join squares with whipstitch or join-as-you-go technique for neat seams.
- Once joined in a rectangle, mark center for neck opening and cut or seam to leave a neck hole. Edging around neck: pick up stitches and work 4–6 rounds of hdc for neat finish.
Finishing touches
- Fringe optional. Add buttons at shoulder for easy on/off. For children, reduce neck opening and size of squares.
Final finishing & care (applies to all ponchos)
- Weave in ends carefully and block if needed to even stitches and drape.
- Seams: mattress stitch or single-crochet join gives neat seams. For decorative join, try a visible slip-stitch seam in contrast color.
- Edging: a single round of sc stabilizes and cleans edges; add picots or shell scallop for interest.
- Care: follow yarn label. Most acrylic/cotton blends are machine-wash gentle and lay flat to dry. Wool/bulky should be hand wash and reshape flat.
Conclusion
Ponchos are wonderfully forgiving: they look good in bold color, subtle neutrals, or variegated yarn. Each of the six styles above can be made in a long evening project or turned into a bigger statement piece with added fringe, hoods, or appliqués.
Quick tips to choose:
- Want fast & cozy? Harvest Moon Ruana in bulky yarn.
- Want summer & lace? Open Shells in cotton DK.
- Want retro fun? Retro Bloom or Granny Square poncho.
- Want practical & warm? Hooded Poncho or Granny Stripe in worsted.