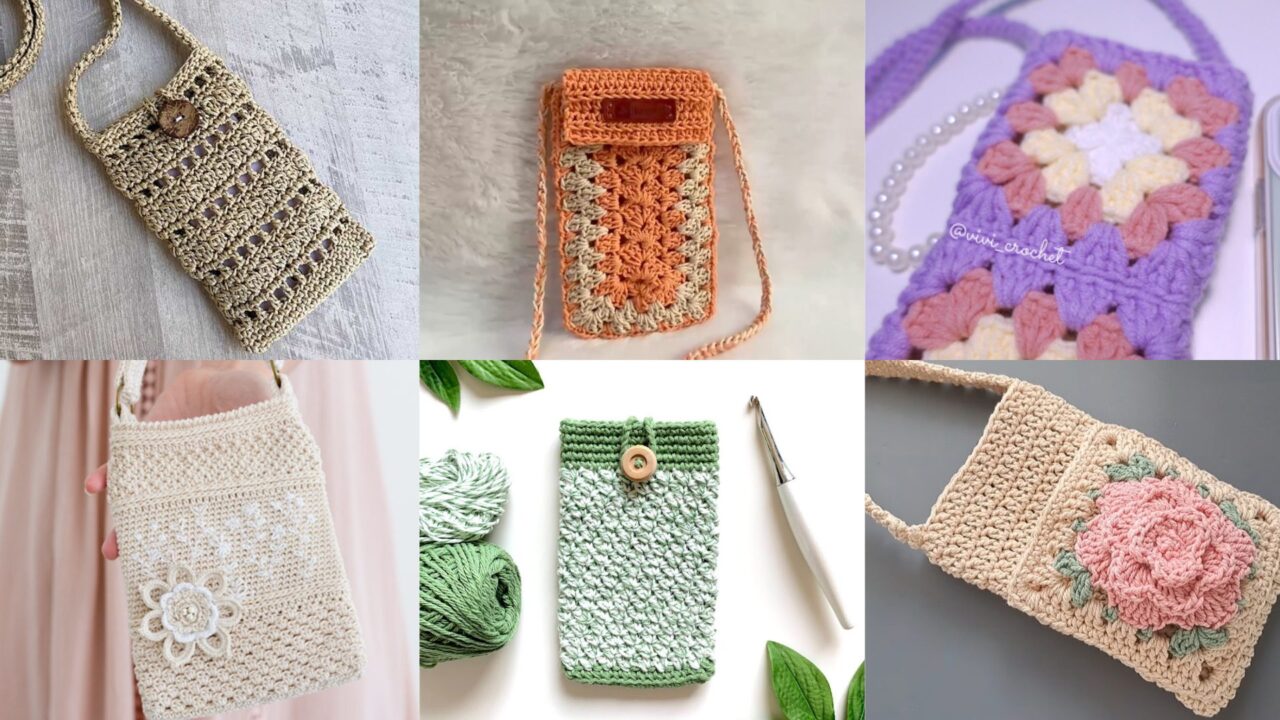
A crochet phone bag is the perfect marriage of form and function — a tiny project that upgrades your daily carry with personality. Whether you want a minimalist pouch to protect your smartphone, a hands-free crossbody for quick errands, or a sweet granny-square piece for a boho look, these six patterns give you stylish options that are quick to make and easy to customize.
Each pattern below includes skill level, exact materials, clear step-by-step instructions, finishing tips, and ideas for customizing colors, straps, and closures. Before you start, measure your phone (width × height) and pick a hook and yarn that give you a slightly snug fabric so the phone won’t fall out. Ready? Let’s make something cute and useful.
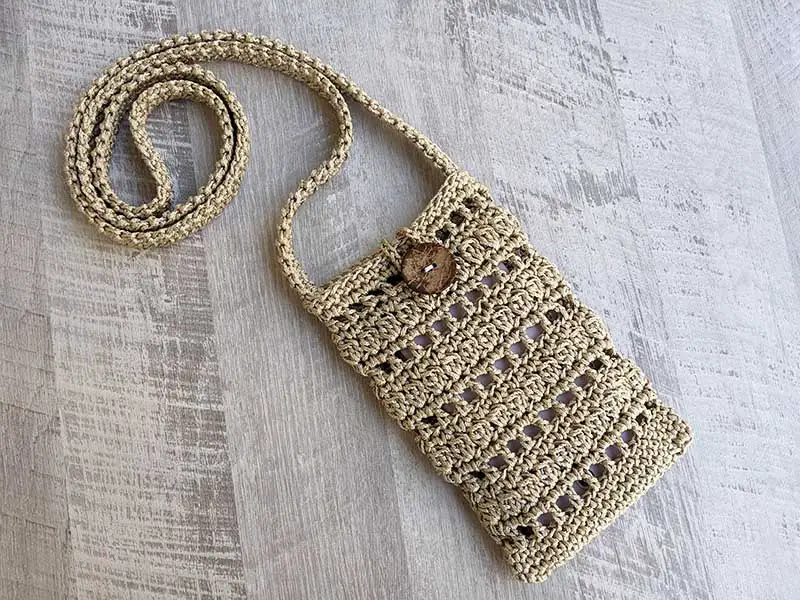
1. Crochet Smartphone Bag Pattern (Classic Envelope Pouch)
Skill level: Beginner
Finished size: Designed to fit most modern smartphones ~3.5–4 in (9–10 cm) wide × 6–7 in (15–18 cm) tall. Adjust as needed.
Materials:
- Worsted weight cotton or cotton-blend yarn (approx. 50–80 g)
- Crochet hook size H/8 (5.0 mm) — or one that gives a slightly dense fabric
- Yarn needle, scissors
- Optional: button (1), small piece of felt for lining
Abbreviations: ch = chain, sc = single crochet, sl st = slip stitch, st(s) = stitch(es)
Notes before you start: Measure your phone and make a small gauge swatch: a dense fabric is safer. This pattern makes a rectangle folded in half and seamed to form an envelope pouch with a flap.
Instructions:
- Chain a foundation that equals the width of your phone plus ¼ in (6 mm) for ease. Example: ch 22 (adjust to your gauge).
- Row 1: sc in 2nd ch from hook and across. Turn.
- Row 2–X: ch 1, sc across. Repeat until the rectangle length equals phone height × 2 plus flap length. For example, if your phone is 6.5 in tall and you want a 1.5 in flap, make the total height 6.5 × 2 + 1.5 = 14.5 in; divide by your row height to get X. (Or simply fold as you work and check length.)
- Fasten off, leaving a long tail for seaming. Fold the rectangle so the bottom meets the fold line where you want the flap to start (usually around half the rectangle).
- Seam the sides using whip stitch or single crochet seam, leaving the flap open. Weave in ends.
- Add a closure: sew on a button and make a small loop of chain (or a yarn loop) on the flap, or stitch a snap. Optionally line with felt for extra protection.
Finishing & Tips:
- For a neater edge, work a round of sc around the opening before seaming.
- Use contrasting yarn for the flap edge for a pop.
- To make a wrist strap, attach a chain strap or braid and sew to one side.
2. Easy Crochet Phone Bag Tutorial (Tube + Drawstring)
Skill level: Beginner
Finished size: Tubular pouch sized to your phone plus ½ in (1–1.5 cm) ease.
Materials:
- DK or worsted weight yarn (cotton recommended)
- Hook G/6 (4.0 mm) or H/8 (5.0 mm) depending on yarn
- Darning needle, scissors
- 3 small beads (optional for drawstring ends)
Stitches used: ch, sc, hdc (half double crochet), sl st
Instructions:
- Chain the number of stitches that comfortably wraps around your phone’s width (test by wrapping chain around phone). Join with sl st to form a loop, being careful not to twist.
- Round 1: ch 1, sc in each ch around, join with sl st.
- Rounds 2–N: ch 1, sc in each st around until the tube reaches your phone’s height plus 1 in (2.5 cm) for the drawstring casing.
- Drawstring round: ch 2, hdc in each st around (this produces a sturdier casing). Join.
- Next round: ch 1, sc in each st; then create eyelets for drawstring by doing: sc 2, ch 3, skip 1 st; repeat around (adjust spacing as desired). This creates holes for threading the drawstring.
- Fasten off leaving a long tail; weave a long chain (or crochet i-cord) through the eyelets to act as a drawstring. Add beads to ends if desired.
Finishing & Tips:
- Line the interior with thin felt glued in if you want extra screen protection.
- For a crossbody version, attach a longer strap by crocheting a long chain and slip-stitching it into a tube or braiding 3 lengths of yarn.
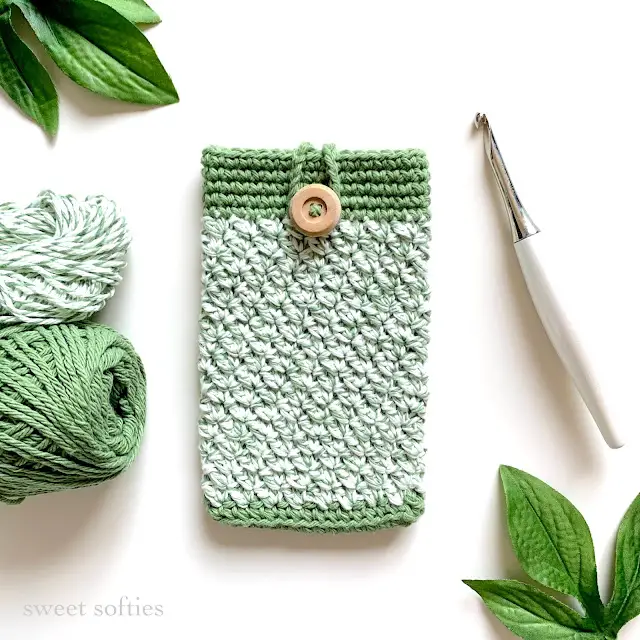
3. Crochet Sage Phone Pouch Pattern (Textured Moss Stitch)
Skill level: Advanced-beginner / Intermediate
Aesthetic: Soft, modern, sage-green textured pouch — great with a botanical or neutral wardrobe.
Materials:
- Sport or DK cotton yarn in sage green (50 g)
- Hook size F/5 (3.75 mm) or G/6 (4.0 mm) for tighter texture
- Yarn needle, scissors, optional button or magnetic snap
Stitches used: ch, sc, dc (double crochet), moss/linen stitch (also called granite stitch) — (ch1, sc in next st alternating)
Instructions:
- Chain enough stitches to match the width of your phone. Join to form a rectangle as in Pattern 1 or work flat and seam later. (Flat instructions below assume you make a rectangle.)
- Row 1: ch 1, sc in 2nd ch from hook and every ch across. Turn.
- Row 2: ch 2 (counts as dc), dc in first sc, ch 1, sc in next dc; repeat across. Turn.
- Repeat Rows 2 until the rectangle reaches desired length (phone height × 2 + flap). The moss/linen-like alternation will give a subtle textured grid.
- Fold and seam sides; create flap by leaving a top portion unseamed. Add button or magnetic snap to finish.
Finishing & Styling:
- Topstitch a contrasting row of sc along flap for a clean look.
- Add an optional lining or a padded pocket inside to protect the phone.
- For a shoulder strap, crochet two strips and braid them or work a chain strap reinforced with sc rounds.
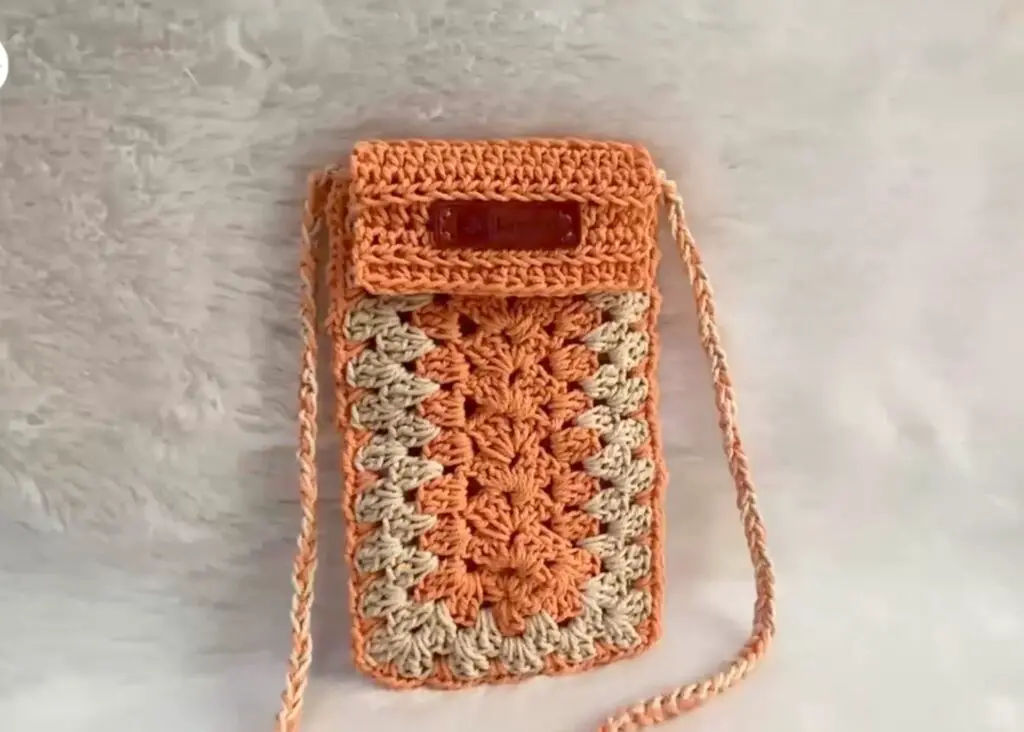
4. Granny Square Phone Bag Crochet Tutorial (Boho Classic)
Skill level: Intermediate (basic granny squares + joining)
Design idea: Two granny squares joined with a crochet border make a fashionable boho pouch. Great for using scrap yarn and colorwork.
Materials:
- Sport to worsted weight yarn in 3–5 colors (main color + accents)
- Crochet hook size depending on yarn (commonly G/6 (4.0 mm) or H/8 (5.0 mm))
- Yarn needle, scissors, optional tassels or fringe
Stitches used: ch, sl st, dc (double crochet), tr (treble) — standard granny square clusters
Instructions:
- Make two granny squares sized so that when joined they cover your phone front and back. Standard small granny: ch 4, join to form ring. Round 1: ch3 (counts as dc), 2 dc, ch2, (3 dc, ch2) three times; join. Continue rounds until you reach the desired square size.
- Make two matching squares (or mix colors for a patchwork look). Block them flat if needed.
- With right sides facing out, join the three sides (bottom and two sides) using slip stitch join or whip stitch, leaving the top open for the flap. Optionally attach another granny as a flap or create a straight sc flap.
- Work a round of sc around the opening for stability. Add a button or decorative crochet loop for closure.
Customization & Tips:
- Add fringe or tassels to the bottom for a festival look.
- Sew on beads or tiny shells for a beachy vibe.
- To make a crossbody, attach a long strap at upper corners or sew on metal rings for a detachable strap.
5. Crochet Phone Purse with a Flower or Fringe Pattern (Statement Bag)
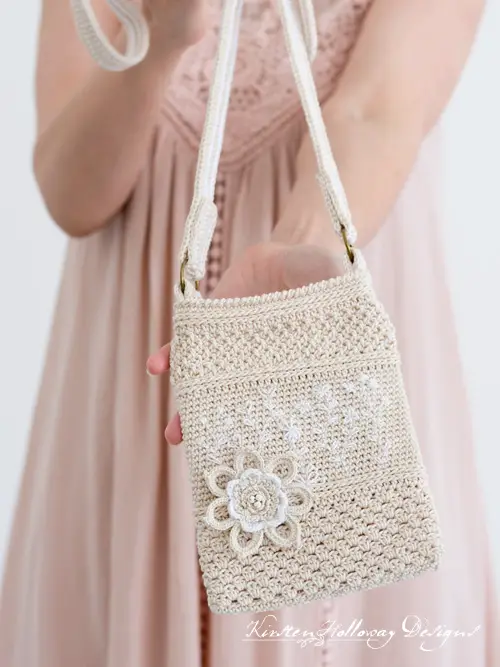
Skill level: Beginner to Intermediate
Design: A slim phone purse embellished with a crocheted flower OR fringe along the base — choose one or both.
Materials:
- Worsted weight cotton or acrylic yarn (main color + contrast for flower)
- Hook H/8 (5.0 mm)
- Yarn needle, scissors, optional button
Main Purse Instructions (simple base):
- Chain enough to fit phone width; Row 1: sc across. Row 2–N: ch 1, sc across until desired height (phone height + flap). Fold and seam sides. Add sc edging around opening.
Flower Appliqué (small layered flower):
- Magic ring, ch 1, 6 sc into ring, join.
- Round 2: ch 2, dc in next st around to form petals; join.
- Round 3: In each ch-2 space, work (sc, hdc, dc, hdc, sc) to make fuller petals. Fasten off and sew flower to flap. Add a button or bead in center.
Fringe Option (boho):
- Decide fringe length (e.g., 2–3 in / 5–7 cm). Cut multiple strands of yarn double that length.
- Fold a strand in half, insert the folded loop through the edge stitch at the bottom, pull tails through loop and tighten (lark’s head knot). Repeat across the bottom edge as dense or sparse as you like. Trim ends evenly.
Finishing Touches & Tips:
- Mix a small flower and light fringe for a playful, layered look.
- Use a sturdier yarn or add interfacing for a structured purse.
- Consider using a snap or button under the flower for a hidden closure.
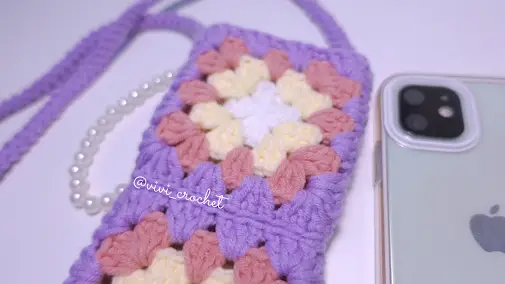
6. Rose Granny Square Crochet Phone Bag Tutorial (Romantic Detail)
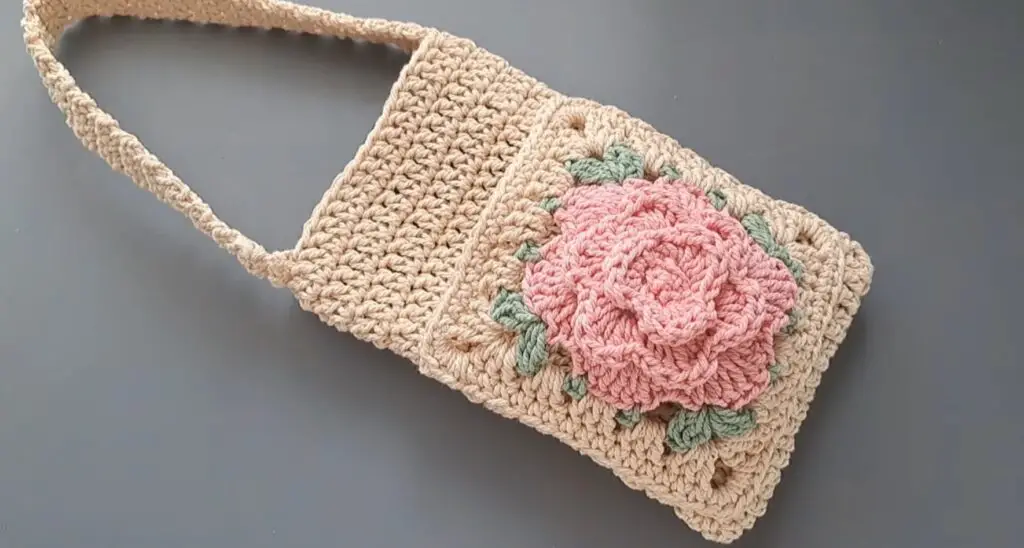
Skill level: Intermediate
Design idea: A granny square with an embroidered or 3D rose appliqué at the center — feminine and eye-catching.
Materials:
- Worsted weight yarn in main color + rose color + leaf green
- Hook H/8 (5.0 mm)
- Yarn needle, scissors, optional small button
Granny square base:
- Work a medium granny square (see Pattern 4): start with magic ring or ch 4 join, and work rounds of 3-dc clusters separated by ch-2 corners until square reaches phone face size.
3D Rose Appliqué (simple spiral rose):
- Crochet a long strip for the rose: ch 21. Row 1: sc in 2nd ch from hook across (20 sc). Row 2: ch1, sc across. Fasten off leaving a long tail.
- Roll the strip tightly from one end to the other to form a spiral (this creates the rose bloom). Secure by stitching through the base as you roll so it holds shape.
- Add small leaves: ch 6, sl st in 2nd ch from hook, sc, hdc, dc, sl st to base. Make 2–3 leaves and stitch behind the rose.
- Sew the rose into the center of your granny square. Make two matching squares if you want front + back or one square for a half-pouch front and plain back.
Assembly:
- Join squares or attach the square to a crocheted back rectangle. Seam sides and add edging.
- For a flap, either extend one square into a rectangular flap or attach a small envelope flap with sc rows.
- Add a decorative button on the flap that pairs with the rose (or a magnetic snap beneath for a clean look).
Finishing & Tips:
- Use a small piece of stiff interfacing under the rose if your yarn is too floppy.
- Make the rose in a tonal color for subtlety or bright red/pink for full effect.
- Consider lining the inside if you’re using thin yarn — it prolongs the bag’s life and protects the phone.
Conclusion
These six crochet phone bag patterns prove that practical accessories don’t have to be boring — and they’re fast enough to satisfy your urge to make something immediate. From the no-fuss tube drawstring to the romantic rose granny square, each pattern can be adapted by changing yarn, color, embellishments, straps, or closures.
Quick checklist before you start any pattern: measure your phone, choose a slightly dense stitch/fabric, and decide whether you want lining or extra padding. Want this to be wearable? Add a crossbody strap or wrist loop. Looking for a perfect handmade gift? Use personalized colors and add a tiny charm.