

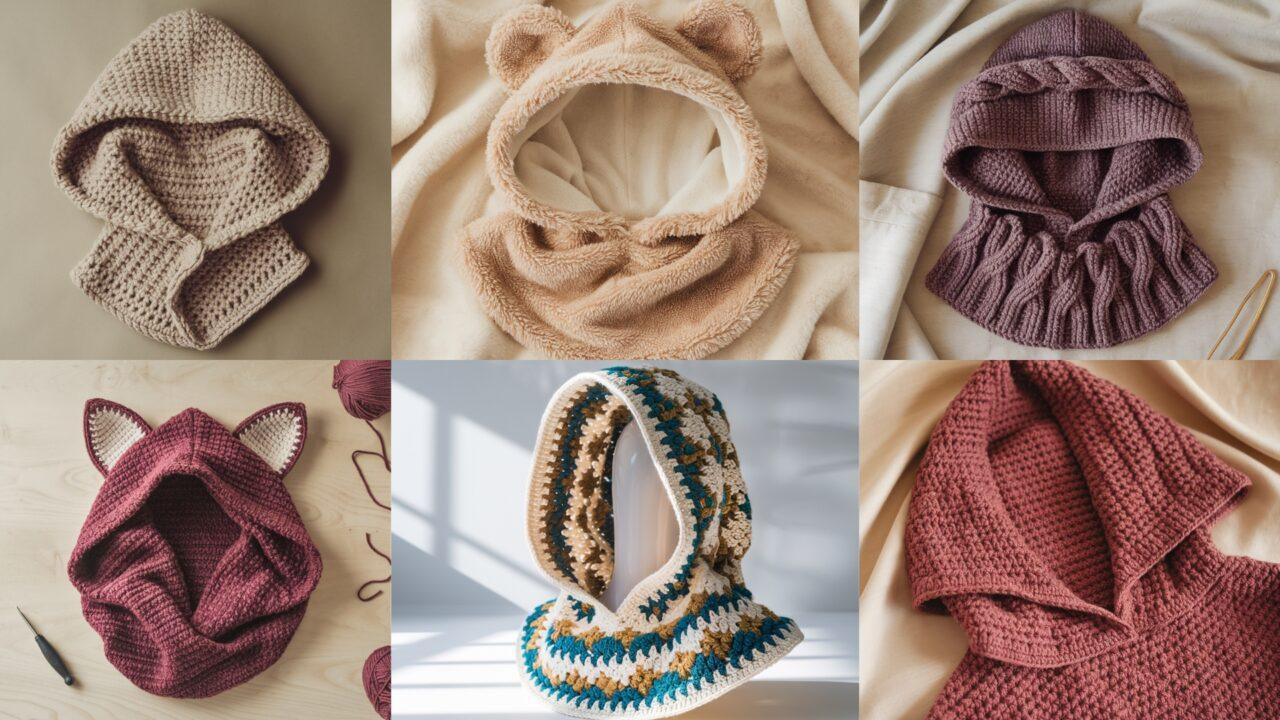
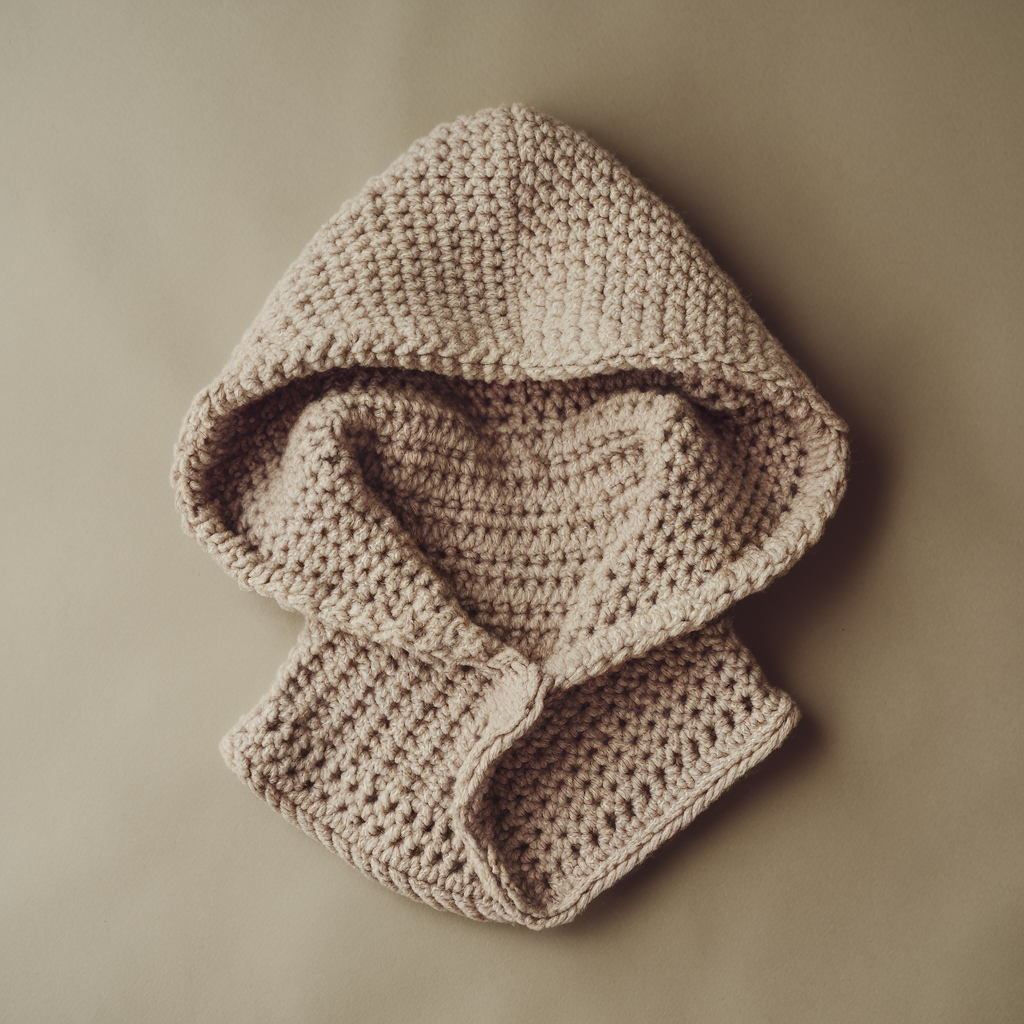
A hooded cowl combines the warmth of a cowl with the protection of a hood — no hat fuss, instant neck + head coverage, and a flattering, modern silhouette. Hooded cowls are perfect for brisk walks, commuting, or lounging by the fire. In this collection you’ll find six cozy, stylish hooded cowl patterns that range from textured mosaic and cables to playful animal-inspired designs and fast, stash-busting versions.
Each pattern below is written in US crochet terms and includes:
- Skill level and estimated time
- Materials with alternatives
- Gauge and finished measurements (small / medium / large)
- Clear, step-by-step instructions for the hood and cowl sections
- Edging, finishing and blocking notes
- Variations and styling tips
Make a swatch first to check gauge if you care about exact fit. Otherwise these designs are forgiving — they’re meant for comfort and warmth. Let’s get started.
Common abbreviations (US)
- CH — chain
- SL ST — slip stitch
- SC — single crochet
- HDC — half double crochet
- DC — double crochet
- TR — treble crochet
- BLO — back loop only
- FLO — front loop only
- FPDC — front post double crochet
- BPDC — back post double crochet
- ST(S) — stitch(es)
- INC — increase (2 stitches in one stitch)
- DEC — decrease (sc2tog, hdc2tog, etc.)
- RS — right side, WS — wrong side
1. Crochet Garland Mosaic Hooded Cowl Pattern
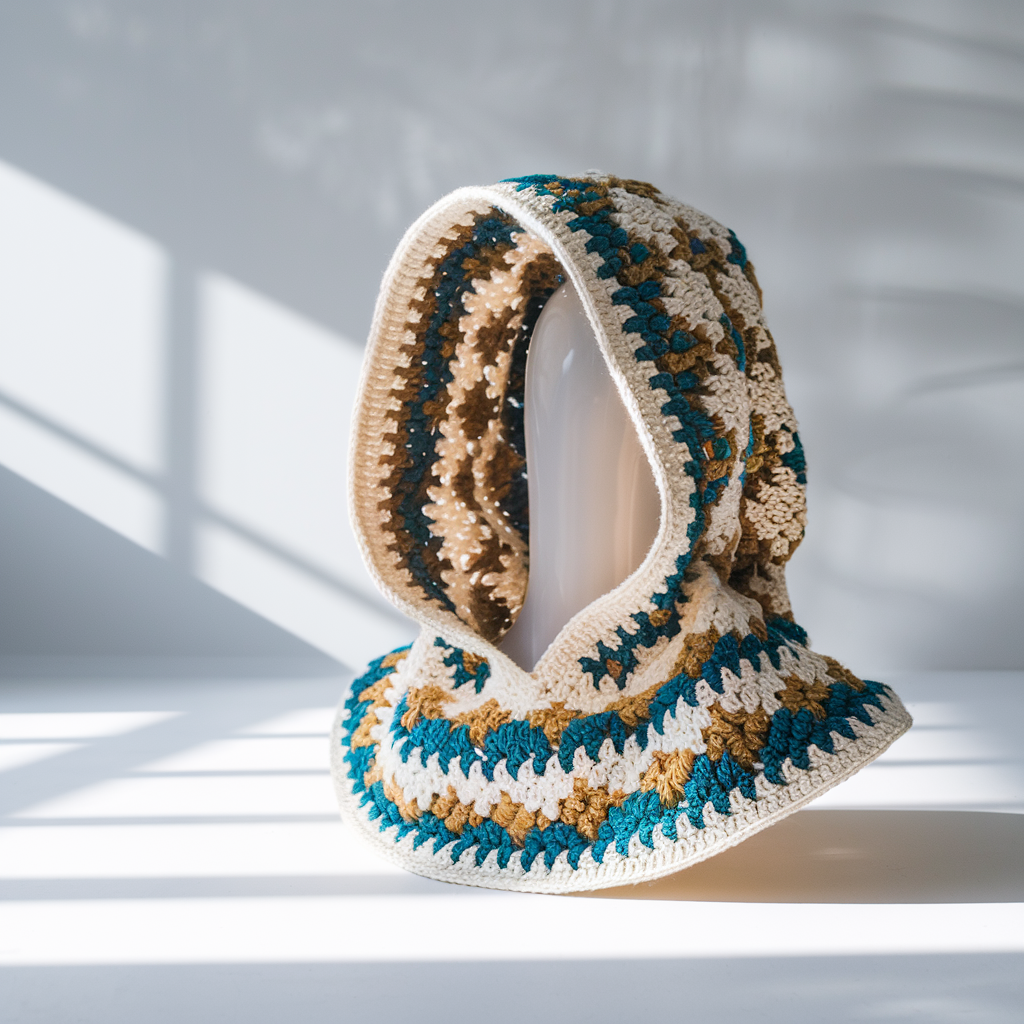
Skill level: Intermediate (basic mosaic/tapestry technique)
Estimated time: 8–12 hours
Materials
- Worsted weight yarn (Category 4): Main Color (MC) 250–350 g; Contrast Color(s) (CC) 100–150 g total (2 colors recommended)
- 5.0 mm (H) crochet hook
- Yarn needle, stitch markers, scissors
- Optional: small buttons or toggle if you want a front closure
Gauge & finished sizes (relaxed)
- Gauge (mosaic panel): 12 DC x 8 rows = 4 in (10 cm) with 5.0 mm hook (check swatch)
- Finished circumference (cowl opening): S 22 in / M 24 in / L 26 in (unstretched)
- Cowl height (measured at back before hood): S 6 in / M 7 in / L 8 in
- Hood depth (measured from neckline to top center): S 10 in / M 11 in / L 12 in
Notes
- Mosaic crochet makes striking two-color motifs using slipped stitches and single color rows. Pattern below uses schematic repeat of 8 sts × 6 rows; adjust width in multiples of 8.
- Instructions give counts for Medium; Small and Large adjustments in parentheses (S, L).
Abbreviations for mosaic
- sl st = slip stitch (used with CC on skip rows)
- MC rows work DC clusters, CC rows work slipped sts to create pattern
Construction overview
- Work flat rectangular mosaic panel that will be seamed into a tube for the cowl body.
- Pick up stitches along top edge and work hood in rows, shaping crown by short rows or decreases.
- Finish edges with SC or small picot.
Instructions — Body (mosaic panel)
- Foundation: CH 96 (multiple of 8; for S use 88, for L use 104). Join with SL ST to form a ring being careful not to twist. (This is a continuous tube method so you can avoid seams; if you prefer a flat panel, work CH 96 and do mosaic rows flat.)
- Round 1 (MC): CH 2 (counts as first DC), DC in each CH around. Join. (96 DC)
- Mosaic Pattern Setup: The mosaic pattern works over 8-st repeats. Example motif: Rows 1–6 (shown with MC and CC instructions).
- Row A (MC): DC in each st across.
- Row B (CC): CH 1, SL ST in first 4 sts, DC in next 4 sts, repeat across (this pulls CC over the DC blocks). Join, change to MC.
- Row C (MC): DC in each st across.
- Row D (CC): CH 1, DC in first 4 sts, SL ST next 4 sts, repeat across.
- Alternate these two-row sequences to build mosaic bands; repeat pattern until cowl body height equals 6–7 in (M). (Aim for 10–12 mosaic motif repeats.)
- Finish body: After the desired height, join final round and fasten off.
Instructions — Hood
- Mark the back center of the cowl body. From that point, count half the circumference forward on each side to find hood starting points; slip a stitch marker at left and right hood base (these markers define a hood opening width — for medium leave ~10–12 in across for the hood base).
- With RS facing, join MC at left marker and pick up and DC across the top edge toward the right marker to create a rectangular hood panel: pick up the same number of stitches as markers define (about 40–44 for M). Work in rows.
- Row 1: CH 2, DC across, turn.
- Rows 2–n: Continue DC rows until hood height reaches approx 10–11 in (M). For shape, on every 4th row perform a short-row decrease at each edge: DC 4, DC2TOG, DC to last 6 sts, DC2TOG, DC 4 — this creates gentle crown shaping. Alternatively, perform center decreases across the top to shape crown.
- Crown shaping (faster): After hood reaches 8–9 in, begin decreasing evenly every other row by 6–8 sts total until about 6–8 sts remain. Fasten off and sew top closed, leaving seam allowance to block into smooth shape.
Edging
- Add one round SC around hood opening and cowl top edge for stability. For decorative touch, add a small scallop: (SC, CH 3, SL ST in same) every 4–6 sts along edge.
Finishing
- Weave ends. Block gently to open mosaic pattern. Optionally sew a small button and loop at the front for a snug closure.
Variations
- Use more contrast colors for vibrant mosaic bands.
- Make the cowl taller for extra neck warmth.
2. Crochet Hooded Fox Cowl Pattern
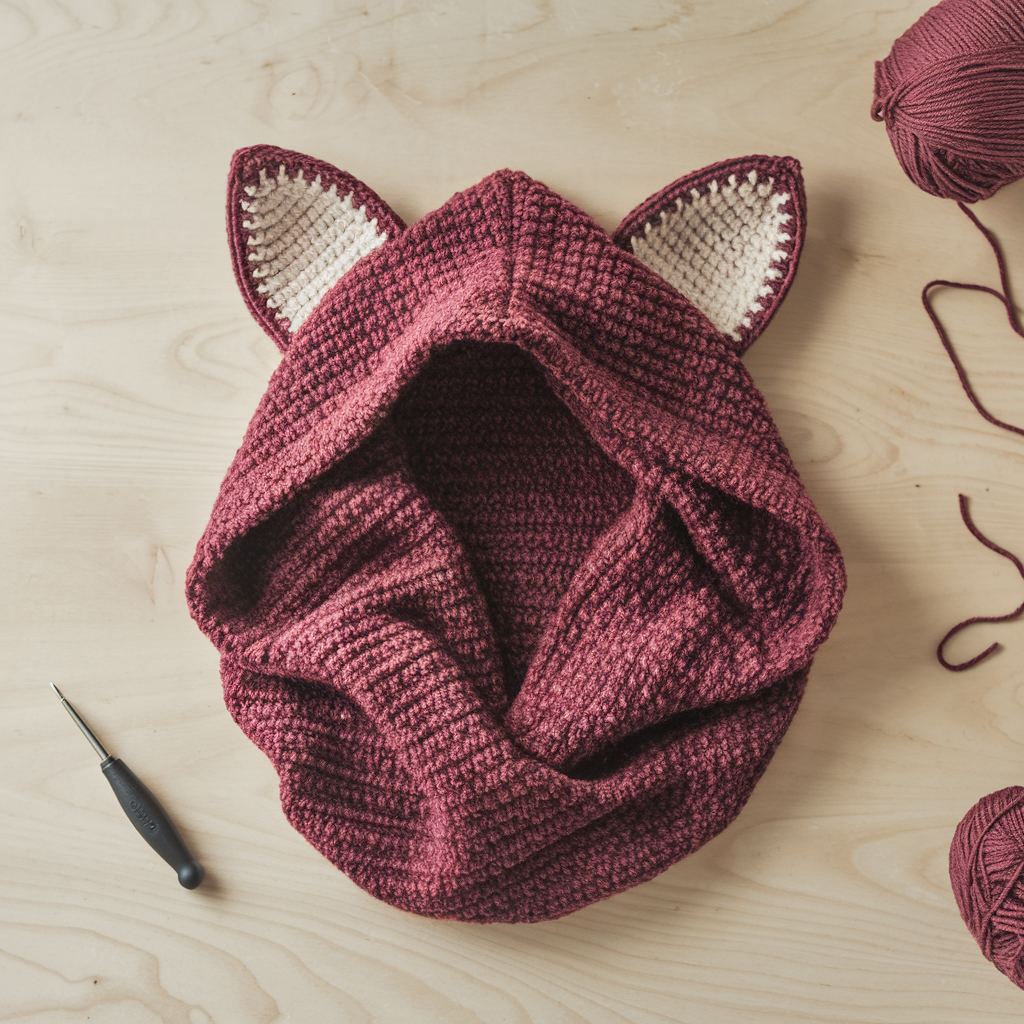
Skill level: Intermediate (simple shaping and applique)
Estimated time: 6–10 hours
Materials
- Worsted weight yarn: Fox orange (MC) ~300 g, cream (face/ear centers) 50 g, black (nose/eye detail) scrap
- 5.0 mm (H) crochet hook
- Yarn needle, stitch markers, stuffing for small ear shaping (optional), safety eyes (optional if making for adult decorative only)
Gauge & sizes
- Gauge: 14 HDC x 10 rows = 4 in
- Finished circumference: S 22 in / M 24 in / L 26 in
- Hood depth: S 10 in / M 11 in / L 12 in
Notes
- This pattern uses HDC for squishy fabric; ears are worked separately and sewn on.
- For a whimsical children’s version reduce sizes by 20% and use safety eyes with caution.
Construction — Cowl body
- Foundation: CH 78 (adjust for S 72, L 84). Join to work in the round.
- Rounds 1–14 (body): HDC around; join each round. Work until cowl height reaches 6–7 in for M.
- Optional texture: After Round 4, add a row of BPDC/FPDC ribbing around to create visual interest.
Hood
- Mark back center, pick up 36–44 sts across top edge (M ~40).
- Work hood in HDC rows: CH 1, HDC across; turn. Continue until hood measures ~10–11 in.
- Shape crown: decrease 2 sts at each edge every 4th row until 8–10 sts remain. Fasten off and sew top seam.
Fox face & ears
Ears (make 2):
- With MC orange, CH 6. Row 1: SC in 2nd ch from hook and across (5). Turn.
- Row 2: SC2TOG, SC, SC (3). Turn.
- Row 3: SC2TOG, SC (2). Turn.
- Row 4: SC2TOG (1). Fasten off leaving long tail. Sew base to hood top on each side, spacing from center for natural positioning.
- Add cream inner ear: small oval worked in SC chain 4, SC back; stitch inside orange ear.
Face details:
- Embroider small closed eyes with black yarn on front of hood or attach small safety eyes set into the face area (if making for adult use or decorative only).
- Embroider tiny nose and mouth under the face area with black yarn.
Edging & finish
- Add SC edging around hood opening and bottom of cowl. Weave ends and block lightly.
Variations
- Make other animal hoodies by changing ear shape and color (bear, bunny, cat).
- Add a pompom tail at the back seam for added charm.
3. Crochet Cabled Hooded Cowl Pattern
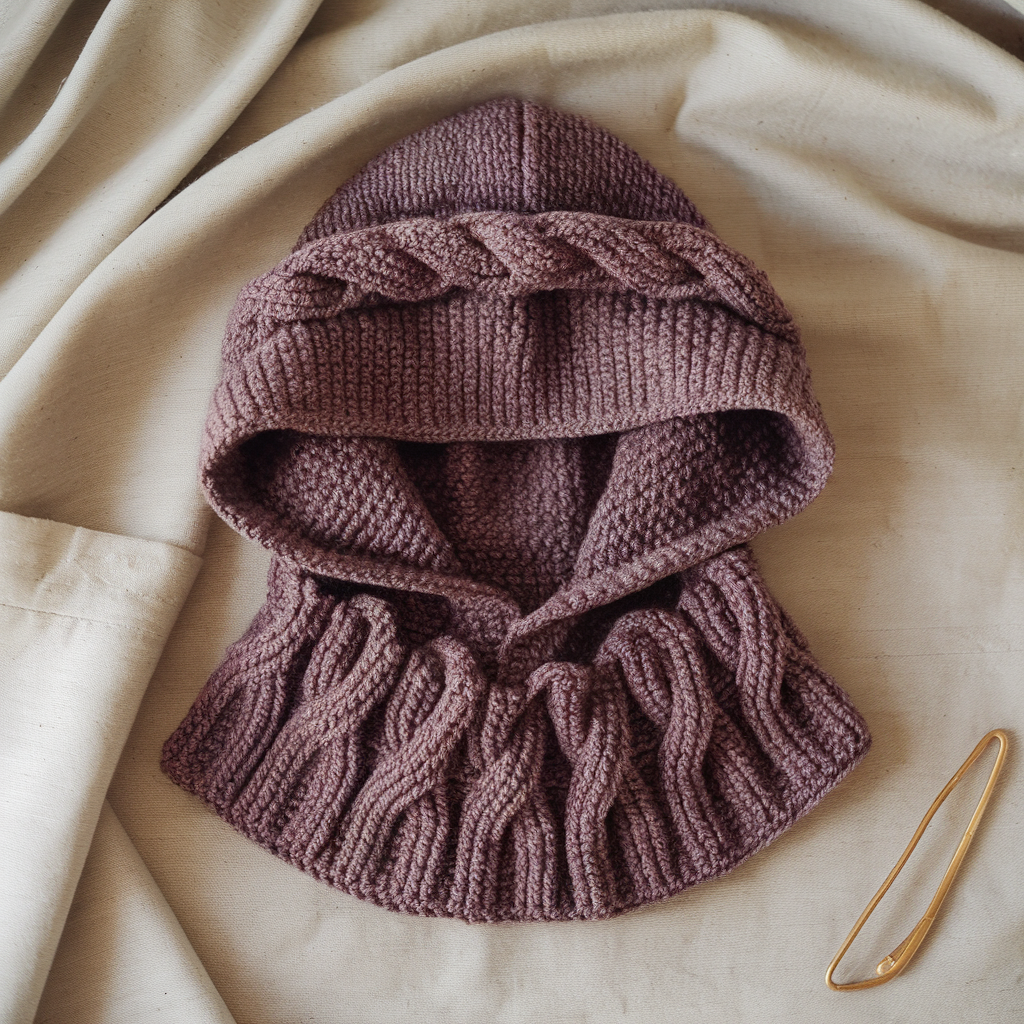
Skill level: Intermediate to Advanced (post stitches and cable crosses)
Estimated time: 10–15 hours
Materials
- Bulky or aran weight yarn (Category 5/4): ~350–450 g depending on size
- 6.0 mm (J) crochet hook (or size to match gauge)
- Tapestry needle, stitch markers
Gauge & sizes
- Gauge: 10 FPDC columns x 8 rows = 4 in (cabled fabric is dense)
- Finished circumference: S 22 in / M 24 in / L 26 in
- Cowl height: S 7 in / M 8 in / L 9 in
- Hood depth: S 10 in / M 11 in / L 12 in
Notes
- Cables are made with front-post double crochet crossings. Use an 8–10 stitch cable panel repeated around the cowl.
- This pattern is ideal for knit-look crochet.
Construction — Cowl body (worked flat then seamed OR in joined rounds)
- Foundation: CH 72 (multiple of 8 + 8 for edge). For M use CH 80, L CH 88.
- Row 1: HDC across (or DC if you prefer drape). Turn.
- Cable pattern (8-st cable block example): Each block 8 sts: FPDC 2, FPDC cross (work FPDC around posts in swapped order to create cable), FPDC 2. Between blocks work 2 HDC as spacer.
- Practical cable cross: To make a 4-over-4 cable: R row where you do FPDCs in standard order; on the cross row insert hook into posts 5–8 and work FPDC, then come back and work FPDC into posts 1–4.
- Repeat pattern: Build 6–8 cable blocks around circumference. Work until cowl body height = 7–8 in (M).
Hood
- Pick up center stitches for hood across top edge (about 36–44 sts for M). Work cable pattern across hood rows in the same cable repeat but using shorter row length.
- Continue until hood reaches 10–11 in. For crown shaping, work cable decreases by replacing a cable cross with standard FPDC decrease stitches every 3–4 rows to bring top inwards.
- Close top by sewing remaining stitches together.
Edging & finish
- Work 2 rounds of SC around edges. Add ribbed neck by working in BLO HDC for 6 rounds for comfortable fit.
- Block the cowl to encourage cable definition.
Variations
- Make a hooded scarf by extending body height to 12–14 in.
- Add a button tab under chin to fasten cowl closed.
4. Crochet Fluffy Hooded Bear Cowl Pattern

Skill level: Beginner to Intermediate (novice-friendly with fuzzy yarn)
Estimated time: 6–9 hours
Materials
- Fuzzy eyelash or faux fur yarn for outer (or soft chunky acrylic) ~350 g (white/cream)
- Smooth worsted weight yarn for structure (same color) 150 g
- 6.0 mm (J) hook (use smaller hook for structural rows)
- Yarn needle, stitch markers, optional stuffing for ears
Gauge & sizes
- Gauge will vary with fuzzy yarn; aim for a dense fabric: approx 12 sts x 8 rows = 4 in with structural yarn.
- Finished sizes S/M/L similar to above; make Medium standard.
Notes
- Use fuzzy yarn sparingly for body; pair with a smooth yarn for stability: e.g., one round smooth yarn, one round fuzzy held together.
- Ears are rounded and slightly padded for bear look.
Construction — Body
- Foundation: CH 80 (M). Join and work HDC or DC in rounds for 6–8 rounds alternating holding smooth yarn with fuzzy yarn to get furry surface but stable fabric.
- Body Height: Continue rounds until cowl height ~7–8 in.
Hood
- Pick up center stitches (36–44 for M) and work hood in DC rows, alternating hold as above with fuzzy + smooth.
- For crown shaping reduce 2–3 sts each side every 4th row until top narrows; sew closed.
Ears (make 2)
- With smooth yarn, CH 5. Rnd 1: SC 5 in ring. Rnd 2: SC in each st. Rnd 3: SC2TOG twice then SC for a slightly cupped shape. Fasten but do NOT overstuff; slip a bit of fiberfill if desired.
- Cover ear with a thin layer of fuzzy yarn by whipstitching or crochet small rounds of fuzzy yarn and sewing onto outer ear face.
- Sew ears to hood top symmetrically.
Face & finishing
- Add simple embroidered eyes and a small nose with contrasting yarn. If you want a whimsical look for kids, use larger eyes (safety eyes) anchored well.
- Edge the hood opening with SC in smooth yarn for definition.
Variations
- Make a bear in different colors (teddy-bear tan, chocolate brown).
- Add fingerless mitten cuffs by extending the cowl at sides.
5. Crochet Bernat Hooded Cowl Pattern
Skill level: Beginner (fast, beginner-friendly using bulky Bernat-style yarn)
Estimated time: 4–6 hours
Materials
- Super-bulky yarn such as Bernat Blanket or similar — 600–800 g (one skein bulky often suffices depending on size)
- 8.0 mm (L) or 10.0 mm (N) hook depending on yarn label
- Yarn needle
Gauge & sizes
- Gauge: 8 sts x 6 rows = 4 in in HDC with bulky yarn
- Finished measurements: S/M/L same proportions; bulky fabric increases warmth and reduces required stitch count.
Notes
- This pattern is optimized for plush bulky yarn and is ideal when you want a quick winter project.
Construction
Cowl body (worked in the round):
- CH 60 (M) and join (or multiple to fit your mug, try on). Rounds in HDC or DC depending on desired height.
- Rounds 1–10: HDC in each st around to reach approx 6–7 in height.
- Optional: add one round of BLO HDC for a folded brim.
Hood
- Mark center and pick up 30–36 sts for hood. Work HDC rows until hood depth is 10 in. Decrease 2 sts each side every 3rd row until top closed. Sew top seam.
Finish
- Add large pompom or chunky toggles if desired.
- Weave ends and lightly steam to set shape.
Variations
- Use variegated bulky yarns for a subtle ombré effect.
- Add faux fur trim by sewing on after completion.
6. Crochet Granny Stitch Hooded Cowl Pattern

Skill level: Beginner (granny clusters)
Estimated time: 6–9 hours
Materials
- Worsted weight yarn ~300–400 g
- 5.0 mm (H) hook
- Tapestry needle, stitch markers
Gauge & sizes
- Gauge: 12 clusters x 8 rows = 4 in in granny cluster pattern (estimate)
- Finished: S/M/L as above
Notes
- Granny stitch (cluster-based) gives a forgiving, stretchy fabric and a classic aesthetic.
Construction — Body (flat panel or round)
- Foundation: CH 96 (multiple of 3 + 1). For medium recommended 96.
- Row 1: CH 3 (counts as DC), skip 2 chains, (3 DC, CH 1, 3 DC) into next space for first granny; continue pattern to end working clusters in CH-1 spaces. Turn.
- Row 2+: Chain 3, work clusters into the chain 1 spaces below (standard granny row technique). Repeat until panel height is 6–8 in.
- Join: Fold and seam short ends to form cowl tube.
Hood
- Place markers for hood base (about 10–12 in opening). Pick up granny cluster stitches along top edge across the hood opening and work hood in granny cluster rows, reducing clusters gradually to shape crown (replace outer clusters with smaller cluster stitches then sc decrease).
- Continue hood rows until depth is 10–11 in; close top by sewing remaining stitches.
Edging & finish
- Single crochet around hood opening and bottom of cowl. Optionally add picot or scallop finish: (SC, CH 3, SL ST in SC) every 4–6 sts.
Variations
- Use color-block granny rows for wide stripes.
- Make hood detachable by creating a button band at the seam line.
Final finishing tips (for all patterns)
- Weave in ends securely and trim tails close to the fabric. Use a tapestry needle to bury ends through several stitches.
- Blocking: Most worsted and bulky yarn cowls benefit from gentle steam or wet blocking to settle stitches and open textured patterns (avoid blocking eyelash/faux fur yarns).
- Lining (optional): For extra wind protection, sew a lightweight fleece lining inside the cowl body and hood.
- Care: Check yarn label for washing instructions; most acrylics are machine washable on gentle cycles, while natural fibers may need hand wash.
- Sizing check: Try on as you go where possible. Cowls are forgiving; if you prefer looser fit, increase foundation chain or skip decreases in hood shaping.
Conclusion
These six hooded cowl patterns give you a wide range of winter-ready styles: a modern mosaic cowl for pattern lovers, whimsical animal hoods for playful warmth, sculpted cables for a knit-look statement, fluffy bear hoods for cozy charm, fast Bernat-style versions for quick gifts, and a classic granny-stitch hooded cowl for timeless appeal. Each design is fully adaptable — change yarn weight, hook size, or color palette to suit your style and warmth needs.
I don’t think the title of your article matches the content lol. Just kidding, mainly because I had some doubts after reading the article.
Thank you for your sharing. I am worried that I lack creative ideas. It is your article that makes me full of hope. Thank you. But, I have a question, can you help me? https://www.binance.com/register?ref=IXBIAFVY
Patterns are not correct and some information is missing. You can’t make a good with these patterns without altering them a lot.
Thank you for your sharing. I am worried that I lack creative ideas. It is your article that makes me full of hope. Thank you. But, I have a question, can you help me? https://www.binance.com/en/register?ref=JHQQKNKN
Can you be more specific about the content of your article? After reading it, I still have some doubts. Hope you can help me.
Your article helped me a lot, is there any more related content? Thanks!
Thanks for sharing. I read many of your blog posts, cool, your blog is very good. https://www.binance.com/register?ref=IXBIAFVY
Thank you for your sharing. I am worried that I lack creative ideas. It is your article that makes me full of hope. Thank you. But, I have a question, can you help me?
Your article helped me a lot, is there any more related content? Thanks!
Your article helped me a lot, is there any more related content? Thanks!
Thank you for your sharing. I am worried that I lack creative ideas. It is your article that makes me full of hope. Thank you. But, I have a question, can you help me? https://www.binance.info/vi/register?ref=MFN0EVO1
Thank you for your sharing. I am worried that I lack creative ideas. It is your article that makes me full of hope. Thank you. But, I have a question, can you help me?
I don’t think the title of your article matches the content lol. Just kidding, mainly because I had some doubts after reading the article. https://accounts.binance.com/register-person?ref=JW3W4Y3A