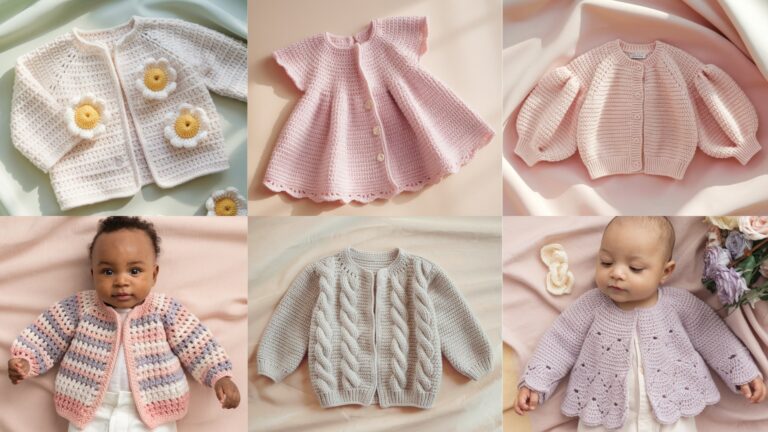
Fingerless mittens are one of the best cold-weather accessories: they keep your hands warm while leaving fingers free for your phone, knitting, or grabbing a coffee. In this post you’ll find one practical introduction (materials, measuring, gauge, sizing and construction notes) followed by six complete patterns. Each pattern includes: skill level, materials (sample for an adult medium), gauge and a sample stitch multiple, detailed step-by-step instructions (including thumb opening), finishing/assembly, variations, fit tips and care.
Read the introduction first — it covers the shared fundamentals you’ll need for every design — then jump to the pattern you want to make.
materials, measuring, gauge, and construction basics
Yarn, hooks & notions
- Yarn weight: For warm, comfortable fingerless mittens I usually recommend DK (light worsted) or worsted weight yarn. DK gives lighter, more fitted mittens; worsted gives warmer, plusher mittens. For lacy styles use DK or sport weight. For textured/cabled mittens worsted works well.
- Fiber: Wool and wool blends are warm and springy. Superwash wool is machine-washable (easier care). Cotton is breathable but less insulating. Alpaca adds luxury and warmth but can stretch. Choose according to desired warmth and care.
- Hooks: Use the hook recommended by the yarn label as a starting point, then adjust to get the gauge you want. Typical hooks: 3.5–4.5 mm for DK; 4.5–5.5 mm for worsted.
- Notions: tapestry needle, stitch markers, waste yarn or removable stitch holder for thumb openings, tape measure, scissors.
Measuring & sizing
Take two measurements of the wearer’s hand (measure with the fingers together, palm relaxed):
- Across palm (widest part): measure around the widest part of the hand (excluding thumb) or across palm flat for circumference.
- Hand length: from wrist bone to base of middle finger (for mitten height) and from wrist bone to base of thumb for thumb placement.
Common adult sizes (approx, finished circumference targets):
- Small: 7 in (17.8 cm)
- Medium: 8 in (20.3 cm) — most adults
- Large: 9 in (22.9 cm)
Digit-by-digit example — converting a desired finished palm circumference to stitches:
- Suppose you want a finished palm circumference of 8 inches, and your swatch shows 4 stitches per inch.
- Multiply 8 × 4 step-by-digit:
- 8 × 4 = (8 × 2) × 2 = 16 × 2 = 32.
- You need 32 stitches around (round to nearest pattern multiple if required).
Gauge & swatching
Always make a swatch in the stitch you’ll use and measure stitches per inch (spi) and rows per inch (rpi). Make your swatch at least 4 in (10 cm) square, then block it as you would the finished item. This determines how many stitches you need for the palm circumference and how many rows for the mitten height.
Construction approaches (choose one)
- Worked in the round from cuff up: seamless tube with thumb opening created later. Common for fitted mitts.
- Worked flat and seamed: good for colorwork or tapestry crochet; join seam at the end.
- Motif join (granny square, hexagon): make motifs then seam into a mitten shape — quick and decorative.
- Two-piece method: separate front/back panels with thumb gusset added, then join — useful for shaping.
Thumb opening options
- Vertical thumb slit: work tube, stop and leave a row of stitches on a holder; later rejoin ends and work thumb as small tube from live stitches.
- Short row thumb/ gusset: shape an inset thumb with increases and decreases for a more fitted thumb.
- Buttoned/seamed flap: make a small rectangular window and add a button flap for style.
Abbreviations (US)
- ch — chain
- sc — single crochet
- hdc — half double crochet
- dc — double crochet
- tr — treble (UK = treble)
- sl st — slip stitch
- st(s) — stitch(es)
- sk — skip
- inc — increase (two stitches in same st)
- dec — decrease (sc2tog, etc.)
- BLO / FLO — back loop only / front loop only
- MR — magic ring
1. Crochet Fingerless Granny Square Mittens Pattern
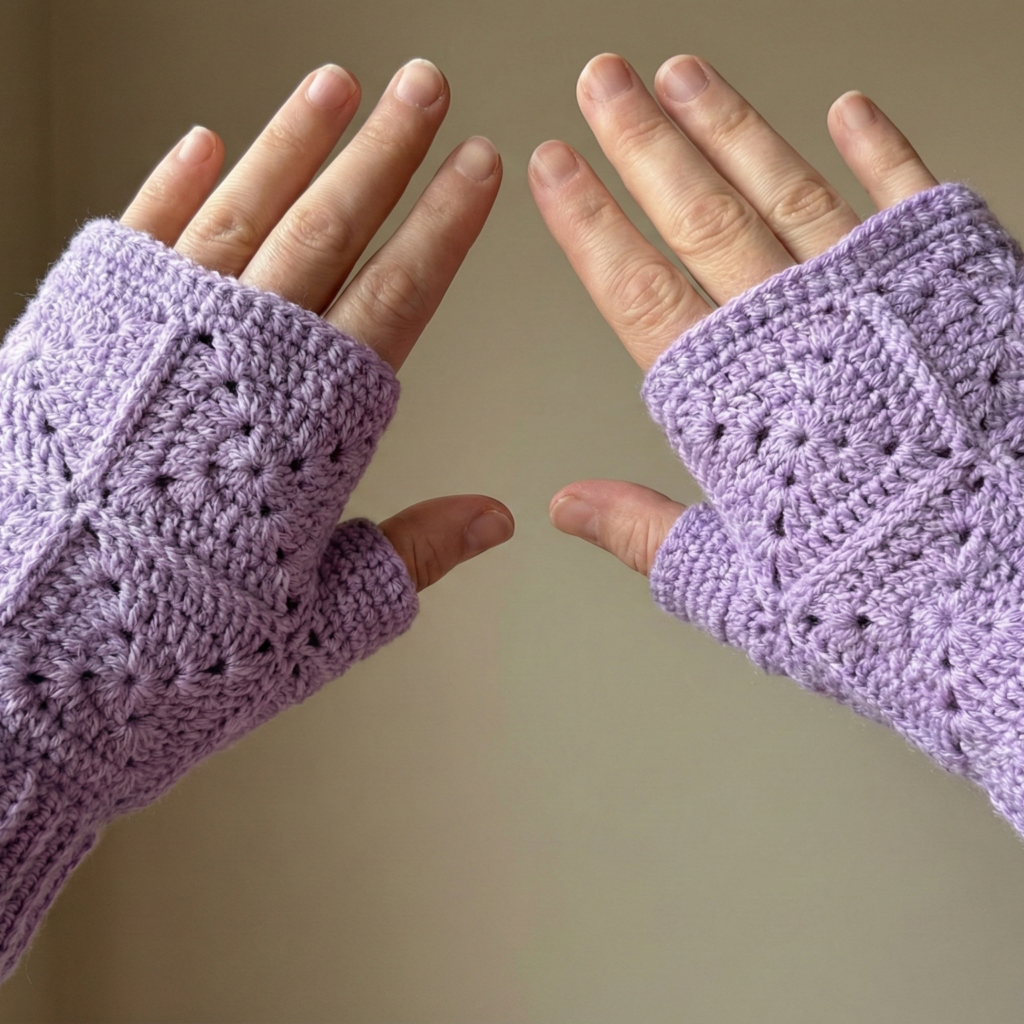
Style & concept: Cute, patchwork feel — each mitten is made from joined granny squares (or a single large square folded and seamed). Ideal for stash-busting colorways and easy customization.
Skill level: Confident beginner (working granny squares + joining)
Materials (adult medium)
- DK yarn in contrasting colors — total ~150–200 yd.
- 3.5–4.0 mm hook.
- Tapestry needle, stitch markers.
- Optional: decorative buttons.
Gauge & multiple
- Classic 2-round granny square measures vary by yarn; make a sample 4-round granny square and block. For a medium hand you’ll likely need 3–4 granny squares across or one large square of approx 6–7 in (15–18 cm) per side folded to form a mitten.
Pattern overview (two approaches)
A — Many small granny squares (modular)
Make 6 small granny squares per mitten (3 for front, 3 for back) or arrange as preferred.
B — One large daisy/granny square folded
Make one large square, fold, and seam leaving thumb opening.
Step-by-step (Approach B — one large square folded; simpler to follow)
Make the large square (both mittens)
- Round 1 (center): MR, ch3 (counts as dc), 2 dc in MR, ch2, 3 dc in MR, ch2 repeat 2 more times (result = 4 clusters), join to top of ch3. Fasten to continue.
- Round 2: Join color B if desired. In corner ch-2 space work (3 dc, ch2, 3 dc), ch1; along sides work 3 dc in each ch1 space; continue around forming corners at each ch2. Join.
- Round 3–X: Continue rounds adding rounds until square measures approx the desired width (for medium, about 7–8 in across). Keep color changes or stay single color.
Fold & seam
4. Fold square so that one half forms the palm and the other forms the back of the hand; overlap about 1 inch for thumb opening placement (or leave a gap of about 2–3 in where the thumb should be). Seam sides with whipstitch or mattress stitch but leave opening for thumb.
Thumb opening (vertical slit)
5. If you want a vertical thumb slit at side seam: when seaming sides, stop sewing for the thumb length (measure from wrist edge up to base of thumb ~1.5–2 in), leave gap, continue seaming above that gap. Pick up live stitches around the gap to crochet a short thumb tube: join yarn at bottom of gap, work sc in rounds about 8–10 rounds (depending on hand length), try on and adjust. Finish by decrease round to fit or bind off and weave tail through remaining sts to close slightly.
Cuff
6. Turn up cuff at wrist or add a short band: pick up stitches at wrist edge, work 6–8 rounds of hdc or sc in BLO for ribbed effect, then bind off.
Finishing & variations
- Add a small appliqué flower or button near thumb.
- Make squares in gradient for ombré effect.
- Lining option: sew a cotton lining for warmth and durability.
Fit tips
- If square is too big/small, add/subtract rounds. For a snugger mitten reduce final square by ¼–½ inch or use smaller hook.
Care
- Machine wash gentle for acrylic/wool blends (check yarn label); reshape while damp.
2. Crochet Lacy Border Sun Fingerless Mittens Pattern
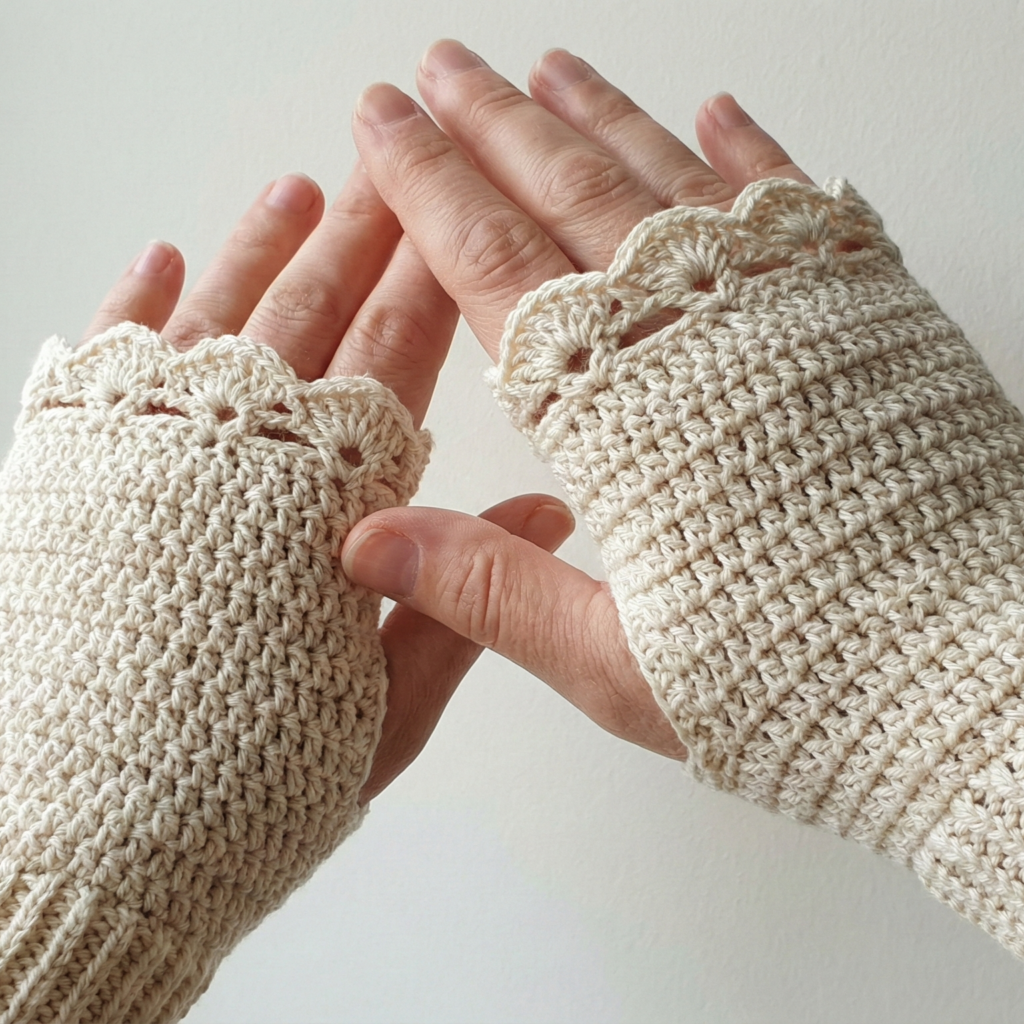
Style & concept: Elegant mittens with a solid body and a decorative lacy sunburst border at the hand edge (top). Great for layering with coats and gloves.
Skill level: Confident beginner → intermediate (working lace and shaping)
Materials (adult medium)
- DK yarn — ~150 yd.
- Hook: 4.0 mm.
- Tapestry needle, stitch markers.
Gauge
- Example gauge: 5 sc = 1 in (adjust by swatch). Palm circumference target 8 in → 40 sc.
Pattern construction (worked in the round, cuff → hand → thumb opening → lacy top)
We’ll work a tube from the cuff up, create a thumb slit, then join and work the lacy border.
Cuff
- Foundation chain & join: Chain 40 (or your calculated number for medium). Join to work in the round, being careful not to twist.
- Rows 1–8: Work hdc rounds (or sc in BLO for a ribbed look). Continue until cuff height ~2.0 in.
Hand/body
3. Rounds 9–20: Switch to sc or a denser stitch; work even in rounds until you reach the base of the fingers (measure from wrist bone to base of fingers — typically 3.5–4 in from cuff top).
Thumb slit (vertical)
4. At the desired height, create a thumb slit: work a round where you work sc across half the stitches, then chain 4 (or the number of stitches corresponding to the slit width), turn work and work back across the chain to secure (or leave those chain stitches unworked and continue next round by joining with sc across the rest of the stitches). Another simple way: for a vertical slit, place a removable marker spanning the thumb stitches for two rounds; on the next round join across leaving them unworked, then pick up those stitches later to make the thumb tube.
Resume body
5. After the thumb slit row, continue sc rounds to desired length above thumb base (about 1–1.25 in).
Lacy sunburst border
6. Work lace motif around the top edge:
- Row A (set up): ch3, skip 2, sc in next st repeat to create ch-spaces.
- Row B (sunburst): In each ch-space work (5 dc, ch3, 5 dc) to form a sunburst petal (shell). Skip appropriate number of base sts between shells so that you get around 8–10 shells around the hand edge depending on stitch count. Finish with a sl st and weave ends.
- Optionally add a picot round: sc, ch3, sl st in same st across shell tips for delicate points.
Thumb tube
8. Join yarn to the held thumb stitches and pick them up. Work sc around the thumb stitches in rounds for about 10 rounds (try on). Decrease if needed to fit snugly by working sc2tog evenly once or twice near the top.
Finishing & variations
- Work lace border in contrasting color for a dramatic effect.
- Add small bead at center of each sunburst petal for sparkle (sew on after).
Fit tips
- For deeper thumbs or broader palms, add 2–4 stitches to foundation chain and adjust lace spacing accordingly.
Care
- Hand wash delicate lace; reshape shells while damp to keep sunburst crisp.
3. Crochet Iris Stitch Fingerless Mittens Pattern
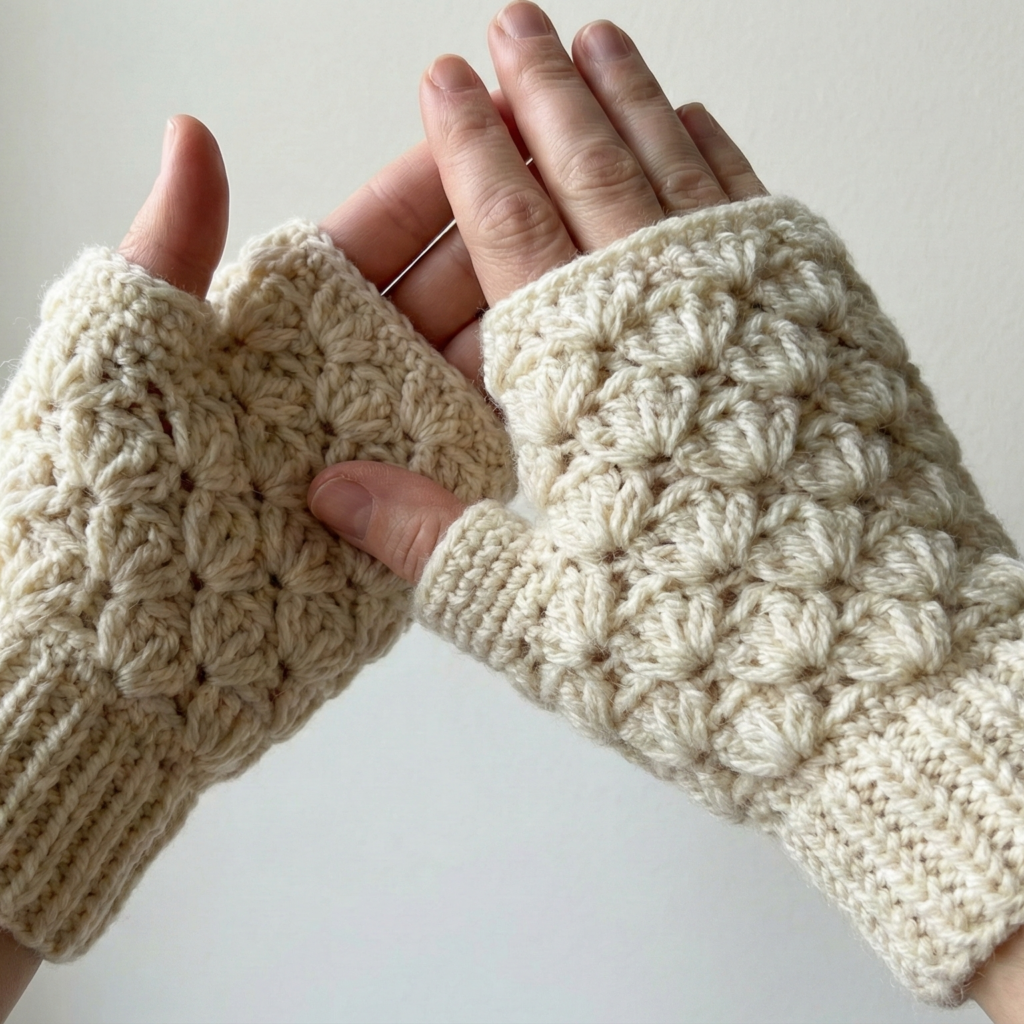
Style & concept: The Iris stitch (a textured, almost floral raised stitch) gives a refined, slightly puffy texture — great for cozy warmth.
Skill level: Intermediate (Iris stitch / post stitches familiarity)
Materials (adult medium)
- Worsted weight yarn for warmth — ~160–200 yd.
- Hook: 5.0 mm (or size to reach gauge).
- Tapestry needle, stitch markers.
Gauge & stitch multiple
- Example iris stitch gauge: 4.5 stitches = 1 in (varies). Make a 4 in swatch in the Iris stitch pattern to get spi. Target palm circumference 8 in → 36 stitches (if 4.5 spi, do digit-by-digit: 8 × 4.5 = 8 × (4 + 0.5) = 8×4 + 8×0.5 = 32 + 4 = 36).
The Iris stitch (brief)
- The Iris stitch uses a combination of dc and post stitches that are worked over the same base stitch to create a raised petal. A simple Iris pattern: (dc around next st, dc around next st) worked in grouped sequence — we’ll give a clear repeat below.
Pattern (worked in the round — cuff up)
Cuff
- Chain 36 (or your calculated count), join in the round.
- Work 8 rounds of hdc for a warm cuff or sc in BLO for ribbing.
Iris body
3. Setup row: sc in each st across to set foundation.
4. Iris Row (repeat): [dc around the next st (work around post from previous row), ch1, dc in next st] skip 1 — the specifics depend on chosen Iris pattern; here’s a compact and reliable Iris-like repeat:
- Row A: ch1, sc in next st around (base row to center the Iris groups).
- Row B: Skip 1 stitch. In next stitch: (yo, insert hook in skipped stitch from previous row behind post, pull up loop, yo, pull through two, yo, pull through two) — essentially a dc worked in the post of the skipped stitch to form a petal, then dc in the next stitch. Repeat across. This creates a raised diagonal petal effect.
- Repeat the Iris Row for 6–8 rounds (adjust for hand height) ending with a sc round.
Thumb opening
6. When mitten reaches base of thumb, create thumb opening using a short row method: work sc across half the stitches (or remove 6–8 stitches on a holder for thumb), chain the number of stitches to bridge and continue rounds on the remaining stitches. Later, pick up held stitches and work thumb tube.
Top finish
7. After working the Iris pattern to desired top edge, finish with 1–2 rounds of sc and an optional decorative picot edge.
Thumb
8. Pick up thumb stitches and work sc in rounds for 8–10 rounds; adjust length; finish with decrease rounds or leave open if preferred.
Variations & styling
- Work Iris stitch panels on the back of hand only and keep palm in sc for extra warmth and phone grip.
- Add a small buttoned flap covering the thumb opening for a convertible mitten look.
Fit tips
- The Iris stitch adds bulk; if you want a same finished circumference choose a slightly smaller number of starting stitches or a tighter hook.
Care
- For wool: hand wash cool or gentle machine in mesh bag on wool cycle if yarn allows; reshape.
4. Crochet Ruffle Fingerless Mittens Pattern
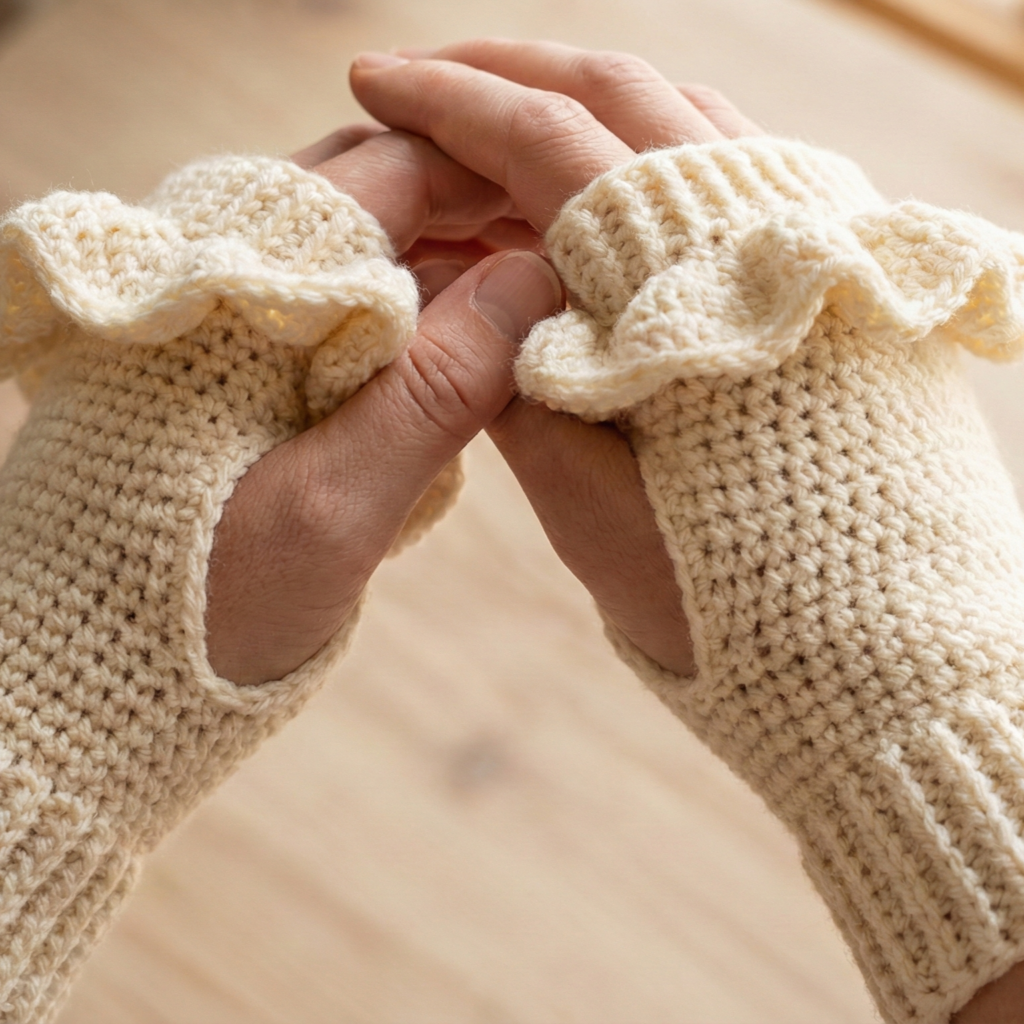
Style & concept: Playful and feminine: a simple mitten body with one or more ruffle tiers at the top edge (above the fingers) that peek out of coats and sweaters.
Skill level: Confident beginner
Materials (adult medium)
- DK or worsted yarn depending on how dramatic you want the ruffle — ~150 yd.
- Hook: 4.0 mm (DK) or 5.0 mm (worsted).
- Tapestry needle, stitch markers.
Gauge
- Example: 4 sc = 1 in. Target palm circumference 8 in → 32 sc around.
Construction (worked in the round)
Cuff
- Chain 32 and join to form a ring. Work 8 rounds hdc in BLO for a ribbed cuff.
Body
2. Rounds 9–20: sc in rounds until you reach the base of the fingers.
Thumb slit
3. Create a thumb slit by leaving a small gap of 5–7 stitches on the side (use a marker to mark the stitches to leave), then continue to work even rounds above the gap.
Ruffle tier(s)
4. Ruffle row 1 (subtle ruffle): 2 dc in each stitch around (this doubles the stitch count and produces a gentle ruffle).
5. Ruffle row 2 (more dramatic): 3 dc or 4 dc in each stitch around for fuller ruffles. You can do 1–3 ruffle rows depending on desired fullness.
6. Alternate ruffle pattern: (Shells) skip 1 st, 5 dc in next st, skip 1 st, sc in next st — classic shell ruffle.
Finish
7. Work one round of sc along the inside edge (or slip stitch) to tidy. Weave in ends.
Variations & styling
- Work ruffles in a contrasting color for pop.
- Add small decorative ties or pom-poms at ruffle base.
Fit tips
- Ruffles can make the opening shorter; if you have long fingers leave extra length before starting ruffles.
Care
- Bulky ruffles in chenille or velvet: hand wash only; reshape and air dry.
5. Crochet Lacy Fingerless Mittens with a Tiny Flower Pattern
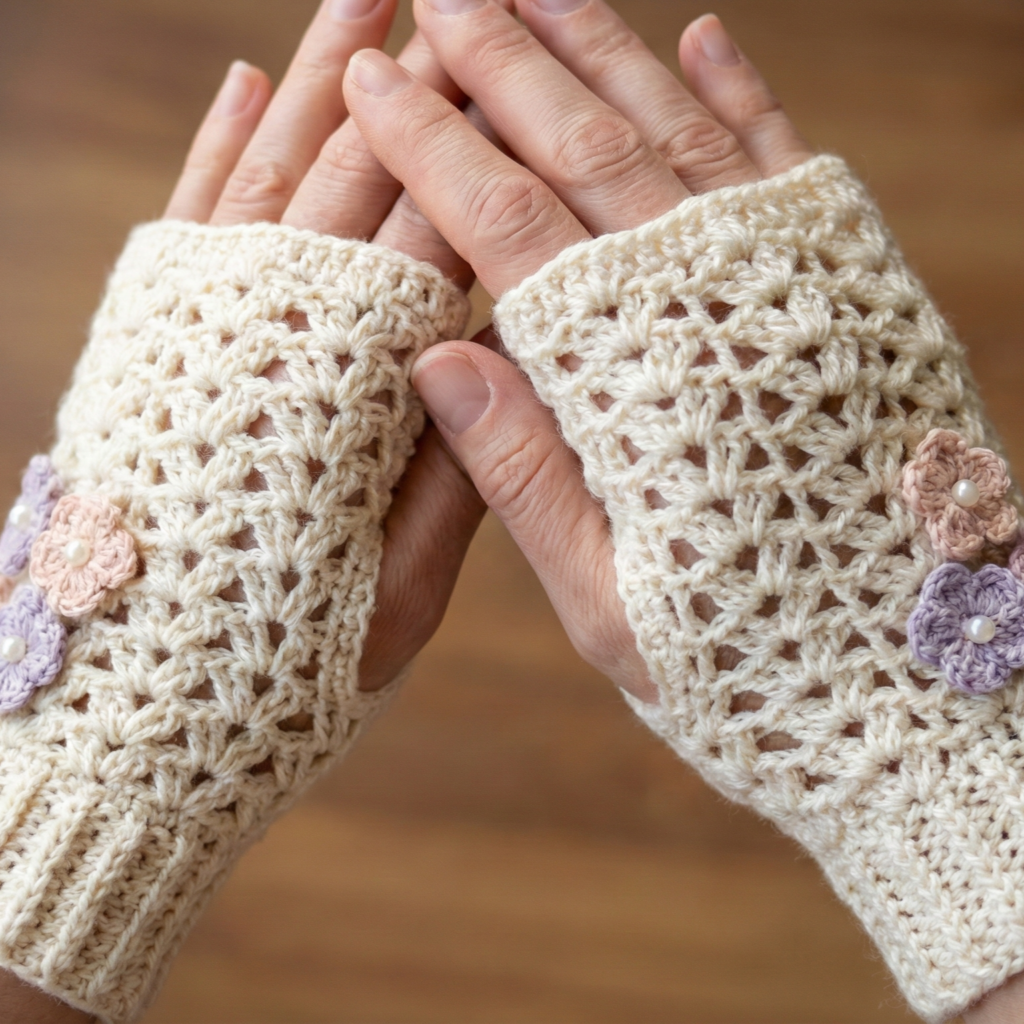
Style & concept: A delicate lacy mitten with a small crocheted flower appliqué on the back of the hand — romantic and pretty for cool evenings.
Skill level: Intermediate (lace stitches + small motif)
Materials (adult medium)
- Sport or DK cotton/wool blend — ~120–150 yd.
- Hook: 3.5–4.0 mm.
- Tapestry needle, stitch markers.
Gauge & stitch multiple
- Lace repeat multiple often 4–8 stitches; make a swatch. Example: 5 spi.
Construction (tube method)
Cuff
- Chain 40 (calculated for 8 in circumference at 5 spi), join. Work 8 rounds of hdc or sc in BLO for a neat cuff.
Lace body
2. Work a lace repeat (example v-stitch pattern):
- Row A: ch1, sc in next st around (foundation).
- Row B: ch3, skip 1, sc in next — creates alternating chain arches.
- Row C: In each ch arch work (dc, ch1, dc) — small v-stitches.
- Continue the lace repeat until mitten reaches base of fingers.
Thumb opening
4. Create thumb opening by leaving 6–8 stitches unworked in one round; hold them on a scrap of yarn or stitch marker.
Top finish
5. Work one or two rounds of delicate shell edging: sc, ch3, sl st in same stitch repeat across to get tiny scallops.
Flower appliqué
6. Tiny flower: MR, ch1, 6 sc in MR, sl st to join. Round 2: ch3, 3 dc, ch3, sl st into same stitch for a 5-petal or 6-petal flower. Make 1–2 flowers.
7. Sew the flower to the back of the mitten using matching thread. Add a tiny bead or French knot at center if desired.
Thumb
8. Pick up held stitches and work sc in rounds for 8–10 rounds or until thumb length is reached. Finish with a tidy decrease round or leave slightly open.
Variations & styling
- Use a tonal yarn and contrast flower color for a vintage look.
- Make flowers removable by sewing with a loop/button for interchangeable motifs.
Care
- Lace patterns made with cotton or delicate blends: hand wash and lay flat to dry.
6. Crochet Cinnamon Twists Mittens Pattern
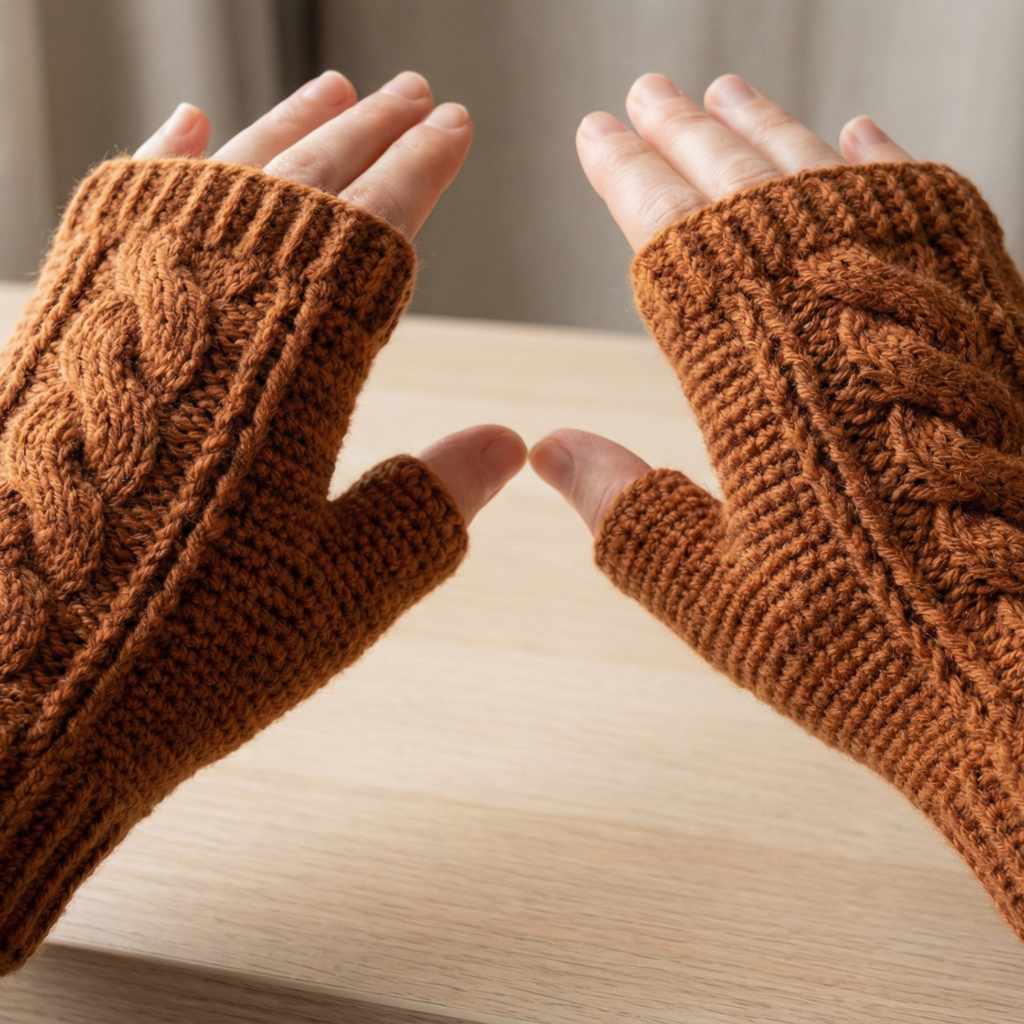
Style & concept: A warm, cozy mitten featuring spiraling cinnamon-twist cables (created with front-post/back-post or crossed stitches). The look is cable-like but crocheted — dramatic and modern.
Skill level: Intermediate → Advanced beginner (comfortable with post stitches)
Materials (adult medium)
- Worsted weight wool or wool blend — ~180–220 yd.
- Hook: 5.0 mm (size to reach gauge).
- Tapestry needle, stitch markers.
Gauge
- Example gauge in sc: 4 sc = 1 in. Cable stitch is denser; make a swatch in the cable repeat.
Cable/ cinnamon twist concept
- Use front-post and back-post double crochets to create twisted columns. A simple twist is made by working fpdc around the post 2–3 stitches ahead and then reversing the order on the following row to lock the twist in place.
Construction (worked in the round)
Cuff
- Chain 36 and join. Work 10 rounds of sc in BLO for a firm cuff.
Set up rows
2. One round sc across, then a round of sc in FLO to provide a firm base for post stitches.
Cinnamon twist panel (repeat across)
3. Pattern repeat (example 8-st repeat): [2 sc, fpdc around next 2 sts, bpdc around next 2 sts] — repeat around. This forms alternating raised columns.
4. On the next row, to make a twist, cross the posts:
- Where you worked fpdc around stitches 3–4 of repeat, now work fpdc around the posts created two rows earlier but in a crossing order (work fpdc around the post of stitch two rows below that sits to the right, etc.). The crossing sequence creates the visual twist.
- If this seems complex, an easier twist is to work fpdc 2, bpdc 2 in first pattern row then on the next pattern row reverse to bpdc 2, fpdc 2 — the offset creates a diagonal twist impression.
- Continue this crossing sequence for the height of the mitten back (about 3–4 in).
Palm
6. For palm side use sc or hdc for a flat comfortable surface.
Thumb gusset (shaped)
7. To add a thumb gusset (more ergonomic than a simple slit): at the start of a round increase 1 stitch every other round on the gusset side 3–4 times (work inc at begin and end of gusset area) to make a triangular gusset. Once gusset is the desired width (about 6–8 small stitches), stop increasing and continue even rounds until you reach base of fingers. Then place gusset stitches on scrap yarn and continue to top. Later pick up gusset stitches to work thumb tube.
Top finish
8. Finish top by decreasing with sc2tog across about 4–6 stitches to close the top or by leaving a small top opening for a decorative closure.
Thumb
9. Pick up gusset stitches and work sc in rounds to create thumb tube; decrease at the tip as desired.
Finishing & variations
- Make the cable panel only on the back of the hand and keep palm plain for comfort.
- Try two smaller cinnamon twists instead of one wide cable for a different look.
Fit tips
- Cables tighten fabric. If you are using the same stitch count as for sc mittens, the mitten may feel snug. Option: add 1–2 more stitches to the starting chain or use a slightly larger hook for the body.
Care
- Wool cables: gentle hand wash; reshape while damp. Superwash fibers may be machine-washed on gentle cycle (check label).
Conclusion
You now have six distinct fingerless mitten patterns that cover motif-based (granny), lacy, textured (Iris), playful ruffles, floral accents, and cable-style cinnamon twists. A few final, practical tips to get professional results:
- Swatch for the stitch: every stitch behaves differently; lace opens up, cables narrow, granny squares can be larger — swatch and adjust stitches for circumference accordingly. Use the digit-by-digit method shown earlier to convert inches → stitches reliably.
- Try on as you go: especially for thumb placement and overall mitt length. It’s easier to add or remove rows than to rip out a mitten after finishing.
- Blocking: block lace motifs and granny squares before assembly. Cables generally need minimal blocking but sometimes a light steam will even them out.
- Seaming: mattress stitch or whipstitch with yarn matching the fabric makes invisible seams. For modular granny mittens use a neat join-as-you-go or slip stitch join.
- Lining: for extra warmth or durability, sew a cotton flannel lining inside the mitten (especially for heavy use).
- Gifts & styling: fingerless mitts make lovely handmade gifts — photograph them styled with cozy sleeves, knitted scarves, and a cup of tea for blog/social images.