Berets are deceptively simple: one circle plus a band, but the fit depends on three small horrors most people skip — gauge, crown increase math, and band finish. Do those three things right and a beret becomes the kind of accessory people ask you about on the street. Do them wrong and you get a pancake or a donut. We are not doing pancakes.
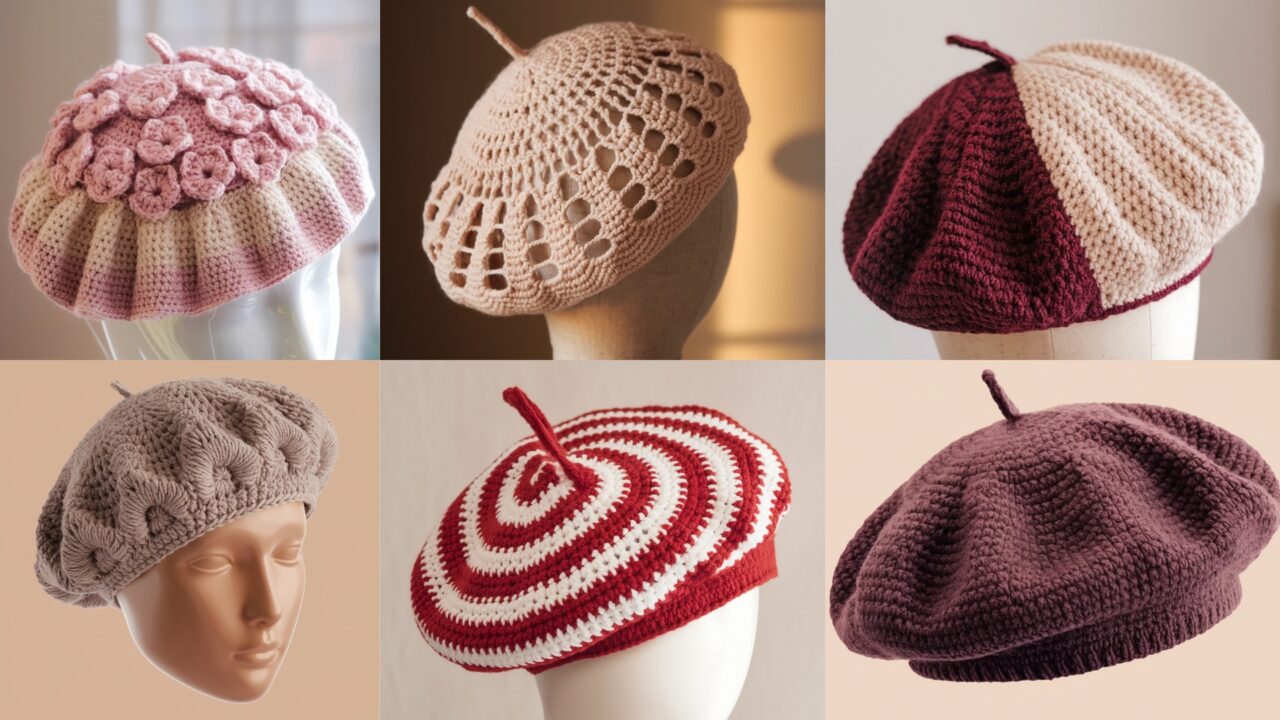
This post gives you six wearable berets — lace, granny, cherry blossom, French classic, candy-cane stripes, and a reversible two-sided version that’s ridiculously polished. Each pattern is written top-down (crown → body → band), includes an adult-medium worked example, and shows how to scale to other sizes.
Universal notes — the practical stuff you must do
Abbreviations (US terms)
MR = magic ring, ch = chain, sc = single crochet, hdc = half double crochet, dc = double crochet, tr = treble, sl st = slip stitch, st(s) = stitch(es), inc = 2 sc in same stitch, dec = sc2tog or invisible decrease, BLO/FLO = back/front loop only.
Yarn & hook baseline used in examples
- Yarn: worsted weight (#4) or a DK if you prefer softer drape; I’ll note when DK/bulky is better.
- Typical hook: 5.0 mm (H) for worsted; if you want extra drape use 5.5–6.0 mm. Use your swatch to pick final hook.
Swatch & stitches-per-inch (do this — no exceptions)
- Make a 4″ (10 cm) square in the stitch you’ll use for the crown/body (use sc for dense beret or dc/honeycomb for lacy).
- Count the stitches across 4″. Example: 16 sts across 4″.
- Compute stitches-per-inch: 16 ÷ 4 = 4 sts/in. (Write that number down.)
Head measurement and finished circumference
- Measure head circumference where the hat will sit (above ears). Typical adult medium ≈ 21″.
- Decide finished band circumference (how snug the hat should be): choose finished circumference = head measurement − ease. For beret bands you usually want 0.5–1.5″ negative ease (snug but wearable). Example: head 21″ → finished 20″ (1″ negative ease).
How to compute foundation stitch count (step-by-step)
- stitches-per-inch (from swatch) × finished circumference = total stitches around. Example using 4 sts/in and finished 20″: 4 × 20 = 80 stitches. Write that: 4 × 20 = 80.
- Round to nearest pattern multiple if needed (some stitch patterns require multiples). Example 80 is fine for multiples of 4, 5, etc.
Construction method used in these patterns
Top-down crown increases (magic ring → evenly spaced increases) until you reach the target stitch count; then work the stitch pattern in the round for the crown/body. Decrease slightly into the band if you want more shaping, then work a ribbed or folded band in BLO to finish.
Blocking & finishing
Block gently to open lace and set shape. For a classic beret block it flat on a plate or beret block and pin the top to achieve gentle doming. Sew in a small yarn stem if you like the French look.
Pattern format notes
- I’ll use an example adult medium with finished circumference 20″ and example gauge 4 sts/in (from the swatch) → target stitches = 4 × 20 = 80. I’ll show crown rounds that increase by +6 each round (common method) until near 80, then make small adjustments if necessary. If your gauge produces a different total, follow the arithmetic method above to adapt the round counts — the shape logic is the same.
1. Crochet Lace Beret Pattern
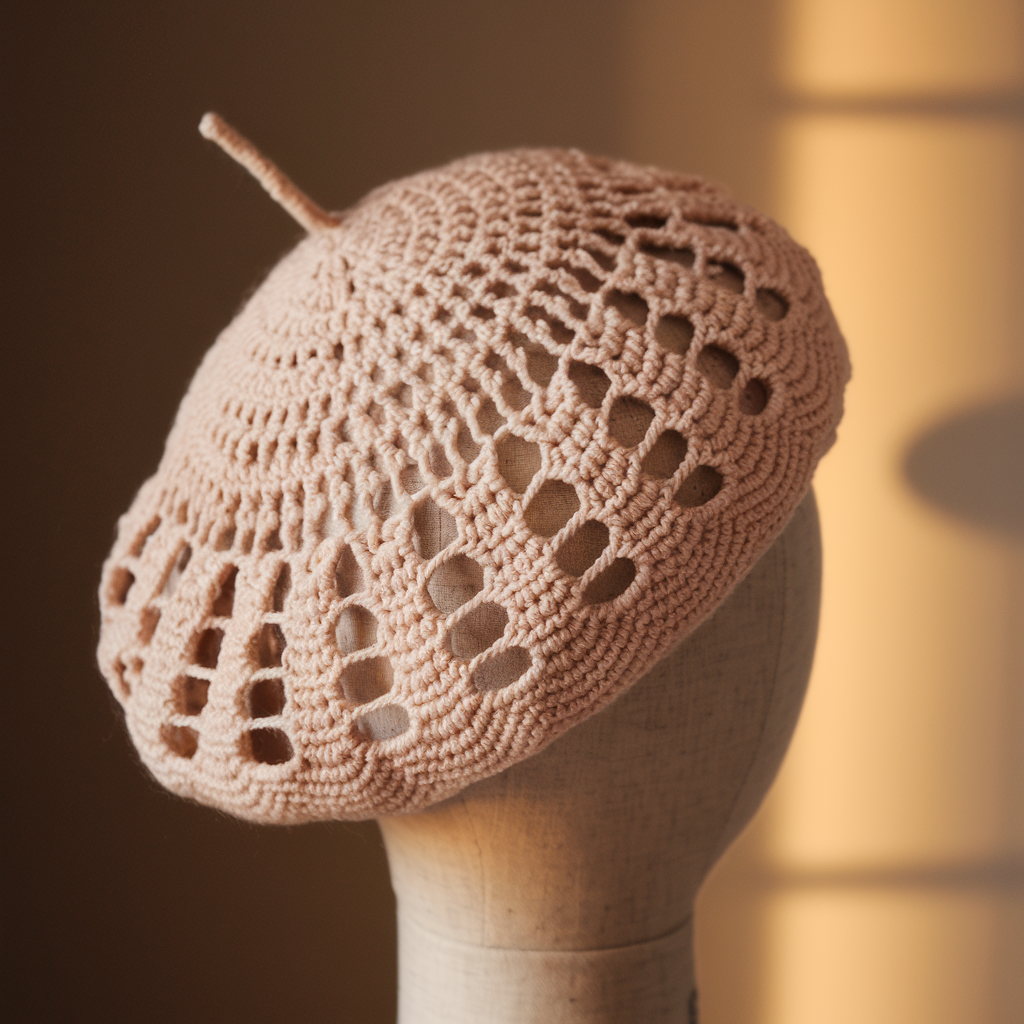
Airy, romantic, and wearable under a coat hood. Works in worsted for structured lace or DK for a floaty drape.
Skill level: Intermediate (lace chart/reading or repeating shell sequences)
Materials: DK or worsted (sample uses worsted), 5.0 mm hook for worsted or 4.0–4.5 mm for DK, tapestry needle, blocking tools. Approx 180–220 yds (worsted) or 220–260 yds (DK).
Gauge example for sample: 4″ = 16 sc = 4 sts/in. Target finished band = 20″ → 20 × 4 = 80 sts.
Design concept
Start with a domed lace crown (shell/cluster lace), switch to even rounds of lace for the crown body, then finish to a ribbed band worked in BLO for stability.
Crown increase (top-down) — example rounds to reach ~80 sts
Use the standard increase sequence: each increase round adds 6 sts total when you use patterns that create six increase points. I list rounds and running totals:
- MR, R1: ch1, 6 sc in MR — 6.
- R2: inc around → 12. (6 + 6 = 12)
- R3: sc1, inc ×6 → 18.
- R4: sc2, inc ×6 → 24.
- R5: sc3, inc ×6 → 30.
- R6: sc4, inc ×6 → 36.
- R7: sc5, inc ×6 → 42.
- R8: sc6, inc ×6 → 48.
- R9: sc7, inc ×6 → 54.
- R10: sc8, inc ×6 → 60.
- R11: sc9, inc ×6 → 66.
- R12: sc10, inc ×6 → 72.
- R13: sc11, inc ×6 → 78.
- R14: sc12, inc ×6 → 84. — we’ve jumped to 84 which is slightly over 80. That’s OK. Alternative: stop at 78 (R13) and perform an even-round increase partial to 80 by adding two increases spaced evenly (e.g., inc in st 14 and st 52). Practically many crocheters prefer 78–84 range; the lace pattern will tolerate some variation. I’ll proceed with 84 stitches for this sample (gives a slightly looser band).
Lace motif (example shell lace repeat — multiple of 6)
Round A (setup after increases): [dc, ch2, sk1, dc] in next st across, slip st to join. This sets lace arches.
Round B: Work shells into ch2 spaces: (ch1, sc, ch1, 5 dc in ch2 space, ch1, sc, ch1) — adjust to make shells sit centered. Repeat rounds A–B until crown diameter measures ~10–11″ across (measure flattened — you want a gentle dome).
Transition & band shaping
- After you’ve worked enough lace rounds, you want to reduce slightly toward the band so beret sits flat: work 1–2 rounds of dc2tog every 10–12 sts to subtly pull the fabric in. Example: with 84 sts, do dc2tog × 8–10 evenly spaced. This is optional; lace sometimes needs no reduction if pattern tightens naturally.
Band (folded rib)
- Work 8–10 rounds BLO hdc (back loop only half-double crochet) — this builds a stretchy rib.
- Fold the band to inside and slip-stitch or whipstitch closed, or work a last round of sc through both layers to close and tidy. This creates a neat, warm band that holds shape.
Finishing
- Block flat: pin to beret shape and allow lace to open slightly. If you want exaggerated slouch, pin with a small dome supporting the center (a bowl works). Add a tiny stem: ch4, sl st at center and sew to top. Weave ends.
Variations & tips
- Use DK + 5.5 mm hook for drapier, more slouch.
- Add a simple lining of silk or cotton for warmth; attach to band only so lace still shows.
2. Crochet Granny Stitch Beret Pattern
Granny clusters give nostalgic texture and surprisingly flattering curves; works well in worsted or held-double yarn for chunky berets.
Skill level: Confident Beginner
Materials: worsted yarn (sample), 5.0 mm hook, tapestry needle. Approx 180–220 yds.
Gauge sample & target: same baseline; stitches-per-inch = 4 → finished band = 20″ → target = 80 stitches. For granny cluster patterns we think in clusters — common cluster uses 3-dc groups spaced with ch1, so plan counts to keep clusters even (80 ÷ 3 ≈ 26 remainder 2). We’ll use 78 or 81 workable counts; I’ll aim for 78 (multiple of 3 × 26).
Design concept
Crown worked in concentric rounds of cluster-granny stitches that create a subtle, flared dome. The motif naturally increases, so the crown math is cluster-focused instead of individual stitches.
Crown & cluster increases (cluster = 3 dc group with ch1 space)
- MR, R1: Ch3 (counts as dc), work 11 dc into MR — 12 dc.
- R2: ch1, (3 dc) in next st, ch1, sl st next st? — instead of complicated notation, a reliable method: convert the starting dc circle into 6 cluster slots: R2 work (3 dc, ch1) into every other stitch to make 6 clusters. This creates the 6 base cluster points for geometric expansion. From there, each round you place clusters into ch-1 spaces and periodically add extra clusters to grow circumference. Practically you will increase clusters per round by 6 until reaching ~26 clusters (3 dc cluster × 26 = 78 sts). So increase cluster count round by round: 6 → 12 → 18 → 24 → 30 clusters (stop at 26 ideally so you’ll need to do a partial increase round). I recommend stopping at 26 clusters total (78 dc equivalent) — that gives a tidy circumference for the granny repeated pattern.
Switch to full granny rounds
- After you establish the cluster count, work full rounds of [3 dc, ch1] in each ch1 space in the round to build crown body. Keep going until the beret crown diameter is 10–11″.
Band
- Work 8 rounds BLO hdc. Fold and seam or join with sc through both layers.
Finishing & variations
- For chunkier beret hold two strands of DK together and use 6.5 mm hook. Adjust cluster rounds by eye — granny grows fast so test next-to-last rounds on head to check slouch.
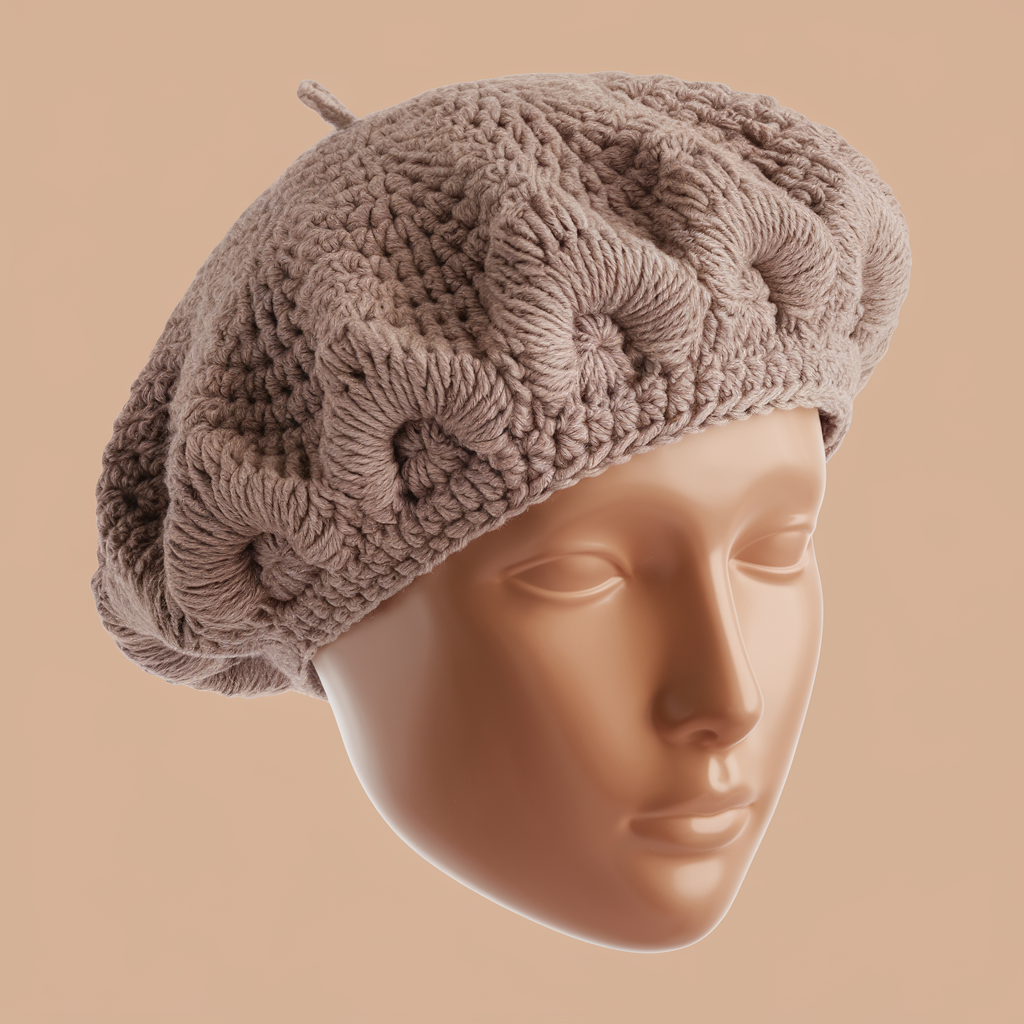
3. Crochet Cherry Blossom Beret Pattern

Feminine, textured tiny blossom clusters across the crown. Uses small puff/bobble stitches as flower centers. Works best in DK or light worsted.
Skill level: Intermediate (bobble/puff stitches)
Materials: DK or light worsted (~200–240 yds), 4.5–5.0 mm hook, tapestry needle.
Gauge & example math: swatch gives 4 sts/in → finish band 20″ → 80 sts target. Cherry blossom motifs repeat over multiples of 8; 80 ÷ 8 = 10 repeats — perfect.
Design concept
Start with even crown increases to target 80 sts, then work a textured round pattern where puff stitch ‘blossoms’ are placed in a grid. This look is classy and works with tonal yarn.
Crown increase (top-down to 80 sts)
Use same increase plan as previous (add 6 per round) and stop at 78 or 84 as needed. Because cherry blossom grid wants multiples of 8, plan to reach 80 exactly. To do that, you can stop at 78 and add 2 evenly spaced increases in the next round:
- Example quick arithmetic: if after R13 you have 78, you need +2 to reach 80. Add two extra incs spaced 39 stitches apart (78 ÷ 2 = 39). Practically: sc across until st 20, inc; sc across 39 sts, inc; finish round.
Blossom stitch (puff) — quick how-to
- Puff stitch (5-loop): YO, insert hook, pull up loop; repeat 5 times total (you’ll have 11 loops on hook), YO and pull through all loops, ch1 to close. Secure with sc around for placement.
Pattern body (example repeat across 80 sts — multiple of 8)
Round pattern (8-st repeat):
- [sc 3, puff in next st, sc 3, sl st into next] repeat across. Space rows so blossoms align in staggered grid (e.g., odd rounds put puffs in position A, even rounds offset by 4 sts so puffs sit staggered). Work until crown diameter ~10–11″.
Band
- 8 rounds BLO hdc, fold inwards, seam.
Finishing
- Light block, steam carefully (puffs set with steam, not soak). Optionally add a small crocheted leaf cluster near the band.
4. Crochet French Beret Pattern
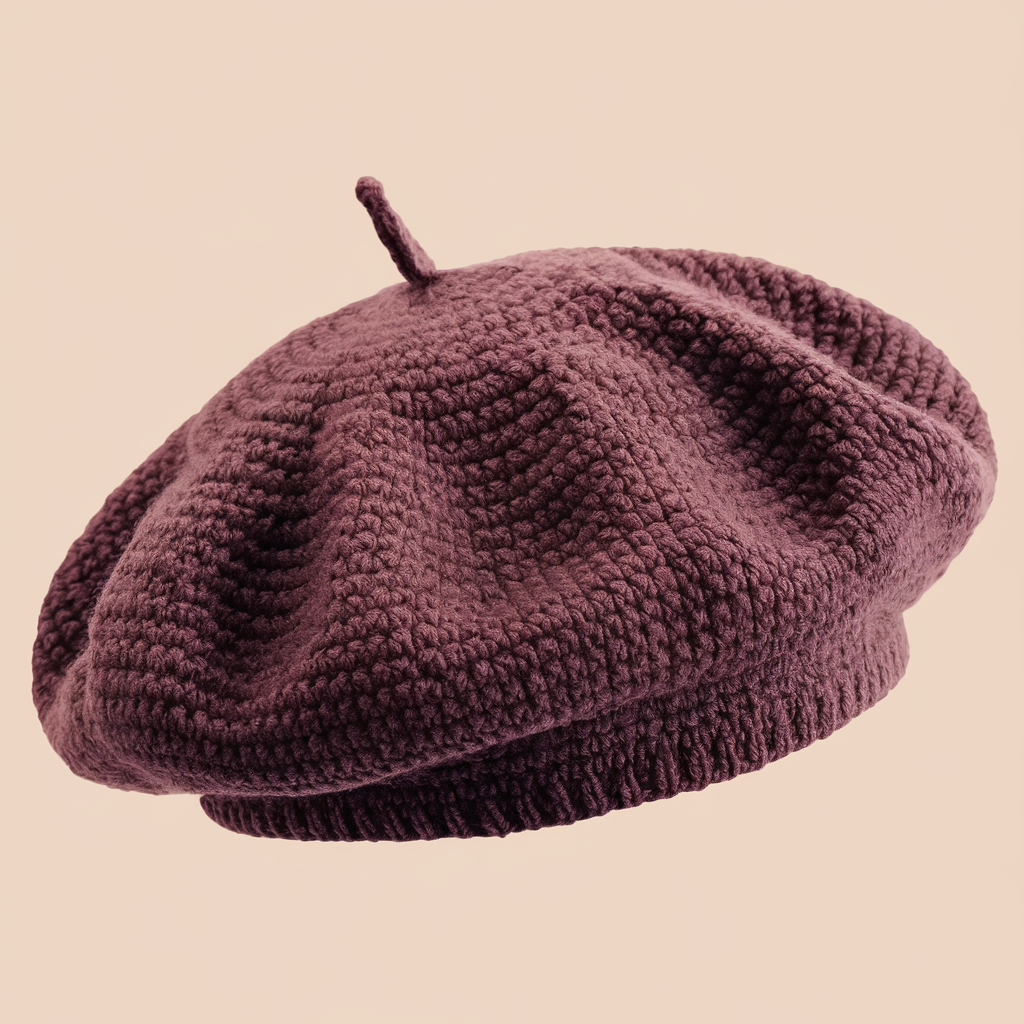
The archetypal beret: tidy dome, short stem, turned-in band. Clean lines — perfect for a nonchalant chic look.
Skill level: Confident Beginner
Materials: worsted or chunky for warmth, 5.0–6.0 mm hook depending on yarn, tapestry needle. ~200–260 yds.
Gauge example: 4 sts/in → target 20″ → 80 sts.
Design concept
Classic circular crown, worked in dc for smooth drape, modest slouch, and a narrow folded band. Add a tiny ch-stem for a French finish.
Crown increases (to ~80 sts)
Use the standard +6 increase rounds until you reach 78 or 84 as above. For classic look, 78 provides a snugger band; 84 yields more slouch. I’ll show target 80 by final small increases if needed.
Smooth dc body
- After achieving the target stitch count, switch to rounds of dc (no increases) until beret diameter measures ~10–11″ when laid flat. For a classic French look, stop at ~2–3″ more than the crown to create drape.
Shaping for band
- Do one or two rounds of dc2tog at regular intervals to pull the shell inward gently to the band. Example: with 80 sts, do 8 evenly spaced dc2tog to remove 8 sts → 72 sts. Then work 6–8 rounds of BLO hdc for the band.
Stem
- At top center make a small stem: ch5, sl st into top center; fasten and sew to center so it stands up about 1/2″.
Finishing
- Block on a shallow dome to set shape. Fold the band inward and hand-tack at 4 points (to keep band tidy but allow stretch).
5. Crochet Candy Cane Beret Pattern
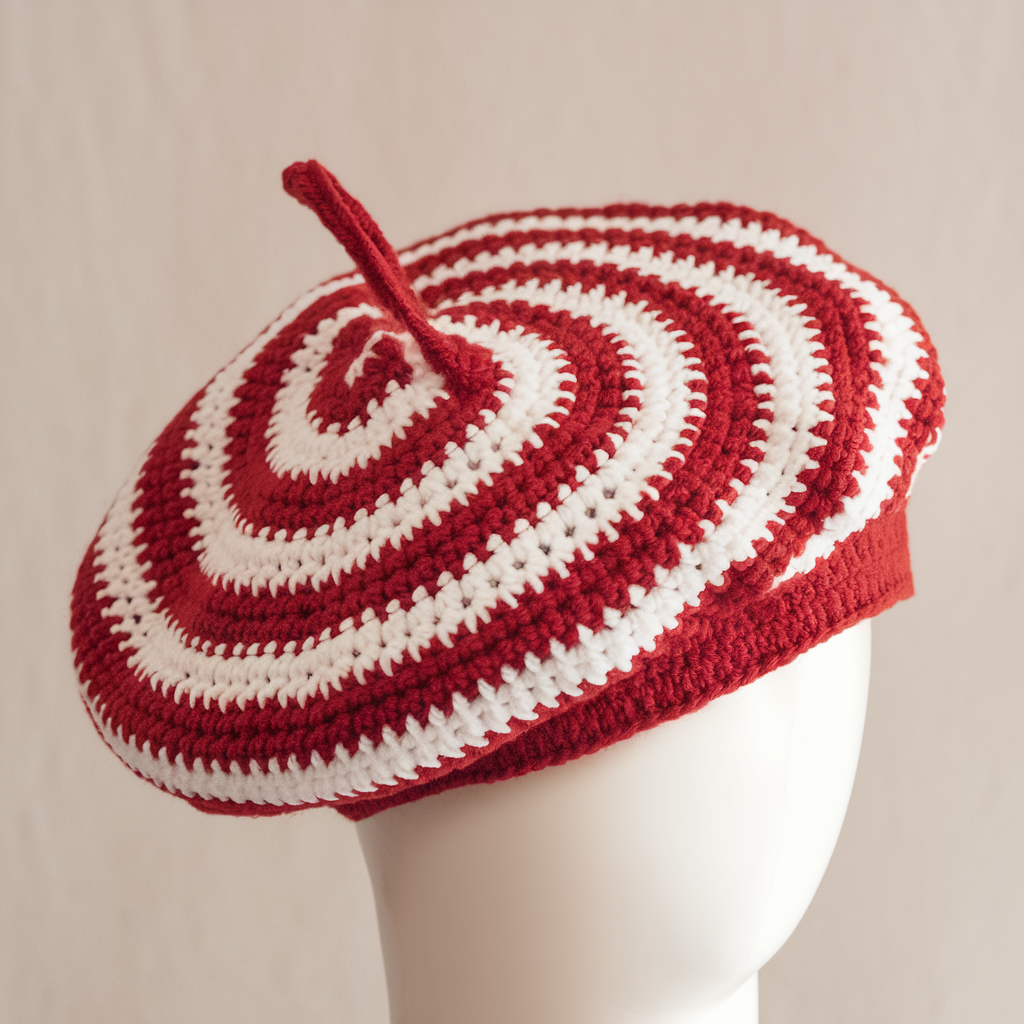
Playful, seasonal, or just cheery — bold spiral stripes in two colors. Works well in worsted or bulky for statement effect.
Skill level: Confident Beginner (striping management)
Materials: two contrasting colors worsted (A & B), 5.5–6.0 mm hook recommended for chunkiness, tapestry needle. ~220–260 yds total.
Gauge & example: adjust per hold-two-strand option; baseline 4 sts/in gives target 80 sts.
Design concept
Work crown increases as usual to target stitch count; then create spiral stripes by changing color every X rounds and offsetting via a half-round color change to create the spiral. For better defined spiral, use slip-stitch spiral technique instead of cutting yarn every stripe to reduce ends.
Crown increases to target
- Same +6 per round until you reach ~80 sts. Stop at a count or round that gives a clean transition into striping (e.g., 78 or 84).
Spiral stripe method (simple carry/continuous)
- Decide stripe height: e.g., 2 rounds color A, 2 rounds color B.
- To create a visible spiral rather than stacked rings, start by offsetting the second color by 1 stitch at the beginning of its round and carry the unused color up the inside loosely — but here’s easier and cleaner:
Simple spiral technique:
- After changing colors at the end of round, do not join with sl st; instead continue in spiral (the round joins are invisible), carrying the old color up inside the hat. This makes stripes spiral naturally. If working in joined rounds, you can make slight spirals by shifting the join point each stripe (tricky).
Body & band
- Work stripes until desired height. Finish with 8 rounds BLO hdc in single color (preferably one of the stripe colors) and fold for a snug band.
Finishing & tips
- Weave in color ends neatly; carry one color up the inside to minimize tails. For a crisp candy-cane look, use thicker yarn and higher contrast (red/white).
6. Crochet 2-Sided Beret Pattern
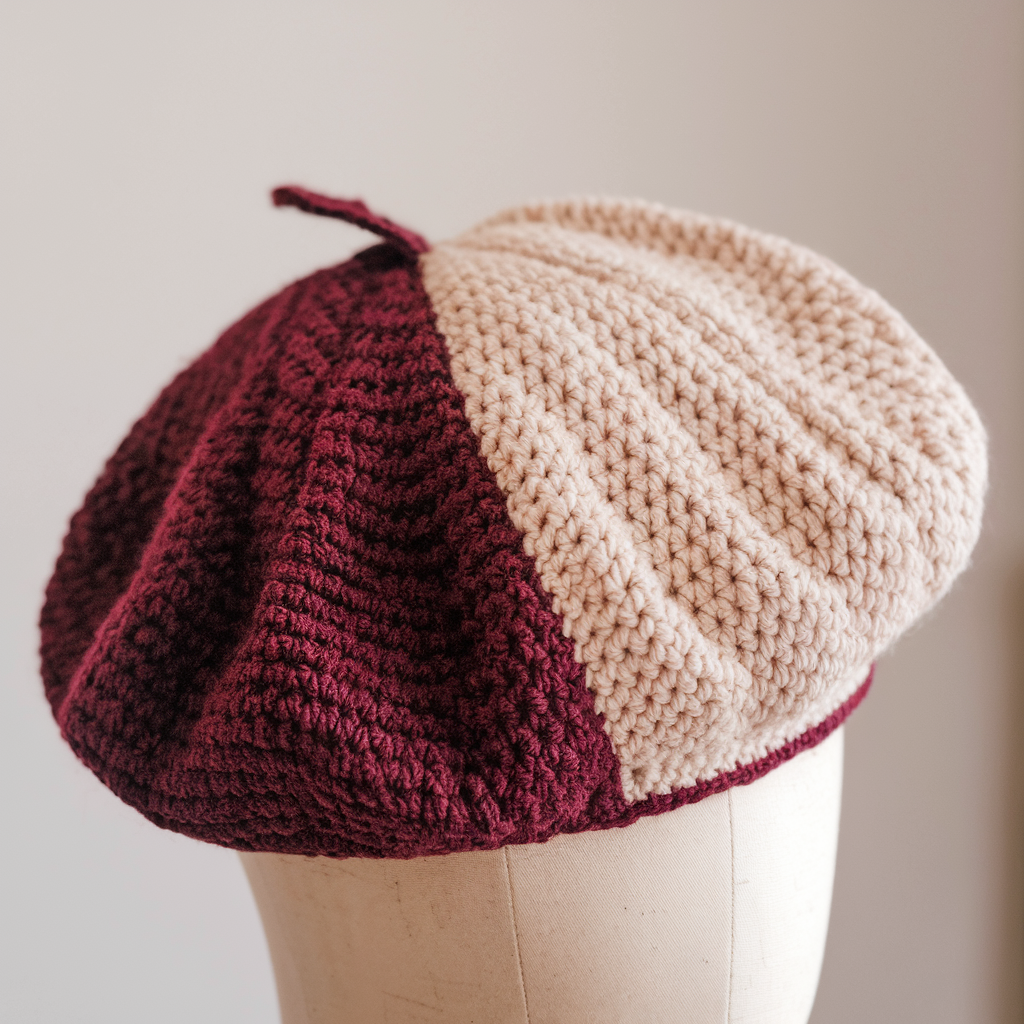
Polished, two-faced beret: one side looks like a solid textured stitch, flip it and get another color/pattern. Great for markets because it’s two hats in one.
Skill level: Advanced-beginner → Intermediate (requires reversible stitch knowledge)
Materials: two contrasting colors (A & B) of worsted (100% cotton or wool works), 5.0 mm hook, tapestry needle. ~240–300 yds total (more yarn because of reversible fabric).
Gauge & math: reversible stitches are often thicker — swatch and get stitches-per-inch; aim for a finished band of 20″ → compute stitches = sts/in × 20.
Design concept
Use a reversible stitch (e.g., waffle stitch done front/back, or linen stitch variant worked with alternating colors) in flat rounds. Start top-down and when you reach target circumference continue reversible stitch in the round. Band is integrated (folded) so both sides look neat.
Crown increases & stitch repeat
- Use the same crown increase pattern to reach target stitch count (account for reversible stitch multiple). Example: if reversible stitch repeats require multiple of 4, make sure final stitch count divides by 4. For 80 stitches and multiple 4 -> 80 ÷ 4 = 20 repeats. Good.
Example reversible linen-like stitch (two-row repeat using two colors):
- Odd rounds: [sc 1 in color A, carried color B chain] — more precise stitch description requires a small chart. For clarity: use a reversible half-double cross-stitch that forms distinct fronts on each side.
Body & shaping
- Work reversible rounds until crown diameter ~10–11″. Because reversible fabrics are thick, you may want to reduce a hair earlier to avoid an overly heavy dome. If you prefer a light slouch, use DK instead and larger hook.
Integrated band (2-sided neatness)
- Work 6–8 rounds of reversible rib (BLO/FLO alternation yields rib on both faces).
- Fold band inward and seam with invisible slip-stitch through both layers so both faces look tidy.
Finishing
- Block flat and ensure reversible pattern sits properly. The band should be tacked in 3–4 places on the inside so it doesn’t flip.
Final fitting, finishing, and care notes
- Try on early. When your work sits at approx 2/3 of the intended height, try the hat on. If it’s too small you can add rounds; too large you can add a decrease round or tighter band.
- If your crown counts don’t match the sample counts: follow the arithmetic method at top. For lace and textured stitches, round totals can vary ±6–12 stitches; aim for an even final number that fits the stitch repeat.
- Ribbed band tips: BLO hdc for folded bands is the best balance of stretch and tidy look. Work 8–10 rounds, fold, and whipstitch or sc through both layers to close. For a slimmer look, use sc BLO fewer rounds (6).
- Blocking: lace berets need wet blocking and pins; chunky berets may only need gentle steam. Use a plate or a real beret blocking form for a professional result.
- Care: wool = hand wash cold, lay flat to dry; acrylic = gentle machine wash (laundry bag), dry flat. Always mention the yarn label on your pattern.
- Label your patterns: include finished circumference, recommended ease, yarn weight, hook size, and notes about blocking so readers don’t guess.
Conclusion
There. Six realistic, wearable beret patterns — from delicate lace to reversible, double-duty styles. The difference between a beret that looks handmade and one that looks thoughtfully designed is simple: swatch, compute, and control the band. Do those three things and you’ll make berets that flatter faces instead of sitting like flat pancakes.