Crochet scarves are the quickest way to add handmade warmth and personality to your wardrobe. Below is a single, useful introduction followed by six long, practical scarf patterns — each with materials, skill level, gauge guidance, measurements and how to scale, a step-by-step stitch-by-stitch construction, shaping/finishing, variations, and care instructions. Read the short sizing & gauge primer first so you can confidently adapt every pattern to your preferred yarn and finished size.
Sizing & gauge primer (read before you start)
- Decide finished dimensions you want for the scarf:
- Narrow everyday scarf: 6–7 in wide × 60–64 in long
- Classic scarf: 8–10 in wide × 64–72 in long
- Wrap / stole: 12–18 in wide × 70–80 in long
- Make a 4″ × 4″ swatch in the stitch pattern you plan to use, blocking it the same way you will finish the scarf. Measure:
- stitches per inch (spi) horizontally
- rows per inch (rpi) vertically
- Convert width to stitches:
- Stitches needed = Desired width (in inches) × spi.
- Example: Desired width = 8 in, spi = 4 sts/in → 8 × 4 = 32 stitches. Round to nearest repeat multiple required by the stitch pattern (I list multiples below).
- Convert length to rows:
- Rows needed = Desired length × rpi.
- Example: Desired length = 68 in, rpi = 5 rows/in → 68 × 5 = 340 rows.
- Adjust for drape & yarn:
- Bulky yarn will give fewer stitches/inch (bigger stitches) and a shorter scarf with fewer rows. Always swatch and recalc.
Now, the patterns.
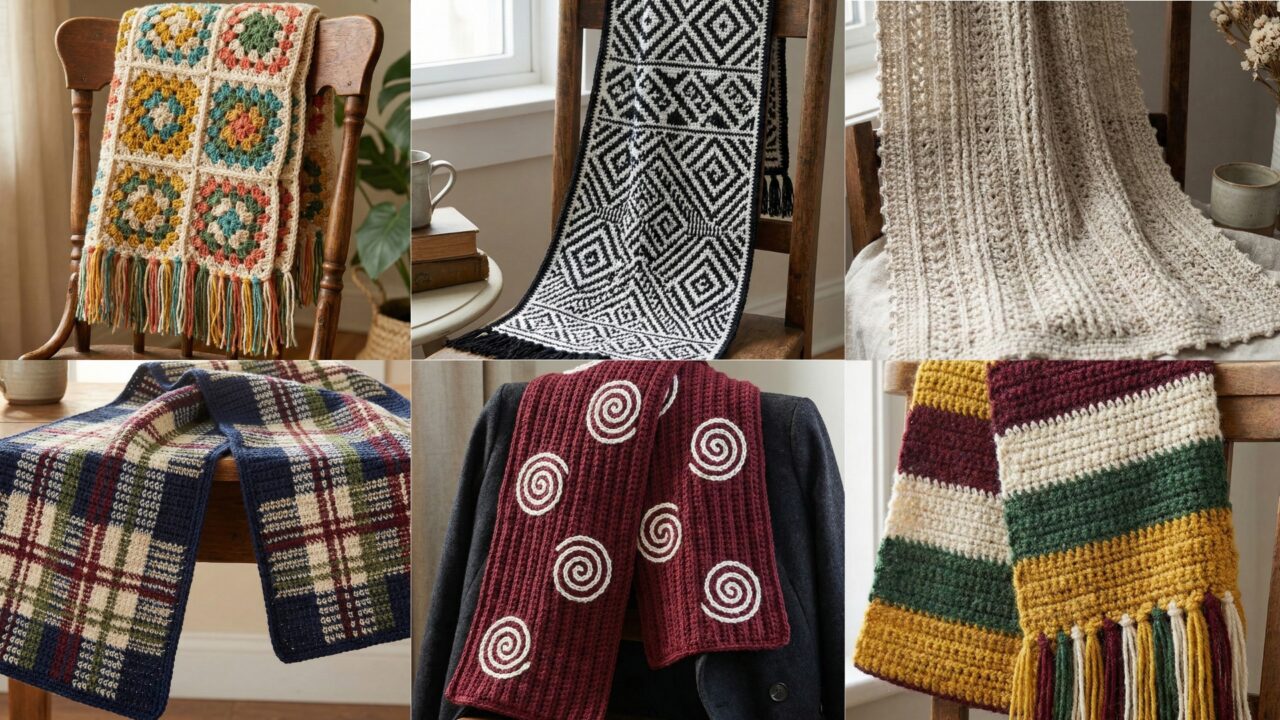
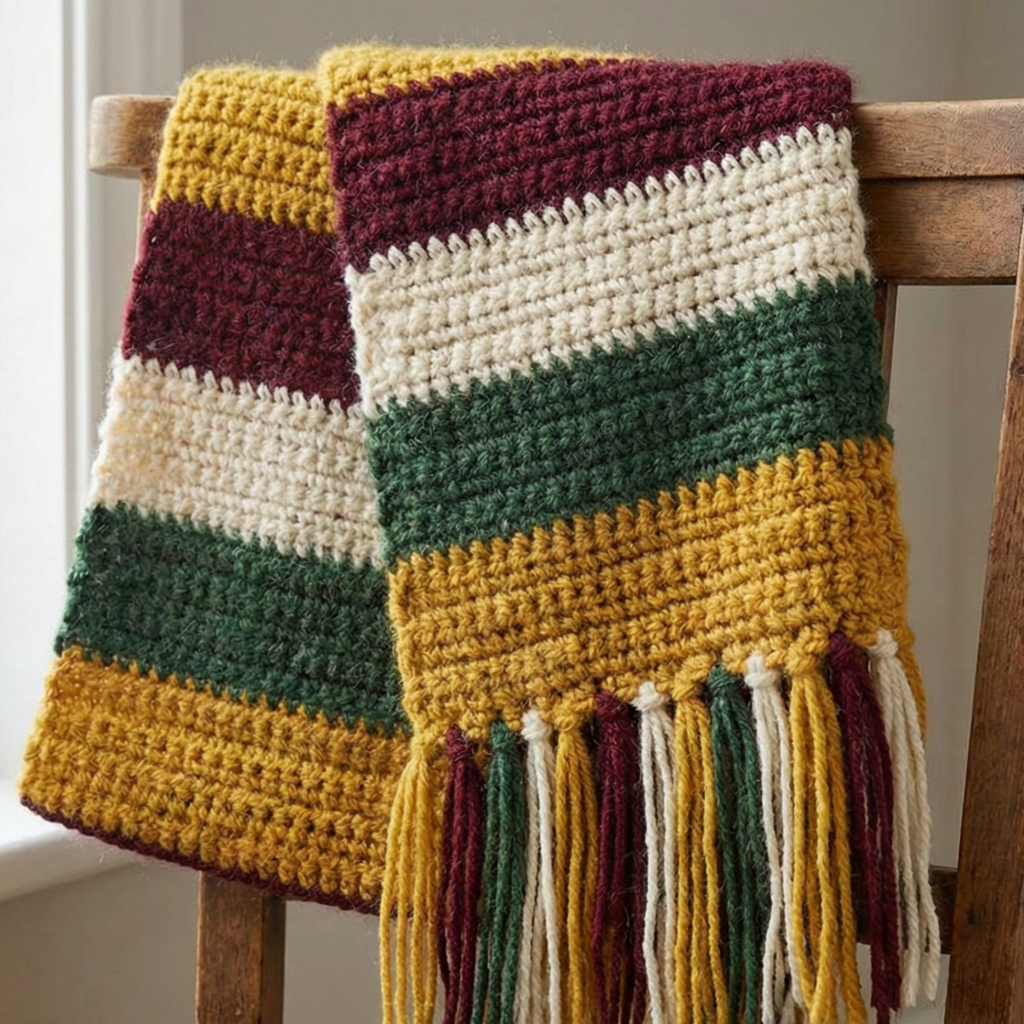
1. Crochet Cinnamon Roll Spiral Maroon and White Scarf Pattern
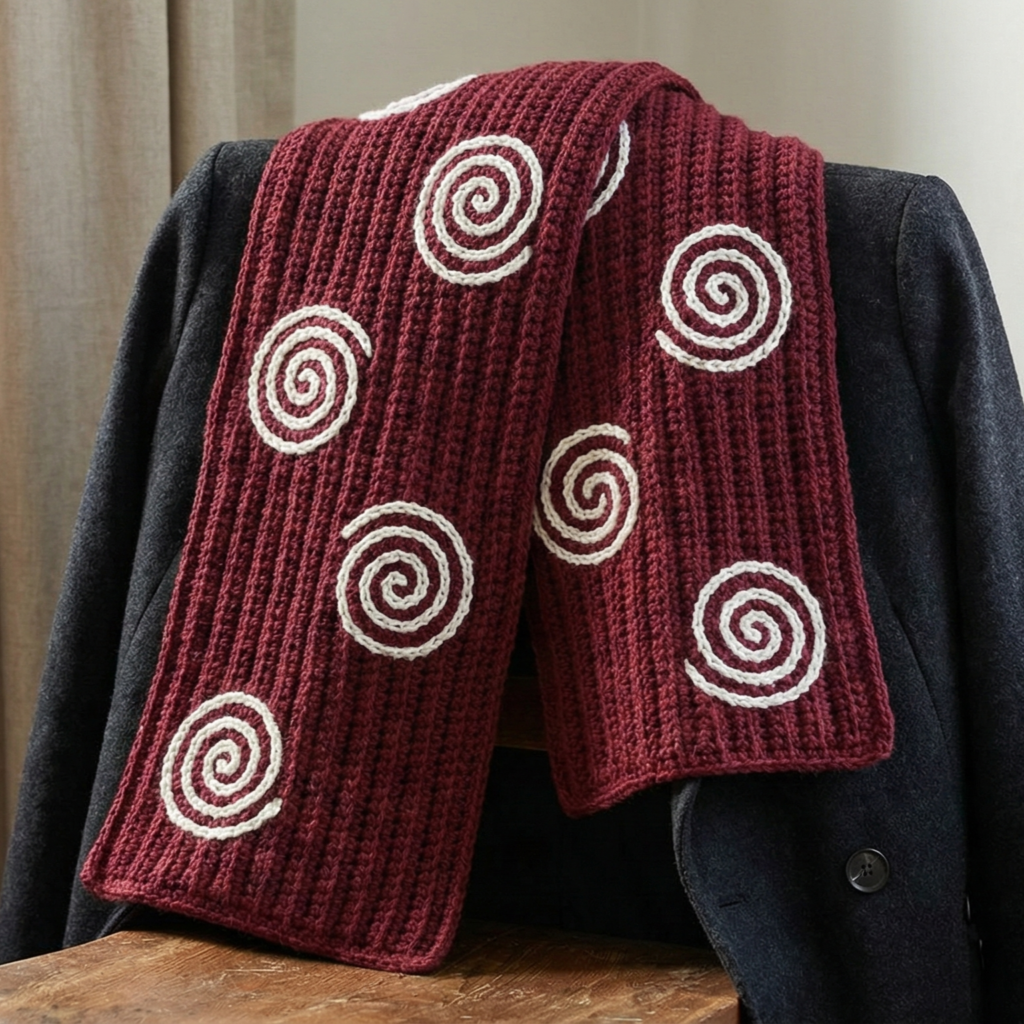
Vibe: Bold two-color spiral — cozy, graphic, and great for gifting.
Skill level: Confident beginner / intermediate (color changes & short-row shaping optional).
Yarn & tools:
- Bulky weight yarn (approx 300–450 yd total). Maroon (MC) ~150–225 yd, White (CC) ~150–225 yd.
- Hook: 8.0 mm (or size to get gauge).
- Notions: tapestry needle, yarn scissors, stitch markers.
Sample gauge (bulky, ribbed pattern): 8 sts × 6 rows = 4″ in pattern (spi = 2 sts/in, rpi = 1.5 rows/in — verify with your swatch).
Finished size (sample): 8 in wide × 68 in long.
Multiple: Pattern repeat is multiple of 4 + 2 (for edge balance).
Concept & construction overview
This design uses alternating maroon and white spiral bands that twist into a cinnamon-roll-like spiral when rolled for storage or wrapped; worn flat, the bold stripes make a modern graphic statement. We’ll work a two-row color block stripe and use a slight offset repeat so the stripes spiral visually; for a true spiral you can use diagonal join technique or Tunisian simple stitch diagonal — here we present a simple, repeatable stranded/striped pattern that gives a spiraled visual when wrapped.
Step-by-step
Step 1 — Swatch & foundation
- Make a swatch in the stitch (see pattern below) to verify spi and rpi. Suppose spi = 2 sts/in and you want 8″ width → 8 × 2 = 16 stitches. Since multiple = 4 + 2, 16 is fine (4×3 + 4 = 16; or choose 18 if you prefer wider). For sample scarf choose 18 stitches foundation.
- Chain 20 (18 sts + 2 turning ch), or use foundation single crochet to get exact foundation height.
Step 2 — Main stitch (bulky textured rib with two-row stripe)
We’ll use a simple textured rib that reads nicely in stripes: alternating rows of half double crochet (hdc) and back-post hdc (bp-hdc) to create vertical texture.
- Row 1 (RS): hdc in 3rd ch from hook and in each ch across. Turn.
- Row 2: ch2; bp-hdc around the next st, hdc in next st repeat across; end hdc in top of turning ch. Turn.
- Row 3: ch2; hdc next, bp-hdc next repeat across. Turn.
This 2-row textured repeat shows great vertical ridges. Work stripes in color blocks: 4 rows MC, switch to CC for next 4 rows, continue alternating. For sample spiral illusion, use a color change every 4 rows (two full repeats).
Step 3 — Working length & stripes
- Continue working 4 rows MC / 4 rows CC alternation until scarf reaches desired length (convert length to rows using rpi). Example rpi measured = 1.5 rows/in (bulky), desired length 68 in → 68 × 1.5 = 102 rows. With 4-row stripe repeats you’ll have 25.5 repeats—round to whole repeats (25 or 26). So work 26 repeats → 26 × 4 = 104 rows total.
- To gradually create the visual spiral (optional advanced): shift the color boundary one stitch every 8 rows by working the last row of the stripe using a two-color diagonal join (slip-stitch decrease across one end), but this is optional; the wrap effect when draped will create the spiral appearance anyway.
Step 4 — Edging
- Fasten off after last row. With a smaller hook (one size down), work a round of sc all around the scarf to neaten edges; place 3 sc in each corner short end to keep edges flat.
- Optional: add a 1-in fringe in both colors repeating the stripe order — fold strands in half, pull loop through edge, pull tails through loop, tighten. For a cinnamon-roll look, keep fringe minimal (1–2″) or omit.
Step 5 — Finishing & blocking
- Weave in ends carefully, especially where colors met.
- Lightly steam or wet-block to even texture. Bulky yarn often needs only gentle shaping.
Variations & notes
- Use worsted weight and smaller hook for a denser scarf. Convert using swatch.
- For a reversible striped look, use surface slip-stitch color changes to hide carried floats.
- Add tassels alternating maroon/white for a playful finish.
Care: Follow yarn label; bulky acrylic usually machine-washable on gentle; wool blends may require hand washing.
2. Crochet Margot Scarf Pattern
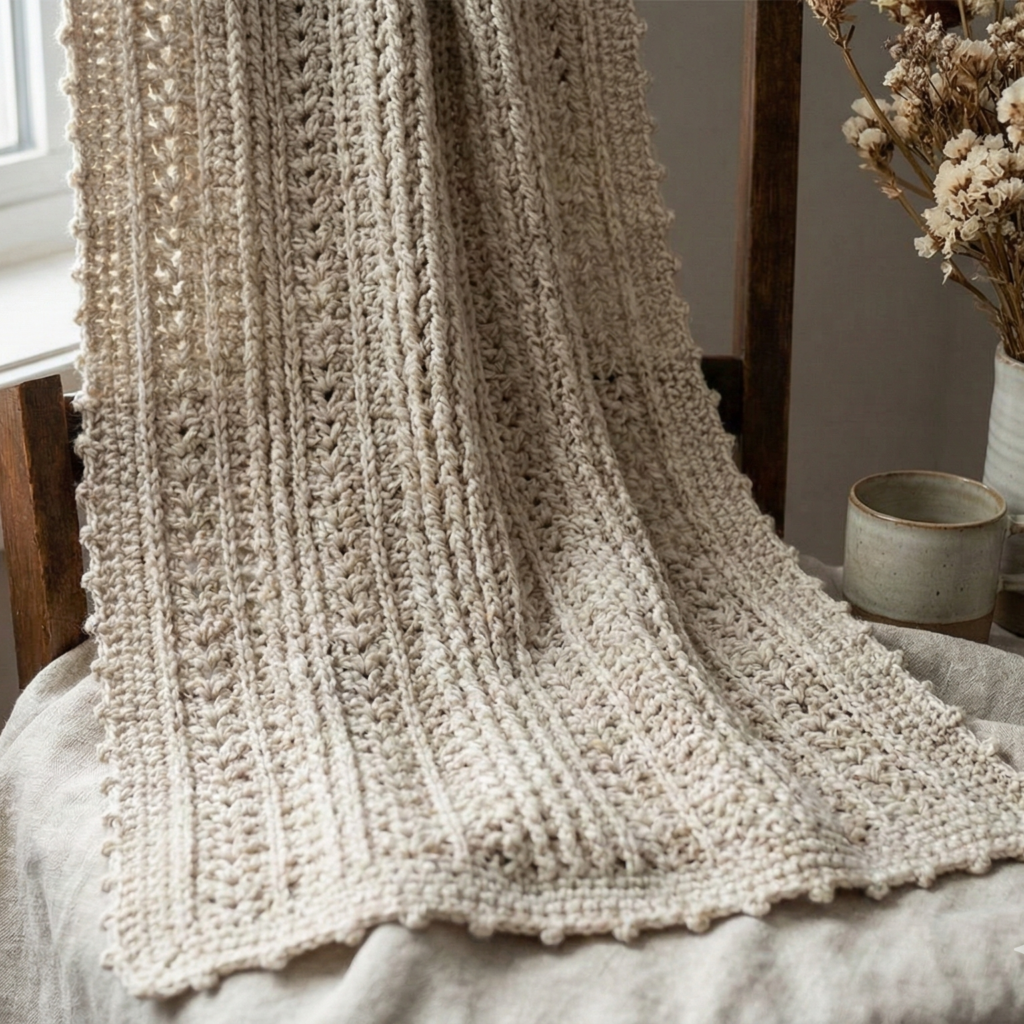
Vibe: Subtle, heavily textured, boutique-style scarf named for an elegant drape.
Skill level: Intermediate (post stitches, lace + texture combo).
Yarn & tools:
- DK or light-worsted yarn ~400 yd for a classic scarf.
- Hook: 4.0 mm.
- Notions: tapestry needle, blocking pins.
Sample gauge (margot stitch): 20 sts × 28 rows = 4″ in Margot stitch (spi = 5 sts/in, rpi = 7 rows/in — test your swatch).
Finished size (sample): 10 in wide × 70 in long.
Multiple: Pattern repeat is multiple of 6 + 2 for the Margot lace/texture repeat.
Stitch & concept
The Margot stitch for this scarf combines V-stitch lace with raised cable-like vertical ridges (produced by front-post treble clusters). The fabric is light but textured, making a lovely everyday scarf with drape.
Step-by-step
Step 1 — Foundation
- Desired width 10 in × spi 5 = 50 stitches. Because multiple = 6 + 2, adjust to nearest: 50 − 2 = 48 → 48 ÷ 6 = 8 repeats → foundation 50 is OK. Chain 50 + 2 turning ch.
Step 2 — Margot stitch pattern (establish over 6-st repeat)
Set-up rows:
- Row 1 (RS): hdc in 2nd ch from hook and across. Turn.
- Row 2 (RS): ch3 (counts as dc), (dc, ch1, dc) in next st (V-st), skip 1, fpdc around next st (creating raised column), skip 1 repeat across ending dc in top ch. Turn.
- Row 3: ch2; hdc in each st/space across (anchors the lace). Turn.
Repeat Row 2–3 for body. The interplay of V-stitches and fpdc columns creates Margot texture.
Step 3 — Work length
- Continue until you reach desired length (convert to rows). Example length 70 in × rpi 7 = 490 rows — large number; with alternating row pattern, count pattern repeats: each pattern repeat is 2 rows; 490/2 = 245 repeats. Work until you approach length then finish.
Step 4 — Borders
- Finish with 3 rounds of sc in a neutral(edge) color to frame the lace—1 round sc in both loops, then 2 rounds sc in BLO for subtle rolled edge.
- Optionally add a picot edge along long sides: sc, ch3, sl st into same st every 6 stitches for delicate points.
Step 5 — Blocking
- Wet/block to open the V-stitch lace and set the vertical columns. Pin to desired shape and let dry completely.
Variations & notes
- Hold two strands together (light-worsted + lace) to make the scarf more substantial.
- Swap in a silk blend for luxury drape; block gently.
Care: Hand wash for silk/wool blends; acrylic variants can be machine washed.
3. Crochet Striped Wool Scarf Pattern
Vibe: Classic, warm, and endlessly customizable — simple stitches let wool yarn shine.
Skill level: Beginner (stripe technique)
Yarn & tools:
- Worsted or Aran wool (or wool blend) ~400–600 yd depending on width/length. Multiple colors for stripes — each color ~80–150 yd.
- Hook: 5.0 mm (or size to match gauge).
- Notions: tapestry needle.
Sample gauge (hdc or moss): 16 stitches = 4″ in hdc (spi = 4 sts/in). Adjust with swatch.
Finished size: 8–10 in × 70 in typical.
Multiple: No strict multiple (hdc/sc rows).
Concept & construction overview
A straightforward horizontal stripe scarf worked in half-double crochet (hdc) or moss stitch (linen stitch) yields excellent warmth and shows color changes attractively. Stripes are created by swapping yarn every few rows with clean color changes and weaving or carrying floats on the backside for tapestry.
Step-by-step
Step 1 — Foundation chain
- Desired width 9 in × spi 4 = 36 stitches. Chain 36 + 2 turning ch.
Step 2 — Moss stitch (option for rich texture)
Moss stitch (linen stitch) pattern:
- Row 1: sc in 2nd ch from hook, ch1, skip 1, sc in next repeat across. Turn.
- Row 2: ch1, sc in each ch-1 space across (this nests scs into chain spaces). Turn.
This two-row repeat produces a durable fabric with subtle texture and excellent drape.
Step 3 — Stripe plan
- Decide stripe width: examples: 6 rows per stripe for bold bands, 3 rows for thinner stripes.
- Work stripe sequence: Color A 6 rows, Color B 6 rows, Color C 6 rows, etc. For clean joins, on the last yarn-over of the row, yarn over with the new color and complete the stitch so the next row begins in the new color.
Step 4 — Length
- Continue stripes until desired length reached (convert to rows: length × rpi). Example rpi 7 → length 70 × 7 = 490 rows again; remember moss stitch two-row repeat counts.
Step 5 — Edging & finishing
- Work 2–3 rounds of sc around ends for durability. At short ends, you can add fringe in each stripe color for a coordinated look. Fringe length 3–5″ is typical.
Care: Wool scarves may be hand washed or gentle machine wash if yarn is superwash; always reshape damp and dry flat.
Variations:
- Use gradient yarn for ombre effect.
- Add a cable panel down center if you want more structure (intermediate).
4. Crochet Granny Square with Fringes Scarf Pattern
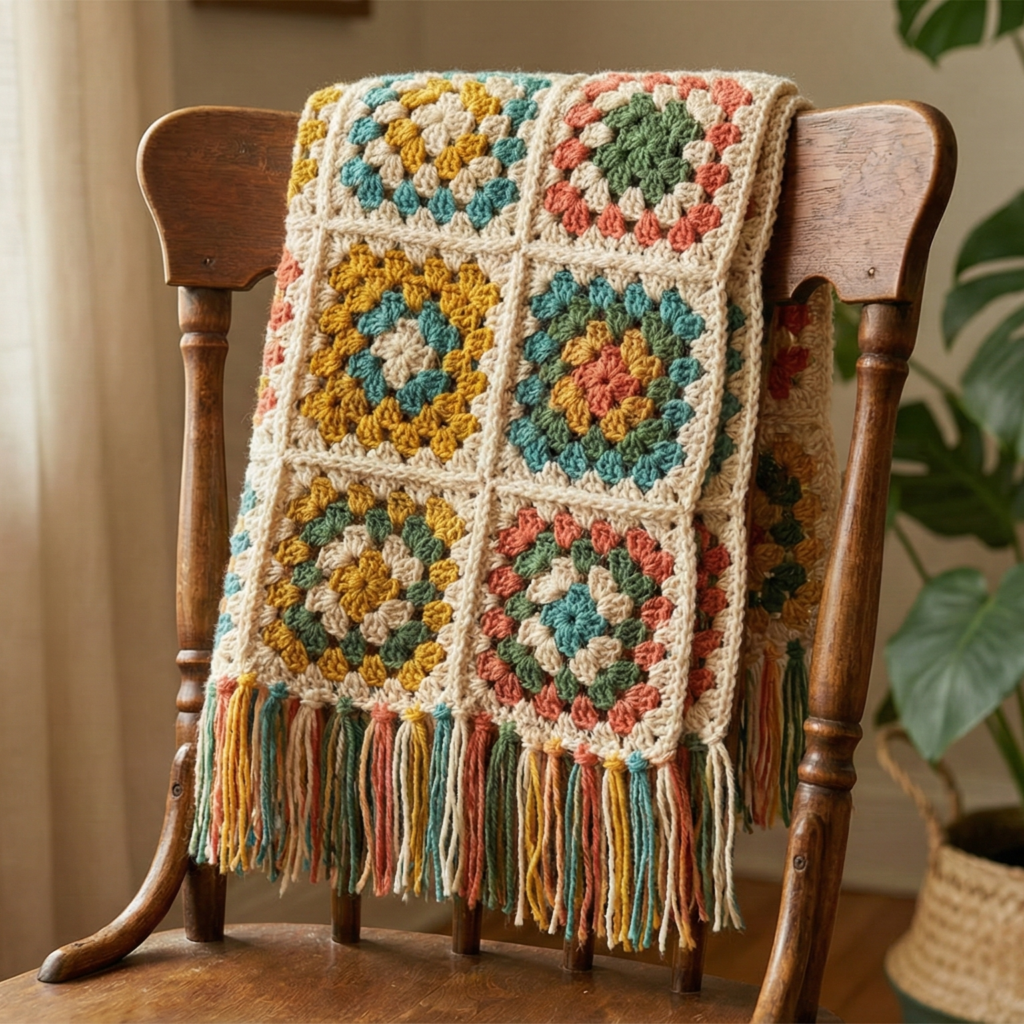
Vibe: Retro-meets-modern — granny squares joined to form a patchwork scarf, finished with playful fringe.
Skill level: Confident beginner (motif making and joining)
Yarn & tools:
- DK or worsted weight yarn in multiple colors (scrap friendly) — total yardage ~500–800 yd depending on number of motifs and scarf length.
- Hook: 4.0–5.0 mm.
- Notions: tapestry needle, blocking mats.
Finished size: Depends on number/size of squares — sample uses 5 squares across × 6 squares long of 4″ squares = width 20 in × length 24 in — join strips and add end fringe to reach typical scarf length.
Concept & construction overview
Make multiple granny squares (classic 3-row granny or layered flower granny), block squares, then join into strips and join strips to create a long scarf. Fringe and edging unify the piece. This is perfect for using scrap yarns and creating an heirloom aesthetic.
Step-by-step
Step 1 — Granny square motif (classic 3-round granny)
Classic small granny (approx 4″ with DK & 4 mm hook):
- Round 1: MR, ch3 (counts as first dc), 2 dc, ch2, 3 dc, ch2 × 3, join (4 clusters).
- Round 2: Slip into next ch2 sp, ch3, 2 dc, ch2, 3 dc into same ch2 sp; (3 dc in next ch2 sp, ch2, 3 dc in same ch2 sp) repeat to corners until square expands; join.
- Round 3: Repeat corner cluster building to enlarge to desired size.
Step 2 — Make multiple squares
- Decide number and layout. Example for a long scarf: make 30 squares (5 across × 6 down) or make 6 long strips of 5 squares each. Use a consistent border color on all squares to unify the design.
Step 3 — Block squares
- Wet block each square to get uniform size and crisp corners. Pin to template and let dry.
Step 4 — Join squares
Joining options:
- Join-as-you-go: on the final round of square B, crochet into adjacent square edges to join seamlessly.
- Whipstitch: mattress or whip stitch through back loops for flat joins.
- Slip-stitch join for decorative ridge.
Join into strips then join strips together to form scarf length. Make the scarf slightly longer than final desired length, then add fringe.
Step 5 — Edge & fringe
- Work a single crochet border around complete scarf to tidy.
- Add fringe: group 6–8 strands folded through edge every 1 inch along short ends or along long edges for boho fringe. Trim to even length.
Variations
- Use square variants: star granny, daisy granny, poppy granny for textural interest.
- Make detachable applique flowers or buttons at seam intersections for visual accents.
Care: Cotton or acrylic squares generally machine-washable; block after washing.
5. Crochet Woven Plaid Scarf Pattern
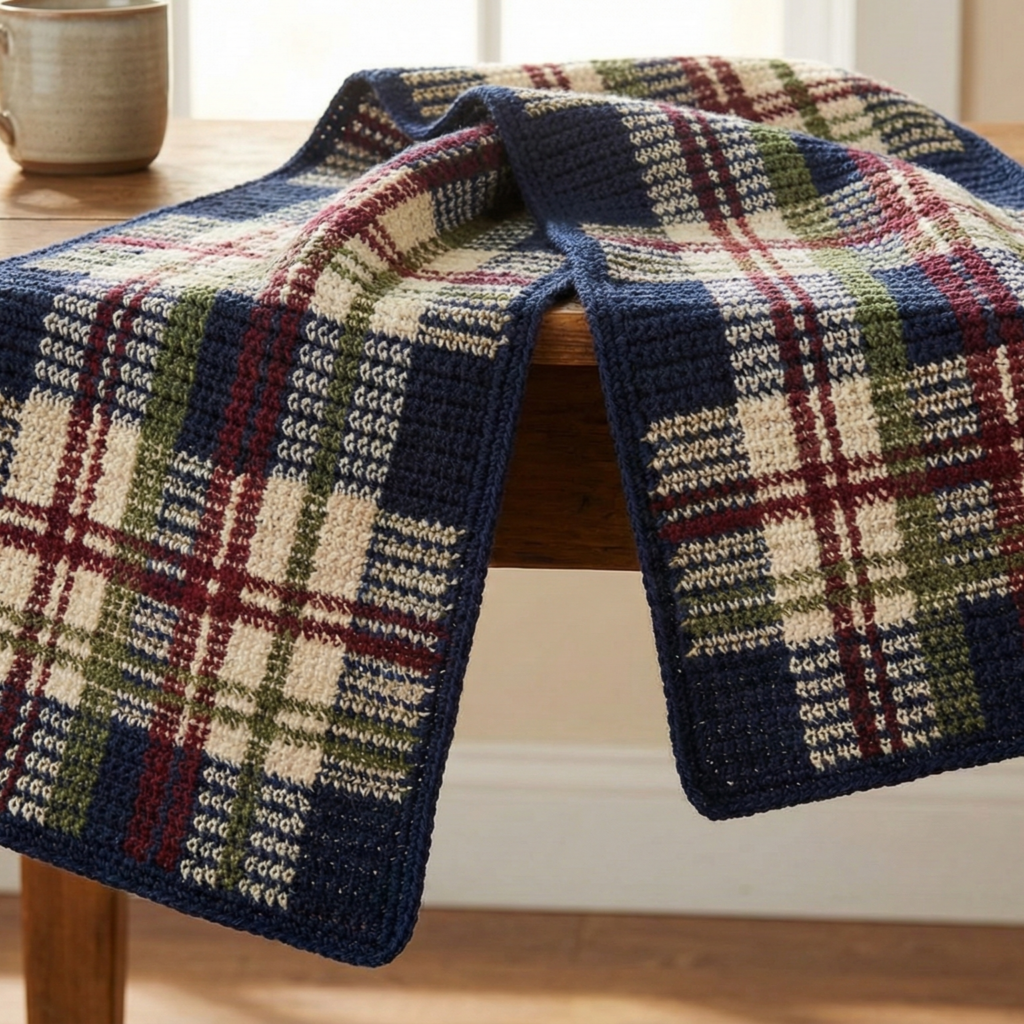
Vibe: Tailored, textile-inspired plaid using tapestry crochet or stranded colorwork for crisp color blocks.
Skill level: Advanced (tapestry crochet / color changes)
Yarn & tools:
- Smooth DK or sport yarn in 3–4 colors (~500 yd total).
- Hook: 4.0 mm (or size to match gauge).
- Notions: tapestry needle for burying floats; graph paper or charting software.
Sample gauge (tapestry sc): 18 sts × 24 rows = 4″ (spi = 4.5 sts/in). Verify.
Finished size: 10 in × 70 in classic.
Concept & approach
Woven plaid is achieved by tapestry crochet: you carry non-working colors across the back and crochet single crochet stitches in the color indicated by the chart, producing crisp geometric blocks and intersections where colors blend visually. The classic plaid layout overlays horizontal and vertical stripes of varying widths.
Step-by-step
Step 1 — Chart & swatch
- Draw plaid chart on graph paper: decide major stripe widths (e.g., 6, 4, 2 stitches wide) and crossing colors.
- Make a tapestry swatch to determine stitches per inch and to practice tension when carrying floats.
Step 2 — Foundation & setup
- Chain foundation per width calculation: e.g., width 10 in × spi 4.5 = 45 stitches + 1 turning ch.
- Work single crochet in first row in background color.
Step 3 — Tapestry technique
- On each stitch, carry the non-working color(s) behind the working stitches by holding floats along the top edge of row and crocheting over them. Avoid floats longer than 6 sts; catch long floats periodically by twisting yarns.
- Work row-by-row following chart. Change color by completing the final yarn-over with the new color so the next stitch begins in new color. Practice tends to produce cleaner edges.
Step 4 — Intersections & subtle blending
- For softened intersections, use a blended stripe where you hold two strands together (one background + one stripe color) for 1–2 rows to create a heathered crossing look characteristic of woven plaid.
Step 5 — Finishing
- Work 2–3 rounds of sc around scarf to frame edges and compress floats.
- Block flat; tapestry usually benefits from firm steaming to settle stitches.
Variations & notes
- Make classic tartan by plotting traditional grid sizes; change color dominance to alter mood.
- Use a soft wool blend for warm winter scarves; handle floats carefully to avoid stretching.
Care: Wool blends should be hand washed or gentle machine wash if yarn labeled superwash.
6. Crochet Palestinian Black and White Fair Isle Scarf Pattern
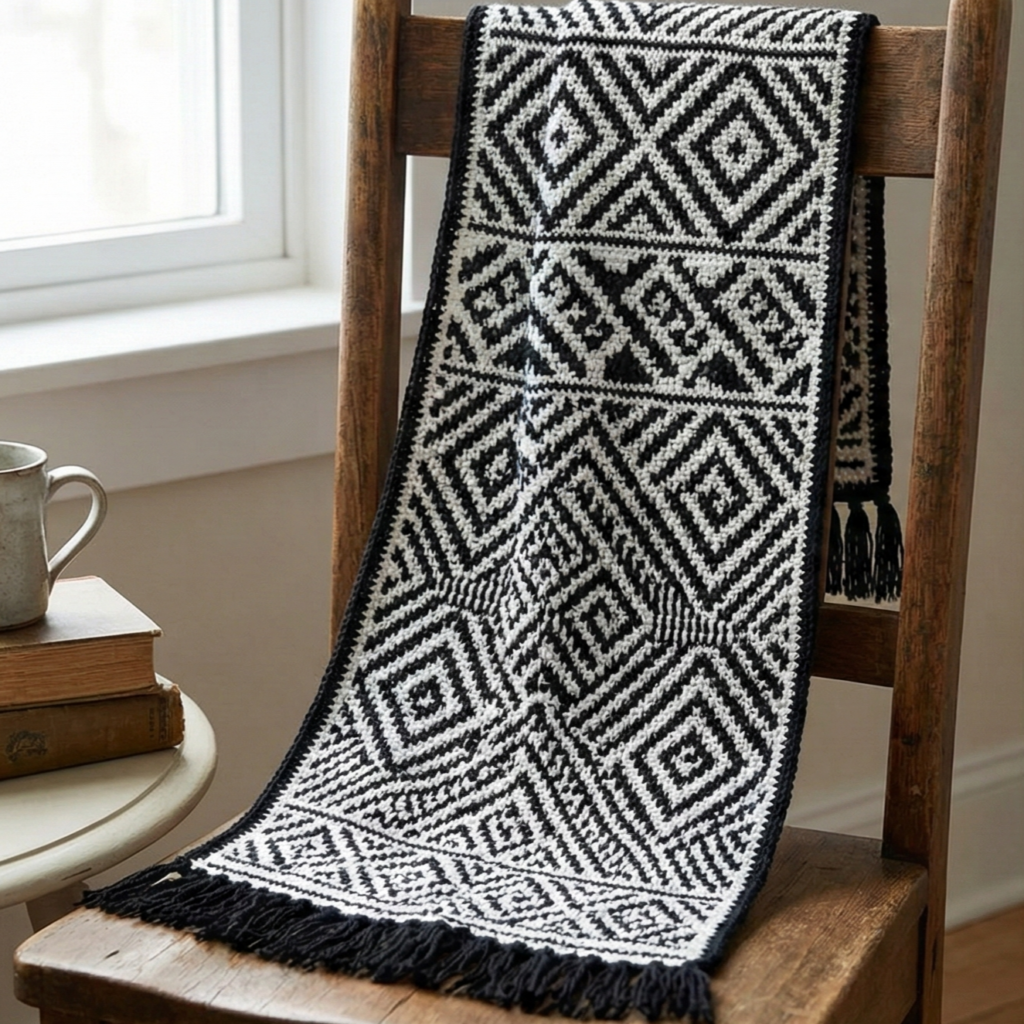
Vibe: High-contrast, graphic, and culturally inspired—fair isle (tapestry) motifing in black & white for a striking scarf.
Skill level: Advanced (tapestry crochet / stranded colorwork skill required)
Yarn & tools:
- High-contrast smooth DK or worsted yarn in black & white — approx 400–600 yd.
- Hook: 4.0–5.0 mm (gauge per tapestry).
- Notions: graph/chart, tapestry needle, blocking pins.
Finished size: 10 in × 68–72 in typical.
Design & technique notes
This scarf borrows from Palestinian-inspired geometric motifs (repeated diamonds, stepped motifs and hatching). Traditionally these motifs appear in embroidery and textiles — here they’re rendered using tapestry crochet (single crochet colorwork), producing a reversible-looking motif on the front with carried floats on the back.
Step-by-step
Step 1 — Chart creation & swatch
- Create or source a geometric black/white chart (repeatable bands, diamonds, stepped forms). Decide motif repeat width in stitches (common repeats 8–16 sts).
- Make a 4″ tapestry swatch to find spi. Example spi = 4.5 sts/in → for 10″ width you need 45 sts foundation.
Step 2 — Foundation & setup
- Chain 46 (45 + 1 turning). Row 1: sc in background color across.
Step 3 — Tapestry crochet execution
- Work across the chart row by row. Because only two colors are used, floats are straightforward to manage — keep tension even and catch floats every 6–8 sts if needed.
- For high contrast, avoid twisting carryovers too tightly to prevent puckering. Use a small hook if necessary to keep fabric dense.
Step 4 — Border & edges
- After completing motif height, add a narrow border of black or white sc around entire scarf for crisp framing.
- Optional: add short black tassels at both ends for a classic finish—2–3″ long for a neat, modern look.
Step 5 — Blocking & final shaping
- Tapestry crochet benefits from firm blocking: wet lightly and pin to desired rectangle; dry fully.
Ethical & cultural note
The motifs referenced are inspired by traditional Palestinian textile patterns, which carry cultural significance. If you explicitly reference or sell designs inspired by cultural motifs, consider attribution and respectful presentation. If you use motifs directly lifted from traditional patterns, acknowledge the source or adapt motifs with original modifications.
Care: Hand wash for wool; acrylic easier care.
Conclusion
Each of these six scarf patterns — Cinnamon Roll Spiral, Margot, Striped Wool, Granny Square, Woven Plaid, and Palestinian Black & White Fair Isle — gives you a different way to approach texture, color, and technique. Use the sizing & gauge primer at the top to scale any pattern to the width and length you want. For best results:
- Always swatch in the stitch you’ll use and block the swatch the same way you’ll finish the scarf.
- Keep a yarn-and-care note with each finished scarf (fiber content, washing instructions) when gifting.
- For tapestry/fair isle techniques, practice color carrying on a small sample so your tension is consistent.
- When using traditional or culturally inspired motifs, be mindful and respectful of origins: attribute inspiration where appropriate.