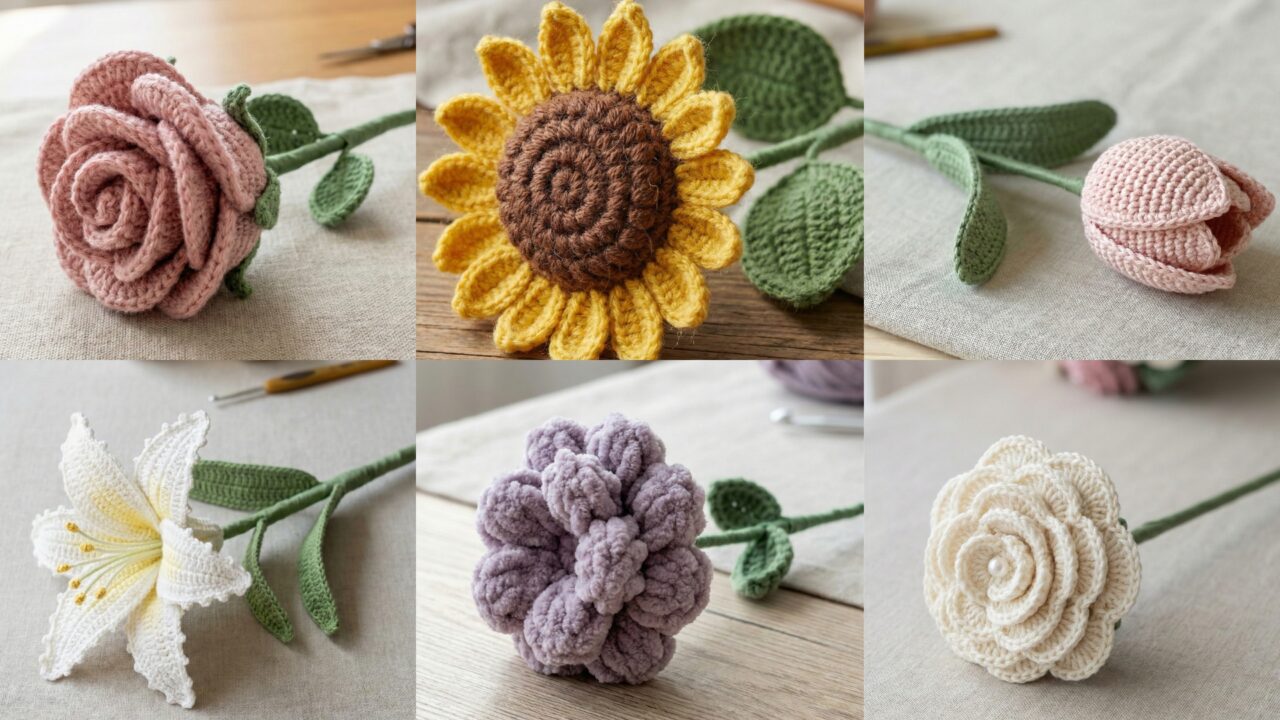
Handmade crochet flowers give you forever-blooms that never wilt — perfect for bouquets, hairpieces, boutonnieres, or little gifts. Below you’ll find a friendly introduction (materials, stem method, tools, sizing, care), then six complete flower patterns with detailed, step-by-step instructions and clear assembly notes so every bloom has a sturdy stem and looks bouquet-ready. I wrote each pattern so you can follow it exactly, customize colors, and arrange the flowers into a romantic bouquet.
Quick Intro — yarn, tools, stems, sizing & care (everything you need)
Yarn & fiber choice
- Cotton (sport/DK) — crisp petals, holds shape, washable. Great for most flowers.
- Acrylic / acrylic blends — soft, durable, and easier for very textured puff flowers.
- Plush/velvet — luxurious petals (best for display-only bouquets; hand-wash).
Pick the fiber based on how the bouquet will be used (everyday handling vs display).
Hooks & notions
- Hooks: 2.5–4.0 mm typically (smaller hook gives tighter detail; larger hook gives softer drape).
- Floral wire: 18–26 gauge depending on stem flexibility needed (18–20 for strong stems, 22–26 for small stems).
- Floral tape (green) or green yarn to cover stems.
- Tapestry needle, small pliers/wire cutters, stuffing (polyfill) for puff centers, small beads/pearls (optional), hot glue (optional, for very secure parts).
- Optional: florist stem pins, green floral tape, florist tape adhesive.
Stem basics — two reliable methods
- Wire + wrap (recommended)
- Insert a length of floral wire (cut to desired stem length) through a small stem pipe or wrap yarn at base of flower to create a secure anchor, then wrap the wire with floral tape (sticky side) or green yarn to form a natural-looking stem. Floral tape stretches and adheres as you wrap — pull gently while winding for best adhesion.
- Yarn-wrapped dowel
- For a kid-safe or very-sturdy stem, wrap a wooden skewer or bamboo dowel with green yarn and secure ends with glue and stitches. This is less flexible than wire but very sturdy for display.
Sizing guide (sample)
- Finished bloom diameter: 1.5–4 in depending on pattern and yarn.
- Stem length: 8–14 in typical for bouquet stems (adjust to vase).
- For a balanced bouquet make stems similar lengths or prepare a few longer stems for focal flowers (roses/sunflowers).
Gauge & scaling
Small crochet flowers don’t require strict gauge, but if you want uniform bouquets, make a sample and measure petal size. Use a smaller hook for tighter petals (smaller bloom) or larger hook for bigger blooms.
Care
- Cotton & acrylic: machine wash gentle in mesh bag, reshape and air dry.
- Velvet / plush: spot clean or hand wash, air dry.
- Avoid placing near open flames or very hot surfaces (synthetic fibers can melt).
1. Crochet Rose Flower Pattern
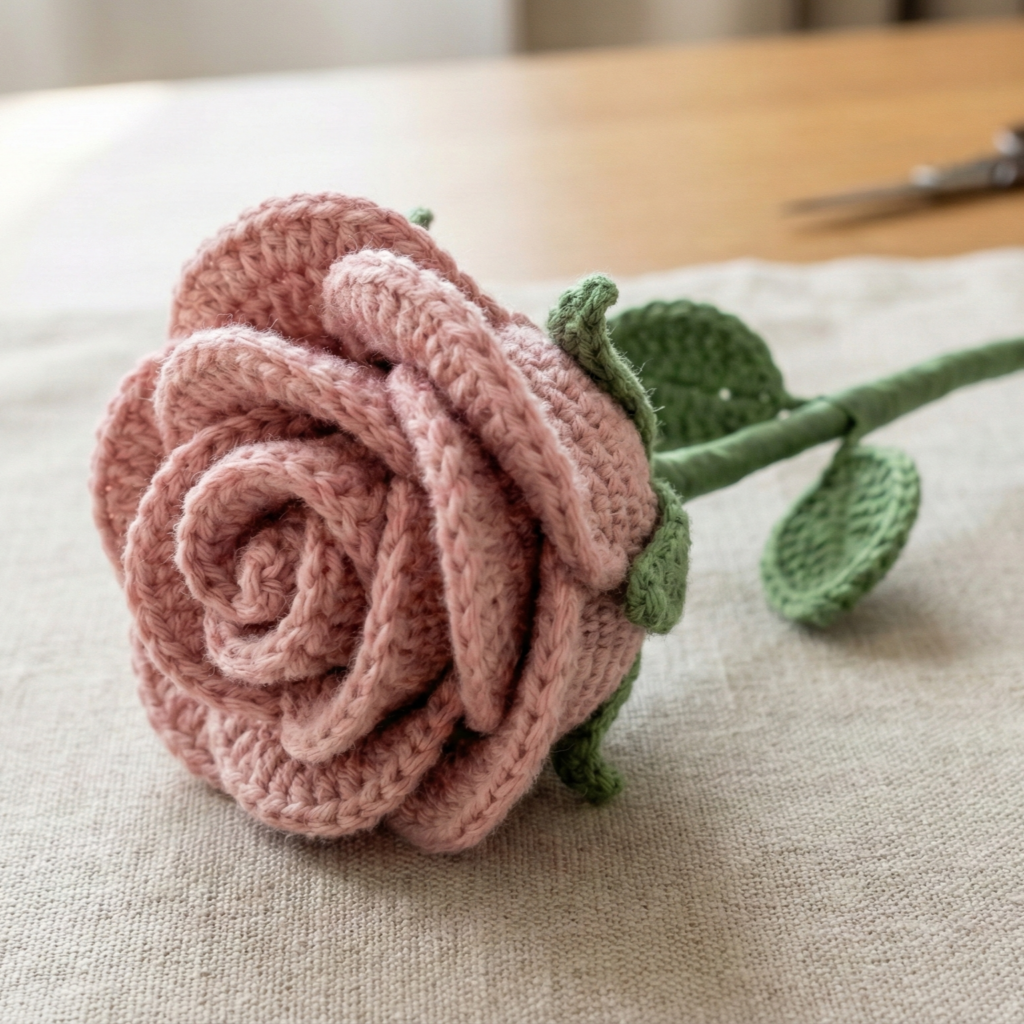
Classic layered rose with wrapped wire stem — works beautifully in bouquets and single-stem displays.
Skill level: intermediate
Materials (per rose)
- DK cotton for petals (approx. 10–20 yd) and green for calyx/leaves
- Hook: 3.0–3.5 mm
- Floral wire (20–22 gauge), floral tape, small bit of polyfill for center (optional)
- Tapestry needle, scissors
Finished example
- Bloom diameter: 2–3 in (depending on rounds)
- Stem length: 10–12 in
Stitches / abbreviations (US)
MR, ch, sc, hdc, dc, tr, sl st, inc (2 sc in st), dec (sc2tog)
Construction overview
Make a long spiral strip of petals, roll and sew into a rose, add a small calyx (green cup) and wrap a floral-wired stem.
Step-by-step
- Spiral petal strip (foundation)
- Chain 60 (adjust to desired fullness; more chains = larger rose).
- Row 1: dc in 4th ch from hook and across (this creates a long dc strip). Turn.
- Row 2: sc across to tidy edge (optional). Fasten off leaving long tail for sewing.
- Form the central bud
- Make a small cone: MR, 6 sc in ring, pull tight, inc around to 12, then 1–2 rounds sc. Lightly stuff center with polyfill if you like a firmer bud. This becomes the core to wrap around.
- Roll the strip into a rose
- Starting at one end of the strip, roll tightly around the bud for a small center, then gradually loosen and stitch the base as you roll to hold layers in place. Use the long tail to sew through the base of the spiral to secure. Keep the stitches hidden along the underside.
- Make the calyx (green cup)
- MR, ch1, 6 sc in ring; R2: ch3, sl st in next st around to make 6 small loops. R3: in each loop work (sc, hdc, dc, hdc, sc) to create small green pointed sepals. Fasten off leaving tail.
- Attach flower to wire stem
- Cut a length of floral wire (~12 in). Bend a small loop at one end (use pliers) and wrap a little yarn or hot glue to create a small base bump (this prevents petals sliding). Thread wire into calyx base and sew calyx to the rose base through the center, catching wire inside as you stitch for security.
- Wrap stem
- Wrap floral tape over bare wire, stretching slightly as you go so it adheres; overlap slightly and spiral down to cover the entire wire. Make the tape come up into the calyx slightly to hide the join.
- Add leaves (optional)
- Crochet small leaves (ch 8; sc, hdc, dc, hdc, sc) and attach by wrapping their bases around the stem and covering with floral tape.
Finishing
- Adjust petals by gently opening and shaping; steam-blocking is optional for cotton roses to smooth petals.
Variations
- Work more waves in the petal strip (dc clusters or shells) for ruffled roses.
- Make miniature roses by chaining 30.
2. Crochet Puffy Flower Pattern

A soft, voluminous puff flower that’s fluffy and romantic — great as filler blooms in bouquets.
Skill level: confident beginner → intermediate
Materials (per bloom)
- Bulky acrylic or chenille for puffy effect (approx. 15–25 yd)
- Hook: 5.0–6.5 mm (use label guidance for bulky)
- Floral wire (18–22 gauge), floral tape or yarn to wrap
- Tapestry needle, stuffing (small)
Finished example
- Bloom diameter: 2–3.5 in, very plush
- Stem length: 8–12 in
Stitches
MR, puff stitch, sc, sl st
Construction overview
Work a circle of puff-stitch petals (or make separate puff petals and sew together) around a wired center, then wrap the stem.
Step-by-step
- Center loop / base
- MR, ch1, 6 sc in MR; join. Make a small disk as the base.
- Puff petal rounds (single-round petals)
- Round 1: Join bulky yarn in base. Ch1, (puff st) in next st, ch1, sl st in next repeat around for 6–8 puff petals. Puff stitch: yo, insert, yo pull up loop — repeat 3–4 times (so you have 4–5 loops), yo and pull through all loops, ch1 to close.
- Second petal round
- In between the puff stitches of R1 work additional puff stitches (placement helps full bloom). Make Rounds 2–3 with slightly larger puffs to fan out petals.
- Secure to wired stem
- Insert floral wire through the base disk; secure with several whipstitches through base while wrapping a tad of glue if needed. Cover wire with floral tape or with matching yarn, spiraling down.
- Optional stuffing & backing
- Sew a small fabric or felt circle to the bloom underside and stitch through to secure the wire and hide ends. This also protects petals from being damaged by wire.
Finishing & shaping
- Fluff puffs open and shape gently. If the yarn sheds, brush lightly.
Variations
- Make small clusters of puffy flowers on one stem by wiring several together.
- Mix colors for variegated puff bouquets.
3. Crochet Tulip Flower Pattern
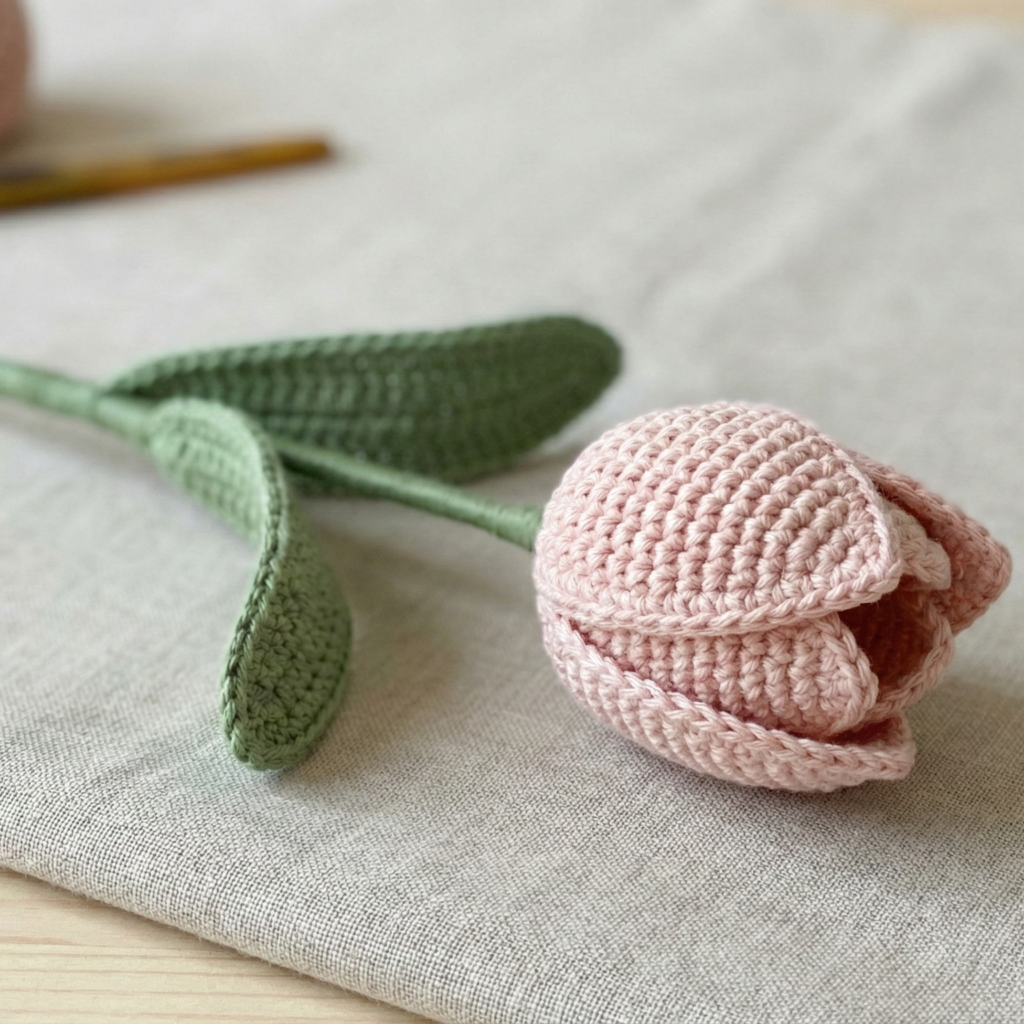
Structured tulip with a cup-shaped bloom and slim stem—sleek and perfect for minimalist bouquets.
Skill level: confident beginner
Materials (per tulip)
- DK cotton for bloom, green for leaves and stem
- Hook: 3.0–3.5 mm
- Floral wire 20–24 gauge (for slender stem) or thin dowel, floral tape
- Tapestry needle
Finished example
- Bloom: 1.5–2.5 in tall (cup)
- Stem: 10–14 in
Stitches
MR, sc, hdc, dc, sl st, inc, dec
Construction overview
Work a 3D cup made from rounds; create 3–4 overlapping petals, attach to wire, then add two elongated leaves.
Step-by-step
- Cup / base
- MR; R1: 6 sc in ring. R2: inc around → 12. R3: sc1, inc around → 18. R4–R6: sc around to build vertical height (3–4 rounds depending on desired cup depth).
- Petal shaping (make 3–4 petals)
- For each petal: join yarn at even intervals around top of cup and work ch2, (dc, hdc, sc, hdc, dc) in same space, sl st to base to shape a pointed petal. Alternate petals around the cup and overlap slightly while sewing their bases together so the cup closes like a tulip.
- Fill & close
- Add a tiny dab of fiberfill at the bottom if you want the cup to have a rounded inner base (optional). Stitch petal bases securely to cup base.
- Stem & leaves
- Insert floral wire into the bottom center. Wrap with floral tape to stabilize. Crochet two leaves: ch 12, sc back along chain shaping with hdc/dc to form pointed leaf. Wrap each leaf base onto the wire and adhere with floral tape, spiraling tape to hide joins.
- Finishing
- Tweak petals to form a smooth cup; use a tiny dab of glue inside if petals want to splay.
Variations
- Make elongated closed tulips by adding more rounds before petal shaping.
- Add gradient color by using variegated yarn.
4. Crochet Lily Flower Pattern
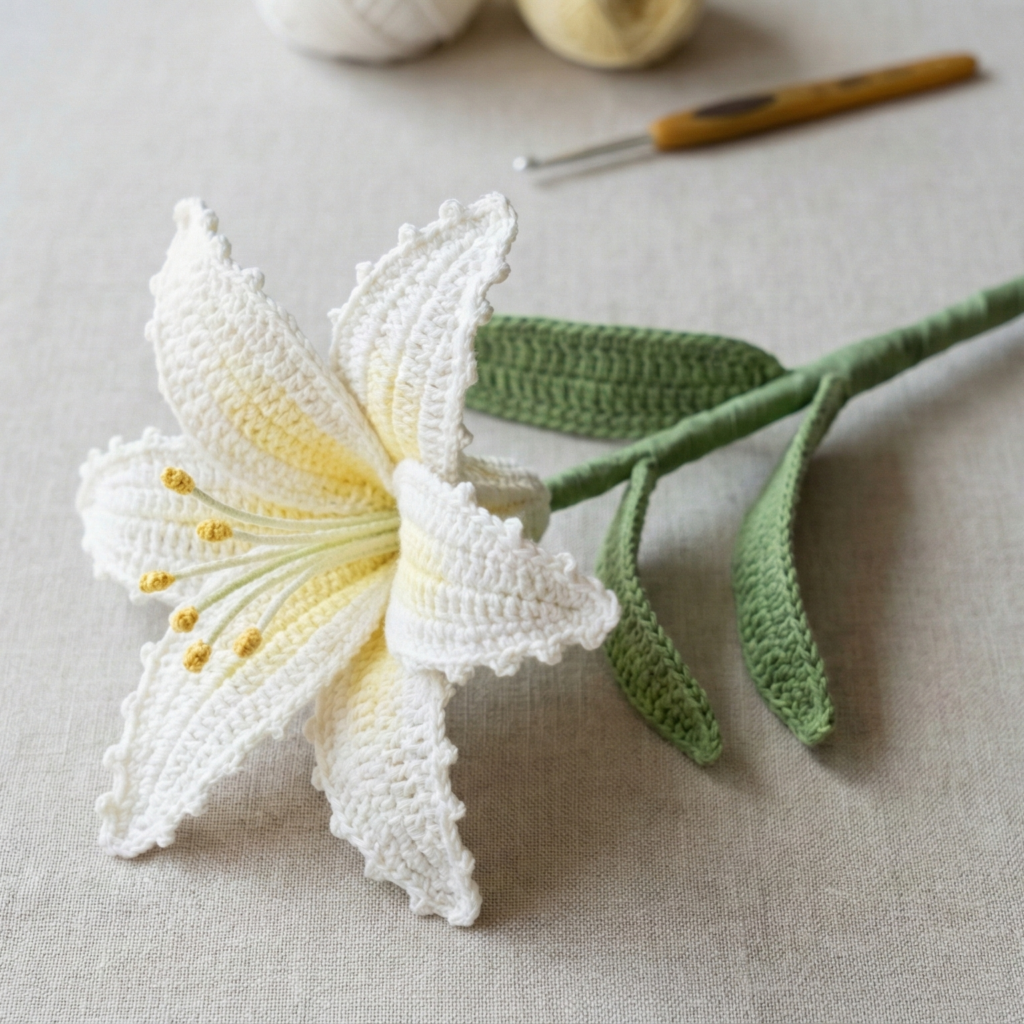
Elegant trumpet-style lily with flared petals and a long supportive stem — dramatic focal flower.
Skill level: intermediate
Materials (per lily)
- DK or sport cotton for petals, green for calyx and leaves
- Hook: 3.0–3.5 mm
- Floral wire (18–20 gauge), floral tape, small bead for stamen tip (optional)
- Tapestry needle, small amount of stuffing
Finished example
- Bloom diameter: 3–4 in (wide, flared)
- Stem: 10–14 in
Stitches
MR, sc, hdc, dc, tr, picot, sl st, increase/decrease
Construction overview
Make 6 elongated triangular petals worked flat then joined at base around a wired center; add stamens and leaves; wrap stem.
Step-by-step
- Make one petal (repeat 6)
- Ch 12. Row 1: sc in 2nd ch and across (11). Row 2: ch2, turn, hdc across. Row 3–8: Continue increasing 1 stitch at one end each row to create a tapered triangular petal (do inc at the tip side). For example: Row N: ch2, sc to last 2 sts, inc, turn. Work until petal height ~3–4 in. Add scroll edge: in final round work picots along outer edge to simulate ruffled lily petals.
- Stamens
- Make 6 stamens with thin wire: crochet a tiny tassel or tube (ch 6, sc back), slip a small bead on the tip, attach to a short wire and secure.
- Join petals to form trumpet
- Gather petal bases in a circle and sew tightly together around a short central tube (or small felt cup). Stitch through the base several times so petals form a flared trumpet.
- Attach stamens & stem
- Insert stamens into center and anchor with glue or a few stitches. Insert a thicker floral wire through the base, secure with tape, then wrap the wire in floral tape downwards.
- Leaves
- Crochet 2–3 long leaves and wrap their bases around the stem, securing with tape.
- Finishing & shaping
- Gently bend petals outward to taste; steam-block lightly if using cotton.
Variations
- Make Asiatic lilies with spotted embroidery on petals (tiny French knots).
- Create trumpet calla-versions by shaping a single large petal into a funnel.
5. Crochet Chanel Rose Pattern
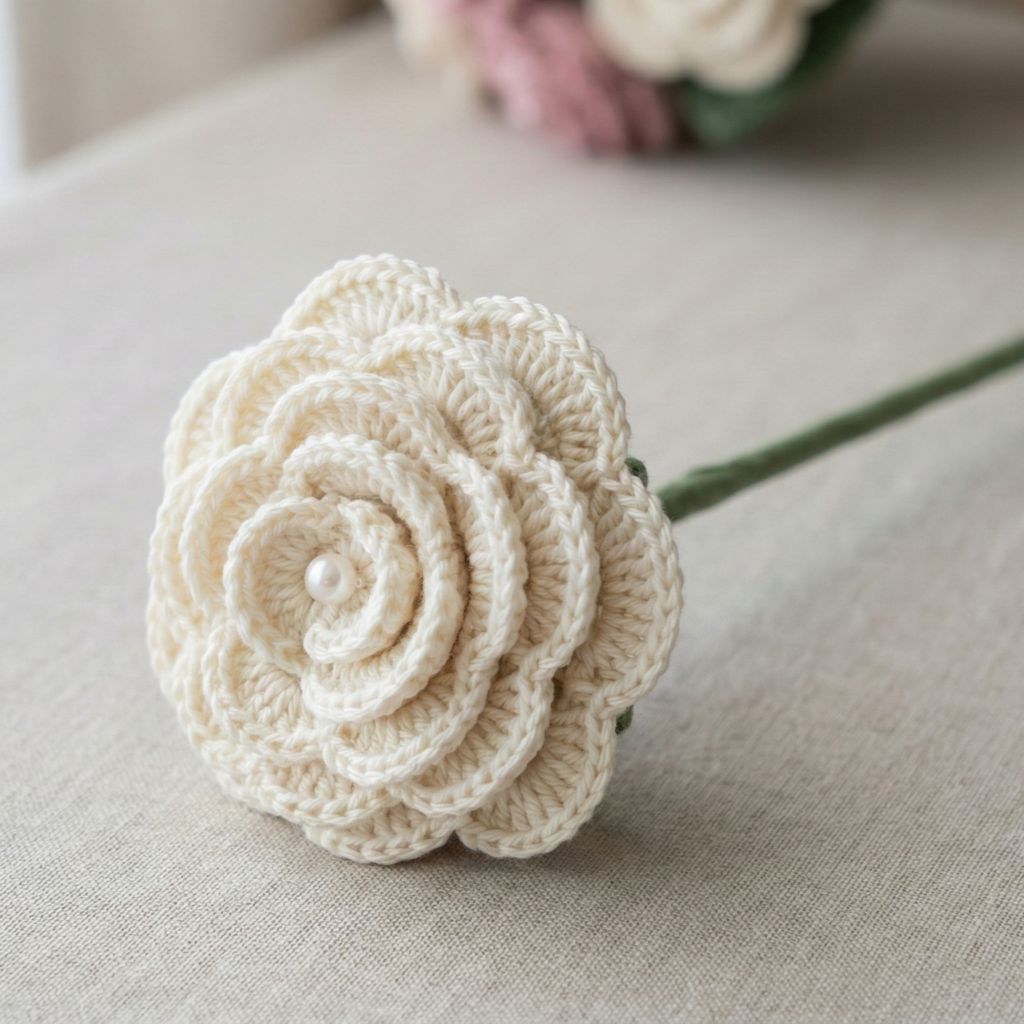
A stylized, fashion-inspired rosette reminiscent of couture Chanel roses — layered, elegant, and perfect for a romantic bouquet.
Skill level: intermediate
Materials (per rosette)
- Fine DK or sport cotton for tight, elegant petals (small amount)
- Hook: 2.5–3.0 mm
- Floral wire 20–22 gauge, floral tape, optional tiny pearl bead in center
- Tapestry needle
Finished example
- Bloom: 1.5–2.5 in diameter (elegant small rosette)
- Stem: 8–12 in
Construction overview
Make concentric petal rounds (small to large), shape edges for couture look, attach to wired stem, and wrap.
Step-by-step
- Small concentric petals
- Round 1: MR, ch1, 6 sc.
- Round 2: ch3, (3 dc) in same st, ch3, sl st in next — create tiny loops around center.
- Round 3: In loops work (sc, hdc, 3 dc, hdc, sc) to make first row of petals. Continue 1–2 more rounds of petal shells to create a layered rosette look.
- Second layer (ruffle)
- Make a separate narrow ruffle strip: ch 30; Row: 2 dc in each ch across to create ruffles; roll and attach around the rosette base for a more dimensional couture look.
- Assemble & attach stem
- Sew ruffle to rosette base, insert floral wire through base, and anchor by stitching through ruffle base and rosette center. Wrap floral tape over wire.
- Optional pearl
- Sew a tiny pearl to the center of the rosette for a signature chic touch.
Finishing
- Make multiple Chanel roses clustered with greenery for a couture bridal bouquet.
6. Crochet Sunflower Pattern

Bright, bold sunflower with textured seed head and sturdy stem — ideal focal flowers for sunny bouquets.
Skill level: intermediate
Materials (per sunflower)
- Yellow for petals, brown for center, green for calyx/leaves
- Hook: 3.5–4.0 mm
- Floral wire (18 gauge for strong stem), floral tape, polyfill for seed-head texture (optional)
- Tapestry needle
Finished example
- Bloom diameter: 3–5 in (sunflower size depends on petal rounds)
- Stem: 12–14 in (sunflowers look great long-stemmed)
Stitches
MR, sc, hdc, dc, puff/bobble stitch for seed texture, sl st, ch
Construction overview
Work a textured seed center (bobble or puff stitches), surround with layered petal rounds, add a green calyx, and wire a sturdy stem.
Step-by-step
- Seed center (textured)
- MR, ch1, 8 sc in ring — R1. R2: inc around → 16. R3–R5: work bobble/puff stitch rounds in brown to create dense seed texture: in each st make a small bobble (e.g., 3–5 dc puff) around. Optionally stuff lightly to round. Fasten off and set aside.
- Create petals (make ~16–20)
- Petal pattern: ch 10; Row: sc in 2nd ch, hdc, dc, tr, dc, hdc, sc — tapering to a point. Fasten off. Make 16–20 petals depending on desired fullness.
- Assemble petals around the center
- Join yellow to the edge of seed disk and sew or sl st petals evenly around, overlapping slightly to create full sunflower appearance. For more fullness add a second petal round behind the first.
- Calyx & stem
- MR, ch1, 6 sc in MR in green — small cup. Add 4–5 small pointed sepals by working (sc, hdc, dc, hdc, sc) into each loop. Attach a thick floral wire through the calyx base, stitch calyx to underside of seed disk, and wrap stem in floral tape.
- Leaves & finishing
- Crochet large leaves and secure to stem with tape. Optionally lightly brush petals for softer look or add brown embroidery to seed center for spotted effect.
Variations
- Make mini sunflowers by reducing petal count and using thinner yarn.
- Create a tall statement bouquet by wiring 3–5 large sunflowers together.
Bouquet assembly & styling tips
- Balance focal and filler: Use roses, lilies, or sunflowers as focal flowers and puff/tulip as fillers. Vary bloom sizes and stem lengths for a natural look.
- Color palette: Romantic bouquets work well in blush + cream + soft green. For bold contrast choose sunflowers with deep brown centers.
- Stem wrapping: Bundle stems and wrap with twine or satin ribbon. Secure with pins or hidden floral tape. For a finished look, glue or stitch a ribbon wrap and hide tape underneath.
- Vase display: For wired stems, use a narrow-neck vase or floral frog to hold stems in place. For wrapped dowel stems, a corked container works well.
conclusion
You now have six full crochet flower patterns—each designed to include a sturdy stem so the blooms are bouquet-ready: the Rose, Puffy Flower, Tulip, Lily, Chanel Rose, and Sunflower. These patterns cover a range of textures and styles (classic, plush, structured, dramatic, couture, and sunny), and they’re easy to customize for color, size, and bouquet composition.