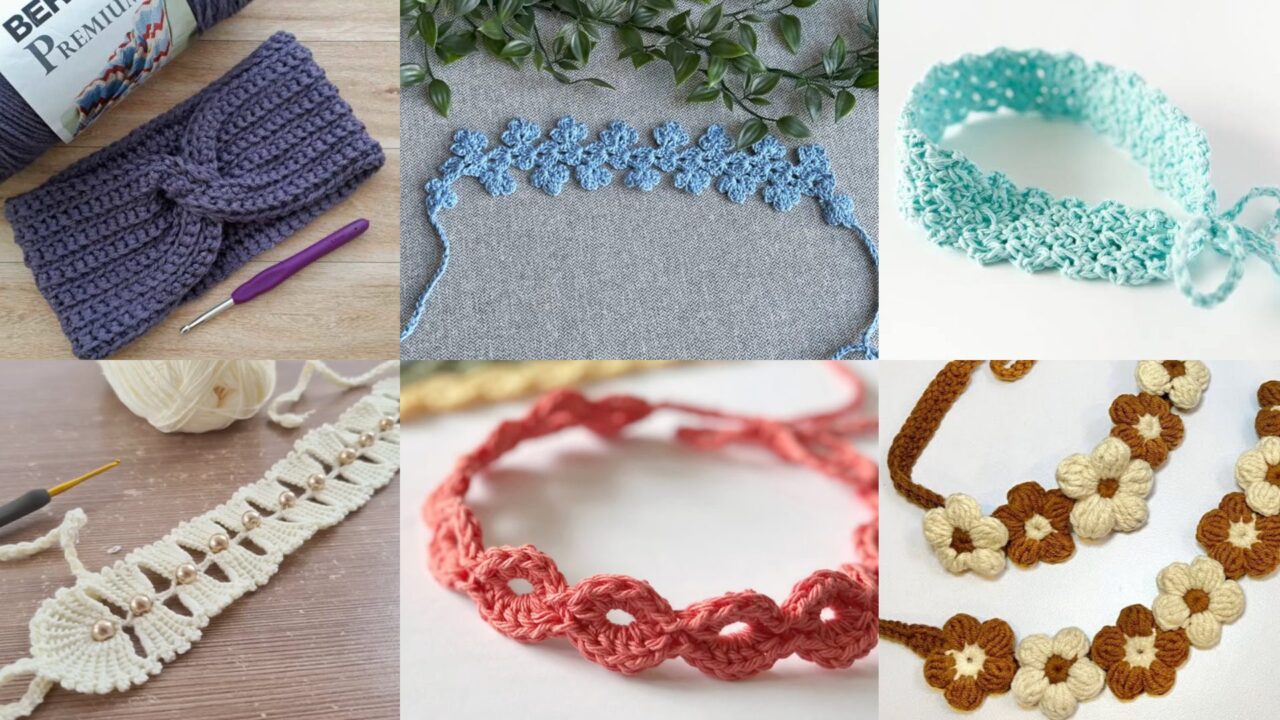
Need a thoughtful handmade gift but short on time? A crochet headband checks all the boxes: quick to make, useful, and style-flexible. Use this guide to pick a pattern that suits your recipient—delicate lace for a spring bride, daisy trims for a little one, or a chunky, cozy band for someone who lives where it’s chilly. Each pattern is designed to be approachable for makers with basic crochet knowledge and highly adaptable: change yarn weight and hook size to speed up or slow down the project and to tailor fit and look.
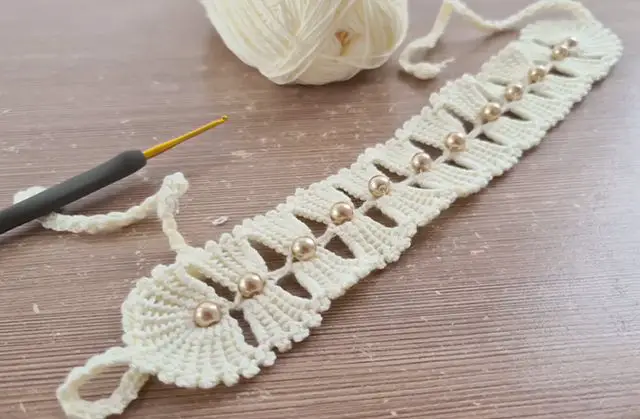
1. Crochet Lace Headband Pattern
Skill level: Beginner–Intermediate (basic lace stitches)
Materials
- Fingering or sport-weight cotton or blend, ~25–40 g
- Crochet hook 2.5–3.5 mm (match yarn)
- Tapestry needle, measuring tape, small elastic or thread for closure (optional)
Finished size (typical adult): ~4–5″ wide (10–12 cm) and 18–20″ circumference (46–51 cm). Adjust chain length for smaller/larger heads.
What you’ll make
A delicate openwork headband with a lacy motif—light, comfortable, and elegant.
Step-by-step (lace band)
- Foundation chain: Ch 36 (or a multiple of 6 + 4) for roughly 18″ circumference; join carefully without twisting to form a loop and place a marker at the join.
- Round 1 (base): Ch 3 (counts as dc), sk 2 ch, (dc, ch 1, dc) in next ch, sk 2 ch, dc in next ch; rep to end; join with sl st to top of ch-3.
- Round 2 (shells): Sl st to first ch-1 space, ch 3, work (2 dc, ch 2, 3 dc) in that ch-1 space (shell), sk next shell, dc in center dc of next shell, sk shell, shell in next ch-1; rep around; join.
- Round 3 (stabilizer): Work one round of sc across each dc and ch-space to stabilize the lace and increase comfort. Join.
- Repeat: Work Rounds 2–3 for 3–5 shell rounds total (or until desired width). Finish with one round of sc. Fasten off and weave in ends.
Finishing
- Sew ends together for a permanent loop, or leave a small gap and secure an elastic strip inside for stretch.
- If you want a continuous loop without a seam, chain to the exact head circumference, join and work in the round—same lace repeats apply.
Tips
- Add a narrow satin ribbon sewn inside at the seam for comfort.
- Mercerized cotton gives a pretty sheen; blends add durability.
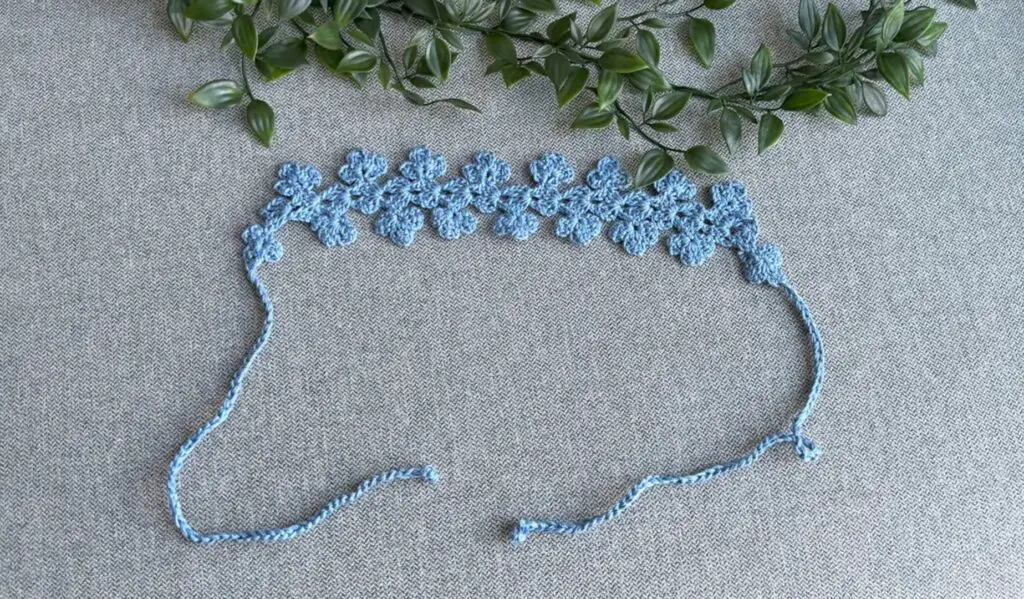
2. Crochet Floral Headband Tutorial
Skill level: Beginner (motifs + assembly)
Materials
- DK or light worsted yarn, ~30–50 g
- Hook 3.5–4.0 mm
- Small buttons or beads for flower centers, tapestry needle, scissors
Finished size (typical adult): Band width 1.5–2.5″, circumference 18–20″ adjustable.
What you’ll make
A sturdy band decorated with small crochet flowers—sweet and endlessly customizable.
Step-by-step
Band
- Foundation: Ch 40 (or measure to desired circumference minus seam). Row 1: hdc in 2nd ch from hook and across; turn. Repeat until band is ~1.5″ wide. Join short ends with sl st to make a loop (or leave open for closure).
- Optional ribbing: Work last row BLO for a little stretch and texture.
Flowers (make 6–10 depending on spacing)
3. Center ring: Ch 4, sl st to form ring. Round 1: ch 1, 8 sc into ring; join. Round 2: ch 3, sl st in next sc around to make 8 loops. Round 3 (petals): Into each ch-3 loop work (sc, hdc, 2 dc, hdc, sc). Fasten off and weave tails. Sew a small button or bead in the center.
Assemble
4. Arrange flowers across the band in a cluster or evenly spaced and sew them securely to the band at several points for durability.
Finishing
- Weave in all ends; consider a soft felt lining on the inside for extra comfort.
- For a gift, tuck a small care card: gentle hand wash recommended for embellished pieces.
Tips
- Use bright colors for a playful look or tonal shades for something more refined.
- For baby sizes reduce chain by 4–6 stitches and make fewer flowers.
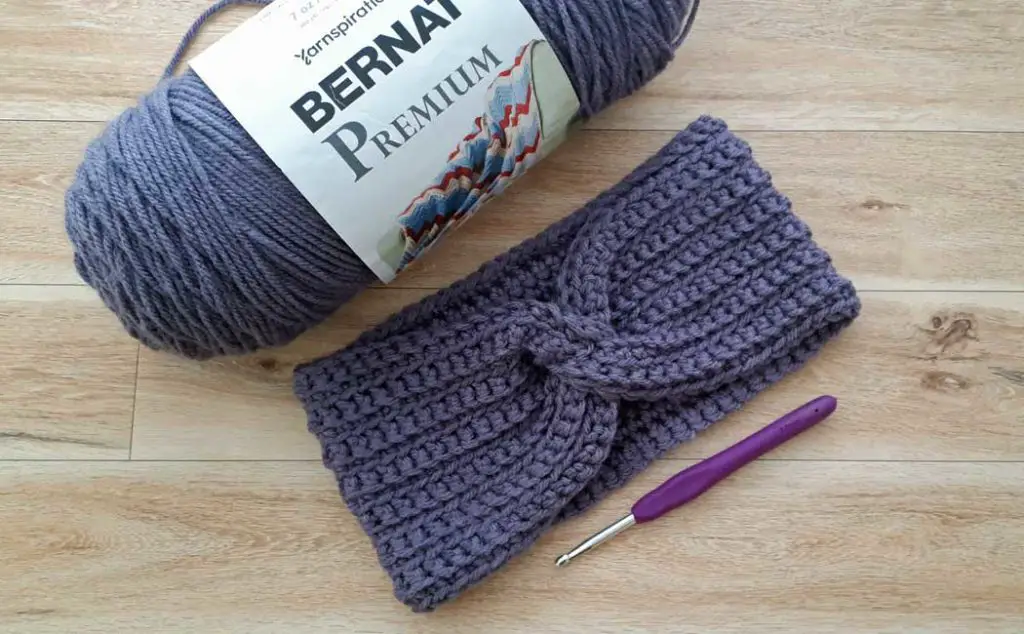
3. Easy Crochet Headband Pattern
Skill level: Beginner (basic single-stitch construction)
Materials
- Bulky (5) or worsted (4) yarn, ~40–60 g
- Hook 6.0 mm (bulky) or 5.0 mm (worsted)
- Yarn needle, measuring tape
Finished size: ~2–3″ wide; 18–21″ circumference (adjust chain).
What you’ll make
A super-fast, cozy headband made using simple stitches—perfect for winter and last-minute gifts.
Step-by-step
- Chain to circumference: Ch enough to reach ~18–20″ around head (or make a strip and seam). For bulky yarn you may only need 40–45 ch for circumference—measure as you go. Join without twisting.
- Work body: Ch 1, sc in each ch around; join. Repeat sc rounds until band measures 2–3″ in depth (or desired width).
- Finish: Fasten off and seam ends with mattress stitch for a flat join, or twist one end 180° before seaming for a turban style.
Finishing options
- Top knot: Create a faux knot by folding and tacking before final seaming.
- No-sew: Use a decorative brooch to cover the join if you don’t want to sew.
Tips
- Bulky yarn + large hook = very quick (20–30 minutes).
- Knit-style look: alternate BLO and FLO rows for subtle ribbing.
4. Crochet Daisy Headband Tutorial

Skill level: Beginner–Intermediate (simple motif repeat)
Materials
- Sport or DK yarn (main + center color), ~25–40 g total
- Hook 3.5–4.0 mm
- Small beads/buttons for centers, tapestry needle
Finished size: Band width 1–1.5″; circumference 18–20″.
What you’ll make
A playful headband adorned with small daisy motifs—light, cheery, and perfect for warm weather gifts.
Step-by-step
Band
- Foundation: Ch 36 (or measure to fit), join for a loop. Work 2 rows of hdc around (or make a longer strip and seam) until the band is the desired width.
Daisies (make 8–12)
2. Center ring: Ch 4, sl st to form ring. Round 1: ch 1, 8 sc into ring; join. Round 2: ch 3, sl st in next sc around to make 8 loops. Round 3: Into each loop work (sc, hdc, 2 dc, hdc, sc). Finish and sew a small yellow bead or embroider a french knot into the center.
Attach daisies
3. Arrange daisies along band and sew firmly at several points so they sit flat and won’t flip.
Finishing
- Weave ends and trim; optionally line the interior with soft ribbon or felt.
- For a continuous garland look, stitch daisies edge to edge.
Tips
- Use cotton for crisp petals; slightly smaller hook produces neater petals.
- Vary daisy size for a handcrafted, organic look.
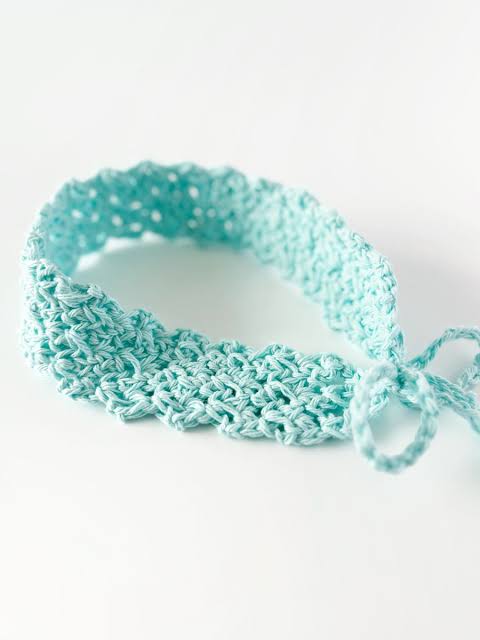
5. Whispering Lace Summer Headband Crochet Pattern
Skill level: Intermediate (delicate lace + finishing)
Materials
- Fingering or lace-weight cotton or bamboo blend, ~20–30 g
- Hook 2.0–2.75 mm
- Tapestry needle, blocking pins, optional narrow ribbon for lining
Finished size: Narrow lace band ~1″ high; circumference 18–20″.
What you’ll make
An airy, whisper-light lace headband ideal for hot weather or elegant occasions.
Step-by-step (delicate looped lace)
- Foundation chain: Ch 72 (or long enough to fit head minus seam). Join in the round carefully (no twist).
- Lace row 1: Ch 1, sc in next ch, ch 3, sk 2 ch, sc in next ch — rep around; join.
- Row 2 (mini shells): Work into ch-3 loops: sc, hdc, 3 dc, hdc, sc (mini shell in each loop); join.
- Row 3 (edge): Work a neat finishing row: sc around, then sc, ch 3, sl st in base to create tiny scallops; join.
- Optional: Repeat the shell round once more for slightly wider lace.
Finishing
- Block gently pinned to set scallops and lace.
- Sew a narrow ribbon to the inner edge for comfort if scallops are prominent.
Tips
- Bamboo yarn gives a beautiful drape and sheen.
- Light colors show lace detail best; dark colors can hide delicate stitches.
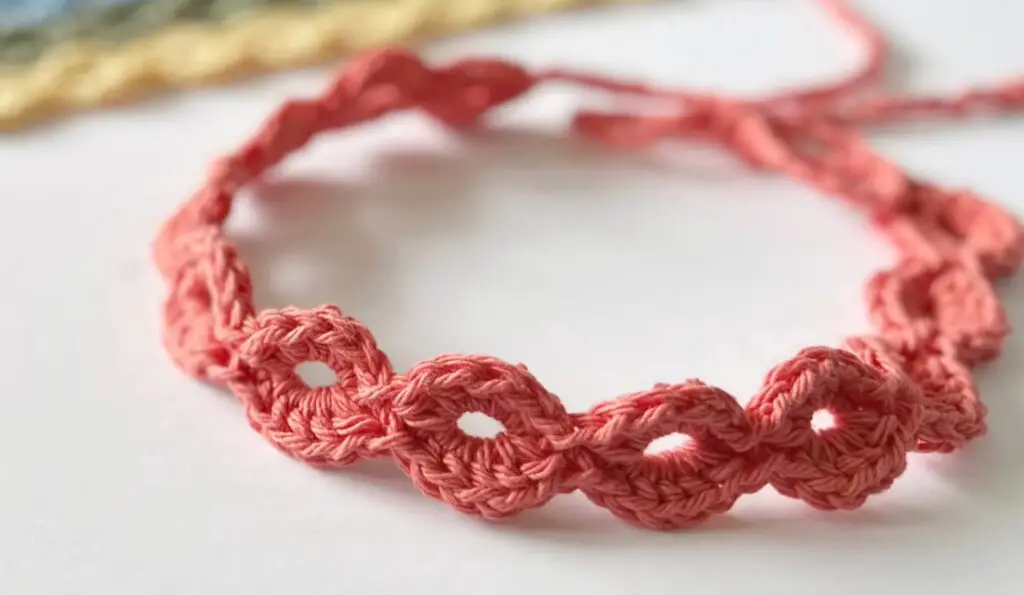
6. Summer Breeze Crochet Hair Band Tutorial
Skill level: Beginner (openwork + quick assembly)
Materials
- Sport or DK cotton, ~30–50 g
- Hook 3.5–4.0 mm
- Tapestry needle, optional elastic insert for sporty fit
Finished size: 1.5–2.5″ wide; circumference 18–20″.
What you’ll make
A relaxed openwork headband with breathable stitch pattern—perfect for beach days or quick, casual gifts.
Step-by-step
- Chain to circumference: Ch to desired head circumference (e.g., ch 60), join tightly to form a loop.
- Openwork round: Ch 2, dc in next st, ch 2, sk 2 — rep around; join. This creates airy V-mesh.
- Stabilizer round: Ch 1, sc into each st and ch-space around; join. Repeat the openwork + stabilizer 3–4 times until desired width.
- Optional elastic: Leave a 2″ gap and weave a narrow elastic through a couple sc rows, knotting and stitching ends to secure—close the gap.
Finishing
- Fasten off and seam with mattress stitch or invisible join for a clean finish.
- Add a small shell charm or wooden bead where the seam sits for a beachy accent.
Tips
- Cotton/linen blends give a lovely texture for summer.
- For a boho twist, add tiny tassels or a removable charm.
Final Finishing & Gift-Ready Notes
- Sizing: Adult circumference typically 18–20″ (46–51 cm). For kids subtract 2–4″. Measure if unsure.
- Seams & closures: Envelope loops are fast and comfy. For adjustable gifts, add small elastic loops, buttons, or ribbon ties. Zippers aren’t needed for headbands.
- Blocking: Lightly block lace and flower motifs for best appearance—pin to shape and spray or steam gently.
- Care: Cotton or blends—hand wash and lay flat. Acrylic—gentle machine wash acceptable; reshape while damp. Embellishments (beads/buttons) require gentle care.
- Presentation: Fold into tissue and box with a small care card. A little bow or a gift tag with size info makes it personal.
- Personalization: Add initial charms, color combos matching wardrobe, or a small sewn inner lining for comfort.
Conclusion
These six quick and cute headband patterns give you a fast, flexible toolkit for making thoughtful last-minute gifts. From airy lace for warm days to chunky cozy bands for chilly mornings, playful daisies for spring, and durable everyday styles, there’s something here for every recipient and every season. Pick the pattern that matches the recipient’s style and the yarn you have on hand—you can complete a polished, wearable gift in an evening. Check fit, finish seams neatly, and include a short care note; your handmade headband will be worn and loved long after the last stitch.