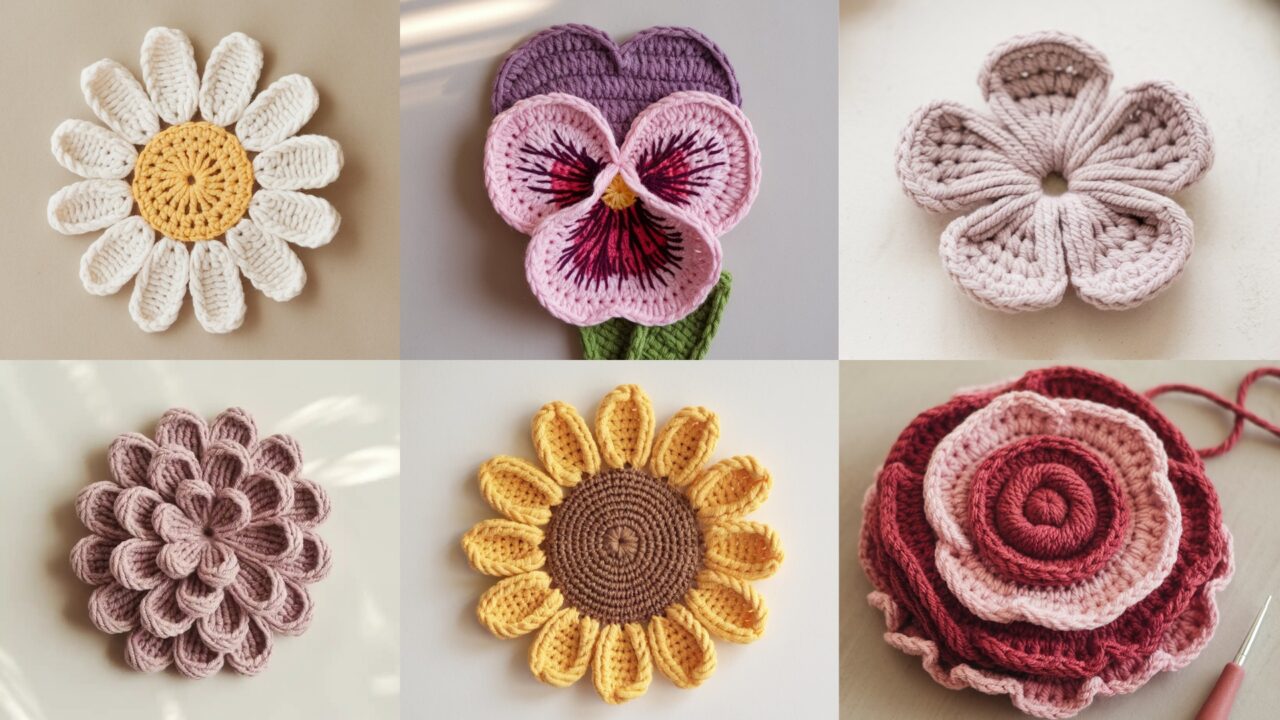
You want quick, pretty crochet flowers that actually look like flowers and can be slapped onto a gift, headband, tote, or last-minute clutch-project without turning into a sad yarn blob. Good. Below are six reliable, fully usable flower appliqué patterns — layered rose, sunflower, daisy, simple flower, dahlia, and pansy — each with materials, skill level, finished sizes, exact step-by-step rounds/rows, finishing, attachment ideas, and variations. Practical, no fluff. Swatch only if you care about exact size; otherwise grab the hook and make something that will make a person smile.
Quick common notes (read this — it saves you time)
- Yarn & hook used in these samples: worsted weight (category 4) cotton or cotton-blend for structure; 3.5–4.0 mm hook gives flowers about 1.5–2.5″ (4–6 cm) depending on the pattern. Use thinner yarn + smaller hook for tiny appliqués; use bulky yarn + larger hook for chunky brooches. I’ll note when a change is recommended.
- Finished sizes: I’ll give approximate finished diameters for a 4.0 mm hook with worsted yarn. Your tension and yarn will change sizes.
- Abbreviations: MR = magic ring; ch = chain; sc = single crochet; hdc = half-double crochet; dc = double crochet; tr = treble (UK = tr is UK dc — I’m using US terms throughout); sl st = slip stitch; sk = skip; st(s) = stitch(es); rep = repeat; FLO/BLO = front/back loop only.
- Assembly & security: For appliqués that will be handled a lot (pinned to bags, worn on hats), sew through the central layers and tack down petals lightly so they don’t flap off after one wash.
- Attachment options: whip-stitch to fabric, sew into seams, glue onto hair clips (use fabric glue and hot-glue sparingly), sew onto buttons for decorative gift closures, or add a small safety-pin backed brooch plate.
- Care: Cotton appliqués tolerate machine washing on gentle, but if you used delicate yarns, hand wash cold and reshape while damp. Remove glued attachments before laundering if possible.
1. Crochet Layered Rose Applique Pattern
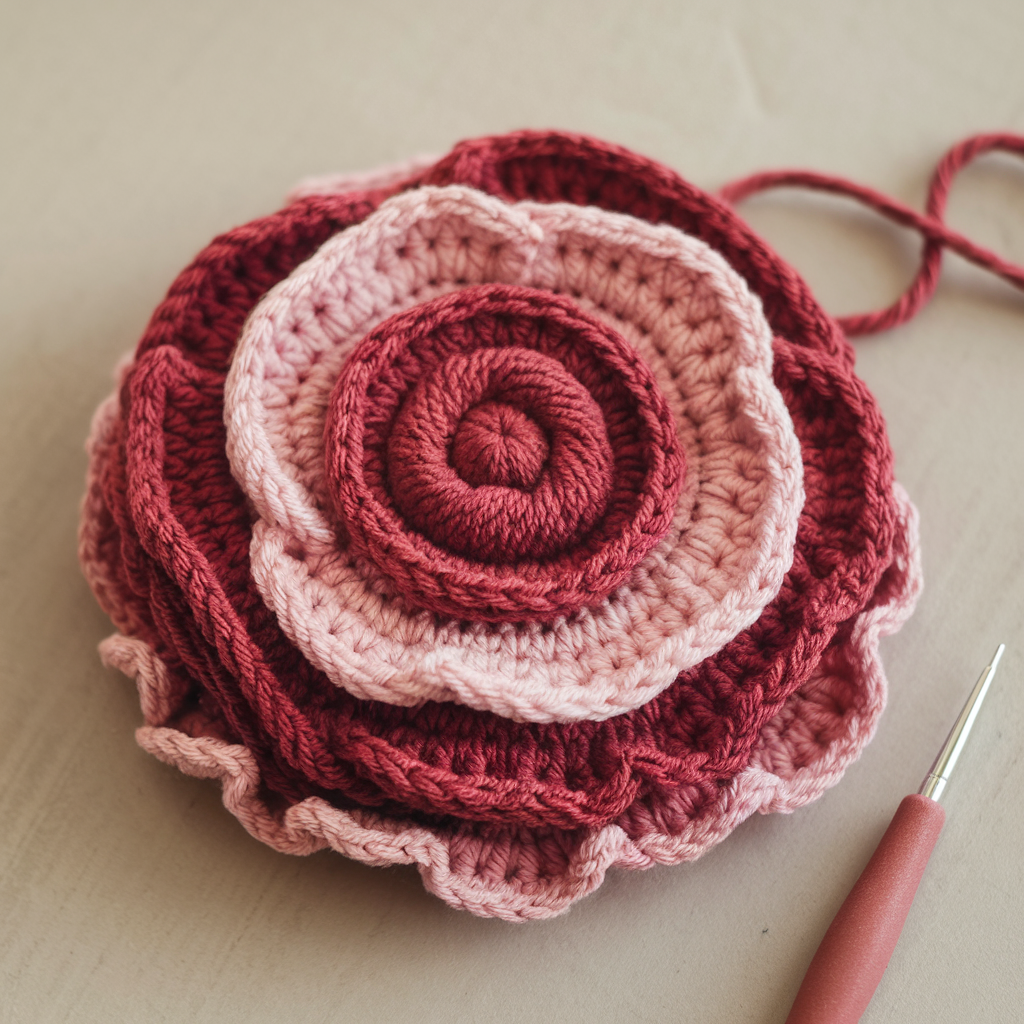
A classic rose built from spiraled petals — looks fancy but takes ten minutes once you get the rhythm.
Skill level: Confident Beginner
Materials: small amount of worsted cotton (main color), 3.5–4.0 mm hook, tapestry needle.
Finished size: small — ~1.5″ (3.8 cm); medium (use sport yarn or larger hook to change size).
Stitches used: sc, hdc, dc, tr, sl st, MR.
Step-by-step (spiral rose)
- MR; ch 2 (counts as first hdc).
- R1 — Base spiral: work 10 hdc into MR; pull ring tight but keep loop open. Don’t join; work in a spiral. (10)
- R2 — Start petal shaping: ch 2, skip 1 st, dc in next st around the spiral, placing about 8–9 dc total spaced evenly. This forms tiny petal bases.
- Continue in a spiral: after the dc round, start your decorative petal repeats along the long edge: (sl st, ch 2, 3 dc, ch 2, sl st) in each dc space along the long strip — this creates the first outer petal ruffle. If you want more dramatic petals, use (tr, 3 dc, tr) instead.
- As you work petals, simply roll the entire strip into a spiral (the base spiral + petal edge will curl naturally). Stitch the bottom of the spiral with small whip stitches every 3–4 mm to lock the rose. Use the long tail from the center to sew through base tightly so the rose holds shape.
- Weave in ends; tack a couple of stitches through the center from the back to the first few petal layers so petals don’t unroll.
Tips & variations
- For a layered rose (bigger, lush): make two spirals (one smaller for inner rose, one larger for outer petals) and sew the small one on top of the larger, then whip-stitch centers together.
- Use a slightly fuzzy yarn for a romantic Victorian look. Don’t use slippery yarns unless you plan to sew the center thoroughly.
How to attach to gifts
Sew the rose to a small fabric tag or glue to a pre-tied ribbon before wrapping. For reusability, sew a small button to the back and loop the ribbon around the button.
2. Crochet Sunflower Applique Pattern
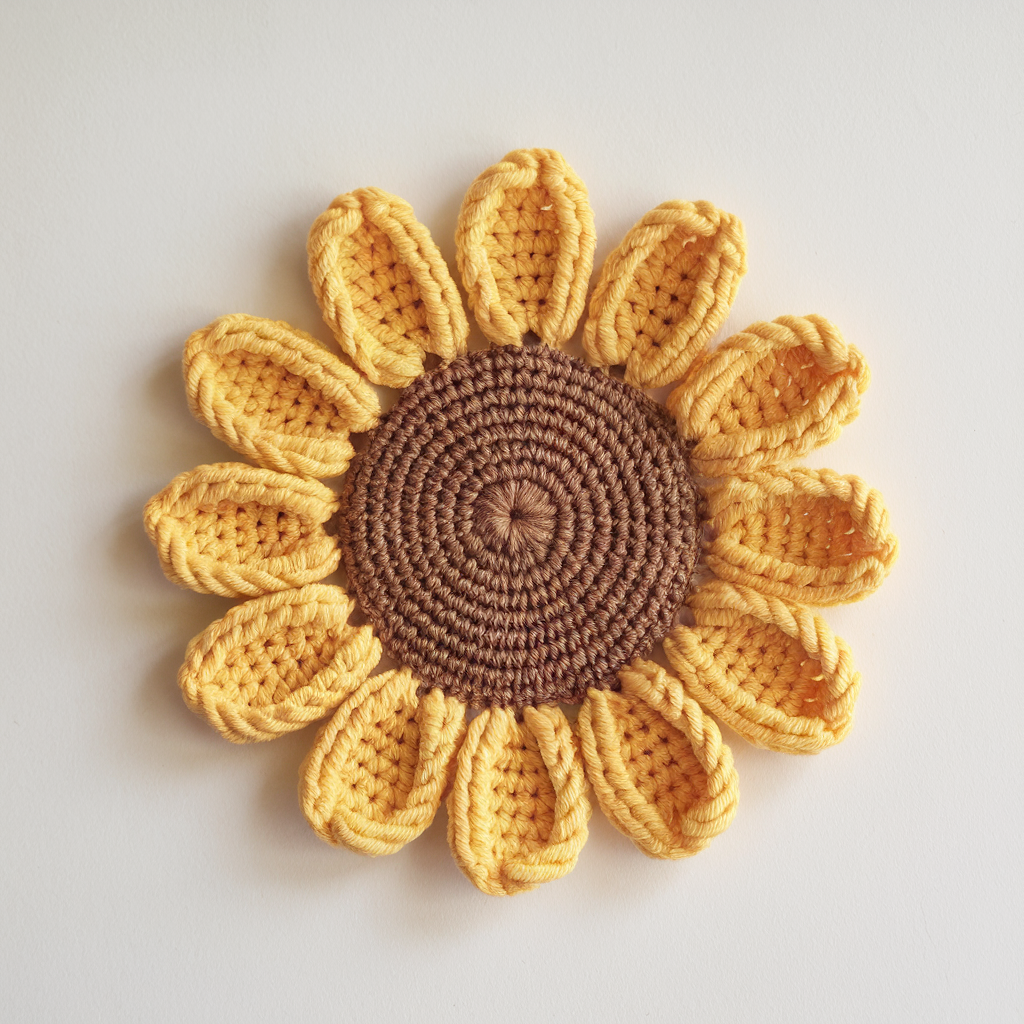
Bold, bright, and fast — structured center and simple petals; great for kids’ gifts and summer vibes.
Skill level: Beginner → Confident Beginner
Materials: worsted cotton in brown (center) and yellow (petals); 3.5–4.0 mm hook; tapestry needle.
Finished size: ~2.0–2.5″ (5–6.5 cm) diameter.
Step-by-step
Center (button-like base)
- MR; R1: ch1, 6 sc into MR; pull tight. (6)
- R2: inc around (12).
- R3: sc, inc around (18). Fasten off brown leaving tail to sew.
Petals (worked onto center)
4. Join yellow to any st on center. Ch 2, (2 dc, ch 2, 2 dc) in same st (creates a big petal cluster), sl st in next st. Repeat around for 9–12 petals depending on spacing. For a compact sunflower use 12 petals (work into every st around).
5. Option: add a second row of petals between first row petals by joining in the gap and working slightly smaller petals (ch 2, 3 dc, ch 2, sl st). This gives fullness.
6. Weave ends; sew a few connecting stitches under petals to anchor.
Tips
- For a realistic touch, slightly steam-block petals downwards to sit like a sunflower.
- Add tiny French knots in center using embroidery floss for texture if you like.
Attachment & use
Sew to a denim tote for an instant summer accent. For sturdier decorative magnets, glue a round craft magnet to a felt backing sewn to the back of the sunflower.
3. Crochet Daisy Flower Applique Pattern
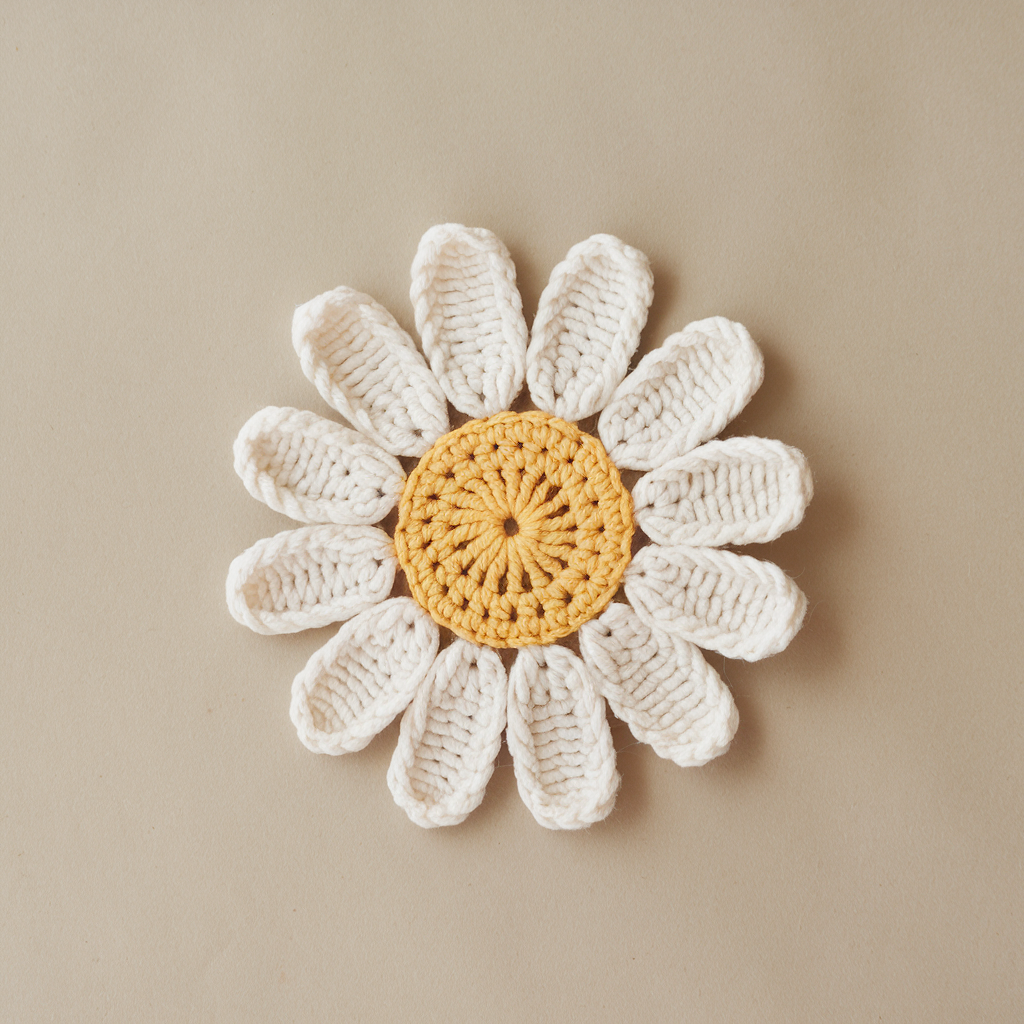
Clean, cheery, and the fastest of the bunch. Makes a perfect cluster on gift wrap or a headband.
Skill level: Beginner
Materials: white (petals) & yellow (center) worsted cotton; 3.5 mm hook.
Finished size: ~1.5–2″ (4–5 cm) diameter.
Step-by-step
- Center: MR; ch 1, 6 sc in MR; pull tight — or make 8 sc for larger center. (6 or 8) Fasten off, change to white.
- Petals: Join white to any st on center; ch 4, sl st in same st (makes a loop), sl st into next center st — repeat around to create 6–8 looped petals.
- Or for definition: ch 2, 3 dc, ch 2, sl st in same st around for fuller petals (6–8 petals).
- Weave in tails. Flatten on a blocking mat and pin petal loops slightly outward if using loop petals.
Tips & variations
- Make a cluster of 3 daisies in graduated sizes for a quick bouquet.
- Add a small bead in center for sparkle if using as jewelry embellishment.
Attachment
Sew daisies directly onto fabric or glue onto gift tags. For brooches, attach a small brooch pin plate with sturdy stitches and a dab of craft glue.
4. Crochet Simple Flower Applique Pattern
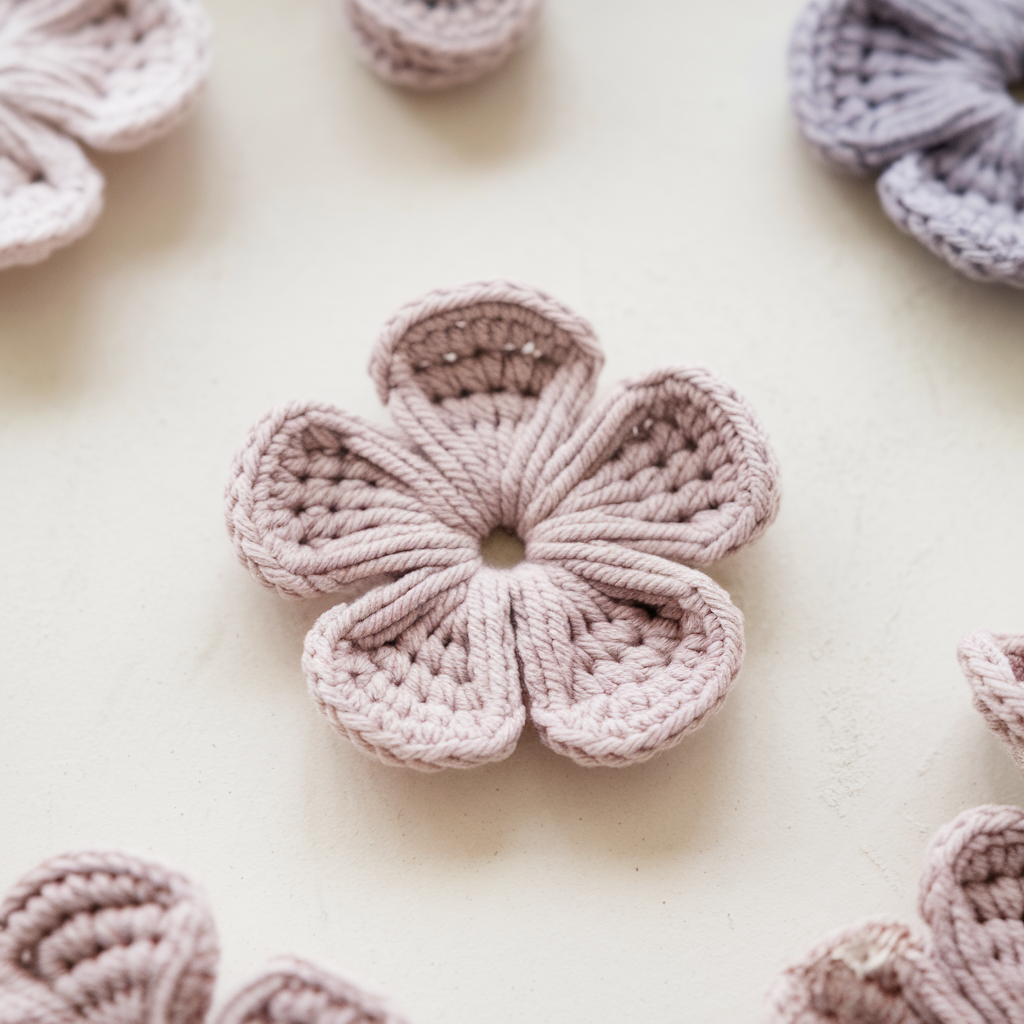
Minimalist, flat, and extremely fast — great when you need dozens for party favors.
Skill level: Beginner
Materials: any scrap cotton; 3.5 mm hook.
Finished size: ~1.25–1.75″ (3–4.5 cm).
Step-by-step (flat puffless)
- MR; R1: ch1, 8 sc into MR, pull tight (8).
- R2: ch 2, skip next st, sl st into next st repeat around to create 4 small loops (for 4 petal version). Or do ch 2, sl st in same st around for 8 tiny petals.
- For defined petals: join in each ch-2 loop and work (sc, hdc, dc, hdc, sc) into each loop; sl st to join. Fasten off and weave ends.
Tips
- Works well in teeny scraps; make two different colors and stitch centers to create contrast.
- For a stiffer appliqué, use a cotton thread or small hook.
Attachment
Glue the underside to ribbon with hot glue (for gift wrap only); for anything washable, sew.
5. Crochet Dahlia Flower Applique Pattern
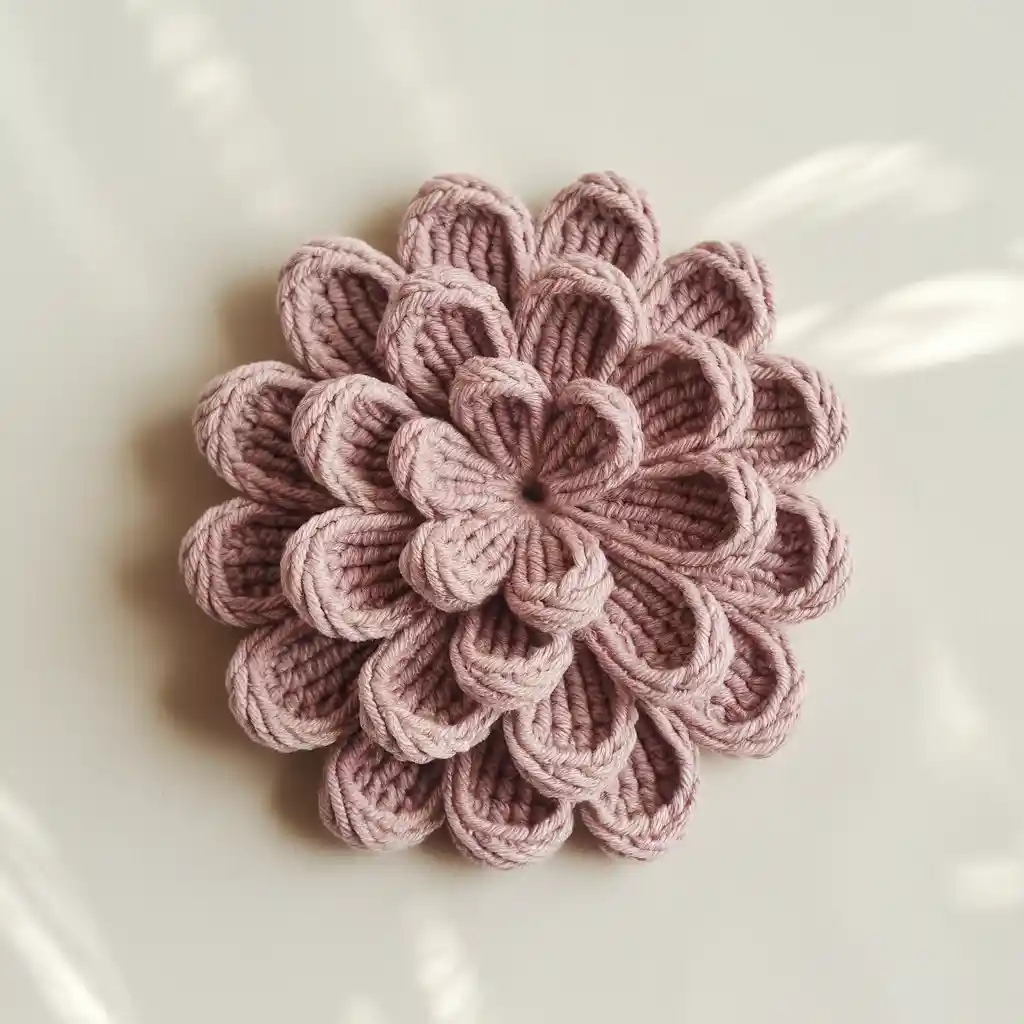
Dense, petal-heavy, looks complicated but follows a simple petal repeat—excellent for dramatic gifts.
Skill level: Intermediate (lots of tiny petals, time + patience)
Materials: worsted cotton (one color or tonal), 3.5–4.0 mm hook, tapestry needle.
Finished size: ~2–3″ (5–7.5 cm) depending on petals and rows.
Step-by-step (layered petals)
- Inner circle: MR, R1: ch1, 8 sc into MR; (8). R2: inc around → 16.
- First petal row (small inner petals): Join yarn, ch 2, 3 dc in same st, sl st in next st around — this creates 8 small petals. Fasten off short tail.
- Second row (covering gaps): Join yarn behind petals (work in back loops of previous round or under petals): ch 2, 4 dc in next space, sl st in next space — place petals staggered between inner petals. You’re building outward in slightly larger petal clusters.
- Third & fourth rows: Repeat the petal cluster increases and increase cluster size slowly (3 dc → 4 dc → 5 dc per petal) until the dahlia reaches desired fullness. Each round stagger the petal placement so the petals overlap like a real dahlia.
- Finish: When outer petal row reaches desired diameter, secure and weave in ends. Tuck the back by working a small round of sc in the back loops to make a small, neat backing if you’ll sew it on.
Tips
- Work tightly so the petals sit neatly. If your petals flatten, use a small amount of starch or fabric stiffener for decorative items only.
- For a 3D puff, add a little stuffing in the center before finishing the inner rounds.
Attachment & uses
Dahlia appliqués look fantastic sewn to felt backing and made into decorative pins. Sew the backing through the lower layers to keep petals secure.
6. Crochet Pansy Flower Applique Pattern
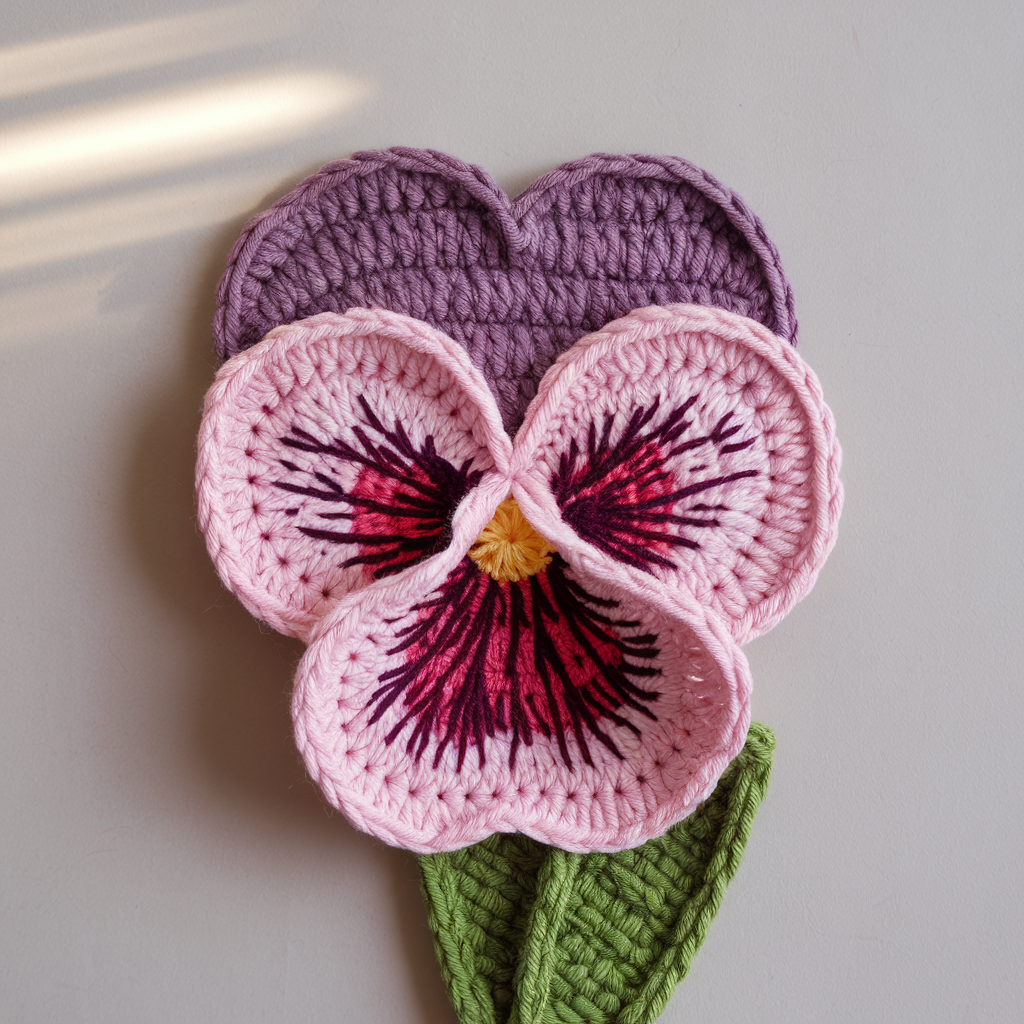
Two-tone pansy with a hearted center—great for feminine accents on little gift bags.
Skill level: Confident Beginner → Intermediate (color changes)
Materials: two contrasting colors (petal & blotch) — worsted cotton, 3.5–4.0 mm hook.
Finished size: ~1.5–2″ (4–5 cm).
Step-by-step
- Center base: MR; ch 1, 6 sc into MR; pull tight. (6) Fasten off tail or leave for sewing.
- Blotch/marking (top petals): Join contrast color at one st, ch 4, (3 dc, ch 1, 3 dc) in same st, sl st in next st — creates two big heart-shaped upper petals. Repeat in opposite side to get two upper petals.
- Side & bottom petals: Join a third color or same background color; ch 3, 3 dc in next st, sl st in next st for side petals; then for bottom petal make a slightly larger fan (ch 2, 5 dc, ch 2, sl st) to create that pansy lower petal.
- Finishing: Add tiny embroidered veins with darker thread from center outward on the two upper petals for the signature pansy look. Weave in ends. Sew a small bead in center if desired.
Tips
- Pansies are all about color contrast — a muddy color here will kill the look. Use crisp contrasting colors or subtle tonal shifts.
- Use embroidery to mimic veins rather than more crochet; it’s faster and more convincing.
How to attach & gift ideas
- Sew pansies to small burlap pouches for gift presentation. Add a thin wire with a bead on the end behind the pansy to tuck into bouquet arrangements as a lasting accent.
Final finishing & practical advice (because you’ll thank me later)
- Secure the center. With layered flowers (rose, dahlia), the center is the stress point — stitch through several layers and back into the backing so it won’t slip.
- Back it for durability. If appliqué will face friction (pocket, bag), sew a small felt disc to the back and stitch through felt into project — this spreads stress.
- Make a cluster. Three or five small flowers grouped tightly look way better than one lonely medium flower. For gifts, a trio of different flowers in a triangular arrangement reads as thoughtful, not haphazard.
- Label your thread tails. If you make many appliqués, write the pattern & yarn used on a tiny tag to reproduce later without guesswork.
- Storage & shipping: Keep appliqués flat inside tissue paper. For gifts, pin them to ribbon instead of gluing for a reusable attachment.
conclusion
You now have six quick, practical crochet flower appliqués with step-by-step instructions and real tips for finishing and attaching them to gifts. The rose and dahlia are your showpieces when you want drama; the daisy and simple flower are speed demons for mass production; the sunflower and pansy give you strong personality without fuss. Pick a size, match the yarn to the project, sew the center properly, and your gift will look handmade instead of hastily slapped together. Now go make an army of flowers and stop apologizing for hand-made.