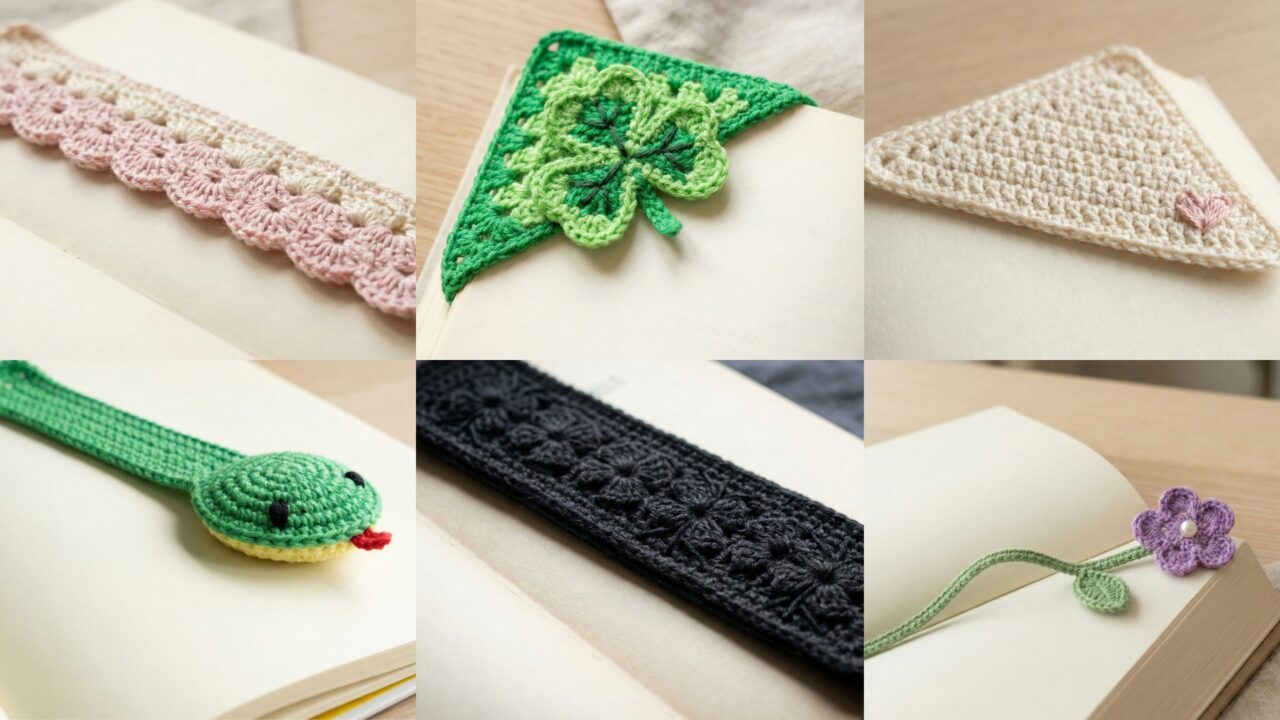
Bookmarks are small, fast projects that make thoughtful gifts and useful accessories. This collection includes six distinct designs — from floral and corner bookmarks to playful animal and textured stitches — with full materials lists, skill levels, step-by-step instructions, finishing options, and variations. Each pattern is written so you can pick it up and make the bookmark in one sitting.
Quick essentials (tools, yarn, abbreviations)
Tools & yarn
- Small crochet hook (recommended sizes below for each pattern)
- Fingering / sport / DK weight yarn or cotton thread — lightweight yarns give neat, flat bookmarks that slide easily into pages.
- Tapestry needle for weaving ends, small button or bead for accents (optional), small piece of felt for backing (optional for durability).
Abbreviations (US)
- ch — chain
- sc — single crochet
- hdc — half double crochet
- dc — double crochet
- sl st — slip stitch
- st(s) — stitch(es)
- sp — space
- rep — repeat
- MR — magic ring (or work a small ch loop as alternative)
Match hook to yarn: for fingering 2.25–3.5 mm, sport 3.5–4.5 mm, DK 4.0–5.5 mm. Adjust for desired drape.
1. Crochet Purple Flower Bookmark Pattern
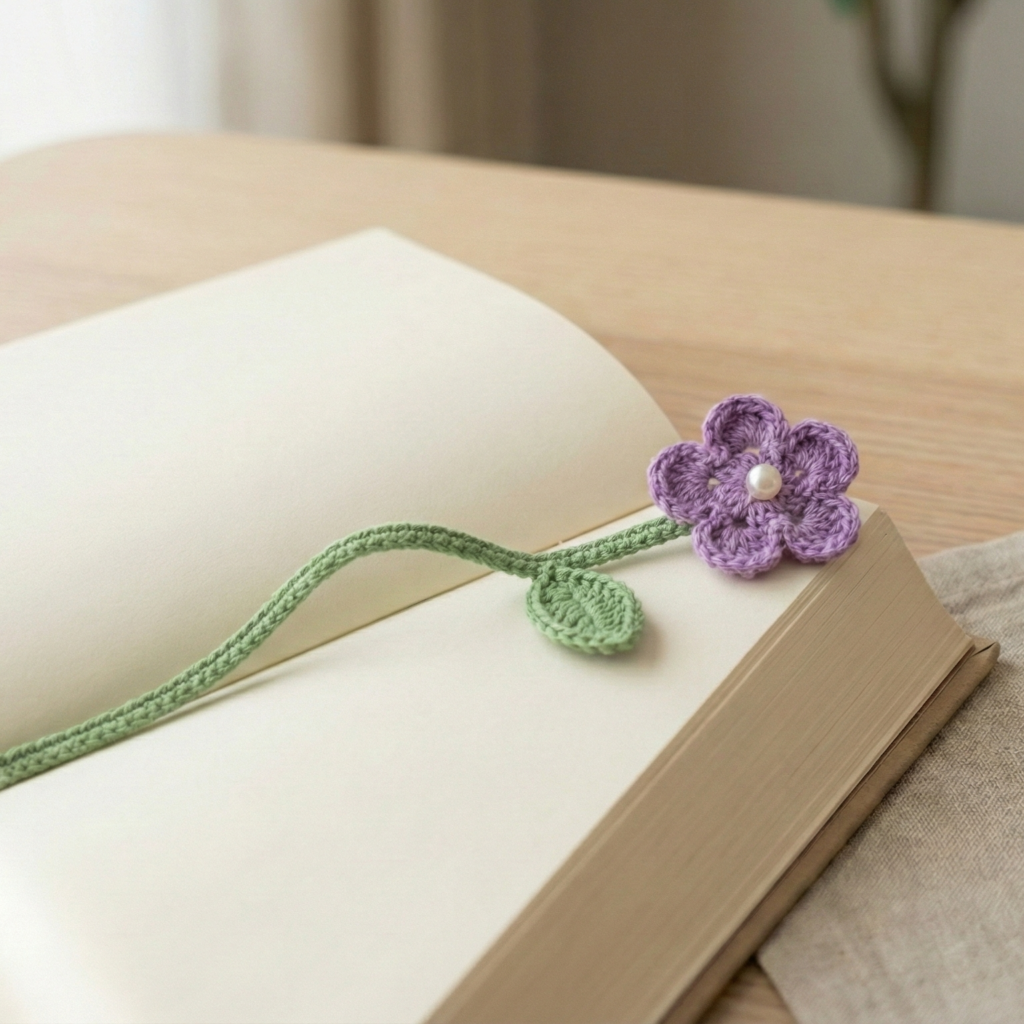
Vibe: delicate floral bookmark with a slim stem and a decorative flower head. Elegant and quick; perfect for gifting with a book.
Skill level: confident beginner.
Finished size (approx): flower head ~1.25–1.75 in diameter; stem ~5–6 in long.
Materials
- Fingering or sport weight cotton in purple (flower) and green (stem) — ~10–15 yd each.
- 2.5–3.5 mm hook (adjust to yarn).
- Tapestry needle, small bead or button for flower center (optional).
Pattern notes
This bookmark is made in two parts: a small 5-petal flower worked flat and a long narrow stem worked in rows or a crocheted chain with slip stitches. The flower is sewn to one end of the stem.
Flower (5 petals)
- MR, ch 1, 6 sc in MR; pull tight and sl st to first sc. (6 sc)
- ch 3, skip 1 sc, sc in next sc around to create 6 loops — sl st to join. (6 ch-3 loops)
- Into each ch-3 loop, work: (sl st, hdc, 3 dc, hdc, sl st) — this forms a full petal. Work into each loop around. Fasten off, leave long tail for sewing. Block flower lightly to open petals if needed.
Variation for fuller petals: use (sl st, dc, 4 dc, dc, sl st) for larger yarn.
Flower center (optional)
- Sew a small bead or a contrasting French knot-style embroidered dot in the center using tapestry needle and thread.
Stem
Option A (slim crocheted strip): With green yarn, ch 30–40 (depending on desired length). Row 1: sc in 2nd ch from hook and across, turn. Row 2: ch 1, sc across; fasten off leaving long tail. This yields a narrow strip ~5–6 in.
Option B (chain & sl st cord): With green yarn, ch 50–70, sl st into 2nd ch from hook and across to make a flat cord. Fasten off and weave ends.
Assembly
- Position the flower at one end of the stem and sew through the flower back and the stem with the long flower tail to secure. Weave in ends. Optionally glue or stitch a small felt circle to the back of the flower to secure the join and protect pages.
Finishing & variations
- Add a small tassel or bead at the free end of the stem.
- Make a pair of flower bookmarks in two complementary colors.
- For sturdier use, make the stem as a narrow i-cord (crochet chain with slip stitches) or back with a length of ribbon sewn to the reverse.
2. Crochet Easy Spider Stitch Bookmark Pattern
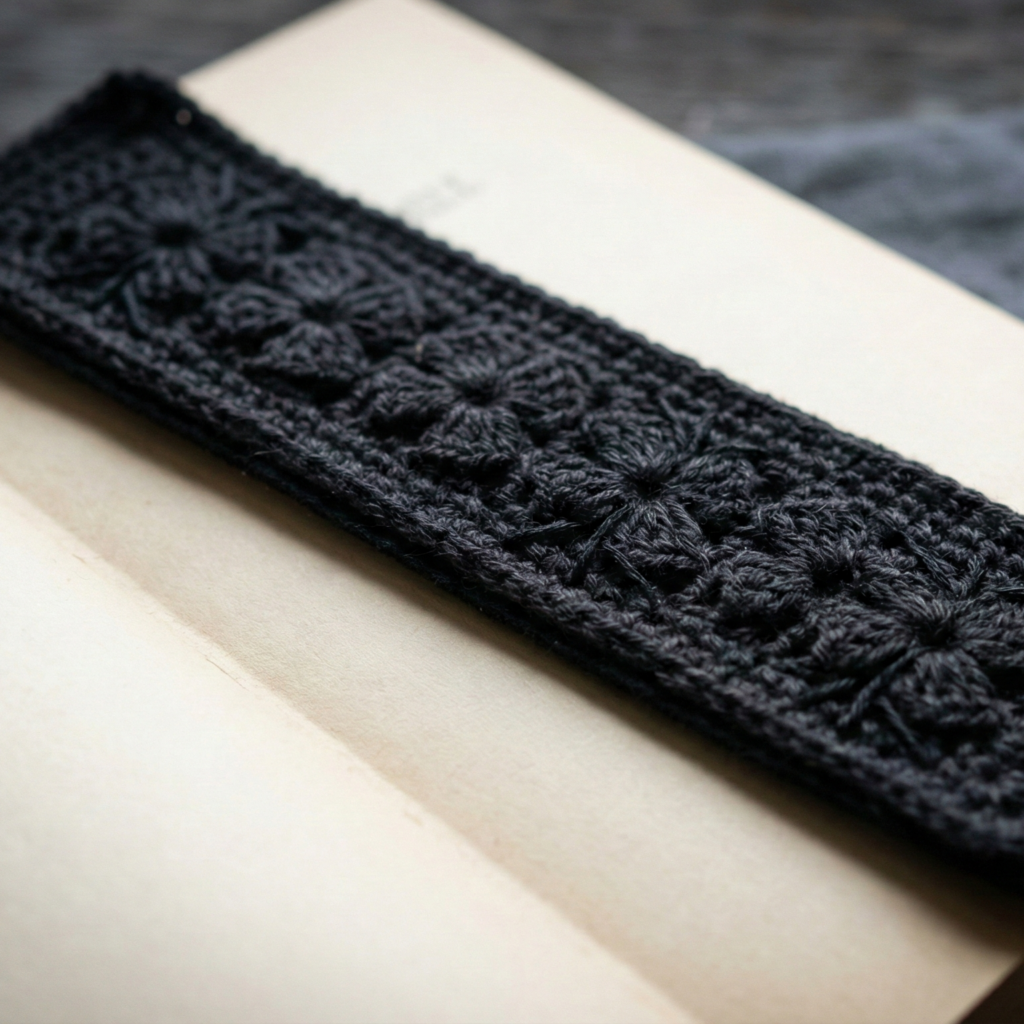
Vibe: textured, slightly gothic bookmark using a spider (cluster) stitch — atmospheric for mystery novels or Halloween gifts.
Skill level: intermediate (working clusters and textured stitches).
Finished size (approx): 1.25–1.5 in wide × 6 in long.
Materials
- Sport or DK weight yarn (black or dark grey) — ~15–25 yd.
- 3.5–4.5 mm hook.
- Tapestry needle.
Stitch used: Spider stitch (cluster)
Spider stitch is a 4-stitch cluster worked around a post or worked as a textured cluster on the row. The pattern below uses small spider cluster motifs placed on a narrow rectangular background.
Bookmark body — rectangular base
- ch 20. (Adjust chain for preferred width; 20 gives ~1.25 in at sport weight.)
- Row 1: sc in 2nd ch from hook and across (19 sc). Turn.
- Row 2–6: ch 1, sc across. (Work until the piece measures ~5 in in height for the base.)
Spider cluster row (placement)
- Row 7: ch 1, sc in next 3 sts, spider cluster in next st (see cluster instruction), sc in next 3 sts repeat across. Turn.
- Spider cluster: yo, insert hook in indicated stitch, draw up a loop, repeat 4 times so there are 9 loops on hook, yo and pull through all loops, ch 1 to secure cluster. (This creates a compact cluster that resembles a small spider body.)
- Row 8–10: ch 1, sc across to stabilize and create spacing. Fasten off and weave ends.
Edging & finishing
- Work a round of sc around the rectangle: sc evenly along sides, 3 sc in each corner for smooth turns. Fasten off and weave ends.
- Optionally add small embroidered spider legs around the cluster with fine black embroidery thread to enhance the motif.
- Back with a small felt rectangle to protect pages if clusters feel too textured, or use a lining to stop snags.
Variations
- Alternate spider cluster rows for a column of spiders.
- Use variegated yarn to make textured mottled background for a subtler effect.
3. Crochet Funny Lizard Bookmark Pattern
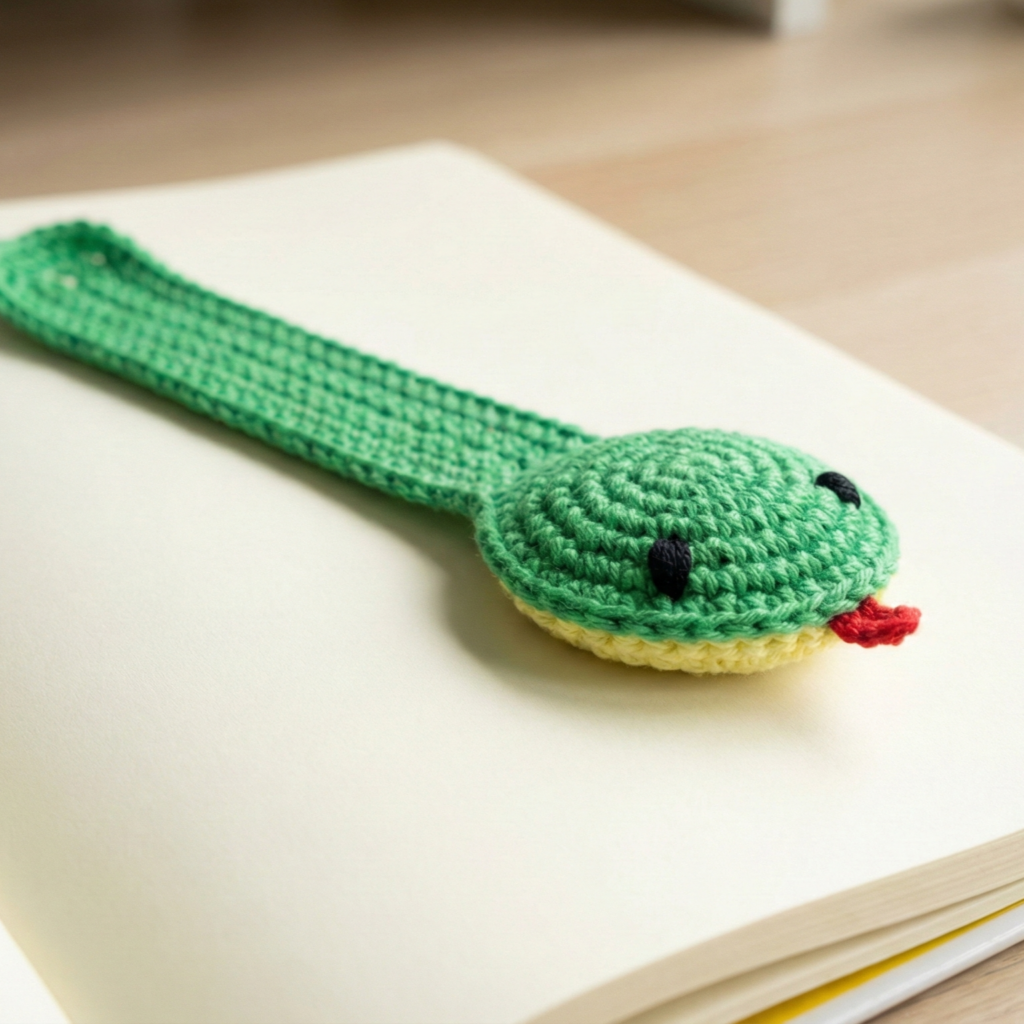
Vibe: playful amigurumi-style lizard head attached to a narrow strap — whimsical and kid-friendly.
Skill level: intermediate (small amigurumi shaping and sewing).
Finished size (approx): lizard head 1.25–1.75 in, strap 5–6 in.
Materials
- Fingering or sport yarn in green (body), lighter green or yellow for belly, small amount black for eyes.
- 2.5–3.5 mm hook (for firm fabric).
- Tapestry needle, small felt for backing (optional), tiny safety eyes (optional).
Lizard head (mini amigurumi)
- MR, 6 sc in MR. (6)
- inc around. (12)
- (sc, inc) around. (18)
- sc around for 2 rounds. (18 × 2)
- (sc, dec) around. (12)
- sc around for 1 round. Fasten off leaving a tail for sewing. Stuff lightly.
Eyes & snout
- Sew two tiny French-knot eyes with black thread, or attach 2 mm safety eyes at round 3.
- Embroider nostrils with a contrasting color.
Tongue (optional)
- Chain 6, sc back along chain; leave a tail for sewing and attach inside mouth opening.
Strap
- With same yarn, ch 40–50 (adjust for length). Work sc in 2nd ch from hook and across for 2–4 rows to make a flat strap. Alternatively, make an i-cord or a chain with sl st to keep it narrow.
Assembly
- Sew lizard head to the top of the strap, stuffing carefully while stitching to ensure a neat join. Weave in ends. Optionally stitch felt backing behind the head to stop any shaping rubbing pages.
Variations
- Make different animals (frog, cat, fox) by adjusting ear/face shaping.
- Add a tiny loop on the tail end to hang from a book spine or fit over a corner.
4. Crochet Simple Corner Bookmark Pattern

Vibe: classic corner bookmark that slips over a page corner; simple, fast and elegant.
Skill level: beginner.
Finished size (approx): fits standard paperback corner, about 2 in square.
Materials
- Fingering or sport weight yarn — 5–10 yd.
- 2.5–3.5 mm hook.
- Tapestry needle.
Pattern (triangle corner)
- ch 11 (or adjust for desired width).
- Row 1: sc in 2nd ch from hook and across (10 sc). Turn.
- Row 2: ch 1, sc in next st, sc2tog over next 2 sts, sc across to last st, sc in last st. (This shapes one decrease at start.) Turn.
- Continue decreasing: Row 3: ch 1, sc across leaving one less stitch before the center decrease; work sc2tog centered; sc to end — follow until only 3 sts remain.
- When 3 sts remain: sc2tog once to make a 2-st triangle tip, fasten off leaving long tail for weaving. Block into a flat right triangle.
Alternative quick method (diagonal granny):
- Make a small square of 3 rounds of granny clusters, fold into a triangle and seam two adjacent edges to form a corner pocket.
Finishing
- Weave in ends. Optionally add an embroidered tiny motif on the outer triangle (initial, small heart) for personalization.
Variations
- Work in lacy stitches (open V-stitch) for a delicate corner that nestles into pages without adding bulk.
- Add a small bead or button at the corner point for decoration.
5. Crochet Shell Stitch Bookmark Pattern
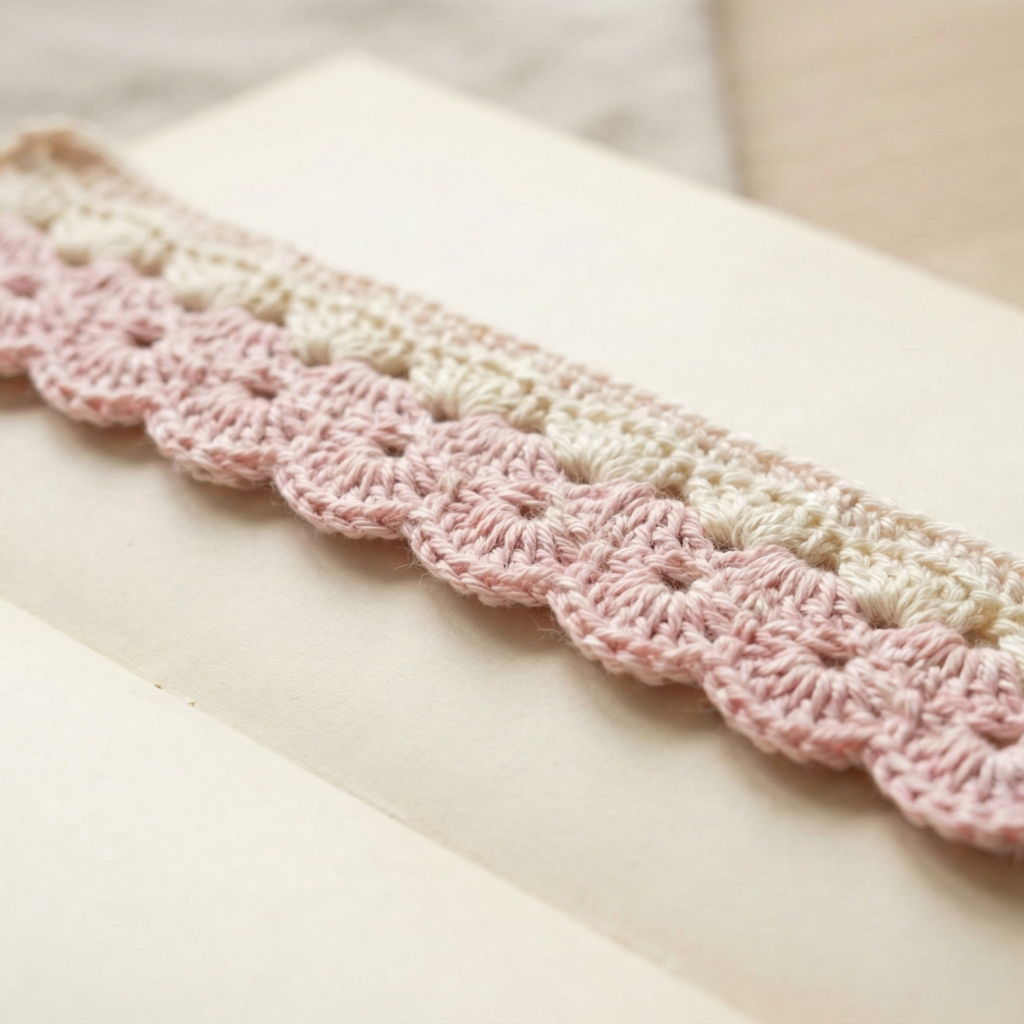
Vibe: textured, feminine bookmark using shell stitches to make a scalloped edge.
Skill level: confident beginner.
Finished size (approx): 1.25–1.5 in wide × 6 in long.
Materials
- Sport or DK cotton yarn — ~10–20 yd.
- 3.5–4.5 mm hook.
- Tapestry needle.
Construction — rectangular shell strip
- ch 14 (or set a multiple of 6 + 2 for width).
- Row 1: sc in 2nd ch from hook and across (13 sc). Turn.
- Row 2 (setup): ch 3 (counts as dc), sk 2, 5 dc in next st (shell), sk 2, (dc, ch 1, dc) in next st repeat across depending on width; end with dc in last st. Turn.
- Row 3: ch 1, sc across to set base and compress shells slightly. Turn.
- Repeat Rows 2–3 until strip measures ~6 in or desired length, ending with sc row for a tidy top edge. Fasten off.
Edging (shell scallop)
- Work a final round along one long edge for a decorative scallop: with RS facing, attach yarn at base of a shell and sc, ch 3, 5 dc in next shell tip, ch 3, sc repeat along edge. This emphasizes scallops.
Finishing
- Weave in ends. Optionally stiffen lightly with a starch spray if bookmark will be used frequently and needs added rigidity.
Variations
- Work shells in two contrasting colors: change color at the setup sc row before shell round to create bold stripes.
- Make a wider panel and fold it in half to create a thicker, double-sided bookmark.
6. Crochet Granny Square Shamrock Bookmark Pattern
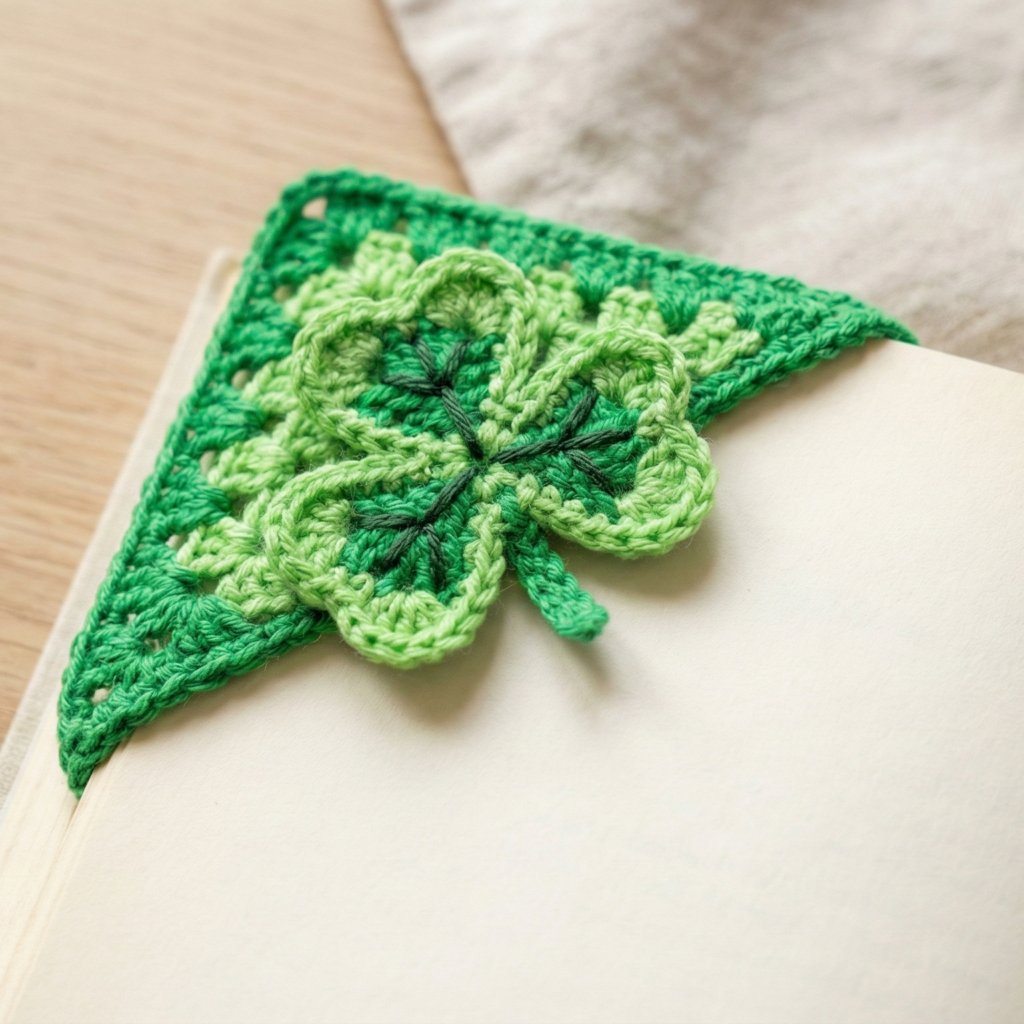
Vibe: playful, symbolic shamrock motif worked in a small granny square and shaped into a shamrock corner bookmark — great for seasonal gifts.
Skill level: intermediate (granny construction and shaping).
Finished size (approx): shamrock motif ~1.25–1.75 in; attached to a short strap or corner pocket.
Materials
- Fingering or sport weight yarn in green and lighter green for contrast — ~10–15 yd.
- 2.5–3.5 mm hook.
- Tapestry needle, small button (optional).
Shamrock motif (small granny with heart-shaped leaves)
- MR, ch 3, 3 dc in MR, ch 2, (3 dc, ch 2) rep 3 times total to form four 3-dc clusters separated by ch-2 corners; sl st to top of turning ch. Pull tight. This makes a tiny square with four corners. Fasten off leaving tail for sewing.
- For heart-shaped leaves: into each ch-2 space, work: sl st, ch 2, (hdc, dc, hdc) then sl st into base — this rounds the corner clusters into leaf shapes. Alternatively work 5 dc in ch-2 space and shape into a petal by flattening.
Assembly as corner bookmark
Option A — corner pocket: make a triangular base as in the corner bookmark (Pattern 4) sized slightly larger; sew the shamrock to the outer point so the leaves overlap the corner. Ensure the pocket opening remains clear to slide pages inside.
Option B — strap bookmark: sew shamrock to the end of a short strap (ch 20, sc across 2 rows) and finish with a small tassel or button on the free end.
Finishing & variations
- Add a tiny embroidered vein on each leaf with a slightly darker green.
- Work the granny motif in a variegated green yarn for natural shading.
- For a sturdier gift, back the shamrock with a small felt shape and glue or hand-stitch it in place.
conclusion
Each of these six bookmark patterns is designed to be approachable and fast, so you can make multiple versions for gifts, book clubs, classroom rewards, or a small handmade shop collection. They use small amounts of yarn, require few tools, and deliver satisfying results in an hour or two.
A few final practical tips that help your finished bookmarks last longer:
- Use cotton or cotton-blend yarn for upright bookmarks that slide easily between pages and withstand repeated handling.
- Weave in ends securely and, for delicate textures, back motifs with a small felt patch to protect book pages.
- Block delicate motifs lightly to open lace and shells; use minimal starch only if you want a stiffer bookmark.
Choose a design, pick a yarn color that fits the reader’s taste, and make a set — bookmarks are small, economical, and always welcome with a good book.