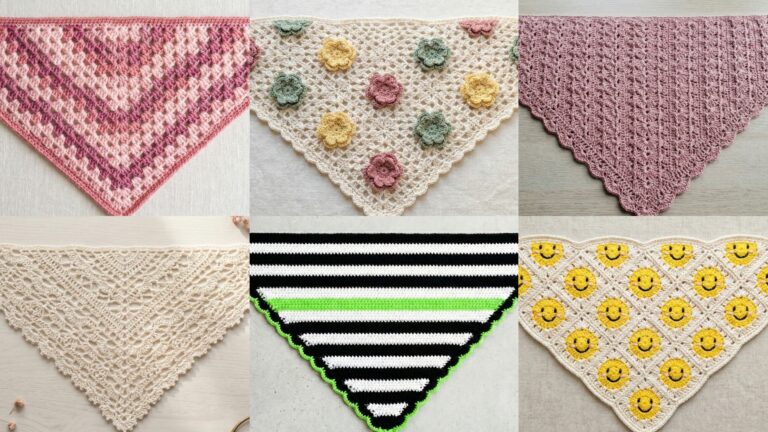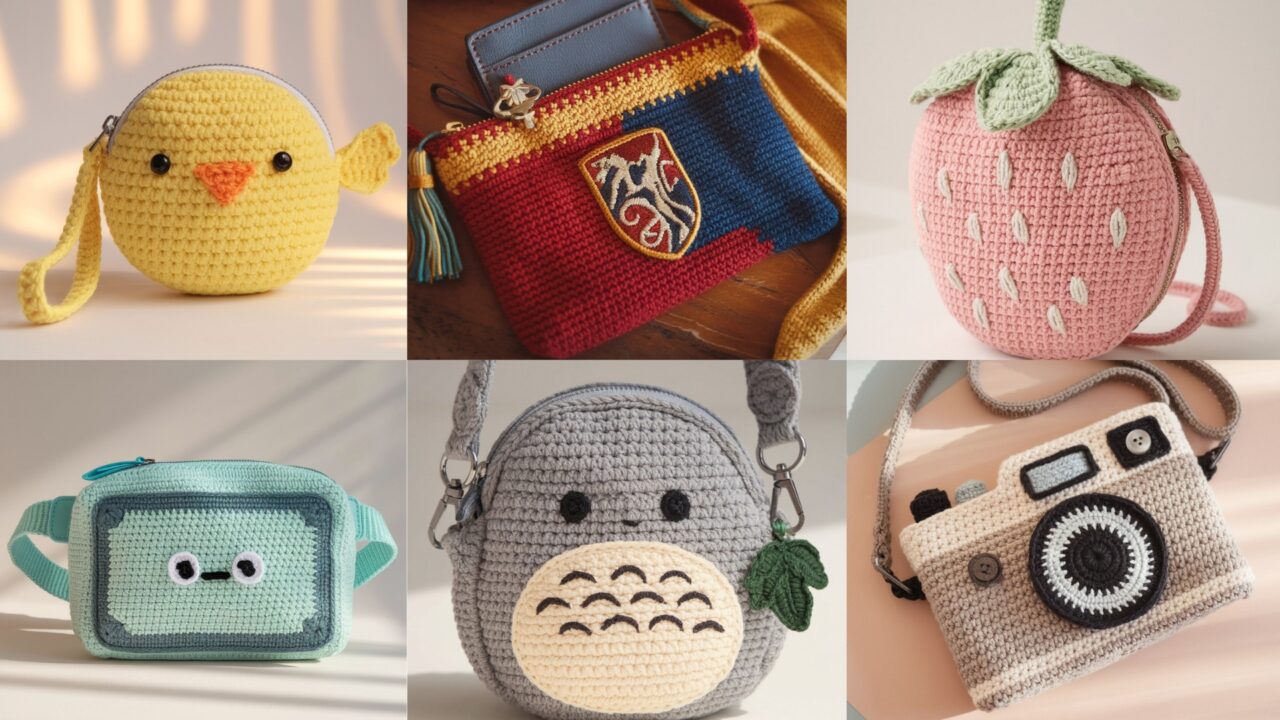
Purses are the craft equivalent of a well-chosen joke: small, memorable, and useful in the real world. These patterns are written for quick wins — a camera-shaped crossbody for the friend who actually carries a camera, a pastel strawberry for the teenager who lives on aesthetic, a BMO waist bag for the cartoon obsessive, Totoro-inspired crossbody (inspired — homage, not a licensed product), and a Gryffindor-adjacent Harry-Potter-themed purse for Potterheads. Every design includes a secure strap option because floppy straps = ruined gift.
Before you start, read the short common notes below. They’ll save you time (and dignity).
Quick common notes (do this — it matters)
Abbreviations (US): ch = chain, sc = single crochet, hdc = half-double crochet, dc = double crochet, tr = treble, inc = increase (2 sc in same st), dec = sc2tog or invisible decrease, sl st = slip stitch, st(s) = stitch(es), MR = magic ring, BLO/FLO = back/front loop only.
Baseline materials & gauge I use in examples
- Yarn: worsted weight (#4) cotton or cotton-blend (gives structure + machine-washability). Acrylic is fine but cotton looks cleaner.
- Hook: 5.0 mm (H) for worsted — gives a dense fabric for purses. If you want stiffer fabric use a 4.5 mm or carry a second strand.
- Example gauge (use your swatch, not mine): 4″ = 16 sc → 4 sts/in. I’ll use that for all sample math below; recalc to your swatch before you chain.
Swatch & sizing: actually do it
- Make a 4″ square in sc, block it, count sts across — divide by 4 to get sts/in.
- Decide finished purse width (e.g., 7″ for a small crossbody). Multiply width × sts/in to get stitches (e.g., 7 × 4 = 28). Round to nearest whole stitch that fits the pattern repeat described in each design.
Strap options (pick one per purse)
- Crochet tube with webbing insert — best: strong, soft, machine-washable look. Crochet a tight tube, slip in cotton webbing, sew ends securely.
- Flat hdc strap (fold & sew with webbing) — broad strap with good weight distribution.
- Chain + crochet cover — dressy: slide a chain through a crocheted sleeve for comfort.
- Adjustable strap with slider — make the strap long, add a slider, or attach with swivel hooks to rings for removable straps.
Hardware & finishing
- Use an inner fabric lining (keeps phone and keys from catching). Sew a zipper into the top for security, or use a magnetic snap for a quick finish.
- Reinforce strap ends with a short piece of cotton webbing sewn inside the crocheted end (box-stitch) — do not rely on a single strand of crochet to hold heavy weight.
1. Crochet Camera Purse Pattern
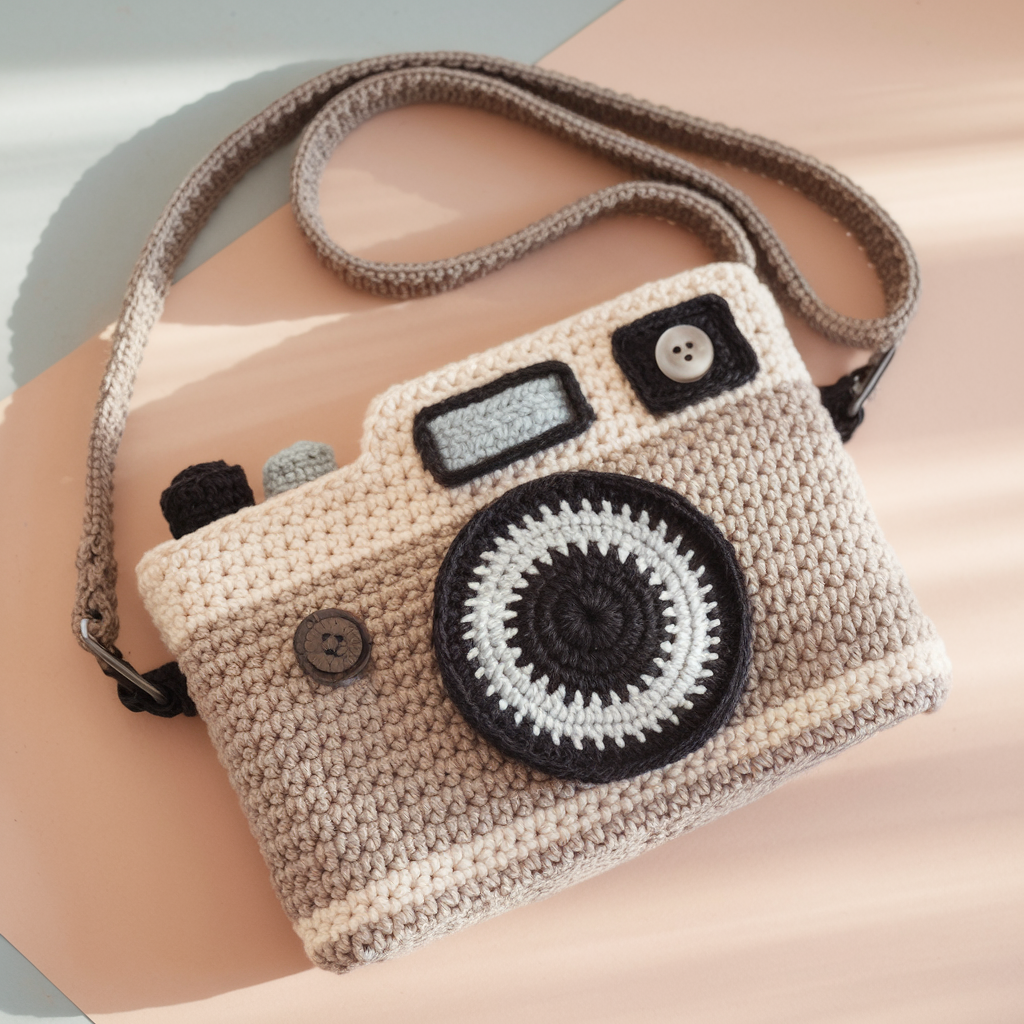
Retro camera purse with lens applique and a sturdy crossbody strap. Works as a minimal camera bag or a phone pouch.
Skill level: Confident Beginner
Finished size (sample): ~7″ wide × 5″ high × 1.5″ deep (fits phone + small wallet)
Materials: worsted cotton (~200 yds), 5.0 mm hook, 8–12″ zipper (or magnetic snap), tapestry needle, small amount black/gray/white for lens appliqué, 1″ cotton webbing 20–45″ for strap reinforcement or optional metal chain for styling.
Math & foundation
Target width 7″; gauge 4 sts/in → 7 × 4 = 28 stitches. Foundation chain = 28 (work in rows and seam).
Body (flat rectangular pouch)
- Ch 28. Row1: sc in 2nd ch from hook and across → 27 sc? Wait — using ch=28 to produce 28 base sts when worked in the round; when working flat as rows, sc in each ch across gives 27 sc. To avoid off-by-one confusion: better foundation: ch 29, sc in 2nd ch from hook across for 28 sc. So do ch 29, sc 28. Turn.
- Row2–Row 15: ch1, sc across 28 sts (repeat until piece measures ~5″ tall). (Adjust rows based on your row gauge — goal approx 5″ height.)
- For depth, you can either fold and seam or add a separate gusset later. For simple bag: fold the rectangle so short edges align and seam both sides with sc through both layers for 1.5″ depth (or crochet a 1.5″ strip and stitch across bottom and sides for boxy shape — I give both below).
Boxed bottom (optional — makes lens sit better)
Option A — simple seam: fold and whipstitch sides to leave a small opening for lining insertion.
Option B — add gusset (recommended): ch 6 (for 1.5″ depth), sc 5 across and join as a loop; sc rounds until rag matches length of bottom edge; sew the gusset to body for true boxed base.
Lens applique (fast)
Small lens: MR, ch1, 6 sc in MR, pull tight (6). R2: inc around → 12. R3: (sc, inc) ×6 → 18. Sl st, fasten off leaving tail to sew centered on front of pouch. For lens ring, make a slightly larger ring in contrast: MR 6 sc, sl st; flatten and sew outer ring around that for a nice camera look. Add embroidered viewfinder rectangle and a tiny silver button for shutter.
Flap/Closure (if you prefer flap)
If you want a flap instead of zipper: pick up stitches across one short edge, sc 1 round to create base, then shape triangular or rectangular flap: sc across, next row sc across but dec on both edges to round the flap — sew on magnetic snap.
Strap (crochet tube + webbing)
- Crocheted tube: ch (webbing width in sts + 2) — for 1″ webbing, ch 6, join to tube. R1–R60: sc in the round until tube equals desired strap length (e.g., 44″ length when laid flat gives drop ~22″). Slip webbing inside and hand-sew tacks at both ends to hold in place.
- Sew ends of tube+webbing into side seams; reinforce with extra passes of heavy thread through webbing and crochet band — box stitch pattern: sew in an X inside a square of stitches at least 1″ high.
Lining
Cut cotton fabric to rectangle slightly smaller than crochet body plus seam allowances. Sew zipper into top if using zipper method; hand whipstitch lining into inside bottom and sides neatly. Lining hides ends and gives structure.
Finishing & variations
- Use leather accents — small strap tabs — attached with rivets or heavy stitching.
- For vintage vibe, make lens and strap in brown/ochre tones; for modern, matte black + neon accent.
2. Crochet Chick Purse Pattern
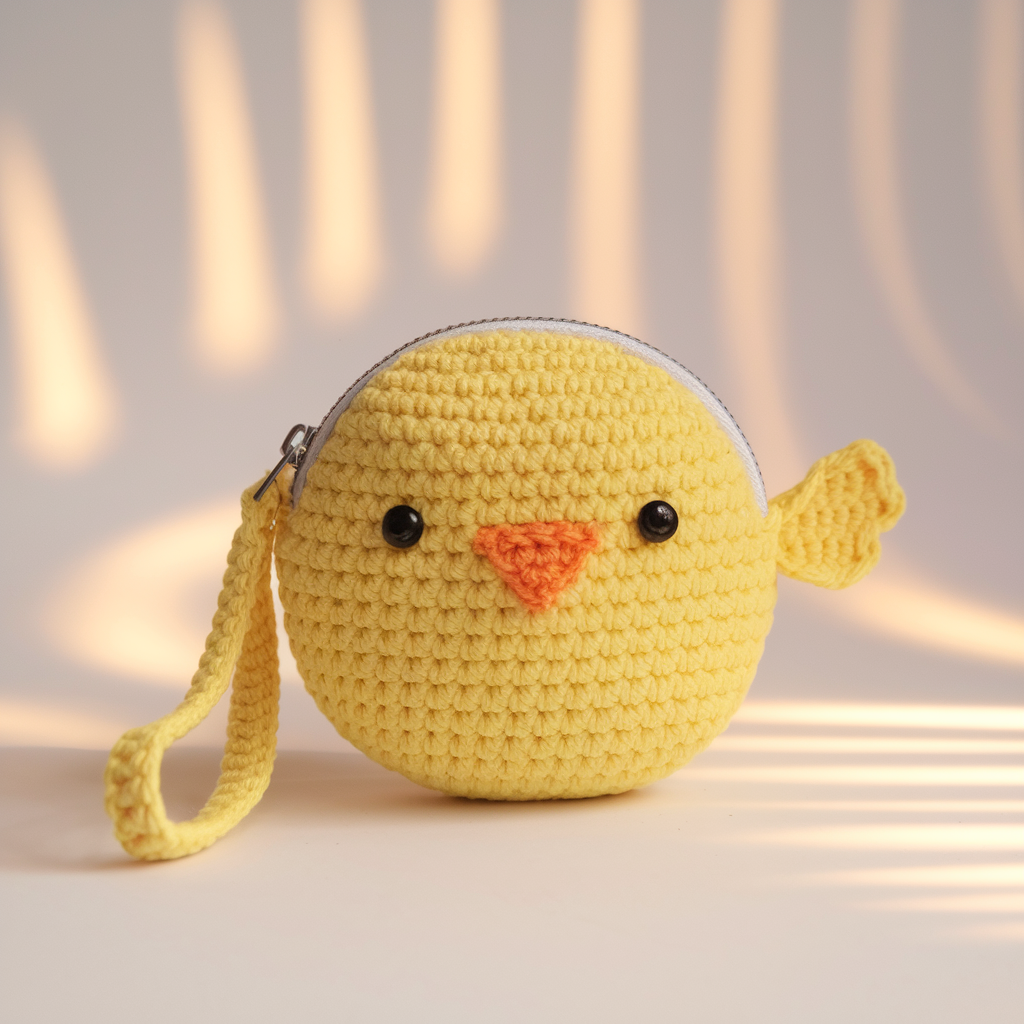
Tiny round purse with a cheerful chick face — perfect for kids or tiny-key projects.
Skill level: Beginner → Confident Beginner
Finished size: ~5″ diameter (coin purse)
Materials: worsted cotton in yellow + orange + black, 4.5–5.0 mm hook, small coin purse zipper or 6–8″ zipper, 1 small snap, optional wrist strap hardware.
Construction (worked in the round — amigurumi-style)
- Start with yellow. MR, R1: 6 sc in MR — 6. R2: inc around → 12. R3: (sc1, inc) ×6 → 18. R4: (sc2, inc) ×6 → 24. R5–R7: sc around (3 rounds) → 24. R8: (sc2, dec) ×6 → 18. R9: (sc1, dec) ×6 → 12. Finish R10: dec around → 6 and finish some hole open to insert zipper? Wait — coin purse should be flat and zip-able; better make two identical flat discs to sew together with zipper around edge.
Make two discs: make first disc as rounds 1–7 (24 sts). Fasten off and make second identical disc.
Edge band (to stitch zipper onto)
Make a narrow band to join the two discs and house the zipper. Option A: If you use a ready-made small coin purse frame, you can sew crochet around frame. Option B (easier): sew zipper between the two discs by placing zipper along edge and whipstitch discs to zipper tape, or crochet a sc round onto each disc and hand-stitch zipper between sc loops.
Face details
- Beak: make small triangular applique: ch 4, sc 3 across, fold and stitch to create triangular bill. Attach centered between rounds 4–5.
- Eyes: small French-stitched black dots or tiny safety eyes if for older children (but safety alert: small parts not for babies). For babies, embroider eyes.
Wrist strap
- Make a short cord strap: ch 30, sc back across to create a 1/2″ wide strap; fold and sew ends inside zipper seam; add lobster clasp if you want removable wristlet.
Lining
Optional: circle lining with seam allowance, attach to inner sc round so zipper tape hides inside.
Finishing & variations
- Make chick with little wings (two small tear-drop shapes sewn on sides).
- Make other animals using same method: bear, cat, bunny.
3. Crochet Neighbour Totoro Crossbody Pattern
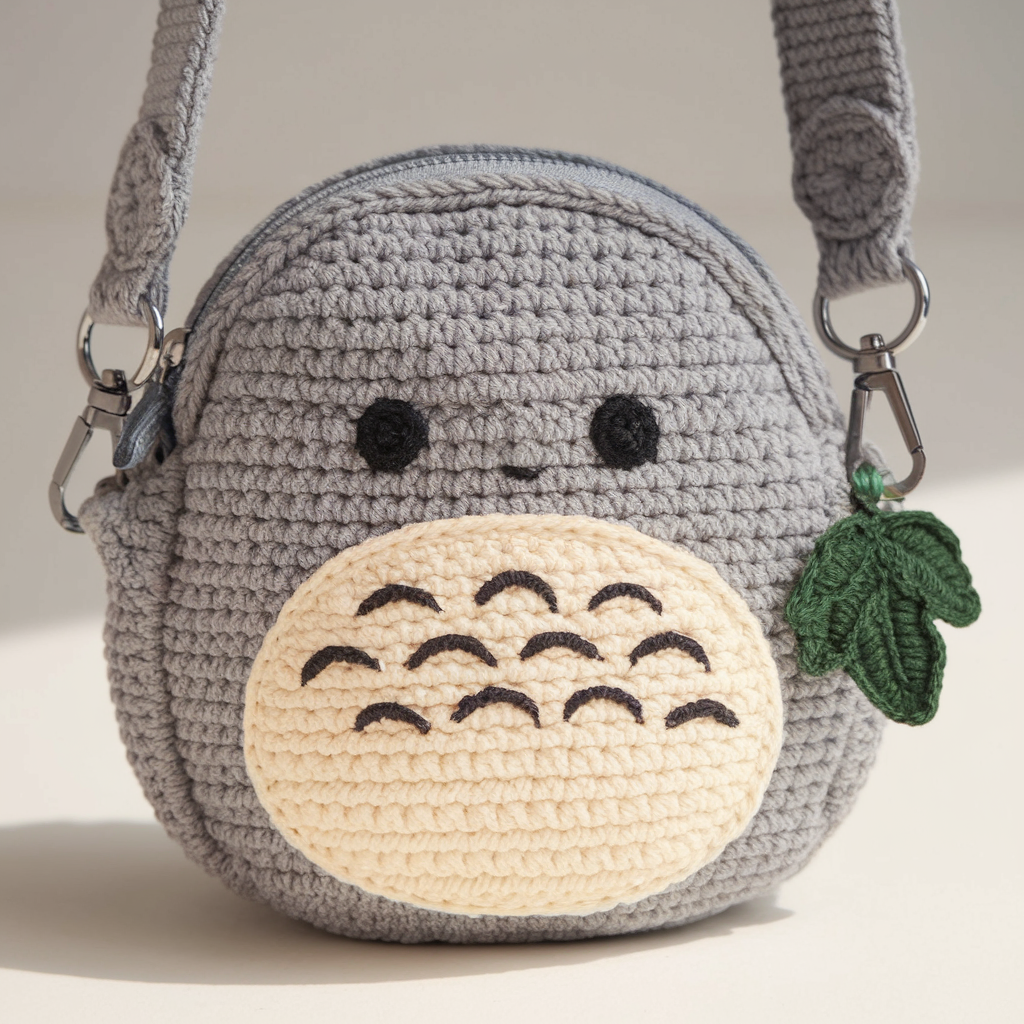
A small, whimsical crossbody purse that nods to a beloved gray forest spirit — inspired by the character rather than a licensed product. Keep it small and sweet.
Skill level: Intermediate (applique + shaping)
Finished size: ~7″ wide × 6″ high × 1.5″ deep
Materials: worsted cotton in gray, cream, black; 5.0 mm hook; 8–10″ zipper; lining fabric; strap hardware.
Note: This is an inspired design — it’s a fan homage rather than a reproduction of a trademarked item.
Body & colorblocking
Foundation width for 7″ target: ch 29 (for 28 sc as earlier). Work rectangle as Camera Purse pattern until about 6″ high. If you want rounded top like a cute creature, shape the upper 1.5″ into gentle curve by decreasing small amounts while working last 4–6 rows and then sewing a neat top seam.
Belly applique (cream oval)
- Ch 12, sc across (11 sc), turn and sc rows until piece measures ~2.5″ tall. Fasten off and sew to front center. Or make an oval by MR + short rounds to keep smooth.
Eye & mouth embroidery
- Two small black circles: MR 6 sc in black for tiny eyes or simply embroider with satin stitch. For safety — if the purse is for kids under 3, use embroidery only.
- Tiny embroidered smile using backstitch in black.
Little leaf hat (optional)
Make a small granny-leaf and tack to top corner for charm. Keep small to avoid heavy dangly pieces.
Strap (crossbody — reinforced flat strap)
- Make flat strap: ch required for length: if you want 45″ strap total, ch 180? That is too long to ch raw. Instead, make two strips and seam or crochet a long strap in hdc: ch (find foundation count by making a 4″ sample). For simplicity: make a tube with webbing insert as described previously — this makes a comfortable crossbody strap.
- Attach with D-rings sewn into side seams and small webbing tabs to secure.
Lining & closure
Line inside, sew zipper in top before finishing seams. Add an internal pocket for cards.
Finishing & fan-note
- Keep proportions subtle: oversized Totoro face stickers are cute but heavy. Stick to small appliqués and embroidered details.
- If you plan to sell these for profit, remember trademark rules — call it “woodland spirit crossbody” on store listings.
4. Crochet Strawberry Purse Pattern
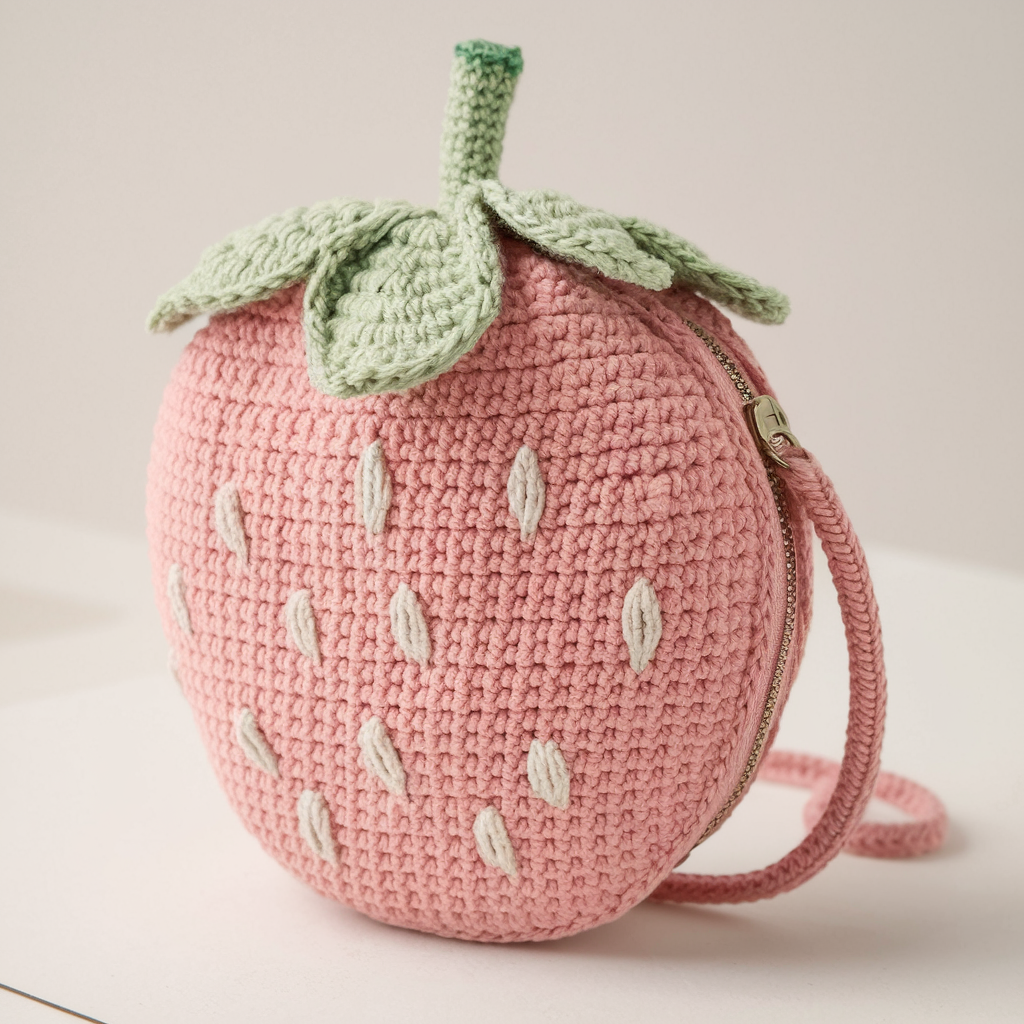
Pretty pastel strawberry purse — semi-3D berry body with green leaf top and short strap. Pastel red makes it sweet, not neon.
Skill level: Confident Beginner
Finished size: ~6″ tall × 5″ wide (rounded berry)
Materials: pastel red worsted, green for leaves, ivory for seeds (tiny sl st/seed beads optional), 4.5–5.0 mm hook, zipper or drawstring top, lining.
Body (worked in rounds — egg-shaped)
- MR, R1: 6 sc. R2: inc around → 12. R3: sc, inc ×6 → 18. R4: sc2, inc ×6 → 24. R5: sc around 24. R6: sc2, dec ×6 → 18. R7: sc, dec ×6 → 12. This gives small rounded base. For strawberry bulge, after R4 add 2–4 rounds sc before starting decreases so it’s wider. Aim for widest circumference ~18–20 sc (approx 5″ wide depending on gauge). Then create short cylinder for height: sc rounds to desired height ~4″. Close small top with zipper or make a leaf-top drawstring.
Leaf crown
- At top, switch to green and make a ring of 6–8 small leaves: ch6, sc in 2nd ch, hdc, dc, hdc, sc, sl st to base. Repeat around to create crown. Sew leaves firmly to top opening, hide drawstring under leaves if you want a drawstring closure, or hand tack a zipper inside leaf circle.
Seeds
Use tiny embroidered stitches in ivory or small seed beads sewn across berry surface in even spacing. For safety (kids), use embroidery not beads.
Strap
- Short strap option: make a short 12–16″ wrist strap or a small crossbody: crochet tube with webbing and attach with tabs. For a cute look, make pastel green strap to match leaves.
Lining
Cut circle for bottom, sew tiny pockets inside.
Variations
- Make bigger versions as a basket bag: increase starting rounds for larger circumference and add handles.
5. Crochet Waist Bag BMO from Adventure Time Pattern
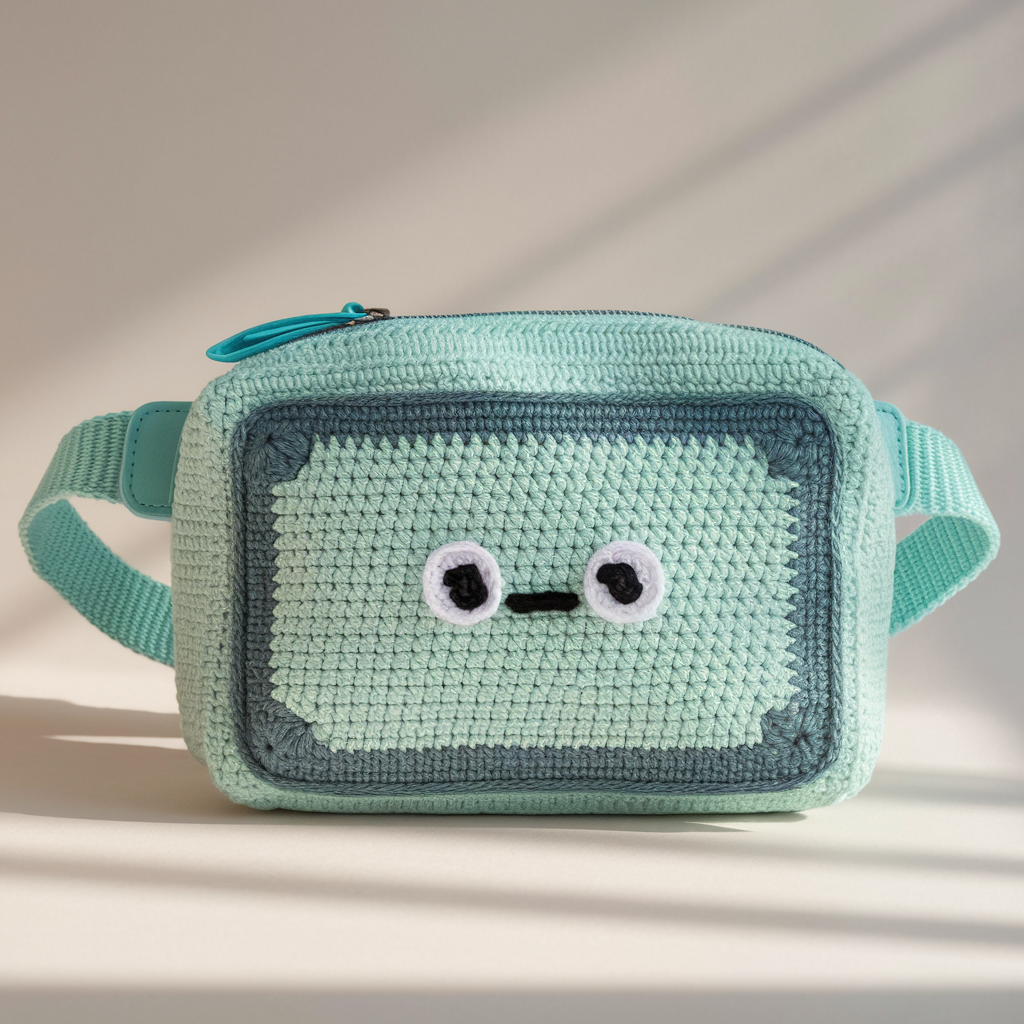
Waist pouch inspired by a very friendly rectangular game console. Fun geeky gift — inspired by the iconic look without exact branding.
Skill level: Confident Beginner → Intermediate (boxy pouch with face applique)
Finished size: ~7″ wide × 5″ high × 1.5″ deep (small belt bag)
Materials: worsted weight in light turquoise + darker for screen + small amount black/white for buttons, 5.0 mm hook, 1″ webbing belt or cotton strap with adjustable slider, zipper, lining.
Body
Make a rectangle for the front face: foundation chain for 7″ width: ch 29 (as before). Row1–Row 16 sc across for 5″ height. Make a second rectangle identical for back piece. Make a gusset strip ch7, join into loop, sc rounds until length equals width of front (7″). Sew the three pieces together to make boxed pouch or crochet seam them.
Screen applique
- Make a rectangular panel in contrasting darker turquoise: ch 17 (16 sc), sc rows 4–6 to create a small screen ~3″ wide. Sew centered on front panel.
Buttons & details
- Tiny round buttons: MR 6 sc for each. Sew in grid under screen. Embroider plus/minus or circle patterns in black and white.
Belt strap
- Use 1″ webbing with slider: fold ends of pouch over webbing ends and sew heavy box stitch through webbing inside the seam to secure. Alternately, crochet a long strap and weave webbing inside, add a side-release buckle to fasten around waist.
Lining & closure
- Insert zipper into top and line the inside with fabric; or use flap and magnetic snap if you prefer belt-buckle look.
Variations
- Make larger crossbody version by adding longer strap. For kids, reduce strap length and keep everything embroidered, no small detachable buttons.
6. Crochet Harry Potter Themed Purse Pattern
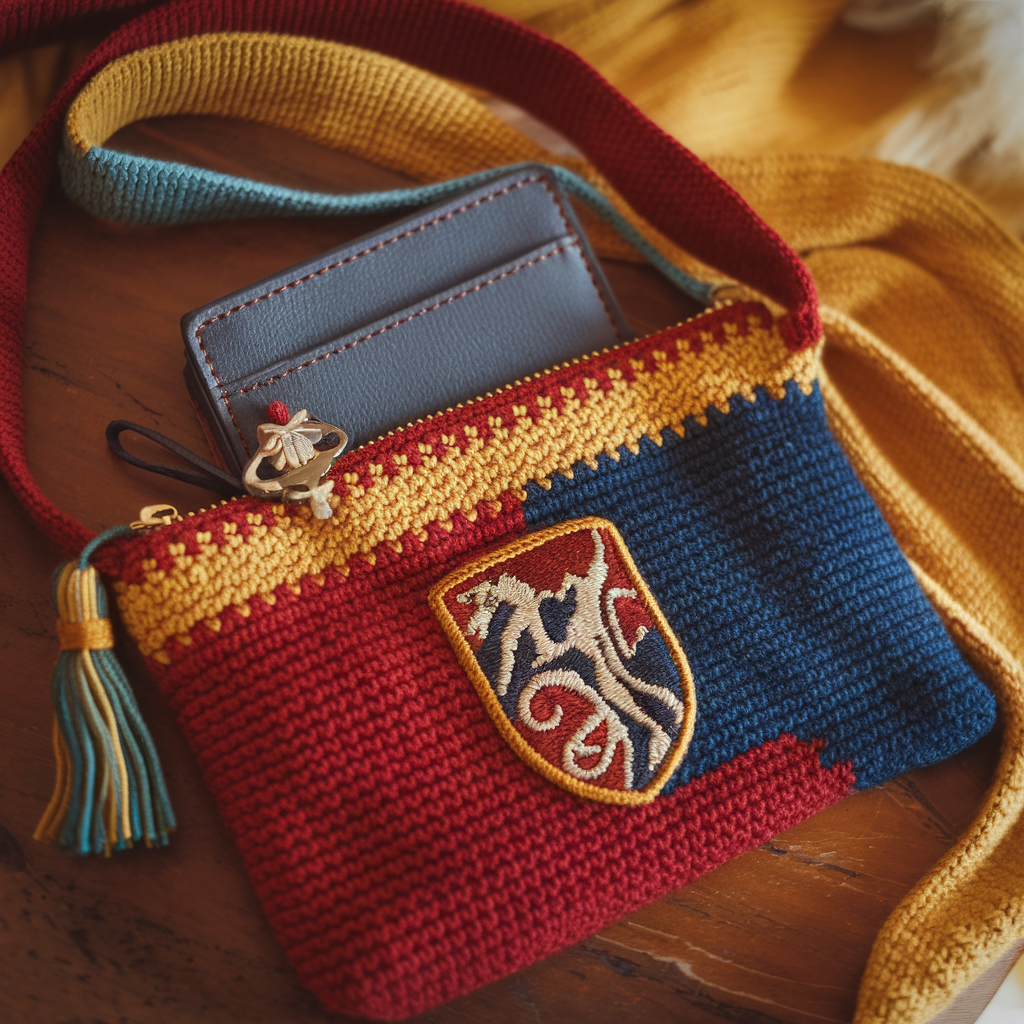
A small purse with house-accent colors, scarf-like tassel, and a subtle crest motif (house-appropriate). I’ll give house-neutral guidance — pick your yarn to nod to a house.
Skill level: Confident Beginner → Intermediate
Finished size: 7″ × 5″ × 1.5″ (crossbody clutch)
Materials: worsted in main base + accent (e.g., deep red & gold or green & silver), 5.0 mm hook, zipper, lining, optional metal crest charm (not official logo to avoid copyright issues).
Body & color-block stripe
Make rectangle as earlier for 7″ × 5″ body. Add a thin band of contrast color across top 1–1.5″ to mimic scarf stripe. Alternatively make diagonal stripes by changing color every few rows.
Scarf tassel accessory
Make a short scarf tassel to hang from zipper: cut multiple yarn strands ~12″ long, fold and loop through a yarn-wrapped small band (or crochet a small tube and wrap). Attach to zipper pull for dramatic effect.
Crest motif (simple embroidered shield)
- Embroider a small shield shape and a simple running-line emblem (lion, snake, bird, or badger motif simplified) with surface crochet or satin stitch — keep it stylized and non-infringing (abstract shapes rather than trademarked crests). Sew on front center.
Strap
- Crossbody strap: flat hdc strap 1.5″ wide reinforced with webbing. Attach with swivel lobster hooks and small D-rings for removability. If you want to be cozy, add a soft mini-scarf wrap across strap with velcro for comfort.
Lining & pockets
Sew an inside card pocket sized for 3–4 cards.
Finishing & gifting
- Present with a small “house” themed tag: a strip of cardstock with suggested care and house-friendly care instructions. If gifting to a Potter fan, make scarf-color pom or attach a small pocket-watch–style keyring for whimsical gift charm.
Final finishing checklist (don’t skip these)
- Swatch & math check. If your width or height looks off by >0.25″, frog and recalc; small purses suffer from poor gauge more than garments.
- Reinforce strap attachments. Use webbing and box-stitch the webbing into the bag for safety — don’t rely on a single pass of crochet.
- Lining. Adds professionalism and prevents snagging of small items. Sew zipper into lining before attaching to bag for neat seams.
- Weave ends & test. Test the strap pull by loading a real phone/wallet and tugging gently on seams. If anything wiggles, sew more.
- Care tag. Add a little card with fiber content and washing instruction — helps the recipient not to ruin your gift.
conclusion
There: six fast, personality-packed purse patterns you can actually finish before the seasonal guilt sets in. Pick one, make a swatch, do the tiny arithmetic (stitches-per-inch × finished width), and follow the step counts above. Reinforce the strap like you mean it and line the interior — that’s the line between “cute gift” and “household disaster.”