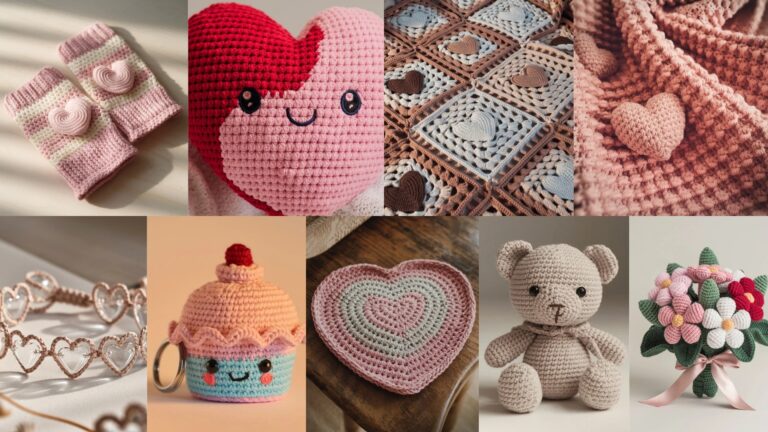
A handful of versatile stitches will take you a very long way. Learn these six — Alpine, Iris, Braid, Ripple, Diamond Granny, and Moss — and you’ll have textures and motifs for blankets, scarves, garments, accessories and home decor. Below you’ll find one clear introduction followed by a deep, practical section for each stitch: what it looks like and where to use it, materials and gauge notes, an exact step-by-step stitch repeat (so you can work a swatch), shaping/edge tips, common mistakes and fixes, variations and sample project ideas. Everything is written so you can pick up a hook and start practicing right away.
Quick essentials (abbreviations, tools, swatching)
Tools & yarn
- Use a yarn and hook combination you already know, or pick a neutral medium: worsted/aran (category 4) yarn and a 5.0 mm (H) hook are excellent for learning because stitches are easy to see.
- Other useful tools: tapestry needle, stitch markers, measuring tape, blocking pins.
Common abbreviations (US)
- ch = chain
- sc = single crochet
- hdc = half double crochet
- dc = double crochet
- tr = treble crochet (UK dc)
- st = stitch
- sp = space
- sk = skip
- rep = repeat
- BLO / FLO = back loop only / front loop only
- RS / WS = right side / wrong side
- … = work between asterisks as indicated
Swatch & gauge
- Always practice each stitch as a 4″×4″ (10×10 cm) swatch. Work the stitch pattern for several inches to get the rhythm, then measure stitches/rows per inch. That tells you how many repeats you’ll need for a project.
- When a pattern gives a repeat like “multiple of 6 + 2”, that tells you how many foundation chains to make.
1. Crochet the Alpine Stitch Pattern
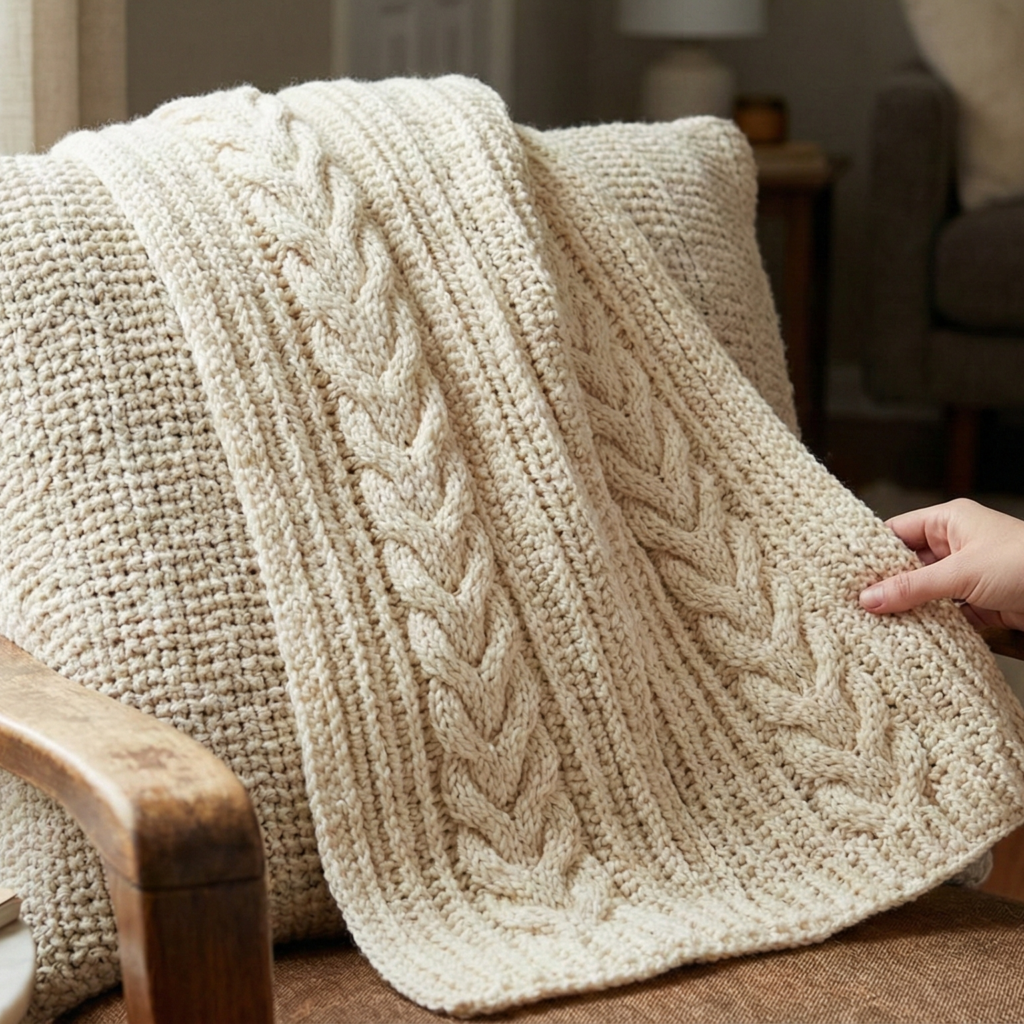
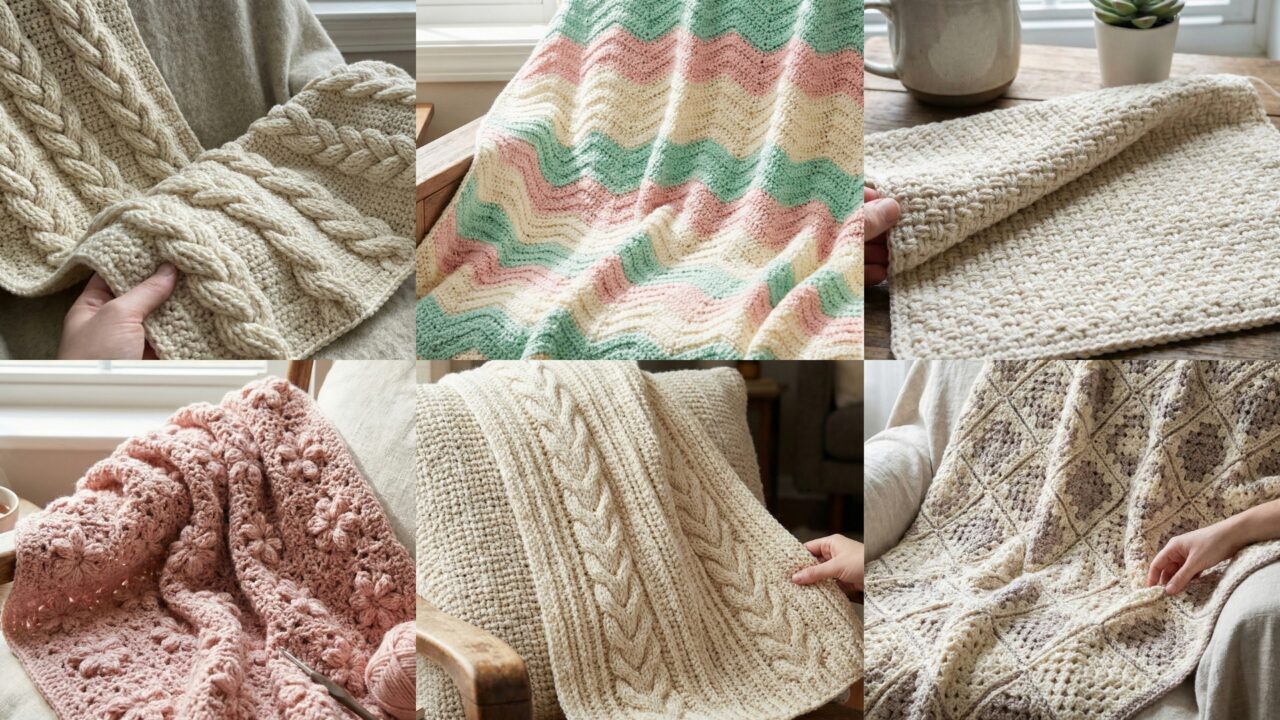
Look & use: Dense, dramatic cables-and-rib texture with vertical columns that resemble alpine knit cables. Fantastic for winter scarves, sweater panels, hats, and cushion covers where structure shows off cables.
Skill level: intermediate (post stitches & crossed stitches)
Materials & gauge: worsted weight, 5.0 mm hook. Swatch: work 4″ in pattern, block flat and count.
How the stitch works (short description)
The Alpine stitch is typically built from a foundation of front/post stitches and chain/treble combinations to create “raised cable” columns. Most versions use sets of crossed post stitches that lean left or right, alternating with rows of single rows to lock the cables in place.
Foundation chain
- Multiple: usually a multiple of 8 + 3 (this is common for one Alpine variation). For the version below we use multiple of 8 + 3.
Step-by-step repeat (worked flat; can be adapted to the round)
Make a chain to desired width: ch (8 × n) + 3. Example for a small swatch: ch 27 (8×3 + 3).
Row 1 (RS): sc in 2nd ch from hook and in each ch across. Turn.
Row 2 (RS): ch 3 (counts as dc), dc in next 3 sts, fpdc around next st, bpdc around next st; rep from * to last 2 sts, dc in last 2 sts. Turn.
- fpdc = front post double crochet; bpdc = back post double crochet.
Row 3 (WS): ch 1, sc across the row in each st and around post stitches (work sc under the posts where they pass to keep edges tidy). Turn.
Row 4 (RS – Cable cross): ch 3, skip next 2 sts, dc in next 2 sts, dc in the skipped 2 sts (cross: work into earlier sts to form a cable), fpdc around next 2 sts, bpdc around next 2 sts; rep to end. Turn.
Repeat Rows 2–4 until swatch reaches desired length; finish with one row of sc for a tidy edge.
Notes on the crossing: when swapping order, you may hold worked stitches on a cable needle or simply work into them in the order that creates the crossing. If working without a cable needle, insert hook into the designated stitch out of numerical order and complete the dc — the result is a crossed look.
Edging & finishing tips
- Work a round or two of sc on the short ends to stabilize, then block with pins and steam or wet block to open the cables.
- For garments, align cables so that seams hide inside a cable column.
Common mistakes & fixes
- Problem: Loose, undefined cables. Fix: Reduce hook size by 1/2–1 mm for crisper post stitches.
- Problem: Posts not sitting straight. Fix: On the row following post stitches, sc into the tops of the posts to lock them upright.
Variations & uses
- Make a narrow Alpine scarf (two cable columns) or a wide blanket panel by repeating the pattern across width.
- Use contrasting color for the background rows to highlight post stitches.
2. Crochet Iris Stitch Pattern

Look & use: floral, lacy raised “petal” motifs repeating in a subtly diagonal grid — great for shawls, baby blankets, lacy cardigans and decorative borders.
Skill level: confident beginner → intermediate (shells + layered stitches)
Materials & gauge: DK or worsted depending on scale. Example: DK with 4.0 mm hook for lightweight scarves.
How the stitch works
The Iris stitch creates petal-shaped clusters (shells) that sit within a mesh. The petals are often made using triples (3 dc clusters) and tall stitches worked into chain loops.
Foundation chain
- Multiple: multiple of 6 + 3 (common), but follow the exact repeat below which is multiple of 6 + 3.
Step-by-step repeat (flat)
Make a chain: ch (6 × n) + 3. Example swatch: ch 27 (6×4 + 3).
Row 1: sc in 2nd ch from hook and across. Turn.
Row 2: ch 3 (counts as dc), skip 2 ch, (3 dc, ch 2, 3 dc) in next ch (shell), skip 2 ch, dc in next ch; rep across and end with dc. Turn.
Row 3: ch 1, sc across inserting sc into the ch2 spaces and top of dcs as needed; this anchors shells. Turn.
Row 4: Repeat Row 2 but offset shells so that shells sit between shells of previous shell row (this creates the iris staggered grid). To offset, start with dc in place of first shell, then skip 2, shell in next, skip 2, dc rep.
Repeat Rows 3–4. The sc rows tidy and lock the shells.
Edging & shaping
- For a straight edge, start and end with sc rows trimmed so shells do not overhang edges significantly, or start/end with half shells.
- For short-row shaping (e.g., triangular shawl), end with partial repeats.
Common mistakes & fixes
- Problem: Shells collapse. Fix: Use a hook a touch smaller for shells or add an extra sc anchor row below to support them.
- Problem: Off-centered shells. Fix: Check your multiple and alignment each shell row — using stitch markers at repeat boundaries helps.
Variations & uses
- Make a feminine baby blanket with full-size iris shells and a cotton yarn for washability.
- Use long chains between shells to create more lacy versions for summer shawls.
3. Crochet Braid Stitch Pattern
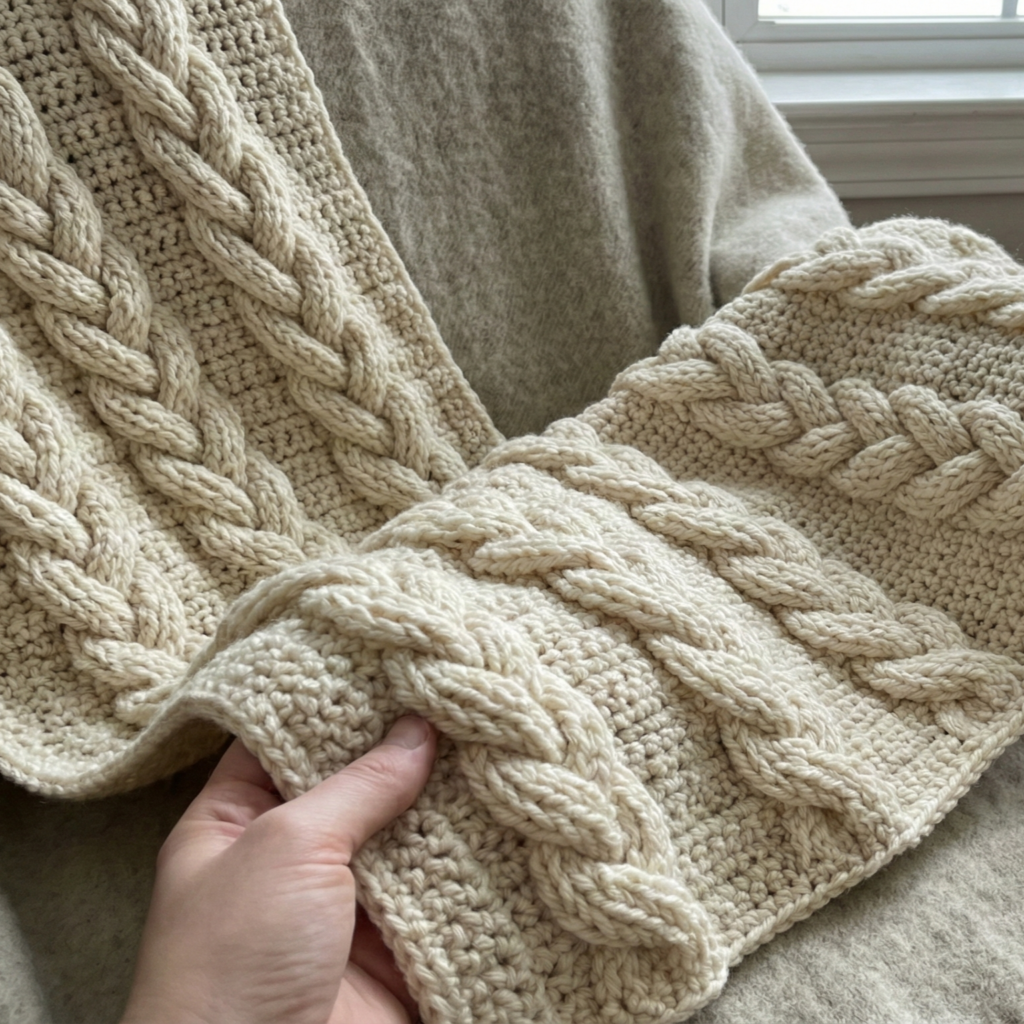
Look & use: thick braided texture that looks knitted (rope-like rows). Perfect for scarves, mitts, headbands, sweater yokes, and anywhere a cabled knitted look is desired.
Skill level: intermediate (relies on crossed stitches, post stitches or front/back post combinations)
Materials & gauge: worsted weight yarn and 5.0–5.5 mm hook are common; use smaller hook for denser braid.
How the stitch works
Braid stitches are made by crossing groups of post stitches — very similar to knitting cables but formed by crocheting around posts and swapping their order over a few rows.
Foundation chain
- Multiple: often a multiple of 6 or 8 depending on braid width. The sample below uses multiple of 8.
Step-by-step repeat (flat, a 2-column braid sample)
Ch (8 × n). Example swatch: ch 24 (8 × 3).
Row 1 (RS): sc in 2nd ch from hook and across. Turn.
Row 2 (RS): ch 3 (counts as dc), dc in next 3 sts, fpdc around next 2 sts, bpdc around next 2 sts; rep to end. Turn.
Row 3 (WS): ch 1, sc across, working under posts where needed. Turn.
Row 4 (Braid cross): ch 3, work fpdc around pair A and then fpdc around pair B but in reversed order (i.e., insert hook into second pair first then first pair) so that the posts cross; continue with dc in remaining sts — if using a cable needle technique, hold certain posts to the front/back and work the other posts first to create the crossing.
Repeat Rows 2–4.
Tips for making the braid tidy
- Mark the posts that will cross with scrap yarn so you don’t lose track.
- Work slowly the first few crossing rows to make sure you’re inserting in the right posts.
Common mistakes & fixes
- Problem: Braid looks messy or gaps after crossing. Fix: Tighten tension when working crossing rows and use sc rows below to compress gaps.
Variations & uses
- Make wider braids by increasing the number of post stitches per cable (eg 4 fpdc across instead of 2).
- Pair braid panels with stockinette crochet (hdc or dc) to highlight texture.
4. Crochet Ripple Stitch Pattern
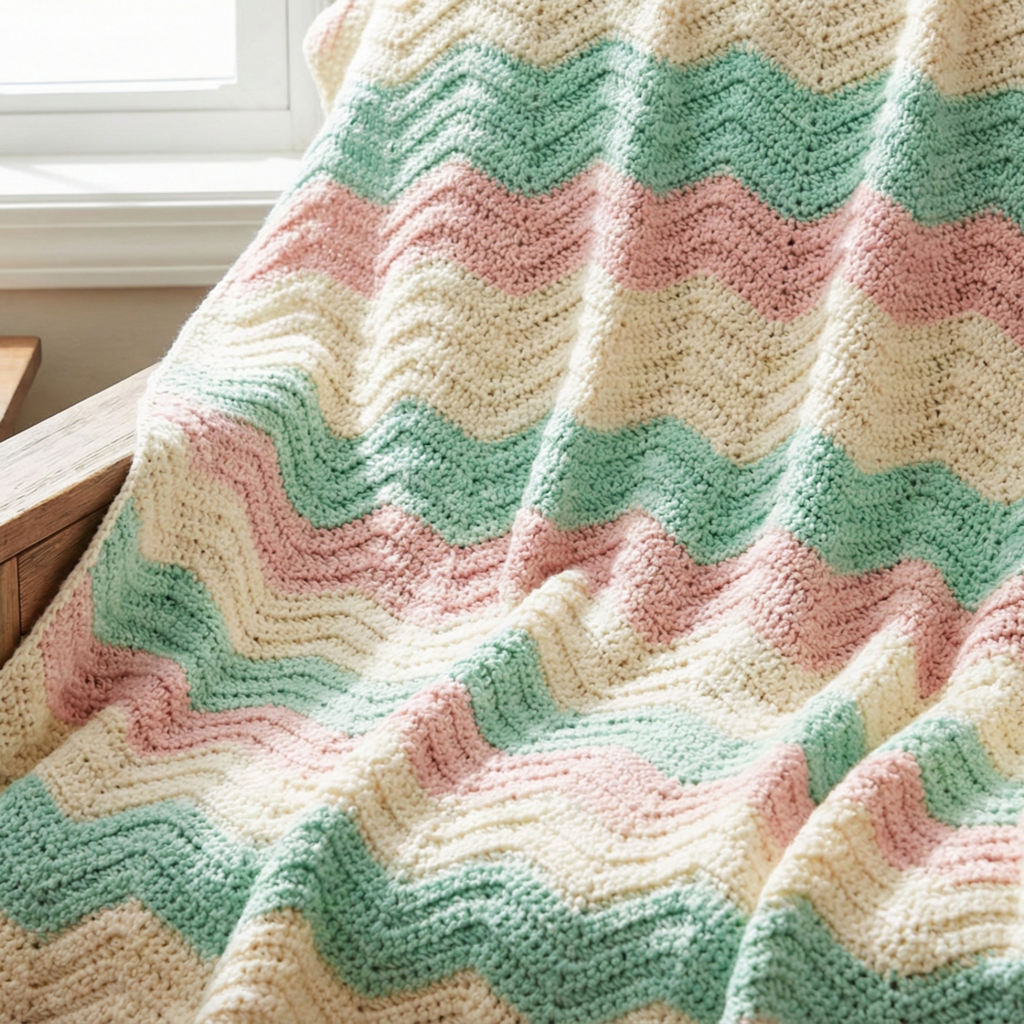
Look & use: classic wavy lines (chevrons) using increases and decreases. Staples for afghans, scarves, and baby blankets — the ripple is arguably the most iconic beginner-friendly textured stitch.
Skill level: confident beginner (basic dc increases & decreases)
Materials & gauge: choose yarn based on desired drape. Worst ed with 5.0 mm hook is standard for afghans; smaller hook/yarn yields daintier ripple.
How the stitch works
Ripple is made by working increases (multiple dc in one stitch) at the valley and decreases (dc2tog or dc3tog) at the peaks. The repeat forms an up/down waveform.
Foundation chain
- Multiple: any multiple of 12 (common ripple charts use 12 or 14), plus a few turning chains; below uses multiple of 12 + 3 (ch counts may vary with pattern).
Step-by-step repeat (classic 14-st ripple sample)
Ch 43 (12 × 3 + 7 for edge). For a larger piece make a longer chain using the multiple and add the extra chains for turning and edge.
Row 1: dc in 4th ch from hook and across as base row. Turn.
Row 2: ch 3 (counts as dc), dc in next 4, dc2tog twice (or dc3tog depending on width of peak), dc in next 4, (3 dc in next) twice for valley; rep across; end with dc to match turning. Turn.
Row 3: ch 3, dc across repeating the same increases/decreases in alignment with row 2 — you will always work the increases at the valley and decreases at peaks to retain the ripple shape.
Repeat Row 2 until desired length. Finish with a row of dc and a neat edging: sc across or picot edge for a decorative finish.
Edge & finishing tips
- To keep straight edges, work half peaks at the start/end (the +3 in the chain usually accounts for edge stitches).
- Blocking helps the waves settle.
Variations & uses
- Change color every few rows for a striped ripple.
- Make baby blankets by using softer yarn and shallower ripples.
5. Crochet Diamond Granny Stitch Pattern
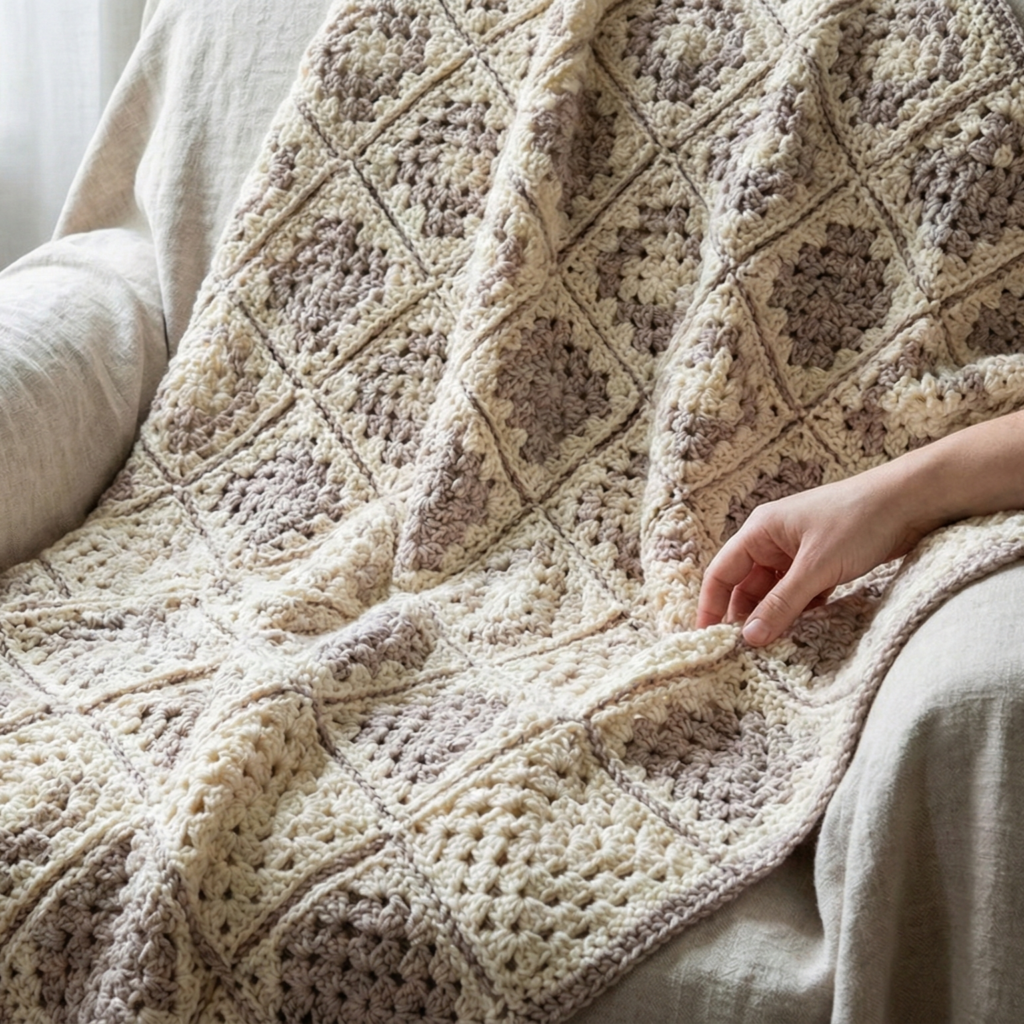
Look & use: granny-square influence turned into a geometric diamond motif that makes an attractive textured fabric for throws, cushion covers, and garments with geometric interest.
Skill level: confident beginner (granny clusters and joining)
Materials & gauge: worsted or DK depending on scale; granny patterns scale easily with yarn weight.
How the stitch works
The Diamond Granny is a mosaic of granny clusters (3 dc clusters) arranged so that negative spaces and chain spaces form diamond shapes. You can work it as a rectangular repeat rather than separate squares.
Foundation chain
- Multiple: usually multiple of 6 + 1 (depending on chosen diamond width). The pattern below uses multiple of 6 + 1.
Step-by-step repeat (grid-style diamond)
Ch (6 × n) + 1. Example swatch: ch 25 (6×4 + 1).
Row 1: dc in 4th ch from hook, ch 2, skip 2 ch, 3 dc in next ch; repeat across to end; turn. This creates little granny clusters separated by chain spaces.
Row 2: ch 3, 3 dc cluster in the chain-2 spaces, ch 1 between clusters where needed to shift placement slightly so diamonds begin to appear; alternate cluster positions on each row to build the diamond shapes.
Row 3: ch 1, sc across tying together cluster tops to create the illusion of diamonds; this sc row can stabilize the pattern and is optional based on your diamond size.
Repeat Rows 1–3 or a 4-row offset depending on how the diamonds line up; once you see the diamonds form you can adjust chain spaces to make larger or smaller diamonds.
Edging & joining
- When joining multiple panels seam along diamond borders so motifs align. You can also join-as-you-go for continuous diamonds.
Variations & uses
- Use two colors alternating per row to make diamonds pop.
- Work narrow strips of diamond granny and join them into a blanket for an elegant modular layout.
6. Crochet Moss (or Linen) Stitch Pattern
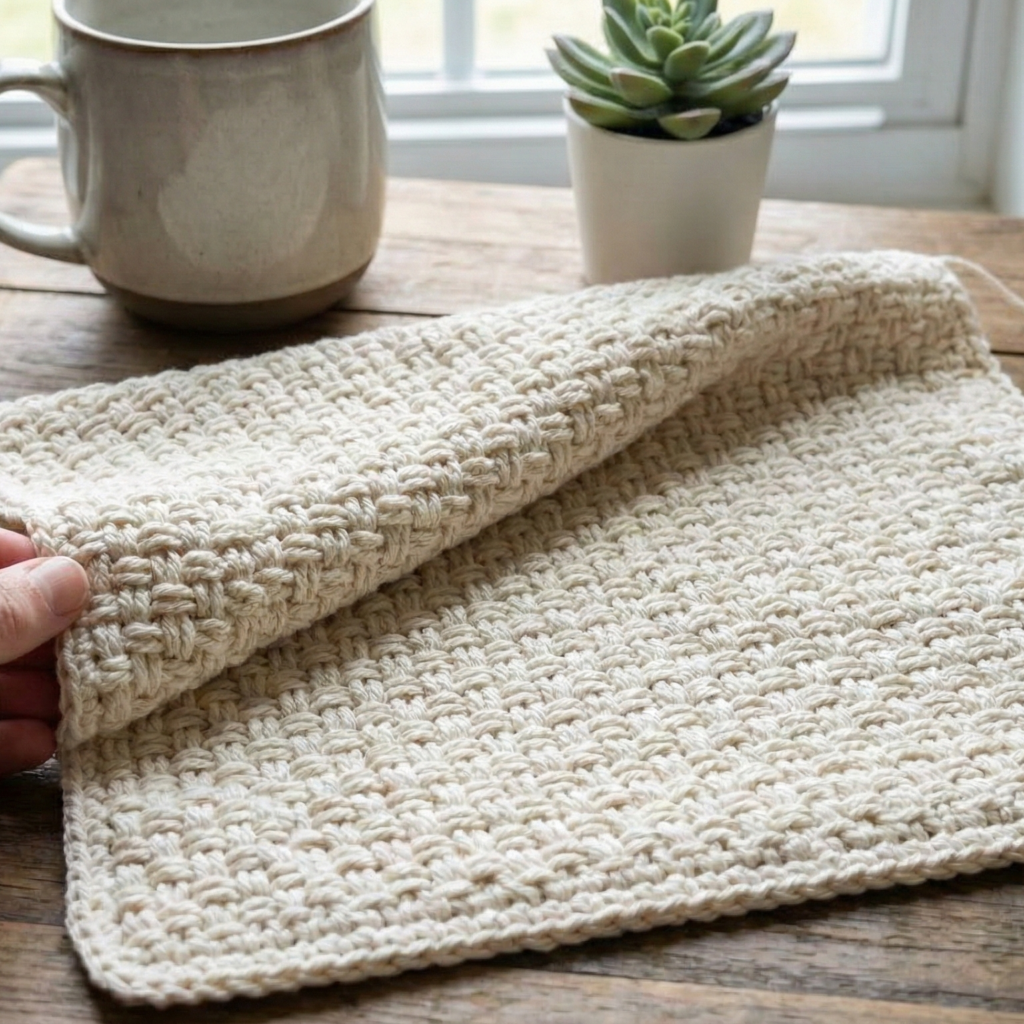
Look & use: small, woven texture that looks like tiny tiles — flat, reversible and extremely useful as a fabric base for garments, washcloths, dishcloths, scarves and warm layers. It’s one of the most versatile basic textures.
Skill level: beginner (simple repeat)
Materials & gauge: works in any weight yarn. For dishcloths use cotton, for garments use wool or acrylic depending on drape.
How the stitch works
Moss stitch alternates sc and ch across a row and then alternates the opposite on the next row (sc into ch-spaces), producing a tightly woven, almost knit-like fabric.
Foundation chain
- Multiple: any even number + 1 (for turning), but you can work any multiple; typical is ch multiple of 2 + 1.
Step-by-step repeat (flat)
Ch an odd number (example 21 for a small swatch).
Row 1: sc in 2nd ch from hook, ch 1, skip next ch, sc in next ch; repeat to the end, end with sc in final ch. Turn.
Row 2: ch 1 (does not count), sc in first ch-1 space (the ch-1 from previous row), ch 1, sc in next ch-1 space across; finish with sc in last sc. Turn.
Repeat Row 2 to continue. Because you work into chain spaces rather than every stitch, the fabric is balanced and reversible.
Edging & shaping
- For a tidy edge, add 1 round sc around the entire piece. For garments, remember the moss stitch shrinks slightly in width; adjust stitch counts based on gauge.
Common mistakes & fixes
- Problem: Edges wobble. Fix: use sc borders or add a foundation row of sc before working the moss repeat.
- Problem: Pattern loses alignment. Fix: count ch-1 spaces and use stitch markers on edges.
Variations & uses
- Work moss stitch in the round to make hats with textured bands.
- Try longer chains between sc (e.g., ch 2) to produce an open linen stitch for summer garments.
Closing & how to practice these stitches
Practice plan
- Make one 4″×4″ swatch per stitch. Focus on tension and placement — post stitches (Alpine, Braid) are slower but rewarding.
- For textured stitches (Alpine, Braid), practice the crossing/cable rows slowly and mark posts with scrap yarn.
- For lace/eyelet stitches (Iris, Ripple), keep chains neat and count repeats to align rows.
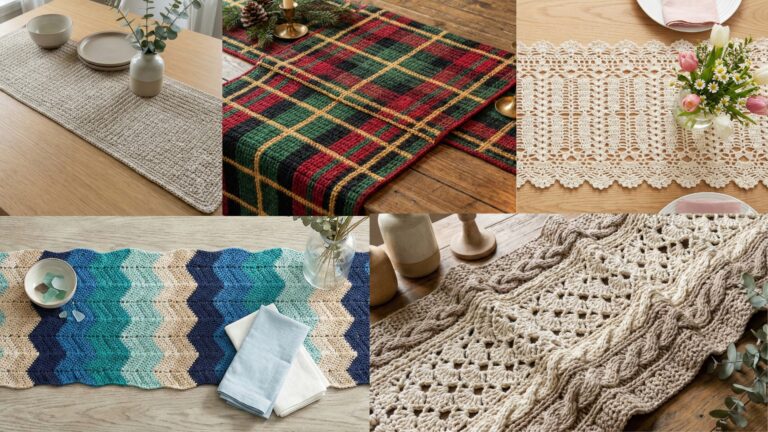
Project suggestions
- Alpine/Braid → chunky scarf, hat band, sweater yoke.
- Iris/Diamond → feminine shawl or baby blanket.
- Ripple → classic throw or table runner.
- Moss → washcloths, sweater body panels, cardigans.
Final tip
Pick one simple project (a scarf or a small throw) and make each stitch block as a panel — you’ll learn how the stitch behaves at scale and get a beautiful sampler as a practical resource.
Conclusion
These six stitches—Alpine, Iris, Braid, Ripple, Diamond Granny, and Moss—cover a broad range of textures and uses. From the warm, cable-like height of the Alpine stitch to the airy fans of Iris, and the tactile simplicity of Moss, each stitch gives you a distinct tool for design. Practice each one with a 4″ swatch, note how yarn and hook size change the result, and then pick a small project to apply the stitch at scale. You’ll find that understanding these foundations gives you the confidence to mix textures, plan colorwork and build garments or home pieces with intention and flair.
Happy crocheting—enjoy exploring texture, color and form with these must-know stitch patterns.