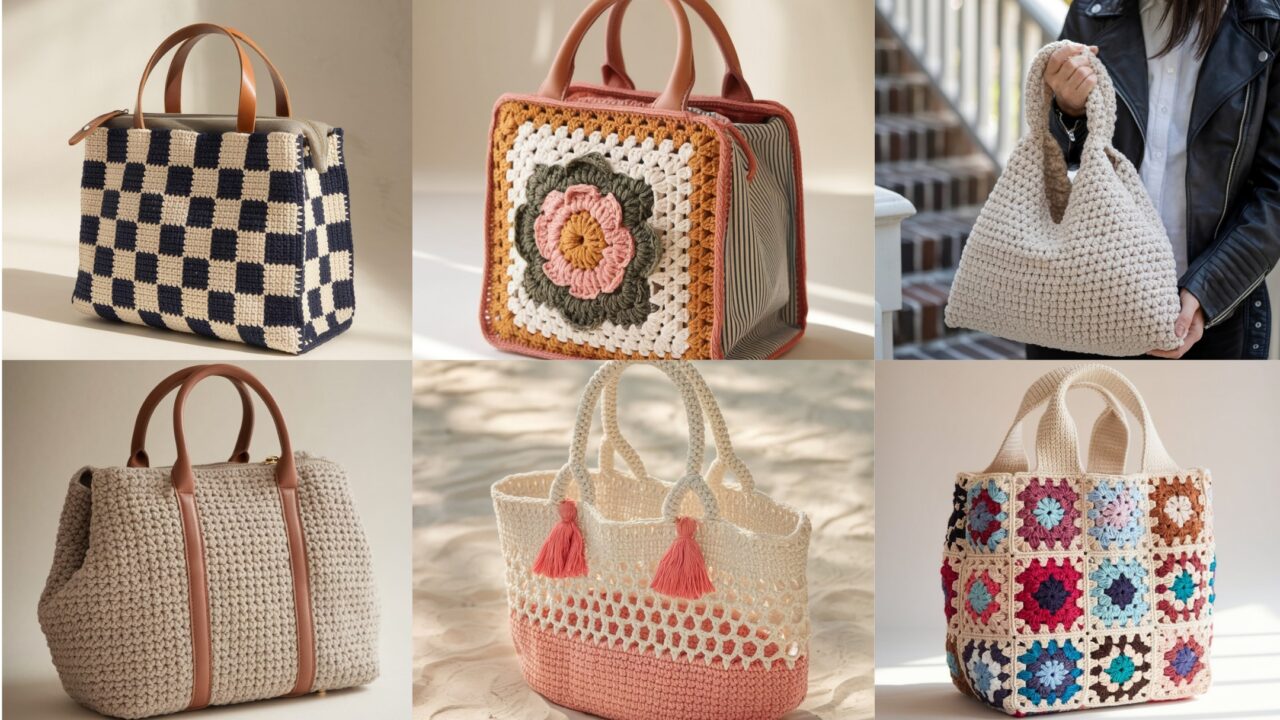
Small, practical, and stylish — a crocheted handbag is one of the most satisfying accessories to make. These six modern handbag patterns cover easy summer totes, retro floral shapes, clean gingham, cozy patchwork, elegant Japanese knot detail, and the structured Belmont tote. Each pattern below includes: finished size and use, skill level, materials and tools, gauge guidance, exact step-by-step construction (works in rounds or rows as appropriate), lining/closure/strap suggestions, finishing tips, and variations so you can personalize every bag.
Before you begin: choose yarn with purpose. For everyday bags use cotton, cotton blends, or sturdy recycled/rope yarn for structure and washability. If you want a soft, slouchy bag, go for acrylic blends or wool blends (but they may stretch). Always consider lining heavier or open-weave bags to protect contents.
Quick common abbreviations & notes
- ch = chain
- sl st = slip stitch
- sc = single crochet
- hdc = half double crochet
- dc = double crochet
- tr = treble crochet
- BLO / FLO = back/front loop only
- st(s) = stitch(es)
- inc = 2 sts in same stitch
- dec = single crochet decrease (sc2tog)
- MR = magic ring
- Gauge: when given, measure a 4” (10 cm) square in the stitch indicated. Adjust hook to match tension for the most predictable fit.
1. Crochet Sweet Summer Handbag Pattern
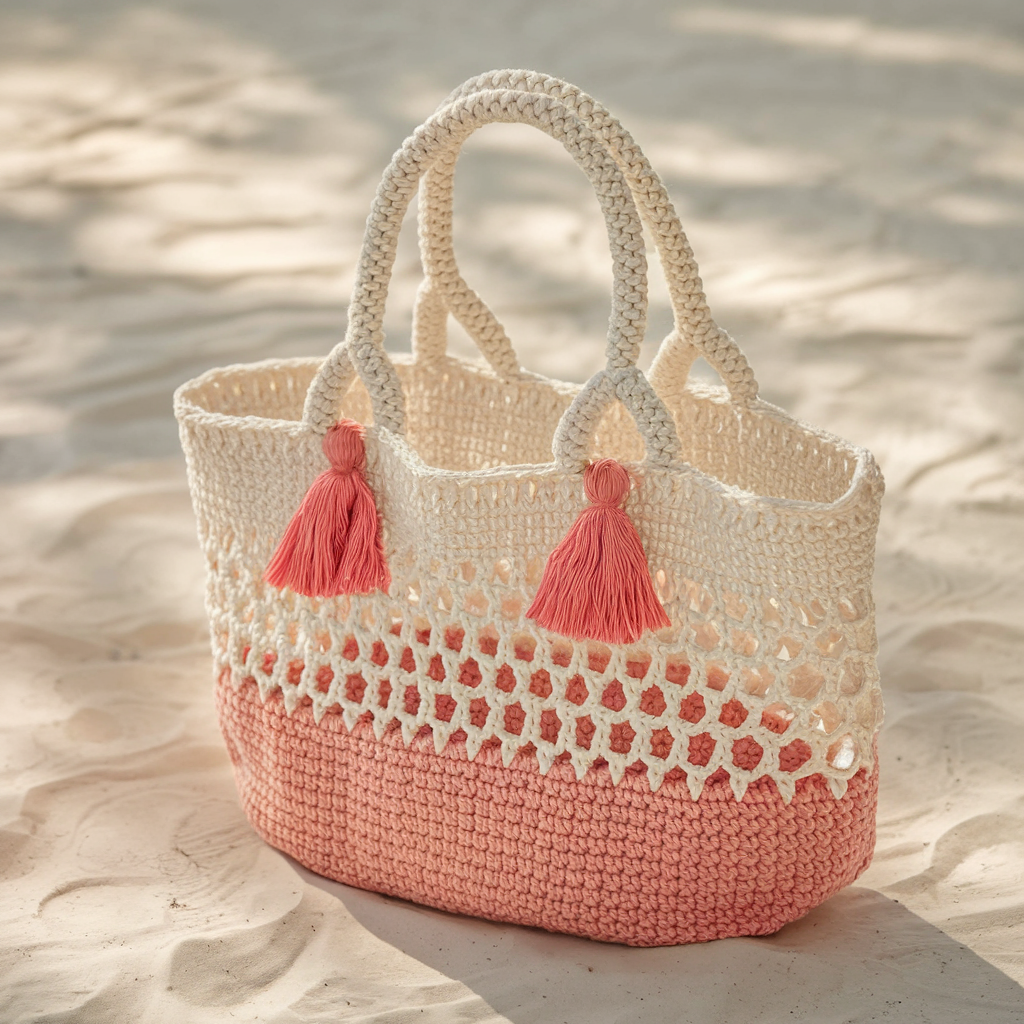
Style & use: Lightweight summer tote for beach, market runs, or a light daily carry. Open-top, airy stitches, quick to make.
Finished size: approx. 13″ wide × 12″ high (excluding handles) × 4″ bottom depth.
Skill level: Easy → Beginner comfortable with basic stitches.
Materials & tools
- Cotton worsted (weight 4) or sturdy cotton blend, ~400–600 yds.
- Hook: 5.0–6.0 mm (match gauge).
- Tapestry needle, stitch markers, optional lining fabric (lightweight canvas) and needle/sewing machine, 24–30″ cotton rope handles or crocheted handles.
Gauge (example): 12 dc × 8 rows = 4″ with 5.5 mm hook. Adjust hook if needed.
Design idea
Open, breathable mesh body with a tighter, reinforced base and comfortable handles. Optional contrast trim and tassels for charm.
Step-by-step (worked bottom-up)
Base (oval—for stability)
- Ch 10. R1: sc in 2nd ch from hook and across (9 sc), then work 3 sc in last ch to turn and work across foundation chain opposite side, 9 sc, then 3 sc in last ch; join with sl st to first sc. (30 sc approx—adjust foundation for desired width). Place marker at join.
- R2: ch 1, sc in same st, sc around, working 2 sc in corner sts (the 3-sc groups) to maintain oval shape. Join.
- R3: Work 1 round of hdc in BLO to thicken the base (optional). This forms a sturdy bottom.
Body (mesh)
4. R4: Join main color: ch 4 (counts as dc + ch1), skip 1 st, dc in next st, ch 1 repeat around, join to top of ch-3 to make open mesh.
5. R5–R20: Repeat R4 until bag height ~12″ (or your preferred height). Keep tension even. For a tighter, denser tote, use (hdc, ch1) instead of dc loops.
Top edge & handles
6. R21: Work 1–2 rounds sc around the top to firm edge. For handles: option A (crocheted handles): mark two opposite sections each ~7–8″ apart—ch an appropriate length for handle (e.g., ch 45), sl st back to base row to create sturdy strap, then sc 1 round around strap for thickness. Option B (rope handles): sew rope handles to the inside of the top edge with heavy-duty thread and reinforce with a short row of hdc around attachment points.
Finishing & lining
7. Weave in ends. If you plan to carry small items, sew a fabric lining (cut lining ½″ smaller than bag opening to tuck) and topstitch into place. Add a snap or magnetic closure sewn through lining for security. Add optional tassels or pom-pom trims.
Tips & variations
- Make the base larger for a deeper market bag.
- Color-block the bottom and the body for a modern look.
- Reinforce handles with plastic webbing under the lining for heavy loads.
2. Crochet Retro Flower Handbag Pattern
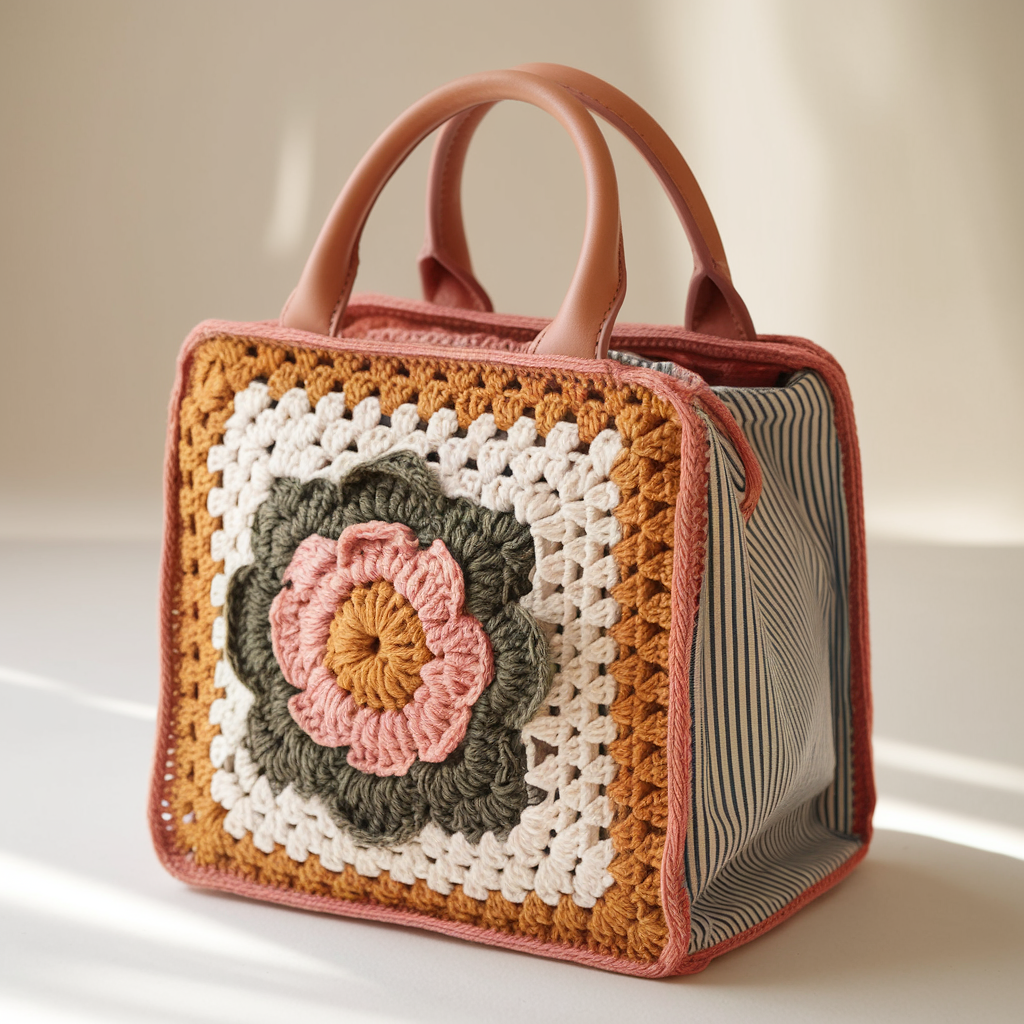
Style & use: Feminine retro handbag with large flower applique integrated into the panel — great as a statement everyday bag or weekend clutch.
Finished size: ~12″ wide × 9″ high × 3″ depth.
Skill level: Intermediate (motif work + assembly)
Materials & tools
- Sturdy cotton DK/worsted in 3–4 colors (main panel, flower contrast, center), ~450 yds.
- Hook: 4.0–5.0 mm; zipper or button closure; fusible interfacing & lining fabric; tapestry needle.
Construction overview
Front panel features a large crocheted flower worked in rounds and then squared into the bag front; back and sides are worked plain or in stripes.
Step-by-step
Front flower motif
- MR, ch 2, work 10 dc into MR, join (10). R2: ch 3, ch 2, sl st into next dc around to create loops, join. R3: Into each loop work (sc, hdc, 3 dc, hdc, sc) to make petals (10 petals). Fasten off.
- Join background color around the petals and sc evenly to form a circular flat disc. Work a few rounds of sc until you have a canvas approx 8–9″ diameter.
Square conversion / panel shaping
3. When disc is ready, work a round placing 4 corner clusters (3 dc, ch 2, 3 dc) at evenly spaced points to convert to a rounded square. Continue granny-style rounds until square measures 12″. Add a sc outer edge.
Back & sides
4. Back panel: work an identical 12″ panel in striped dc rows or a solid sc panel. For sides and bottom: ch length to equal bag circumference around sides (or make two side strips each 3″ × 12″). Join pieces by slip-stitching or whipstitching joined panels inside out.
Handles & closure
5. Sew a zipper into top with lining, or make a flap closure with a large button. For mid-length straps: crochet straps (hdc rows held together) or use leather handles sewn into side seams.
Lining & interfacing
6. Because the flower panel has texture, add fusible interfacing to lining to flatten and protect petals from catching. Sew lining seam and insert into bag, top-stitch into zipper seam.
Styling & variations
- Make the flower 70s-inspired by using mustard + olive + cream.
- Reduce number of petals for simplified graphic look.
- Add a detachable long strap for crossbody use.
3. Crochet Simple Gingham Handbag Pattern

Style & use: Clean, graphic gingham tote inspired by picnic classic—structured and modern. Perfect for errands and work.
Finished size: 14″ wide × 10″ high × 4″ depth (structured)
Skill level: Intermediate (colorwork / tapestry crochet)
Materials & tools
- Sturdy cotton yarn in two colors (A = light, B = dark), approx. 600 yds total.
- Hook: 4.5–5.0 mm (use smaller hook if you want denser fabric to better hold shape), lining fabric, interfacing, zipper, tapestry needle.
Technique: tapestry crochet (carry floats or use bobbins per color)
Core concept & chart
Make a color-chart grid for gingham squares (e.g., 4 sts × 4 rows per block). Gingham is made by combining color A and B in alternating blocks that form the classic checked look. For a 14″ wide bag, calculate number of blocks needed across using your gauge.
Step-by-step
Panel counts & gauge
- Make a 4″ swatch in your intended tapestry pattern to determine stitches per inch. Convert bag width to stitch count (example: 3.5 sts/in × 14″ = 49 sts). Plan pattern to center the grid.
Front panel (worked in rows)
2. Ch foundation count (e.g., ch 51). Row 1: sc (or dc based on your chart preference) across in chosen color, carrying the other color along the back every time you skip colors (catch floats every 4–6 stitches to avoid long floats). Follow the gingham chart row by row to change colors smoothly. Use a consistent method to carry yarn to maintain fabric thickness.
3. Continue for height until panel = 10″. Repeat for back panel. Keep tension even — tapestry tends to form a dense fabric ideal for structured bags.
Bottom & sides
4. For a boxy bag, crochet a long strip with same pattern for sides and bottom: ch enough to go around bag perimeter and sc in rows until desired depth (4″). Alternatively, make separate side panels and seam.
Assembly & interfacing
5. Apply fusible interfacing to fabric lining pieces to create structure. Sew lining to zipper, then sew zipper to bag top—this gives a professional finish. Sew panels together (bag shell), then insert lining and blind-stitch closed.
Handles
6. Use sturdy leather handles (sewn through lining and shell) or crochet thick straps with multiple rows of hdc and topstitch.
Tips & variations
- For easier colorwork, use self-striping yarn for alternating rows and simulate checks with surface crochet.
- Make a smaller clutch version by scaling down rows.
4. Crochet Patchwork Handbag Pattern
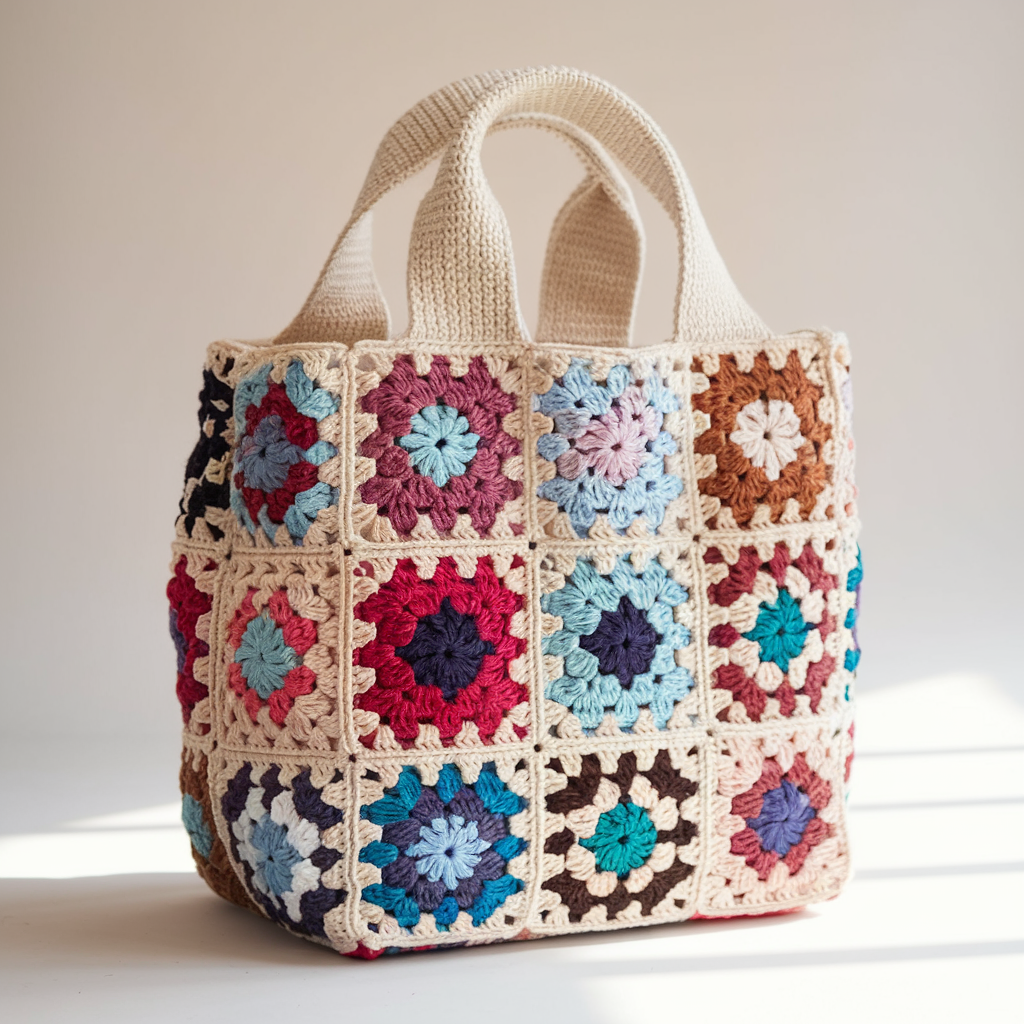
Style & use: Charming, stash-busting patchwork tote built from granny squares or mixed motifs. Great for eclectic, boho, or casual everyday use.
Finished size: depends on motif size; example: 5 × 4 motifs at 5″ each = 25″ × 20″ (adjust); suggested: 12″ × 14″ for medium bag using 3″ squares.
Skill level: Beginner → Intermediate (many small motifs + joining)
Materials & tools
- Multiple yarn scraps in assorted colors (cotton/worsted), hook 4.0–5.0 mm, tapestry needle, lining fabric, sturdy thread and zipper.
Construction concept
Make a grid of granny squares or small motifs (flower, star, mini granny). Join them using join-as-you-go, slip stitch join, or whipstitch.
Step-by-step
Make motifs
- Choose a simple 4-round granny, or variety: sunburst granny, solid granny, little hexes. Make even number to match desired grid (e.g., 4 × 3). Aim for consistency in gauge by using same hook and yarn thickness.
Block & layout
2. Block squares to uniform size. Lay them out to find a pleasing color composition—alternate warm/cool and dark/light to balance.
Join
3. Join squares using join-as-you-go on the final round (recommended for neatness): when working the final round of a square, slip-stitch into the neighbor’s corresponding stitch to attach. Alternatively use whipstitch on the wrong side and weave seam tidy.
Sides & base
4. Sew three sides together to form bag shell. For a boxed bottom, add a rectangular base piece: either crochet a long strip and fold or make two triangular side gussets. A simpler approach: seam the bottom and then flatten corners and sew across to create depth (insert width 3–4″ as desired). Reinforce base with interfacing or a cardboard insert covered in fabric for heavy loads.
Handles & lining
5. Sew lining and insert into bag. For handles: crochet thick straps or attach leather handles through lining and shell with rivets or sew-in reinforcements.
Variations & finishing
- Add internal pockets to lining.
- Add tassels at corners or a fringe trim across top.
- Use neutral joins (cream) or bold contrasting joins for a graphic look.
5. Crochet Japanese Knot Handbag Pattern
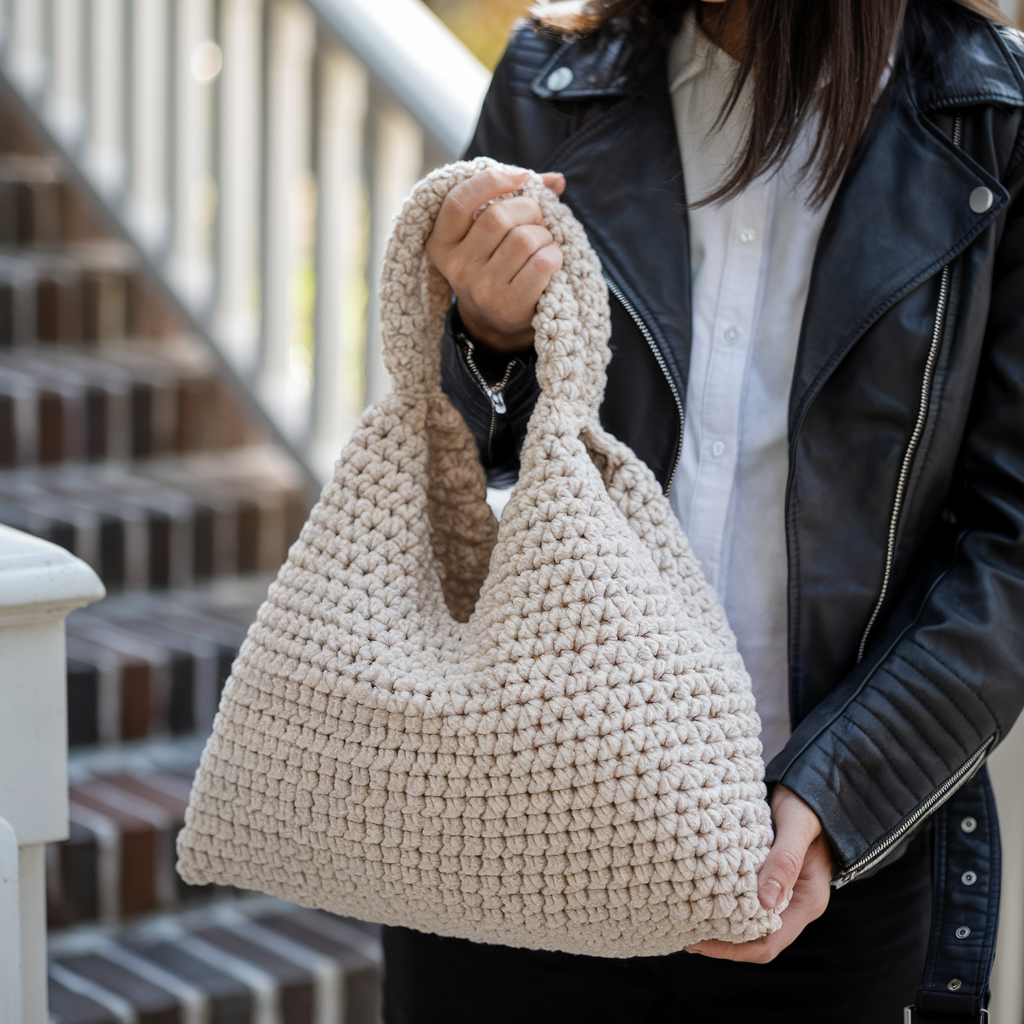
Style & use: Elegant handbag featuring a Japanese knot detail or closure — minimalist lines, structured silhouette; daytime-to-evening versatile.
Finished size: ~11″ wide × 8″ high × 3″ depth; knot strap fits through top for secure closure.
Skill level: Intermediate → Advanced (shaping + fastenings)
Materials & tools
- Smooth cotton/silk-blend or linen yarn (gives clean stitch definition), ~500 yds.
- Hook: 4.0–5.0 mm. Leather or rigid handles optional. Lining + small button/hooks.
Concept & inspiration
The “Japanese knot” here refers to decorative knotted strap detail (inspired by mizuhiki or kumihimo knots) used as a decorative & functional closure. We’ll make a structured rectangular bag with a top flap that loops through a decorative knot loop.
Step-by-step
Base & body (worked flat)
- Ch 36 (or width per gauge). Row 1: dc in 4th ch from hook and across. Row 2–26: dc rows to build front panel ~8″ high. Make a matching back panel.
- For bottom gusset: ch length equal to side depth (e.g., 10 ch), sc row to match perimeter and work until side gusset height = 3″; you may also create a base panel rectangle and seam all pieces together.
Flap
3. On front panel, mark a flap center to fold down. Alternatively, make a separate flap crocheted as: ch 36, dc rows decreasing each side to form a tapered flap about 6″ long. Attach flap to back top edge so it folds over front.
Japanese knot strap & loop
4. Make a decorative knot strap: crochet a narrow cord (i-cord or chain stitched rope) of about 30–40″ (depending on desired knot look). Use cord to tie a decorative knot (figure-8 style) or follow kumihimo-inspired loop technique: form a loop of cord and weave the loose end through multiple passes creating a chunky knot. Secure with stitches that are hidden in the knot.
- Sew knot to flap center (decorate) and make a small loop on the bag front (stitch a short cord loop) that the knot can pass through to secure the flap. The knot acts as an elegant toggle.
Handles & lining
6. For a structured handbag, attach leather top handles through reinforced holes or sew in stiffened handles. Line the bag with interfaced fabric and add an internal zip pocket.
Finishing & tips
- Keep stitch tension even for fold-over flap to fold nicely.
- Use a dense stitch (sc or hdc) for firmness, or back post stitches to add body.
- For evening clutch version, make smaller scale and use a magnetic snap under the knot for extra security.
6. Crochet Belmont Handbag Pattern
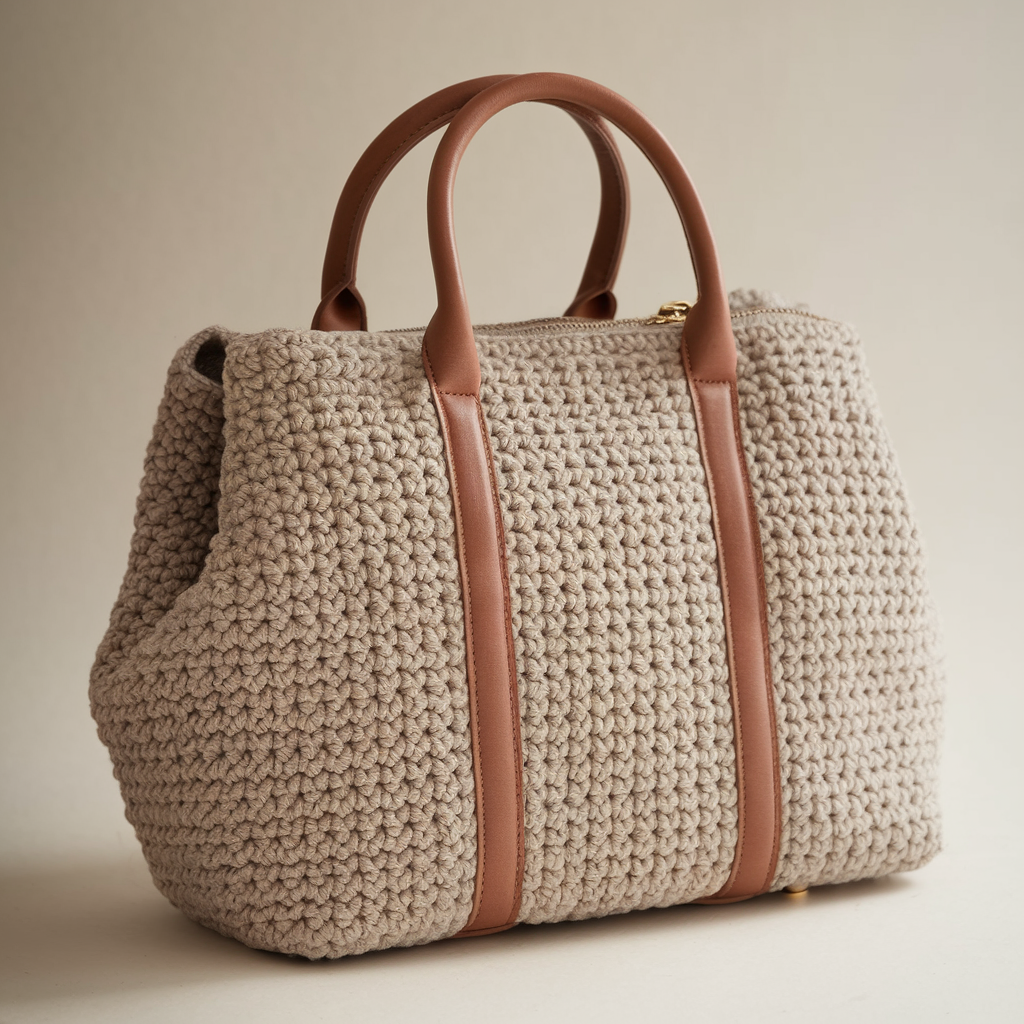
Style & use: Structured, chic everyday tote with geometric panels and reinforced base. The Belmont is inspired by city totes — roomy, professional, and durable.
Finished size: 15″ wide × 11″ high × 5″ depth (substantial daily tote)
Skill level: Intermediate → Advanced (structured shaping & interfacing)
Materials & tools
- Sturdy cotton or cotton/nylon blend yarn, ~900 yds.
- Hook: 5.5 mm for body (or appropriate to get dense fabric).
- Heavy duty interfacing for base & sides, lining fabric, robust zipper (14–16″), leather or thick crochet straps, rivets or strong thread.
Design features
- Boxy base; panel texture via waffle stitch or stepped rib; internal pockets and optional key leash.
Step-by-step
Base (rectangle)
- Ch 36 (or width for 15″ with your gauge). R1: sc in 2nd ch from hook across. R2–4: sc across to form a dense base approx 5″ high. Alternatively make a separate base rectangle and reinforce with interfacing/cardboard covered with fabric.
Body panels (front/back)
2. For textured Belmont look, use waffle stitch: (row repeats) ch 1, hdc in next st across for texture: Waffle stitch: RowA: ch 1, hdc across; RowB: ch 1, hdc BLO across; RowC: ch 1, hdc across; repeat A–C to create grid-like waffle panels. Make two panels 11″ high each.
Sides & assembly
3. Make two side panels (5″ wide × 11″ high) in sc or same waffle stitch. Seam the panels to base using whipstitch or mattress stitch, ensuring corners are square. Use heavy thread to reinforce stress points.
Top edge & zipper
4. Add 1–2 rounds of sc around top to tidy. Install zipper: either sew zipper to top edge before final seam, using lining and zipper as one assembly to keep finish clean.
Handles
5. For durability, use leather handles riveted through bag or crochet thick straps by working multiple panels held together (hdc rows, folded and sewn) and sew securely through reinforced holes with washers or rivets.
Lining & pockets
6. Cut lining from sturdy cotton and apply fusible interfacing. Sew inner pockets (zip pocket and open phone pocket). Insert lining, hand-stitch or machine stitch into zipper seam. Add key-lanyard strap.
Reinforcement tips
- Add square of interfacing or plastic base inside bottom to prevent sagging.
- Topstitch handles and reinforce with bartack stitches or rivets to last through heavy use.
Final finishing & care across designs
- Seaming: whipstitch for neatness inside-out to hide seam tails. For heavy bags, use mattress stitch or back-stitch with tapestry/darning needle and doubled yarn.
- Lining: strongly recommended for loose or open-weave bags; makes them look professional and protects the crochet.
- Closures: zippers, magnetic snaps, or knot closures (Japanese knot) — pick based on style & security need.
- Care: cotton bags generally machine-washable on gentle; always remove leather parts and check yarn label. For lined bags, hand-wash shell and air dry to keep shape. Reshape while damp.
Styling, gifting & personalization ideas
- Add hardware (bag feet) and metal closures for a boutique finish.
- Personalize with initials embroidered into lining or on a leather tag.
- Create matching accessories: coin pouch, phone sleeve, or small clutch that tucks inside the larger bag.
- Make mini versions of each bag as giftable coin purses or doll-sized accessories.
Conclusion
These six modern crochet handbags span the spectrum from airy summer totes and retro floral statements to tidy gingham, joyful patchwork, elegant knot closures, and the hardworking Belmont tote. Each design can be scaled, lined, and personalized to suit your daily needs or style. Choose sturdy yarn and thoughtful assembly methods (interfacing, reinforcing handles, quality linings) for lifelong bags you’ll reach for every day.