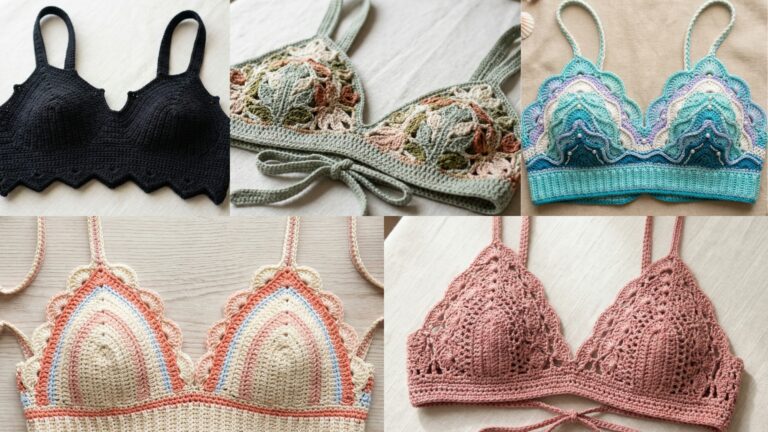
Bralettes are the best handmade garment: fast, flattering, and endlessly customizable. Crochet bralettes work equally well as a light layer under a shirt, a festival top, or a swim-covering piece for hot-weather styling. This post walks you through everything you need to design and make six modern bralette styles — each with a clear materials list, sizing guidance, gauge and fitting method, step-by-step construction (with band, cups, straps and finishing), variations, and care notes.
Read the introduction first — it contains essential measuring, gauge and math advice so the bralettes fit well. Then pick the style you like and follow the detailed instructions. All instructions use US crochet terms.
materials, measuring, gauge and how to size a bralette
Yarn & hooks
- Yarn: For bralettes use sport / DK / light worsted yarns (lightweight cotton, cotton-blend, bamboo or thin linen blends). These give drape and firmness without too much stretch. Avoid highly elastic or extremely fuzzy yarns. If you want more structure, choose a cotton/linen/wool blend; for soft drape choose bamboo/cotton blends.
- Hook: 3.0–4.5 mm depending on yarn and desired fabric. Use a smaller hook for a firmer fabric (support), larger for drape.
Notions
- Tapestry needle, stitch markers, measuring tape, small ring/adjusters (optional), narrow elastic or soft bra elastic (optional), soft foam cups (optional), small amount of clear elastic thread (optional) to stabilize strap attachments.
Measuring for fit
To fit a bralette you need two main measurements:
- Underbust (UB) — measure snugly right under the bust where the band will sit (in inches).
- Full bust (FB) — measure at the fullest part of the bust (in inches).
Decide whether you want the bralette to sit snug (for support) or loose (for layering). Typical finished band (FBand) is equal to your UB measurement or slightly smaller for comfortable hold. For a fitted band, allow negative ease: finished band 0.5–1.0 inch smaller than the UB for a secure fit. For comfortable/relaxed band choose finished band equal to UB.
Gauge & converting inches → stitches (digit-by-digit)
Always make a 4″ swatch in the stitch pattern you plan to use and measure stitches per inch (spi) and rows per inch (rpi). Then compute the number of stitches needed for the band or any linear measurement.
Example (digit-by-digit) — converting a target finished band to stitches:
- Suppose desired finished band = 30 inches, and your swatch shows 4 stitches per inch.
- Multiply 30 × 4. Do digit-by-digit:
- Break 30 into 20 + 10.
- 20 × 4 = (2 × 10) × 4 = 20 × 4 = 80. (But to be explicit: 20×4 = 2×4×10 = 8×10 = 80.)
- 10 × 4 = 40.
- Add: 80 + 40 = 120 stitches.
- So you need 120 stitches across the band (or nearest pattern multiple — see below).
If the stitch repeat needs a multiple (for example a multiple of 6 + 2), round 120 to the nearest valid number for your repeat.
Cup sizing & shaping (practical method)
A bralette cup is best handled modularly:
- Work a small sample cup to measure width and height and compare to your FB measurement and desired coverage.
- Use a triangle-cup method: a base foundation chain establishes cup width; increasing rows build height. Calculate needed cup base width by dividing desired cup coverage width by two (one cup covers half of the frontal chest width). For full-bust coverage, use (FB ÷ 2) minus half the band overlap.
Simple rule: start with a cup base equal to about 1/2 the distance between the sternum and the FB side point (measuring directly on the body) or simply make sample cups and try on — crochet is forgiving.
Stabilizing & support options
- Use elastic: sew a narrow elastic into the bottom band to keep stretch under control.
- Add removable foam or seamed cups for more shaping.
- Use denser stitch (sc/hdc) for the band and combos of open stitches (V-stitch, mesh) for the cup for breathability.
Pattern conventions in this post
- Each pattern includes: Skill level, Materials (sample for S/M/L where applicable), Gauge example, Key stitch notes, Step-by-step construction (band → cups → straps → assembly), Variations, Fit tips and Care.
- The sample sizes referenced are generic: S ~ 32 band / 34 bust, M ~ 34–36 band / 36–38 bust, L ~ 36–38 band / 38–40 bust. Adjust using the gauge conversion method above.
1. Crochet Front Twist Bralette Pattern
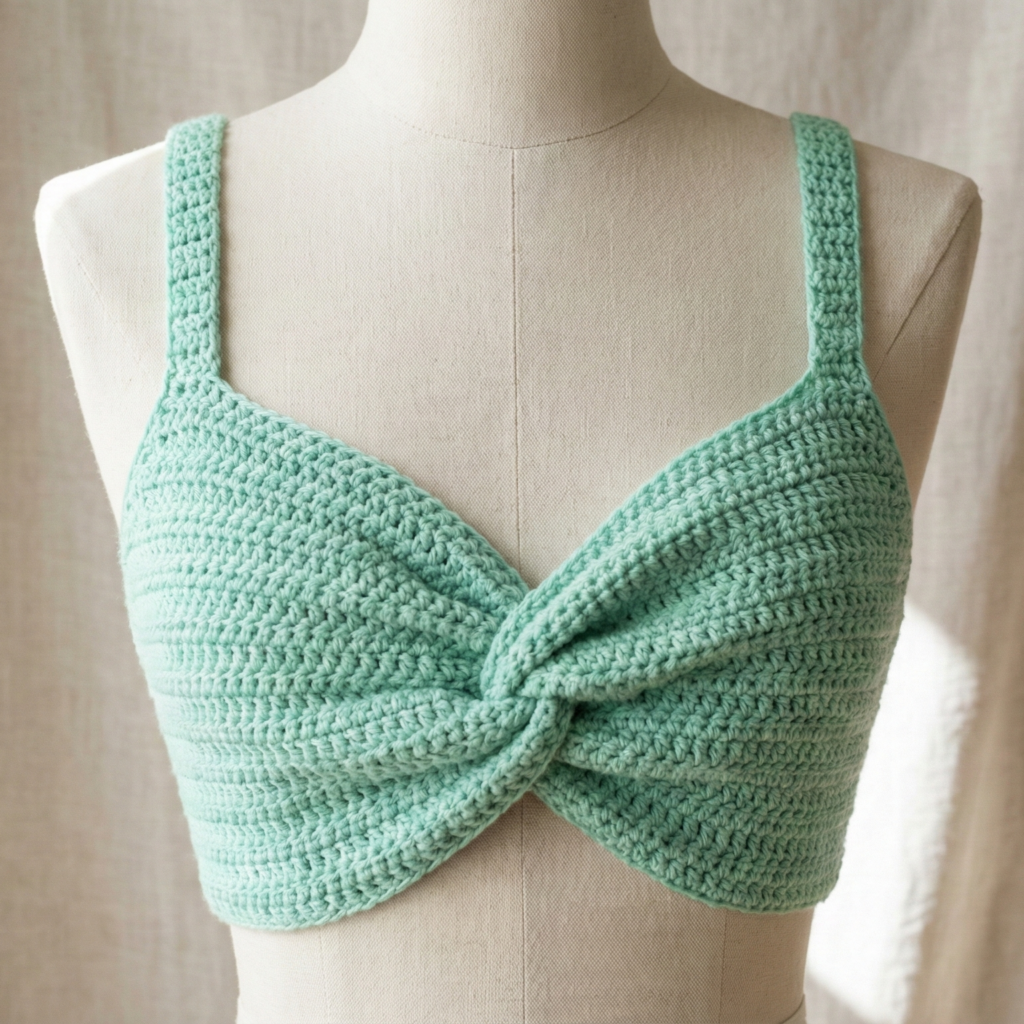
A chic twisted-front bralette with a decorative front knot that creates flattering ruched shaping. Great layered under shirts.
Skill level: Confident beginner — intermediate (basic shaping, working in rounds and seaming)
Materials (sample set — S / M / L)
- DK cotton blend yarn: S ~ 200 yd, M ~ 250 yd, L ~ 300 yd.
- Hook: 4.0 mm.
- 10–12″ elastic for band (optional), tapestry needle, scissors.
- 2 small rings if you want adjustable straps.
Gauge (example)
- Sample in hdc: 4 hdc = 1 in. Make a 4″ swatch in your intended stitch.
Key notes
- Construction: band worked first in the round, then cups are worked as two rectangles that are twisted and seamed to make the front twist. Finally straps attach to the top of cups and band.
Step-by-step
A — Band (working in the round)
- Measure your desired finished band length (see Measuring section). Using your gauge, compute stitches. Example: finished band 30 in × 4 hdc/in = 120 hdc (use the digit method).
- Chain 120 (or required stitch count). Join carefully to work in rounds without twisting.
- Round 1: hdc in each ch around. Join.
- Rounds 2–8: repeat Round 1 (or until band depth is ~1.25–1.5 in). For a firmer band, work one round of hdc in BLO (back loop only). If using elastic, leave a small opening to insert elastic later or stitch elastic into band seam after finishing.
B — Cups (worked flat — make 2)
- Decide cup width (example S = 7–8 in base). If cup base desired is 8 in and gauge is 4 sts/in → 8 × 4 = 32 sts. Chain 32.
- Row 1: hdc across (32). Turn.
- Row 2: ch2, hdc inc every 4th stitch across to begin shaping (e.g., hdc 3, inc repeat) → increases expand the cup. Alternatively use triangular increases at edges: Row 2 hdc in next st, inc (hdc2) in next to shape triangular cup.
- Continue increasing rows until cup height equals desired cup height (measure from base up). Stop when cup top reaches ~5–6 in height for moderate coverage — try on as you go.
- Repeat for the second cup.
C — Twist & attach
- Place cups side by side; take the left cup and twist it once over the right cup so the inner edges overlap in a twist. The twist forms the front ruched knot.
- Fold band so the lower edges of the cups align with the top edge of the band (front-center). Sew the bottom edge of each cup to the band using a secure whipstitch — adjust overlap so the twist sits centered.
- Seam sides of cups to band on the outside to secure.
D — Straps & finishing
- Straps: pick up stitches at top outer corner of each cup and chain to desired strap length (e.g., 10–14 in depending on body). Attach to back band and secure using small rings for adjustability if desired.
- Edge: work 1 round sc around cup tops and underband for neatness.
- Insert elastic into band if used: measure elastic to fit snugly around UB minus 0.5–1.0 in, thread through band, stitch ends of elastic together and close insertion seam.
Variations & styling
- Make cups in a mesh or v-stitch and band in solid hdc for contrast.
- Swap twist for a decorative knot: crochet a separate 2–3″ band and wrap/sew around the center.
Fit tips
- If twist pulls too tight across bust, use a wider band or larger cup base.
- Add foam inserts for more shape.
Care
- Hand wash cold or machine wash gentle; reshape and dry flat.
2. Crochet Granny Stitch Bralette Pattern
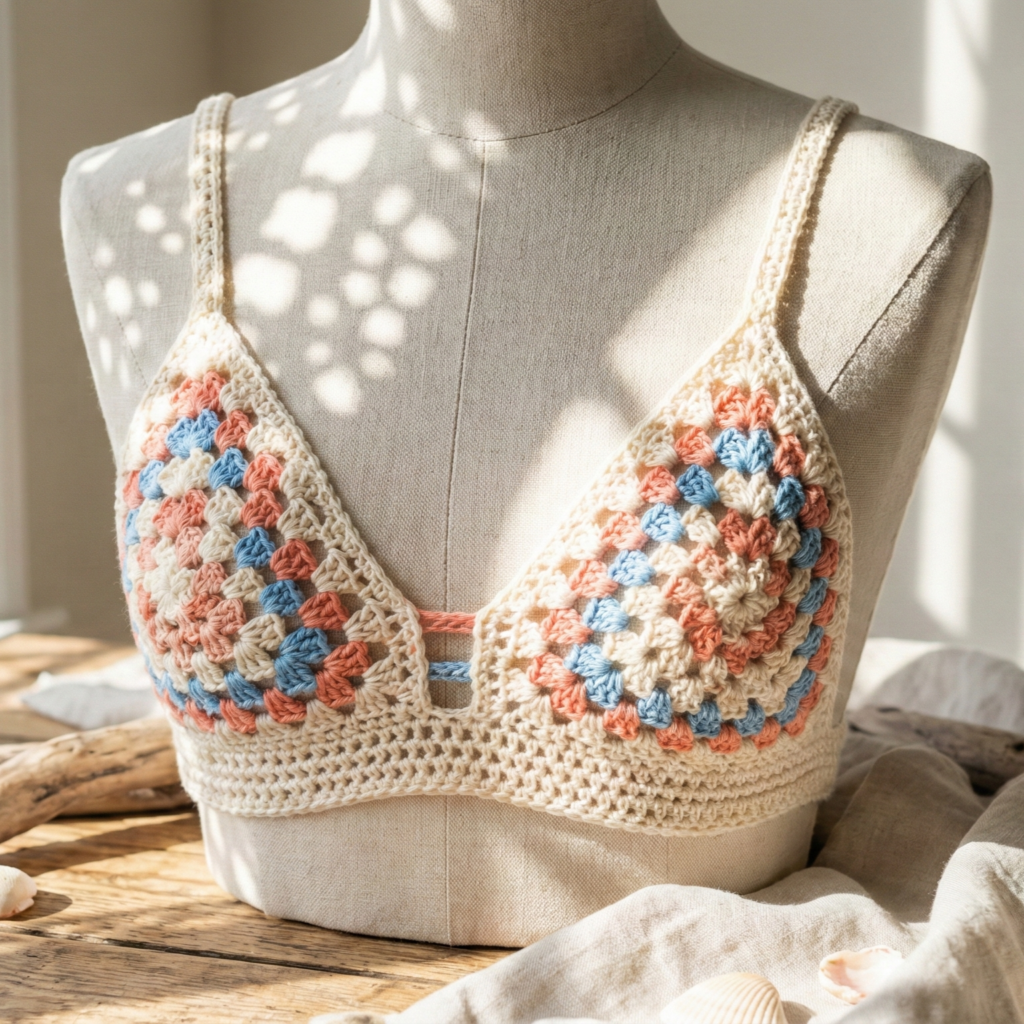
A retro-modern bralette made from granny clusters for a breathable, boho look. Great layered over a T or as summer beachwear.
Skill level: Beginner–Confident beginner (granny clusters + joining)
Materials (S / M / L)
- DK cotton: S 180 yd / M 220 yd / L 260 yd.
- Hook: 3.5–4.0 mm.
- 16″ band elastic optional, tapestry needle.
Gauge & repeat
- Granny cluster multiple: clusters form in groups of 3 dc separated by ch spaces — typical multiple of 4 chains for foundation clusters. Swatch to find cluster size.
Construction overview
- Make two triangular cups from granny rows (worked flat in joined rounds), join them with a small central band, and work an underband in rows or in the round. Straps are chains or narrow crocheted straps.
Step-by-step
A — Cups (make 2)
- Magic ring: ch3 (counts as dc), work 2 dc into MR, ch2, 3 dc into MR. (First corner of a small granny square.)
- Join with sl st to top of ch3. This produces a small unit. Continue rounds adding granny clusters in sides, increasing in corners to maintain square shape.
- After a few rounds (3–4), you’ll have a small square motif. To make a triangle cup, fold square diagonally and seam the two sides together forming a triangle. Alternatively, work triangular granny directly by starting with a small chain and working clusters that increase at edges.
- For measured control: make a small motif and fold to cup shape, adjust rounds until the triangular cup reaches the height and width you like (try on).
B — Central joining band & underband
- Join two cup bases at center with a short horizontal band: chain a length that covers cleavage width (e.g., 2–3 in) and sew cups to each end of the chain.
- Underband: pick up stitches along bottom of cups and work hdc rounds in the round to create a band ~1.25–1.5 in tall. Alternatively make a separate long strip and seam to cups.
C — Straps & finishing
- Make straps by chaining desired length and slip-stitching into strap loops along the top corners of cups and into the back band. Consider using a small ring to attach strap to band for adjustability.
- Edge with sc to tidy edges.
Variations
- Make a full motif bralette by joining multiple granny squares for a cropped top.
- Add a scalloped lace front trim.
Fit tips
- Granny fabric stretches; to avoid excessive stretch, use smaller hook or hold two strands together for the band.
Care
- Machine wash gentle if using cotton; line dry.
3. Crochet Goldstone Bralette Pattern
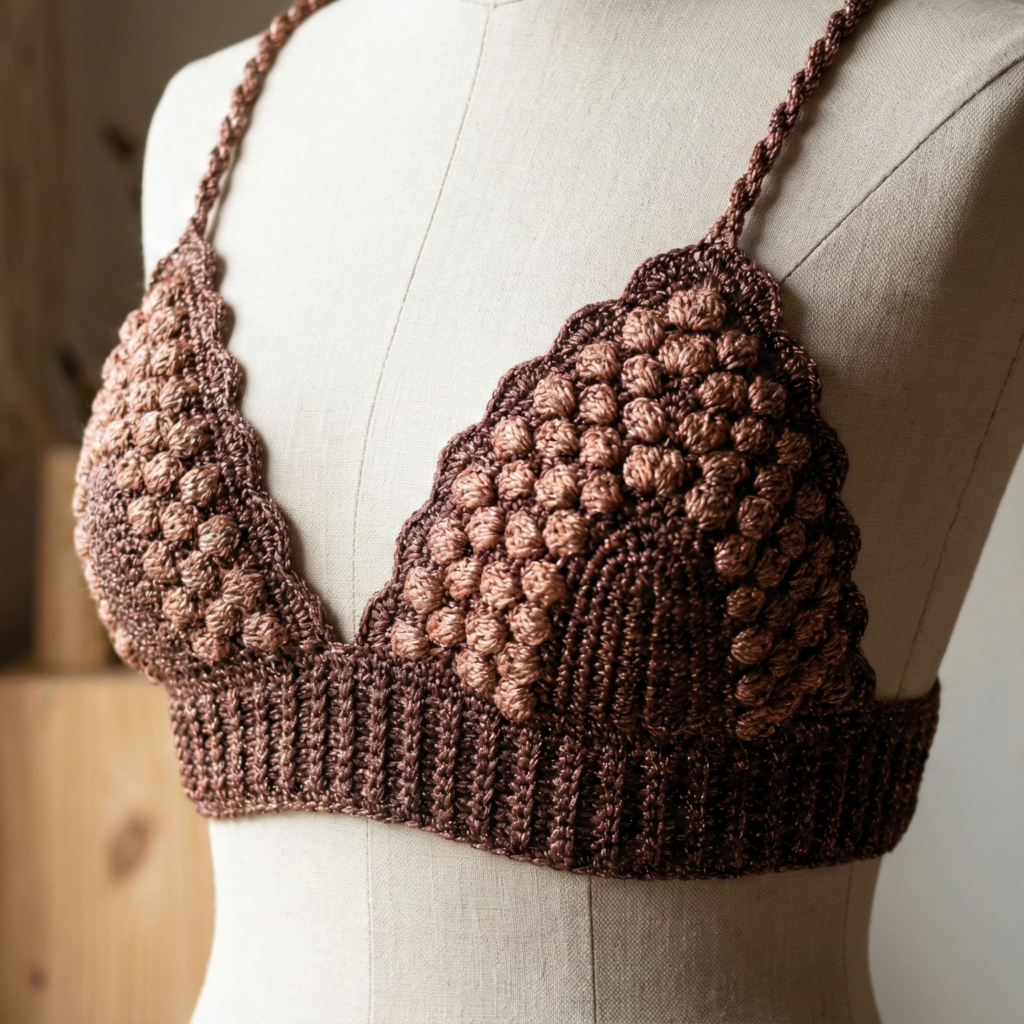
A chic textured bralette using raised cluster stitches that resemble hammered goldstone texture — good for evening layering.
Skill level: Intermediate (cluster stitches and shaping)
Materials (S / M / L)
- DK/Light worsted blend with some sheen (viscose/cotton) — S 220 yd / M 260 yd / L 300 yd.
- Hook: 3.75–4.25 mm.
- Optional: thin elastic for band stabilization.
Gauge
- Example in cluster stitch: 14 clusters = 4 in (swatch to confirm). Cluster patterns vary; compute band stitches via method in intro.
Construction overview
- Band in dense stitch (hdc or sc), cups made with textured cluster stitch that creates a slightly firm but decorative fabric. The cups can be made as two trapezoids sewn to the band and shaped by a short decrease row for cleavage.
Step-by-step
A — Band
- Work band in the round: compute stitches for your finished underbust circumference. Chain that number, join, and work 8–10 rounds of hdc (or single crochet in BLO for rib effect). Insert elastic if desired.
B — Cups (2 trapezoids)
- Chain base width (e.g., S = 28 sts) and work in cluster stitch (cluster = yarn over, insert, yo pull up, yo pull through 2 etc., depending on cluster chosen) across.
- Increase at each end every other row to create a trapezoid shape that is wider at top (or do increases toward center if you prefer triangle).
- Once trapezoid height is reached, decrease gradually toward tips to shape.
- Repeat for second cup.
C — Attachment
- Sew cups to band at lower edge; overlap inner cup edges slightly and seam to create center front shaping.
- Add a small connector tab of ch and sew under cup centers if you want a gathered look.
D — Straps & finish
- Add adjustable straps as chains with rings or made-up crocheted straps attached to back band.
- Edge cups with 1 round sc for a polished look.
Variations
- Add metallic thread in one round for sparkle.
- Use a different cluster density to vary texture.
Care
- Hand wash recommended for sheen yarns; reshape and dry flat.
4. Crochet Basic Mesh Bralette Pattern
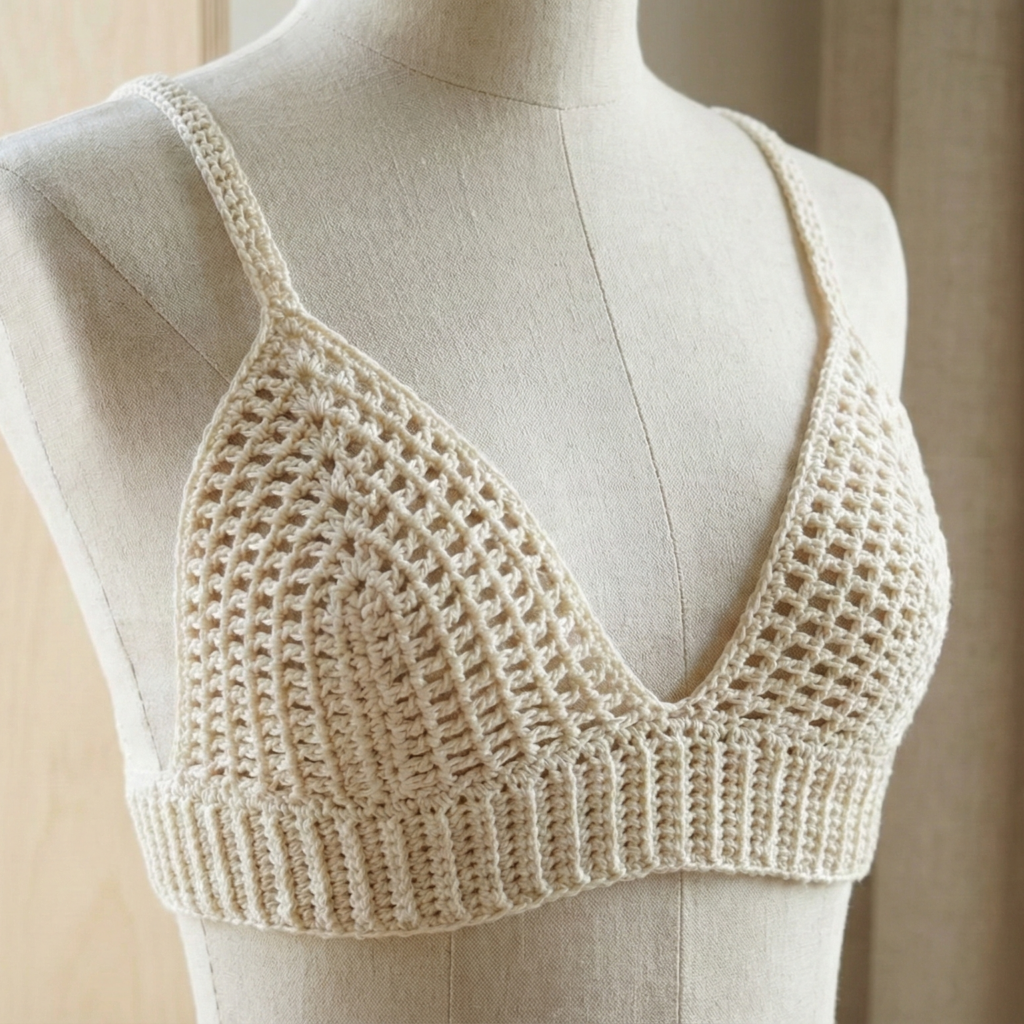
Lightweight, airy and perfect for layering — the mesh bralette uses v-stitches for openwork and an elasticized band for support.
Skill level: Beginner–Confident beginner
Materials (S / M / L)
- Sport/DK lightweight cotton ~ S 170 yd / M 210 yd / L 250 yd.
- Hook: 3.5–4.0 mm.
- Narrow elastic for bottom band optional.
Gauge & stitch
- Mesh gauge: example 8 v-stitches = 4 in across. Swatch to confirm.
Construction overview
- Band in hdc with elastic (or hdc in BLO), body in v-stitch mesh, cups shaped by working triangular meshes and closing in top rows.
Step-by-step
A — Band (support base)
- Work a snug band in hdc around UB computed to stitches, 8–10 rounds. Insert elastic if you prefer.
B — Mesh body & cups
- From band pick up stitches for the front body — work v-stitch rows (V-stitch = dc, ch1, dc in same st or ch-space).
- For cups: work triangular increases: start at center front with small chain and increase v-stitch clusters on each side of center to build two triangles that meet at top.
- Alternatively: work rectangular mesh and seam center front for simpler construction; add gathering at center with an over-sew to shape cups.
C — Straps & edging
- Work narrow crocheted straps or chain-and-ss straps that tie or attach to back band with rings.
- Edge with sc or small picot trim.
Variations
- Double up the band for more support; or add a back tie closure for adjustable fit.
Care
- Machine wash gentle; reshape mesh while damp.
5. Crochet Sunburst Mosaic Bralette Pattern
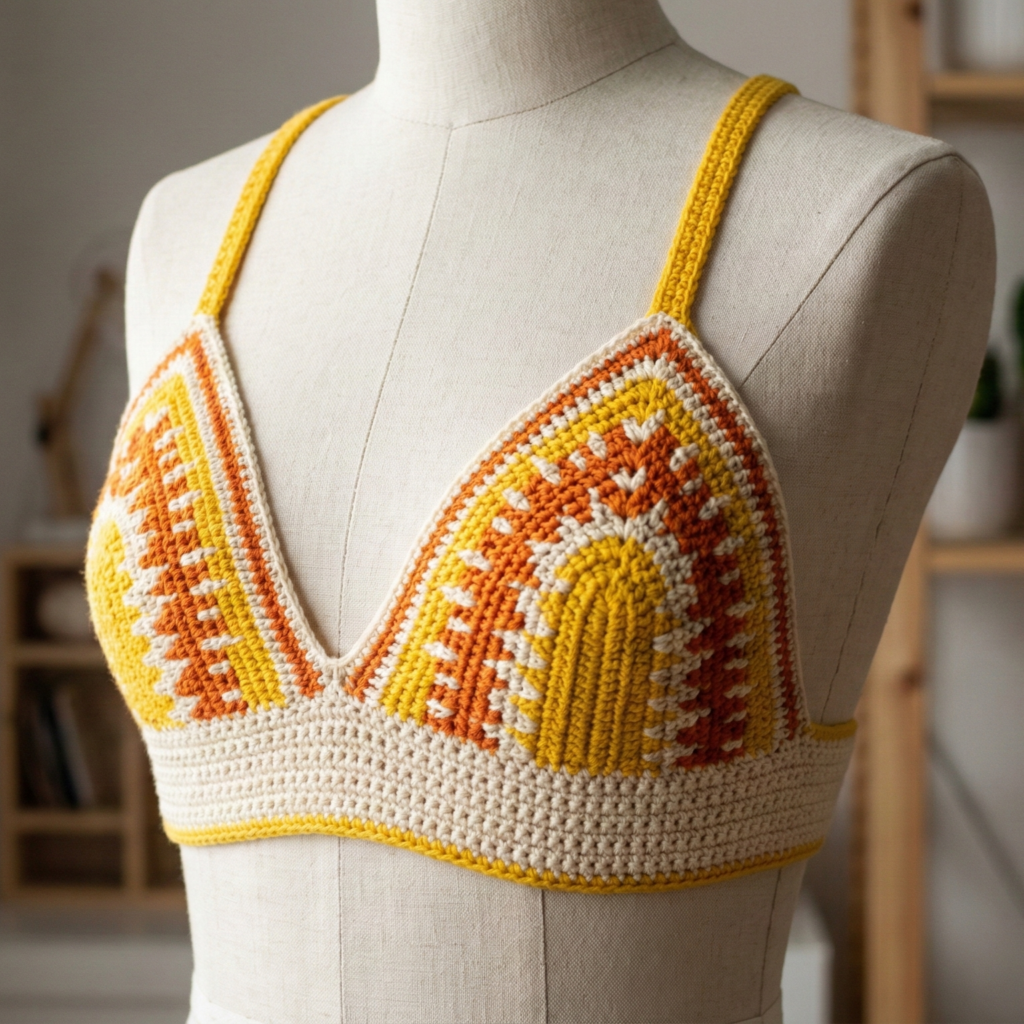
A mosaic/tapestry technique bralette with radiant sunburst motif on the cups — striking, modern and graphic.
Skill level: Intermediate — you should be familiar with tapestry single crochet and carrying floats.
Materials (S / M / L)
- DK cotton in 2–3 contrasting colors — S 220 yd / M 260 yd / L 300 yd.
- Hook: 3.5–4.0 mm.
- Tapestry needle.
Gauge & technique
- Tapestry single crochet: count spi accordingly; for colorwork the fabric is dense — swatch using all colors.
Construction overview
- Cups are worked using tapestry sc with a sunburst chart (work each cup flat as half-circle or trapezoid), then seamed onto a firm underband.
Step-by-step
A — Create a sunburst chart
- Design or use a simple chart: center dot, radial rays expanding outward. The cup width will be the radius of the sunburst.
- Work the cup by crocheting single crochet rows following the chart, carrying unused colors across the WS with tidy floats (trap floats as necessary).
B — Band & assembly
- Work the band in single crochet around UB computed earlier (for a firm band).
- Position cups on top of band symmetrically and sew in place; overlap inner edges slightly to form center seam if required.
- Add straps with narrow crocheted strips; consider cross-back straps for modern look.
Variations
- Mosaic crochet (slip stitch) can be used as an alternative to tapestry for less float management.
- Larger sunburst for more coverage.
Care
- Wash gentle, cold; test colorfastness.
6. Crochet Boho Lace Summer Bralette Top Pattern
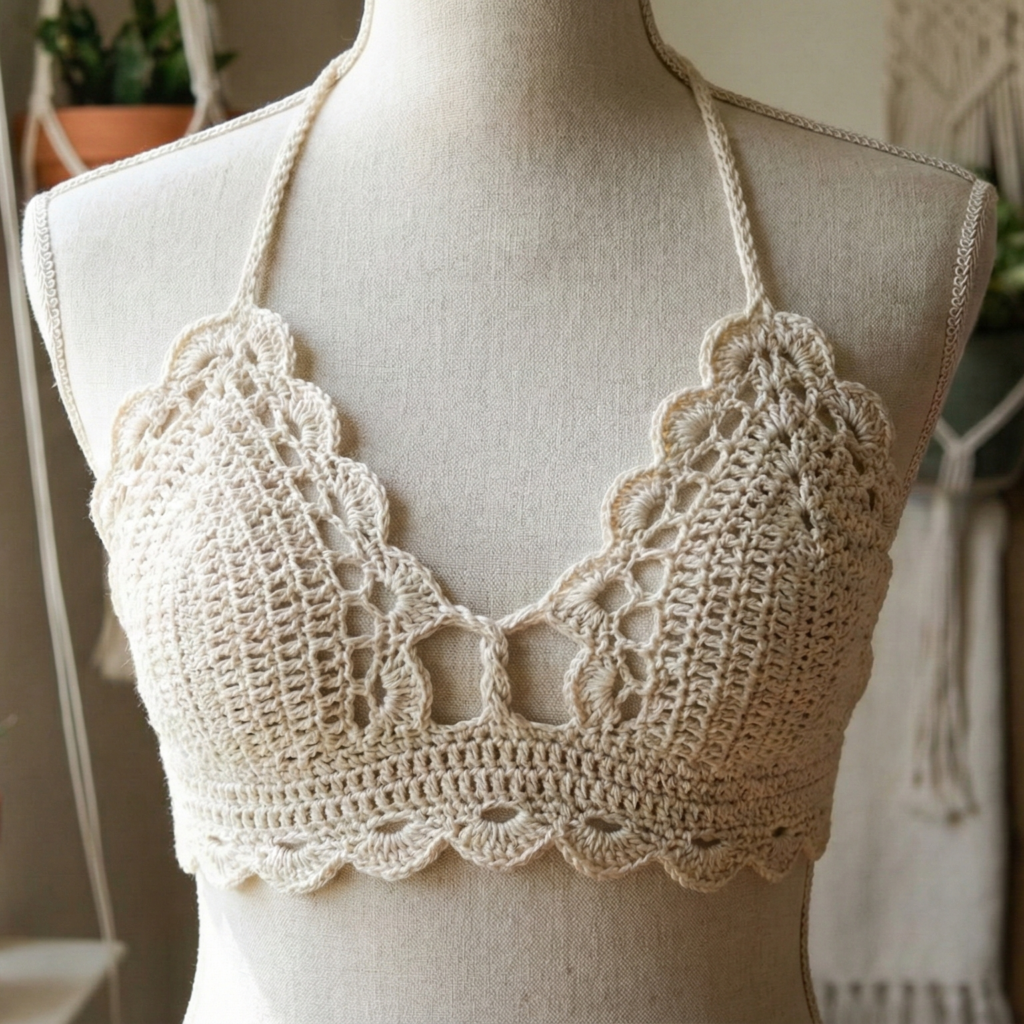
An airy, lace-forward bralette with scalloped edges and vintage boho vibe. Works well layered or as a crop.
Skill level: Intermediate (lace repeats, shaping)
Materials (S / M / L)
- Sport weight cotton or cotton-linen blend — S 200 yd / M 240 yd / L 280 yd.
- Hook: 3.5 mm.
- Small elastic optional for band.
Gauge & stitch
- Lace repeat: multiple of 8 + 1; example 8 repeats = 4 in. Swatch for exact measurement.
Construction overview
- Lace cups using shell/openwork patterns; join at center with a decorative loop; band in hdc or rib; scalloped edging finishes neckline.
Step-by-step
A — Band
- Work a sturdy underband of hdc around UB (as detailed earlier), 6–8 rounds; optionally stitch in narrow elastic.
B — Lace cups
- Work cups in shell-lace vertical panels: pick up base stitches across the band and work height until desired coverage.
- Shape tops by decreasing shell repeats and working one final row of small shells for scallop.
C — Center & straps
- Join cups with a small crocheted loop or a twisted chain strap (center tie) for decorative closure.
- For boho tie-back: make long crocheted straps that tie at back or neck for adjustable fit.
Variations
- Add fringe under bust for festival style.
- Add small floral appliqués or beads (avoid if making for children).
Care
- Cotton lace: hand wash or machine gentle; reshape and block to maintain scallops.
conclusion
You now have six modern bralette designs that span structured, textured, lace and colorwork approaches. A few final practical tips to make your bralette project a success:
- Swatch and measure. Always make a 4″ swatch in the stitch pattern you plan to use and compute stitches per inch. Use that to calculate the band stitch count (see the digit-by-digit example in the intro). Bralette fit depends heavily on band fit.
- Make a prototype. Use inexpensive yarn to test fit (band and cup coverage) before making the final piece.
- Stabilize the band. Even a delicate bralette benefits from a reinforced underband — either by working it in a firmer stitch (hdc in BLO), sewing in a narrow elastic, or working two thin bands together.
- Try-on during construction. For top-down or cup-by-cup construction, stop and try on as you go. It’s simple to add or remove rows for better coverage.
- Support options. For more support add a thin elastic, small sewn-in foam cup inserts, or a wider band.
- Care & labeling. Add care instructions to your pattern or product: “Handwash cold or machine gentle in a mesh bag; lay flat to dry; avoid chlorine bleach.