A hooded cape is one of those instantly dramatic pieces — part cozy outerwear, part costume, fully charming. Whether you want a quick granny-square cape to toss over jeans, a show-stopping crocodile-stitch cloaklet for cosplay, or a lacy ripple cape for spring evenings, this collection covers six very different styles with full, practical instructions. Each pattern below includes: skill level, materials & yardage, finished-size guidance and how to adapt, gauge, a construction overview, a clear step-by-step guide for body + hood + finishing, plus variations, lining & closure suggestions, and care. All patterns use US crochet terms.
Quick abbreviations: ch, sc, hdc, dc, tr, dtr, sl st, st(s), rep, BLO/FLO, MR = magic ring. Make a 4″ swatch in your chosen stitch to check gauge before starting.
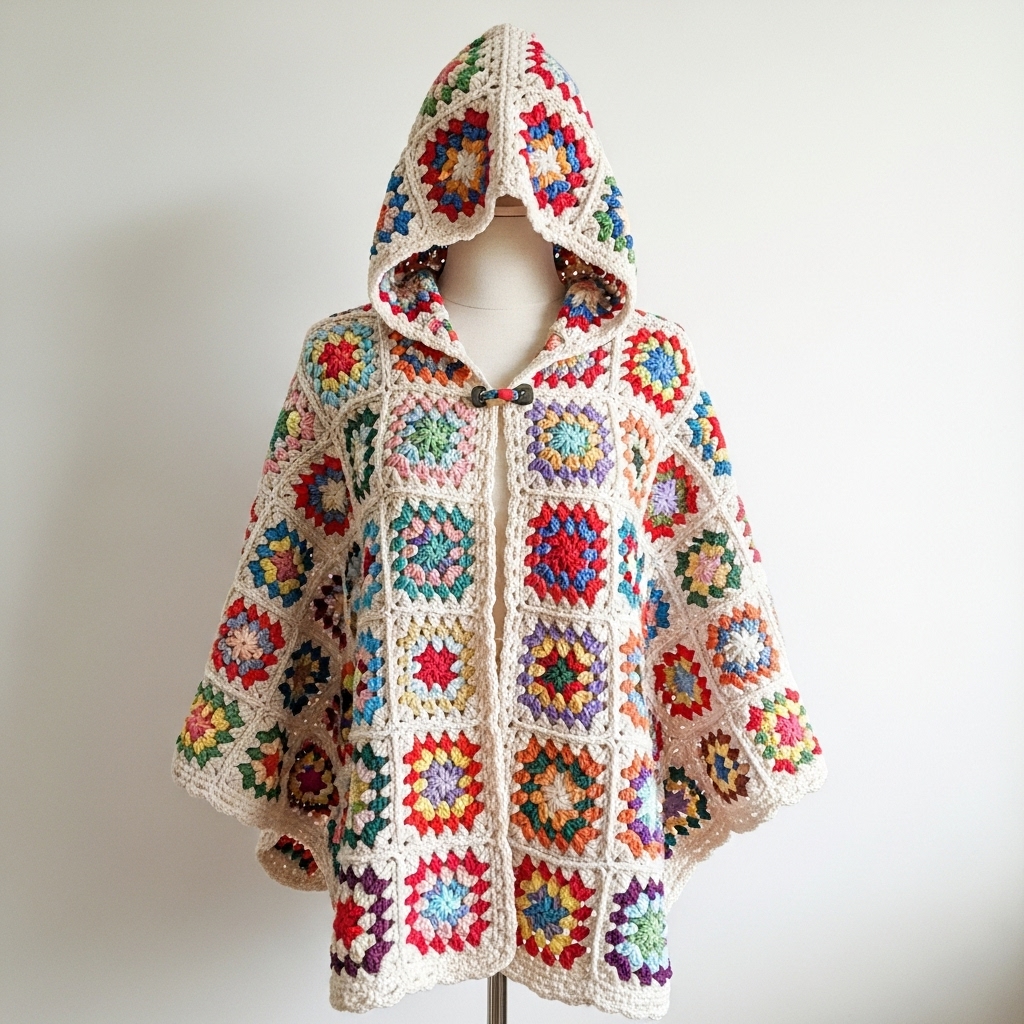
1. Crochet Granny Square Hooded Cape Pattern
Skill level: Beginner → Confident beginner
Vibe: Playful, highly customizable, great for stash-busting and fast assembly.
Materials (adult medium):
- Worsted-weight cotton or acrylic, approx 900–1200 yds (adjust for longer/shorter cape).
- Hook: 5.0 mm (H) for body.
- Tapestry needle, optional lining fabric, 2 small buttons or a toggle.
Finished size (sample):
- Shoulder-to-hem: 22–26 in (short capelet to mid-thigh), Wingspan (neck opening around shoulders) approx 48–60 in depending on number of motifs. To resize: change number of granny squares across/rows.
Gauge & motif size:
- Make one granny square motif ~4 in after blocking using your chosen yarn/hook. For a 24″ wide front panel (when joined), you’ll need ~6 squares across (6 × 4″ = 24″). Plan grid: for a circular cape, make panels and seam; for rectangular cape, join rows to desired circumference.
Construction overview:
Work multiple granny squares (classic 3-round or 4-round granny) then join into a semicircle or full circle with a center back seam. Work a simple hood separately (a half-circle/triangle hood worked top-down then seamed), attach, tidy borders.
Step-by-step (adult medium, 4″ motif):
- Make motifs: MR; Round 1: ch3; 2 dc, ch2, 3 dc into ring — repeat for 4 corners; join. Round 2–3: work classic granny rounds, increasing at corners to keep square. Make 48–64 motifs depending on desired fullness (example for a mid-length cape: front/back each 6 × 4 squares = 24 per side → 48 total).
- Block motifs to exact size.
- Layout & join: Arrange motifs into panels: you can do a semicircular layout (center back seam) or a rectangle that will be gathered later. Join using join-as-you-go or mattress stitch for an invisible seam. Leave the top edge open for the neck (measure neck circumference ~16–18 in adult; leave central gap for the hood seam). Option: leave a front opening with overlap for closure.
- Neckband: Work 2–3 rounds of sc around the neck opening to stabilize.
- Hood (worked flat or top-down):
- Option A (top-down semicircle hood): Ch 2; Row 1: 6 sc in second ch from hook; R2: inc in each st around to form a small circle (or begin with MR). Continue working in rounds, increasing evenly until hood base measures ~10–12 in across (adult). Then work even rounds (no increases) until hood depth from forehead to nape is ~11–13 in. Fold and seam center back to shape.
- Option B (triangular hood): Work a triangle starting with ch4, increase each RS row by 2 sts (one at each end) until desired base width; work even for depth.
- Attach hood to neck opening: Pin hood RS to RS, seam with whipstitch. Work 2 rounds of sc around join to tidy.
- Border & closure: Add 3–4 rounds of shell or sc around hem for stability. Add toggles/buttons or a crocheted cord closure (ch 80, weave through neckband) with tassels.
Variations & styling:
- Make motifs larger for a bold retro look; mix solids and variegated for boho effect.
- Use luster or metallic yarn for an evening cloak.
- Add fringe to hem or crochet a scalloped edge for feminine finish.
Lining & care:
- Line with lightweight cotton if you need wind protection. Machine wash gentle for acrylics; hand wash for delicate fibers.
2. Crochet Crocodile Stitch Hooded Cape Pattern

Skill level: Intermediate → Advanced (post-stitch layering and shaping)
Vibe: Dramatic, textured “scale” effect perfect for fantasy/cosplay or statement outerwear.
Materials (adult medium):
- Worsted-weight yarn (or a bulky for bolder scales) 1000–1500 yds.
- Hook: 5.5–6.5 mm depending on yarn.
- Tapestry needle, optional interfacing for hood rim.
Finished size: Similar sample dimensions as Granny cape; crocodile stitch is denser — allot extra yardage for full coverage.
Construction overview:
Work body in rows or rounds of alternating rows: base rows of dc/hdc to anchor crocodile scales (worked as 5-dc shells over staggered foundation), then scale rows worked in front post fashion to produce layered “scales”. Hood built similarly to body so scales continue onto hood.
Step-by-step (adult medium):
- Swatch & plan: Make a 4″ swatch of crocodile stitch (base row + 2 scale rows) to determine stitches per inch. Crocodile stitch eats yarn — gauge is essential.
- Body foundation: Decide cape shape: A-line rectangle that’s seamed into a cape works well. For a semicircular cape, work in long strips and seam into curve. For a rectangular cape: Chain foundation length equals desired shoulder-to-shoulder (e.g., 48–56 in). Work 6–8 rows of sc or hdc to create a strong bottom edge.
- Crocodile stitch repeat:
- Base row (establishing row): dc across, turning.
- Anchor row: ch1, dc in next st to set up scallop anchors.
- Scale row: Working around pairs of dc from the anchor row, make scale: (5 dc) in the side of a dc (insert hook into the horizontal space or post as preferred) for each scale, stagger scales by working next scale anchored between the pair of prior ones. After working a scale row, do an even row of sc/dc across to create the next anchor foundation. Repeat scale + anchor rows until cape length is reached (bottom to neck).
- Shaping/width: To make a cape (circular feel) decrease toward the neck by stopping scales at sides and continuing center rows; or assemble rectangular panels into a circular form by seaming and gathering slightly.
- Hood (scale-covered):
- Work hood top-down or flat triangular method, applying scale rows as on body. Ensure the base width of hood matches neck opening. For a snug scale-covered hood, work more densely and seam center back.
- Finishing: Work 2–3 rounds sc around neck opening and front hem for stability. Because of scale height, topstitch the first hood seam to flatten. Optionally add a small metal clasp or tie.
Variations & tips:
- Mix scale sizes: small 3-dc scales near face, larger 7-dc scales toward hem.
- Use two colors for each scale row (one color for top scales, one for base) for a shimmering effect.
- If making for cosplay, line hood with a smooth fabric so scales don’t snag hair.
Care:
- Crocodile stitch is thick — hand wash and lay flat to dry to preserve scale structure.
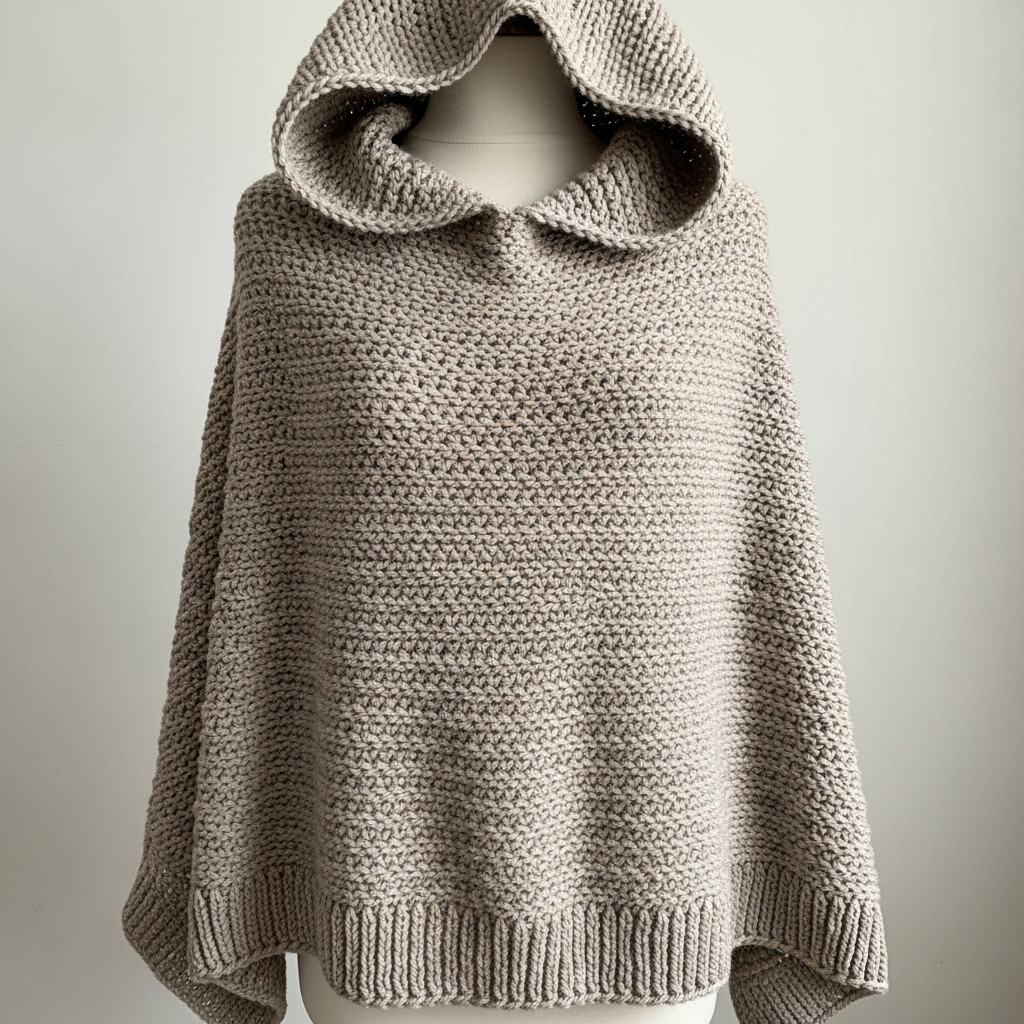
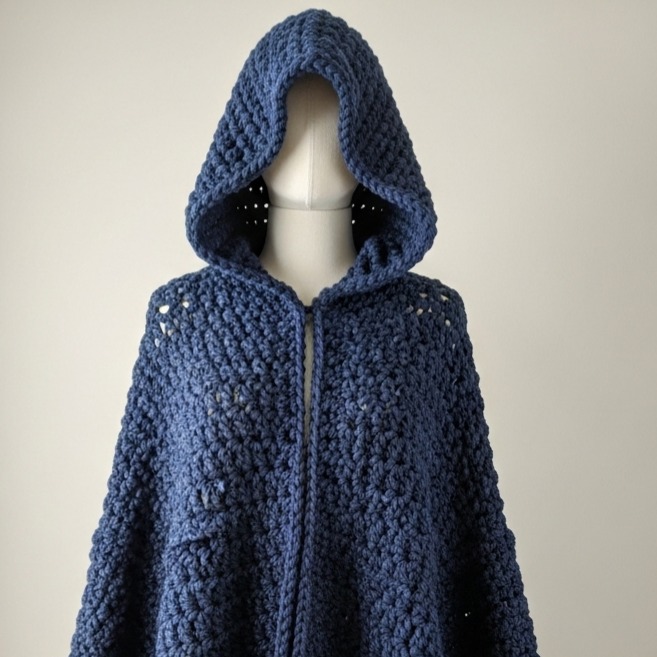
3. Crochet Driftwood Oversized Hooded Cape Pattern
Skill level: Confident beginner → Intermediate
Vibe: Oversized, drapey, rustic — the “driftwood” cape uses neutrals and texture to create an effortless cocoon.
Materials (adult oversized):
- Bulky/aran yarn 1100–1600 yds for generous drape.
- Hook: 6.5–8.0 mm.
- Tapestry needle, optional buttons.
Finished size: Oversized: shoulder-to-hem 28–36 in, breadth generous for wrap effect.
Construction overview:
Work large panels in simple textured stitch (granite/moss stitch, waffle, or linen stitch) to achieve drape; seam into cape shape; hood worked proportionally large for cozy coverage.
Step-by-step (oversized adult):
- Decide silhouette: Two main approaches — a) single large rectangle folded over shoulders and seamed at sides with hood attached to top edge; b) a semicircular cape worked in rounds from center neck outward. Rectangle is easier.
- Make main panels (rectangle method):
- Chain foundation width = desired shoulder width + ease (e.g., 50–60 in). Work textured stitch rows (moss stitch recommended: Row 1: sc row; Row 2: ch1, sc in ch-1 spaces across, ch1) to create a fabric that drapes but isn’t floppy. Work until panel height equals desired drop from shoulder (e.g., 28–36 in).
- Fold & seam: Fold rectangle in half widthwise to create neck opening; seam sides from hem up toward shoulders leaving arm openings (adjust seam length to create sleeve gaps). Alternatively leave minimal side seams for poncho-like cape.
- Hood (oversized):
- A generous hood is worked top-down: MR and increase evenly until hood base equals neck opening (~18–20 in), then work even until hood depth ~13–15 in for a deep, slouchy hood. Seam back center and attach to neck edge, seaming through both layers if folded.
- Edge finishing: Add wide ribbed border (BLO sc or FP/BPDC rib) for structure around hem and hood. A 2–3 in rib gives an upscale finish.
- Optional pockets and closures: Add large patch pockets sewn into side seams. For closure, use a leather toggle at the throat.
Variations & styling:
- Use neutral heathered yarns to create a “driftwood” palette.
- Make hood detachable using buttons for versatility.
Care:
- Bulky natural fibers may bloom — follow yarn care; block to shape.
4. Crochet “Scent of Spring” Hooded Cape Pattern
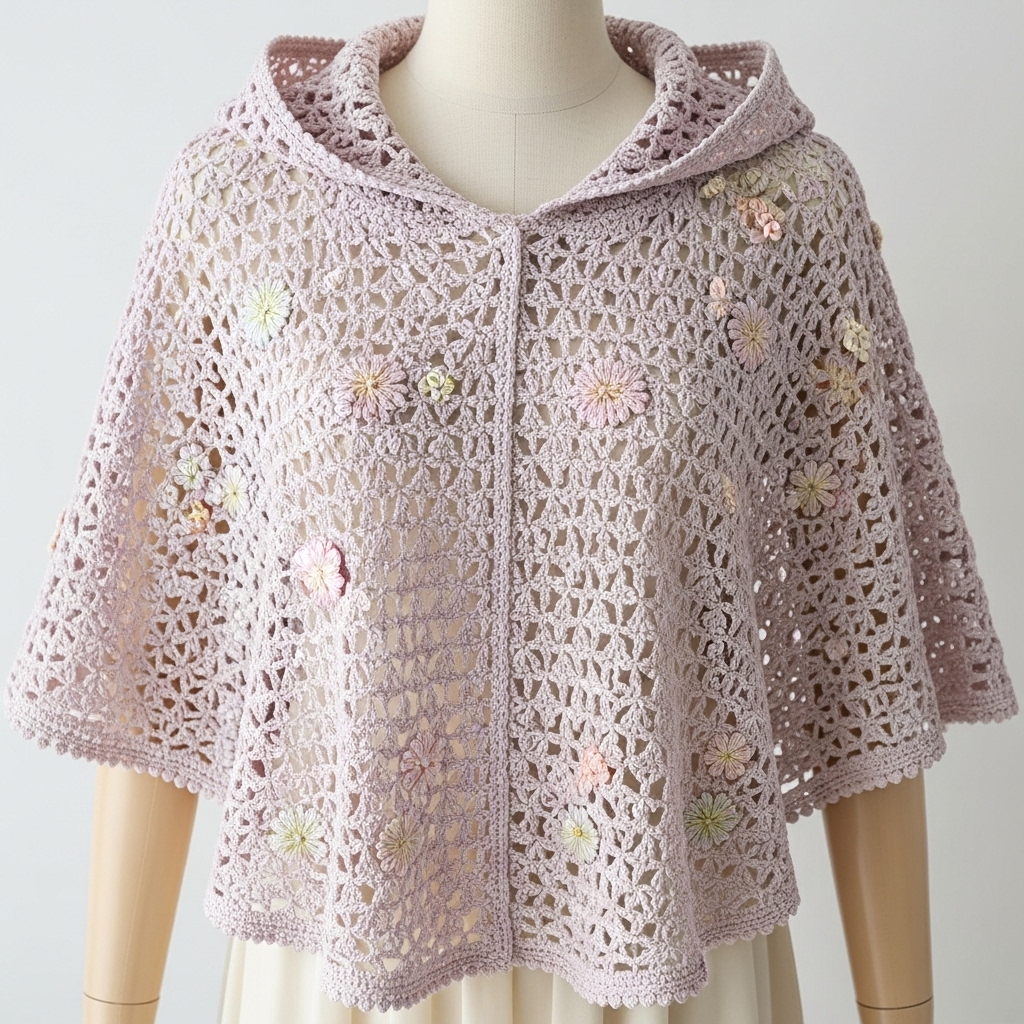
Skill level: Intermediate
Vibe: Light, floral, feminine — lacy stitchwork with small embroidered/appliqué flowers.
Materials (adult medium):
- Sport-weight cotton or cotton-blend 800–1100 yds (lighter yarn to keep lacy texture).
- Hook: 4.0 mm.
- Small embroidery thread for floral accents, optional fabric lining.
Finished size: Shoulder-to-hem 22–26 in; width customizable by stitch repeats.
Construction overview:
Work a triangular or semicircular shawl-style cape in a repeating lacy stitch (eyelet + shell rows) with integrated small flower appliqués; hood is a softly tapered triangle to echo cape lace.
Step-by-step:
- Swatch & stitch choice: Choose a lacy repeat (example 6-row repeat: dc/chain mesh, shell band, eyelet row). Make a 4″ swatch to figure stitches per inch.
- Body (top-down semicircle):
- Start with a small center chain (or MR) for the top center at nape, increase 2 sts per right-side row (one at each end) to create semicircle. Work lace repeat rows, increasing increases at edges only. Continue until desired cape depth achieved.
- Row 1: ch 4, 3 dc in 4th ch from hook (small 3-dc start).
- Row 2+: ch3, (work dc clusters across), at row ends work 2 dc in last st to increase width.
- Flower appliqués: Make small 5-petal flowers (MR, 5 sc; petal round: ch3, sl st into adjacent sc to form loop, work (sc, hdc, dc, hdc, sc) in each loop). Scatter-stitch onto cape in balanced clusters or sew onto the long edge like a garland. Embroider tiny French-knots for centers.
- Hood: Work a triangular hood that mirrors cape lace pattern but with fewer increases and a slightly tighter gauge to frame the face. Block hood flat; seam center back.
- Edging: Work a delicate picot or shell edging around hem and hood for a romantic finish.
- Finishing touches: Add a small tie at throat (thin crocheted cord) with flower tassel ends.
Variations:
- Use pastel gradient yarn for a spring bloom effect.
- Omit appliqués for a more modern minimal lace cape.
Lining & care:
- A lightweight cotton lining is optional if you want wind coverage; otherwise it’s a light shawl cape for mild weather. Hand wash recommended.
5. Crochet Ripple Lacy Hooded Cape Pattern
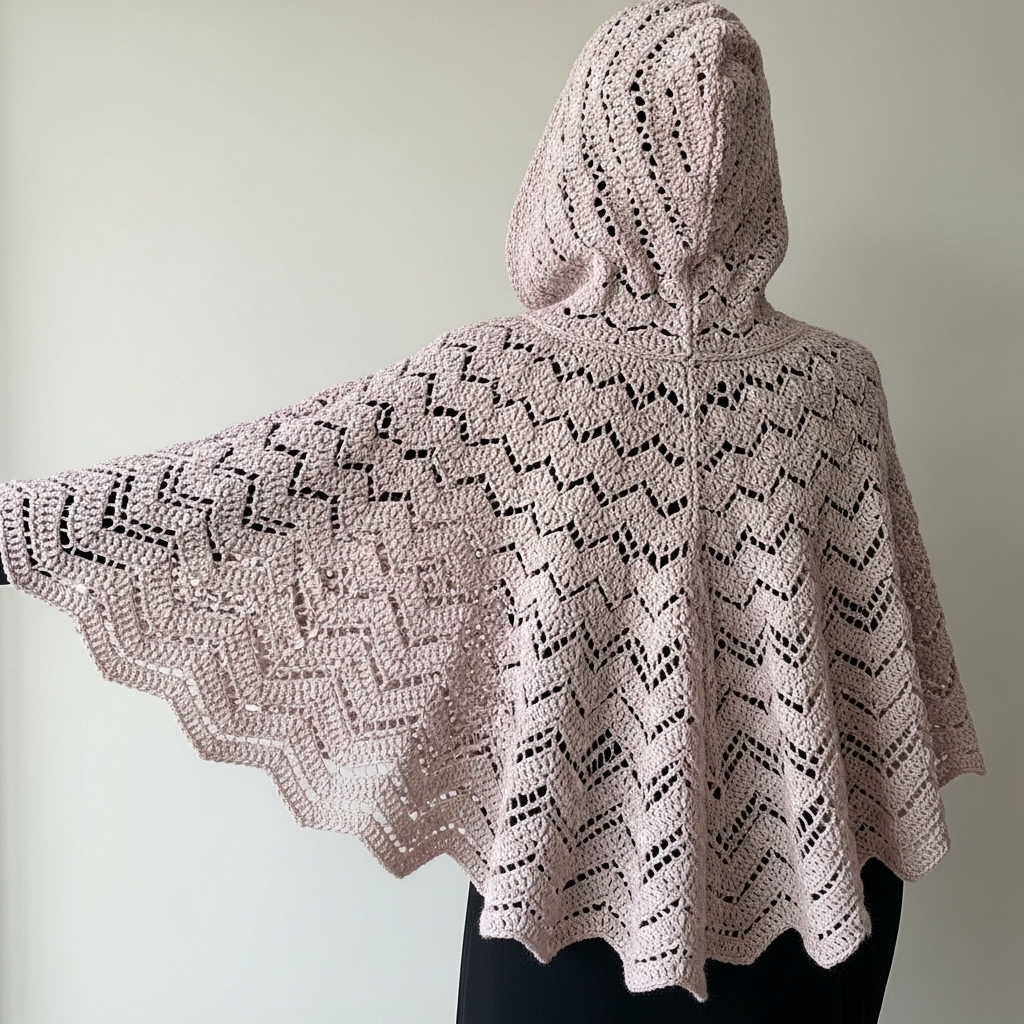
Skill level: Confident beginner → Intermediate
Vibe: Vintage-inspired ripple (chevron) lace with dramatic waves around hem.
Materials (adult medium):
- DK or light worsted yarn 900–1200 yds.
- Hook: 4.5–5.5 mm.
- Stitch markers for chevron valleys.
Finished size: Shoulder-to-hem 20–26 in; ripple repeats determine width and visual curves.
Construction overview:
Work a circular/semi-circular cape in repeated ripple/chevron lace rows so the hem forms soft waves. Hood made to coordinate with ripple peaks.
Step-by-step:
- Decide ripple repeat: Common chevron lace uses a multiple of 12–18 sts; pick one and swatch.
- Body (top-down semicircle):
- Begin at neck with small ring and increase at sides only (two increases per RS row) so the body grows into a semicircle. Work the ripple lace repeat across each row. Continue until desired depth.
- Hem shaping & blocking: The ripple will naturally generate scalloped hem. To emphasize waves, add extra shell rounds at the final border (e.g., shells across peaks and picots in valleys).
- Hood: Work a slight triangular hood in the same ripple pattern or work even rows that mimic the wave motif, then fold and seam center back.
- Finishing & reinforcement: Because chevrons create open fabric, add a narrow inner band or select a denser stitch for the neckband to support the weight of the cape.
Variations:
- Create a gradient ripple using 3–4 shades of one color family for oceanic effect.
- Add an inner lining for warmth.
Care:
- Lace opens beautifully with wet-blocking; be patient while pins dry.
6. Crochet Long Hooded Cape Pattern
Skill level: Intermediate
Vibe: Dramatic, floor-length cape for cold weather or theatrical effect.
Materials (adult long):
- Bulky or double-strand worsted 1500–2500 yds depending on desired length (to knees or floor).
- Hook: 7.0–9.0 mm or two strands held together with a 5.5–7.0 mm hook.
- Lining fabric for warmth, heavy-duty needle, long zipper or big clasp.
Finished size: Floor-length option: shoulder-to-hem 38–55 in; hem circumference large — plan yardage accordingly.
Construction overview:
Make large panels (2–3) and seam into a dramatic cape; ensure hood is generously shaped and the neckband reinforced to bear weight. Lining is highly recommended for warmth and to hide seams.
Step-by-step:
- Panel method (recommended for manageability):
- Create two large trapezoid panels: each panel base width equals half the desired hem circumference; height equals cape length. Work in simple dense stitch (hdc or moss stitch) for weight and warmth.
- Join panels:
- Seam panels at center back and optional side seams. Leave generous arm openings or create slits.
- Hood:
- For dramatic coverage, work a deep hood as a large semicircle in rounds with a little extra drop (e.g., depth 14–18 in). Line the hood with fabric to keep shape and add richness.
- Lining:
- Cut lining pieces matching panels, sew into shell via hand-stitching at seams; attach lining at neckband and hem if desired. Lining prevents stretch and gives a polished look.
- Closures & reinforcements:
- Because of weight, use large toggles or a sturdy zip front; reinforce neck with a facing or double rows of sc.
- Hemming & finishing:
- Work a broad ribbed border (BLO sc rib of 4–6 rows) to stabilize hem and avoid stretching. For floor-length, consider a narrow leather trim at hem for durability.
Variations & styling:
- Make a dramatic hooded cape in deep jewel tones for evening wear.
- Add faux-fur trim around hood and hem for a luxurious statement.
Care & storage:
- Heavy capes should be spot-cleaned or professionally cleaned depending on fibers. When not in use, store folded rather than hung to prevent stretching of hand-knitted fabric.
Conclusion
This set of six hooded cape patterns gives you options from quick, playful granny caps to heavyweight, theatrical cloaks. Pick a project that matches your time, yarn stash, and the look you want — granny squares for speed and colorplay; crocodile stitch for fantasy texture; driftwood or long capes for practical warmth; lacy “Scent of Spring” and ripple patterns for romantic, airy wraps.