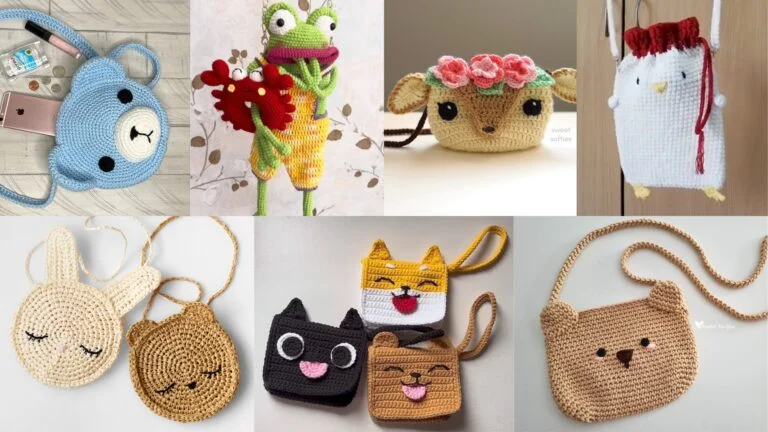
Phone charms are tiny, fast crochet projects that personalize your phone or case, make perfect pocket-sized gifts, and are ideal for practicing new stitches. This post contains six complete patterns — Tiny Chubby Panda, Butterfly Pearl, Jellyfish, Sunflower, Cherry, and Sakura — each presented without extra descriptive blurbs. Every pattern includes: skill level, finished size, materials, stitches/abbreviations, step-by-step instructions, assembly and attachment options, finishing tips, and quick variations so you can jump right into making.
Before you begin
- Use a slightly smaller hook than the yarn label recommends to create tight stitches; this keeps stuffing from showing.
- For charms with beads, sew beads on securely and avoid small beads if the charm is for a young child.
- Attach charms with a lobster clasp, split ring, or a thin strap loop so they clip on and off cases and keyrings easily.
- Spot clean when possible; for cotton or acrylic charms without glued elements, a very gentle hand wash and air dry flat usually works.
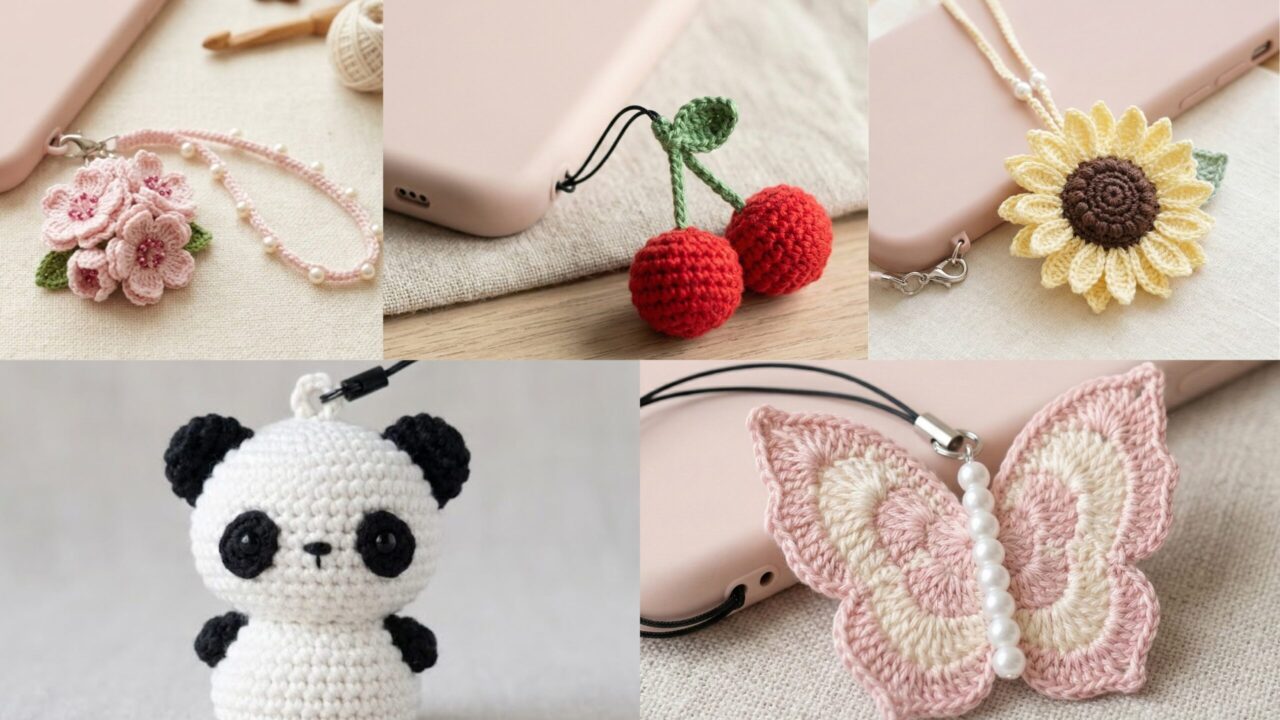
1. Crochet Tiny Chubby Panda Phone Charm Pattern
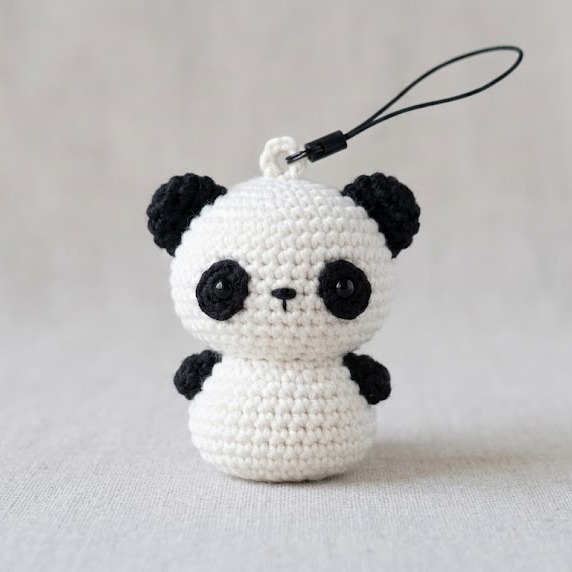
Skill level: Beginner–Intermediate (amigurumi basics + simple embroidery)
Finished size: ~1.5–2″ (4–5 cm) tall
Materials
- DK / light-worsted yarn: white (~10 g) and black (~10 g)
- Crochet hook: 2.5–3.5 mm (use a tight gauge for firm stuffing)
- Fiberfill (small amount)
- Tapestry needle, scissors
- 2 tiny safety eyes (4–6 mm) or black embroidery thread
- Small jump ring + lobster clasp or a phone strap loop
- Stitch marker
Abbreviations
MR = magic ring
ch = chain
sc = single crochet
inc = increase (2 sc in same st)
dec = decrease (sc2tog)
sl st = slip stitch
Pattern — head/body (worked in continuous rounds)
- MR, 6 sc (6).
- inc ×6 → 12.
- (sc, inc) ×6 → 18.
- (2 sc, inc) ×6 → 24.
- (3 sc, inc) ×6 → 30.
- (4 sc, inc) ×6 → 36.
7–10. sc around for 4 rounds (36). - (4 sc, dec) ×6 → 30.
- (3 sc, dec) ×6 → 24.
- (2 sc, dec) ×6 → 18.
- (sc, dec) ×6 → 12. Stuff firmly.
- dec ×6 → 6. Fasten off leaving a 6–8″ tail, weave through remaining sts, pull closed, secure and hide tail.
Ears (make 2)
- MR, 6 sc (6).
- (sc, inc) ×3 → 9.
- sc around 1 round, fasten off leaving tail for sewing. Flatten slightly and sew to top sides of the head.
Eye patches (make 2)
- Using black, MR, 6 sc; pull tight, fasten off leaving tail to sew on around safety eyes or embroidered eyes.
Tiny arms (optional, make 2)
- MR, 6 sc; fasten off leaving tail. Sew low on sides.
Face
- Insert safety eyes between rounds 7–8 (6–8 sts apart) before stuffing.
- Or embroider eyes using black thread: two small French knots or small oval satin stitches. Embroider a tiny nose under the eyes with a few short satin stitches.
Attachment
- Create a small strong loop at the top center by threading a short length of yarn through the top stitch, forming a tight loop, and securing with multiple stitches; or sew in a metal jump ring through the top center.
- Attach lobster clasp or phone strap loop to the jump ring.
Finishing & tips
- Use shorter hook than yarn label recommends for firm stitches; this prevents stuffing showing.
- Reinforce the attachment loop with several passes of stitching into the top stitches and hide the ends inside the charm.
- Variations: add a tiny crocheted bow, change ear color for a red panda look, or omit limbs for a minimalist round panda.
2. Crochet Butterfly Pearl Phone Charm Pattern
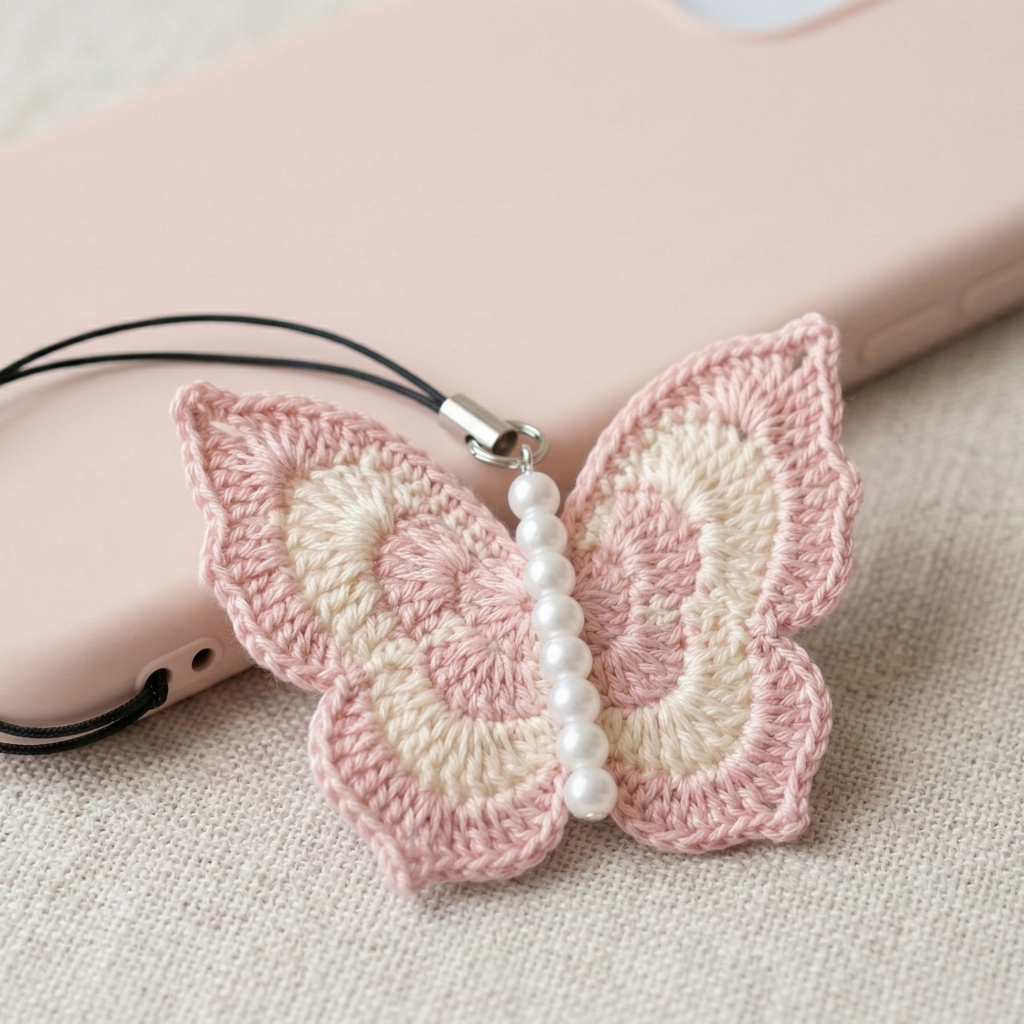
Skill level: Intermediate (small shaping, beadwork)
Finished size: wingspan ~2.5–3″ (6–8 cm)
Materials
- Fingering/sport weight yarn (two wing colors + body color)
- Hook: 2.5–3.5 mm
- 6–8 small pearls or seed beads (pre-strung or sewn after)
- Thin beading thread (if sewing beads on)
- Small amount of fiberfill (optional)
- Small jump ring + lobster clasp or phone strap loop
- Optional thin craft wire for wing shaping (wrap with yarn to hide)
Abbreviations
ch, sc, hdc, dc, tr, sl st
Pattern — body (tube with beads)
- If pre-stringing beads: thread beads onto yarn before starting.
- MR, 6 sc (6).
3–6. sc around for 4 rounds (6). Slide a bead into place between rounds as you go if pre-strung; otherwise leave beads to sew on later. - dec rounds to taper: (sc, dec) → 4, dec → 2. Stuff lightly and close. Fasten off leaving tail.
Pattern — wings (make 2 mirrored sets: upper + lower)
Upper wing (per side)
- Ch 8. Row 1: sc in 2nd ch, hdc, dc, tr, dc, hdc, sc (fan shape).
- Turn and work 1–2 more rows following the fan: increase at mid stitch if you want fuller curve. Fasten off leaving tail.
Lower wing (per side)
- Ch 6. Row 1: sc, hdc, dc, hdc, sc.
- Work 1 extra row if fuller. Fasten off.
Assembly
- Stack upper and lower wings on each side (upper on top) with edges overlapping slightly; tack them together at the base with small stitches.
- Center the body across the middle of the wing bases and wrap the body tube around the wing join, sewing the body closed at the back so wings are sandwiched and secure. If using beads, ensure they are visible on the front center.
- Optionally add a small row of picots or single crochet around wing edges for polish and to hide seams.
Attachment & finishing
- Make a sewn loop at the top of the butterfly body, reinforce it, and attach a jump ring + lobster clasp or phone strap.
- To shape wings, carefully thread thin craft wire around the outer wing edge (slide in and wrap with a few stitches) — test gently before gifting.
- Variations: embroider a vein pattern on wings, add seed bead edging along wing borders, or make the body in metallic yarn for sparkle.
3. Crochet Jellyfish Phone Charm Pattern
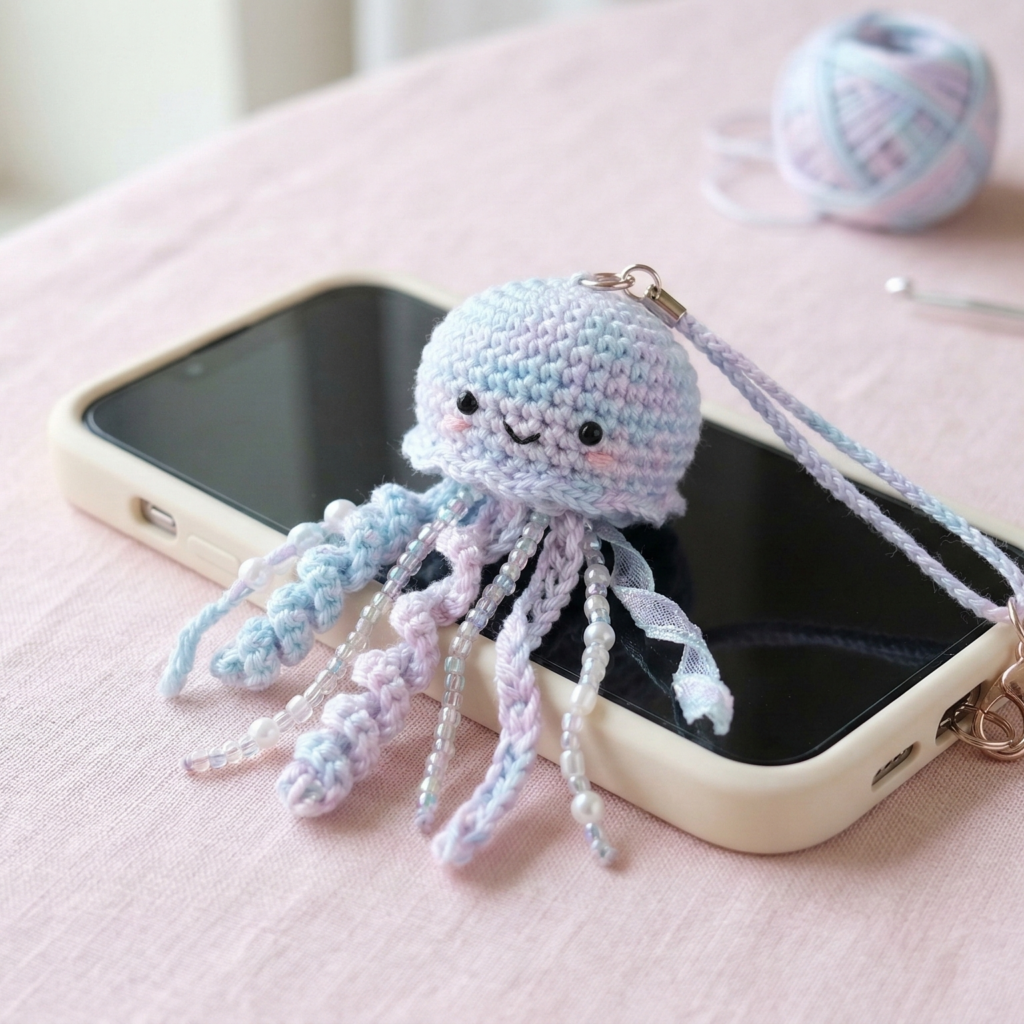
Skill level: Beginner–Intermediate (amigurumi + tentacle finishing)
Finished size: dome ~1.5–2″ (4–5 cm); total length including tentacles 4–5″ (10–13 cm)
Materials
- DK / light-worsted yarn (main color)
- Hook: 3.0–4.0 mm
- Fiberfill (small amount)
- Tapestry needle, scissors
- Small safety eyes or embroidery thread for face
- Small jump ring + lobster clasp or phone strap loop
Abbreviations
MR, ch, sc, inc, dec, sl st
Pattern — dome (worked in continuous rounds)
- MR, 6 sc (6).
- inc ×6 → 12.
- (sc, inc) ×6 → 18.
- (2 sc, inc) ×6 → 24.
- (3 sc, inc) ×6 → 30.
6–7. sc around 2 rounds (30). - (3 sc, dec) ×6 → 24.
- (2 sc, dec) ×6 → 18. Stuff lightly.
- (sc, dec) ×6 → 12.
- dec ×6 → 6. Close and weave end.
Face
- Attach tiny safety eyes between rounds 6–7 or embroider small eyes. Add a tiny smile with embroidery thread.
Tentacles (make 6–10; mix styles)
Curly tentacle (springy)
- Ch 25. Starting in second ch from hook, work 3 sc in each ch across — the piece will curl naturally. Fasten off leaving a tail for attaching.
Ribbon tentacle (flat)
- Ch 30; sl st back across, or sc across to create a thin flat strip. Fasten off.
Braided tentacle
- Cut three lengths of yarn ~12–16″ each, knot at one end into base, braid, and knot at tip. Trim ends.
Skirt
- To hide join and tidy the base, work 1 round of evenly spaced sc into the dome edge, then attach tentacles by sewing their ends into the sc round.
Attachment
- Make a reinforced loop at the dome top (sew through multiple top stitches) and attach jump ring + lobster clasp or phone strap loop.
Finishing & variations
- Use variegated yarn for an iridescent jellyfish look.
- Keep tentacle lengths balanced for a pretty drape.
- Variations: add tiny bead accents to tentacles, or attach a small bell (securely sewn) for a jingling charm.
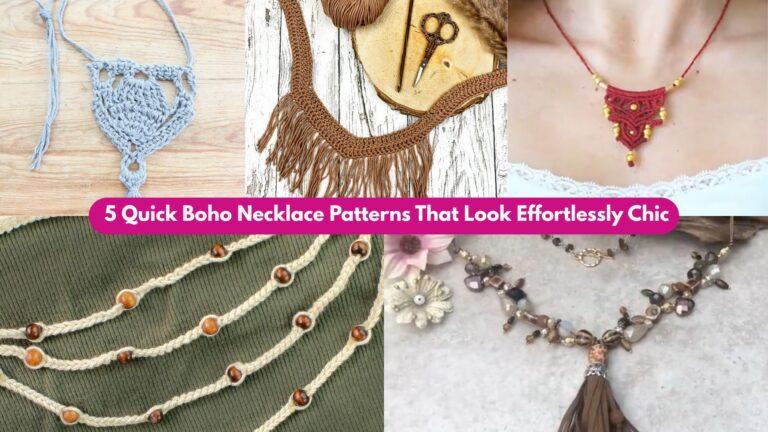
4. Crochet Sunflower Phone Charm Pattern
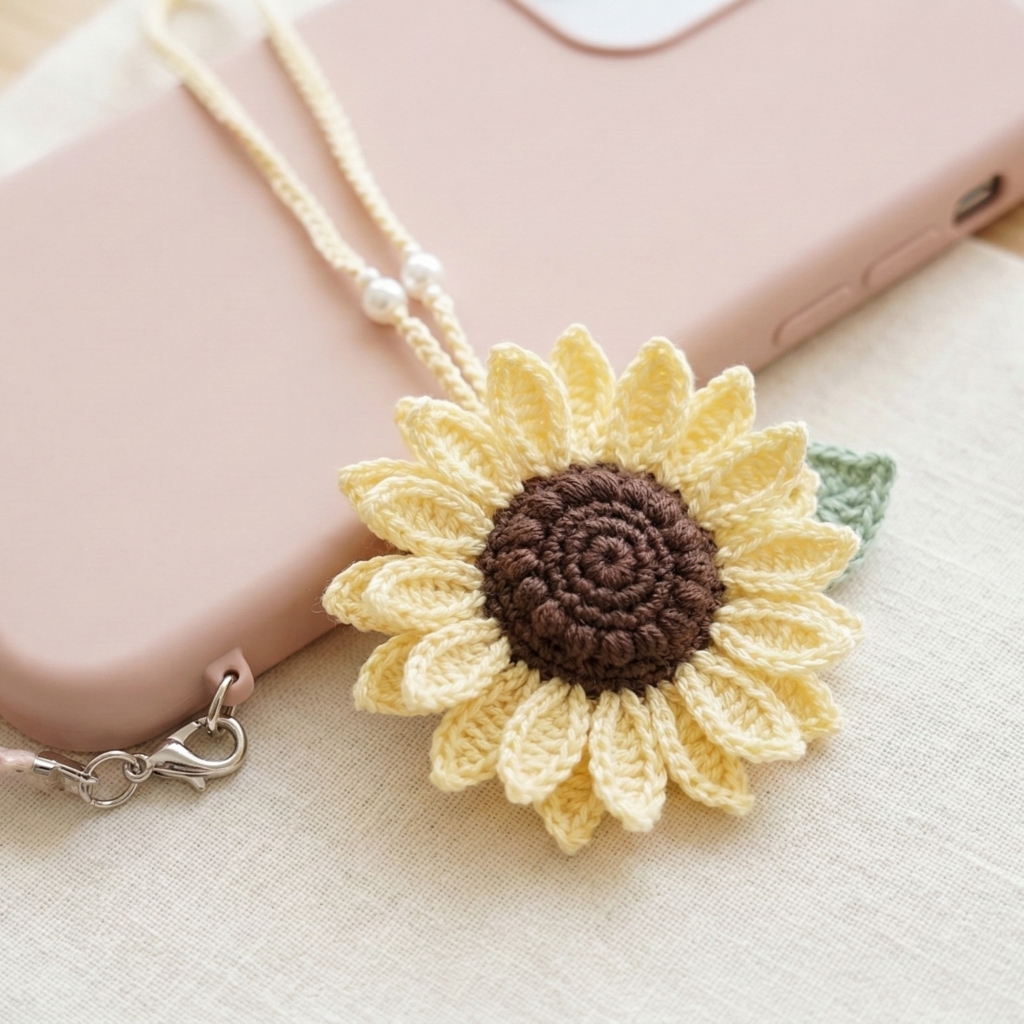
Skill level: Beginner (motif layering)
Finished size: diameter ~2–2.5″ (5–6 cm)
Materials
- Worsted cotton yarn: dark brown (center), yellow (petals), optional green for leaf
- Hook: 3.0–3.5 mm
- Small amount of fiberfill (optional for slightly raised center)
- Jump ring + lobster clasp or strap loop
Abbreviations
MR, ch, sc, hdc, dc, tr, sl st, puff (small puff stitch)
Pattern — center (textured)
- MR, 8 sc (8).
- inc ×8 → 16.
- (sc, inc) ×8 → 24.
- Work 1 round of small puff stitches in each st to create a raised texture: yarn over, insert, pull up loop; repeat 2 times; yarn over and pull through all loops; ch1 to secure — repeat around. Fasten off leaving tail; stuff slightly if you want a domed center.
Pattern — petals (10–12 petals)
- Join yellow to edge of center with a sl st. Ch 6, sl st in 2nd ch from hook, sc, hdc, dc (or tr for longer), hdc, sc; sl st into center to secure.
- Repeat evenly around until you have a full ring of petals. For fullness, add a second round of slightly smaller petals behind the first, offset to fill gaps.
Assembly
- Weave ends to the back and secure petals with small stitches into the center’s edge.
- Optionally sew a tiny felt circle behind the center to hide ends and give extra durability.
Leaf (optional)
- With green: ch 6, sc in 2nd ch, hdc, dc, hdc, sc. Fasten off and sew to back.
Attachment & finishing
- Sew a small loop of yarn or thread into the back center and secure with multiple stitches; attach a jump ring + lobster clasp or phone strap loop.
- Variations: make tiny sunflower bunches (2–3 mini blooms) on one loop for a cluster charm.
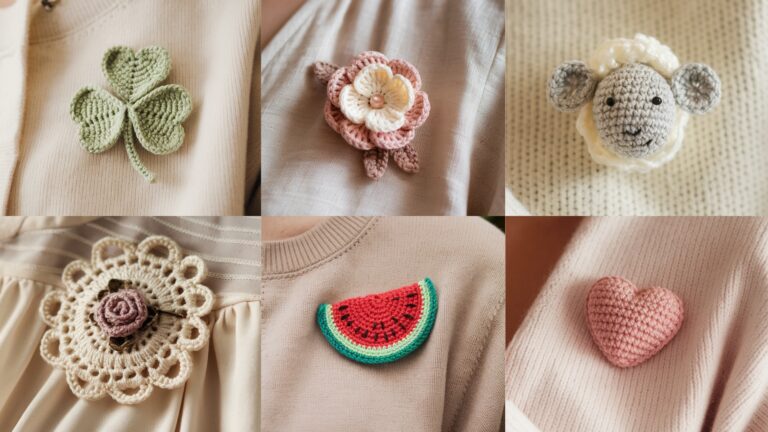
5. Crochet Cherry Phone Charm Pattern
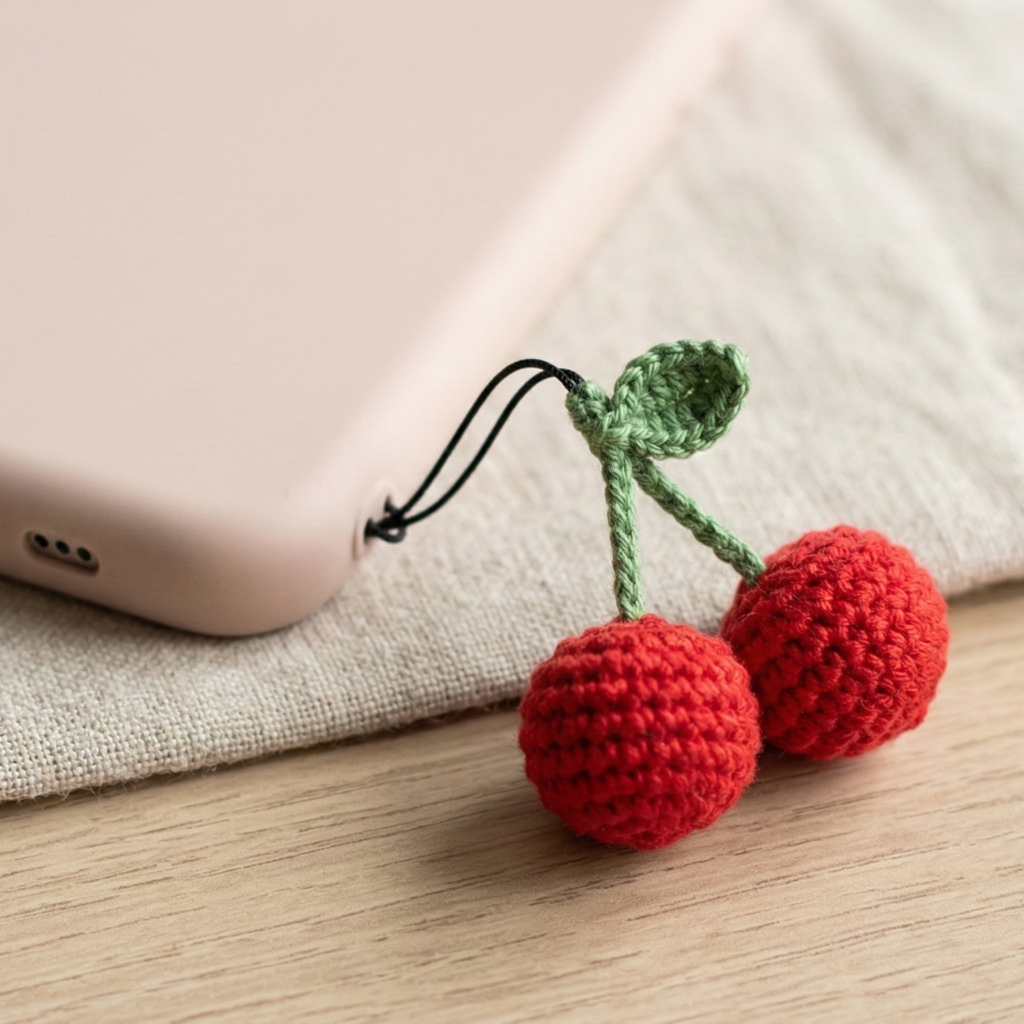
Skill level: Beginner
Finished size: cherries ~1″ (2.5 cm) each; total with stem ~2.5–3″
Materials
- DK yarn: red, green, brown (small amounts)
- Hook: 2.5–3.5 mm
- Tiny beads for highlight (optional)
- Fiberfill (very small amount)
- Tapestry needle, scissors
- Jump ring + lobster clasp or phone strap loop
Abbreviations
MR, ch, sc, inc, dec, sl st
Pattern — cherry (make 2)
- MR, 6 sc (6).
- inc ×6 → 12.
- (sc, inc) ×6 → 18.
- sc around 1–2 rounds for shape.
- (sc, dec) ×6 → 12.
- dec ×6 → 6. Stuff lightly; close and fasten off leaving a long tail for sewing.
Repeat for second cherry.
Stem & connector
- With brown or green, ch 12 (or desired connector length). Attach cherries by sewing the end tail of each cherry through a chain stitch or through the central chains so that both hang side-by-side. Secure with several back-and-forth stitches and hide ends inside cherries.
- At the top of the ch length, add a small green leaf (ch 6, sc/hdc/dc/hdc/sc). Sew in place.
Attachment
- Create a small loop at the top of the stem chain and attach a jump ring + lobster clasp or phone strap loop.
Finishing & tips
- For shiny highlights, sew a tiny clear bead on each cherry or embroider a tiny white stitch to mimic a light reflection.
- Variations: make cherries in pastel colors, or pair with a tiny leaf charm.
6. Crochet Sakura Phone Charm Pattern
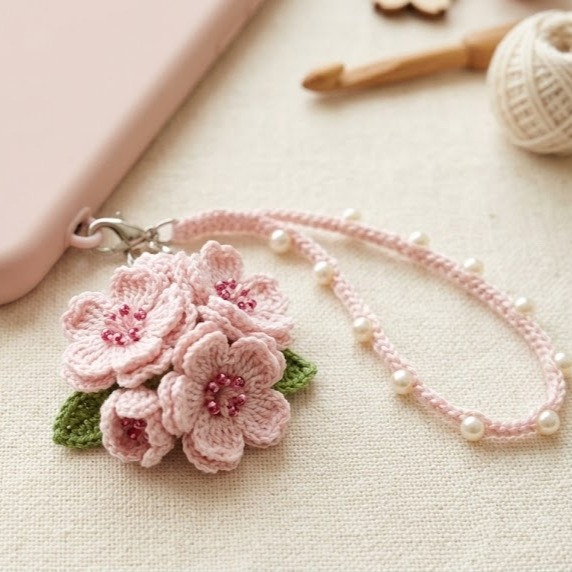
Skill level: Beginner–Intermediate (small motifs + layering)
Finished size: single blossom ~1.5″ (3.5–4 cm); 2–3 blossom cluster ~2–3″
Materials
- Fingering/sport yarn: pale pink (petals), darker pink or brown (center), optional green for leaf
- Hook: 2.5–3.0 mm
- Embroidery thread or a few tiny seed beads for stamen
- Tapestry needle, scissors
- Jump ring + lobster clasp or delicate strap loop
Abbreviations
MR, ch, sc, hdc, dc, sl st
Pattern — single blossom (make 3–5 for a cluster)
- MR, ch1, 10 sc into MR; join (10). Pull tight.
- (ch3, sl st into next st) around to create 10 loops for petals (or make 5 larger petals by spacing every other stitch).
- Into each ch-3 loop work: sc, hdc, dc, hdc, sc — rounded petal. Repeat around. Fasten off, weave ends.
Alternative 5-petal version (more compact)
- MR, ch2, (dc, tr, dc) in ring for petal; ch1, (dc, tr, dc) in ring repeat 5 times total. Shape petals by flattening and sewing base.
Center & stamen
- Use darker pink embroidery thread to make 3–5 French knots at the center or sew 3–5 tiny seed beads for a sparkly center.
Assembly (cluster)
- Overlap 3–5 blossoms slightly and sew them together on the backs to create a small spray. Add one or two tiny crocheted leaves sewn to the back (ch 6, sc, hdc, dc, hdc, sc).
- Sew a reinforced thread loop at the top and attach a jump ring + lobster clasp or a slim strap loop.
Finishing & tips
- Back each blossom with a small felt circle glued/sewn to hide stitches and strengthen the attachment point.
- Variations: single blossom on a delicate chain for a minimalist charm; cluster of three for more presence.
Conclusion
These six compact patterns make quick, satisfying projects with big personality. Whether you want kawaii, elegant, or playful, each charm includes clear step-by-step instructions, an attachment method, and finishing notes so you can finish strong and make gifts that hold up.
Universal finishing tips
- Firmness: Use a smaller hook than the yarn label recommends to create tight, non-holey stitches; this keeps stuffing from showing.
- Attachment strength: Reinforce the attachment loop with multiple passes of thread/yarn and hide ends inside the charm. For metal findings, secure them to a small felt patch glued/sewn inside the charm for stress relief.
- Bead safety: Sew beads with doubled thread, knot securely, and hide knots inside the charm; avoid small beads if gifting to young children.
- Cleaning: Spot clean when possible. For cotton/acrylic charms without glued elements, very gentle hand wash and air dry flat works. Avoid submerging charms with metal hardware that can rust.
- Presentation: Add a tiny care note and a stitched tag (e.g., “handmade with ♥”) when gifting.