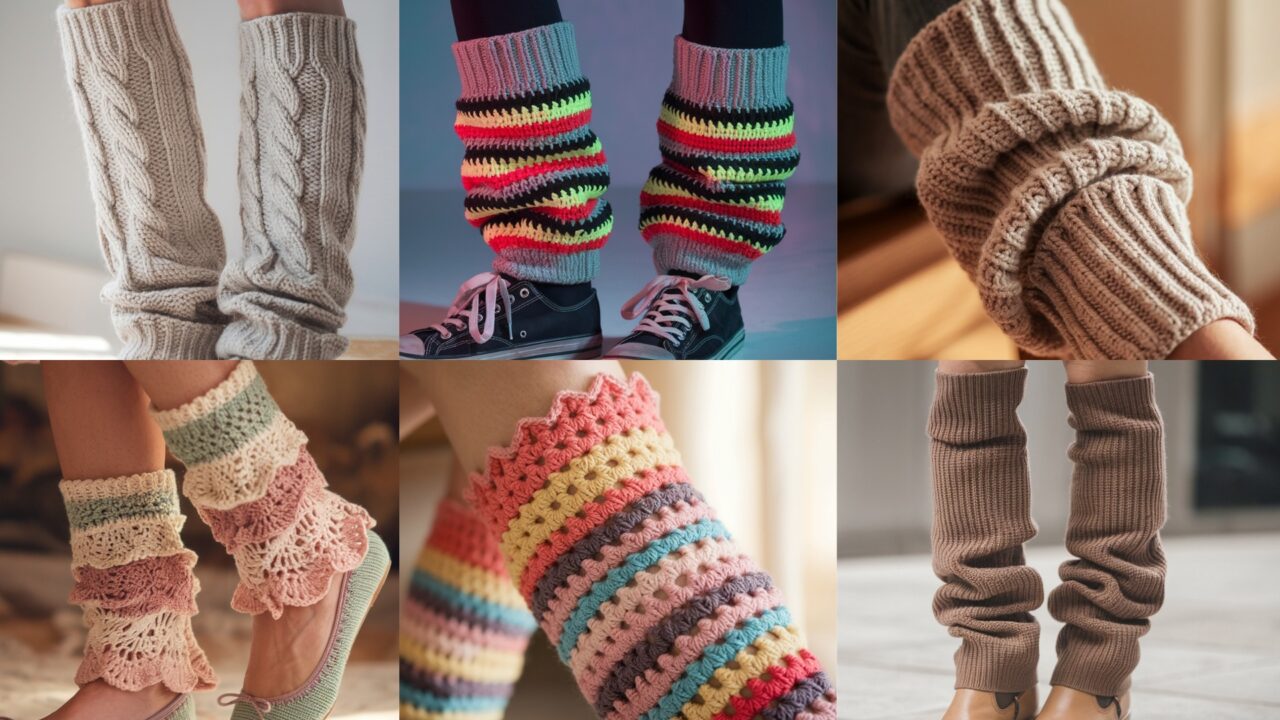
Leg warmers are the tiny garments that make chilly mornings tolerable and questionable fashion choices defensible. They’re fast to make, great for stash-busting, and easy to customize. Below you’ll find six distinct styles — cottagecore lace, relaxed slouch, neon 80s, structured cable, sleek cosmopolitan, and a granny-stitch classic — each designed to be wearable and actually useful.
General notes that matter (read this first)
- Sizes shown target adult calves. Finished calf circumference (unstretched) used for samples:
S = 12″ (30.5 cm), M = 14″ (35.5 cm), L = 16″ (40.5 cm), XL = 18″ (45.5 cm). - Example gauge used to convert sizes into stitch counts: 4 stitches per inch (common for worsted weight using a 5.0 mm/US H hook in single crochet / structured rib). Rows per inch example: 4.5 rows per inch. I give concrete stitch/row numbers based on those rates — but you must swatch. Your yarn or tension will change this.
- Formula if your gauge differs:
stitch count = desired finished circumference (inches) × your stitches per inchrows needed = desired length (inches) × your rows per inch - Finished length in patterns is a suggestion; you can shorten or lengthen easily by adding/subtracting rounds.
- For leg warmers, use slightly negative ease at the top edge (so they stay up) OR add elastic/ drawcord if you want zero-mystery fit.
Abbreviations used
ch = chain
sc = single crochet
hdc = half-double crochet
dc = double crochet
tr = treble crochet
sl st = slip stitch
st(s) = stitch(es)
sk = skip
rev sc = reverse single crochet (aka crab stitch)
fpdc / bpdc = front-post / back-post double crochet
sp = space
( ) = repeat instructions in parentheses as directed
1. Crochet Cottagecore Leg Warmers Pattern
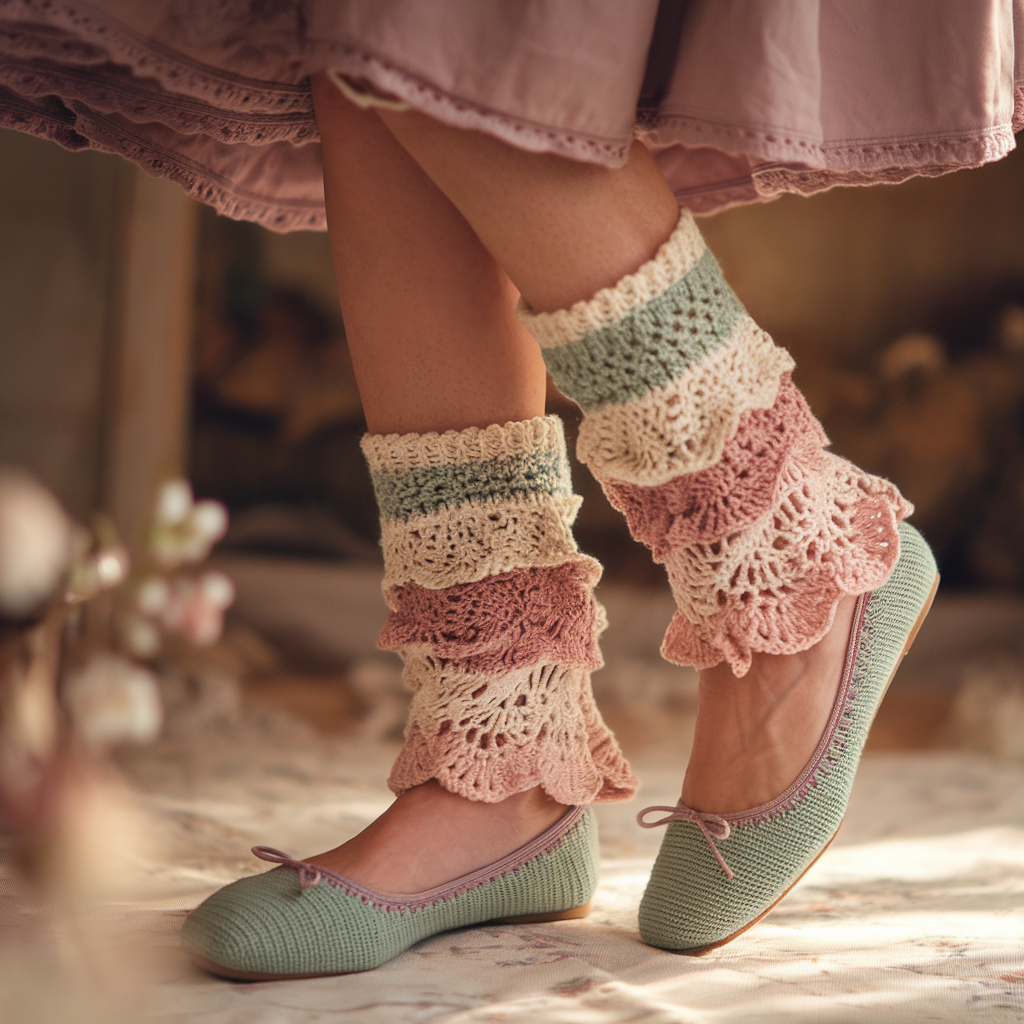
Delicate lace, soft yarn, cottage-ready. These are light but warm and look great layered over tights or boots.
Skill level: Confident Beginner / Intermediate
Yarn: DK or light worsted (Category 3–4) — 150–250 yards per pair depending on length
Hook: 4.0 mm (adjust to match gauge)
Suggested finished length: 14″ (adjustable)
Gauge used for sample math: 4 sts/inch (sc in the round equivalent). For 16″ length the example below uses 72 rows (16 × 4.5).
Stitch pattern (fan-lace)
Round pattern uses shell fans: (2 dc, ch 2, 2 dc) in same st, sk 2, sc in next st repeat.
Stitch counts for sizes (based on 4 sts/inch target)
- S: 48 sts
- M: 56 sts
- L: 64 sts
- XL: 72 sts
Note: Because the lace uses shell repeats, choose a starting count that’s a multiple of 8 for this fan pattern. If your calculated count isn’t a multiple of 8, adjust ±2 sts.
Build (worked in joined rounds)
- Foundation: Join in magic loop or ch 48 (56, 64, 72) and join to form a ring, being careful not to twist. Place marker for round start.
- Round 1 (base round): 1 rnd sc in each st around. Join. — This evens your foundation.
- Round 2 (setup): Ch 2 (counts as dc), 2 dc in next st, ch 2, 2 dc in same st (shell made), sk 2 sts, sc in next st; repeat to end. Join with sl st to top of ch 2.
- Round 3: Ch 2, 2 dc in ch-2 sp, ch 2, 2 dc in same sp, sk next shell, sc in next sc repeat. Join.
- Repeat Rounds 2–3 until piece measures desired length from top to bottom. Example for 16″ length: work 72 rows total (roughly 36 fan rounds × 2 if each fan takes two rounds), but always measure on the body — fabric will stretch vertically with lace.
- Top & bottom edges: Work 2 rounds sc to tidy edges. For a delicate finish, work one round of rev sc at the top (gives a tidy rope-like edge that grips better).
- Optional elastic: If you want extra hold, sew a 1/4″ elastic band inside the top 1/2″ and tack at intervals.
Finishing & care
- Weave in ends, block gently to open the lace (do not over-stretch).
- Wash: hand wash cold, press between towels, and lay flat to dry.
- Styling: pair with a midi skirt and boots for total cottagecore energy.
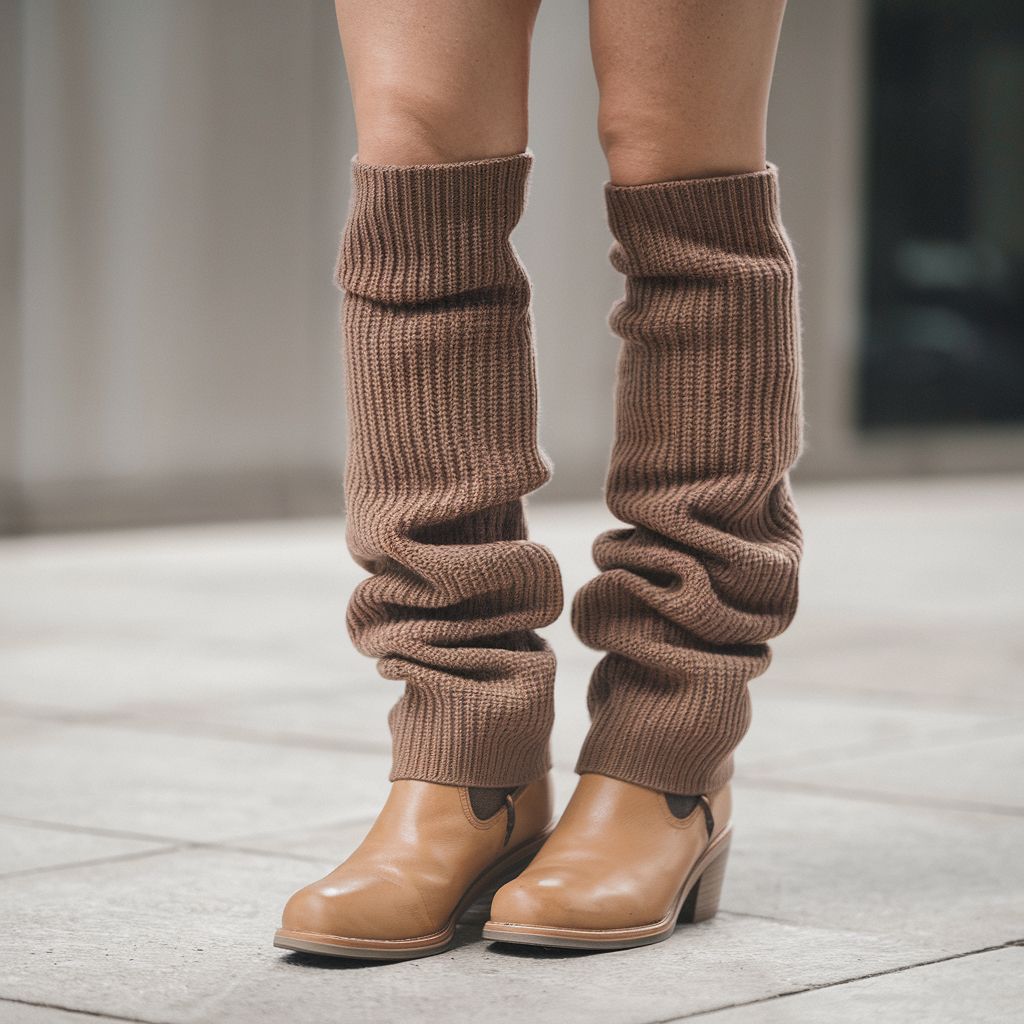
2. Crochet Slouchy Leg Warmers Pattern
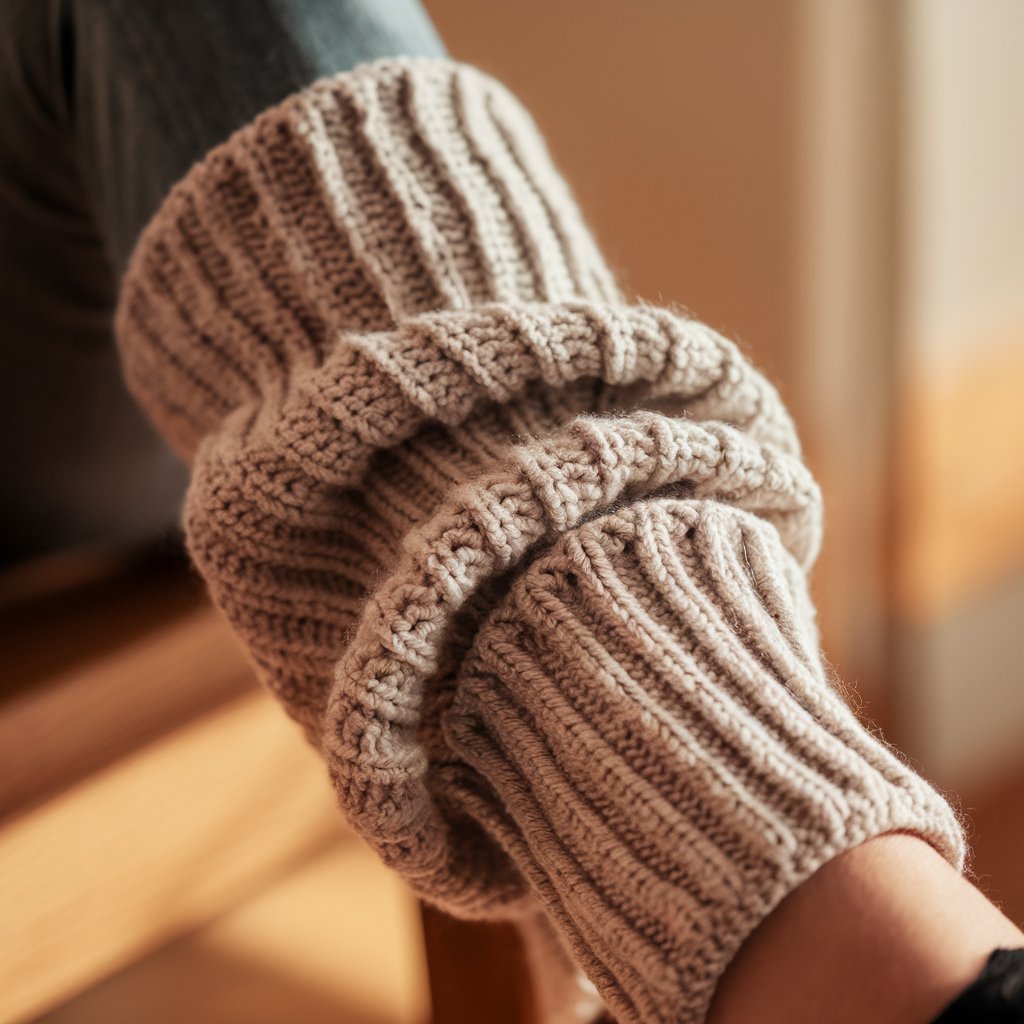
Tall and comfy with a loose scrunch — ideal for lounging, dance class, layering.
Skill level: Beginner
Yarn: Worsted weight (Category 4) — 200–300 yards per pair
Hook: 5.0 mm
Finished length: 18″ tall (you can shorten to 14–16″)
Gauge used for math: 4 sts/inch, rows/inch 4.5 → for 18″ length rows = 81 (18 × 4.5)
Fabric choice & stitch
Simple elastic rib with alternating fpdc/bpdc rounds for vertical stretch and recovery.
Stitch counts for sizes (based on 4 sts/inch)
- S: 48 sts
- M: 56 sts
- L: 64 sts
- XL: 72 sts
Rib pattern works on even counts (no further multiple required).
Build (worked in the round)
- Foundation: ch to desired st count, join carefully.
- Round 1: (RS) fpdc around next st, bpdc around next st repeat around. Join. This establishes the vertical rib.
- Rounds 2–end: Repeat Round 1 until piece measures desired length. For 18″ length, plan for 81 rounds.
- Cuff finish (both ends): Work 6 rounds of sc in BLO to create a cuff that folds in and helps keep them in place. Or fold the last 1.5″ inward and slip-stitch to form a rolled grip.
- Optional drawstring: Weave a narrow icord or chain through alternating post rows near the top to allow slight tightening.
Finishing & care
- Weave ends, block lightly (pressing with steam, do not overstretch).
- Wash per yarn label (worsted acrylic blends often machine-safe), reshape and dry flat.
Styling & tips
- For extra slouch, add 2–4″ length. To keep scrunch without sliding down, fold top cuff over and secure with a few hand-stitches.
3. Crochet 80’s Leg Warmers Pattern
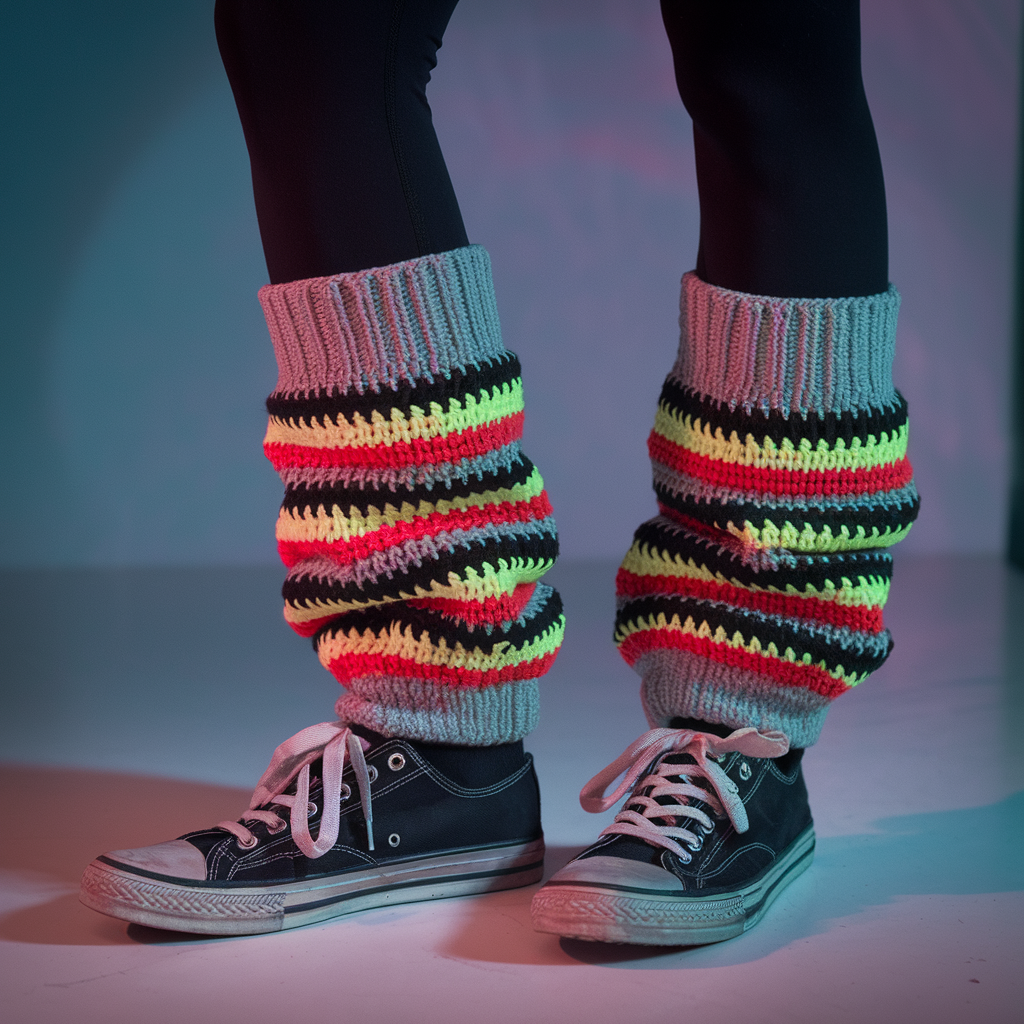
Retro, loud, and ridiculous in a good way. Stripes, colorblocking, and lots of attitude.
Skill level: Beginner
Yarn: Worsted weight; 6 colors suggested — 200–300 yards total
Hook: 4.5–5.0 mm
Finished length: 15″–18″ depending on scrunch
Construction idea
Striped tube worked in sc or hdc with elastic cuff. Count must align with stripe repeat; no special stitch multiples required.
Stitch counts for sizes (4 sts/inch target)
- S 48, M 56, L 64, XL 72
Build (worked in the round)
- Foundation: join 48 (56, 64, 72) sts in the round.
- Stripe plan: Decide stripe heights: eg. alternate 6 rounds neon / 4 rounds neutral. For a 16″ finished length at 4.5 rows/inch → 72 rounds. If your stripe repeat is 10 rounds, choose a number of repeats that fits or end with a tall stripe.
- Rounds: Work sc (or hdc for looser fabric) around, changing colors at the end of rounds. Carry yarn up inside or cut and weave ends (neater when colors change often).
- Top & bottom cuffs: Work 6 rounds of sc in BLO at each end for grip, or fold and slst to create a double-thickness cuff.
- Optional legwarmers-with-holes-for-toes: At the bottom edge, leave a gap of 4–6 sts unworked for a thumb-like toe opening (for dancers). Reinforce the edge with sc.
Finishing & care
- Bright neons can bleed — prewash colors if you’re mixing.
- Machine washable if yarn allows; tumble dry low only if yarn label permits.
Style notes
- Go loud: neon paired with black leggings is the practical 80s look. Use variegated yarn for a quick gradient without changing skeins.
4. Crochet Cabled Leg Warmers Pattern
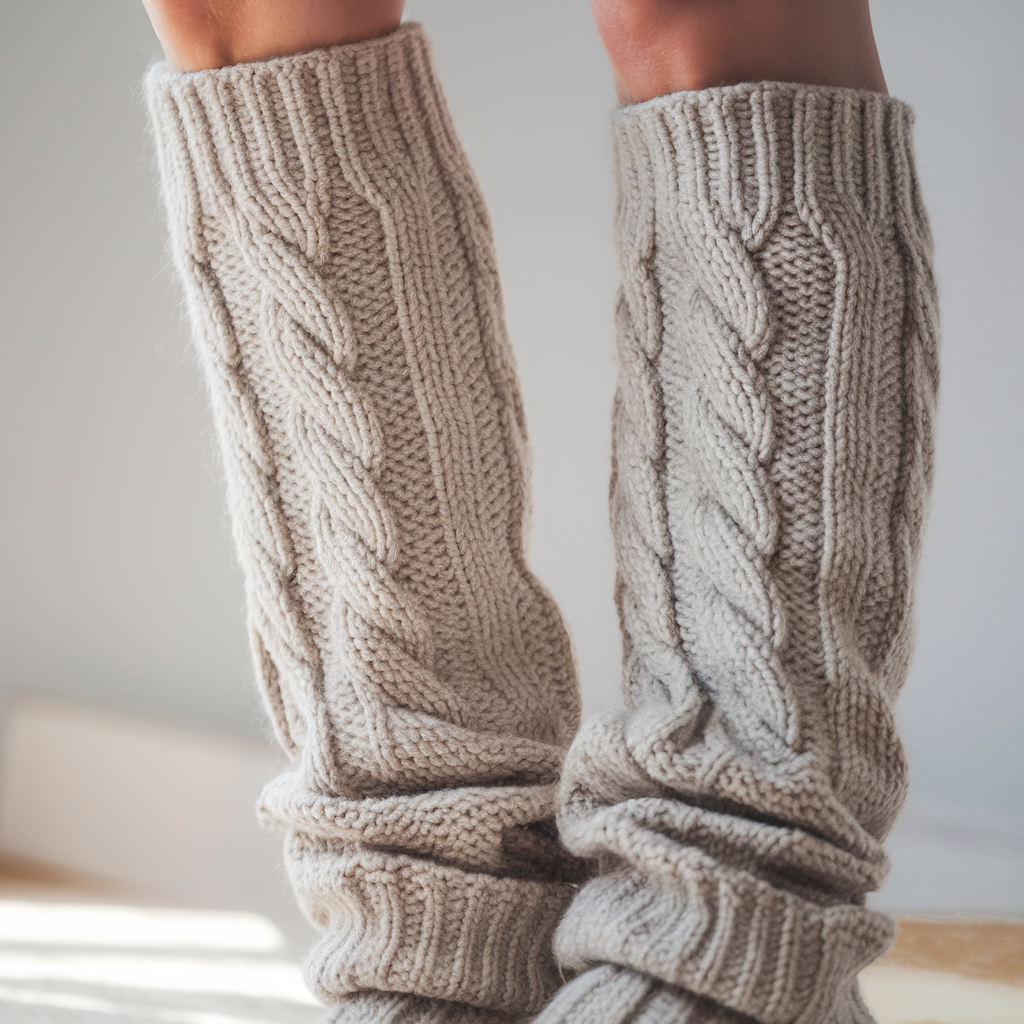
Cables made with post stitches give a knit-like look that stays put. These look expensive and are surprisingly quick.
Skill level: Intermediate (post stitches + counting)
Yarn: Worsted or aran (Category 4–5) — 200–300 yards per pair
Hook: 5.0–6.0 mm depending on yarn
Finished length: 14″ (adjustable)
Gauge & stitch math used
Same stitch counts: S 48, M 56, L 64, XL 72 (these counts give tidy cable columns).
Cable layout (example)
Cable panel = 8 sts cable, with 2-st purl (sc) ribs between panels. Example repeat: (8-cable sts, 2 sc) across.
Cable executed with fpdc/bpdc:
- To make a right-leaning cable: work fpdc around next 4 sts, then fpdc around previous 4 sts (requires working around posts out of order) — but easier method described below uses front/back post group swaps.
Build (worked in the round)
- Foundation: ch 48 (56, 64, 72) join.
- Round 1 (base): sc around, join.
- Round 2 (setup): Establish ribbed ground: (2 sc, 8 sts ground for cable area worked in dc) — work in sc/dc as desired.
- Cable rounds (every 6 rounds swap):
- Rounds 1–5: work pattern in post/dc as established.
- Round 6 (cross round): To cross cable, you’ll perform fpdc on the later cable stitches prior to the earlier ones — practically: skip placing post stitches for the group you want to cross, place posts in a temporary holder (or use stitch markers), then work the posts in swapped order. If that sounds fiddly, use this simple cross: Round X: (bpdc around next 4 sts, then fpdc around previous 4 sts) done carefully.
- Repeat cable/ground rounds until your piece measures desired length (e.g., 72 rows for 16″).
- Cuffs: Work 8 rounds of sc in BLO (creates neat cuff that tucks).
Easier cable method (if you hate live swapping)
- Use 8-row mock cable: 4 rows fpdc, 2 rows sc, 4 rows bpdc — alternate groups to simulate a braided look without complicated crossing.
Finishing & care
- Block lightly to set cables.
- Because cables add density, these will be snug — check fit before final blocking.
Styling & tips
- Cables read best in solid, slightly fuzzy fibers (wool blends). Avoid busy variegated skeins.
5. Crochet Cosmopolitan Leg Warmers
Smooth, refined, and slightly textured. Think streamlined panels, geometric stitch choices, and subtle sheen.
Skill level: Advanced Beginner
Yarn: Sport to DK with a good drape (bamboo blends work well) — 150–250 yards per pair
Hook: 4.0 mm
Finished length: 14″–16″
Stitch choice & texture
Use a repeating textured combo: hdc in front loop only (FLO) alternating with hdc in back loop only (BLO) every round to create a subtle rib that’s flatter than deep post ribs.
Stitch counts (same base)
- S 48, M 56, L 64, XL 72
Build (worked in the round)
- Foundation: ch 48 (56, 64, 72), join.
- Round 1: hdc in BLO around. Join.
- Round 2: hdc in FLO around. Join.
- Repeat rounds 1–2 for the entire length. For a 16″ length, expect about 72 rounds.
- Optional shaping: If you want +knee flare, add 2 sts on back panel every 16 rounds (increase evenly across a 6–8 round band).
- Edge finish: 3 rounds sc for a clean edge. For a polished edge, finish with rev sc.
Finishing & care
- Gentle hand wash recommended for silky fibers. Dry flat.
- These are designed to layer under structured boots or skirts.
Styling & tips
- Use tonal gradients or one accent stripe near the top for a high-fashion touch.
6. Crochet Granny Stitch Leg Warmers
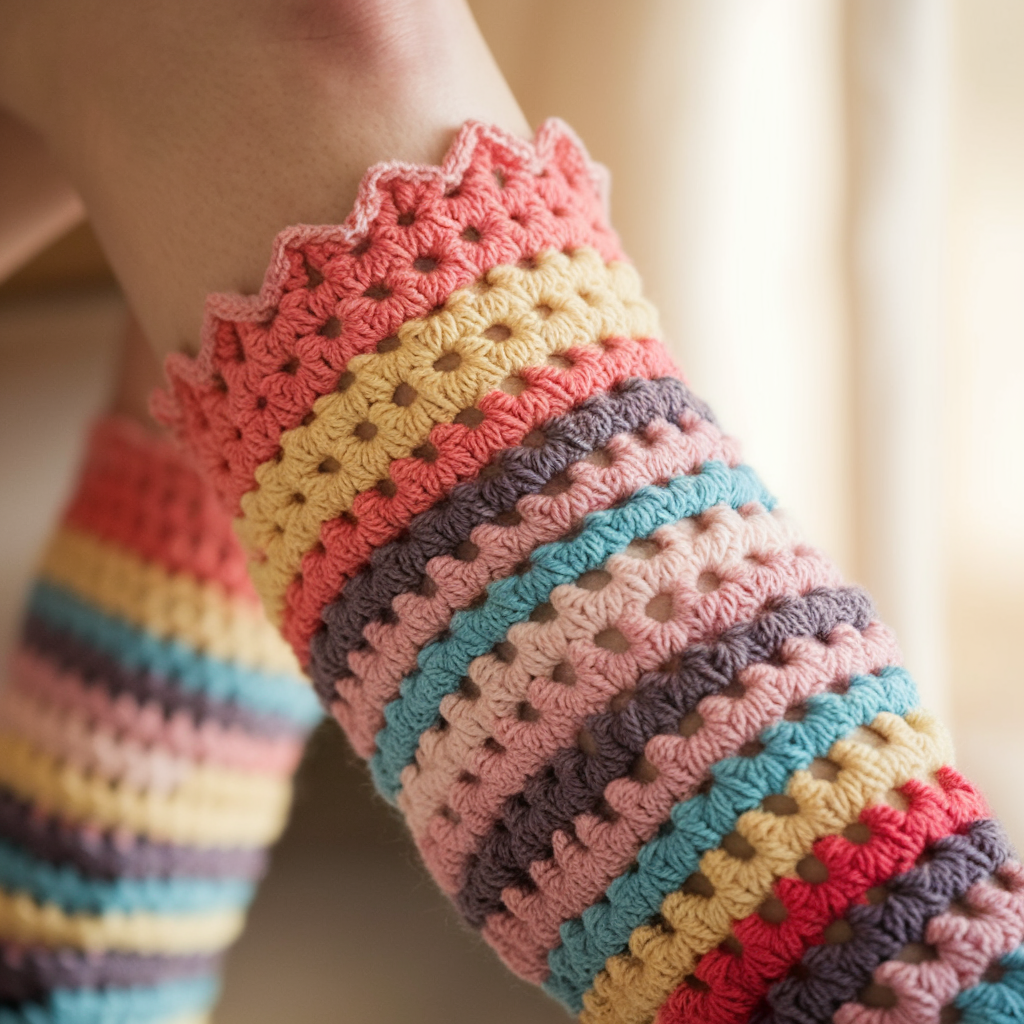
Quick, retro-friendly; granny stitch makes a stretchy, colorful tube that’s perfect for variegated or small-skein projects.
Skill level: Beginner (patterning attention)
Yarn: Worsted weight (Category 4) — 200 yards per pair
Hook: 5.0 mm
Finished length: 14–16″
Granny cluster & stitch math
Granny cluster = (3 dc, ch 1) in same spot. Multiple: clusters in rounds will work best if your starting chain is a multiple that yields an even number of clusters around — for tube: create a foundation chain that becomes the circumference, then work granny clusters into spaces.
Example counts based on 4 sts/inch (converted to cluster count roughly half):
- S: 48 sts → ~24 clusters around
- M: 56 sts → ~28 clusters
- L: 64 sts → ~32 clusters
- XL: 72 sts → ~36 clusters
Build (worked in joined rounds)
- Foundation ch: ch 48 (56, 64, 72), join careful not twisted.
- Round 1: ch 3 (counts as dc), 2 dc in next st, ch 1, sk next st; repeat to end — this creates clusters spaced by ch-1 sps. Adjust if you prefer clusters in ch spaces (some prefer odd multiples).
- Round 2: In each ch-1 sp work (3 dc, ch 1, 3 dc) to make the round’s granny clusters. Work until desired length.
- Edge finish: 2 rounds sc; for a retro look, add a scallop (5 dc in one stitch, sk 2, sc in next).
- Optional scrunch: Add a second inner cuff (sc tube folded and stitched) to keep them up if you intend heavy slouch.
Finishing & care
- Block gently; granny stitch spreads so check proportion.
- Store folded to avoid stretching.
Variation idea
- For a monochrome granny: make every other round in a neutral to make the clusters pop.
Final fit & measurement checklist
- Measure widest part of calf. Decide desired finished circumference (if you want a snug fit, use measurement; if you want them to sit loose, add 1–2 inches).
- Make a small swatch in the stitch you use (at least 4″ square). Count stitches per inch and rows per inch.
- Calculate stitch counts using the formulas above and adjust to stitch multiples required by the stitch pattern.
- Make the tube, try it on before finishing the cuff, and tweak length.
General finishing tips that stop disasters
- Weave ends inside the top rows and tack them every 2–3 inches to prevent yarns from peeking out after washes.
- Elastic option: Sew a short piece of 1/8″ elastic inside the top cuff and tack every 1″ — invisible hold.
- Reinforce heavy color changes (like in the 80s pattern) with a tiny knot and tidy seam on the inside to reduce tension differences.
- Blocking: For wool, block to finished measurements. For acrylics, reshape when damp and dry flat. Always test a small edge before aggressive blocking.
Care summary
- Wool/wool blends: hand wash cold, lay flat to dry.
- Acrylic/ washable blends: machine-wash gentle in a mesh bag if label permits; reshape and dry flat.
- Avoid hanging leg warmers — gravity and seams don’t like each other.
conclusion
You now have six distinct, fully actionable leg warmer patterns: delicate cottagecore lace, lazy slouch, loud 80s, structured cable, sleek cosmopolitan, and granny-cluster retro. Each pattern is built so you can change yarn weight, alter length, and tweak fit without rewriting the whole thing. Swatch first. Adjust stitch counts using the simple formulas. If you want one of these converted into a printable, size-graded pattern sheet with exact row-by-row counts for S–M–L–XL (and a yardage table), I can produce that next — but for now, these patterns are ready to go into your hook and into winter.