

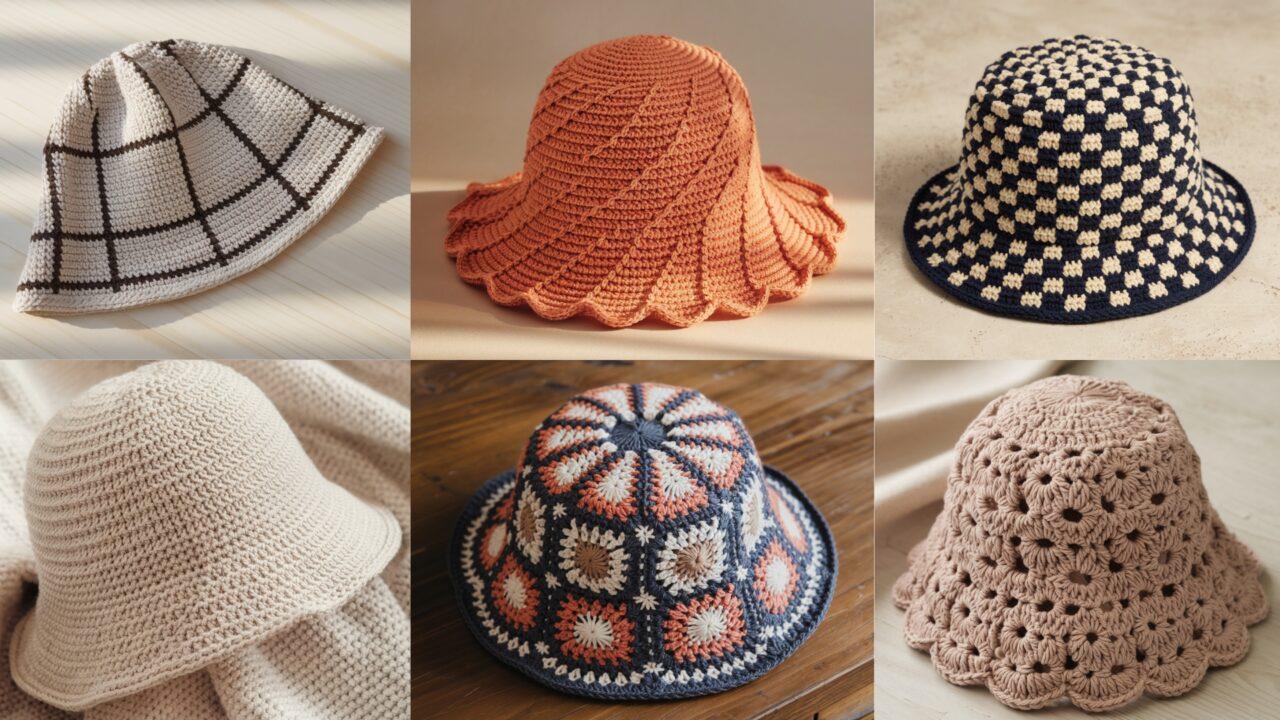
Bucket hats are a timeless, practical accessory that can be adapted to dozens of styles—from vintage granny-chic to modern minimalism. They’re also an excellent beginner-friendly crochet project: the basic construction (crown → sides → brim) is the same across most designs, but small changes in stitch, color, and brim shaping create very different looks.
This guide contains six approachable bucket hat patterns designed for beginners who want clear, step-by-step instructions. Each pattern includes:
- Skill level and estimated time
- Materials and suggested yarn alternatives
- Gauge and sizing guidance (small, medium, large)
- Detailed, round-by-round instructions for a medium head (with specific notes on how to modify for small or large)
- Variations, finishing, and care tips
- Troubleshooting notes and optional embellishments
All patterns use US crochet terms. If you prefer an alternate gauge or yarn weight, follow the “How to adapt sizes” notes near the start of each pattern. Read the general tips near the end if you’re new to hat shaping or want to customize fit.
General notes: yarn, hook, gauge, and sizing
- Suggested yarn for these hats: worsted weight (Category 4) cotton or cotton-blend for warm weather hats and sturdy shape; acrylic or acrylic blend for budget / easy care hats. If you prefer lighter summer hats, substitute DK (Category 3) yarn and a smaller hook — follow the adaptation notes below.
- Common hook sizes used in these patterns: 4.0 mm (G) or 5.0 mm (H) depending on the yarn and desired drape. Each pattern specifies a starting recommendation.
- Gauge is important for fit and brim shape. Where a precise gauge is required, the pattern will call it out. If you change yarn or hook, make a small test swatch and measure.
- Standard adult head circumferences:
- Small (S) — 20–21 in (51–53 cm)
- Medium (M) — 22–23 in (56–58 cm) — pattern base size
- Large (L) — 24–25 in (61–64 cm)
- For each pattern I provide stitch counts for Medium; I include notes for adjusting to Small/Large.
Abbreviations (US)
- CH = chain
- SL ST = slip stitch
- SC = single crochet
- HDC = half double crochet
- DC = double crochet
- BLO = back loop only
- FLO = front loop only
- ST(S) = stitch(es)
- INC = increase (2 stitches in the same stitch)
- DEC = decrease (as noted)
- RS = right side; WS = wrong side
1. Crochet Granny Stitch Bucket Hat
Skill level: Beginner / confident beginner
Estimated time: 3–5 hours
Style & notes: Classic granny clusters give this hat a soft, vintage look. Worked mostly in clusters and double crochet rounds, it’s forgiving for newcomers.
Materials
- Worsted weight cotton or cotton blend (Category 4) — 120–150 g total
- Crochet hook: 5.0 mm (H) recommended
- Yarn needle, scissors, tape measure
- Optional: stitch marker
Gauge
- 10 DC = 4 in (10 cm) in the pattern used (use this for rough fit). Because granny clusters are looser, measure and adjust hook if necessary.
Sizing
- Pattern below is for Medium (22–23 in / 56–58 cm) head circumference.
- To make Small, decrease final round cluster repeats by about 2 clusters evenly; to make Large, add 2 clusters per round in the body section when increasing circumference (details below).
Construction overview
- Crown: worked in rounds using DC cluster increases
- Sides (body): Granny cluster rounds, worked until desired height
- Brim: rounds of DC/HDC to flare and shape
Stitch definitions used
- Granny cluster = (DC, CH 1, DC) all in same space (or use the common three DC cluster with no chain depending on your preferred granny look). In this pattern we’ll use (DC, CH1, DC) cluster in chain spaces to make a flexible fabric.
Instructions — Medium
Crown (flat top)
- Start: magic ring (or CH 4 and join to form ring).
- Rnd 1: CH 3 (counts as DC), work 11 DC into ring; join with SL ST to top of CH 3. (12 DC total)
- Rnd 2: CH 3, DC in same st, INC by working 2 DC in next st — simpler method: work 2 DC in every stitch around. Join. (24 DC)
- Rnd 3: CH 3, DC in next st, 2 DC in next repeat around. Join. (36 DC)
- Rnd 4: CH 3, DC in next 2, 2 DC in next repeat. Join. (48 DC)
- Rnd 5: CH 3, DC in next 3, 2 DC in next repeat. Join. (60 DC)
- Rnd 6: CH 3, DC in next 4, 2 DC in next repeat. Join. (72 DC)
Stop increasing when the crown diameter approximates the flatter top you want. For many adult mediums, 60–72 DC is a common crown count when using worsted/5.0 mm hook. The counts above show a typical increase progression — if your crown is already wide enough at Rnd 5, proceed to body.
Body / Sides — Granny rounds
- Rnd 7 (first granny round): CH 3 (counts as DC), skip next 2 DC, (DC, CH 1, DC) in next DC, skip next 2 DC, DC in next DC — this spacing creates chain spaces for clusters. Join. (number of clusters will depend on previous row; aim for a tidy alignment)
- Rnd 8: SL ST into CH-1 space, CH 3, [(DC, CH 1, DC) in same CH-1 space], skip next DCs until next CH-1 — essentially place granny clusters into the chain spaces from previous round. Join.
- Repeat Round 8 until the hat body measures about 3–4 in (7.5–10 cm) from the crown edge for a typical bucket height. For a taller bucket style, add another 0.5–1 in.
Brim — shaping
- Brim Rnd 1: Change to HDC if you prefer a thicker brim. Work HDC in each stitch around for 2 rounds to start stabilizing.
- Brim Rnd 2: HDC in next 3 sts, 2 HDC in next repeat around — this begins a gentle flare. Join.
- Brim Rnd 3–5: HDC around (no increases); for a wider brim, repeat a round of increases (e.g., every other round, increase by 1 HDC every 4 stitches) until desired brim width (2–3 in is typical for a bucket hat brim).
- Finish: Fasten off, weave in ends. Optionally block brim with a light steam or pin the brim to shape.
Small / Large adjustments
- Small: finish the crown at the previous increase round (e.g., stop at 60 DC instead of 72) and reduce body rounds by 1; reduce one increase in brim shaping.
- Large: continue crown increases one extra round to add 12–18 DC; add 1–2 more body rounds; add an extra increase round to the brim for more flare.
Variations & finishing
- Make granny clusters with a different color every 2 rounds for a striped granny hat.
- For more structure, hold a cotton yarn with a slightly firmer gauge or add a topstitch of single crochet in BLO around the brim.
- Add a crocheted band or drawstring to the crown base for styling.
Care
- Cotton: machine wash cold, gentle; reshape and lay flat to dry.
- Acrylic: machine wash and dry per label.
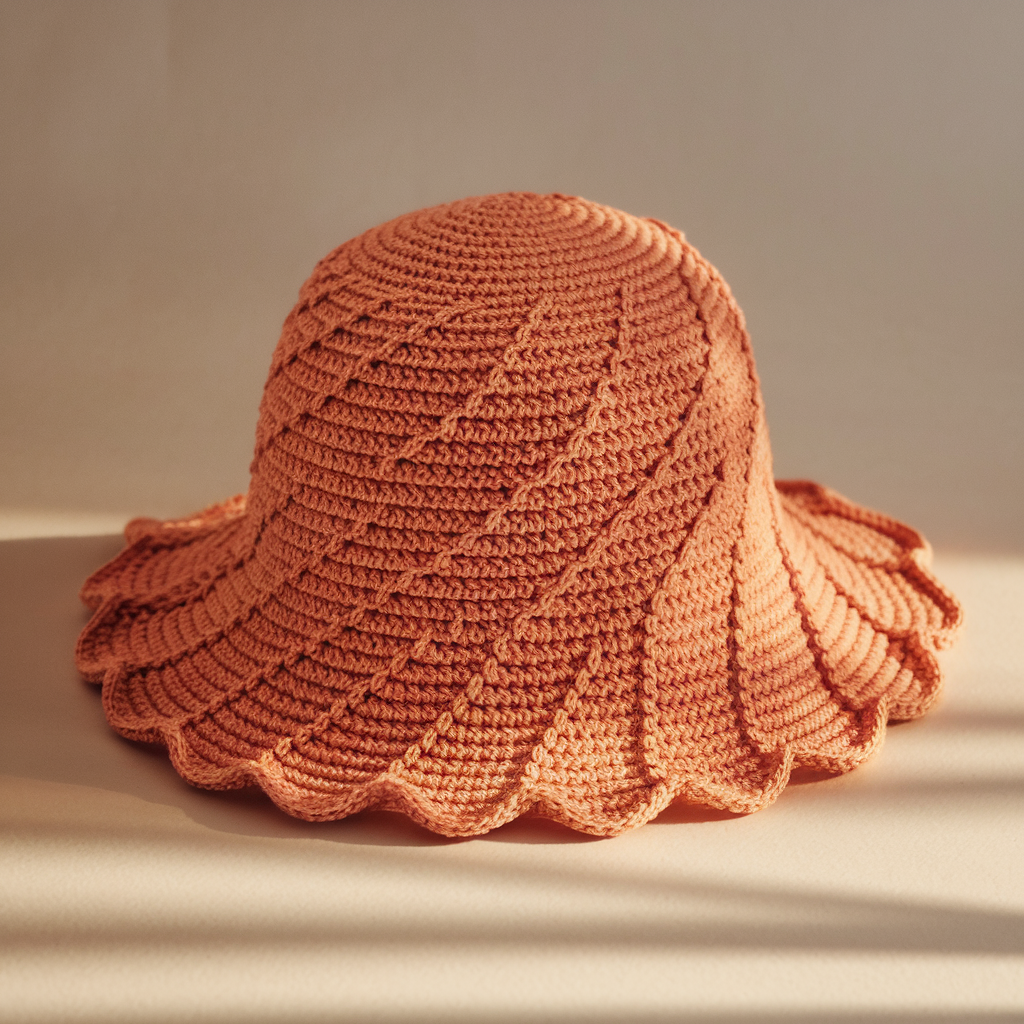
2. Crochet Lily Sun Swirl Bucket Hat
Skill level: Beginner to Intermediate
Estimated time: 3–6 hours
Style & notes: This hat uses a simple spiral/lily stitch (alternating chain spaces and clusters) to create a sun-burst swirl effect. It’s airy and great for warm weather when made with cotton.
Materials
- Worsted weight cotton (Category 4) — 120–140 g
- Crochet hook: 4.0 mm (G) for a slightly tighter fabric
- Yarn needle, stitch marker
Gauge
- 14 HDC = 4 in (10 cm) in HDC pattern
Sizing
- Pattern for Medium head circumference (22–23 in / 56–58 cm). Small / Large notes follow.
Stitch used: Lily motif
- Lily stitch / elongated cluster: yarn over, insert hook in same stitch, pull up loop (repeat in subsequent stitches to make 5 loops on hook), yarn over, pull through 4 loops, chain 1 to close (one way of creating a flower-like stitch). (I’ll provide a simpler lily variation below.)
Instructions — Medium
Crown
- Magic ring. CH 3 (counts as DC), work 11 DC into ring, join. (12 DC)
- Round 2: CH 3, 2 DC in each stitch around (24 DC). Join.
- Round 3: CH 3, DC in next, 2 DC in next repeat (36 DC). Join.
- Round 4: CH 3, DC in next 2, 2 DC in next repeat (48 DC). Join.
- Round 5: CH 2, HDC in each stitch around to prepare a slightly shorter transition (48 HDC). Join.
Begin Lily/Sun rounds
- Round 6: CH 1, SC in next st, skip 1, [Lily in next st] repeat around. (Place lilies evenly; lilies will create small petal groups.)
- Simpler lily: in target stitch make (YD, insert hook, pull up loop) 4 times (5 loops on hook), YO and pull through all loops, CH 1 to close; secure.
- Rnd 7: SL ST into each CH-1 of lily to balance, then CH 3, SL ST in next base st to create a swirl. Continue alternating lily rounds and short spacer rounds to build the swirl texture.
- Continue until body height is 3–4 in from crown.
Brim
- Attach HDC: work HDC around the body for 2 rounds to stabilize.
- Increase round: HDC 3, 2 HDC in next repeat for gentle flare.
- Work 2–4 rounds HDC around without increases; for wider brim add another increase round and 1–2 extra HDC rounds.
- Finish and weave in ends.
Small / Large modifications
- Small: use one fewer increase round on crown and brim.
- Large: add an additional crown increase round (e.g., an extra DC 5, inc round) and one more body round.
Variations
- Alternate colors every lily round for a vivid sunburst effect.
- Use thinner yarn and a smaller hook to create a more delicate summer hat.
Finishing
- For a more structured brim, add a row of SC in BLO for firmness before blocking.
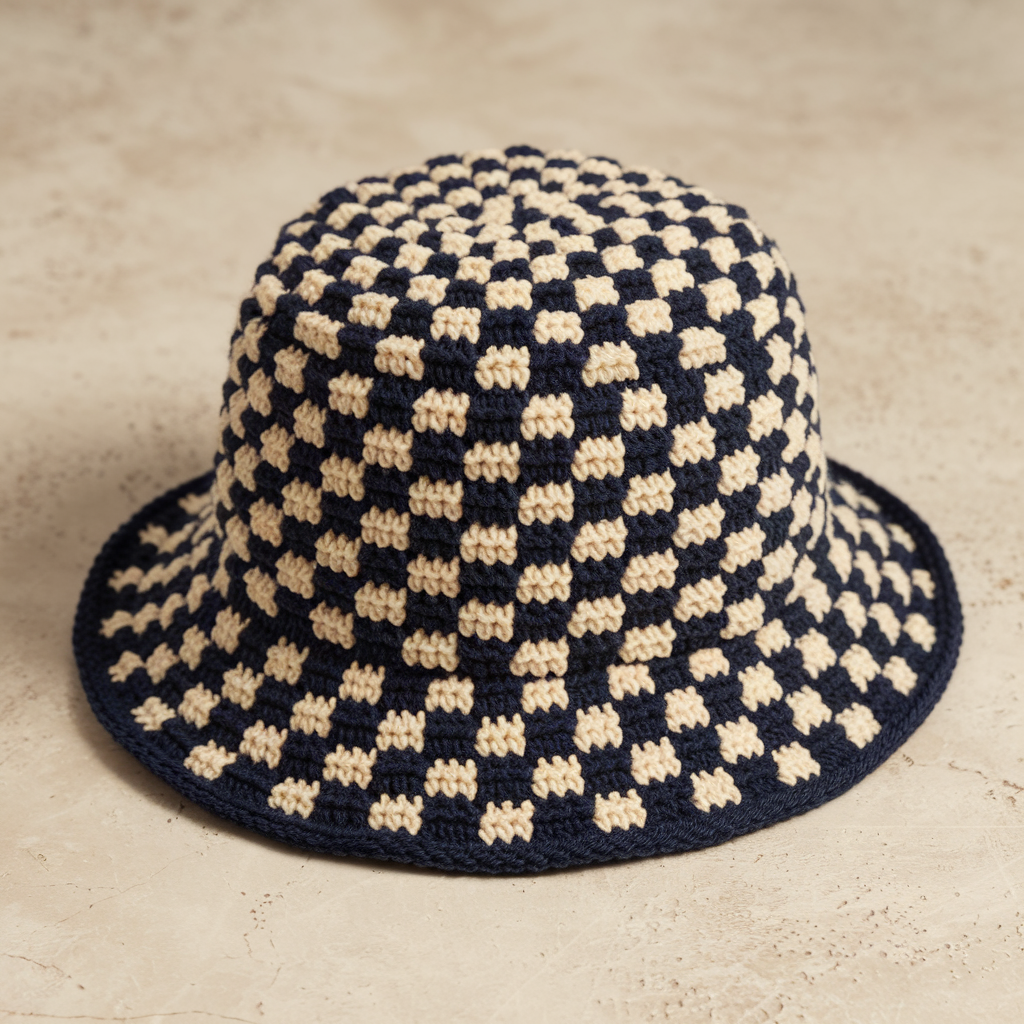
3. Crochet Cotton Checkered Bucket Hat
Skill level: Beginner
Estimated time: 3–5 hours
Style & notes: A two-color checkerboard built from alternating blocks of HDC and DC or HDC and SC. This is visually bold but structurally simple—ideal for beginners who want striking colorwork without complex colorwork techniques.
Materials
- Worsted weight cotton yarn in two contrasting colors (A and B) — about 120–150 g combined
- Crochet hook: 5.0 mm (H)
- Yarn needle, stitch markers
Gauge
- 14 HDC = 4 in (10 cm)
Sizing
- Medium base; small and large tweaks given below.
Construction concept
- Work crown in rounds; alternate color blocks by switching colors at specified stitch counts to create 1-inch or 2-inch squares.
Instructions — Medium (checker blocks ~1 in)
Crown
- Magic ring, CH 2, work 10 HDC into ring (or CH 3, 10 DC). Join. (10 HDC)
- Rnd 2: CH 2, HDC inc in each st (20 HDC). Join.
- Rnd 3: CH 2, HDC in next st, INC in next repeat (30 HDC). Join.
- Rnd 4: CH 2, HDC in next 2, INC in next (40 HDC). Join.
- Continue increase rounds until you reach the crown diameter to fit the head (typically 56–60 HDC for medium; measured flat results in circumference roughly 22–24 in depending on gauge).
Body (create checker)
- Choose block size: for ~1 in squares, determine how many stitches equal 1 in from your gauge (e.g., if 14 HDC = 4 in, then ~3.5 HDC = 1 in; round to 3 or 4 stitches per block). For simplicity we’ll use 4-stitch blocks: each block is 4 sts wide.
- Beginning with Color A: Rnd 1 of body: HDC in color A for 4 stitches, change to color B and HDC 4 sts, repeat around (use mattress stitch or carry yarn behind to avoid many ends). Join.
- Rnd 2: To offset and create checkerboard, start with half-block offset: CH 2, HDC 2 in color A then change color B for next 4 sts, etc., or maintain alignment for a plaid look. Repeat the block pattern vertically for 4–6 rounds to form squares.
- Continue body rounds in alternating blocks until the hat body height is ~3.5–4 in from crown.
Brim
- Brim: Work 2 rounds HDC in alternating colors (maintain checker columns).
- Increase round: HDC 4, 2 HDC in next repeat to start a soft flare (maintain checker color switches at the increases as best as possible).
- Work 2–4 rounds HDC — for wider brim do another increase round and more HDC rounds.
Adjustments
- Small: reduce final crown circumference by ~8–12 HDC (stop increasing earlier), reduce body rounds 1–2.
- Large: add an extra crown increase round and an extra body round or two.
Tips
- Carry color across the back for small floats if blocks are short (<6 sts). For longer floats, weave in ends or change colors more frequently.
- To make squares clearer, switch to SC for a tighter grid and DC for a taller, more drapey square.
Finishing
- Block flat and, if desired, lightly starch/shape the brim for a sturdier finish.
4. Crochet Simple Bucket hat
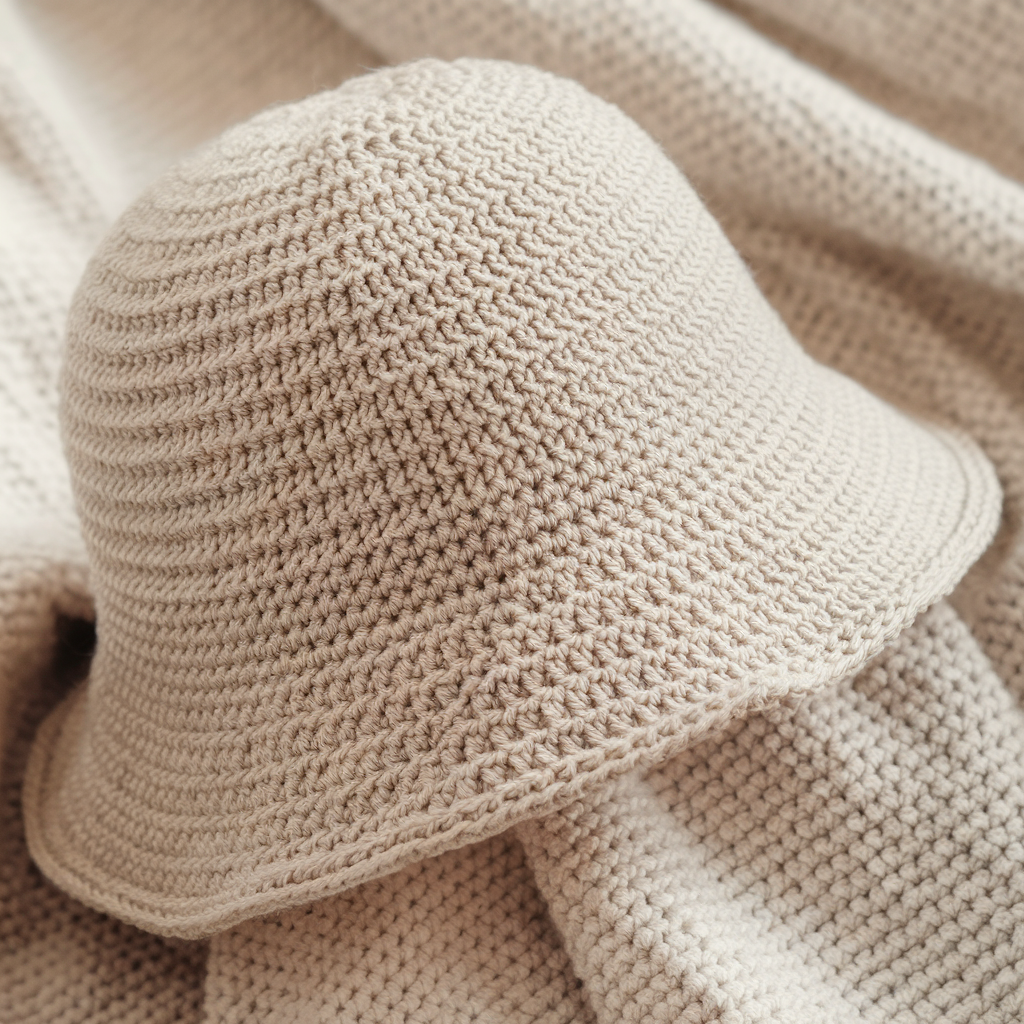
Skill level: True Beginner
Estimated time: 2–4 hours
Style & notes: Minimal construction using simple HDC rounds for a streamlined, classic bucket hat. This pattern is ideal when you want the quickest, cleanest result.
Materials
- Worsted weight yarn (acrylic or cotton) — 150 g
- Crochet hook: 5.0 mm (H)
- Yarn needle, stitch marker
Gauge
- 14 HDC = 4 in (10 cm)
Sizing
- Medium head: 22–23 in (56–58 cm), counts shown for Medium.
Instructions — Medium
Crown
- Magic ring. CH 2, work 10 HDC into ring. Join. (10)
- Rnd 2: CH 2, 2 HDC in each st around. Join. (20)
- Rnd 3: CH 2, HDC in next, 2 HDC in next repeat (30). Join.
- Rnd 4: CH 2, HDC in next 2, 2 HDC in next (40). Join.
- Rnd 5: CH 2, HDC in next 3, 2 HDC in next (50). Join.
- Rnd 6: CH 2, HDC in next 4, 2 HDC in next (60). Join.
Stop increasing once crown diameter matches the top of head (flat measurement across crown). Common medium crown: 56–60 HDC.
Body
- Rnds 7–12: HDC around, no increases, until body measures ~3.5–4 in from crown.
Brim
- Brim Rnd 1: HDC in each st around for 2 rounds (stabilize).
- Brim Rnd 2: HDC 4, 2 HDC in next repeat around (gentle flare).
- Brim Rnds 3–5: HDC around; add another increase round if you want a wider brim.
- Finish: Fasten off, weave ends and block to shape.
Small / Large
- Small: stop increasing at 50 HDC crown and reduce body rounds by 1.
- Large: increase crown to 66 HDC or add a round of HDC x5, inc to reach larger circumference.
Variations
- Use a textured stitch for the body (e.g., moss/linen stitch) to change the appearance without altering construction.
- Add a contrasting color brim by changing color at the brim start.
Finishing
- Add a narrow band of SC at the edge of the brim for a neat finish.
- Block and press to shape; for cotton hats wet-blocking sets shape nicely.
5. Crochet Sunburst Granny Square Bucket Hat

Skill level: Beginner–Intermediate
Estimated time: 4–7 hours
Style & notes: This hat is built from oversized sunburst/granny squares joined around the crown to create a vintage-inspired patchwork hat. It’s a great way to use leftover yarn and practice joining squares.
Materials
- Worsted weight yarn in 2–4 colors (Color A dominant, Colors B/C accents) — 150–200 g total depending on size
- Crochet hook: 5.0 mm (H)
- Yarn needle, stitch markers
Gauge
- Not strictly gauge-dependent; ensure each sunburst granny square measures approximately 6.5–7 in across after blocking for Medium.
Sizing & Panel count
- For Medium, you’ll need 6–8 granny panels joined in a circular band (size depends on your square size). I’ll provide a method to size panels to fit.
Make one Sunburst Granny Panel (sample square)
- Center: Magic ring. CH 3 (counts as DC), work 11 DC into ring; join. (12 DC)
- Rnd 2 (Petals): Switch color B. CH 2, skip 1 st, DC in next around to create petal bases. Join.
- Rnd 3 (Granny rounds): In each chain space work (DC, CH1, DC) to create a rounded square effect — continue rounds to expand square to roughly 6.5–7 in.
- Rnd 4: Add rows until the panel reaches target size (measure and block).
Assembly
- Make 6–8 panels the same size.
- Join panels along vertical edges with slip stitch or whipstitch to form a closed circular band — test fit by placing the assembled band on a rounded bowl or head block to check circumference. For Medium, aim for ~22 in circumference.
- Add a top circle if necessary: either decrease from your square center or create a circular insert using DC rounds to close the top.
- Once the crown band is assembled and closed, work 2–3 rounds of HDC around the lower edge for a clean join.
- Brim: pick a single color and work HDC rounds around the bottom of the band: 2 rounds HDC, then one increase round (every 6th stitch inc) and 2–3 rounds HDC for brim width.
Sizing
- Adjust number of panels or panel size for S/L — make panels smaller or larger or change panel count (e.g., 6 larger panels for smaller stitch counts, 8 smaller panels for larger sizes). Measure while assembling.
Variations
- Use contrasting colors for centers for a mosaic effect.
- Join panels with a colorful join-as-you-go slip stitch for a decorative seam.
Finishing
- Weave in ends; block squares before joining for clean edges.
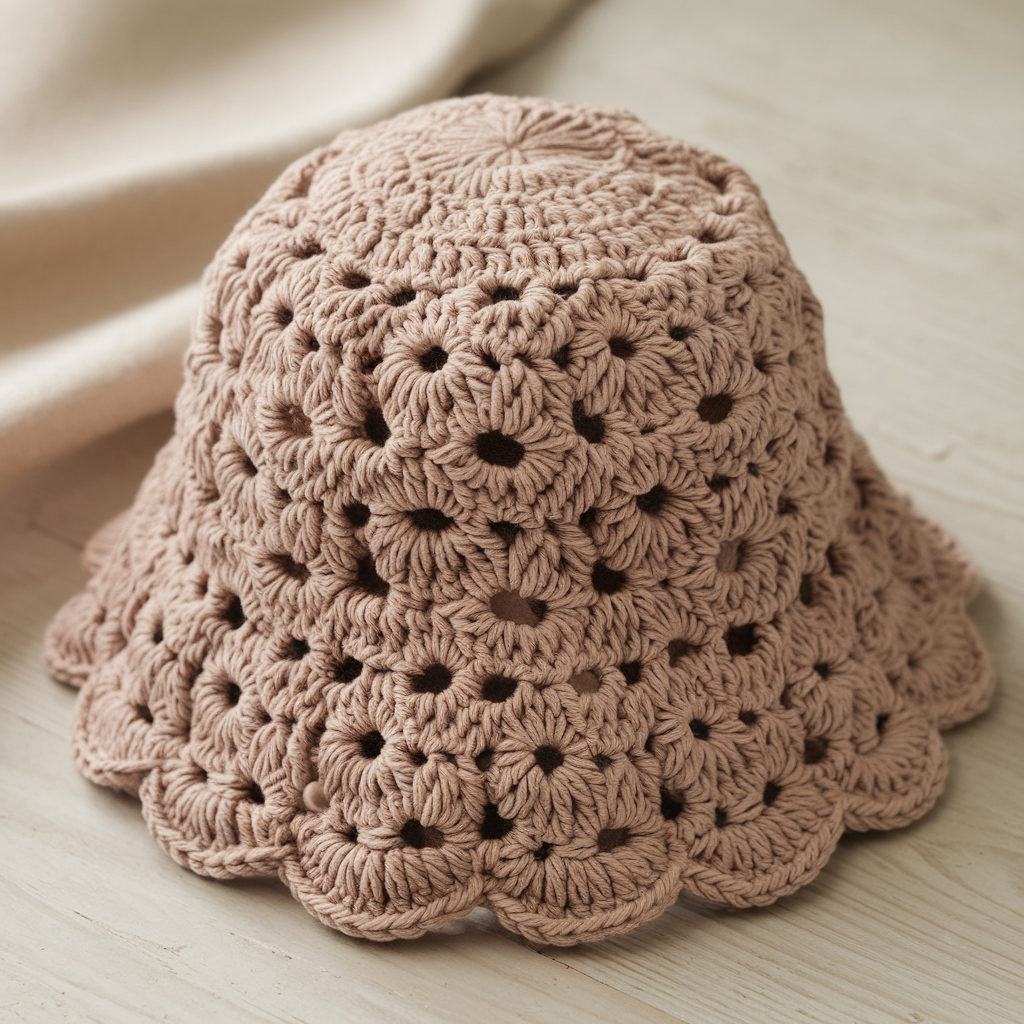
6. Crochet Plaid Bucket Hat
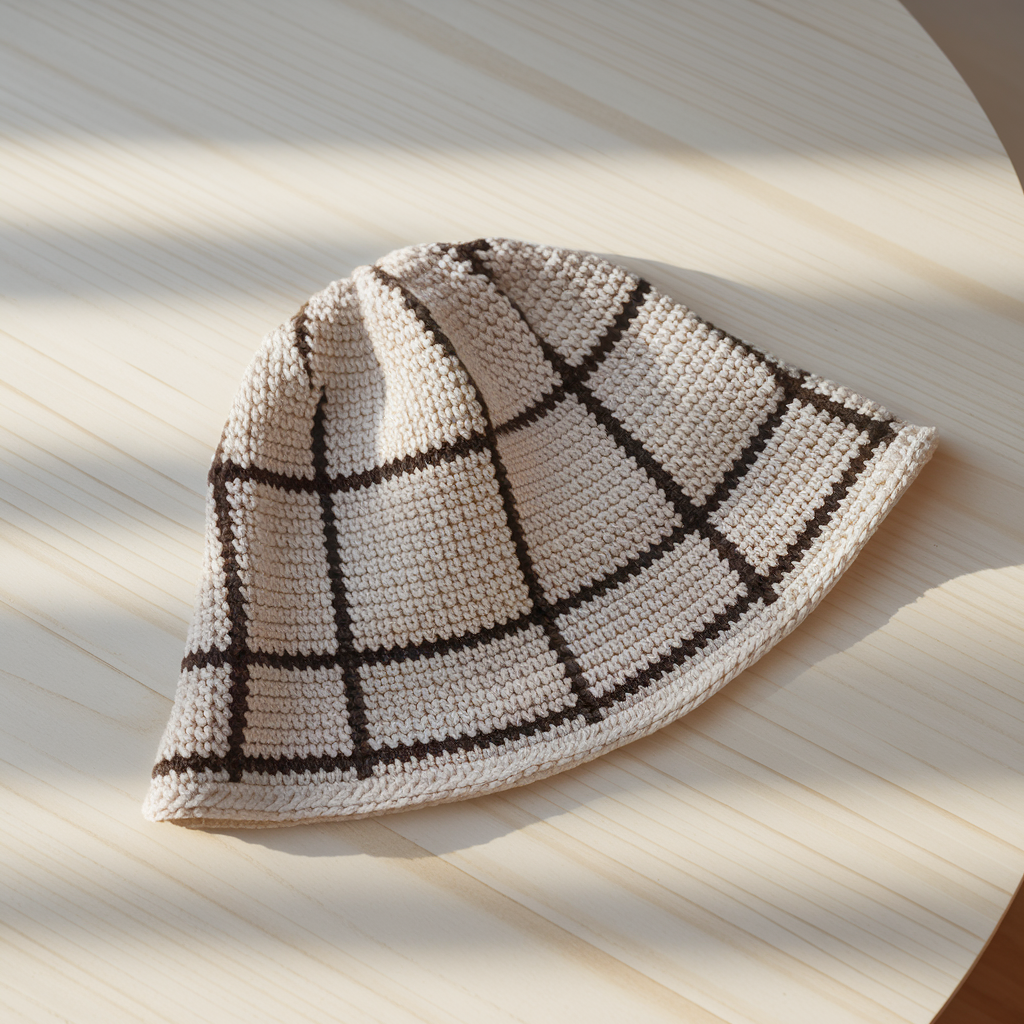
Skill level: Beginner–Intermediate
Estimated time: 4–6 hours
Style & notes: Plaid is created by alternating stripes and then adding short surface slip-stitch checks to simulate plaid lines. The base hat is a simple HDC hat; the plaid effect is added on the finished body.
Materials
- Worsted weight yarn in 3 colors (main color + 2 contrast colors) — 150 g total
- Crochet hook: 5.0 mm (H)
- Tapestry needle
Gauge
- 14 HDC = 4 in
Sizing
- Medium (base pattern); small/large adjustments below.
Instructions — Medium
Hat base
- Magic ring. CH 2, 10 HDC in ring. Join. (10)
- Rnd 2: 2 HDC in each st (20)
- Rnd 3: HDC 1, 2 HDC in next around (30)
- Rnd 4: HDC 2, 2 HDC in next (40)
- Rnd 5: HDC 3, 2 HDC in next (50)
- Rnd 6: HDC 4, 2 HDC in next (60) — adjust to head size
- Work even HDC rounds until body reaches 3.5–4 in from crown.
Brim
- 2 rounds HDC stabilizing.
- Increase round: HDC 4, 2 HDC in next repeat.
- Work 2–3 rounds HDC; add more increases for wider brim.
Plaid surface
- Change to Color B and work 2–4 rounds of horizontal stripe at the body area (or alternating every other round for finer stripes).
- Using yarn needle and contrasting color C, work surface slip stitch lines vertically and horizontally to form a plaid grid. Surface slip stitch technique: with right side facing, insert hook through post of HDC and pull a loop of contrast yarn, SL ST across the outside of the stitches creating clean lines. Work lines spaced evenly (e.g., every 6–8 stitches).
- Avoid long floats — go over the edge and secure ends inside the hat.
Variations
- Use a checked colorwork technique instead of surface slip stitch for a reversible plaid.
- Use heavier yarn and fewer surface lines for a chunky, rustic plaid.
Finishing
- Weave in ends, trim stray fibers. Lightly block and shape the brim.
Tips for all patterns: fitting, customization, and care
How to check fit while working
- Measure crown flat diameter regularly and compare to the head circumference target: Head circumference ≈ crown diameter × π. A crown diameter of ~7 in yields circumference ≈ 22 in (7 × 3.14 = 21.98).
- Try the hat on as you work the body rounds; hats can be worked over a beanie block, bowl, or on the wearer.
How to adapt to other yarns / DK or bulky
- If using DK yarn, switch to a smaller hook (e.g., 4.0 mm) and reduce crown increases earlier — check gauge; you may need more rounds to reach same circumference.
- If using bulky yarn, go up a hook size and reduce crown increases (fewer total stitches required to reach the circumference).
Brim shaping guidance
- For a soft relaxed brim, use HDC or SC and minimal increases.
- For a stiffer brim, use tighter tension and an extra row of SC in BLO at the edge; consider adding a lightweight interfacing or a plastic brim insert (sew into a fabric lining).
Blocking and shaping
- For cotton hats: wet block and pin the brim into the desired shape, allow to dry fully.
- For acrylic hats: steam lightly and shape with hands; excessive heat can damage synthetic fibers — follow manufacturer guidelines.
Troubleshooting common issues
- Hat too tight: switch to a hook 0.5 mm larger and rework body rounds.
- Crown has a visible spiral or odd join: ensure you are counting increases properly; using stitch markers helps.
- Brim folds upward: either add more increase rounds for flare or add a stiffer stitch row (SC in BLO) to weigh edge down.
Conclusion
These six easy crochet bucket hat patterns cover a wide range of styles—granny clusters, sunburst motifs, checkered colorwork, minimal classic cuts, granny square panels, and plaid surface designs—while keeping construction approachable for beginners. Each hat follows the same basic structure (crown → body → brim), so once you make one, you’ll be able to adapt and improvise confidently.
Choose cotton for a breathable summer bucket hat or acrylic for durable, easy-care seasonal styles. Use the size adjustment guidance and always check your gauge — a small tweak in hook size or rounds will make a big difference in fit.


Thanks for sharing. I read many of your blog posts, cool, your blog is very good.
Can you be more specific about the content of your article? After reading it, I still have some doubts. Hope you can help me.
Can you be more specific about the content of your article? After reading it, I still have some doubts. Hope you can help me.
Can you be more specific about the content of your article? After reading it, I still have some doubts. Hope you can help me.
Your article helped me a lot, is there any more related content? Thanks!
Your point of view caught my eye and was very interesting. Thanks. I have a question for you.
Your article helped me a lot, is there any more related content? Thanks! https://accounts.binance.com/es-MX/register-person?ref=GJY4VW8W
I don’t think the title of your article matches the content lol. Just kidding, mainly because I had some doubts after reading the article.
Your point of view caught my eye and was very interesting. Thanks. I have a question for you.
Your article helped me a lot, is there any more related content? Thanks! https://www.binance.com/pt-BR/register?ref=GJY4VW8W