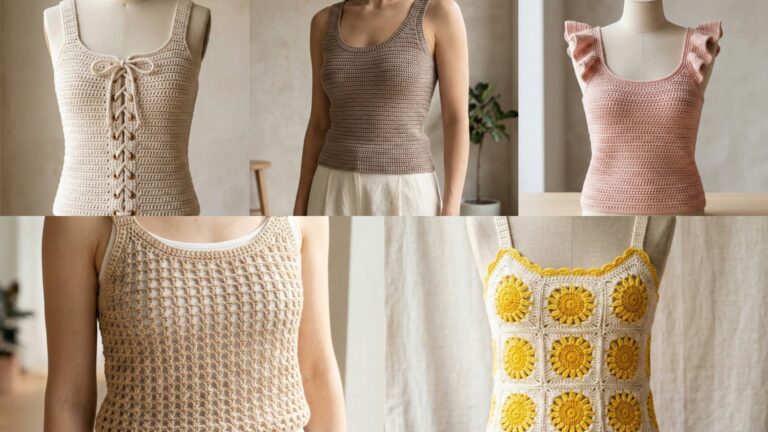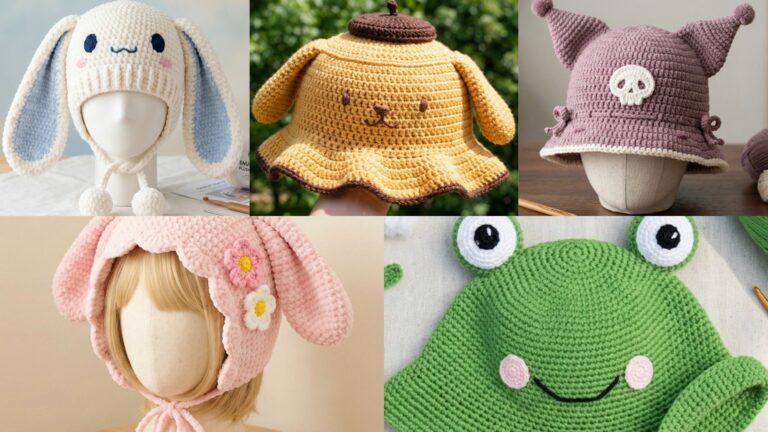
Crochet corset tops are a gorgeous way to merge vintage-inspired shaping with modern fabrics and stitches. They can be structured and fitted like a corset or soft and lacy like a bralette-style top — perfect for dressing up or layering over a tee. In this post you’ll find one clear introduction (materials, sizing & gauge primer, pattern-building tips) followed by six complete corset-top patterns with skill level, materials & yardage, gauge and sample measurements, and detailed step-by-step construction for each design. Every pattern includes shaping notes, fitting tips, finishing and styling ideas, and care instructions.
Read the short sizing & gauge primer first — it will make adapting these patterns to your body easy.
materials, sizing & gauge primer, safety notes
Yarn & notions (general)
- Yarn choices
- Fingering / sport weight for delicate, lacy corsets and summer tops.
- DK / light worsted for structured tops with a bit more body.
- Cotton, cotton blends or bamboo for breathability and drape. Silk blends for sheen. Avoid very slippery yarns unless you plan lining.
- Hooks: Use the hook recommended on your yarn label as a starting point. Smaller hooks create firmer fabric for shaping; larger hooks give drapier texture.
- Optional corset hardware: narrow elastic, lightweight plastic boning (fashion boning), waist stays, eyelets & cord for lace-up backs (if you want authentic corset lacing). These are optional — many crochet corset tops achieve shape with stitch choice and elasticized bands.
- Other tools: tapestry needle, stitch markers, measuring tape, safety pins, small sewing needle and thread (for attaching lining or hardware).
Sizing & gauge primer — a digit-by-digit example
- Measure bust (fullest point) and underbust (if you want a fitted corset that cinches). Decide desired finished circumference (FC) of the corset at the bust line. Example target FC = 36 in (medium fit).
- Make a 4″ × 4″ swatch in the stitch you intend to use, blocked the way you will finish the top. Measure stitches per inch (spi).
- Convert FC to stitches using digit-by-digit calculation:
- Suppose your swatch shows 5 stitches per inch (spi = 5). Multiply: 36 × 5.
- Do it digit by digit: 36 × 5 = (30 × 5) + (6 × 5).
- 30 × 5 = 150.
- 6 × 5 = 30.
- 150 + 30 = 180 stitches required across the bust line.
- Adjust to stitch multiple required by the stitch pattern (for example the lace pattern might be multiple of 8 + 2). Round 180 to the nearest number that fits the stitch multiple, or adjust hook/yarn to meet the multiple. Always measure on the body as you work.
Pattern-building tips (apply to each corset top)
- Work in sections: many corset tops are made as front and back panels that are seamed, or as a single top-down piece with shaping for bust and waist.
- Support & shaping: Use ribbed bands at underbust for grip. Add elastic in the hem channel or a hidden back elastic to hold shape. For more structure, sew lightweight boning into fabric channels, or add a lining with sewn stays.
- Adjust as you go: try the piece on frequently. Corset style depends heavily on fit — small tweaks in rounds/rows make big differences.
- Lining & modesty: lacy patterns often need a lining or a camisole underneath. A cotton cami or sewn fabric lining creates a smooth wearable finish.
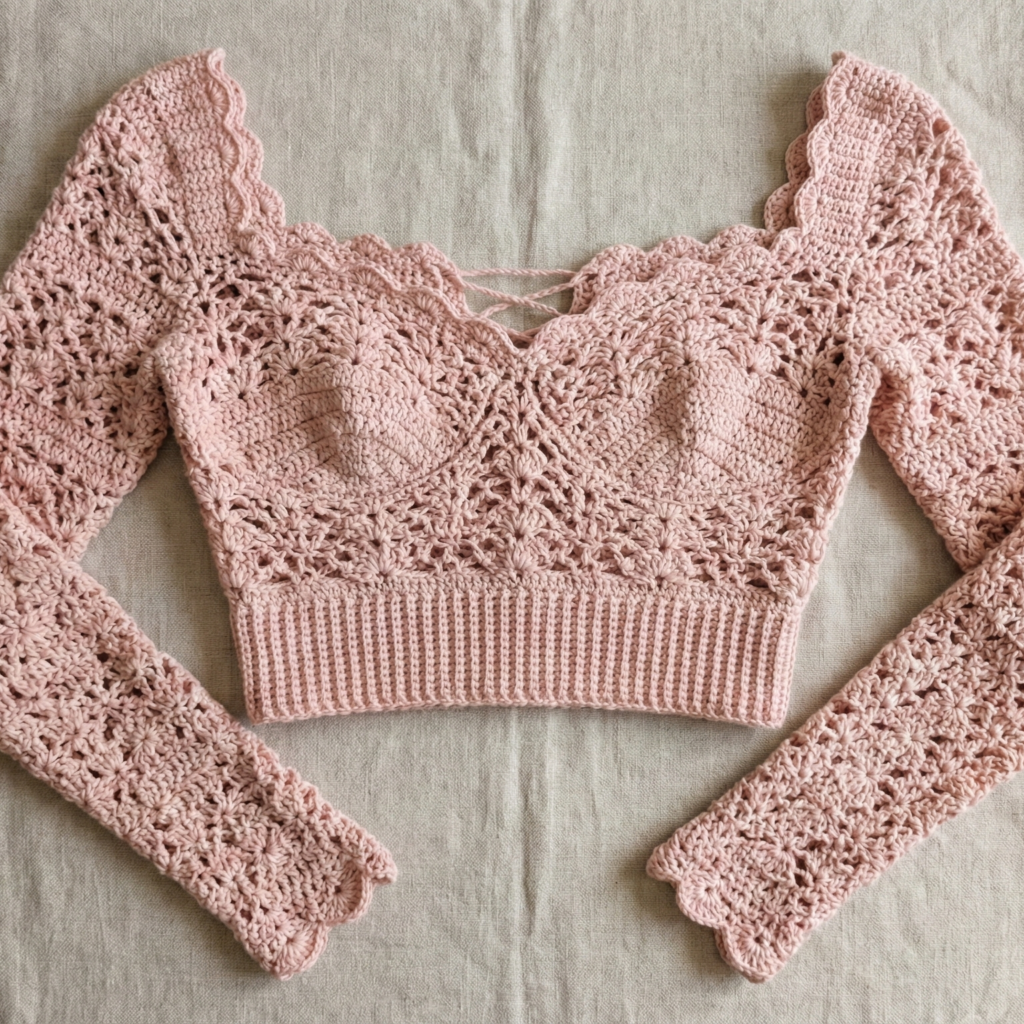
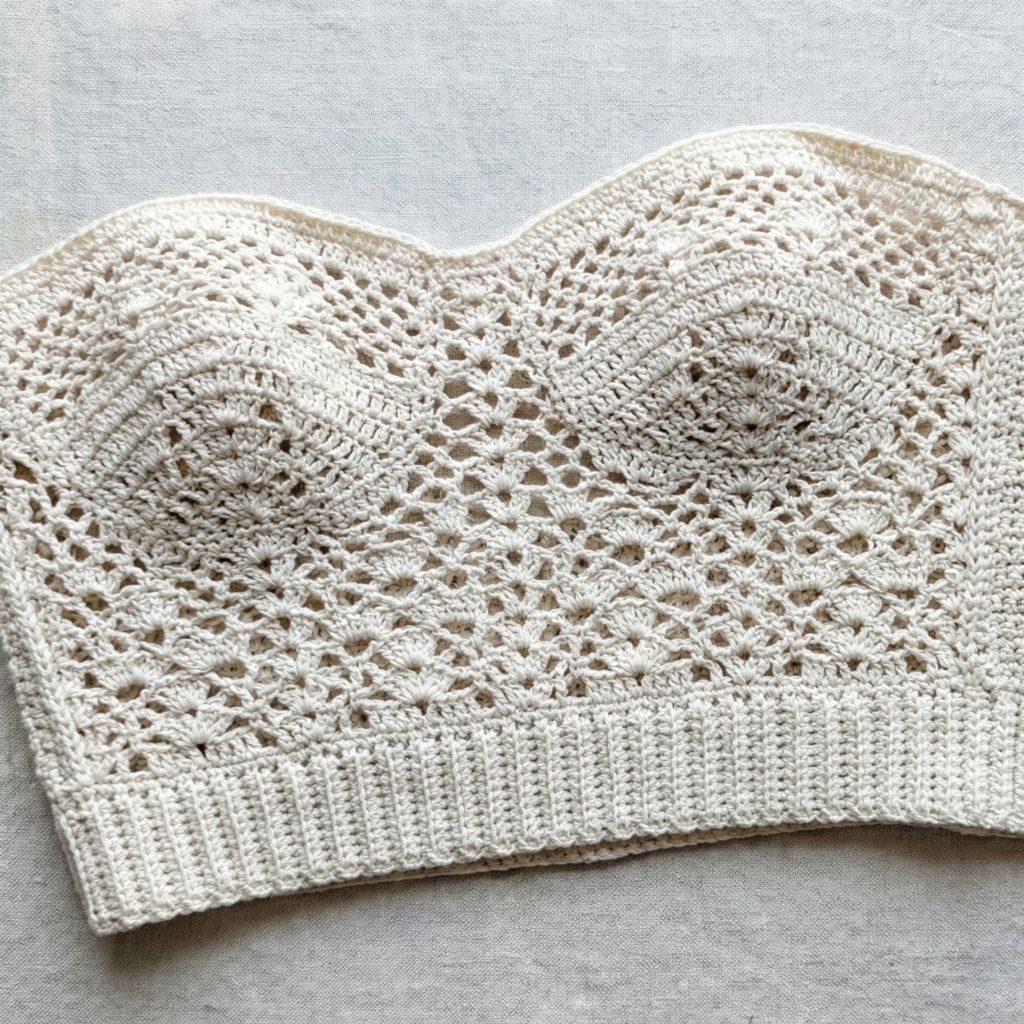
1. Crochet Fairy Lace Corset Top Pattern
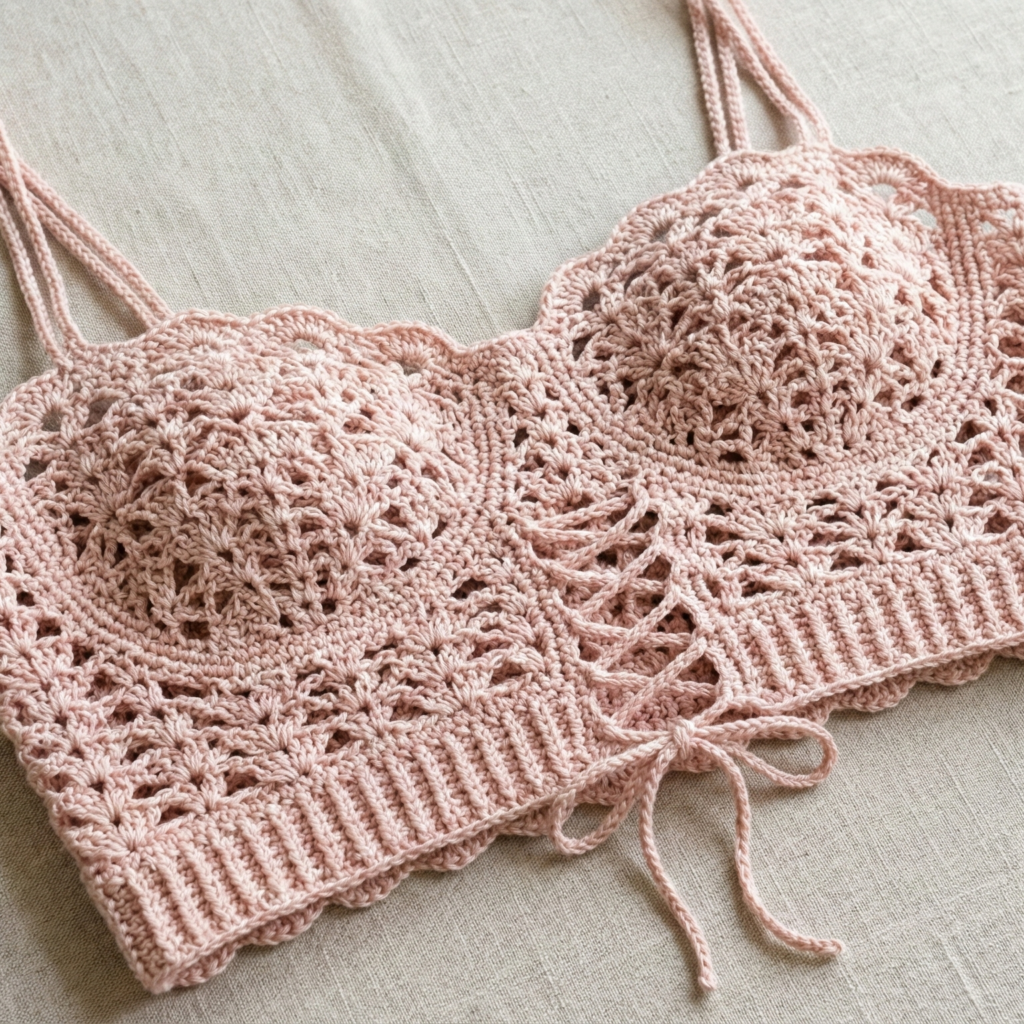
Vibe: Romantic, lacy, ethereal — a flattering corset-style bralette with delicate scalloped edges.
Skill level: Intermediate (lace repeats, short-row bust shaping)
Suggested yarn & tools
- Fingering or sport-weight yarn (e.g., 350–550 yd total for adult sizes depending on coverage).
- Hook: 3.0–3.5 mm (adjust to your swatch for firmer lace).
- Notions: stitch markers, tapestry needle, optional narrow elastic (½” or 1″) for underbust channel.
Sample gauge (blocked in lace): 6 sts × 8 rows = 1″ (spi = 6). Use a swatch.
Finished size sample: Medium bust FC ≈ 36 in → convert to stitches using sample gauge: 36 × 6 = (30 × 6) + (6 × 6) = 180 + 36 = 216 stitches across bust. Adjust to lace multiple below.
Stitch multiple: lace motif is multiple of 8 + 4 (example). So round 216 to 216 is divisible by 4 and 8? 216 ÷ 8 = 27 exactly, so 216 fits multiple 8 (216 = 8 × 27). Good.
Construction overview
Top-down cropped corset with:
- a short upper bust band that begins as a narrow center-front triangle or scoop,
- expansion into full bust coverage using lace repeats,
- underbust rib band for support (elastic optional),
- optional back lace-up panel or simple stepless seam with hook/eye or elastic.
You can make either a panel + seam construction (front + back sewn) or a single-piece top-down. Below uses top-down center increase to make a triangular or slight sweetheart shape, finishing with underbust band.
Step-by-step
1. Swatch & set counts
- Make a 4″ lace swatch and confirm spi. Choose desired finished bust stitches (example 216). Check that 216 fits your lace multiple (8 + 4). If not, adjust hook slightly.
2. Upper center start
- Begin with a small central chain: ch 6, join into a ring if you prefer a center front, or work a short chain and turn for a top-down central increase. For a sweetheart center, start with a small V-shaped foundation: ch 4, row 1: sc 3 in second ch from hook to create base.
3. Lace repeat and increases
- Work lace motif in an outward increase method: increase on both edges and optionally at the center spine every right-side RS row. Example increase rule: add 2 stitches per RS row (one on each side) until you reach approximately half of the bust stitches (because you are working half the front — for a symmetric top you’ll work left half and mirror, or do full round increases). If working flat panel, increase until front width equals half bust (216 ÷ 2 = 108 sts per half).
4. Shaping for cups
- Once panel reaches underarm level, start shaping for the cups: either continue with lace but add short rows to create cup projection (wrap & turn short rows) or work a small set of decreases at the apex and increases at sides to create molded cup shape. Short-row method example: work 4–6 short rows centered over the apex area to add depth, then resume full-row lace repeats.
5. Side attachment / back panels
- Make a back panel of equal height but slightly narrower for shaping and seam. Alternatively, make two side panels and seam them at center back leaving space for lacing. For a lace tie-back, add an edge row with eyelet spaces: ch 2, sc repeat to create slits for cord.
6. Underbust rib band
- Pick up stitches along lower edge and work a firm rib band: 8–10 rounds of hdc in BLO or alternating fpdc/bpdc for rib effect. If using elastic, fold band up and whipstitch to create a casing and insert narrow elastic (measure wearer underbust and cut elastic to that size for snug support).
7. Straps & finishing
- Add delicate straps by chaining required length and securing ends with sc or crochet small strap panels: ch 60, sc back or make two- or three-strand straps for strength. Attach to front upper corners and back top edge. For optional boning, create small vertical channels inside the lining and insert plastic boning vertically at side seams or center front for more corset shape.
8. Lining / modesty
- If lace is open you can hand-sew a cotton lining cut to same pattern inside, or attach a fabric camisole to wear under the top.
Finishing
- Block lacy edges to open up scallops. Weave in ends. If you added lacing, knot cord ends and add ornamental beads.
Fitting tips
- Try on after lace body is complete, before the rib band is finished, to confirm placement of straps and band tightness. The rib band can be adjusted once you know how snug the main body is.
- If you want a more corseted effect, choose a tighter spi or add elastic and boning; for a soft look, use looser hook and drapey yarn.
Care
- Hand wash for delicate fibers; block flat. Cotton blends may allow gentle machine wash in cold; always check yarn label.
2. Crochet Corset Top with Sleeves Pattern
Vibe: A romantic, feminine corset top with short cap sleeves — wearable as a stand-alone or layered piece.
Skill level: Intermediate to advanced (garment shaping & sleeve integration)
Suggested yarn & tools
- DK or light worsted yarn for a balance of structure and drape — 400–700 yd depending on size and sleeve length.
- Hooks: 4.0–5.0 mm depending on yarn.
- Notions: stitch markers, narrow elastic for hem, optional lightweight boning.
Sample gauge: 4.5 sts × 6 rows = 1″ in a dense pattern (spi ≈ 4.5).
Construction overview
This pattern is worked in three main pieces:
- Front panel with bust shaping,
- Two sleeveed side-back panels worked in one piece each (shoulder and underarm shaped),
- A final joining at sides and optional back lace-up or buttoned closure.
Alternatively, you can work in the round up to armholes, then separate body and sleeves, finishing each in the round or flat.
Step-by-step
1. Measurements & counts
- Decide finished bust FC and sleeve length. Convert FC to stitches using the spi measured. Example FC 36 in × 4.5 spi = 36 × 4.5 = (36 × 4) + (36 × 0.5) = 144 + 18 = 162 stitches around bust. For construction with sleeves, allocate front 1/3 stitches, each side panel with sleeve 1/3 each, or customize.
2. Front panel (worked flat)
- Start with central front panel: ch foundation for half the front width (e.g., 81 sts if total 162). Work lace or textured stitch pattern with increases for bust as described in Pattern 1, but include shaping for a sweetheart or scoop neckline by doing central decreases or a curved top edge:
- Example neckline shaping: once front is the right width at underbust, bind off central 8–12 sts for neckline and work left and right halves separately for a short number of rows to form the dip, then rejoin.
3. Side-back + sleeve panels
- For each side, pick up stitches along the armhole and work outward and upward to form short cap sleeve:
- Work in rounds or rows: start at underarm seam with number of stitches that correspond to half the side measurement, and increase slightly for the sleeve cap.
- Shape sleeve cap by short rows or decreases to create curve that fits over the shoulder.
- Finish sleeve hem with a few rounds of sc or a lace trim.
4. Join and finish bodice
- Join front and side-back panels at the sides using slip stitch or mattress stitch for a flat seam. Ensure the underarm seam is comfortable (try on).
- Add underbust ribbing as in Pattern 1: firm hdc rounds in BLO. Insert elastic into a casing if you prefer a cinched underbust.
5. Closure
- Choose between:
- Back lace-up: create a back panel with eyelet rounds (ch 2 spaces every x stitches) and thread cord through; this gives adjustable fit.
- Hidden zipper or hook/eye: sew in a short zipper or attach hook-and-eye tape in the center back.
- Buttoned back: add button band and decorative buttons.
6. Finishing touches
- Add decorative scalloped lace at sleeve edges and neckline. Sew in optional minimal boning channels at side seams for sculpting effect.
- Add straps if you prefer more support, or leave off for off-shoulder look.
Fitting tips
- Cap sleeves can restrict arm movement if too fitted — ensure at least 1–2″ positive ease at upper arm.
- For bust shaping, use short rows and increases around apex to get a smooth cup curve.
Care
- Wash according to yarn; if lined, remove lining for machine wash if fabric allows.
3. Crochet Corset Top with a Lace Front Pattern
Vibe: Structured back with a lacy front panel — great for a dramatic front focal point while keeping support under the bust.
Skill level: Intermediate (overlay lace + structural back panel)
Suggested yarn & tools
- DK yarn for body + lace in same weight (approx 400–650 yd).
- Hook: 3.5–4.5 mm.
- Notions: plastic boning optional, narrow elastic, eyelet sets for lacing.
Construction overview
This design has a lacy front panel (made flat or in rounds) and a solid back panel worked in a sturdy stitch. The back includes either a lace-up center or hook closure for fit.
Step-by-step
1. Prepare counts
- Convert bust circumference to stitches as before. Decide how wide the front lace panel should be (e.g., front = 1/3 of bust, each back panel = 1/3). Example total stitches = 180: front = 60, each back = 60.
2. Work front lace panel
- Crochet lace panel flat: chain 62 (60 stitches + edge). Work lace pattern rows (example: diamond eyelets + small shells) until reaching desired length from neckline to underbust. Add shaping at bust with small increases along sides or short rows over cup area.
3. Work back panels
- Make left and right back panels in a firm stitch like hdc rib or moss stitch. Each panel should include an edge row to accommodate eyelets: on one side work a row of ch 2, sc to form eyelet spaces for lacing; on the opposite panel mirror or place eyelets accordingly if you prefer double-laced design.
4. Seam + underbust band
- Join panels at sides with mattress stitch leaving armholes free. Pick up stitches along bottom to work a strong underbust band in BLO hdc; fold and create elastic channel if needed.
5. Lacing & shaping
- If using boning, sew small fabric channels onto the interior seams vertically and insert plastic boning for vertical support (do not use metal boning unless making couture corset — and be careful if worn directly on skin).
- Thread ribbon or cord through eyelets for lace-up closure. Use a lining if the lace is delicate and you want to wear it without another top under it.
6. Neckline & finishing
- Add a narrow decorative lace edgingsuch as picot or scallop to the front panel. Sew in lining for coverage if needed.
Styling ideas
- Worn over a fitted tee or dress for layered looks, or paired with high-waisted jeans or skirts.
- For festival looks, use metallic thread lightly held with main yarn.
Care
- Remove boning for machine wash if possible. Otherwise hand wash and dry flat.
4. Crochet Mirana Corset Top Pattern
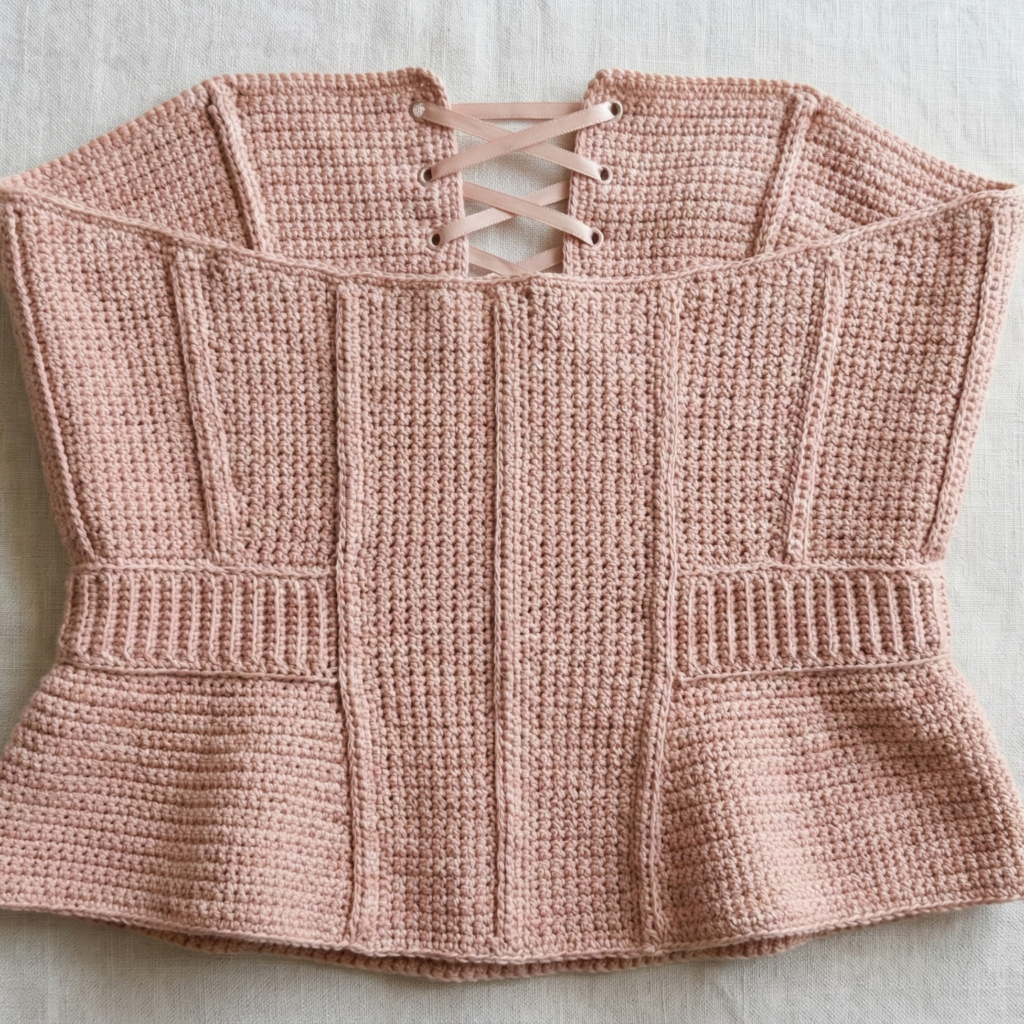
Vibe: Modern, geometric, slightly structured corset with a flattering waist panel and optional peplum. The Mirana is a named design here for a sleek silhouette.
Skill level: Advanced (panel shaping, optional peplum and boning)
Suggested yarn & tools
- DK or light worsted yarn (approx 500–800 yd).
- Hooks: 4.0–5.0 mm.
- Notions: plastic boning, small eyelets for lacing, narrow elastic.
Construction overview
Mirana uses multiple vertical panels joined together to create princess seams and waist shaping, just like tailored corset garments. Panels give excellent contour and allow precise shaping.
Step-by-step
1. Measure & panel planning
- Decide number of vertical panels: common layout is 6 panels — 2 front, 2 side, 2 back. Convert bust circumference to stitches then divide for panels. Example FC 36 in × spi 4.5 = 162 stitches. If using 6 panels, aim for roughly 27 stitches per panel (162 ÷ 6 = 27). Adjust for seam allowance and waist shaping.
2. Create panel templates
- Make a small paper template for each panel size and shape for guidance: front panels will be slightly wider at bust, narrower at waist and wider at hip. Use these to crochet panels to match shapes.
3. Crochet panels
- Work panels flat using a dense, supportive stitch such as hdc or moss stitch. Increase or decrease at panel edges to create hourglass contour:
- At bust rows, increase 1–2 sts on panel edges distributed across a few rows.
- At waist rows, decrease 1–2 sts for cinch.
- Keep track of row counts: all panels should have the same height from top edge to underbust.
4. Join panels
- Seam panels together using whipstitch or mattress stitch to create nearly invisible seams. Leave openings for eyelets at center back panel or plan center back seam for lacing.
5. Underbust band & boning channels
- Add an underbust band using firm stitch and create small stitched channels inside between panels for plastic boning insertion. Stitch channels at panel seams or inside lining. Insert boning vertically along seams for sculpting.
6. Add peplum (optional)
- For a peplum, pick up stitches at lower edge and work rounds of shell stitch or flared dc to create a short ruffle around the hip.
7. Closures
- Insert eyelets in center back for lacing, or add a hidden zipper if you prefer. Lace up for adjustable fit.
Fitting
- Because this design is structured, try on as you add seams and before inserting boning — use temporary lacing to test fit. Once satisfied, insert boning and finalise seam stitching.
Finishing touches
- Topstitch around neckline and arms for a polished look. Add strap options (off-shoulder bands, thin straps, or removable sleeves).
Care
- Remove boning before washing if your boning type allows, or hand wash and dry flat.
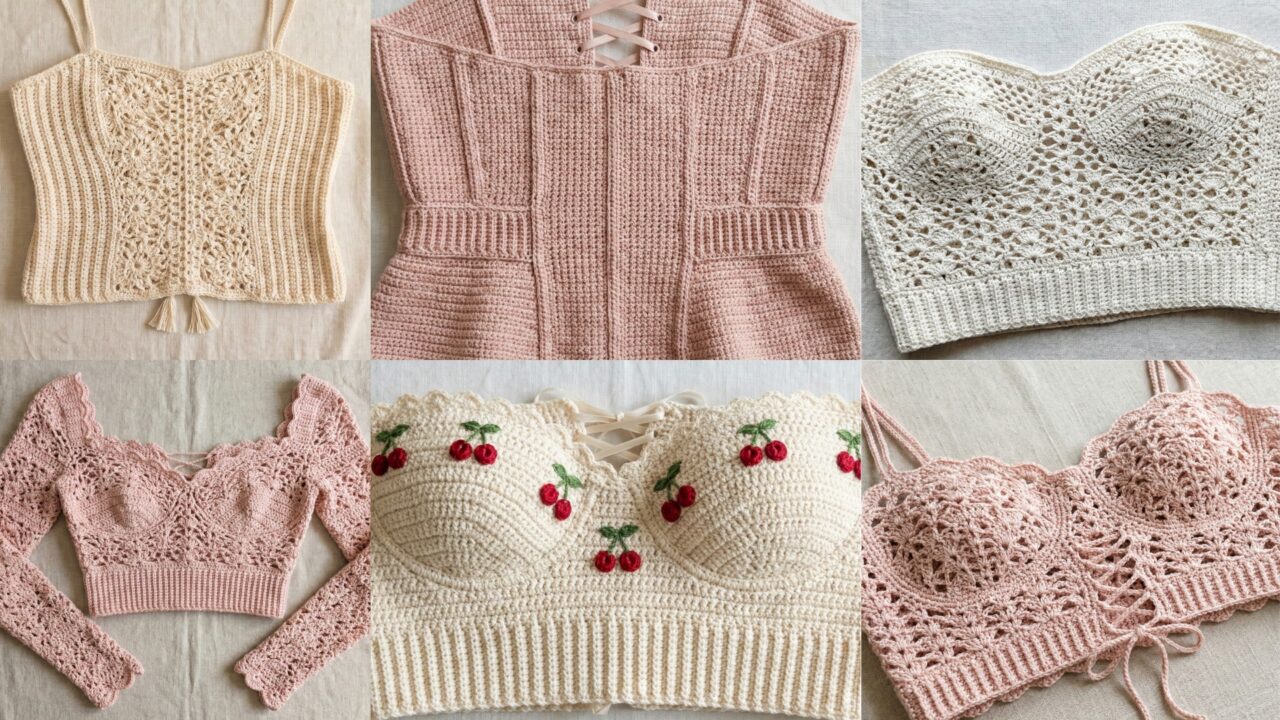
5. Crochet Cherry Embroidered Corset Top Pattern
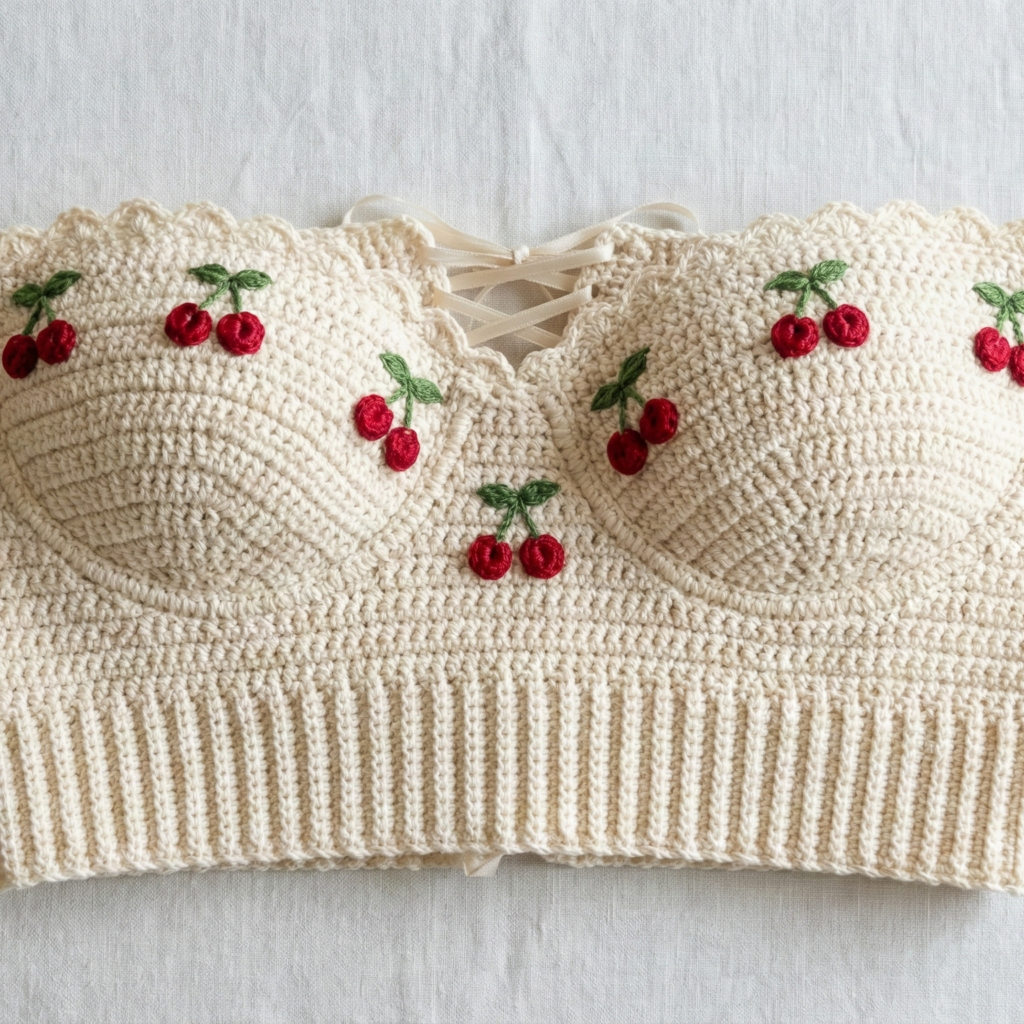
Vibe: Playful, retro-inspired corset top embellished with embroidered cherry motifs — cute and eye-catching.
Skill level: Intermediate (applique/embroidery + corset basics)
Suggested yarn & tools
- DK cotton yarn for body and contrasting embroidery thread for cherries (or use yarn for embroidered cherries). Approx 450–700 yd.
- Hook: 4.0–4.5 mm.
- Notions: small embroidery needle, tapestry needle, optional lining.
Construction overview
This corset top combines a simple fitted corset body worked in a textured stitch with small cherry appliqués embroidered or crocheted and sewn onto the fabric once the body is complete.
Step-by-step
1. Body construction
- Work the main body as a simple top-down cropped corset or as front and back panels joined at the sides. Use a dense stitch (hdc or double crochet in BLO for some structure).
- Add shaping for waist by decreasing at waist rows and increasing at bust rows — aim for princess seams as needed.
2. Cherry applique motifs
- Crocheted cherry motif (small):
- Make tiny cherries: MR, R1: 6 sc in ring, R2: sc, inc → 9 or 12 depending on desired size; fasten off leaving tail for sewing. Make two cherries per pair.
- Make tiny leaf: ch 4, sc, hdc, dc in last ch, sl st back along chain to make leaf shape.
- Sew two cherries together close to each other and attach leaf.
- Embroidered cherries:
- Use a small satin stitch or French knots with embroidery floss to make round cherry shapes; stitch a small stem and leaf with backstitch.
3. Placement
- Plan cherry placement: 2–4 small cherries along the top edge or across the cups. Pin motifs in place and try on to check symmetry.
4. Underbust and closure
- Add underbust elastic band and choose closure: back zipper or lace-up. For vintage vibe, use small decorative bows at the top center and under the cups.
5. Lining
- Because embroidery may show on wearable side, line the corset with a thin cotton fabric: cut lining pieces to shape and stitch by hand inside hems.
Finishing
- Add small scalloped trim along neckline and optional small pearl beads (hand-stitched) as “cherry highlights” (avoid small beads if children may use the garment).
Care
- Hand wash or gentle machine wash inside garment bag; reshape and dry flat.
6. Crochet Serendipity Corset Top Pattern

Vibe: Modern boho with mixed textures, a flattering waist cinch, and optional off-shoulder or halter variations. The Serendipity design mixes lace panels with ribbed shaping.
Skill level: Intermediate (mixed stitchwork + shaping)
Suggested yarn & tools
- DK or light worsted cotton blend ~500–800 yd depending on style.
- Hook: 4.0–5.0 mm.
- Notions: elastic for underbust, optional narrow boning.
Construction overview
Serendipity uses three panels: central front lace, two ribbed side panels with shaping, joined together with internal elastic and optional soft boning. The top can be strapless, halter or with thin spaghetti straps.
Step-by-step
1. Panel planning
- Convert bust circumference to total stitches and allocate to central and side panels. Example total 180 stitches: central lace = 60, each side ribbed panel = 60.
2. Crochet central lace panel
- Work lace pattern flat to desired height, adding slight increases at bust area for shaping. Use a repeat that complements side ribs (e.g., vertical motifs).
3. Crochet side ribbed panels
- Use front/back post stitch ribbing to create vertical support and slimming effect. Incorporate waist decreases: every X rows decrease 1–2 stitches on inner edge to sculpt waist.
4. Join & fit
- Seam panels together temporarily and try on to check fit. Insert narrow elastic under the bust by folding ribbed band and whipping to create channel for elastic. Fasten elastic snugly.
5. Optional off-shoulder or halter
- Halter: crochet a long strap in the round and attach to center front; tie behind neck.
- Off-shoulder: add short decorative cap sleeves by picking up stitches along top edge and working in lace motif for a few rounds.
6. Optional soft boning
- For light shaping, sew boning channels on inner seams and insert flexible plastic boning between seams.
7. Finishing touches
- Add decorative tassel or small fringe at lower front center. Add small decorative cord or belt at waist for accent.
Care
- Treat mixed stitch fabrics with care; block carefully and wash per yarn label.
conclusion
Crochet corset tops can take many forms — from ethereal lace to structured paneling — and each of the six patterns above offers a different way to explore shaping, textures, and finishing techniques. Key practical reminders:
- Swatch and measure before starting. Use the digit-by-digit conversion method to convert body measurements to stitches so your corset fits the way you intend.
- Try on as you go. Because fit matters more than exact stitch counts, test the top on the wearer at several construction stages: after the main body, before adding elastic or boning, and before final seams are closed.
- Support is flexible. If you want more corset-like shaping, add narrow plastic boning and a supportive underbust elastic. If you prefer softer lines, skip rigid elements and rely on stitch choice and rib bands.
- Mind modesty and lining. Lacy corsets are beautiful but often need a lining or an under-layer to be wearable as standalone tops.
- Finish thoughtfully. Blocking, tidy seams, and reinforced strap/eyelet areas make the difference between a handmade sample and a polished garment.