Winter will come whether or not you plan for it. These six mittens are cozy, quick, and forgiving — perfect for beginner crocheters who want finished projects that actually keep fingers warm. I cover everything you need to know: yarn choices, gauge, how to size as you go, thumb gusset shaping (that one thing people avoid), finishing tips, and a few charming design variations. Pick a pattern, measure once or twice, and stop blaming ill-fitting mittens for your cold hands.
Quick universal notes (read this, it actually matters)
Yarn & hook (general): Most patterns below use worsted weight (Aran/medium/4) and a 5.0 mm (H) crochet hook unless otherwise noted. Worsted is warm, easy to handle, and forgiving for beginners.
Gauge example (use this to size):
- Example gauge: 18 sc = 4 in (10 cm) in single crochet (sc) with worsted yarn and 5.0 mm hook.
- If your gauge is different, adjust starting stitch count to match circumference (see sizing tips per pattern).
Measurements / sizing (adult medium example):
- Hand circumference (around knuckles, excluding thumb): ~9 in (23 cm)
- Hand length (base of palm to tip of middle finger) — mittens close before finger tips: ~7.5 in (19 cm)
- Thumb opening target: 2–2.5 in (5–6.5 cm) wide
How to calculate starting stitch count (example):
If gauge = 18 sc / 4 in and target circumference = 9 in → stitches = 18 × (9 / 4) = 18 × 2.25 = 40.5 → round to 40 stitches (choose even number for easier shaping). Yes, math. Do it.
Abbreviations (US): ch = chain, sl st = slip stitch, sc = single crochet, hdc = half double crochet, dc = double crochet, inc = 2 sc in same stitch, dec = sc2tog (single crochet two together), st(s) = stitch(es), rnd = round, BLO/FLO = back/front loop only.
Construction overview (all mittens):
- Cuff — ribbed for stretch (BLO hdc or foundation sc rib).
- Hand tube — worked in rounds to measured length.
- Thumb gusset — increases at a marked spot to make thumb space.
- Top shaping — decreases to close top.
- Finish — weave ends, block if needed, optional lining or embellishment.
Now the fun part.
1. Crochet Mosaic Mittens Pattern
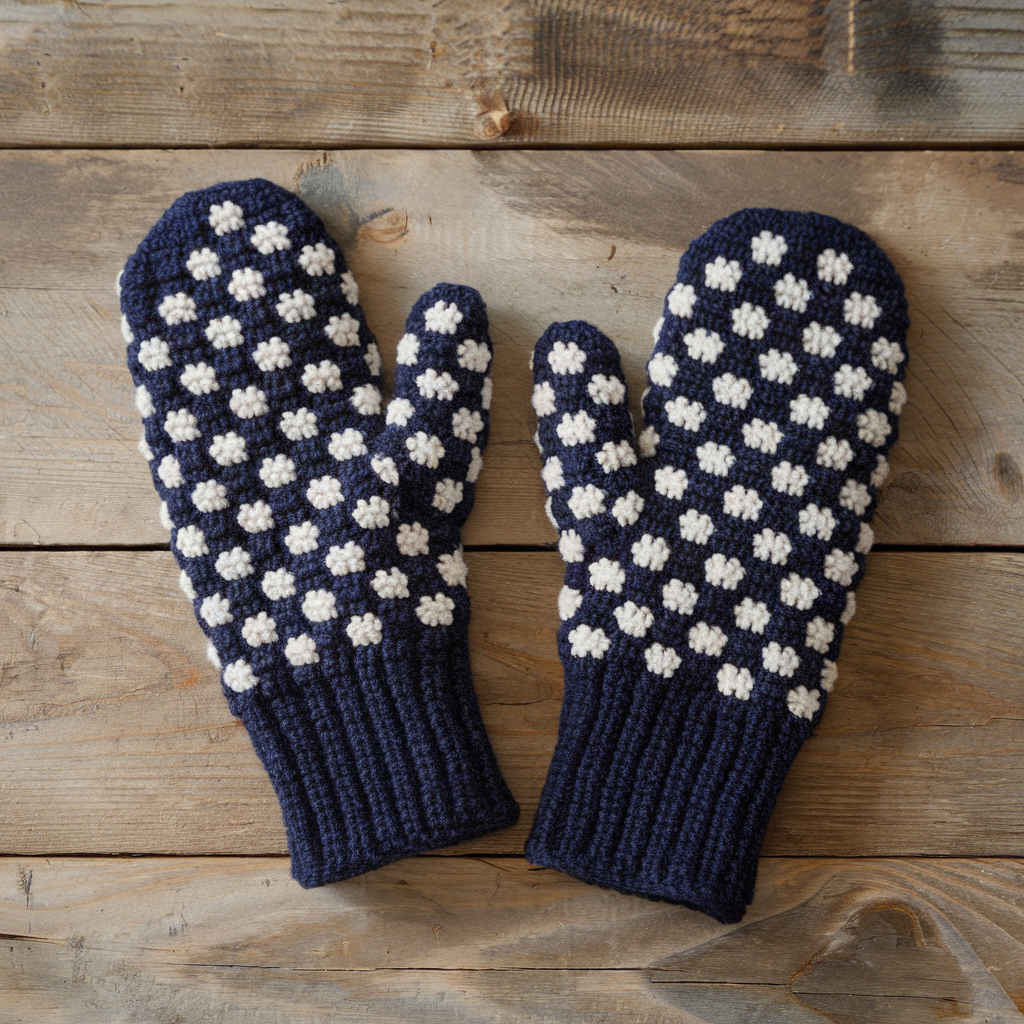
Mosaic crochet produces neat geometric colorwork without carrying a ton of floats across the whole row — looks fancy, behaves well, and is surprisingly beginner-friendly.
Skill level: Confident beginner (basic mosaic technique + pattern reading)
Materials
- Worsted weight yarn in two contrasting colors (MC = main color, CC = contrast color)
- 5.0 mm (H) hook
- Stitch marker, tapestry needle, scissors
Gauge (example): 18 sc = 4 in (10 cm). Adjust as needed.
Pattern notes
This uses simple mosaic blocks: you work short color rows and carry the non-working color up behind the stitches (no long floats). The chart below is described in text — make a small swatch to get comfortable.
Step-by-step (Adult medium example — start with 40 sc circumference)
Cuff — ribbed (BLO hdc rib)
- Ch 41, join with sl st to form ring (or ch 40 then join; use 40 stitches for gauge). Make sure chain isn’t twisted.
- Round 1: ch1, sc in each ch around; join. (40 sc)
- Round 2–6 (ribbing): Change to hdc in BLO around (ch2 counts as first hdc on each round), join each round. Work 6 rounds or until cuff reaches desired length (2–3 in). Keeping tension tight makes a nicer rib.
Hand (start mosaic pattern)
4. Switch to MC. Rounds 1–3: sc around (40 sc) to even out after cuff; join. These form a small base.
5. Mosaic setup — you’ll work rows in MC and CC per the simple repeat: (See chart text below.)
- The mosaic tile is 4 stitches wide × 2 rounds high. Example tile pattern across 40 sts = 10 repeats.
- Mosaic repeat (work in rounds, changing colors):
- Row A (MC): sc in each st for one round (MC). Join.
- Row B (MC): sc in next 2 sts, ch1, skip 1 repeat across to create small holes that the next color will travel behind. Join.
- Row C (CC): sc into the ch1 spaces from previous round and the stitches as written so CC creates the contrast bar. Join.
- Row D (MC): sc in each st — this locks the row. Join.
- Repeat Rows B–D for desired pattern height. You’ll see mosaic rectangles form. Work until hand length measures about 2–3 in below thumb base (measure on wearer).
Thumb gusset
7. On the round where you want thumb base (roughly 3–3.5 in from cuff for adult medium), mark the first stitch of gusset (use a marker). Increase there as follows:
- Round gusset 1: sc in next 10 sts, inc, sc in next 10 sts, inc, sc remaining — total increases 2 (place increases next to each other if you prefer all increases in center of palm).
- Round gusset 2: sc around (no increases)
- Repeat alternating increase round / even round until you have added 6–8 gusset stitches total (adult medium typically 8 gusset stitches). Aim for a gusset width of ~2–2.5 in. Keep mosaic pattern aligned as you increase — do increases at the same spot each increase round.
- Once gusset done, place the gusset stitches aside (put them on a scrap yarn or stitch holder) to be used for thumb later. Continue working the hand tube in established mosaic pattern only over the remaining stitches until you reach the top of the mitten, about 2–2.5 in below desired fingertip closure.
Top shaping
9. Decrease rounds to close top: sc in pairs or do sc2tog around (e.g., sc in next 2, dec repeat). Decrease every other round until 6–8 sts remain; fasten off and thread tail to close.
Thumb finishing
10. Transfer held gusset stitches back to hook or realign on working round; pick up 2–4 sts around thumb hole to close gap (you’ll typically have 10–12 thumb sts). Work in rounds of sc for 4–6 rounds (or until thumb reaches comfortable length), then decrease top as above and close.
Finish & block
11. Weave in ends; lightly block to straighten pattern if needed.
Tips & variations
- Use a charted mosaic pattern for cleaner results (every 4-stitch repeat).
- If color changes feel fiddly, try doing mosaic in rows on a flat swatch first.
- Make gauntlet length (longer cuff) by extending ribbing rounds.
2. Crochet Miss Stitch Mittens Pattern
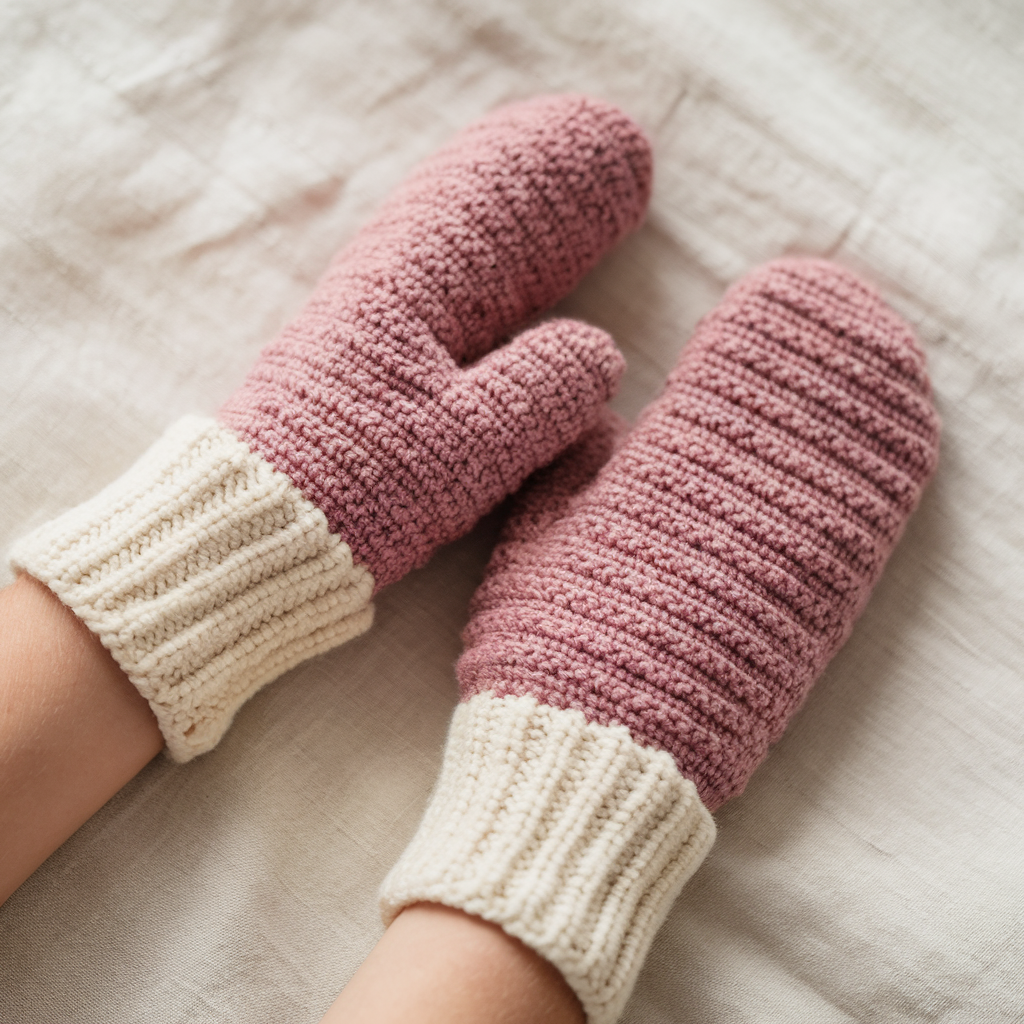
Miss stitch (or drop-stitch) gives a textured, slightly lacy vertical rib — warm, breathable, and surprisingly elegant.
Skill level: Beginner–Confident beginner
Materials
- Worsted weight yarn; 5.0 mm hook
- Stitch marker, tapestry needle
Gauge: Same example — adapt as needed.
Stitch overview: Miss stitch (vertical ladder)
- Miss stitch pattern: you skip stitches and work stitches into the previous row to create vertical ladder-like columns. It’s worked in rounds with regular repeats.
Step-by-step (adult medium — 40 sc base)
Cuff
- Ch 40, join. Rounds 1–6: BLO hdc (creates stretchy rib). Join each round.
Hand
2. Switch to sc in both loops for 2 rounds to firm transition.
3. Miss stitch pattern (work in rounds): Round A: sc in next 2 sts, ch1, skip next st repeat around; Round B: sc into the ch1 spaces from previous round (or work sc in next 2, then sc into the skip from previous round)*. The skipping/backfilling creates vertical bars. Repeat these two rounds to build texture until you reach thumb placement.
Thumb gusset
4. Choose a gusset location at palm-side (often between 2 vertical bars). On the gusset increase round: work increases by doing inc, sc in next 3 around the gusset area only — add 6 gusset sts over several increase rounds (every other round) until gusset reaches ~8 sts. Hold gusset sts on scrap yarn.
Continue hand & close
5. Work hand tube until top position; decrease with sc2tog rounds until 6–8 sts remain; close.
Thumb
6. Return gusset stitches, pick up extra sts around hole to make comfortable thumb circumference (10–12 sts). Work miss stitch or plain sc for thumb length; close as above.
Styling & variations
- Miss stitch looks great as contrast cuff (do cuff in CC then switch to MC for body).
- Lightweight and less hot than dense sc — good for transitional weather.
3. Crochet Half Heart Mittens Pattern

A romantic heart motif that sits on the back of the hand — subtle enough for adults, cute enough for kids.
Skill level: Intermediate (simple intarsia / surface embroidery)
Materials
- Worsted weight in MC and heart-color (contrast), 5.0 mm hook.
- Optional: tapestry needle for surface embroidery hearts (easier than intarsia).
Two approaches
- Option A (intarsia during rounds): Work colorwork with small floats; better for experienced beginners.
- Option B (surface embroidery): Make mittens in MC and embroider hearts on finished mittens — easier, safer for beginners, no floats.
Step-by-step (Option B recommended)
Make plain mitten in MC
- Follow the basic mitten template (cuff, hand, thumb gusset) described earlier — use sc rounds and size to taste. Example: start 40 sc cuff, rib 6 rounds, then sc around for hand for 3 rounds before starting heart placement.
Heart placement
2. Decide heart placement on the back-of-hand area (centered between thumb base and top). Mark where center of motif will be.
3. Use small surface embroidery: chain small hearts or use satin stitch to fill heart — simple approach: embroider a small heart outline with contrast yarn then fill with satin stitch (parallel stitches packed in).
Alternatively (intarsia)
4. Work small heart motif by changing colors across rounds where heart sits. Keep floats short or switch to surface embroidery if you see long floats.
Finish & scaling
5. Weave ends and optionally add a tiny pompom at cuff with heart-color or a little bow.
Sizes & notes
- For kids, reduce starting stitches (e.g., 30 sc circumference) and shorter gauge.
- Embroidery lets you size heart after mitten made — much more forgiving.
4. Crochet Santa Mittens Pattern
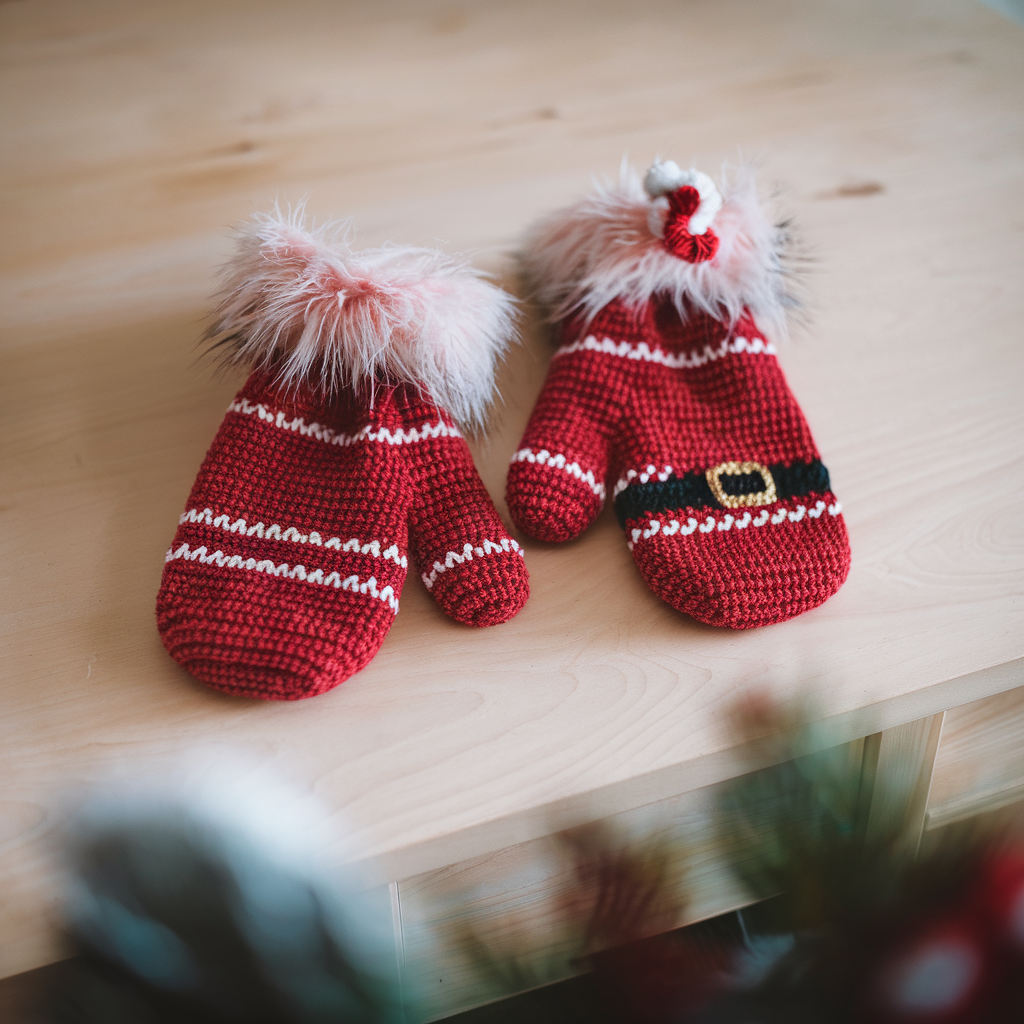
Playful seasonal mittens with Santa suit colors, cuff trim like fur, and a little pompom “button.” Cute, festive, and fast.
Skill level: Beginner (color changes + simple trim)
Materials
- Worsted in red (MC), white (fur trim), black (belt), gold (optional buckle), 5.0 mm hook, small pompom maker or yarn bits.
Step-by-step
Cuff
- Ch 40 (adult medium), join, BLO hdc rounds 6–8 rounds with white (faux fur cuff) held double if you have eyelash/fur yarn or with regular white for a tidy look. If you use eyelash, keep tension gentle.
Body
2. Switch to red (Santa coat). Work sc rounds until you reach the wrist area and then add strip of black for belt: work 2–3 rounds in red, switch to black for 2 rounds across the circumference to mimic belt, then one round of gold for buckle (surface embroider small square buckle on top center). Continue red for hand up to thumb placement.
Thumb gusset & top
3. Make gusset increases as standard (hold 8 gusset sts). Continue red. Close top with decreases.
Fur trim details
4. Add white faux-fur trim around cuff and optionally around top of mitten just below decreases (as Santa’s coat collar). Use white eyelash yarn held with worsted or single strand for fluffy tone.
Pompom
5. Make small pompom in white and sew to cuff corner, or attach on a short chain for dangle.
Tips
- Use a small length of elastic inside cuff for snug wrist fit if you want to keep snow out.
- These also make cute holiday gifts — make a pair in mini size for tree ornaments.
5. Crochet Houndstooth Mittens Pattern
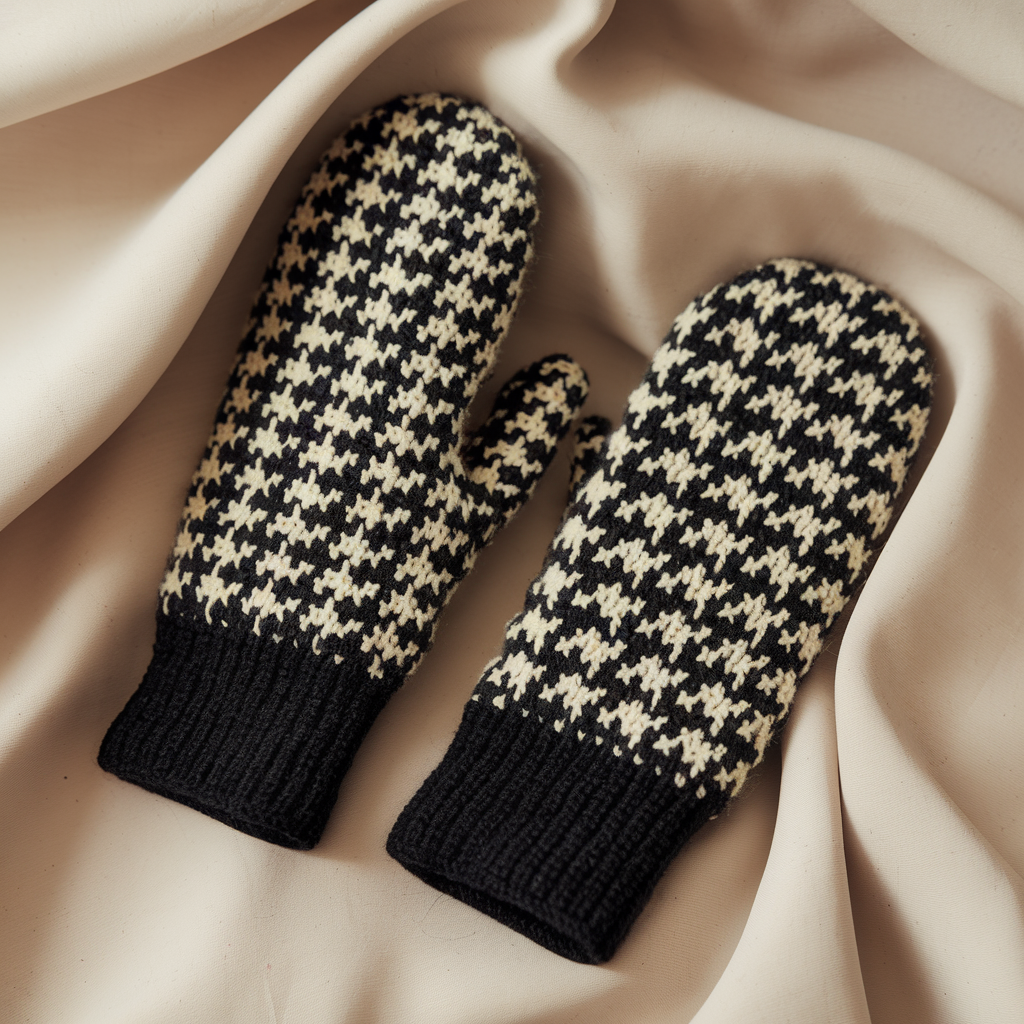
Sophisticated, graphic, and surprisingly vintage-chic. Houndstooth is a two-color geometric pattern; do it by tapestry crochet or surface slip-stitching after making a neutral mitten.
Skill level: Intermediate (colorwork/tapestry or surface technique)
Materials
- Two contrasting colors (black + cream), 4.5–5.0 mm hook for dense fabric, worsted yarn.
- Tapestry needle.
Approach A — surface slip-stitch houndstooth (easiest-looking, less floats)
- Make base mitten in MC (e.g., cream) in sc rounds. Block flat.
- Using CC (black), do surface slip stitch pattern to make houndstooth squares: surface slip stitch along the mitten back to create short broken checks. This avoids floats inside the mitten and gives crisp pattern.
Approach B — tapestry crochet (denser fabric)
- Follow basic mitten template but change colors across rounds per houndstooth chart. Keep floats short and catch them every few stitches. Work smaller hook for denser texture so pattern reads well.
Construction basics (if making from scratch with tapestry)
- Chart the houndstooth repeats; each motif repeat may be 4–6 sts wide × 4 rounds tall. Plan the chart to fit your starting stitch count (40 sc example fits 10 repeats of 4-stitch motif).
- Work in sc for best color clarity.
Finish
- Weave ends carefully; flossing color ends inside can be trimmed close. Light steam blocking sharpens pattern.
Styling
- These look elegant in neutral combos — pair with a matching scarf or beret.
6. Crochet Country Cottage Mittens Pattern
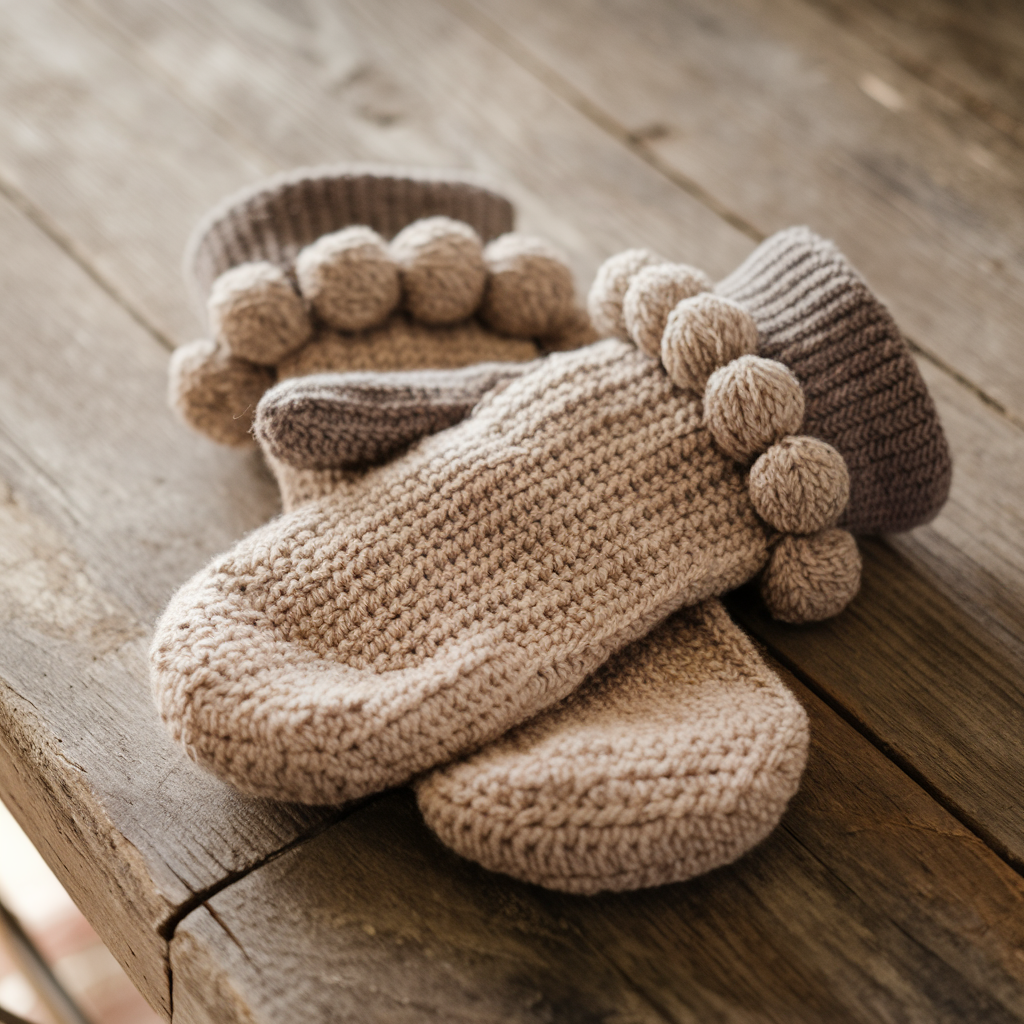
A warm, rustic mitten with textured stitches, little bobbles (or popcorns), and a rolled cuff — the kind of mitten you’ll never throw out.
Skill level: Confident beginner (textured stitches + bobbles)
Materials
- Worsted wool or wool-blend for warmth, 5.0 mm hook.
- Tapestry needle, stitch marker.
Stitch choices for texture
- Use front-post/back-post hdc rows for rib-like texture, add bobble/puff clusters on the back of the hand for visual interest.
Step-by-step
Cuff (rolled cuff for cottage look)
- Ch 40 join. Rnds 1–8: sc around in BLO to create a thick cuff that will roll nicely. Roll will form naturally.
Hand
2. Work rounds in hdc for durability for 3 rounds, then switch to textured row pattern: *Round A: hdc in next 2, fpdc around next st (front post dc), hdc next 2 — makes vertical ridges. Repeat until reaching thumb placement.
Bobbles/puff details
3. Decide bobble placement on back of hand in two staggered rows. Make bobble stitches: (yo, insert, pull up loop) ×3–4, yo and pull through all loops, ch1 to close. Space bobbles evenly (e.g., 3 across, 2 above). Work bobble rounds integrated into texture rounds.
Thumb & shaping
4. Add thumb gusset increases near palm side as usual; hold gusset sts, continue body to top and decrease.
Finish / lining
5. For extra warmth, line mittens with fleece or add a crochet lining (make a smaller mitten lining in soft yarn and sew inside). That turns these into actual winter workhorses.
Variations
- Use natural tweed yarn for cottage aesthetic.
- Switch bobbles to simple surface knots if you don’t like the added bulk.
Final finishing & practical tips that apply to all patterns
Check fit as you go: Measure circumference at cuff and around knuckles as you work — don’t wait until the top to realize it’s too tight.
Thumb gusset quick recap:
- Mark gusset spot early.
- Increase 1–2 sts every other round at the gusset for 3–5 repeats until gusset has 6–10 sts. Hold those stitches for later. After finishing body, pick them up for thumb, add 2–4 sts around hole to make thumb comfortable.
Blocking: Most worsted acrylic/cotton mittens don’t need harsh blocking — steam lightly and shape. Wool benefits from a gentle wet-block.
Durability: Reinforce the palm with a round of slip-stitch in a tighter gauge or a duplicate stitch of durable yarn on high-wear spots. Add a small leather or suede palm patch if you do rough work.
Care: Follow yarn label. Wool mittens often require hand wash and dry flat; acrylics handle machine washing. If lined with fleece, wash gently.
Sizing adjustments:
- To make smaller (teen/kid): reduce starting stitches by 20–25% (e.g., 40 → 30–32).
- To make larger: add 10–20% to starting stitches (e.g., 40 → 44–48) and add rounds for length.
Conclusion
Crochet mittens are deceptively simple: the magic is in measurement, thumb shaping, and comfortable finishing. Pick a pattern that suits your skill and aesthetic — mosaic if you want striking colorwork, Santa for seasonal fun, houndstooth for a grown-up vibe, or Country Cottage for real winter toughness. Measure as you go, keep a consistent gauge, and don’t be ashamed to frog a round if fit feels wrong. That’s how things get fixed.